Deployment and Application of MQTT Server Mosquitto
MQTT Introduction Please Click
Project Purpose
The MQTT protocol is used for signal remote monitoring.
Sensor->Signal Collection->lora Gateway->Server->Client
application environment
Operating System Windows 10
Hardware Configuration Lora Gateway ND65-L01CE-470M-EA
IoT Switch Sensor
Platform building
1. Set up MQTT server
1. This project uses Mosquitto to build the server. Download Mosquitto from the website, please note the version.
https://mosquitto.org/download/
 2. After the installation is complete, open the configuration file mosquitto in the installation directory. Conf, add the following text anywhere, save and exit
#Settings do not allow anonymous login
allow_anonymous false
#Set account password file location to C:\MosquittoTest\pwfile.example
password_file /MosquittoTest/pwfile.example
Open the cmd console in the installation directory
Execute the following command
./mosquitto_passwd -c pwfile.example user
A dialog box will pop up to enter the password. (The password will not be displayed)

3. Configure address and port number

You can use listener more than once if you have more than one IP and port to bind to.
4. When the save is complete, restart the service running in the service cmd. Open the service dialog in MSC or re-task Manager
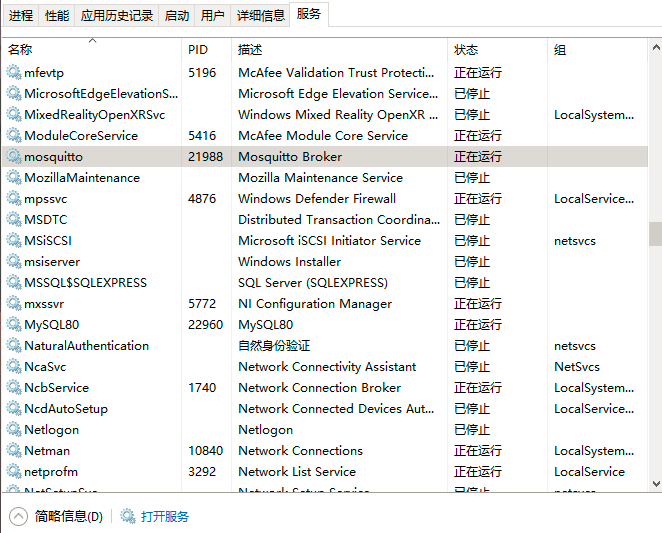
Restart it.
5. Test Server
Common test software includes MQTTFx.MQTT Box
http://mqttfx.jensd.de/index.php/download
MQTTFx is now introduced as an example
You can also debug too directly under control, referring to the link at the beginning of the file.
Open MQTTfx, click the Settings button, enter the server address and port number
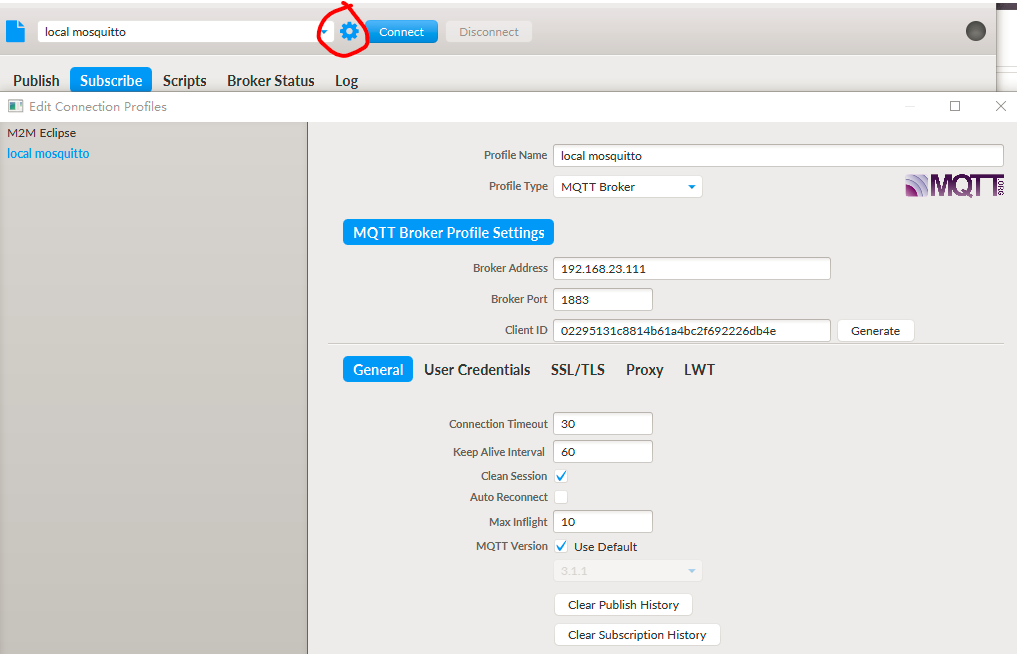 Select User Credentials to enter the account and password for the second step of registration
 Then select the connection.
publish publishing theme
 Subscription Service
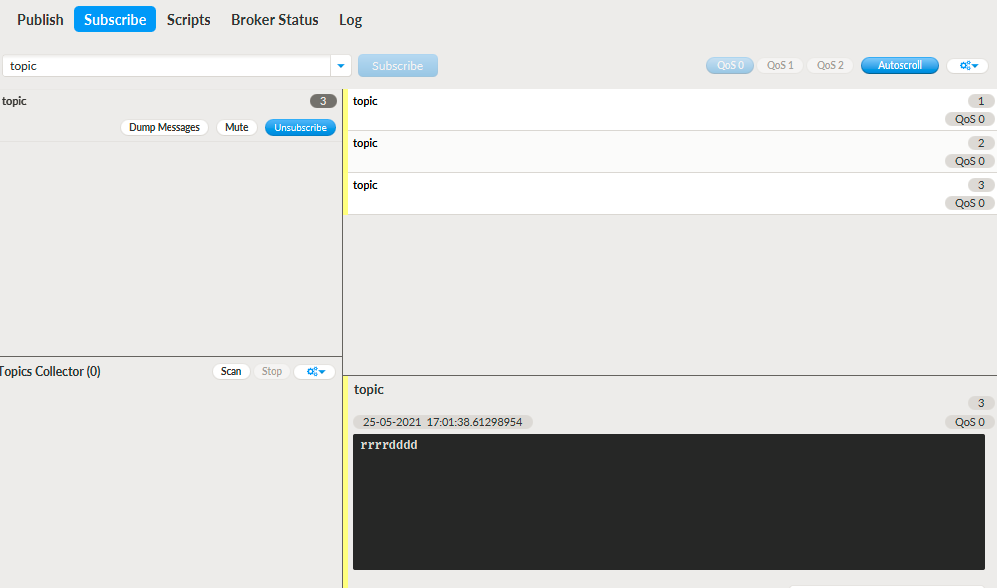 Server installation is complete.
2. Configure LoRa Gateway
Connect LoRa Gateway.
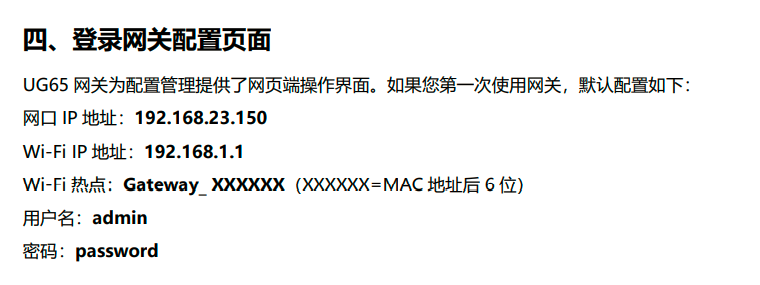 Open Network Server
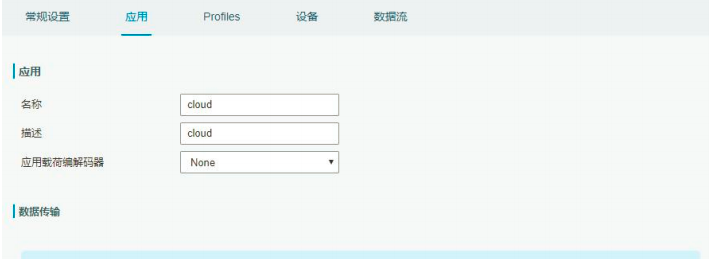
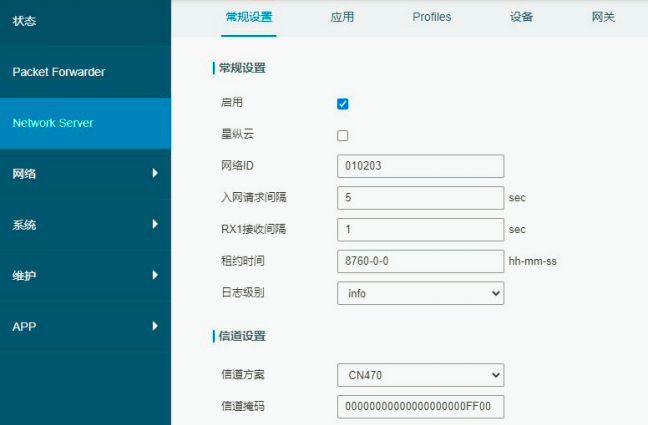 Enter the application name, click on "Add third-party MQTT/HTTP/HTTPS server information" in "Data Transfer", gateway can transfer data to corresponding
Server.
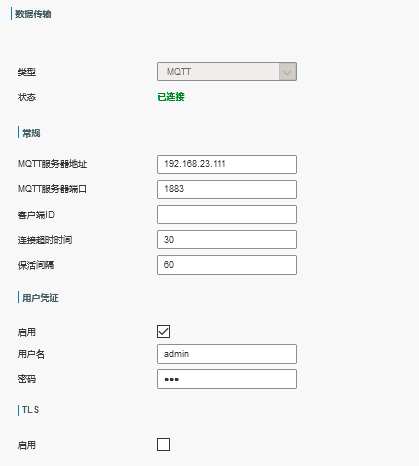
 Enter the server address port username password to display the connection status when saved
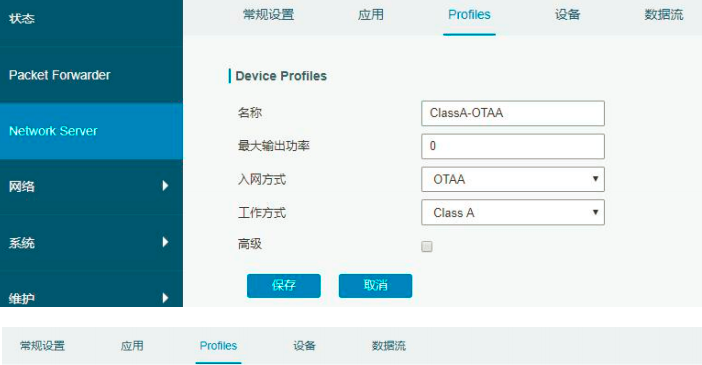
Add a device profile based on LoRaWAN node type on the Profile page
 On the Devices page, click Add to add the LoRaWAN node devices one by one.
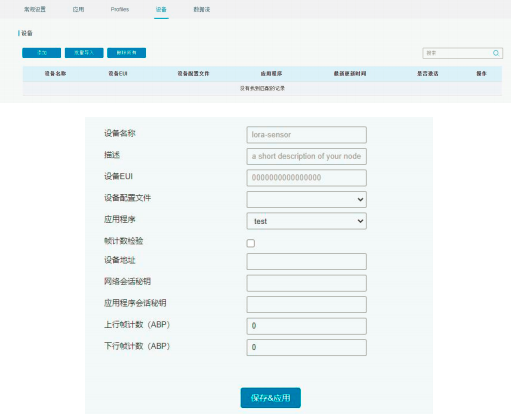
Device EUI refer to 3. Configure the controller.
3. Configure LoRa Controller
The LoRa controller used in this project is NC502-470M star lengthwise for remote monitoring of on-off signals.
A. Connect UC11-N1 to your computer by referring to Manual 3.3.
B. Download the local configuration software Toolbox on the official website of LIFO. After downloading, run the exe program to enter the configuration interface. After selecting the corresponding serial port, enter the login password (default password is 123 456), other parameters remain default.
Toolbox download link: Download Link
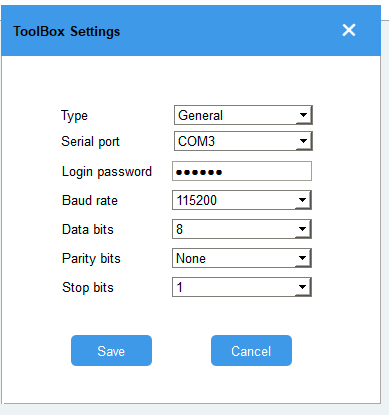
Input password.
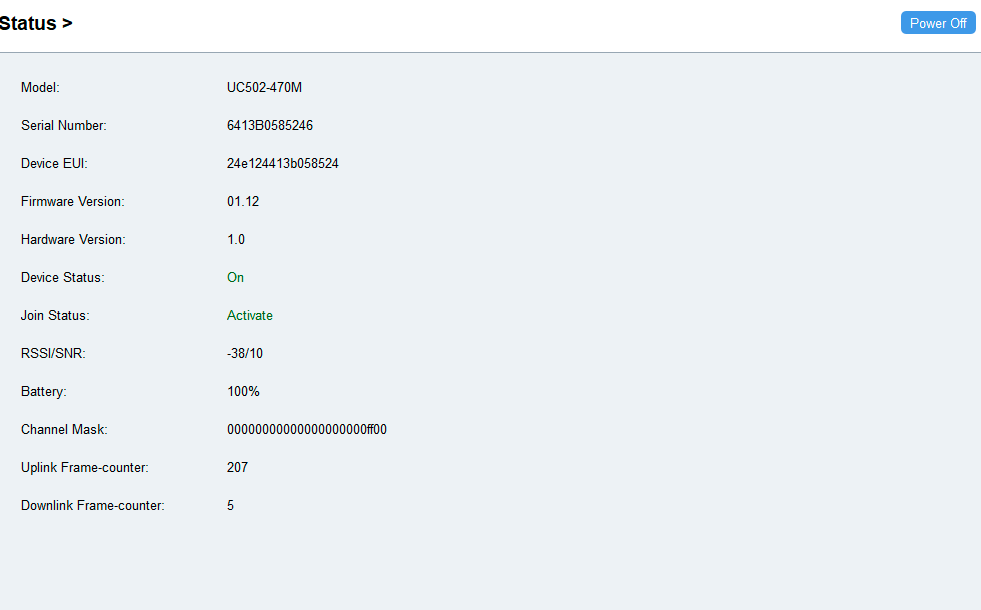 View status and corresponding EUI addresses for use by gateways.
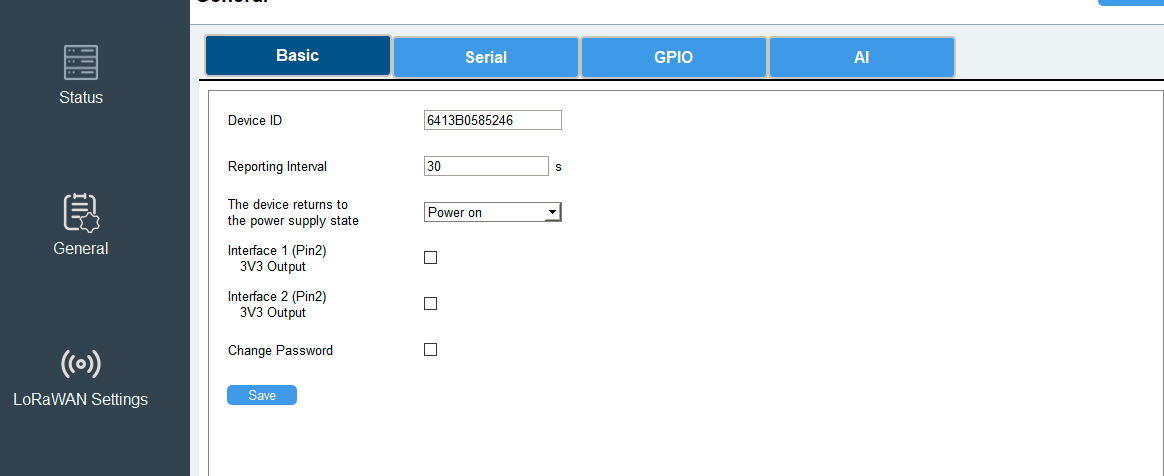
Set Upload Frequency
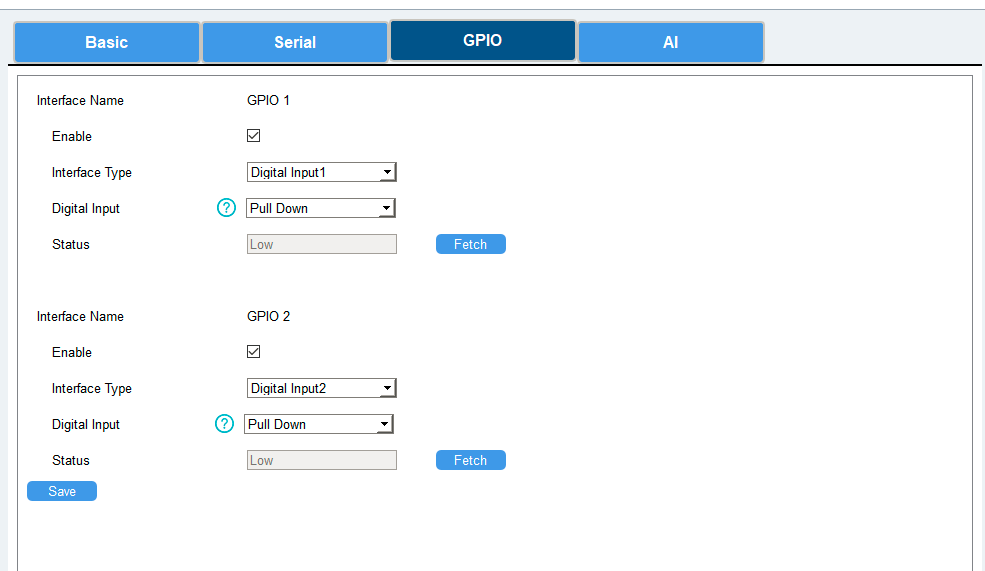
Set channel and high and low level trigger
4. C#. Net programming
This project uses MVVM architecture using 4.5.2.NET FRAMEWORK
Download M2MQTT using NUGET

See below for code
Add MQTT links and initialization to the main function.
		public Main(object para)
        {
            _viewModel = (MenuViewModel)para;
            //mqtt connect
            try
            {
                MqttClient = new MqttClient(System.Net.IPAddress.Parse(Properties.Settings.Default.Server));
                MqttClient.MqttMsgPublishReceived += Client_MqttMsgPublishReceived;
                string clientId = Guid.NewGuid().ToString();
                MqttClient.Connect(clientId, "admin", "123");
                MqttClient.Subscribe(new string[] { "/platform_1/uplink" }, new byte[] { MqttMsgBase.QOS_LEVEL_EXACTLY_ONCE });
            }
            catch (Exception e)
            {
                MessageBox.Show("Mqtt Server Link Error" + e.Message);
                _viewModel.CloseSystem();
            }
		}
Receive subscription messages
void Client_MqttMsgPublishReceived(object sender, MqttMsgPublishEventArgs e)
        {
            //Processing received messages
            string msg = System.Text.Encoding.Default.GetString(e.Message);
            UplinkTelegram telegram = JsonConvert.DeserializeObject<UplinkTelegram>(msg, _serializerSettings);
            switch(telegram.ApplicationName)
            {
                case "Platform_1":
                    Plantform_1Execute(telegram);
                    break;
            }
        }