Deploying virtualization under Windows system can adopt Hyper-V and vSphere virtualization technology, so KVM is needed under Linux system.
KVM relies on CPU virtualization instruction set to achieve high performance virtualization support. Because of its high integration with the Linux kernel, it has good performance in performance, security, compatibility and stability.
Each virtualized operating system running in a KVM environment will represent a single independent system process. Therefore, it can be easily integrated with the security module in Linux system, and can flexibly realize the allocation and management of resources. As shown in the figure: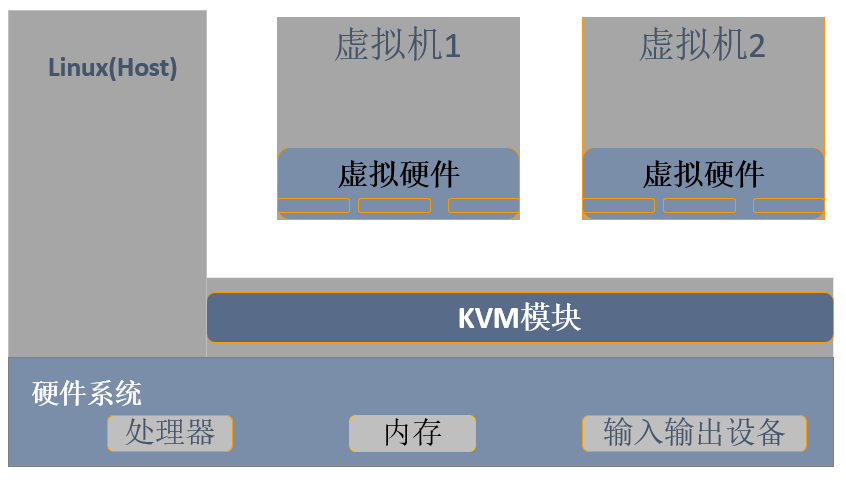
To deploy KVM virtualization under Linux system, CPU virtualization support must be turned on.
Installation of KVM and corresponding management tools
(1) Installation of KVM and required software
[root@localhost ~]# yum groupinstall -y "GNOME Desktop"
//Install GNOME Desktop Environment
[root@localhost ~]# yum -y install qemu-kvm
//Install KVM module
[root@localhost ~]# yum -y install qemu-kvm-tools
//Install the KVM Debugging Tool (you can not install it)
[root@localhost ~]# yum -y install virt-install
//Install command line tools to build virtual machines
[root@localhost ~]# yum -y install qemu-img
//Install qemu components, create disks, start virtual machines, etc.
[root@localhost ~]# yum -y install bridge-utils
//Install Network Support Tools
[root@localhost ~]# yum -y install libvirt
//Install Virtual Machine Management Tools
[root@localhost ~]# yum -y install virt-manager
//Install GUI Management Virtual Machine
(2) Verify that CPU supports virtualization
[root@localhost ~]# cat /proc/cpuinfo | grep vmx
//Intel servers use this command for validation (virtualization is supported with output)
[root@localhost ~]# cat /proc/cpuinfo | grep smv
//AMD server uses this command to verify
(3) Check whether KVM module is installed or not
[root@localhost ~]# lsmod | grep kvm
//Indicates that it has been installed
kvm_intel             170181  0
kvm                   554609  1 kvm_intel
irqbypass              13503  1 kvm
(4) Start libvirtd service and open corresponding support
[root@localhost ~]# systemctl start libvirtd
[root@localhost ~]# systemctl enable libvirtd
II. Setting up KVM Network
When KVM is installed on the host server, the first step is to set up the network. There are two ways to run KVM network in libvirt: NAT and Bridge. (NAT by default)
Explanation of the two modes:
1. User mode: and NAT mode. In this way, the default network is the NAT mode. Data packets are transmitted through the host's interface, and the external network can be accessed, but the virtual machine network can not be accessed from the outside.
2. Bridging mode: This mode allows the virtual machine to own the network like a host, and the external network can directly access the inside of the virtual machine, but it needs the support of network card, which is generally supported by wired network card.
Take Bridge as an example:
[root@localhost ~]# cd /etc/sysconfig/network-scripts/
[root@localhost network-scripts]# cp ifcfg-ens33 ifcfg-br0
//Copy the configuration file of the network card and name it br0
[root@localhost network-scripts]# vim ifcfg-ens33
TYPE=Ethernet
BOOTPROTO=none                                   //Do not get IP address
DEFROUTE=yes
PEERDNS=yes
PEERROUTES=yes
IPV4_FAILURE_FATAL=no
IPV6INIT=yes
IPV6_AUTOCONF=yes
IPV6_DEFROUTE=yes
IPV6_PEERDNS=yes
IPV6_PEERROUTES=yes
IPV6_FAILURE_FATAL=no
IPV6_ADDR_GEN_MODE=stable-privacy
NAME=ens33
UUID=431fe077-8089-4503-95a5-6eb6236a8c00
DEVICE=ens33
ONBOOT=yes
BRIDGE=br0                                     //Bridge to br0 network card
[root@localhost network-scripts]# vim ifcfg-br0
TYPE=Bridge                                   //Change type to bridge mode
BOOTPROTO=static                        //Statically Get IP Address
DEFROUTE=yes
PEERDNS=yes
PEERROUTES=yes
IPV4_FAILURE_FATAL=no
IPV6INIT=yes
IPV6_AUTOCONF=yes
IPV6_DEFROUTE=yes
IPV6_PEERDNS=yes
IPV6_PEERROUTES=yes
IPV6_FAILURE_FATAL=no
IPV6_ADDR_GEN_MODE=stable-privacy
NAME=br0
DEVICE=br0                                //Modify the network card name and device name, (UUID line must be deleted)
ONBOOT=yes
IPADDR=192.168.1.1
[root@localhost ~]# systemctl restart network
//Restart Network Card Service
[root@localhost ~]# ifconfig
//Confirm network card information
br0: flags=4163<UP,BROADCAST,RUNNING,MULTICAST>  mtu 1500
        inet 192.168.1.1  netmask 255.255.255.0  broadcast 192.168.1.255
        inet6 fe80::5a86:eff9:cdb9:c746  prefixlen 64  scopeid 0x20<link>
        ether 00:0c:29:00:11:89  txqueuelen 1000  (Ethernet)
        RX packets 4  bytes 808 (808.0 B)
        RX errors 0  dropped 0  overruns 0  frame 0
        TX packets 25  bytes 3727 (3.6 KiB)
        TX errors 0  dropped 0 overruns 0  carrier 0  collisions 0

ens33: flags=4163<UP,BROADCAST,RUNNING,MULTICAST>  mtu 1500
        ether 00:0c:29:00:11:89  txqueuelen 1000  (Ethernet)
        RX packets 15  bytes 3627 (3.5 KiB)
        RX errors 0  dropped 0  overruns 0  frame 0
        TX packets 25  bytes 3751 (3.6 KiB)
        TX errors 0  dropped 0 overruns 0  carrier 0  collisions 0
3. KVM Management
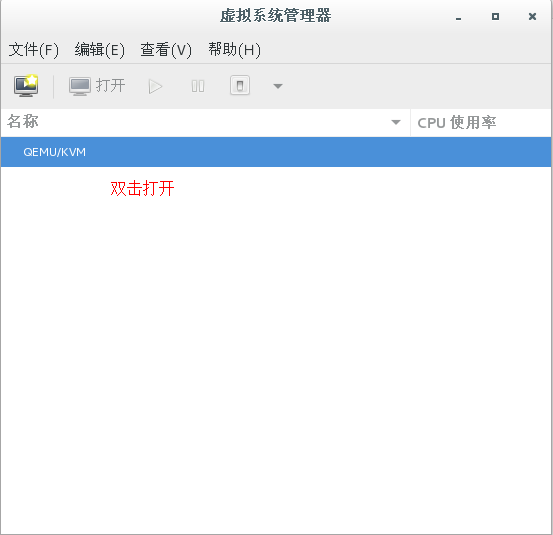
[root@localhost ~]# mkdir -p /data_kvm/store
//Create a directory for the virtual machine storage pool
[root@localhost ~]# mkdir -p /data_kvm/iso
//Create a directory for the mirror storage pool
[root@localhost ~]# virt-manager
//Using Graphic Interface to Manage KVM
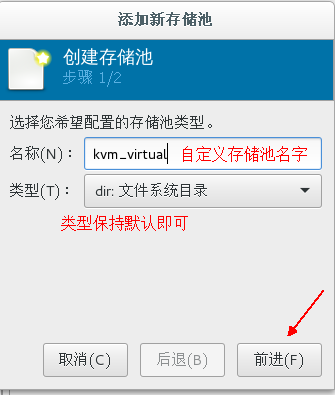
(1) Create a storage pool
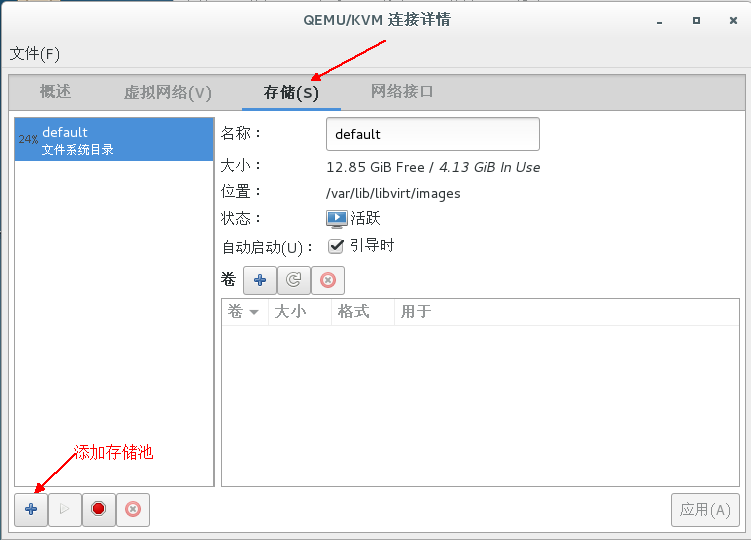
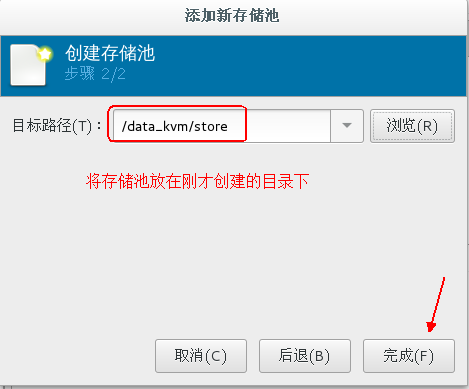
Create a pool of mirrors again in the same way!
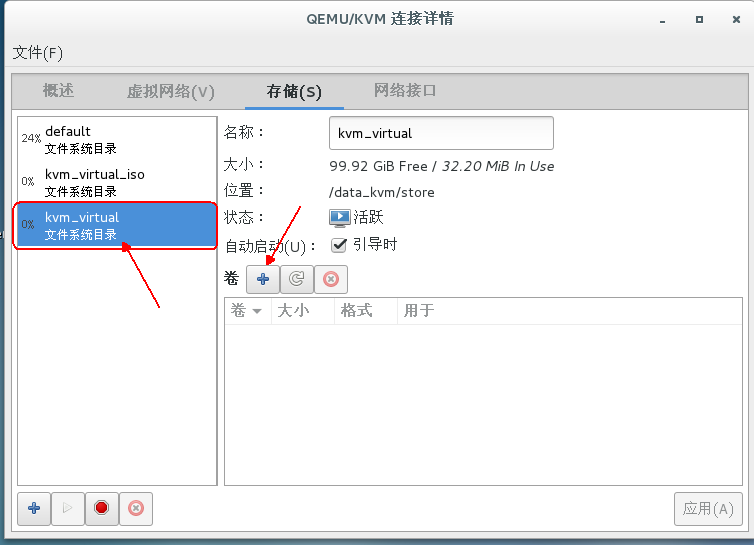
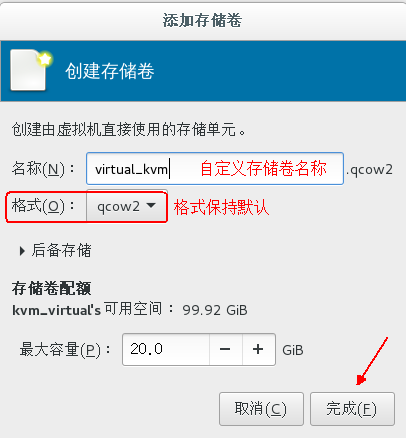
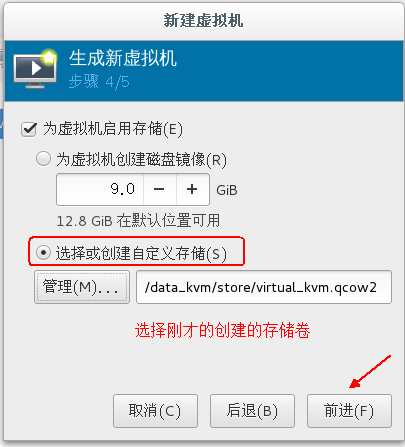
(2) Creating storage volumes
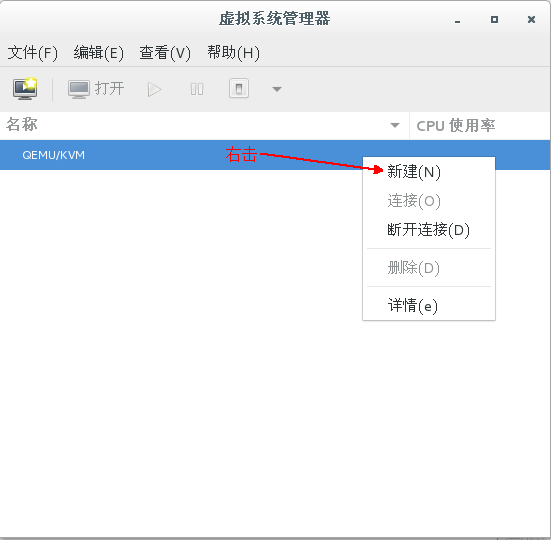
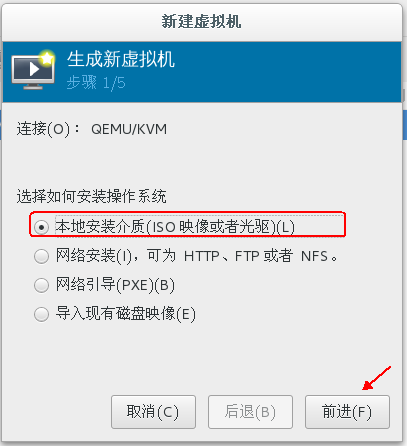
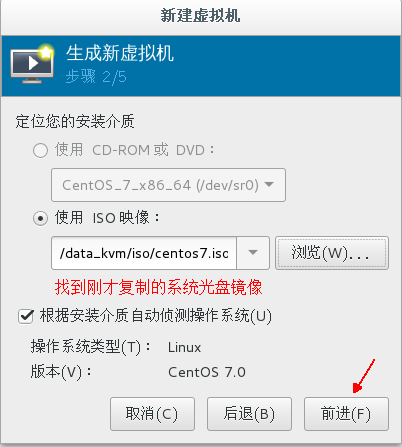
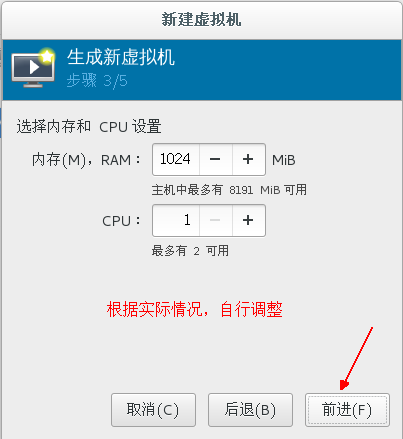
(3) Upload system image and create virtual machine
[root@localhost ~]# cp /dev/cdrom /data_kvm/iso/centos7.iso

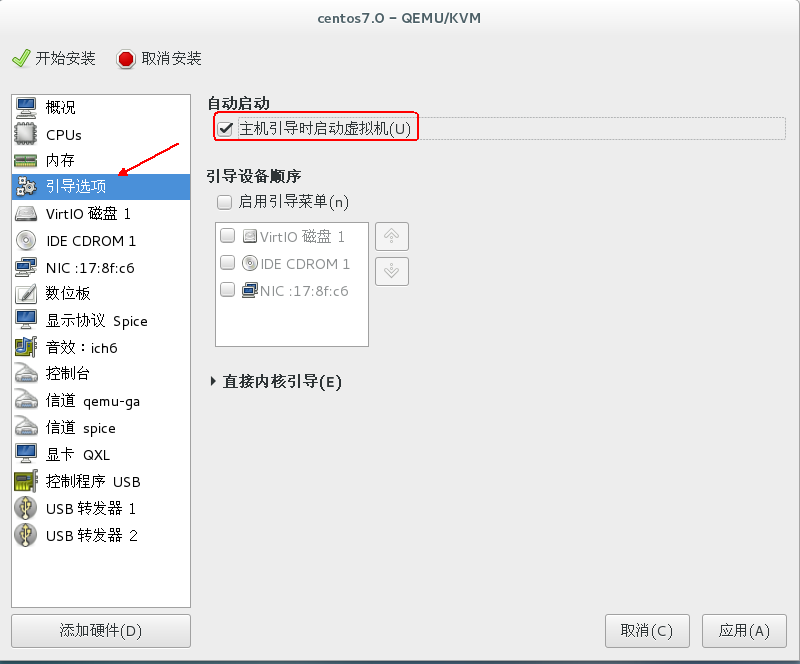
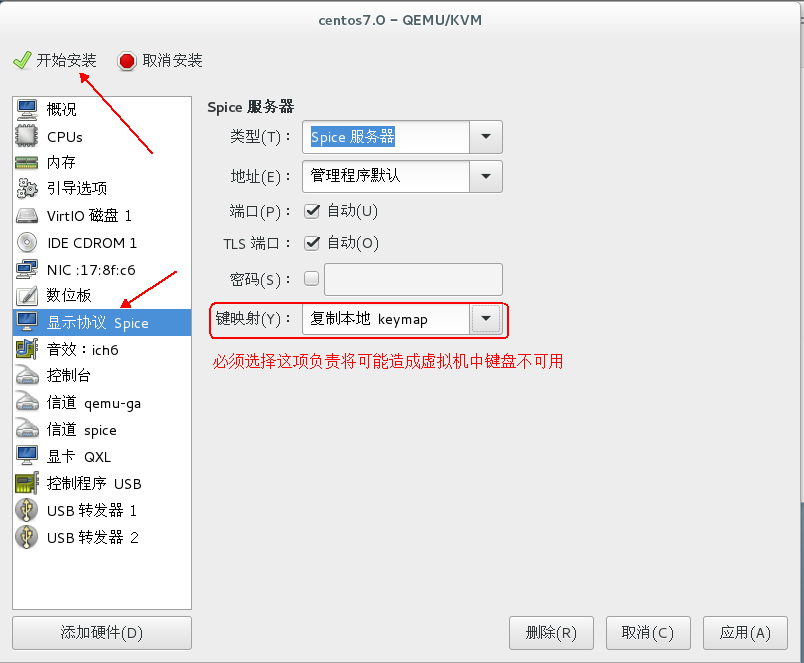
Next, just like the regular installation of operating system, after the installation of the system, you can set up the IP address, self-test, and whether you can communicate with the external network!
So far, KVM has been deployed!
There are two ways to manage KVM virtual machines:
1. Graphical management;
2. Manage with commands
As for graphical management, it's easy to understand, so I won't introduce it more here.
This paper mainly explains the common commands for managing KVM virtual machines:
[root@localhost ~]# virsh -h
//View command help
[root@localhost ~]# ls /etc/libvirt/qemu
//View the KVM configuration file storage directory
networks  test01.xml
(test01.xml Is a configuration file for a virtual machine system instance
[root@localhost ~]# virsh list --all               #View Virtual Machine Status
 Id    Name                         state
----------------------------------------------------
 2     test01                         running

[root@localhost ~]# virsh shutdown test01
//Turn off the virtual machine
[root@localhost ~]# virsh start test01
//Turn on Virtual Machine
[root@localhost ~]# virsh destroy test01
//Forced shutdown
[root@localhost ~]# virsh create /etc/libvirt/qemu/test01.xml
//Start the Virtual Machine through the Configuration File
[root@localhost ~]# virsh suspend test01
//Hang up the virtual machine
[root@localhost ~]# virsh resume test01
//Restore the virtual machine from suspended state
[root@localhost ~]# virsh autostart test01
//Setting up Virtual Machine with Host Autostart
Delete and add virtual machines:
[root@localhost ~]# virsh dumpxml test01 > /etc/libvirt/qemu/test02.xml
//Export Virtual Machine Configuration
[root@localhost ~]# virsh  shutdown test01
[root@localhost ~]# virsh  undefine test01
//Delete virtual machines
[root@localhost ~]# virsh list --all
//Check to see if the virtual machine is deleted
 Id    Name                         state
----------------------------------------------------

//Redefine the virtual machine by backing up the configuration file:
[root@localhost ~]# cd /etc/libvirt/qemu/
[root@localhost qemu]# mv test02.xml test01.xml
[root@localhost qemu]# virsh define test01.xml

 [root@localhost qemu]# vim /etc/libvirt/qemu/test01.xml
 //Modify virtual machine configuration (memory size, etc.) information:
[root@localhost qemu]# virt-df -h test01
//Viewing Virtual Machine Disk Information on the Host
Cloning Virtual Machine:
[root@localhost qemu]# virt-clone -o test01 -n test02 -f /kvm/store/test02.qcow2
#Cloning test01 into test02
[root@localhost qemu]# virsh list --all                 #View existing virtual machines
 Id    Name                         state
----------------------------------------------------
 -     test01                         Close
 -     test02                         Close
Virtual Machine Creates Snapshots:
(For KVM virtual machines to use snapshot capabilities, the disk format must be qcow2)
[root@localhost qemu]# virsh snapshot-create test01
//Create a snapshot of the virtual machine test01
[root@localhost qemu]# virsh snapshot-list test01
//View snapshot information
 //Name generation time state
------------------------------------------------------------
 1560191837           2019-06-11 02:37:17 +0800 shutoff
[root@localhost qemu]# virsh snapshot-revert test01 1560191837
//Restore virtual machine status to 156091837
[root@localhost qemu]# virsh snapshot-delete test01 1560191837
//Delete snapshots