1, Foreword
- Next, we will install and debug the groundsdk Android in the linux environment. The official documents given by Parrot are generally no problem, but I have never been in contact with Android development before, so I have encountered some difficulties, which is hereby recorded.
- The following is a link to the official installation tutorial:
1,Setup Ground SDK AAR
2,Install and build GroundSdk - If some files cannot be edited, you can use the chmod command to change the file permissions. Be careful.
2, Environmental preparation
1,Ubuntu 18.04
- I use dual system for installation and testing. If I use virtual machine, this article can be used as a reference.
- The tips on the official website are as follows:

2. Android Studio 3.4 and above
-
Official download address: Android Studio
If the download does not respond, you can try to download the https change into http
-
To install Android Studio: Android Studio Install
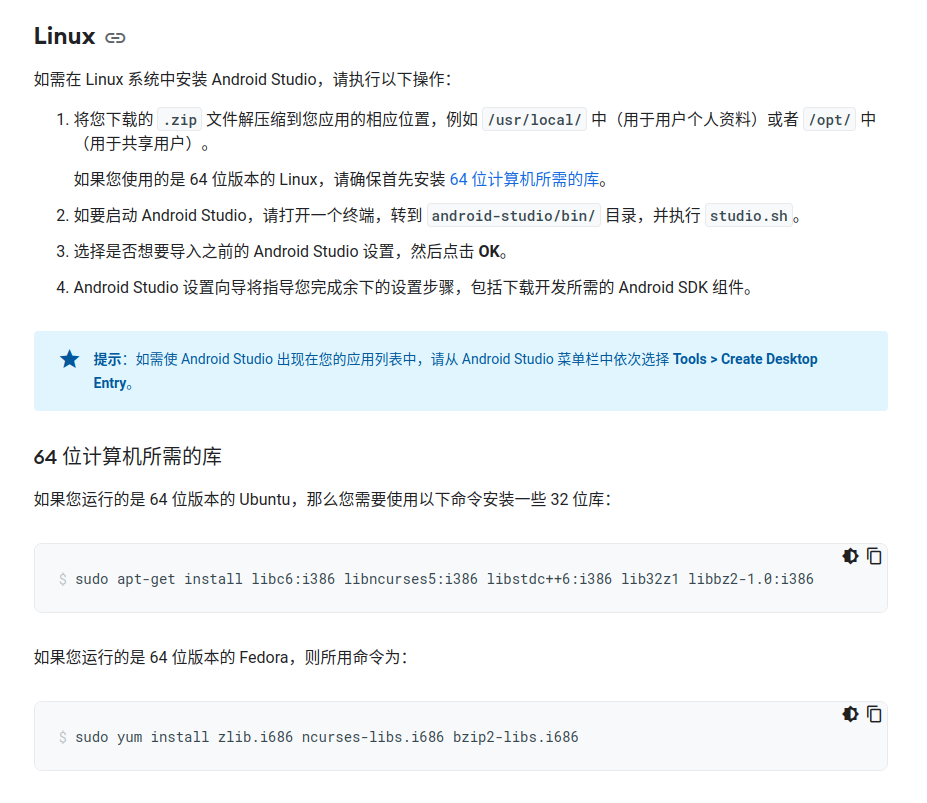
If you can't access it, just look at this picturesudo apt-get install libc6:i386 libncurses5:i386 libstdc++6:i386 lib32z1 libbz2-1.0:i386
-
Download and unzip it to / opt / directory, and execute the command:
cd /opt/android-studio/bin/
./studio.sh
-
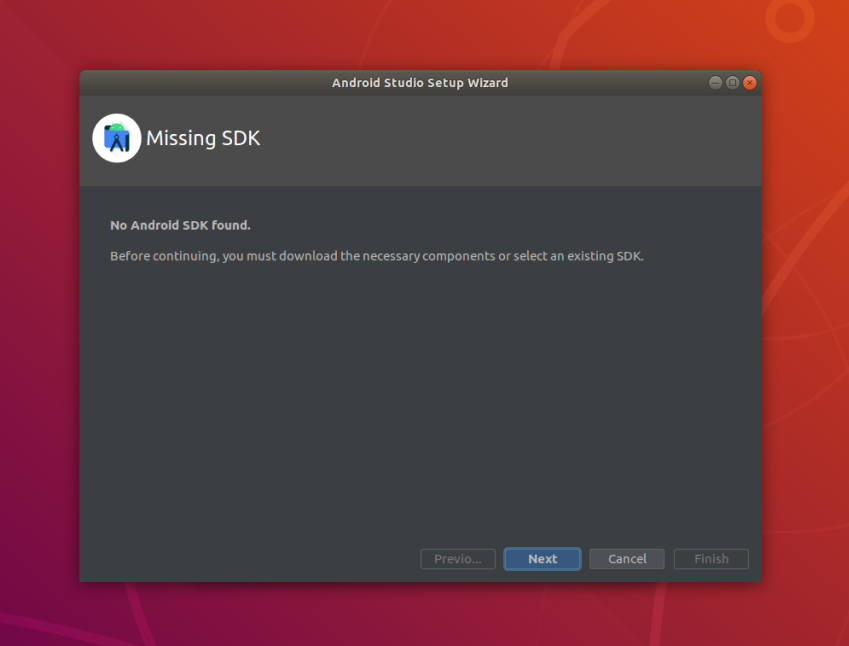
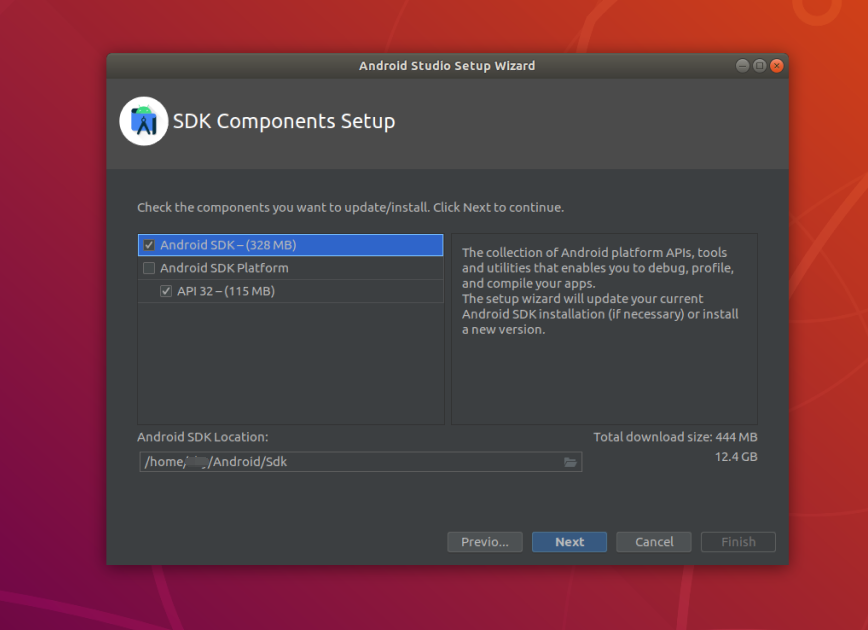
The first time you open Android Studio, you will be prompted that there is no SDK. You can download it according to the prompt and write down the path of SDK installation.
-
We need to configure the environment variable, which is not configured here first. We will configure it together with NDK later.
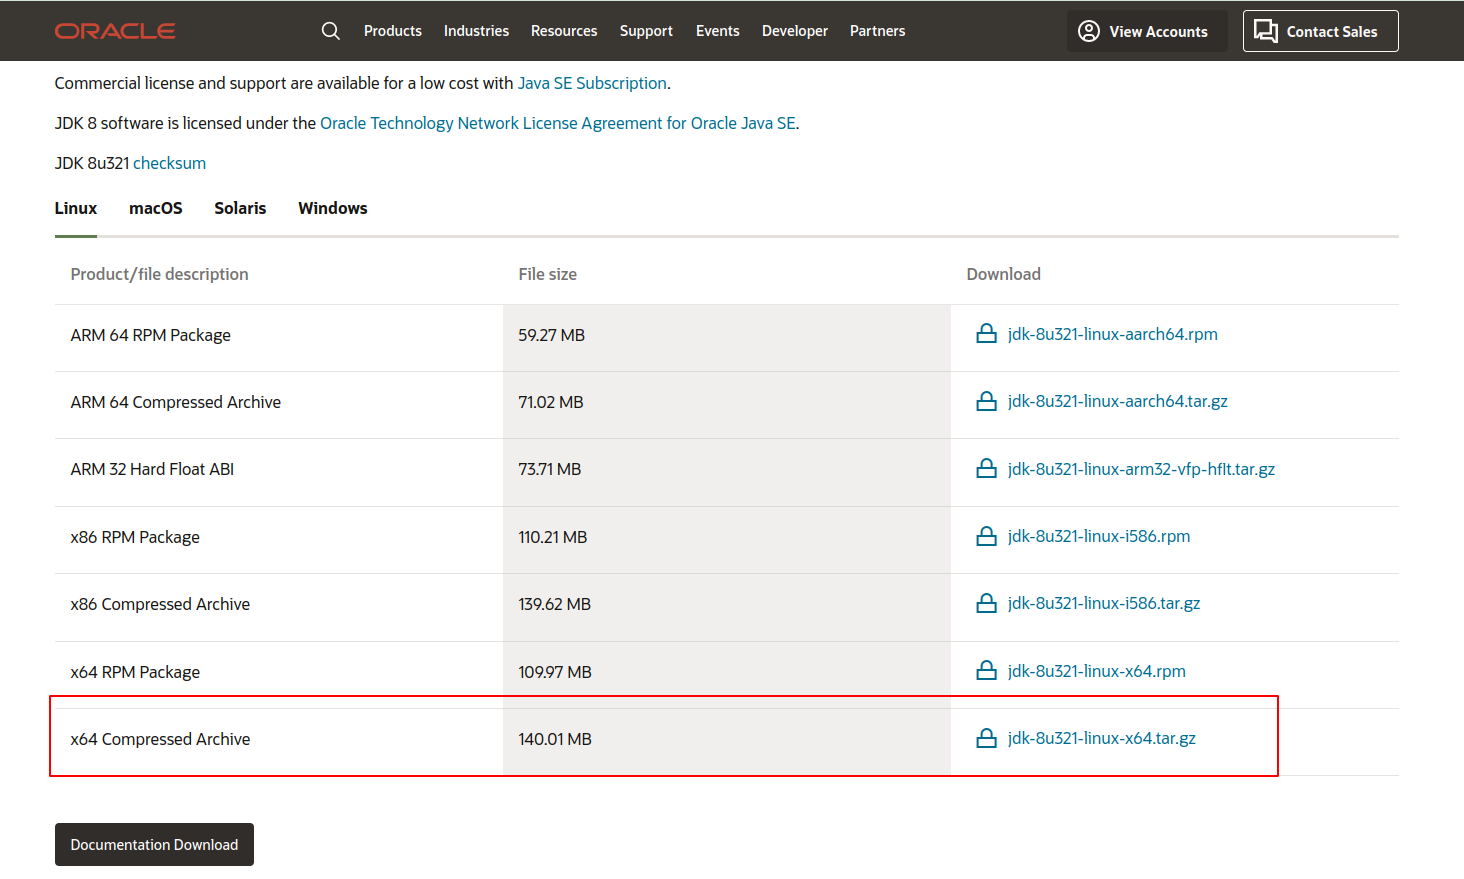
3,JDK1. 8.0_ 321 (as long as it is JDK8)
-
Download JDK8 from the official website to / opt / directory or other directories and unzip it( Download link)
-
Configure environment variable: vim /etc/profile
export JAVA_HOME=/opt/jdk1.8.0_321 export JRE_HOME=${JAVA_HOME}/jre export CLASSPATH=.:${JAVA_HOME}/lib:${JRE_HOME}/lib export PATH=${JAVA_HOME}/bin:${JRE_HOME}/bin:$PATH -
Remember to save! Then close. In order for the changes to take effect, you also need to execute: source /etc/profile
-
Check whether the jdk installation is successful: java -version

4,Android NDK Revision 17c for Linux
-
Download this version of NDK and extract it to the / opt / Directory: Android NDK Revision 17c for Linux
-
There is an episode before configuring environment variables. First download and install Repo tool (the following content is extracted from Parrot's official website)
- Download it from Google APIs
- Put it in a directory that is included in your path ->(~/bin)
- Make it executable with chmod a+x repo
-
Configure environment variable: vim /etc/profile
 ###The environment variables of SDK, NDK and Repo are configured here
 export ANDROID_HOME=/home/XXX/Android/Sdk
 export ANDROID_SDK_ROOT=/home/XXX/Android/Sdk
 export ANDROID_SDK_PATH=/home/XXX/Android/Sdk
 export ANDROID_NDK_ROOT=/opt/android-ndk-r17c
 export ANDROID_NDK_PATH=/opt/android-ndk-r17c
 export REPO_HOME=~/bin

 export PATH=$PATH:$REPO_HOME
-
Remember to save! Then close. In order for the changes to take effect, you also need to execute: source /etc/profile
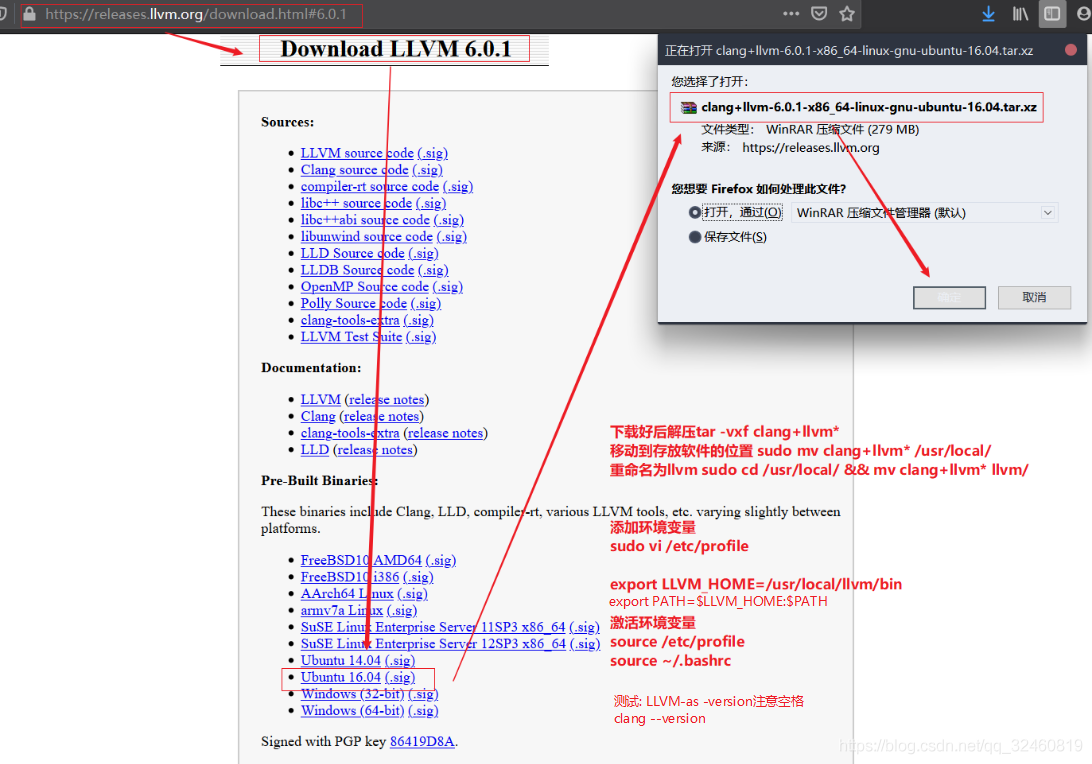
5. Download and install the compiled LLVM
-
The compiled LLVM is used here. You can also download the source code and compile it locally. However, it takes too long and takes up too much space. This is not recommended. If you are interested, you can study it in depth.
-
If you want to compile locally, you can see this big brother's article LLVM_Ubuntu installation , this big brother also did the steps of downloading and compiling directly. I'm lazy here, ha ha ~
-
Generally, it doesn't matter what version is installed. Here I install LLVM 8.0.0 and choose Ubuntu 18.04(.sig) - > LLVM download official website
-
Configure environment variable: vim /etc/profile
 export LLVM_HOME=/usr/local/llvm/bin
 export PATH=$PATH:$LLVM_HOME
-
Remember to save! Then close. In order for the changes to take effect, you also need to execute: source /etc/profile
-
Attachment: here, our environment variables have been completed, and the content of / etc/profile file is
export JAVA_HOME=/opt/android-studio/jre export ANDROID_HOME=/home/XXX/Android/Sdk export ANDROID_SDK_ROOT=/home/XXX/Android/Sdk export ANDROID_SDK_PATH=/home/XXX/Android/Sdk export ANDROID_NDK_ROOT=/opt/android-ndk-r17c export ANDROID_NDK_PATH=/opt/android-ndk-r17c export LLVM_HOME=/usr/local/llvm/bin export REPO_HOME=~/bin export JAVA_HOME=/opt/jdk1.8.0_321 export JRE_HOME=${JAVA_HOME}/jre export CLASSPATH=.:${JAVA_HOME}/lib:${JRE_HOME}/lib export PATH=$PATH:$LLVM_HOME:$REPO_HOME:${JAVA_HOME}/bin:${JRE_HOME}/bin -
Remember to save! Then close. In order for the changes to take effect, you also need to execute: source /etc/profile
In order that the environment variable can also take effect normally under the current user, copy the above text to - > ~ / profilevim ~/.profile source ~/.profile
6. Download the ground SDK
-
First, you need a Github account
 git config --global user.name "Your Name"
 git config --global user.email "you@example.com"
-
Select the download directory of the ground SDK, and I put it in / opt/
  cd /opt/
  mkdir groundsdk
  cd groundsdk

  repo init -u https://github.com/Parrot-Developers/groundsdk-manifest
  repo sync
-
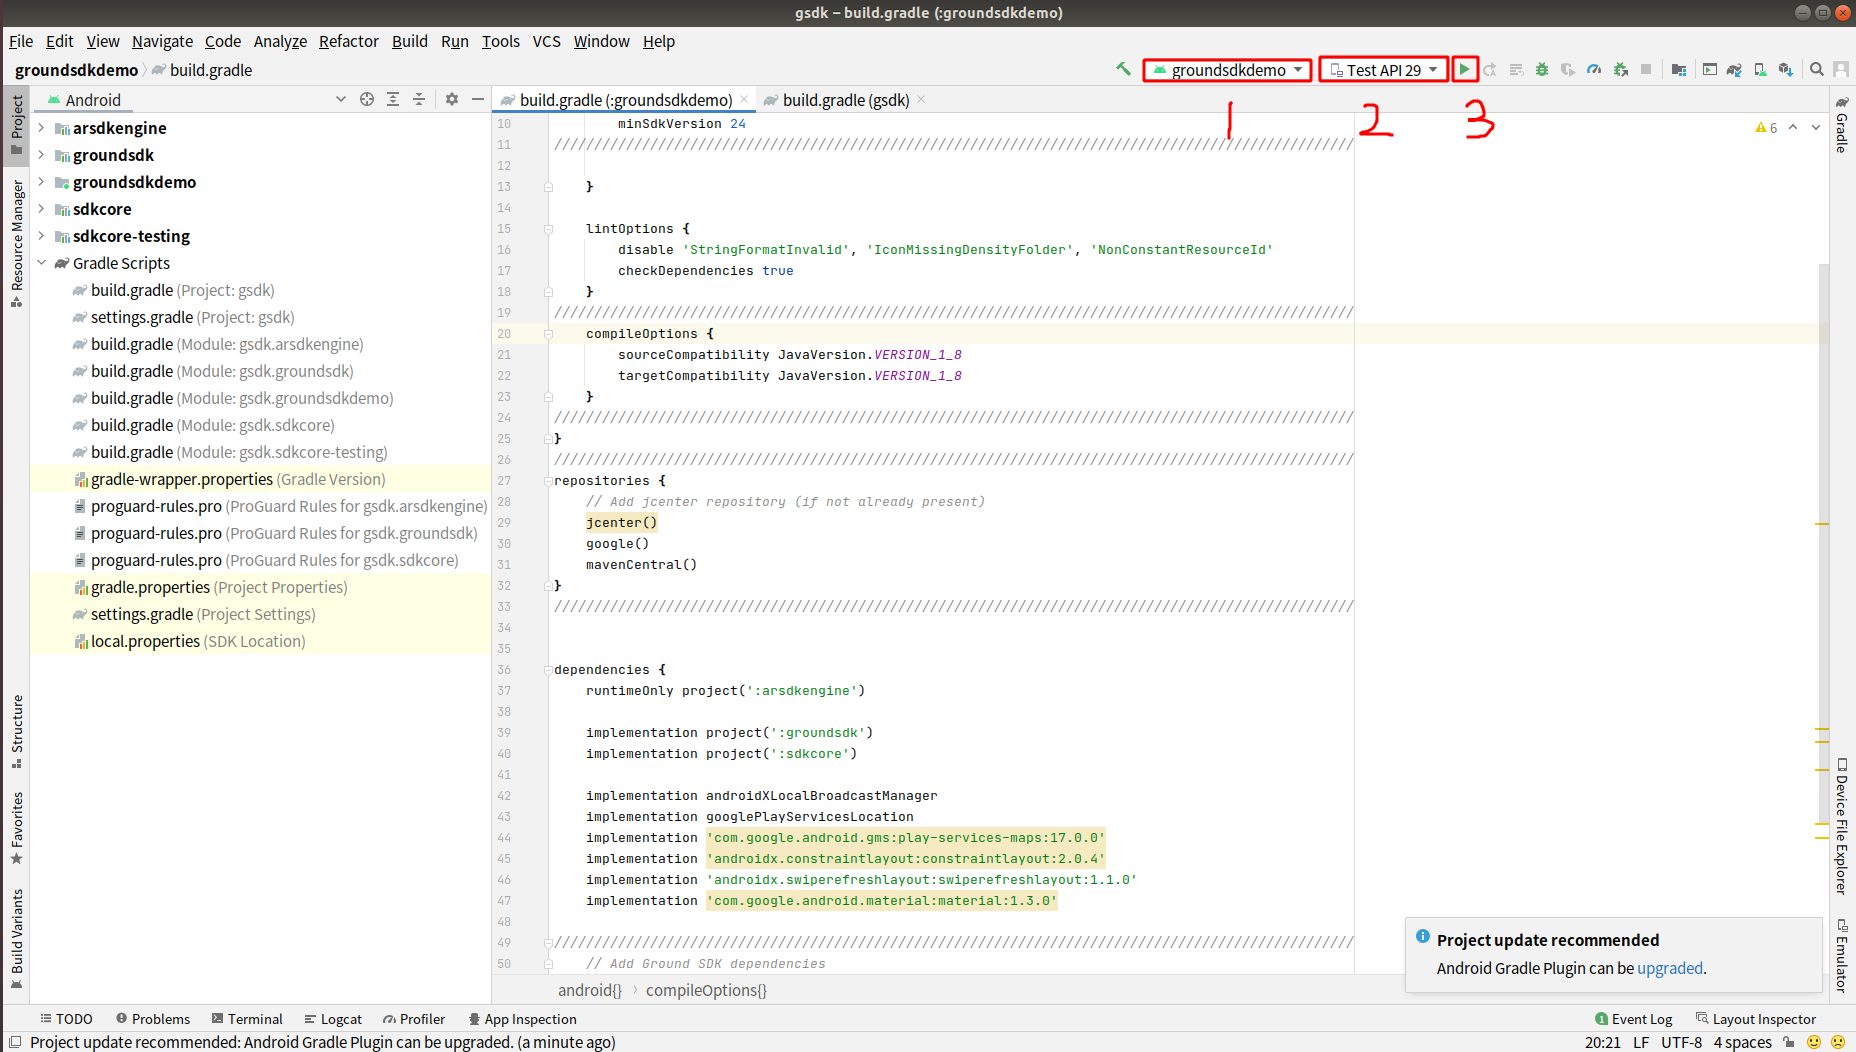
By now, we have finished more than half of our work. Here is build Gradle configuration, edit build Gradle has two ways:
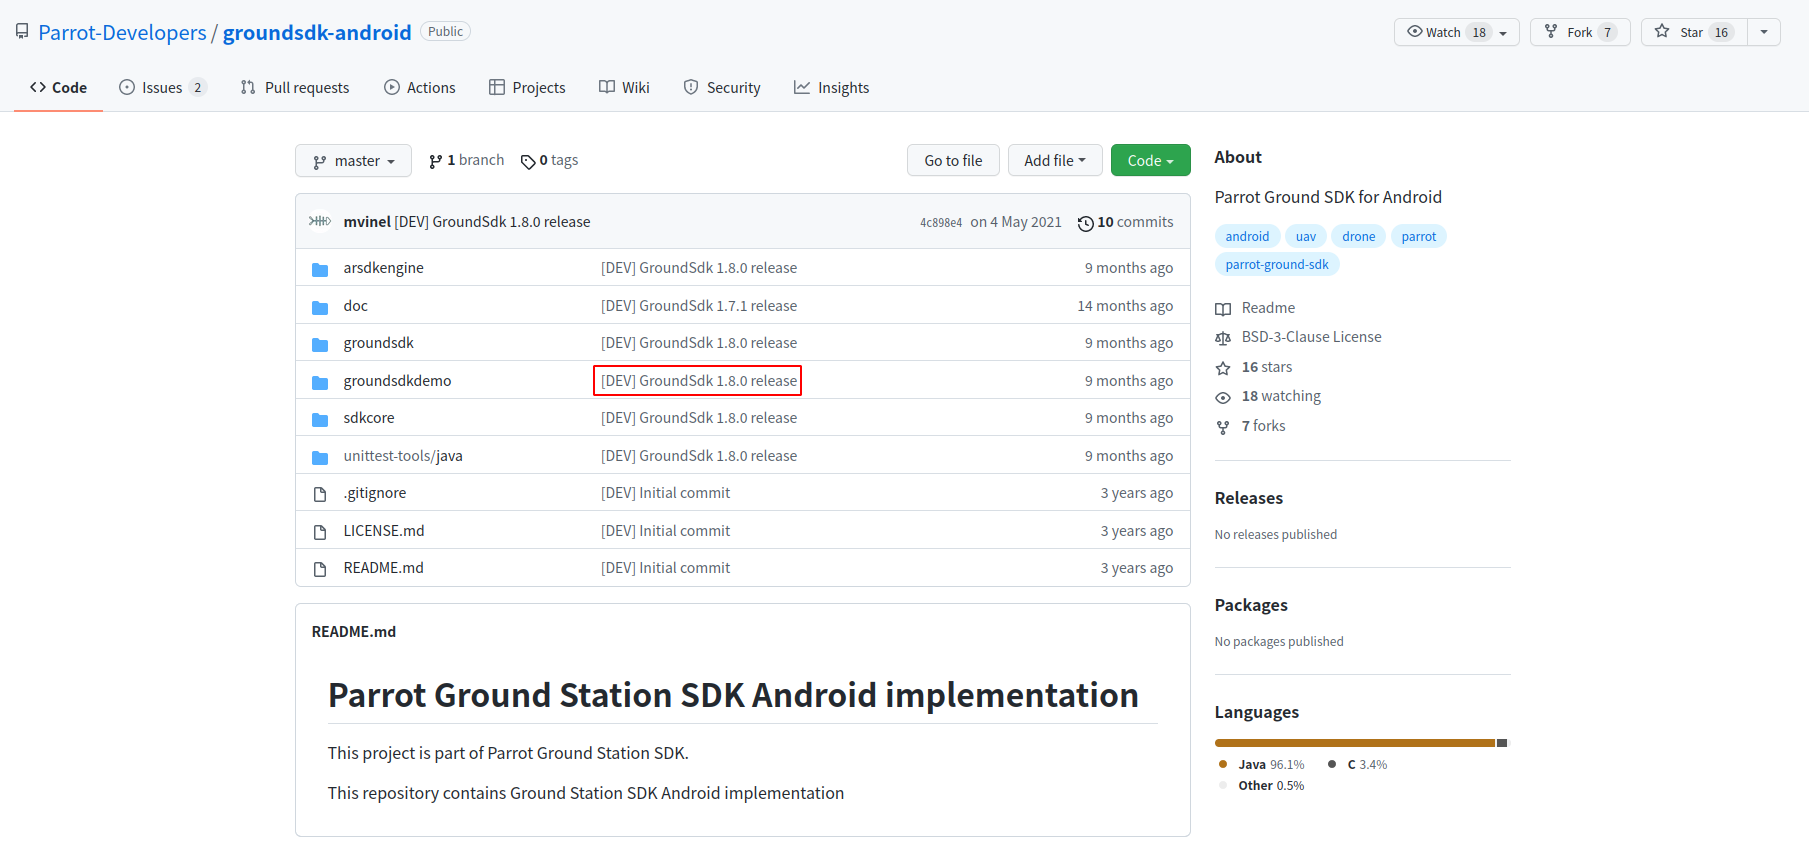
  1,Import the project into Android Studio Reuse AS edit
  2,use vim Editor edit: vim /opt/groundsdk/packages/groundsdk-android/groundsdkdemo/build.gradle
  It should be noted that the configuration is Module Lower build.gradle,that is build.gradle(Module:gsdk.groundsdk)
  The content between the two lines is the content to be added on the official website. Here is a very important point, that is, the two dependent version numbers
 // Add Ground SDK dependencies
    implementation 'com.parrot.drone.groundsdk:groundsdk:1.8.0'
    runtimeOnly 'com.parrot.drone.groundsdk:arsdkengine:1.8.0'
Should and https://github. COM / Parrot developers / groundsdk Android corresponds to the version number shown in the figure below
PS: MVNRepository (this website can be used to check the versions of the dependencies you refer to) -
Next, run the command
 cd /opt/groundsdk/
 ./build.sh -p groundsdk-android -t build -j
-
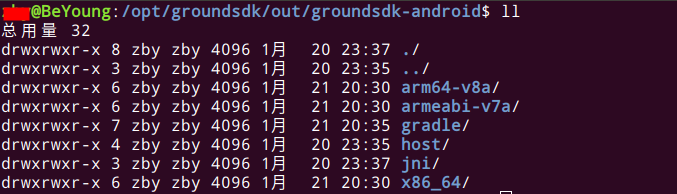
After running successfully, a / out folder will appear in your grandsdk directory. After entering the inner layer, there are the following folders, which represent the system supported by the compiled and packaged program. The system selected by our simulator should be one of the following.
-
In addition: in short, jcenter will stop service soon, so we need to add other warehouses here. For details, see the announcement on the official website: JFrog official website announcement
 repositories {
	 // Add jcenter repository (if not already present)
 	jcenter()
 	google()
 	mavenCentral()
 }
apply plugin: 'com.android.application' android { defaultConfig { // Google Geo API key. Put your own key to enable google Maps related features in demo. resValue 'string', 'gsdkdemo_google_geo_api_key', '' // Set minimum SDK version supported by GroundSdk minSdkVersion 24 } lintOptions { disable 'StringFormatInvalid', 'IconMissingDensityFolder', 'NonConstantResourceId' checkDependencies true } compileOptions { sourceCompatibility JavaVersion.VERSION_1_8 targetCompatibility JavaVersion.VERSION_1_8 } } repositories { // Add jcenter repository (if not already present) jcenter() google() mavenCentral() } dependencies { runtimeOnly project(':arsdkengine') implementation project(':groundsdk') implementation project(':sdkcore') implementation androidXLocalBroadcastManager implementation googlePlayServicesLocation implementation 'com.google.android.gms:play-services-maps:17.0.0' implementation 'androidx.constraintlayout:constraintlayout:2.0.4' implementation 'androidx.swiperefreshlayout:swiperefreshlayout:1.1.0' implementation 'com.google.android.material:material:1.3.0' // Add Ground SDK dependencies implementation 'com.parrot.drone.groundsdk:groundsdk:1.8.0' runtimeOnly 'com.parrot.drone.groundsdk:arsdkengine:1.8.0' }
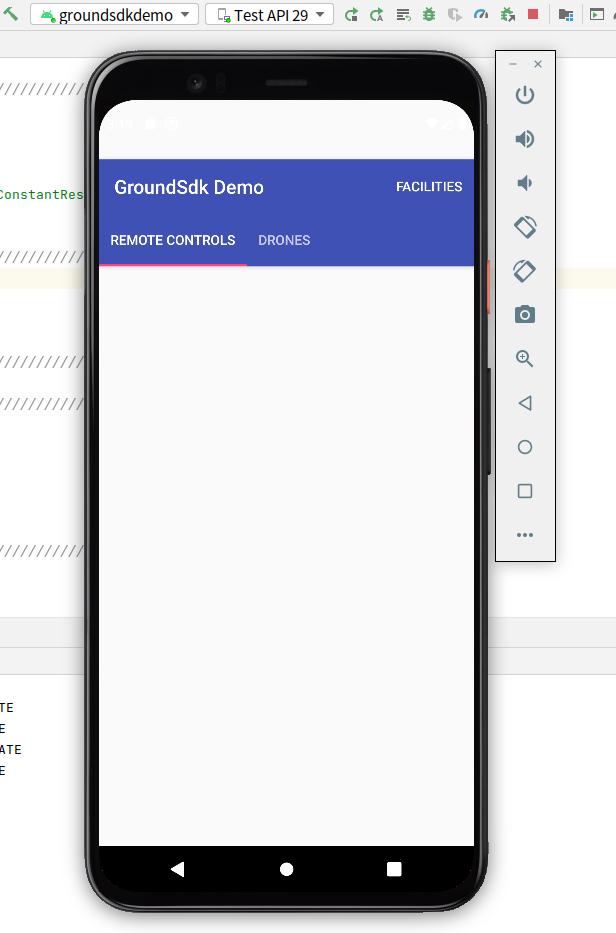
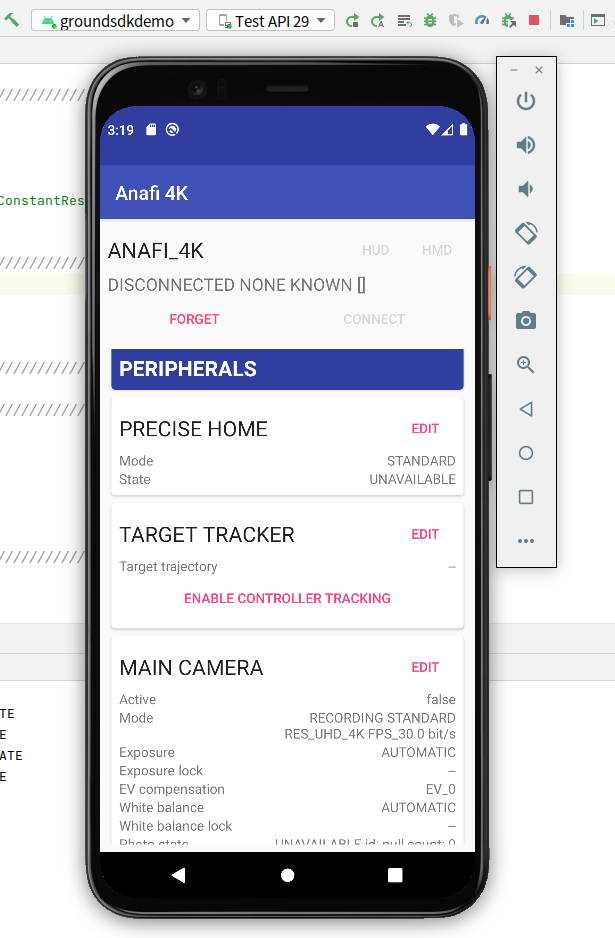
3, Run program
- At this time, we can compile and run the code without error, and can also install it on the simulator normally. However, the problem of 'groundsdk demo keeps stopping' will occur during operation because the simulator system is not selected correctly.
- Open avdmmanager
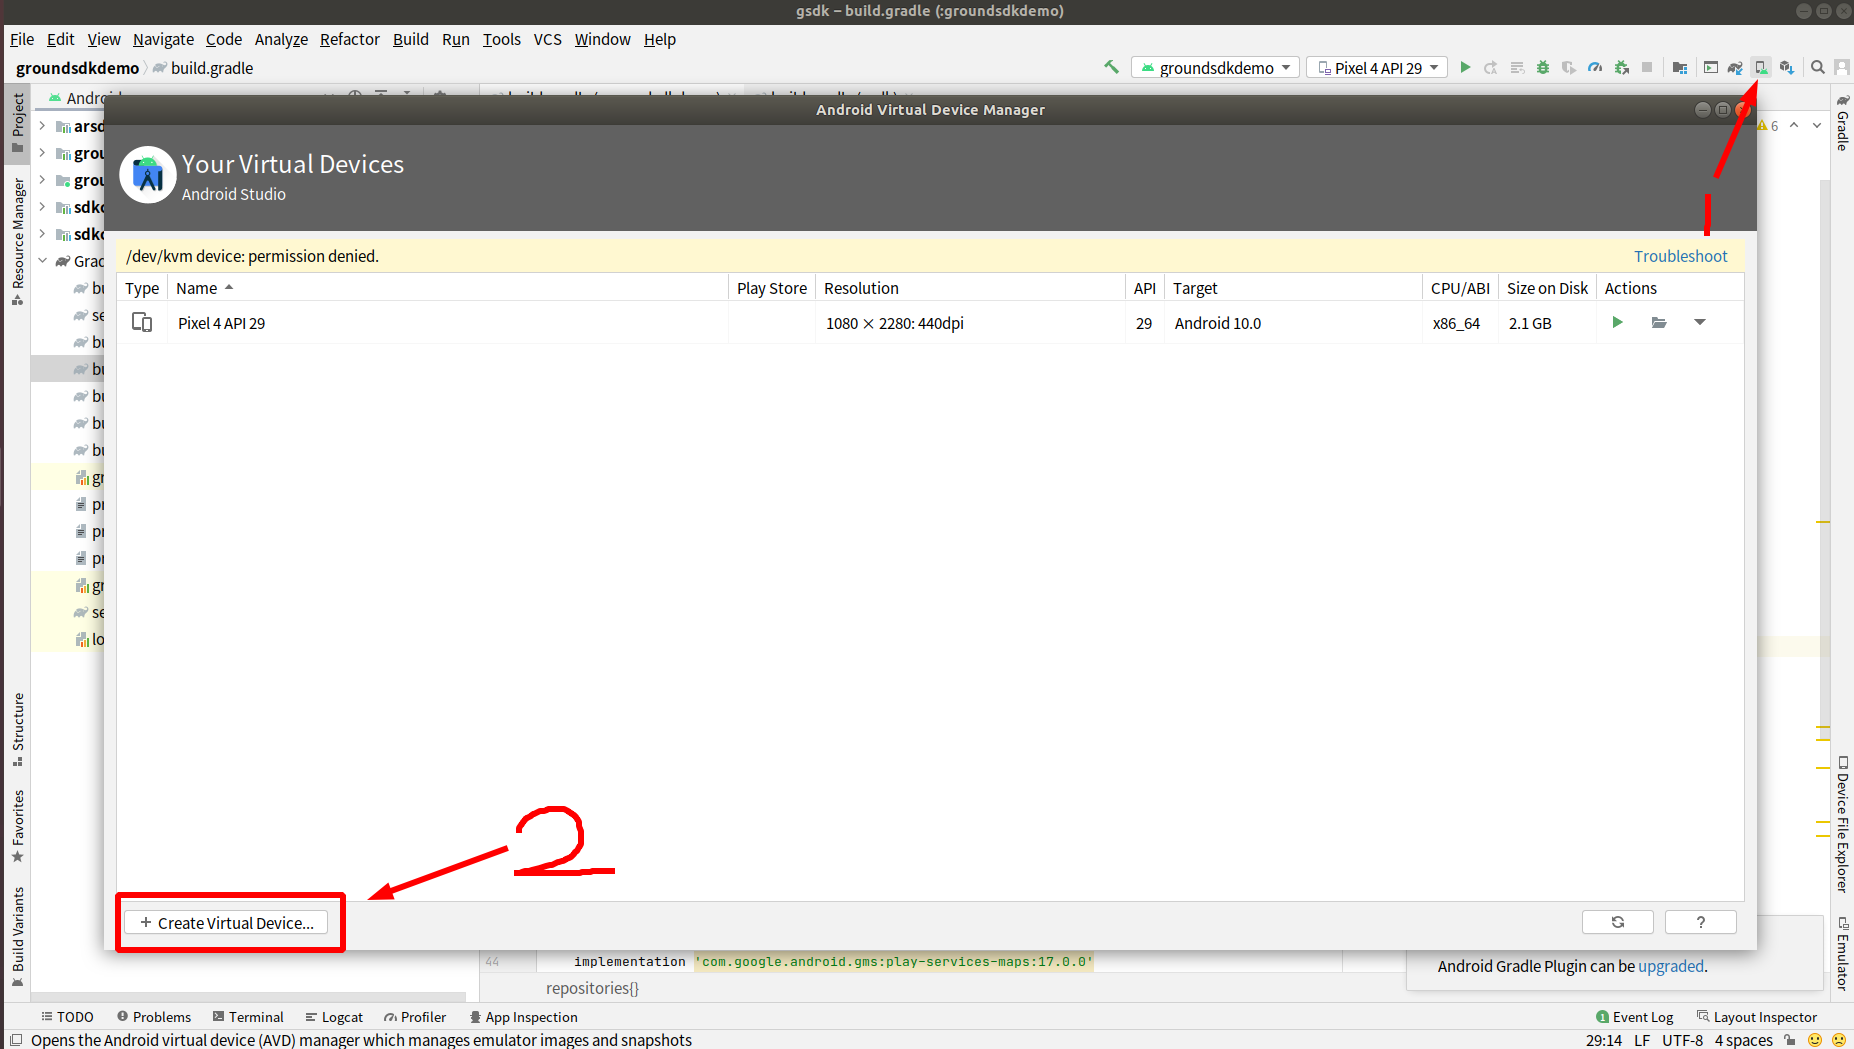
- Select a device at random, and then select the system
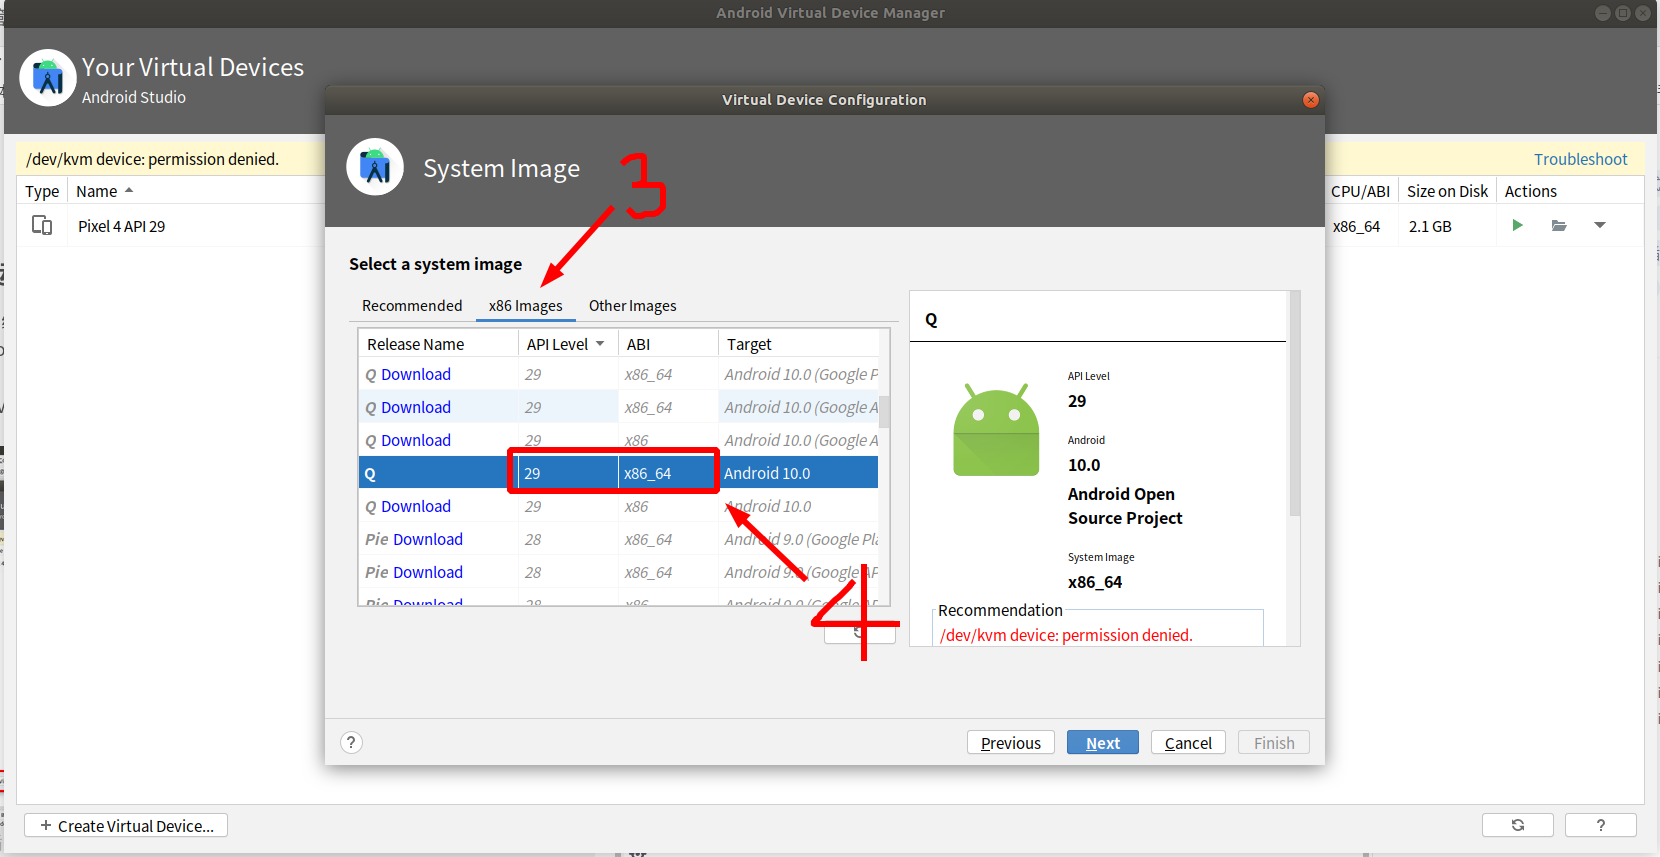
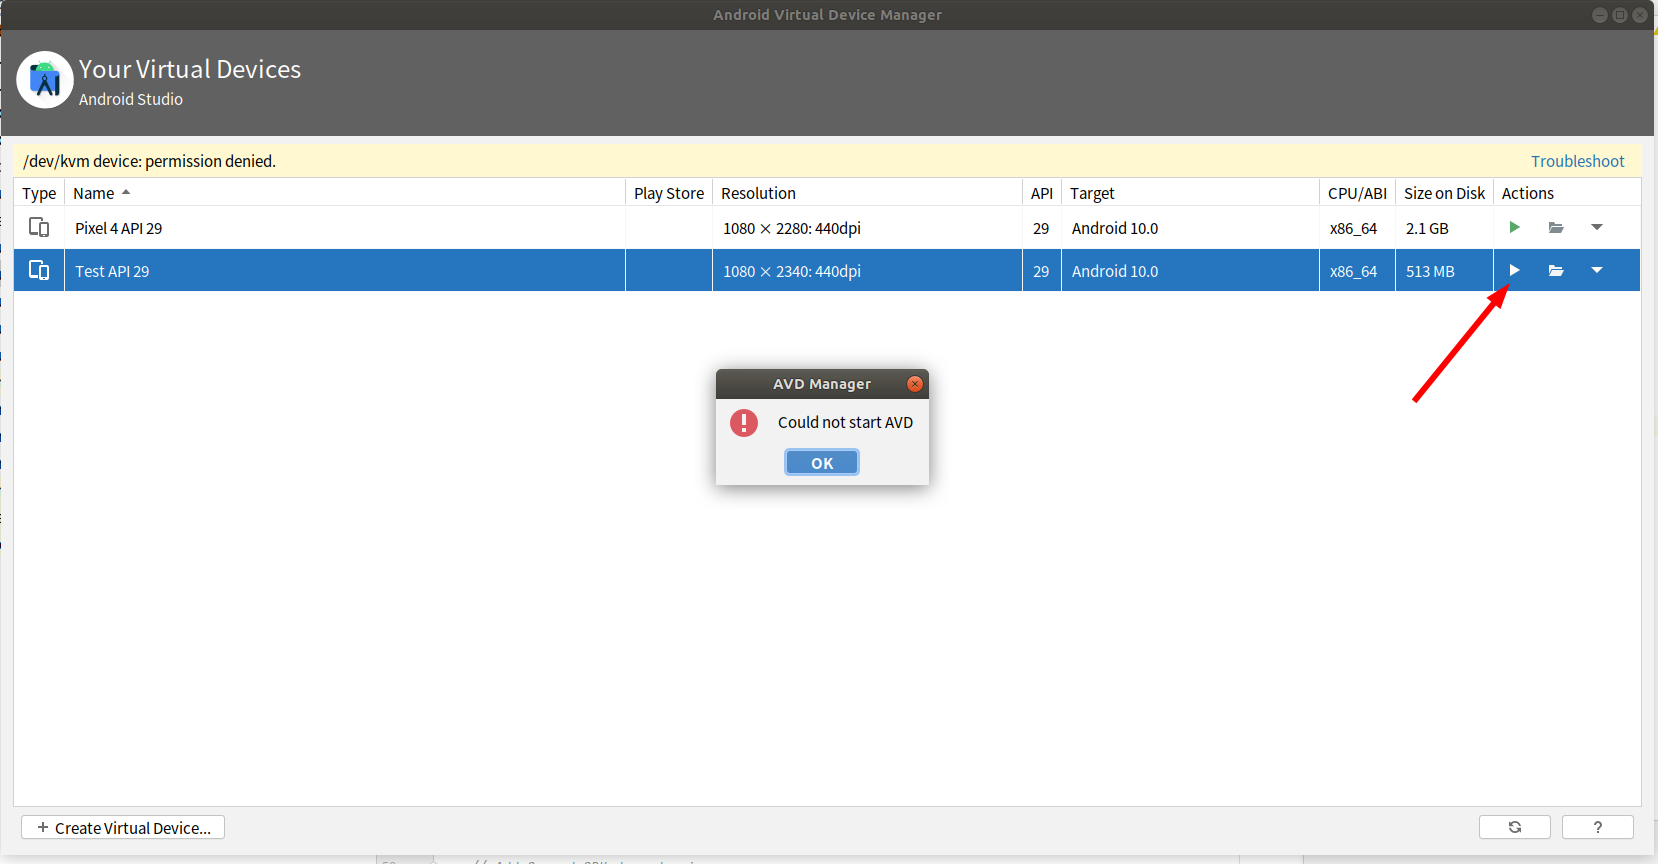
- Open the simulator. If the following problems occur, open the terminal and enter sudo chown XXX -R /dev/kvm (XXX is the user name of the currently logged in user)
- File ----> Sync Project With Gradle Files
- Run the program!
- The running results of the program are as follows: