@TOC
1. Introduction of picture format
Picture format is the format in which pictures are stored by computers. Common formats are bmp, jpg, png, tif, gif, pcx, tga, exif, fpx, svg, psd, cdr, pcd, dxf, ufo, eps, ai, raw, WMF, webp, avif, apng, etc.
(1) BMP format
1. Introduction
BMP(Bitmap-File) graphics file is a graphics file format used by Windows. BMP image file format is supported by all image processing software running in Windows environment. Each image drawing operation inside the Windows system is based on BMP. BMP image file format prior to Windows 3.0 is related to display devices, so this BMP image file format is called device-dependent bitmap file format. BMP image files after Windows 3.0 are not related to display devices. So this BMP image file format is called device-independent bitmap (note: DDB bitmaps still exist in the system after Windows 3.0. Functions like BitBlt are based on DDB bitmaps, but Microsoft strongly recommends that you save images in DIB format if you want to save them in BMP format to a disk file). The purpose is to enable Windows to display stored images on any type of display device. The default file extension for BMP bitmap files is BMP or BMP (sometimes it also has a.DIB or.RLE extension).
2. File structure
It consists of four parts: a bitmap-file header, a bitmap-information header, a color table, and an array of bytes (bitmap data, i.e., image data, Data Bits, or Data Body) that define the bitmap.
(2) JPEG format
1. Introduction
jpeg (Joint Photographic Experts Group), or Joint Photographic Experts Group, is a standard for continuous tone static image compression with a file suffix named. jpg or. jpeg, is the most commonly used image file format. It mainly uses predictive coding (DPCM), discrete cosine transformation (DCT) and entropy coding to remove redundant image and color data. It is a lossy compression format. It can compress the image in a small storage space, which will cause image data damage to a certain extent. Especially, using too high compression ratio will reduce the quality of the recovered image after final decompression. If you want high quality image, you should not use too high compression ratio.
2. Classification
(1) Standard JPEG format: This type of web page download can only display images in top-down order, until all image data are downloaded, the image panorama can be seen.
(2) Progressive JPEG: When downloading a web page, this type first presents the rough appearance of the image, then slowly presents the complete content. Progressive JPG format is smaller than standard JPG format, so if you want to use images on the web page, you can use this format more.
(3) JPEG2000: It is a new generation of image compression method with higher compression quality and can improve the mosaic phenomenon and position disorder caused by unstable signal in wireless transmission, so as to improve the transmission quality.
3. Features
Advantage:
- It supports very high compression rates, so downloading JPEG images is much faster.
- It can easily process 16.8M colors and reproduce full color images very well.
- During image compression, the image format allows the freedom to choose between the minimum file size (the lowest image quality) and the maximum file size (the highest image quality).
- The format has a relatively small file size, fast download speed, and is good for transferring when bandwidth is not "affluent".
Disadvantages: - Not all browsers support inserting various JPEG images into web pages.
- This format is not suitable for displaying high-definition images because the quality of the image may be compromised during compression.
(3) GIF format
1. Introduction
The GIF format is short for Graphics Interchange Format and was developed in 1987 by Compu Serve to fill in gaps in cross-platform image formats. GIF can be supported on a variety of platforms, such as PC and Actiontosh. GIF is a bitmap. The general principle of bitmaps is that pictures are made up of many pixels, each of which is assigned a color, and these pixels together make up a picture.
2. Structure
- The header is a block of data with a stream identifying the GIF format used to distinguish between earlier and new versions.
- The Logical Screen Description Area defines the image plane size and color depth associated with the image data and indicates whether the following palette data area belongs to the global or local palette. If a global palette is used, a 24-bit RGB global palette is generated, with one base color taking up one byte.
- Palette data area. There are universal palettes and local palettes. The universal palette is suitable for all images in the file, while the local palette is only suitable for one image.
- There are two types of content in an image data area, one is pure image data, and the other is data blocks for specific purposes (including specialized application code and unprintable annotation information). In an image file in GIF89a format, if a file contains multiple images, the image data area repeats the data block sequence in turn.
- The end flag area primarily marks the end of the entire data stream.
3. Features - The GIF format image file has the extension'.gif'.
- Best performance for grayscale images.
- There are two versions of GIF87a and GIF89a.
- An improved LZW compression algorithm is used to process image data.
- Palette data can be divided into universal palettes and local palettes with different color values.
- 24bit color mode is not supported, maximum 256 colors are stored.
(4) PNG format
1. Introduction
Portable Network Graphics is the latest image file format accepted on the Internet. PNG can provide lossless compressed image files 30% shorter in length than GIF. It provides 24-bit and 48-bit true color image support as well as many other technical support. Because PNG is very new, not all programs can use it to store image files, but Photoshop can process PNG image files or store them in PNG image file format.
2. Structure
A PNG image format file (or data stream) consists of an 8-byte PNG file signature field and more than three chunk s of data organized according to a specific structure.
PNG defines two types of data blocks, one called critical chunk s, which are required and the other called ancillary chunks, which are optional. Key data blocks define four standard data blocks that must be included in each PNG file and supported by PNG read-write software. Although the PNG file specification does not require PNG coders to encode and decode optional data blocks, it advocates supporting optional data blocks.
3. Features
Advantage:
- PNG supports high-level lossless compression.
- PNG supports alpha channel transparency.
- PNG supports gamma correction.
- PNG supports interleaving.
- PNG is supported by the latest Web browsers.
Disadvantages:
- Older browsers and programs may not support PNG files.
- As an Internet file format, PNG provides less compression than JPEG's lossy compression.
- As an Internet file format, PNG does not provide any support for multi-image or animation files. GIF format supports multiple image and animation files.
2. Examples
(1) Comparing BMP files with different bit depths
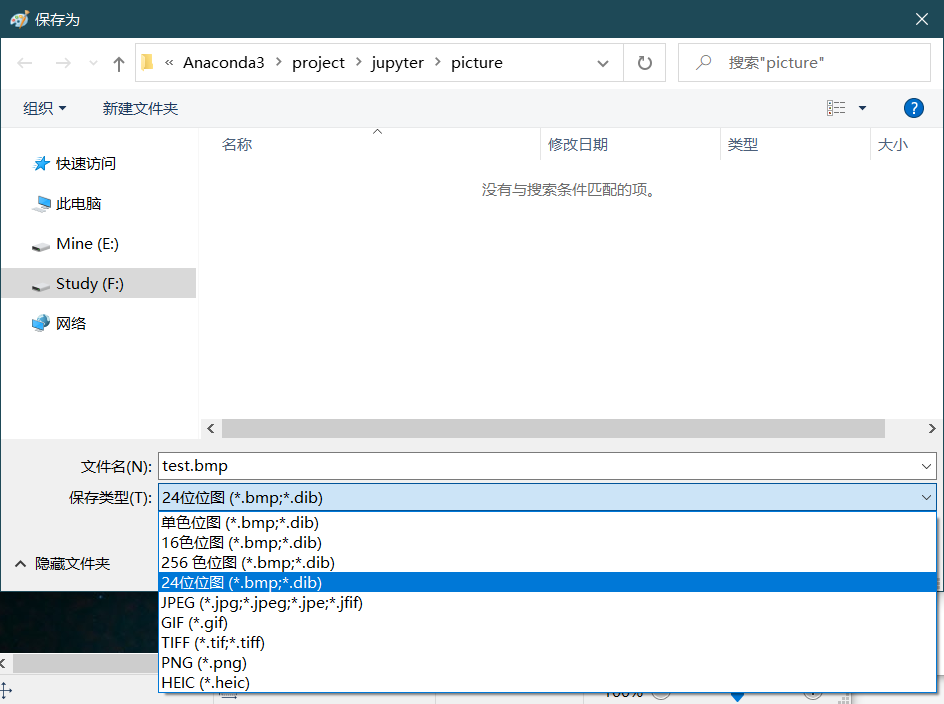
Select a picture and open it with a drawing board or other image editing software (Photoshop/GIMP, cximage, IrfanView, etc.).
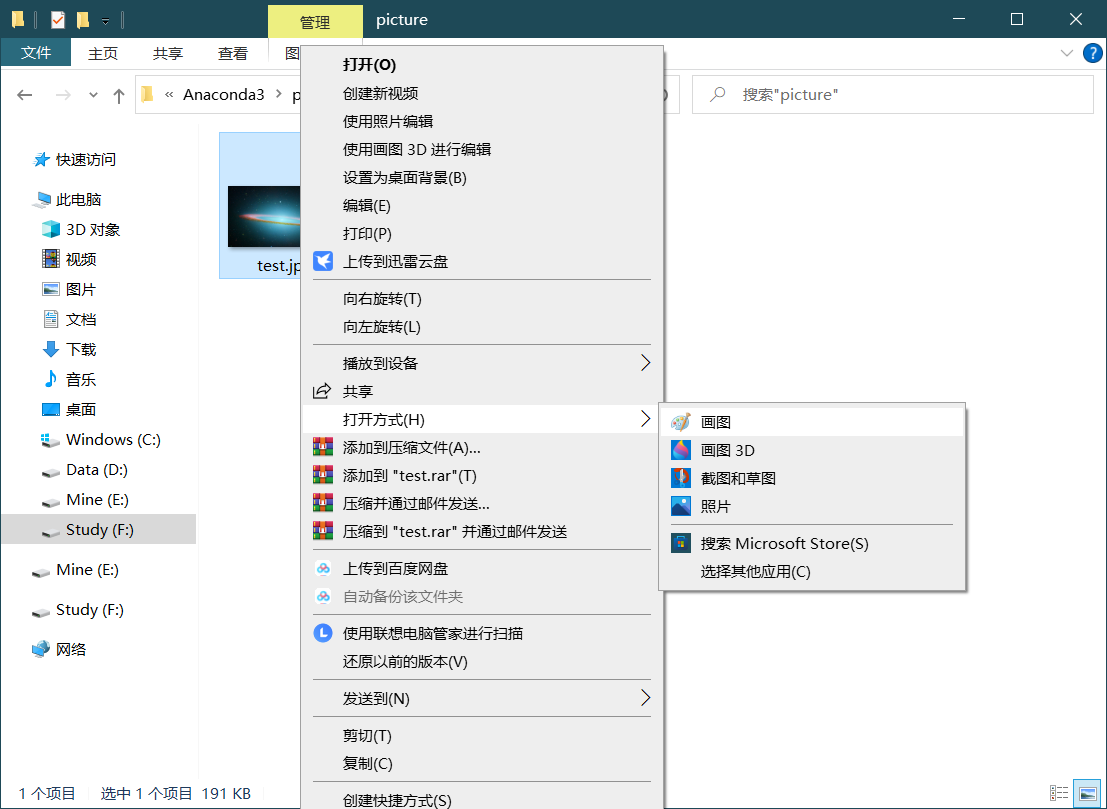
Save it in BMP format
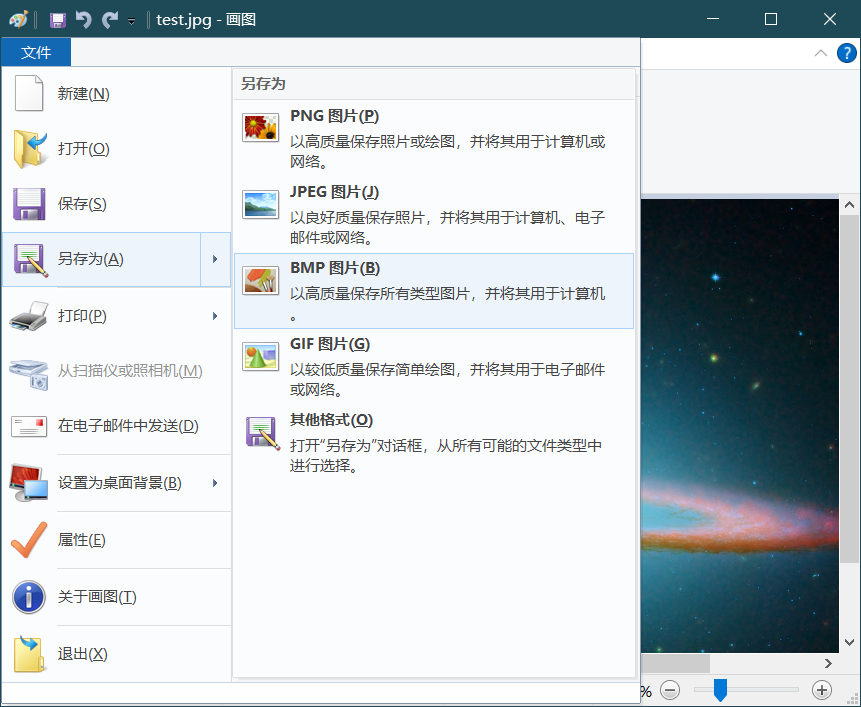
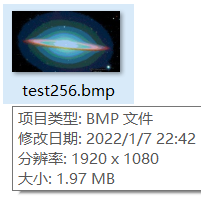
The bmp format has four types: monochrome, 16-color, 256-color and 24-bit, which are selected and saved separately.
The results are as follows:
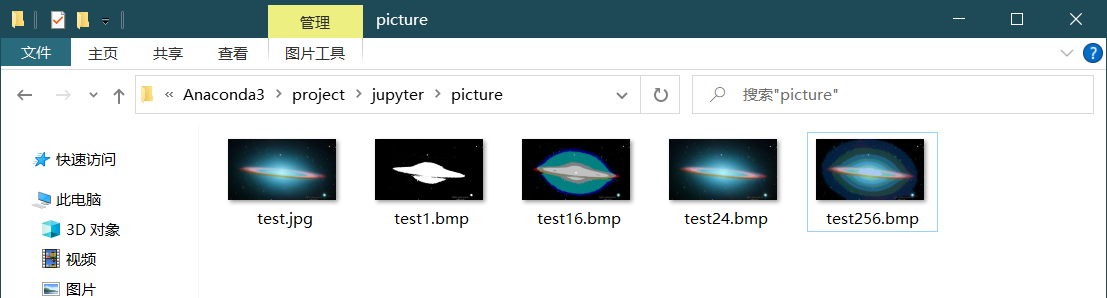
Move the mouse over the picture to show its size
(2) Comparing compression ratios of different formats
Save pictures in BMP, JPG, GIF, PNG formats
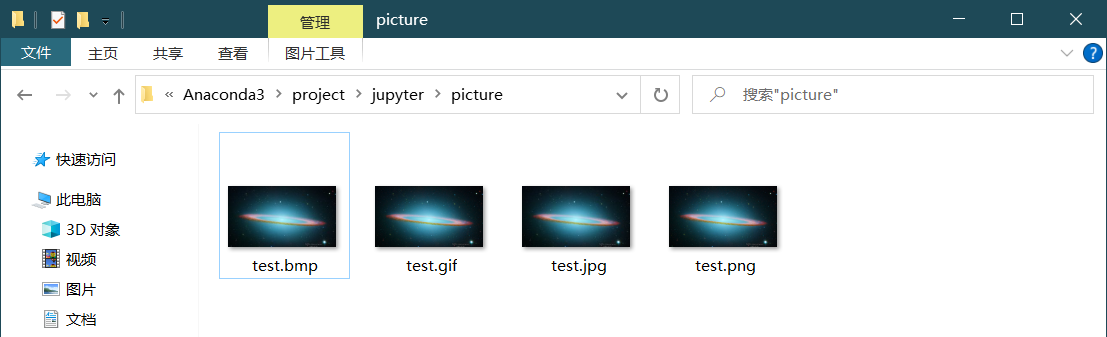
View Size Separately
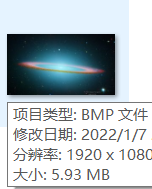
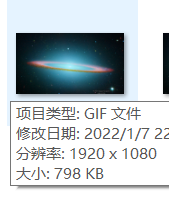
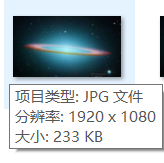
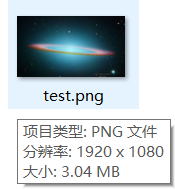
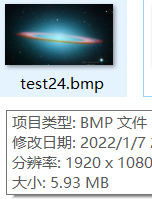
Because BMP is not compressed, the compression ratio is calculated based on it
| file format | file size | Compression ratio |
|---|---|---|
| BMP | 5.93MB | — |
| GIF | 798KB | 87% |
| JPG | 233KB | 96% |
| PNG | 3.04MB | 49% |
3. Image Processing Programming
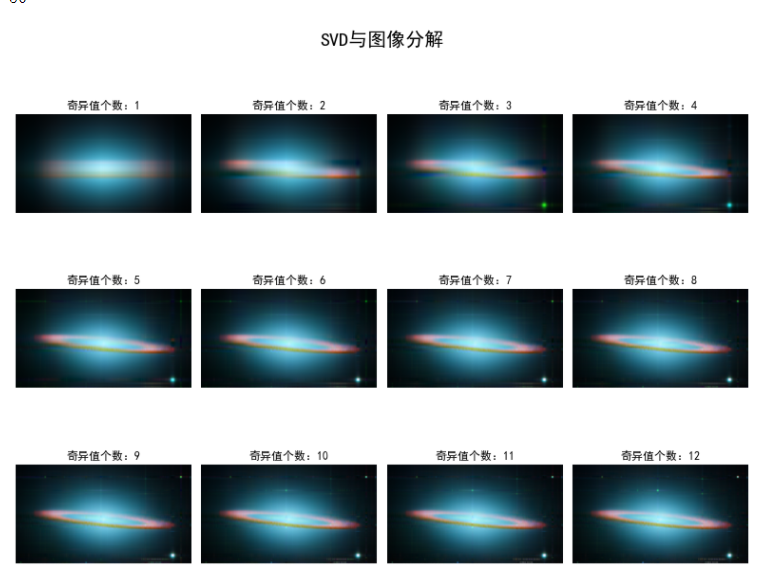
(1) Singular Function Decomposition (SVD)
Code:
import numpy as np
import os
from PIL import Image
import matplotlib.pyplot as plt
import matplotlib as mpl
from pprint import pprint
def restore1(sigma, u, v, K): # Singular value, left eigenvector, right eigenvector
m = len(u)
n = len(v[0])
a = np.zeros((m, n))
for k in range(K):
uk = u[:, k].reshape(m, 1)
vk = v[k].reshape(1, n)
a += sigma[k] * np.dot(uk, vk)
a[a < 0] = 0
a[a > 255] = 255
# a = a.clip(0, 255)
return np.rint(a).astype('uint8')
def restore2(sigma, u, v, K): # Singular value, left eigenvector, right eigenvector
m = len(u)
n = len(v[0])
a = np.zeros((m, n))
for k in range(K+1):
for i in range(m):
a[i] += sigma[k] * u[i][k] * v[k]
a[a < 0] = 0
a[a > 255] = 255
return np.rint(a).astype('uint8')
if __name__ == "__main__":
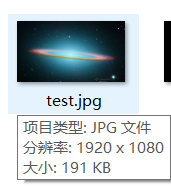
A = Image.open("F:\\Anaconda3\\project\\jupyter\\picture\\test.jpg", 'r')
print(A)
output_path = r'F:\\Anaconda3\\project\\jupyter\\picture\\Output'
if not os.path.exists(output_path):
os.mkdir(output_path)
a = np.array(A)
print(a.shape)
K = 50
u_r, sigma_r, v_r = np.linalg.svd(a[:, :, 0])
u_g, sigma_g, v_g = np.linalg.svd(a[:, :, 1])
u_b, sigma_b, v_b = np.linalg.svd(a[:, :, 2])
plt.figure(figsize=(11, 9), facecolor='w')
mpl.rcParams['font.sans-serif'] = ['simHei']
mpl.rcParams['axes.unicode_minus'] = False
for k in range(1, K+1):
print(k)
R = restore1(sigma_r, u_r, v_r, k)
G = restore1(sigma_g, u_g, v_g, k)
B = restore1(sigma_b, u_b, v_b, k)
I = np.stack((R, G, B), axis=2)
Image.fromarray(I).save('%s\\svd_%d.png' % (output_path, k))
if k <= 12:
plt.subplot(3, 4, k)
plt.imshow(I)
plt.axis('off')
plt.title('Number of singular values:%d' % k)
plt.suptitle('SVD And image decomposition', fontsize=20)
plt.tight_layout()
# plt.subplots_adjust(top=0.9)
plt.show()
The results are as follows:

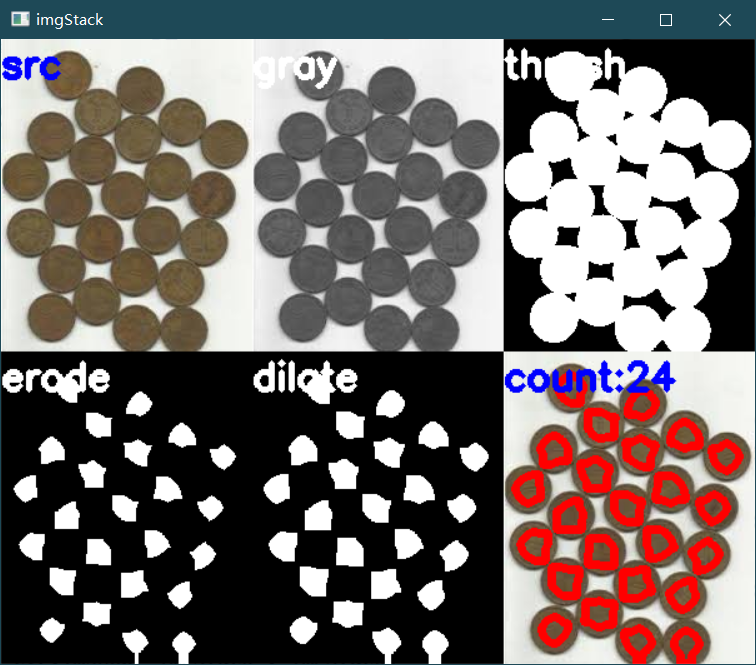
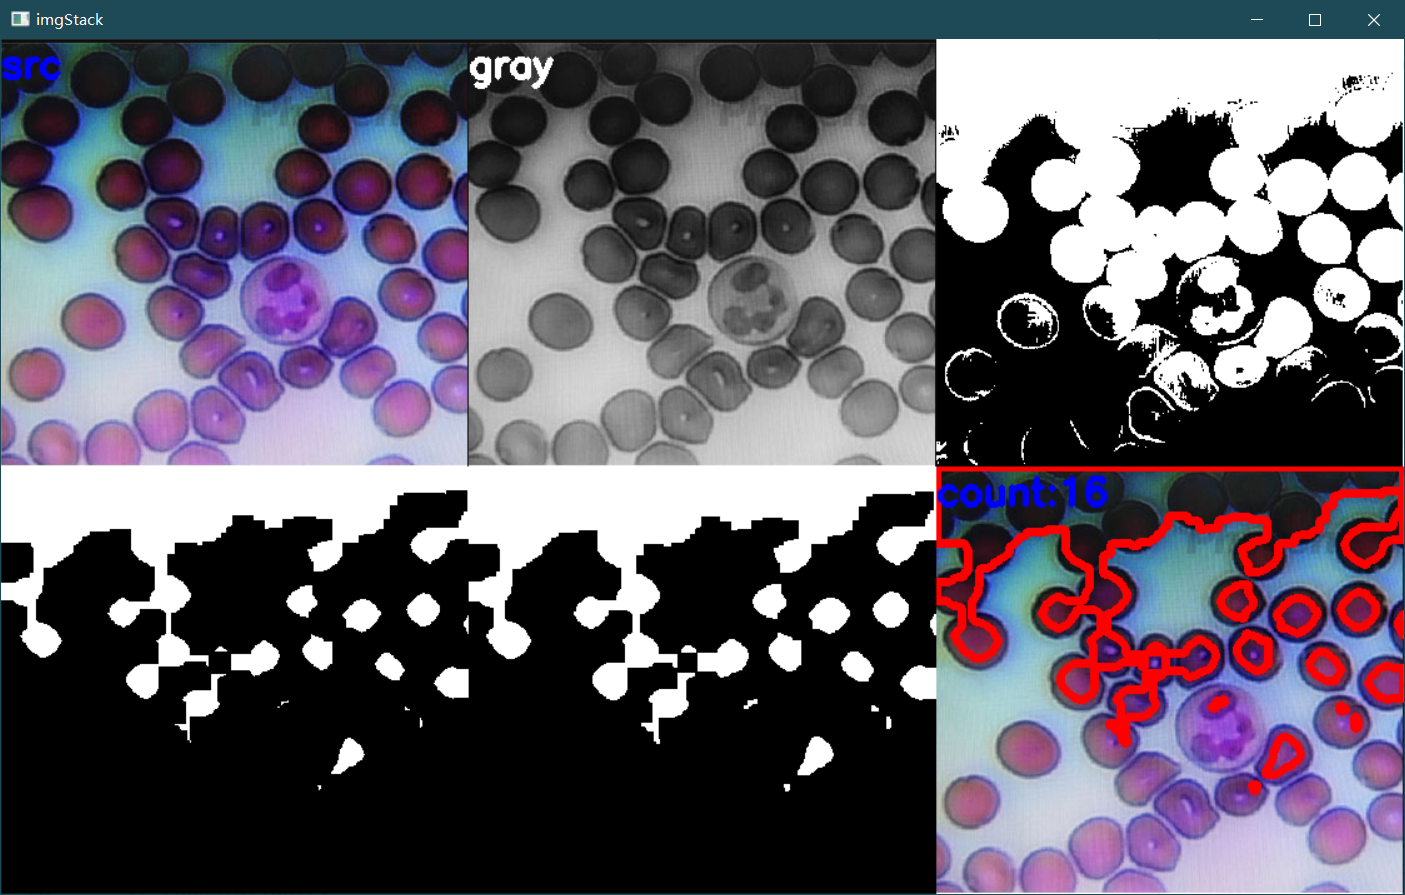
(2) The number of coins and cells in two sample images was detected by open-close operation (corrosion-expansion).
1. Coins
The code is as follows:
import cv2
import numpy as np

def stackImages(scale, imgArray):
    """
        Push multiple images into the same window to display
        :param scale:float Type, output image display percentage, control zoom ratio, 0.5=Reduce image resolution by half
        :param imgArray:Tuple Nested List, Image Matrix to Arrange
        :return:Output Image
    """
    rows = len(imgArray)
    cols = len(imgArray[0])
    rowsAvailable = isinstance(imgArray[0], list)
    width = imgArray[0][0].shape[1]
    height = imgArray[0][0].shape[0]
    if rowsAvailable:
        for x in range(0, rows):
            for y in range(0, cols):
                if imgArray[x][y].shape[:2] == imgArray[0][0].shape[:2]:
                    imgArray[x][y] = cv2.resize(imgArray[x][y], (0, 0), None, scale, scale)
                else:
                    imgArray[x][y] = cv2.resize(imgArray[x][y], (imgArray[0][0].shape[1], imgArray[0][0].shape[0]),
                                                None, scale, scale)
                if len(imgArray[x][y].shape) == 2: imgArray[x][y] = cv2.cvtColor(imgArray[x][y], cv2.COLOR_GRAY2BGR)
        imageBlank = np.zeros((height, width, 3), np.uint8)
        hor = [imageBlank] * rows
        hor_con = [imageBlank] * rows
        for x in range(0, rows):
            hor[x] = np.hstack(imgArray[x])
        ver = np.vstack(hor)
    else:
        for x in range(0, rows):
            if imgArray[x].shape[:2] == imgArray[0].shape[:2]:
                imgArray[x] = cv2.resize(imgArray[x], (0, 0), None, scale, scale)
            else:
                imgArray[x] = cv2.resize(imgArray[x], (imgArray[0].shape[1], imgArray[0].shape[0]), None, scale, scale)
            if len(imgArray[x].shape) == 2: imgArray[x] = cv2.cvtColor(imgArray[x], cv2.COLOR_GRAY2BGR)
        hor = np.hstack(imgArray)
        ver = hor
    return ver

#Read pictures
src = cv2.imread("F:\\Anaconda3\\project\\jupyter\\picture\\coin.png")
img = src.copy()

#gray level
img_1 = cv2.cvtColor(img, cv2.COLOR_BGR2GRAY)

#Binarization
ret, img_2 = cv2.threshold(img_1, 127, 255, cv2.THRESH_BINARY_INV + cv2.THRESH_OTSU)

#Corrosion (Corrosion is mainly to separate each coin. Too much makes a loss and too low makes it impossible to distinguish. Parameters can be set to suit them.)
kernel = np.ones((17, 17), int)
img_3 = cv2.erode(img_2, kernel, iterations=1)

#Expansion (Expand to the right value so that each white area is a coin.)
kernel = np.ones((3, 3), int)
img_4 = cv2.dilate(img_3, kernel, iterations=1)

#Found Coin Center
contours, hierarchy = cv2.findContours(img_4, cv2.RETR_EXTERNAL, cv2.CHAIN_APPROX_NONE)[-2:]

#Identify Coin
cv2.drawContours(img, contours, -1, (0, 0, 255), 5)

#display picture
cv2.putText(img, "count:{}".format(len(contours)), (0, 30), cv2.FONT_HERSHEY_SIMPLEX, 1.0, (255, 0, 0), 3)
cv2.putText(src, "src", (0, 30), cv2.FONT_HERSHEY_SIMPLEX, 1.0, (255, 0, 0), 3)
cv2.putText(img_1, "gray", (0, 30), cv2.FONT_HERSHEY_SIMPLEX, 1.0, (255, 0, 0), 3)
cv2.putText(img_2, "thresh", (0, 30), cv2.FONT_HERSHEY_SIMPLEX, 1.0, (255, 0, 0), 3)
cv2.putText(img_3, "erode", (0, 30), cv2.FONT_HERSHEY_SIMPLEX, 1.0, (255, 0, 0), 3)
cv2.putText(img_4, "dilate", (0, 30), cv2.FONT_HERSHEY_SIMPLEX, 1.0, (255, 0, 0), 3)
imgStack = stackImages(1, ([src, img_1, img_2], [img_3, img_4, img]))
cv2.imshow("imgStack", imgStack)
cv2.waitKey(0)
The results are as follows:
2. Cells
import cv2
import numpy as np

def stackImages(scale, imgArray):
    """
        Push multiple images into the same window to display
        :param scale:float Type, output image display percentage, control zoom ratio, 0.5=Reduce image resolution by half
        :param imgArray:Tuple Nested List, Image Matrix to Arrange
        :return:Output Image
    """
    rows = len(imgArray)
    cols = len(imgArray[0])
    rowsAvailable = isinstance(imgArray[0], list)
    width = imgArray[0][0].shape[1]
    height = imgArray[0][0].shape[0]
    if rowsAvailable:
        for x in range(0, rows):
            for y in range(0, cols):
                if imgArray[x][y].shape[:2] == imgArray[0][0].shape[:2]:
                    imgArray[x][y] = cv2.resize(imgArray[x][y], (0, 0), None, scale, scale)
                else:
                    imgArray[x][y] = cv2.resize(imgArray[x][y], (imgArray[0][0].shape[1], imgArray[0][0].shape[0]),
                                                None, scale, scale)
                if len(imgArray[x][y].shape) == 2: imgArray[x][y] = cv2.cvtColor(imgArray[x][y], cv2.COLOR_GRAY2BGR)
        imageBlank = np.zeros((height, width, 3), np.uint8)
        hor = [imageBlank] * rows
        hor_con = [imageBlank] * rows
        for x in range(0, rows):
            hor[x] = np.hstack(imgArray[x])
        ver = np.vstack(hor)
    else:
        for x in range(0, rows):
            if imgArray[x].shape[:2] == imgArray[0].shape[:2]:
                imgArray[x] = cv2.resize(imgArray[x], (0, 0), None, scale, scale)
            else:
                imgArray[x] = cv2.resize(imgArray[x], (imgArray[0].shape[1], imgArray[0].shape[0]), None, scale, scale)
            if len(imgArray[x].shape) == 2: imgArray[x] = cv2.cvtColor(imgArray[x], cv2.COLOR_GRAY2BGR)
        hor = np.hstack(imgArray)
        ver = hor
    return ver

#Read pictures
src = cv2.imread("F:\\Anaconda3\\project\\jupyter\\picture\\cell.png")
img = src.copy()

#gray level
img_1 = cv2.cvtColor(img, cv2.COLOR_BGR2GRAY)

#Binarization
ret, img_2 = cv2.threshold(img_1, 127, 255, cv2.THRESH_BINARY_INV + cv2.THRESH_OTSU)

#Corrosion (Corrosion is mainly to separate each coin. Too much makes a loss and too low makes it impossible to distinguish. Parameters can be set to suit them.)
kernel = np.ones((17, 17), int)
img_3 = cv2.erode(img_2, kernel, iterations=1)

#Expansion (Expand to the right value so that each white area is a coin.)
kernel = np.ones((3, 3), int)
img_4 = cv2.dilate(img_3, kernel, iterations=1)

#Found Coin Center
contours, hierarchy = cv2.findContours(img_4, cv2.RETR_EXTERNAL, cv2.CHAIN_APPROX_NONE)[-2:]

#Identify Coin
cv2.drawContours(img, contours, -1, (0, 0, 255), 5)

#display picture
cv2.putText(img, "count:{}".format(len(contours)), (0, 30), cv2.FONT_HERSHEY_SIMPLEX, 1.0, (255, 0, 0), 3)
cv2.putText(src, "src", (0, 30), cv2.FONT_HERSHEY_SIMPLEX, 1.0, (255, 0, 0), 3)
cv2.putText(img_1, "gray", (0, 30), cv2.FONT_HERSHEY_SIMPLEX, 1.0, (255, 0, 0), 3)
cv2.putText(img_2, "thresh", (0, 30), cv2.FONT_HERSHEY_SIMPLEX, 1.0, (255, 0, 0), 3)
cv2.putText(img_3, "erode", (0, 30), cv2.FONT_HERSHEY_SIMPLEX, 1.0, (255, 0, 0), 3)
cv2.putText(img_4, "dilate", (0, 30), cv2.FONT_HERSHEY_SIMPLEX, 1.0, (255, 0, 0), 3)
imgStack = stackImages(1, ([src, img_1, img_2], [img_3, img_4, img]))
cv2.imshow("imgStack", imgStack)
cv2.waitKey(0)
(3) Using image gradient, open-close, contour operation, etc., to locate and extract the barcode in the picture, and then calling the barcode library to get the barcode characters
The code is as follows:
import cv2
import numpy as np
import imutils
from pyzbar import pyzbar
def stackImages(scale, imgArray):
    """
        Push multiple images into the same window to display
        :param scale:float Type, output image display percentage, control zoom ratio, 0.5=Reduce image resolution by half
        :param imgArray:Tuple Nested List, Image Matrix to Arrange
        :return:Output Image
    """
    rows = len(imgArray)
    cols = len(imgArray[0])
    rowsAvailable = isinstance(imgArray[0], list)
    width = imgArray[0][0].shape[1]
    height = imgArray[0][0].shape[0]
    if rowsAvailable:
        for x in range(0, rows):
            for y in range(0, cols):
                if imgArray[x][y].shape[:2] == imgArray[0][0].shape[:2]:
                    imgArray[x][y] = cv2.resize(imgArray[x][y], (0, 0), None, scale, scale)
                else:
                    imgArray[x][y] = cv2.resize(imgArray[x][y], (imgArray[0][0].shape[1], imgArray[0][0].shape[0]),
                                                None, scale, scale)
                if len(imgArray[x][y].shape) == 2: imgArray[x][y] = cv2.cvtColor(imgArray[x][y], cv2.COLOR_GRAY2BGR)
        imageBlank = np.zeros((height, width, 3), np.uint8)
        hor = [imageBlank] * rows
        hor_con = [imageBlank] * rows
        for x in range(0, rows):
            hor[x] = np.hstack(imgArray[x])
        ver = np.vstack(hor)
    else:
        for x in range(0, rows):
            if imgArray[x].shape[:2] == imgArray[0].shape[:2]:
                imgArray[x] = cv2.resize(imgArray[x], (0, 0), None, scale, scale)
            else:
                imgArray[x] = cv2.resize(imgArray[x], (imgArray[0].shape[1], imgArray[0].shape[0]), None, scale, scale)
            if len(imgArray[x].shape) == 2: imgArray[x] = cv2.cvtColor(imgArray[x], cv2.COLOR_GRAY2BGR)
        hor = np.hstack(imgArray)
        ver = hor
    return ver


#Read pictures
src = cv2.imread("F:\\Anaconda3\\project\\jupyter\\picture\\barcode.png")
img = src.copy()

#gray level
img_1 = cv2.cvtColor(img, cv2.COLOR_BGR2GRAY)

#Gauss filter
img_2 = cv2.GaussianBlur(img_1, (5, 5), 1)


#Sobel Operator
sobel_x = cv2.Sobel(img_2, cv2.CV_64F, 1, 0, ksize=3)
sobel_y = cv2.Sobel(img_2, cv2.CV_64F, 0, 1, ksize=3)
sobel_x = cv2.convertScaleAbs(sobel_x)
sobel_y = cv2.convertScaleAbs(sobel_y)
img_3 = cv2.addWeighted(sobel_x, 0.5, sobel_y, 0.5, 0)

#Mean Square Wave
img_4 = cv2.blur(img_3, (5, 5))

#Binarization
ret, img_5 = cv2.threshold(img_4, 127, 255, cv2.THRESH_BINARY + cv2.THRESH_OTSU)

#Closed operation
kernel = np.ones((100, 100), int)
img_6 = cv2.morphologyEx(img_5, cv2.MORPH_CLOSE, kernel)

#Open operation
kernel = np.ones((200, 200), int)
img_7 = cv2.morphologyEx(img_6, cv2.MORPH_OPEN, kernel)

#Draw barcode area
contours = cv2.findContours(img_7, cv2.RETR_EXTERNAL, cv2.CHAIN_APPROX_SIMPLE)
contours = imutils.grab_contours(contours)
c = sorted(contours, key = cv2.contourArea, reverse = True)[0]
rect = cv2.minAreaRect(c)
box = cv2.cv.BoxPoints(rect) if imutils.is_cv2() else cv2.boxPoints(rect)
box = np.int0(box)
cv2.drawContours(img, [box], -1, (0,255,0), 20)

#Show picture information
cv2.putText(img, "results", (200, 200), cv2.FONT_HERSHEY_SIMPLEX, 1.0, (255, 0, 0), 3)
cv2.putText(img_1, "gray", (200, 200), cv2.FONT_HERSHEY_SIMPLEX, 1.0, (0, 0, 0), 3)
cv2.putText(img_2, "GaussianBlur",(200, 200), cv2.FONT_HERSHEY_SIMPLEX, 1.0, (0, 0, 0), 3)
cv2.putText(img_3, "Sobel", (200, 200), cv2.FONT_HERSHEY_SIMPLEX, 1.0, (255, 0, 0), 3)
cv2.putText(img_4, "blur", (200, 200), cv2.FONT_HERSHEY_SIMPLEX, 1.0, (255, 0, 0), 3)
cv2.putText(img_5, "threshold", (200, 200), cv2.FONT_HERSHEY_SIMPLEX, 1.0, (255, 0, 0), 3)
cv2.putText(img_6, "close", (200, 200), cv2.FONT_HERSHEY_SIMPLEX, 1.0, (0, 0, 0), 3)
cv2.putText(img_7, "open", (200, 200), cv2.FONT_HERSHEY_SIMPLEX, 1.0, (0, 0, 0), 3)

#Output Barcode
barcodes = pyzbar.decode(src)
for barcode in barcodes:
    barcodeData = barcode.data.decode("utf-8")
    cv2.putText(img, barcodeData, (200, 600), cv2.FONT_HERSHEY_SIMPLEX, 5.0, (0, 255, 0), 30)
    #Picture, added text, upper left coordinates, font, font size, color, font size

#Show all pictures
imgStack = stackImages(0.8, ([img_1, img_2],[img_3,img_4],[img_5,img_6],[img_7,img]))
cv2.imshow("imgStack", imgStack)
cv2.waitKey(0)