Before implementing the home page template, we first put the public page template base HTML call OK. First of all, let's look at the navigation part. In addition to the home page and about bloggers, the rest is actually the classification name of our articles. As shown in the figure:

We just need to query all the article classification names in the home page view function, and then display them on the template page.
blog/views.py

from .models import Category
#Import Category class from models
def index(request):
    allcategory = Category.objects.all()#Find out all categories through the Category table
    #Encapsulate the queried classification into the context
    context = {
            'allcategory': allcategory,
        }
    return render(request, 'index.html', context)#Pass the context to index HTML page
Open base HTML page, we find the navigation code:
templates/base.html

<nav class="nav fl">
    <ul id="fix-list" class="fix-list clearfix">
        <li id="menu-item-24086" class="menu-item"><a href="/">home page</a></li>
        <li id="menu-item-117720" class="menu-item">
            <a href="/list-1.html">Django</a></li>
        <li id="menu-item-117720" class="menu-item">
            <a href="/list-2.html">Python</a></li>
        <li id="menu-item-117720" class="menu-item">
            <a href="/list-3.html">Linux</a></li>
        <li id="menu-item-117720" class="menu-item">
            <a href="/list-4.html">Mysql</a></li>
        <li id="menu-item-117720" class="menu-item">
            <a href="/list-5.html">Operation and maintenance knowledge</a></li>
        <li id="menu-item-117720" class="menu-item">
            <a href="/list-6.html">My diary</a></li>
        <li id="menu-item-24086" class="menu-item"><a href="/about/">About bloggers</a></li>
    </ul>
</nav>
Inside
- The tag only leaves the home page and information about the blogger:
<nav class="nav fl">
    <ul id="fix-list" class="fix-list clearfix">
        <li id="menu-item-117720" class="menu-item"><a href="/">home page</a></li>

        <li id="menu-item-117720" class="menu-item"><a href="/about/">About bloggers</a></li>
    </ul>
</nav>
Then add the following code in the middle part:
{% for category in allcategory %}
<li id="menu-item-117720" class="menu-item">
 <a href="{% url 'index' %}list-{{ category.id }}.html">{{ category.name }}</a>
 </li>
{% endfor %}
Final code:
templates/base.html

<nav class="nav fl">
    <ul id="fix-list" class="fix-list clearfix">
        <li id="menu-item-117720" class="menu-item"><a href="/">home page</a></li>

        {% for category in allcategory %}
         <li id="menu-item-117720" class="menu-item">
         <a href="{% url 'index' %}list-{{ category.id }}.html">{{ category.name }}</a>
         </li>
        {% endfor %}

        <li id="menu-item-117720" class="menu-item"><a href="/about/">About bloggers</a></li>
    </ul>
</nav>
In the code, we traverse the contents of the output variable through the following code:
{% for category in allcategory %}The article category name can be obtained through the following code:
{{ category.name }}Click the article category name to enter the list page of each article category, combined with myblog / URLs List page URL in py list int: lid Html is composed of list - and category ID, so the complete URL is:
Website home page(Website domain name)/list-classification ID.html
The code to call the url alias on the template page is:
{% url 'xxx' %} #xxx is an alias. The homepage of the website is {% url 'index'%}The classification ID can be obtained by the following code:
{{ category.id }}Why can I find the classification ID in this way? The previous article mentioned: Experience data query
Finally, the complete list URL code is as follows:
{% url 'index' %}list-{{ category.id }}.htmlAfter that, we can refresh the page and see the effect.
Implementation of home slide
Before implementation, add some data * *** Then query the data of all slides in the homepage view function:
blog/views.py

from blog.models import Category, Banner
#Import the Banner table
def index(request):
    allcategory = Category.objects.all()
    banner = Banner.objects.filter(is_active=True)[0:4]#Query all slide chart data and slice
    context = {
                'allcategory': allcategory,
                'banner':banner, #Encapsulate the queried slide chart data into the context
        }
    return render(request, 'index.html', context)
Tip: we can query all active is through filrter_ Active slide chart data, and slice, only 4 pieces of data are displayed.
Home page index HTML file, find the slide chart code, inside
- Keep only one tag, and then modify it to the following code“
templates/index.html

{% for b in banner %}
<li class="slide fix-width">
    <a href="{{ b.link_url }}" title="{{ b.text_info }}">
    <img src="{% url 'index' %}media/{{ b.img }}" srcset="{% url 'index' %}media/{{ b.img }}" alt="{{ b.text_info }}"
                 class="wp-post-image" width="370" height="290"/></a>
        <span class="text ani-left"><strong>{{ b.text_info }}</strong></span>
    </li>
{% endfor %}
Where {{b.link_url}} represents the URL of the picture link, {{b.text_info}} is the title description of the picture, {{b.img}} is the name of the uploaded picture, and the complete picture path consists of {% URL 'index'%} media / {{b.img}}. Media / is the image upload directory we set before.
Home page recommended reading implementation
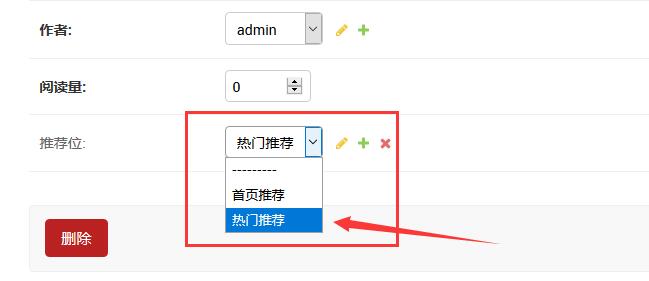
When publishing articles, we should first select the articles to be recommended in the recommendation space, and then query and display them.
In the homepage view function:
blog/views.py
from blog.models import Category,Banner, Article
#We query articles for recommendation, so we need to import the Article table
def index(request):
    ....
    tui = Article.objects.filter(tui__id=1)[:3]#Query articles with recommendation ID 1
    context = {
            ...
            'tui':tui,
        }
    return render(request, 'index.html', context)
**Prompt: * * Tui in filter query criteria__ Id = 1, which means filtering through the foreign key recommendation bit in the article.
Home page index On the HTML page, find the three codes with the same structure in the recommended reading, keep one, and then modify it to:
templates/index.html

{% for t in tui %}
<div class="caption">
    <h4><a href="{% url 'index' %}show-{{ t.id }}.html" title="{{ t.title }}"
               rel="bookmark">{{ t.title }}</a></h4>
    <p>{{ t.excerpt|truncatechars:"80" }}</p>
    </div>
{% endfor %}
Note the composition of the article URL, which is the same as the list URL. It is not repeated here. The code {t.excerpt|truncatechars: "80"}} indicates that 80 characters of the article summary are intercepted.
Implementation of the latest article on the home page
The latest articles on the home page call the latest articles in all categories. Only 10 articles are called here:
blog/views.py

def index(request):
    ...
    allarticle = Article.objects.all().order_by('-id')[0:10]
    context = {
        ...
        'allarticle': allarticle,
        }
    return render(request, 'index.html', context)
Inside order_by('- id') is the data sorting method, [0:10] is to get only 10 index slices and only the latest 10 articles.
For the latest article on the home page, only one article display code is reserved, and then modified to:
templates/index.html

{% for a in allarticle %}
    <div class="article-box clearfix excerpt-1">
        <div class="col-md-4">
            <div class="thumbnail">
                <a href="{% url 'index' %}show-{{ a.id }}.html" title="{{ a.title }}">
                    <img src="media/{{ a.img }}"
                         srcset="media/{{ a.img }}"
                         alt="{{ a.title }}" class="wp-post-image" width="240" height="160"/></a>
            </div>
        </div>
        <div class="col-md-8">
            <h2><a href="{% url 'index' %}show-{{ a.id }}.html" target="_blank"
                   title="{{ a.title }}">{{ a.title }}</a></h2>
            <p class="txtcont hidden-xs"><a href="{% url 'index' %}show-{{ a.id }}.html" target="_blank"
                                            title="{{ a.title }}">{{ a.excerpt }}</a></p>
            <div class="meta"><span class="label label-info"><a
                    href="{% url 'index' %}list-{{ a.category.id }}.html">{{ a.category.name }}</a></span>
                <time class="item"><i class="fa fa-clock-o"></i>{{ a.created_time|date:"Y year m month d day" }}
                </time>
            </div>
        </div>
    </div>
{% endfor %}
**Tip: * * the category name and category ID are the foreign key fields in the article, so we call them through codes {{a.category.name}} and {{a.category.id}}. We format the time field and display it in the form of year, month and day, {{a.created_time|date: "m, month and d, Y"}}.
Popular article ranking implementation
There are many ways to implement popular articles. If you want to display the articles specified by yourself, you can add another recommendation bit in the background. You can also query all articles and display them in reverse order through the number of article views, or query the database and display them in a random way. The codes are as follows:
blog/views.py

def index(request):
    ...
    #hot = Article.objects.all().order_by('?')[:10]#Random recommendation
    #hot = Article.objects.filter(tui__id=3)[:10]   #Query by recommendation. Take recommendation ID 3 as an example
    hot = Article.objects.all().order_by('views')[:10]#Sort by number of views
    context = {
               ...
          'hot':hot,
        }
    return render(request, 'index.html', context)
In the popular article recommendation code,
- Label, keep only one, and then modify it to the following code:
templates/index.html

{% for h in hot %}
<li><a href="{% url 'index' %}show-{{ h.id }}.html" title="{{ h.title }}">{{ h.title }}</a></li>
{% endfor %}
Top recommended implementation on the right
The popular recommendation code on the side is right HTML, so we need to modify right HTML page. This place is realized through the recommendation bit ID of 2 in the background. When we send an article, we can recommend it. Query code:
blog/views.py

def index(request):
    ...
    remen = Article.objects.filter(tui__id=2)[:6]
    context = {
            ...
            'remen':remen,
        }
    return render(request, 'index.html', context)
Open right HTML page, modify the corresponding code:
templates/right.html

<ul class="post-hot clearfix">
{% for k in remen %}
    <li>
        <div class="img">
        <a href="{% url 'index' %}show-{{ k.id }}.html" title="{{ k.title }}">
        <img src="{% url 'index' %}media/{{ k.img }}"
         srcset="{% url 'index' %}media/{{ k.img }}" alt="{{ k.title }}"
            class="wp-post-image" width="120" height="80"/>
        </a>
        </div>
        <div class="text">
        <a href="{% url 'index' %}show-{{ k.id }}.html" title="{{ k.title }}"
                   target="_blank">{{ k.title }}</a>
        </div>
       </li>
{% endfor %}
</ul>
All labels on the right are implemented
blog/views.py

from blog.models import Category,Banner, Article, Tag
#Import label table
def index(request):
    ...
    tags = Tag.objects.all()
    context = {
            ...
            'tags':tags,
        }
    return render(request, 'index.html', context)
Find the tag code and modify it to:
templates/right.html

<div class="tags">
    {% for tag in tags %}
        <a href="{% url 'index' %}tag/{{ tag.name }}">{{ tag.name }}</a>
    {% endfor %}
</div>
The QR code image on the right is simple. Let's modify the path. Note that we need to be in right Add {% load staticfiles%} to the HTML header:
templates/right.html

{% load staticfiles %}
#The above code should be added to the first line

<img src="static/picture/weixinqr.jpg" alt="Wechat QR code" width="160" height="160">
Amend to read:
<img src="{% static "picture/weixinqr.jpg" %}" alt="Wechat QR code" width="160" height="160">
The following links are implemented:
blog/views.py
from blog.models import Category,Banner, Article, Tag, Link
#Import friendship Link table Link

def index(request):
    ...
    link = Link.objects.all()
    context = {
            ...
            'link':link,
        }
    return render(request, 'index.html', context)
Find the friendship link code and modify it to:
templates/index.html

<ul class="clears">
    {% for l in link %}
        <li><a href="{{ l.linkurl }}" target="_blank">{{ l.name }}</a></li>
    {% endfor %}
</ul>
After all the modifications are completed, refresh the page and you can see the effect.
Reference link: Django blog development tutorial: realizing the home page of the website