Django Admin administration tool
Django provides web-based management tools.
Django automatic management tool is Django Part of contrib. You can find it in the project settings Installed in PY_ Apps sees it:
/mysite456/mysite456/settings.py file code:
INSTALLED_APPS = (
    'django.contrib.admin',
    'django.contrib.auth',
    'django.contrib.contenttypes',
    'django.contrib.sessions',
    'django.contrib.messages',
    'django.contrib.staticfiles',
)
django.contrib is a huge set of functions. It is an integral part of Django's basic code.
Activate management tools
Usually when we build a project, we will use URLs Py, we just need to remove the comments.
Configuration items are as follows:
/mysite456/mysite456/urls.py file code:
# urls.py
from django.urls import include, re_path
from django.contrib import admin

urlpatterns = [
    re_path(r'^admin/', admin.site.urls),
]
When all this is configured, the Django management tool is ready to run.
Using management tools
Start the development server and access it in the browser http://127.0.0.1:8003/admin/ , the following interface is obtained:
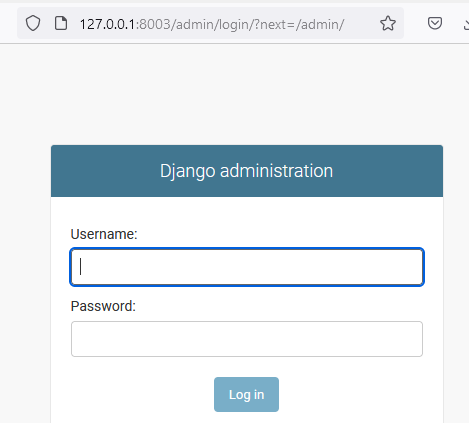
You can use the command Python manage Py createsuperuser to create superuser, as shown below:
# python manage.py createsuperuser
D:\temp-test\djangodemo>cd mysite456

D:\temp-test\djangodemo\mysite456> python manage.py createsuperuser
Username (leave blank to use 'administrator'): admin
Email address: emanlee@163.com
Password:123456
Password (again):123456
This password is too short. It must contain at least 8 characters.
This password is too common.
This password is entirely numeric.
Bypass password validation and create user anyway? [y/N]: N
Password:@163.com
Password (again):@163.com
Superuser created successfully.
Then enter the user name and password to log in, and the interface is as follows:
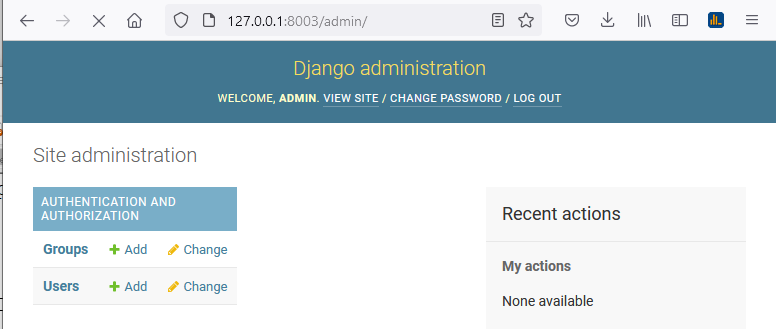
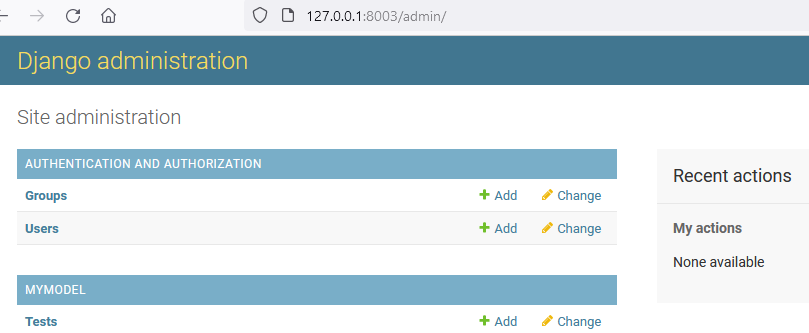
In order for the admin interface to manage a data model, we need to register the data model with admin first. For example, we have created the Test model in MyModel before. Modify MyModel / Admin py:
mysite456/MyModel/admin.py: file code:
from django.contrib import admin
from MyModel.models import Test

# Register your models here.
admin.site.register(Test)
After refreshing (or restarting), you can see the MyModel data table:
Complex model
The management page is powerful and fully capable of dealing with more complex data models.
Start with mymodel / models Add a more complex data model to py:
mysite456/MyModel/models.py: file code:
from django.db import models

# Create your models here.
class Test(models.Model):
    name = models.CharField(max_length=20)

class Contact(models.Model):
    name   = models.CharField(max_length=200)
    age    = models.IntegerField(default=0)
    email  = models.EmailField()
    def __unicode__(self):
        return self.name

class Tag(models.Model):
    contact = models.ForeignKey(Contact, on_delete=models.CASCADE,)
    name    = models.CharField(max_length=50)
    def __unicode__(self):
        return self.name
Here are two tables. Tag takes Contact as the external key. One Contact can correspond to multiple tags.
We can also see many attribute types we haven't seen before, such as IntegerField, which is used to store integers.
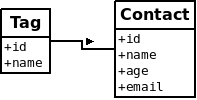
In mymodel / Admin Py registers multiple models and displays:
mysite456/MyModel/admin.py: file code:
from django.contrib import admin
from MyModel.models import Test,Contact,Tag

# Register your models here.
admin.site.register([Test, Contact, Tag])
Refresh the management page, and the display results are as follows:
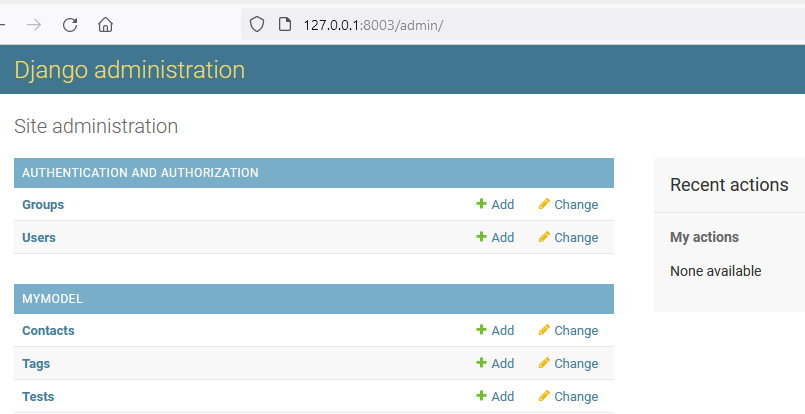
In the above management tools, we can operate complex models.
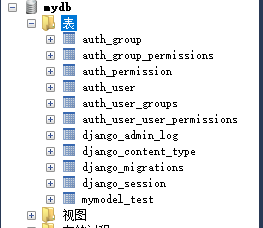
If you haven't created a table structure before, you can use the following command to create it:
$ python manage.py makemigrations MyModel # let Django know that we have some changes in our model
 $ python manage.py migrate MyModel # create table structure
D:\temp-test\djangodemo\mysite456>python manage.py makemigrations MyModel
Migrations for 'MyModel':
  MyModel\migrations\0002_contact_tag.py
    - Create model Contact
    - Create model Tag

D:\temp-test\djangodemo\mysite456>python manage.py migrate MyModel
Operations to perform:
  Apply all migrations: MyModel
Running migrations:
  Applying MyModel.0002_contact_tag... OK

D:\temp-test\djangodemo\mysite456>
After:
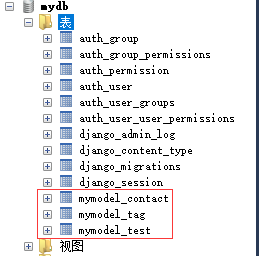
Customer Form
Default add page:
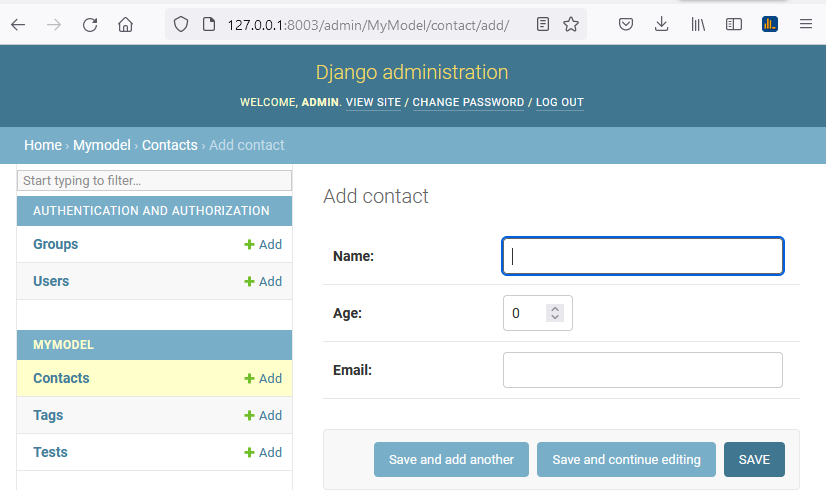
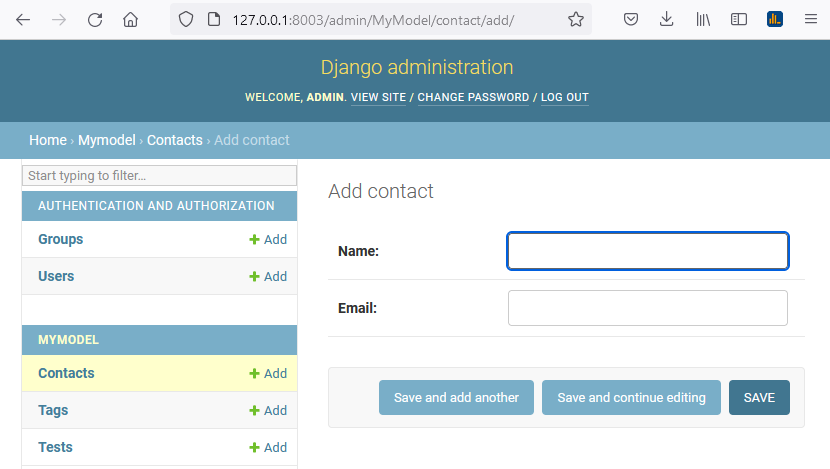
We can customize the management page to replace the default page. For example, the "add" page above. We want to show only the name and email sections. Modify mymodel / Admin py:
mysite456/MyModel/admin.py: file code:
from django.contrib import admin
from MyModel.models import Test,Contact,Tag

# Register your models here.
class ContactAdmin(admin.ModelAdmin):
    fields = ('name', 'email')

admin.site.register(Contact, ContactAdmin)
admin.site.register([Test, Tag])
The above code defines a ContactAdmin class to describe the display format of the management page.
The fields attribute inside defines the fields to be displayed.
Since this class corresponds to the Contact data model, we need to register them together when registering. The display effect is as follows:
We can also divide the input fields into blocks, and each field can also define its own format. Modify mymodel / Admin Py is:
mysite456/MyModel/admin.py: file code:
from django.contrib import admin
from MyModel.models import Test,Contact,Tag

# Register your models here.
class ContactAdmin(admin.ModelAdmin):
    fieldsets = (
        ['Main',{
            'fields':('name','email'),
        }],
        ['Advance',{
            'classes': ('collapse',), # CSS
            'fields': ('age',),
        }]
    )

admin.site.register(Contact, ContactAdmin)
admin.site.register([Test, Tag])
The above columns are divided into two parts: Main and Advance. classes describes the CSS format of the part where it is located. Here, let the Advance part be hidden:
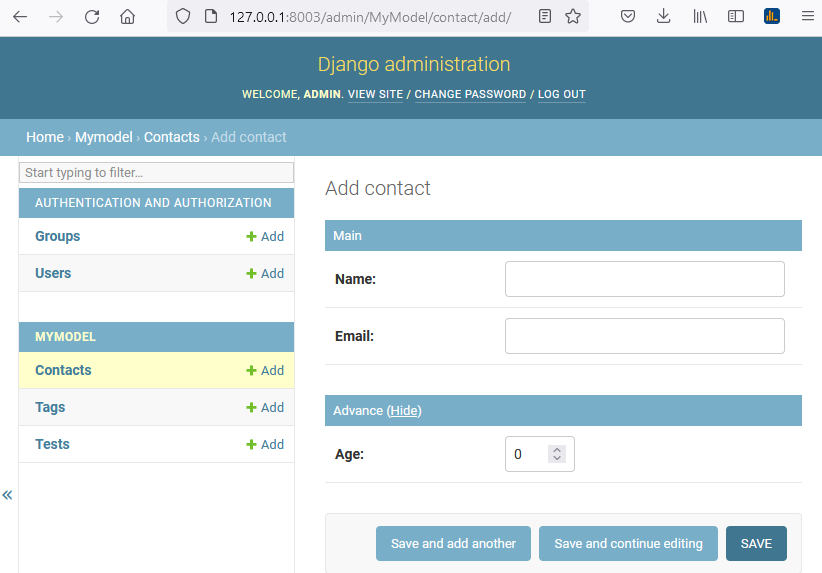
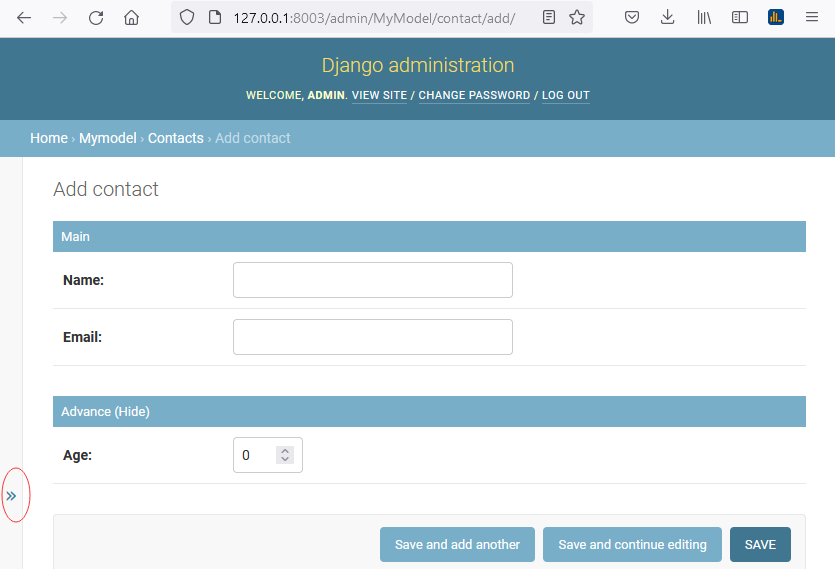
Next to the Advance part, there is a Show button for expansion. After expansion, click Hide to hide it, as shown in the following figure:
Inline display
The Contact key has an external reference, so the Contact key has an external reference.
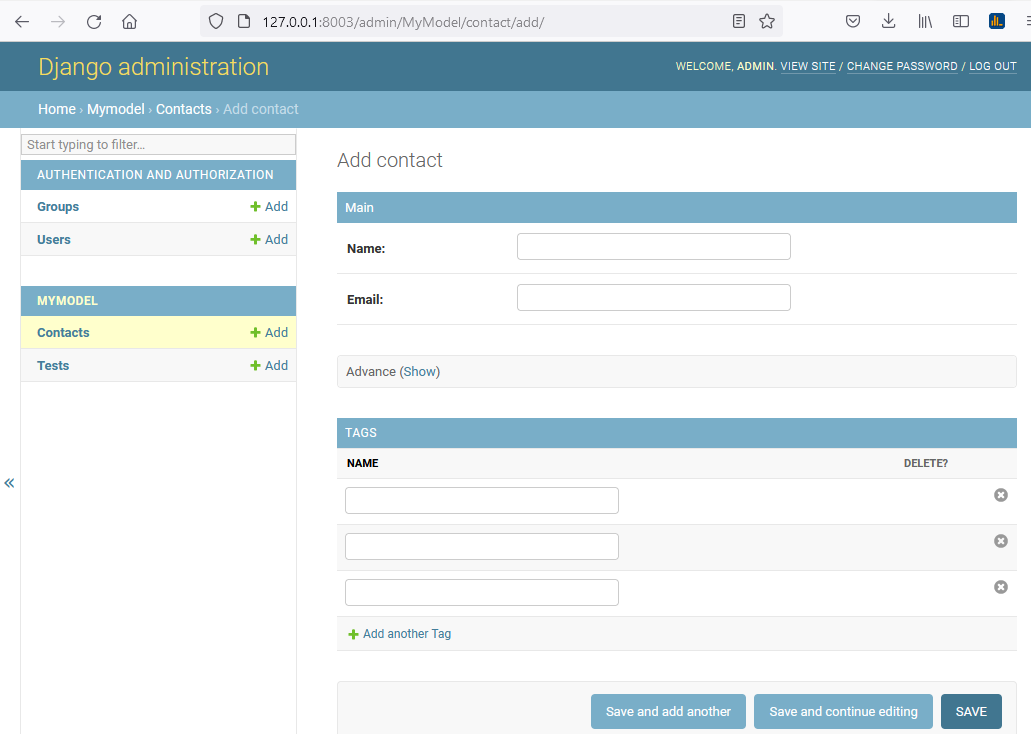
In the default page display, the two are separated, which can not reflect the subordinate relationship between the two. We can use inline display to attach Tag to the edit page of Contact.
Modify mymodel / Admin py:
mysite456/MyModel/admin.py: file code:
from django.contrib import admin
from MyModel.models import Test,Contact,Tag

# Register your models here.
class TagInline(admin.TabularInline):
    model = Tag

class ContactAdmin(admin.ModelAdmin):
    inlines = [TagInline]  # Inline
    fieldsets = (
        ['Main',{
            'fields':('name','email'),
        }],
        ['Advance',{
            'classes': ('collapse',),
            'fields': ('age',),
        }]

    )

admin.site.register(Contact, ContactAdmin)
admin.site.register([Test])
The display effect is as follows:
Display of list pages
After entering several records in Contact, the list page of Contact looks as follows:
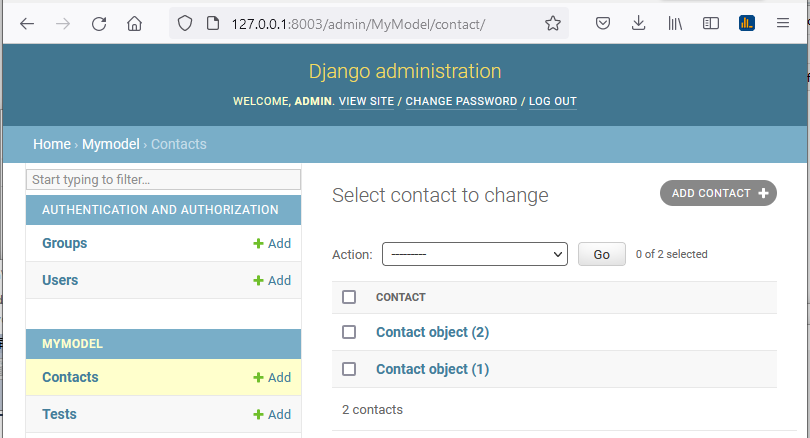
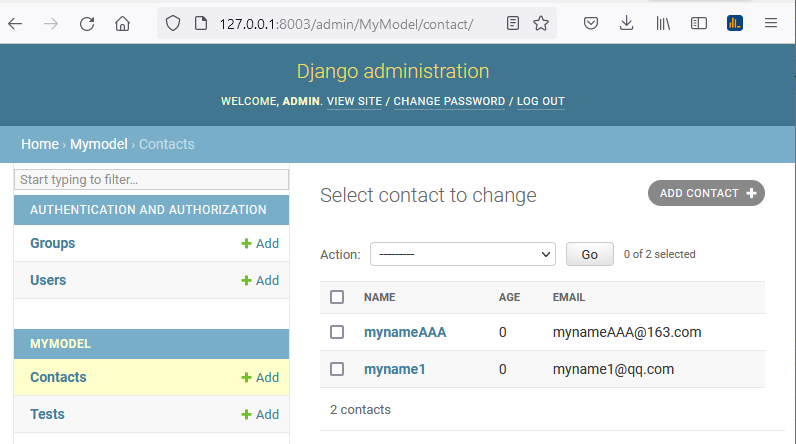
We can also customize the display of this page. For example, to display more columns in the list, we only need to add a list in ContactAdmin_ Display attribute:
mysite456/MyModel/admin.py: file code:
from django.contrib import admin
from MyModel.models import Test,Contact,Tag

# Register your models here.
class TagInline(admin.TabularInline):
    model = Tag

class ContactAdmin(admin.ModelAdmin):
    list_display = ('name','age', 'email') # list
    inlines = [TagInline]  # Inline
    fieldsets = (
        ['Main',{
            'fields':('name','email'),
        }],
        ['Advance',{
            'classes': ('collapse',),
            'fields': ('age',),
        }]

    )

admin.site.register(Contact, ContactAdmin)
admin.site.register([Test])
The display effect of refreshing the page is as follows:
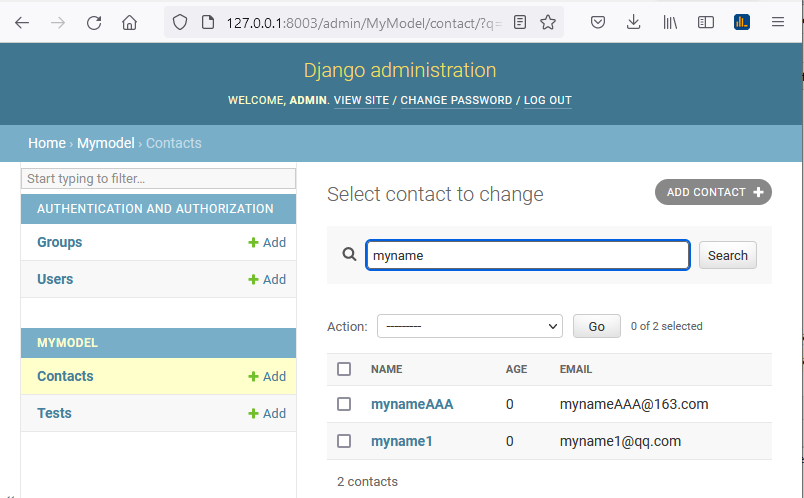
The search function is very useful in managing a large number of records. We can use search_fields adds a search bar to the list page:
mysite456/MyModel/admin.py: file code:
from django.contrib import admin
from MyModel.models import Test,Contact,Tag

# Register your models here.
class TagInline(admin.TabularInline):
    model = Tag

class ContactAdmin(admin.ModelAdmin):
    list_display = ('name','age', 'email') # list
    search_fields = ('name',)
    inlines = [TagInline]  # Inline
    fieldsets = (
        ['Main',{
            'fields':('name','email'),
        }],
        ['Advance',{
            'classes': ('collapse',),
            'fields': ('age',),
        }]

    )

admin.site.register(Contact, ContactAdmin)
admin.site.register([Test])
In this example, we searched the record name d runoob, and the results are as follows:
Django Admin management tool also has many practical functions. If you are interested, you can study it in depth.
REF
https://www.runoob.com/django/django-admin-manage-tool.html