Django model
This section describes the interaction between Django and the database, such as creating tables, adding, deleting, modifying, and querying.
Django provides good support for various databases, including PostgreSQL, MySQL, SQLite and Oracle.
Django provides a unified call API for these databases. You can choose different databases according to your business needs.
MySQL is the most commonly used database in Web applications. MySQL will be introduced as an example.
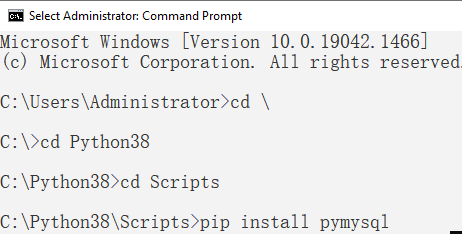
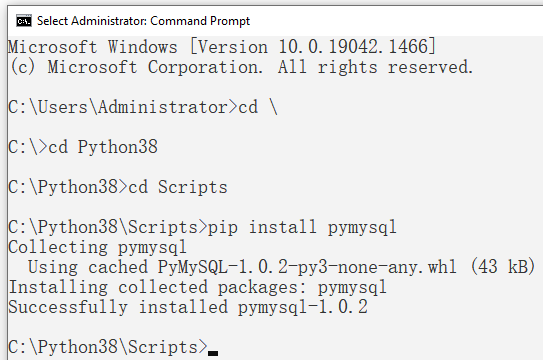
If you do not install the mysql driver, you can execute the following command to install it:
pip install pymysql
Django ORM
Django model uses its own ORM.
Object Relational Mapping (ORM) is used to realize the conversion between data of different types of systems in object-oriented programming language.
ORM acts as a bridge between business logic layer and database layer.
ORM is to automatically persist the objects in the program to the database by using metadata describing the mapping between the object and the database.
Benefits of using ORM:
- Improve development efficiency.
- Different databases can be switched smoothly.
Disadvantages of using ORM:
- When converting ORM code into SQL statements, it takes some time and the execution efficiency will be reduced.
- Writing ORM code for a long time will reduce the ability to write SQL statements.
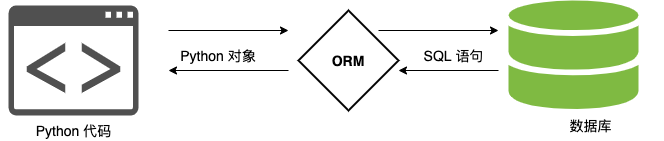
ORM parsing process:
- 1. ORM converts Python code into SQL statements.
- 2. SQL statements are transferred to the database server through pymysql.
- 3. Execute SQL statements in the database and return the results.
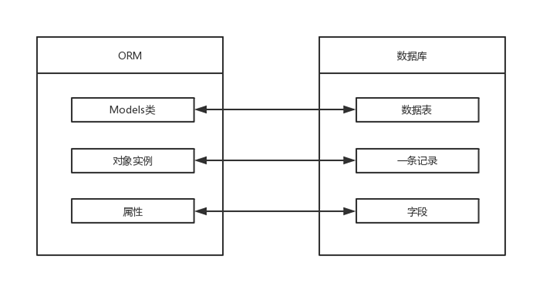
ORM correspondence table:
Database configuration
How Django uses mysql database
Using SQLyog or Navicat, you can operate MySQL.
Create a MySQL database (ORM cannot operate to the database level, only to the data table) syntax:
create database database name default charset=utf8# To prevent coding problems, specify utf8
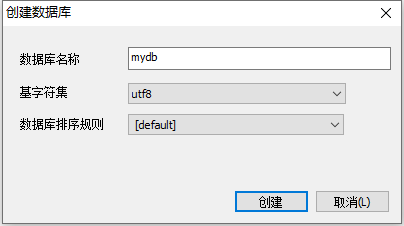
For example, we create a database named mydb with the code specified as utf8:
create database mydb default charset=utf8;
We are in the project settings Py file, and modify its information to:
mysite456/mysite456/settings.py: file code:
DATABASES = {
    'default':
    {
        'ENGINE': 'django.db.backends.mysql',    # database engine
        'NAME': 'mydb', # Database name
        'HOST': '127.0.0.1', # Database address, native ip Address 127.0.0.1
        'PORT': 3306, # port
        'USER': 'root',  # Database user name
        'PASSWORD': '123456', # Database password
    }
}
The above contains the database name and user information, which are the same as the settings of the corresponding database and user in MySQL. According to this setting, Django connects with the corresponding databases and users in MySQL.
Next, tell Django to use the pymysql module to connect to the mysql database:
example
import pymysql
pymysql.install_as_MySQLdb()
Define model
Create APP
Django stipulates that if you want to use the model, you must create an app. Use the following command to create an app for MyModel:
django-admin startapp MyModel
C:\Python38\Scripts>D:

D:\>cd temp-test

D:\temp-test>cd djangodemo

D:\temp-test\djangodemo>cd mysite456

D:\temp-test\djangodemo\mysite456>django-admin startapp MyModel
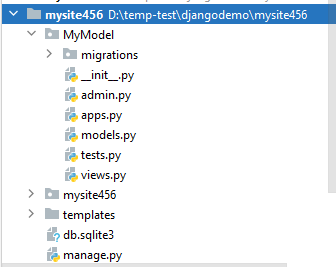
The directory structure is as follows:
mysite456
|-- mysite456
|-- manage.py
...
|-- MyModel
|   |-- __init__.py
|   |-- admin.py
|   |-- models.py
|   |-- tests.py
|   `-- views.py
We modify mymodel / models Py file, the code is as follows:
mysite456/MyModel/models.py: file code:
# models.py
from django.db import models

class Test(models.Model):
    name = models.CharField(max_length=20)
The above class name (Test) represents the database table name and inherits models Model, the field (name) in the class represents the field (name) in the data table, and the data type consists of CharField (equivalent to varchar), DateField (equivalent to datetime), max_ The length parameter limits the length.
Next, in settings PY_ Apps, as follows:
INSTALLED_APPS = (
    'django.contrib.admin',
    'django.contrib.auth',
    'django.contrib.contenttypes',
    'django.contrib.sessions',
    'django.contrib.messages',
    'django.contrib.staticfiles',
    'MyModel',               # Add this item
)
Run from the command line:
$ python manage.py migrate # create table structure
D:\temp-test\djangodemo\mysite456>python manage.py migrate
Operations to perform:
  Apply all migrations: admin, auth, contenttypes, sessions
Running migrations:
  Applying contenttypes.0001_initial... OK
  Applying auth.0001_initial... OK
  Applying admin.0001_initial... OK
  Applying admin.0002_logentry_remove_auto_add... OK
  Applying admin.0003_logentry_add_action_flag_choices... OK
  Applying contenttypes.0002_remove_content_type_name... OK
  Applying auth.0002_alter_permission_name_max_length... OK
  Applying auth.0003_alter_user_email_max_length... OK
  Applying auth.0004_alter_user_username_opts... OK
  Applying auth.0005_alter_user_last_login_null... OK
  Applying auth.0006_require_contenttypes_0002... OK
  Applying auth.0007_alter_validators_add_error_messages... OK
  Applying auth.0008_alter_user_username_max_length... OK
  Applying auth.0009_alter_user_last_name_max_length... OK
  Applying auth.0010_alter_group_name_max_length... OK
  Applying auth.0011_update_proxy_permissions... OK
  Applying auth.0012_alter_user_first_name_max_length... OK
  Applying sessions.0001_initial... OK

D:\temp-test\djangodemo\mysite456>
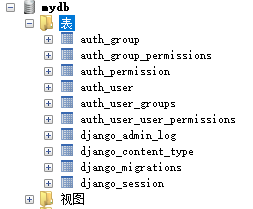
The results are as follows (there was no table before; the following table appears after execution):
$ python manage.py makemigrations MyModel # let Django know that we have some changes in our model
D:\temp-test\djangodemo\mysite456>python manage.py makemigrations MyModel
Migrations for 'MyModel':
  MyModel\migrations\0001_initial.py
    - Create model Test

D:\temp-test\djangodemo\mysite456>
$ python manage.py migrate MyModel # create table structure
D:\temp-test\djangodemo\mysite456>python manage.py migrate MyModel
Operations to perform:
  Apply all migrations: MyModel
Running migrations:
  Applying MyModel.0001_initial... OK

D:\temp-test\djangodemo\mysite456>
Results (the table mymodel_test is created after execution):
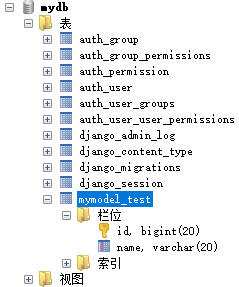
Table name composition structure: application name_ Class name (e.g. MyModel_test).
Note: Although we do not set the primary key for the table in models, Django will automatically add an id as the primary key.
Database operation
Next, we add testdb. Net to the mysite456 directory Py file (described below), and modify URLs py:
mysite456/mysite456/urls.py: file code:
from django.urls import path

from . import views,testdb

urlpatterns = [
    path('mytemp/', views.mydef),
    path('testdb/', testdb.testdb),
]
Add data
To add data, you need to create an object first, and then execute the save function, which is equivalent to INSERT in SQL:
mysite456/mysite456/testdb.py: file code:
# -*- coding: utf-8 -*-

from django.http import HttpResponse

from MyModel.models import Test

# Database operation
def testdb(request):
    test1 = Test(name='firstname')
    test1.save()
    return HttpResponse("<p>Data added successfully!</p>")
Visit http://127.0.0.1:8003/testdb/ You can see the prompt of successful data addition.
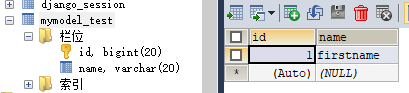
The output results are as follows:

MySQL results are as follows:
get data
Django provides various ways to obtain the contents of the database, as shown in the following code:
mysite456/mysite456/testdb.py: file code:
# -*- coding: utf-8 -*-

from django.http import HttpResponse

from MyModel.models import Test

# Database operation
def testdb(request):
    # initialization
    response = ""
    response1 = ""


    # adopt objects Of this model manager all()Get all data rows, equivalent to SQL Medium SELECT * FROM
    list = Test.objects.all()

    # filter amount to SQL Medium WHERE,You can set conditions to filter results
    response2 = Test.objects.filter(id=1)

    # Get a single object
    response3 = Test.objects.get(id=1)

    # Limit the returned data equivalent to SQL Medium OFFSET 0 LIMIT 2;
    Test.objects.order_by('name')[0:2]

    #Data sorting
    Test.objects.order_by("id")

    # The above methods can be used in chain
    Test.objects.filter(name="firstname").order_by("id")

    # Output all data
    for var in list:
        response1 += var.name + " "
    response = response1
    return HttpResponse("<p>" + response + "</p>")
Visit http://127.0.0.1:8003/testdb/

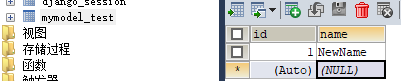
Update data
To modify data, you can use save() or update():
mysite456/mysite456/testdb.py: file code:
# -*- coding: utf-8 -*-

from django.http import HttpResponse

from TestModel.models import Test

# Database operation
def testdb(request):
    # Modify one of them id=1 of name Field, and then save,amount to SQL Medium UPDATE
    test1 = Test.objects.get(id=1)
    test1.name = 'NewName'
    test1.save()

    # Another way
    #Test.objects.filter(id=1).update(name='Google')

    # Modify all columns
    # Test.objects.all().update(name='Google')

    return HttpResponse("<p>Modified successfully</p>")

Delete data
To delete an object in the database, simply call the delete() method of the object:
mysite456/mysite456/testdb.py: file code:
# -*- coding: utf-8 -*-

from django.http import HttpResponse

from MyModel.models import Test

# Database operation
def testdb(request):
    # delete id=1 Data
    test1 = Test.objects.get(id=1)
    test1.delete()

    # Another way
    # Test.objects.filter(id=1).delete()

    # Delete all data
    # Test.objects.all().delete()

    return HttpResponse("<p>Deleted successfully</p>")


REF
https://www.runoob.com/django/django-model.html