Django uses haystack+whoosh to realize search function

Posted by tamayo on Tue, 08 Oct 2019 22:48:53 +0200

In order to achieve the search function in the project, we use the full-text search framework haystack+ search engine whoosh+ Chinese word packet jieba

install and configure

Installation of required packages

pip install django-haystack
pip install whoosh
pip install jieba

Register haystack application to settings file

INSTALLED_APPS = [
    'haystack',  # Registered Full Text Retrieval Framework
]

Configuring Full Text Retrieval Framework in settings File

# Configuration of Full Text Retrieval Framework
HAYSTACK_CONNECTIONS = {
    'default': {
        # Use whoosh engine
        'ENGINE': 'haystack.backends.whoosh_backend.WhooshEngine',
        # Index file path
        'PATH': os.path.join(BASE_DIR, 'whoosh_index'),
    }
}

# When adding, modifying and deleting data, automatically generate index
HAYSTACK_SIGNAL_PROCESSOR = 'haystack.signals.RealtimeSignalProcessor'


Generation of Index Files

To generate an index file, you first need to configure which content to index, such as product name, profile and details; in order to configure the database to index the specified content, we need to do the following steps:

Configure the search_indexes.py file

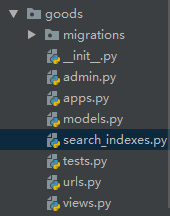
Because the database in django is usually generated by ORM, first of all, we need to create a search_indexes.py file in the application corresponding to the data table. For example, I want to retrieve the corresponding table of the goods now is the Goods SKU table, and the table is under the application of goods, so I create a new search_indexes.py file under the application of goods. The screenshot is as follows:


Add the following to the search_indexes.py file

# Define index classes
from haystack import indexes
# Import your model class
from goods.models import GoodsSKU


# Specifies that some data of a class is indexed
# Index Class Name Format:Model class name+Index
class GoodsSKUIndex(indexes.SearchIndex, indexes.Indexable):
    # Index field use_template=True Specifies which fields in the table are indexed according to the instructions placed in a file
    text = indexes.CharField(document=True, use_template=True)

    def get_model(self):
        # Return to your model class
        return GoodsSKU

    # Indexed data
    def index_queryset(self, using=None):
        return self.get_model().objects.all()


Specify the content to be retrieved

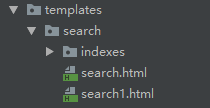
New search folder under templates folder, new indexes folder under search folder, new folder to retrieve application name under indexes folder, such as goods folder, new table name _text.txt under goods folder, table name lowercase, so the current directory structure is templates/search/indexes/goods/goodssku_text.txt, such as screenshots. Next:

In the goodssku_text.txt file, specify which fields in the table you want to index data. Now we need to index according to the name, description and details of the product. The following configuration

# Specify which fields in the table to index data
{{ object.name }} # Index by the name of the commodity
{{ object.desc }} # Establish an index based on the product profile
{{ object.goods.detail }} # Index the details of the goods

Objects can be understood as commodity objects corresponding to data tables.


Generate index file

Use the command line terminal that comes with pycharm to run the following commands to generate index files:

python manage.py rebuild_index

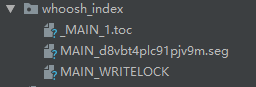
After running successfully, you can see the following index files under the project


Using Full Text Retrieval

With the above configuration, our data index has been established, and now we are going to use full-text retrieval in our project.

Form form modification where retrieval is needed

<form action="/search" method="get">
    <input type="text" class="input_text fl" name="q" placeholder="Search merchandise">
    <input type="submit" class="input_btn fr" name="" value="search">
</form>

As shown above, it should be noted that:

  • The way of sending must use get.
  • The search input box name must be q;


Configuration retrieves the corresponding url

Add the following url configuration to the urls.py file under the project

urlpatterns = [
    url(r'^search/', include('haystack.urls')),  # Full Text Retrieval Framework
]


Parameters generated after successful retrieval

When haystack automatically retrieves successfully, three parameters will be returned to us.

  • The query parameter represents the parameters of your query.
  • The page parameter, the page object of the current page, is a collection of queried objects, which can obtain a single commodity through the for loop class, and the corresponding fields of the commodity through the commodity. objects. xxxx.
  • paginator parameter, paginator object paginated.

The parameters can be tested with the following code

<!DOCTYPE html>
<html lang="en">
<head>
    <meta charset="UTF-8">
    <title>Title</title>
</head>
<body>
Search keywords:{{ query }}<br/>
Current page Page object:{{ page }}<br/>
<ul>
    {% for item in page %}
        <li>{{ item.object }}</li>
    {% endfor %}
</ul>
paging paginator object:{{ paginator }}<br/>
</body>
</html>
templates/indexes/search.html

Note that the location and file name are fixed, and this is only a test file. When using full-text search later, remember not to use search.html and change it to another name.


Data + search.html returns to the rendered page

When haystack retrieves the full text, it will return the data. Now we need a page to receive the data, and return the page to the user after the page is rendered. The haystack has helped us to render and return the page. Now we just need to prepare a page to contain the data.

Create a new search.html under the indexes folder under the templates folder. Note that the path and file name are fixed, as shown below.

Using the parameters returned from the search, the template and style to be rendered are defined in search.html. My page is as follows

<div class="breadcrumb">
    <a href="#">{{ query }}</a>
    <span>></span>
    <a href="#">The search results are as follows:</a>
</div>

<div class="main_wrap clearfix">
    <ul class="goods_type_list clearfix">
        {% for item in page %}
        <li>
            <a href="{% url 'goods:detail' item.object.id %}"><img src="{{ item.object.image.url }}"></a>
            <h4><a href="{% url 'goods:detail' item.object.id %}">{{ item.object.name }}</a></h4>
            <div class="operate">
                <span class="prize">¥{{ item.object.price }}</span>
                <span class="unit">{{ item.object.price}}/{{ item.object.unite }}</span>
                <a href="#" class="add_goods" title="Add to cart"></a>
            </div>
        </li>
        {% endfor %}
    </ul>
    <div class="pagenation">
            {% if page.has_previous %}
            <a href="/search?q={{ query }}&page={{ page.previous_page_number }}"><Previous page</a>
            {% endif %}
            {% for pindex in paginator.page_range %}
                {% if pindex == page.number %}
                    <a href="/search?q={{ query }}&page={{ pindex }}" class="active">{{ pindex }}</a>
                {% else %}
                    <a href="/search?q={{ query }}&page={{ pindex }}">{{ pindex }}</a>
                {% endif %}
            {% endfor %}
            {% if page.has_next %}
            <a href="/search?q={{ query }}&page={{ page.next_page_number }}">next page></a>
            {% endif %}
        </div>
</div>
search.html

At this point, we can search the content on the page, it should be successful, but it may not return any data, even if name is the content of your search. This is because we are still using the word segmentation package for English service. Next we need to configure the Chinese word segmentation package.


Use Chinese word segmentation package jieba

In the previous configuration, we have installed jieba;

Create the ChineseAnalyr.py file

New ChineseAnalyr.py file under Libsite-packageshaystackbackends directory entering virtual environment

The catalogue is as follows

Add the following to the file

import jieba
from whoosh.analysis import Tokenizer, Token

class ChineseTokenizer(Tokenizer):
    def __call__(self, value, positions=False, chars=False,
                 keeporiginal=False, removestops=True,
                 start_pos=0, start_char=0, mode='', **kwargs):
        t = Token(positions, chars, removestops=removestops, mode=mode,
                  **kwargs)
        seglist = jieba.cut(value, cut_all=True)
        for w in seglist:
            t.original = t.text = w
            t.boost = 1.0
            if positions:
                t.pos = start_pos + value.find(w)
            if chars:
                t.startchar = start_char + value.find(w)
                t.endchar = start_char + value.find(w) + len(w)
            yield t

def ChineseAnalyzer():
    return ChineseTokenizer()
ChineseAnalyzer.py


Write the whoosh_cn_backend.py file that haystack can use

Copy a whoosh_backend.py file directly under the Lib site-packages haystack backends directory in the virtual environment and rename the copy file as whoosh_cn_backend.py.

Import the ChineseAnalyr class we wrote in whoosh_cn_backend.py

from .ChineseAnalyzer import ChineseAnalyzer

Changing the Chinese word segmentation package used by haystack is a Chinese sub word class written in jieba, probably around 160th lines.

# schema_fields[field_class.index_fieldname] = TEXT(stored=True, analyzer=StemmingAnalyzer(), field_boost=field_class.boost, sortable=True)
schema_fields[field_class.index_fieldname] = TEXT(stored=True, analyzer=ChineseAnalyzer(), field_boost=field_class.boost, sortable=True)


Configure the whoosh engine to use whoosh_cn_backend.py

Change the original configuration in the settings file as follows

# Configuration of Full Text Retrieval Framework
HAYSTACK_CONNECTIONS = {
    'default': {
        # Use whoosh engine
        # 'ENGINE': 'haystack.backends.whoosh_backend.WhooshEngine',
        'ENGINE': 'haystack.backends.whoosh_cn_backend.WhooshEngine',
        # Index file path
        'PATH': os.path.join(BASE_DIR, 'whoosh_index'),
    }
}

# When adding, modifying and deleting data, automatically generate index
HAYSTACK_SIGNAL_PROCESSOR = 'haystack.signals.RealtimeSignalProcessor'


Rebuilding index file

python manage.py rebuild_index

At this point, you can safely use the search function, as shown in the figure, to search the successful display page.

The number of searched objects per page can be controlled by the following configuration

# Specifies the number of entries displayed per page of search results
HAYSTACK_SEARCH_RESULTS_PER_PAGE = 1

Topics: Python pip Django Database