1. Docker image pull Jenkins environment command
docker pull jenkins/jenkins:lts
View the drop-down image
docker images
2. Building Jenkins containers through container orchestration
Create corresponding directory
# Create corresponding directory
mkdir -p /data/jenkins/jenkins_home/
chown -R 1000:1000 /data/jenkins/jenkins_home/

+ data
- docker-compose.yml  // Docker compose executable
+ /data/jenkins
- jenkins_home       // Jenkins mount volume
docker-compose.yml file configuration
version: "3"
services:
  jenkins:
  	user: root
  	restart: "always"
    image: jenkins/jenkins:lts
    container_name: jenkins
    privileged: true
    ports:
      - 8080:8080
      - 50000:50000
    environment:
      JAVA_OPTS: -Duser.timezone=Asia/Shanghai
    volumes:
      - /data/jenkins/jenkins\_home/:/var/jenkins\_home
      - /data/jenkins/workspace/:/root/.jenkins/workspace \
      - /usr/local/apache-maven-3.6.0:/usr/local/maven
      - /usr/local/maven/maven-3.6.0/repository:/usr/local/maven/repository
      - /usr/local/jdk1.8.0_211:/usr/local/jdk
      - /var/run/docker.sock:/var/run/docker.sock
      - /usr/bin/docker:/usr/bin/docker
      - /etc/localtime:/etc/localtime
      - /usr/local/bin/docker-compose:/usr/local/bin/docker-compose
      - /usr/lib/x86\_64-linux-gnu/libltdl.so.7:/usr/lib/x86\_64-linux-gnu/libltdl.so.7
      - /root/.ssh:/root/.ssh # (optional) in password free configuration, the public key can be directly configured locally
3. Start container environment
You need to enter the compose directory and enter the following command to start the environment
docker-compose up -d
4. Docker compose other operations
After the image content container is operated, it can be saved as a new image. For example, if jdk is installed in the container and environment variables are configured, it can be saved as a new image
# Find the currently running container ID
docker ps

# Create a new image based on containerId
docker commit 5d81d56b18b6 jenkins/jenkins:centos.v1
Modify docker compose to modify the created container according to the new image
version: "3"
services:
  jenkins:
  	user: root
    image: jenkins/jenkins:lts
    ports:
      - 8080:8080
      - 50000:50000
    restart: "always"
    container_name: jenkins
    environment:
      JAVA_OPTS: -Duser.timezone=Asia/Shanghai
      #For example, add environment variables
      java_home = xxx Just for example
    volumes:
      - /home/jenkins/jenkins\_home/:/var/jenkins\_home
      - /var/run/docker.sock:/var/run/docker.sock
      - /usr/bin/docker:/usr/bin/docker
      - /usr/local/bin/docker-compose:/usr/local/bin/docker-compose
    privileged: true
Delete previous container
docker-compose down
Restart into a new container
docker-compose up -d
5. Configure Jenkins
Premise: when Jenkins is deployed to the remote server, the Jenkins server must log in to the remote server without secret. At the same time, the remote server must log in to the Jenkins server without secret and copy the corresponding jar package. Therefore, before configuring Jenkins, ensure that the two servers log in to each other without secret. With this configuration, you can view the text I wrote before[ Two machines in Linux system can log in each other without secret ], it's simple.
5.1 configure ssh plug-in first
1. Install ssh related plug-ins, directly search ssh in the plug-in center, and then install the following two plug-ins by
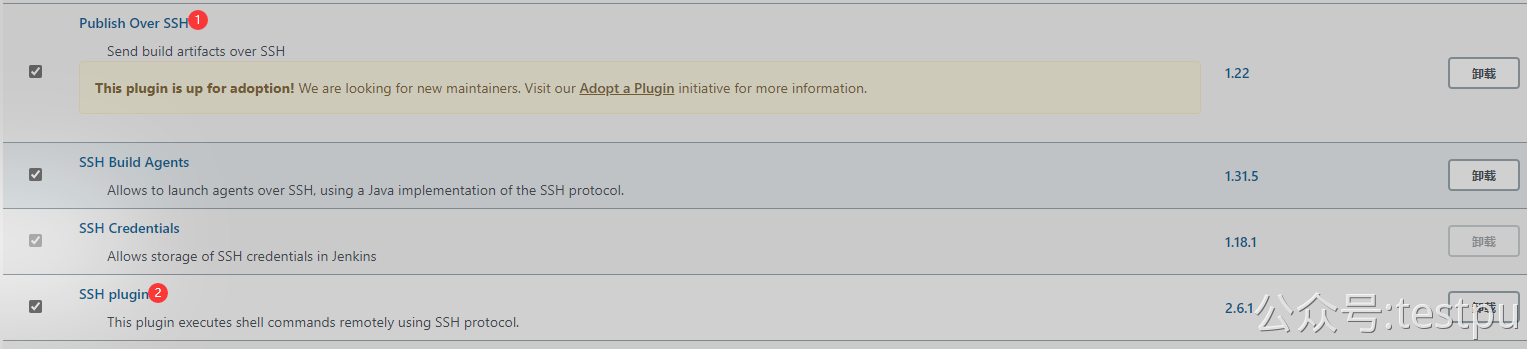
① Plug in, which is mainly used to link the global configuration (public configuration) of remote server;
② The plug-in is mainly used to link the remote server to transfer the file configuration, which is configured in the project.
2. Global configuration Publish over SSH, system management - > system configuration, drop-down to find it

In the first marked place, if no password is set when generating the private key, there is no need to fill in any content and leave it blank;
The second marked place, the alias of the remote server, is optional;
The third marked place is the address of the remote server;
The fourth marked place is the account name (login name) of the remote server;
In the fifth place, the application directory should be placed on the remote server. It should be noted that the directory filled in during later project configuration is spliced with this.
In the sixth marked place, click Advanced and expand the filling items below.
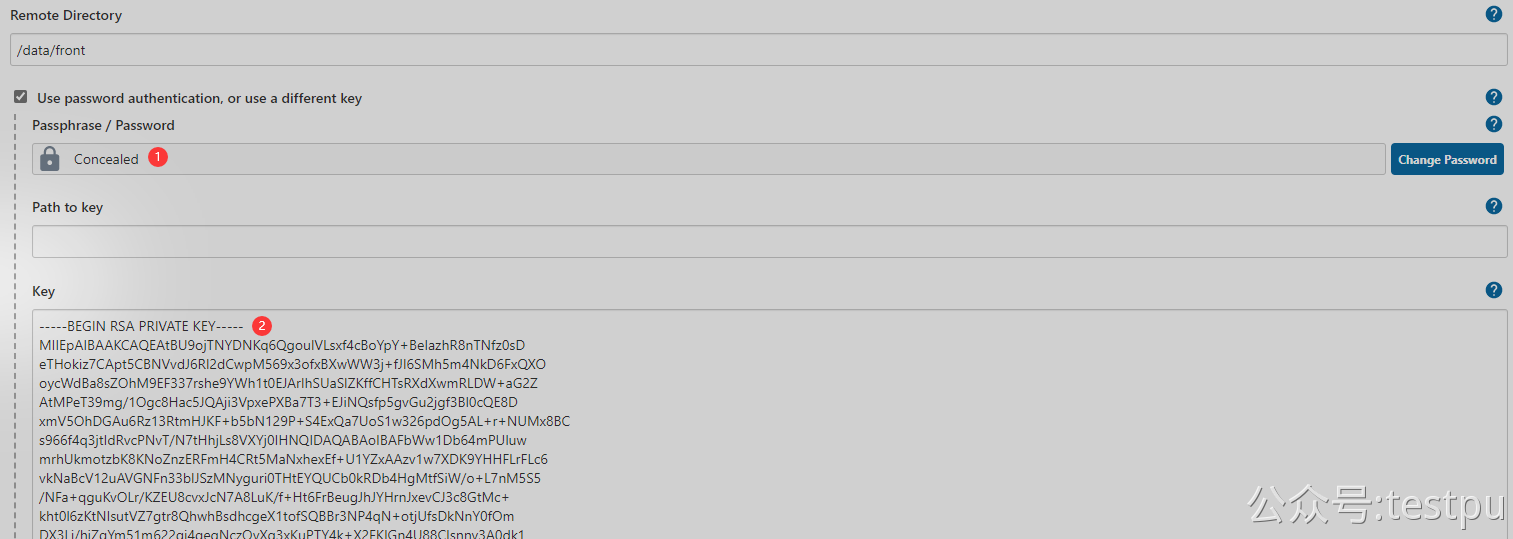
The first marked place is the password of the remote server
The second place marked is the private key of the remote server.
3. Project (job) configure ssh plug-in related content - front end VUE
Create a new job, enter the name, select the pipeline project, and click OK.
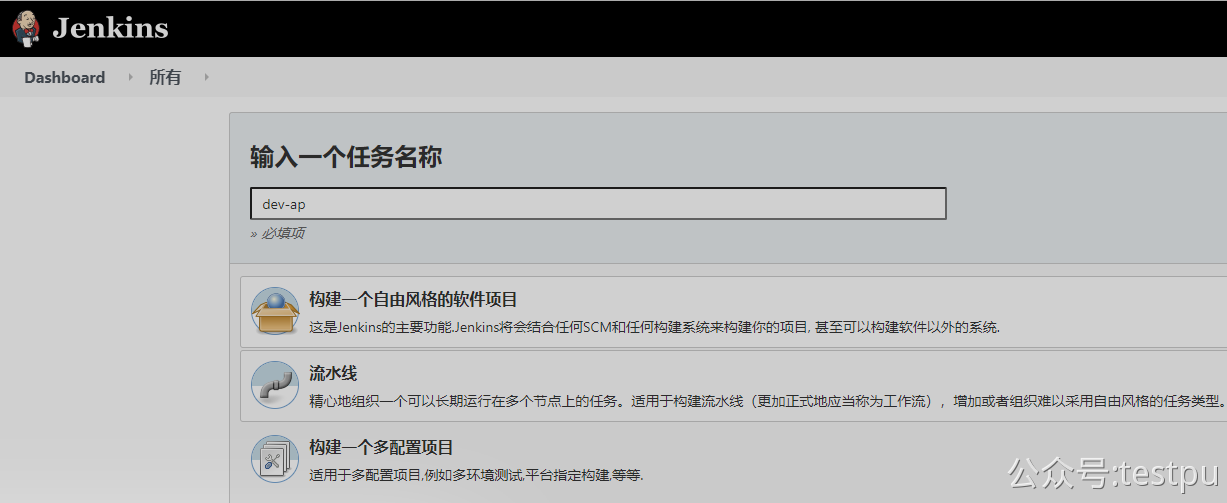
Here is only a demonstration to build the configuration of this step. Other configurations are very simple. You can search online.

The screenshot ① above corresponds to the two steps ① and ② below the screenshot.
In the first step of building configuration, Jenkins packaged the front-end application of the project:
At the first mark in the figure above, the shell script is as follows.
#!/bin/bash
cd /data/jenkins/jenkins_home/workspace/data/xxx-all/xxx-admin
#This directory can also be written as follows. In this way, different Jenkins versions may be different, starting from the next level directory of the packaging project.
./dev-xxx
npm install
npm run build
cd dist
tar -cvf dev-xxx.tar *
script,
The second line indicates that the Jenkins service period switches the directory to the project directory under the workspace directory configured by Jenkins.
Lines 5 and 6, the front-end application packaging command.
In line 7, switch to the dist directory (Jenkins automatically generates this directory after packaging the front-end application, and the packaging results are in this directory)
In line 8, package all contents in the dist directory (* is very important) to facilitate transmission to the remote server (deployment server).
In the second step of building configuration, upload the packaging results to the remote server;

The above five configurations are explained as follows one by one. If the configuration is not good, the project cannot be deployed to the remote server at all.
① , the name (alias) of the remote server, which has been set in the previous global configuration, can be selected from the drop-down list here.
② , the directory address of the packaging result (source file), that is, the place where the content generated after packaging is placed on Jenkins. This directory is easy to fill in incorrectly and will kill you. This directory starts from the project directory under Jenkins main directory, that is, it is filled at the next level under the project directory.
③ , delete the prefix, or your remote server will create the dist directory again.
④ , remote directory. Note that when I configured global (public) ssh above, I filled in the remote directory of application deployment, https://www.yuque.com/u21187464/cf/bo7lzr#GsmxQ The fifth tag here is the splicing of directories based on global public configuration.
⑤ , if the command executed by the remote server is a front-end VUE project, it is to decompress the project packaged above. The script is as follows.
Script writing method 1:
# cd /data/xxx-all/xxx-admin/dev-xx.tar
# tar -zxvf dev-xx.tar

Script 2 (the writing method above is OK in theory, I'll verify it Jenkins Error will be reported):
tar -xvf /data/xxx-all/xxx-admin/dev-xx.tar -C /data/xxx-all/xxx-admin/
Script description,
In the first line, switch the directory to the directory where the remote server deploys the application,
The second line, unzip the application package.
Here is a summary of the source files (Sourec files) configured above. There are many pits.
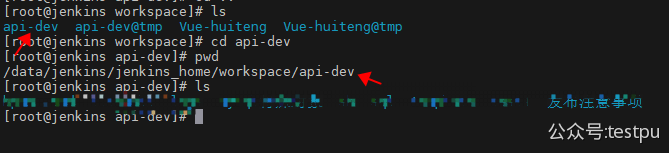
After Jenkins is built, a folder corresponding to the project will be generated in the workspace directory of its workspace (the folder name is the project name named when the project is created, as shown in the figure below). At this time, there will be a folder such as API dev in the workspace directory,
Therefore, the directory after this folder is filled in the source file directory. Do not fill in this folder too.

4. Project (job) configure ssh plug-in related content - Java jar package
As mentioned above, here is a screenshot to show,
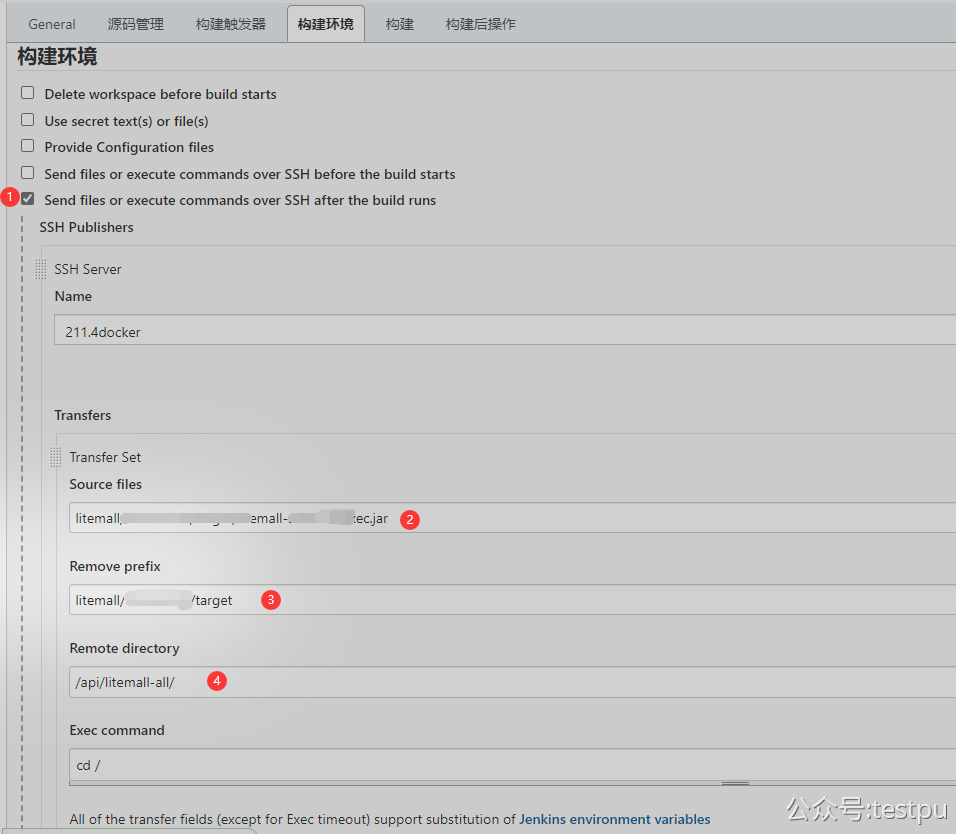
After Jenkins builds, the api project directory generated from its working directory is as follows.

① The place marked means that the jar package is transferred to the remote server after the build and run is completed. Here, build means that maven is transferred after the build.
② The identified place is the source file directory. As mentioned above, fill in the directory after the api project name.
③ Delete the prefix and the directory in front of the jar package, otherwise this directory will be created on the remote server.
6. Summary
1. After Jenkins is compiled and built, the application package (jar package, war package, etc.) needs to be deployed to the remote server. Therefore, it is necessary to ensure that the Jenkins server and the remote server are free of secret access. The configuration has been mentioned above.
2. If your Jenkins server and application server are deployed in the docker container, you need to ensure that the two containers log in each other without secret. The specific configuration is the same as that mentioned above, but you need to operate in the container.
3. The Jenkins packaging configuration above is an example of the front-end vue packaging result, which is compressed into a compressed package, uploaded and deployed to a remote server. If the api is deployed, the process is roughly the same, but compression and decompression are not required.
reaction to a book or an article
Come here to talk to me
-
QQ group: 330374464
-
Official account: software testing resource station (ID:testpu)
-
Language bird: https://www.yuque.com/testpu/pro