1, Introduction to docker
1. What is docker?
Docker is a container software.
Docker is an open source project, which was born in early 2013. It was originally an amateur project within dotCloud. It is based on the Go language introduced by Goole company. The project later joined the Linux foundation and followed Apache 2 0 protocol, and the project code is maintained on GitHub.
Docker is an open source engine that can easily create a lightweight, portable and self-sufficient container for any application. Developers can package their applications and dependent packages into a portable image, and then publish them to any machine that supports docker. Containers are completely sandboxed, and there will be no interface calls between them.
Docker's idea comes from the container. What problem does the container solve? In a large ship, the goods can be placed neatly. And all kinds of goods are packed in containers, and containers will not affect each other. Then I don't need a ship for cooked vegetables and a ship for goods. As long as the goods are well sealed in the container. Then I can take them all away in a big ship.
docker is a similar concept. Cloud computing is like a cargo ship. docker is a container.
2. Advantages of docker
In the cloud era, applications created by developers must be easily disseminated on the network, that is, applications must be free from the limitations of underlying physical hardware; At the same time, it must meet the characteristics that can be obtained and used "at any time and anywhere". Therefore, developers need a new way to create distributed applications for rapid distribution and deployment, which is the biggest advantage that docker can provide. Docker provides a smarter way to package applications, decouple applications and run platforms through containers. This means that when migrating, you only need to start the required containers on the new server, regardless of whether the old and new servers are the same platform. This undoubtedly helps us save a lot of valuable time and reduce the risk of problems in the deployment process.
(1) Come on
The performance of runtime is fast, and the management operations (start, stop, start, restart, etc.) are in seconds or milliseconds.
(2) Nimble
It's as agile as a virtual machine and cheaper. Deploying on bare metal is as simple as clicking a button.
(3) Flexible
"Container" applications and systems without adding additional operating systems.
(4) Light weight
100-1000 Containers can be deployed on one server.
(5) Cheap
Open source, free, low cost.
Docker Ce: Community Edition
Docker EE: commercial edition
3. Disadvantages of docker
All containers share linux kernel resources. Whether the resources can be used to the maximum extent, so there will be vulnerabilities in security.
4. Comparison between Docker and virtual machine
In the cloud era, applications created by developers must be easily disseminated on the network, that is, applications must be free from the limitations of underlying physical hardware; At the same time, it must meet the characteristics that can be obtained and used "at any time and anywhere". Therefore, developers need a new way to create distributed applications for rapid distribution and deployment, which is the biggest advantage that docker can provide. Docker provides a smarter way to package applications, decouple applications and run platforms through containers. This means that when migrating, you only need to start the required containers on the new server, regardless of whether the old and new servers are the same platform. This undoubtedly helps us save a lot of valuable time and reduce the risk of problems in the deployment process.

5.docker and virtualization
Docker and other container technologies belong to the category of operating system virtualization. The biggest feature of operating system refinement is that it does not need additional supervisor support. The reason why docker virtualization has many advantages is inseparable from the design and implementation of operating system virtualization technology.

The traditional way is to realize virtualization at the hardware level, which requires additional virtual machine management application and virtual machine operating system layer. Docker container in operation
It realizes virtualization at the system level and directly reuses the operating system of the local host, so it is more lightweight.
2, Installing and deploying docker
Download link: https://www.docker.com/products/docker-desktop
windows :
mac
linux
docker is divided into two versions:
docker-ce : Community Edition
Docker EE: Enterprise Edition
The kernel of linux 3.10 has a BUG
1. Upgrade system kernel
    [root@localhost ~]# wget https://elrepo.org/linux/kernel/el7/x86_64/RPMS/kernel-lt-5.4.167-1.el7.elrepo.x86_64.rpm # download kernel
    [root@localhost ~]# wget https://elrepo.org/linux/kernel/el7/x86_64/RPMS/kernel-lt-devel-5.4.167-1.el7.elrepo.x86_64.rpm # download kernel expansion package
    # install
    [root@localhost ~]# yum localinstall -y kernel-lt*
    # Automatically select the latest system version at startup
    [root@localhost ~]# grub2-set-default  0 && grub2-mkconfig -o /etc/grub2.cfg
    # View the latest system kernel boot version
    [root@localhost ~]# grubby --default-kernel
    # Restart effective
    [root@localhost ~]# reboot
    # testing
    [root@localhost ~]# uname -a
2. Install dependent packages
[root@localhost ~]# yum install -y yum-utils device-mapper-persistent-data lvm2
3. Add software source information
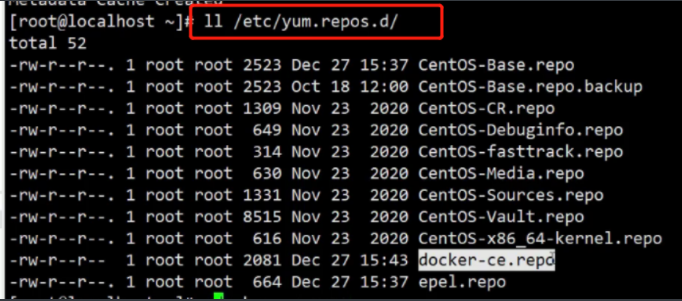
[root@localhost ~]# sudo yum-config-manager --add-repo https://mirrors.aliyun.com/docker-ce/linux/centos/docker-ce.repo
4. Update and install docker CE
 [root@localhost ~]# sudo yum makecache fast
 [root@localhost ~]# sudo yum -y install docker-ce-19.03.9

    k8s The latest and most stable version supported is 19
5. Start Docker
[root@localhost ~]# systemctl start docker
6. Detect docker
[root@localhost ~]# docker info
7. Accelerate docker (log in to alicloud - Product - container and Middleware - container mirroring service ACR - management console - mirroring tool - mirroring accelerator - select centos' mirroring accelerator)
sudo mkdir -p /etc/docker
sudo tee /etc/docker/daemon.json <<-'EOF'
{
    "registry-mirrors": ["https://8mh75mhz.mirror.aliyuncs.com"]
}
EOF
sudo systemctl daemon-reload
sudo systemctl restart docker

Detect successful acceleration: docker info See if there is aliyun Mirror image of


III. concept and basic use of docker
1. Three core concepts of docker
(1) Mirroring: mirroring is the template for starting containers
(2) Container : It is an instance of providing external services
(3) Harbor: the place where images are stored
2. Mirror image
Image is the template for starting containers. All containers started by the same image are identical
2.1 downloading images
        docker pull [Warehouse URL]/[Namespace]/[Image name]:[Version number]
        Example: docker pull nginx

        docker info see:
        Default warehouse URL: https://index.docker.io/v1/
        Default namespace: library
        Default version number: latest

        index.docker.io/library/nginx:latest Equivalent to downloading nginx,Because there are default values
2.2. View the local image list
        [root@localhost ~]# docker images
        [root@localhost ~]# docker image ls
        REPOSITORY   TAG       IMAGE ID       CREATED      SIZE
        nginx        latest    f6987c8d6ed5   6 days ago   141MB
        Warehouse name       edition       image ID         Create time size from now
2.3} view the details of the image
docker inspect [Image name|ID]
        Example: docker inspect nginx
2.4 image tag (alias)
docker tag [image ID] [New name]
        Example: docker tag f6987c8d6ed5 xiaodocker
2.5 log in to the warehouse (to upload the image to the warehouse, you need to log in to the warehouse first)
docker login [Warehouse URL address]
        Default warehouse address: hub.docker.com
        Example:[root@localhost ~]# docker login
Login with your Docker ID to push and pull images from Docker Hub. If you don't have a Docker ID, head over to https://hub.docker.com to create one.
   Enter user name, password (required) https://hub.docker.com/Register to log in)
   vim /root/.docker/config.json   #It saves the user's login address and password TOKEN Value. Login is not required for the second time
2.6 upload image
 Step 1: fight tag(To write all, do not write all, use the default)
            [root@localhost ~]# docker tag f6987c8d6ed5 alvinos/nginx:v2
            see docker images One more piece of data
 Step 2: Upload
            [root@localhost ~]# docker push alvinos/nginx:v2

2.7} delete image (rmi is the abbreviation of rm image)
docker rmi [Name of the mirror|ID]
  [root@localhost ~]# docker rmi alvinos/nginx:v2

Note: docker Images can only be created and deleted, not modified.
    docker of ID Unique in the universe

3. Container
Examples of external services.
3.1. Container lifecycle
At least one process in the container is running in the foreground.
3.2. Start a container (the image is the template for starting the container, so the name or id of the image should be added when starting the image)
docker run [parameter] [Image name|ID] [Start command]
    Example: docker run centos(If not, it will be downloaded)
      docker run nginx    #The simplest command to start a container

    Parameters:( docker run --help)
        -d     : Run as a daemon
        --rm   : When the container life cycle ends, the mirror is deleted immediately
        --name : Specify container name
        -e     : Specifies the environment variables inside the container
        -h     : Specifies the host name of the container
        -p     : Port mapping(fixed)   #Port mapping is required for Internet access
        -P     : Port mapping (random)
        -i     : Open standard output (connect the standard output inside the container to the command line, normal and-t (combined use)
        -t     : Create a command line (pseudo terminal)
         -v     : Add a directory map

        --link
        --network
Example:[root@localhost ~]# docker run -d nginx    #Background run container
  [root@localhost ~]# docker run --rm nginx   When the container life cycle ends, the mirror is deleted immediately
  [root@localhost ~]# docker run -d --name nginx nginx   # --Name specifies the container name
  [root@localhost ~]# docker run -d --name nginxv1 -e NGINX_NAME=nginx nginx     #-e specifies the environment variables inside the container
  [root@localhost ~]# docker run -d --name nginxv2 -e NGINX_NAME=nginx -h hostnames nginx  # -h specifies the host name of the container
  [root@localhost ~]# docker run -d --rm --name nginxv3 -p 30000:80 nginx   #, to access on the Internet, you need - p port mapping. At this time, you can access 192.168 15.105:30000
  64064393f87b5f2018142e014bdd020890c4310605c0c0cd97ce6c29a54b2b4d
[root@localhost ~]# docker run -d --rm --name nginxv4 -P nginx
3a86c4d34bdf8a2f1f3a2e8948c831c3c58c22443690fa2132fdbbdbf6599cbd

[root@localhost ~]# docker run -it --rm centos  #Connect the standard output inside the container to the command line

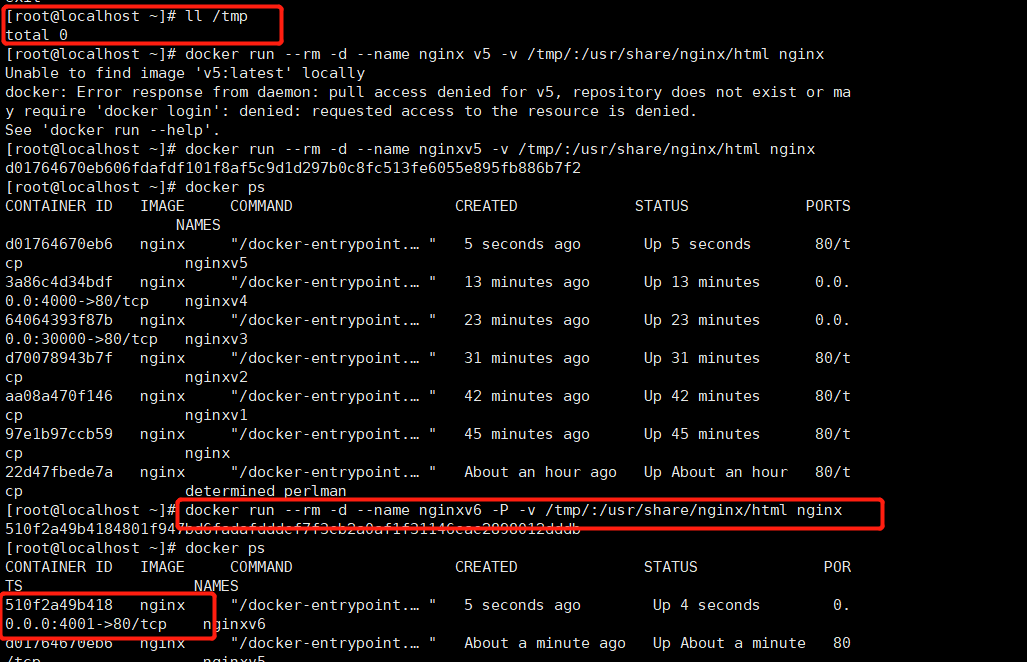
[root@localhost ~]# ll /tmp
total 0
[root@localhost ~]# docker run --rm -d --name nginxv6 -P -v /tmp/:/usr/share/nginx/html nginx
[root@localhost ~]# docker ps
CONTAINER ID   IMAGE     COMMAND                  CREATED              STATUS              PORTS                   NAMES
510f2a49b418   nginx     "/docker-entrypoint...."   5 seconds ago        Up 4 seconds        0.0.0.0:4001->80/tcp    nginxv6
[root@localhost ~]# echo "Hello word" >> /tmp/index.html
[root@localhost ~]# docker exec nginxv6 cat /usr/share/nginx/html/index.html
Hello word

[root@localhost ~]#  yum install pip3
[root@localhost ~]# pip install django
[root@localhost ~]# django-admin startproject linux
[root@localhost ~]# cd linux/
[root@localhost linux]# django-admin startapp application
[root@localhost linux]# python3 manage.py runserver 0.0.0.0:8000
Access at this time http://192.168.15.105:8000/ Will appear django Interface
 So, how to do it in the container? The home page is mapped to the container
[root@localhost linux]# cd ..
[root@localhost ~]# docker run --name django -it --rm -p 8000:8000 -v /root/linux/:/opt/ python:3.6 bash
root@379a06657ab0:/# cd /opt
root@379a06657ab0:/opt# ls
application  linux  manage.py
root@379a06657ab0:/opt# pip install django
root@379a06657ab0:/opt# python3 manage.py runserver 0.0.0.0:8000
Access at this time http://192.168.15.105:8000/ Will appear django Interface

[root@localhost ~]#cd linux/
[root@localhost linux]# cd application/
[root@localhost application]# ll
[root@localhost application]# vim views.py
   def index(request):
      return HttpResponse("hello world")
 [root@localhost application]# cd ..
 [root@localhost linux]#cd linux/
 [root@localhost linux]#vim urls.py
 path("",views.index)
 root@379a06657ab0:/opt# python3 manage.py runserver 0.0.0.0:8000
 Access 192 at this time.168.15.105:8000,appear hello world
3.3. View the list of containers running on this machine
docker ps
    -a :  Displays all containers on this machine
    -q :  Show only ID
    Example: docker ps    #View containers running on this machine
        docker ps -a  #Displays all containers on the machine
        docker ps -a -q #Displays the of all containers on the machine id
3.4 execute commands inside the container
docker exec [Container name] [command]
    [root@localhost ~]# docker exec nginxv1 printenv    #Print environment variables for nginxv1

    Enter container:
        docker exec -it [Container name] bash
        [root@localhost ~]# docker exec -it hungry_wright bash
3.5 delete container
docker rm [container ID Or name]

    -f : Force delete
    [root@localhost ~]# docker rm -f 379a06657ab0   #Delete a container

    [root@localhost ~]# docker rm -f $(docker ps -a -q)  #Delete all containers


3.6 saving containers and images
3.61 ― directly save the container as a local image
docker commit
    docker commit --help
    Usage:  docker commit [OPTIONS] CONTAINER [REPOSITORY[:TAG]]

    Parameters:
        -a : author
        -m : Explain information when submitting
        -p : Do you want to pause running the container when saving it

    [root@localhost ~]# docker ps
    CONTAINER ID   IMAGE     COMMAND                  CREATED         STATUS         PORTS     NAMES
    7390f1d18977   nginx     "/docker-entrypoint...."   9 minutes ago   Up 9 minutes   80/tcp    hungry_wright
    [root@localhost ~]# docker commit -a "Linux" -m 'init' -p hungry_wright test:v1

3.62. Save the local container as an image compressed package
1. Save the container as an image compressed package
docker export
    -o, --output string   Write to a file, instead of STDOUT
    [root@localhost ~]# docker export -o nginx.tar hungry_wright
2. Decompress the container into an image
docker import
    [root@localhost ~]# docker import nginx.tar test:v2
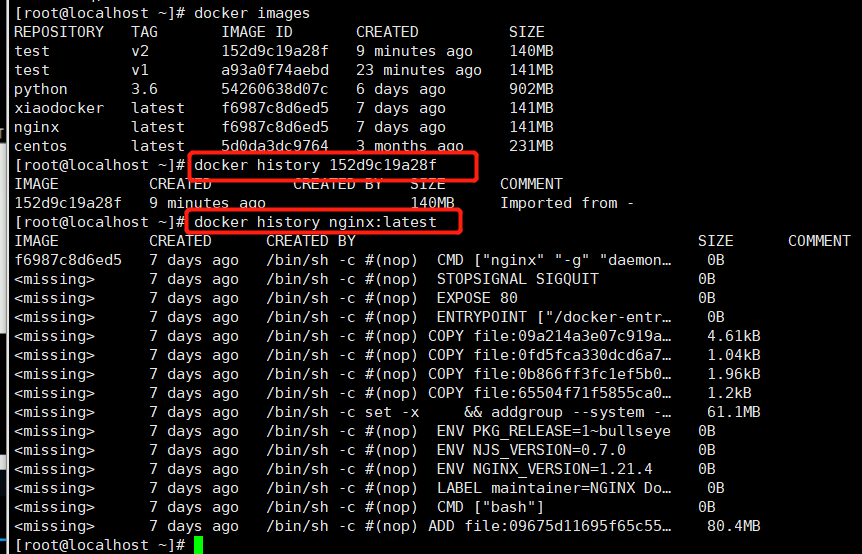
    [root@localhost ~]# docker images
REPOSITORY   TAG       IMAGE ID       CREATED          SIZE
test         v2        152d9c19a28f   8 seconds ago    140MB
3.63. Save the local image as an image compressed package
1. Save the image as a compressed image package
    docker save
    Options:
  -o, --output string   Write to a file, instead of STDOUT
    [root@localhost ~]# docker save -o nginxv1.tar python:3.6 nginx:latest
2. Unzip the image package as an image
docker load
    Options:
  -i, --input string   Read from tar archive file, instead of STDIN
  -q, --quiet          Suppress the load output
    [root@localhost ~]# docker load -i nginxv1.tar
3.64 difference between save and export
 1,Different objects
 2,save The saved image is more perfect


