1, Introduction to Docker Swarm
1. Introduction
- Swarm was an independent project before Docker version 1.12. After Docker version 1.12 was released, the project was merged into Docker and became a subcommand of Docker.
- Swarm is the only native tool that supports Docker cluster management provided by Docker community.
- Swarm can convert a system composed of multiple Docker hosts into a single virtual Docker host, so that the container can form a cross host subnet network.
- Docker Swarm is an orchestration tool that provides clustering and scheduling capabilities for IT operation and maintenance teams.
2. Advantages of docker swarm
High performance on any scale
Flexible container scheduling
Continuous availability of services
Compatibility with Docker API and integration support
Docker Swarm provides native support for the core functions of docker based applications, such as multi host network and storage volume management.
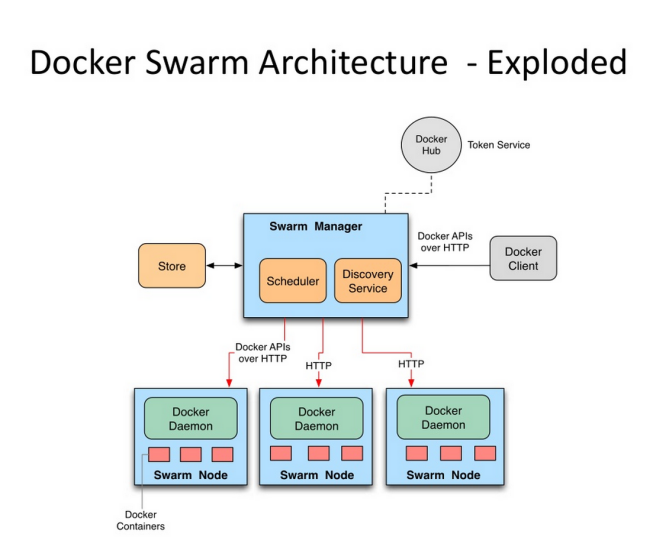
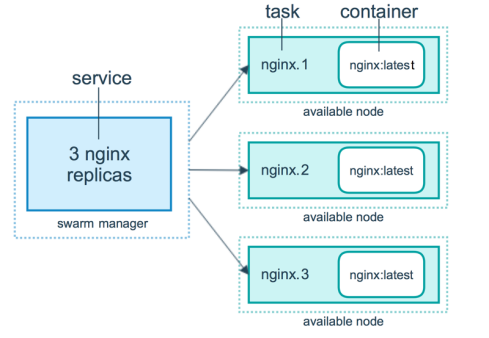
3. Related concepts of docker swarm
- Nodes are divided into manager nodes and worker nodes
Task is the smallest scheduling unit in Swarm. At present, it is a single container. - A service is a collection of tasks. A service defines the properties of a task.
2, Docker Swarm practice
It needs to be installed in advance
| host | ip | service | jurisdiction |
|---|---|---|---|
| server1 | 172.25.15.1 | haobor,docker | Network warehouse |
| server2 | 172.25.15.2 | docker | Management end |
| server3 | 172.25.15.3 | docker | client |
| server4 | 172.25.15.4 | docker | client |
1. Create Swarm cluster
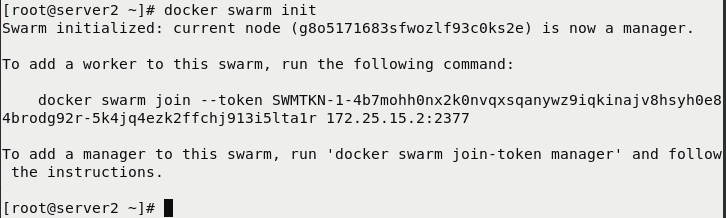
Initialize cluster: docker swarm init
[root@server2 ~]# docker swarm init	#Initialize cluster
Swarm initialized: current node (g8o5171683sfwozlf93c0ks2e) is now a manager.

To add a worker to this swarm, run the following command:

    docker swarm join --token SWMTKN-1-4b7mohh0nx2k0nvqxsqanywz9iqkinajv8hsyh0e84brodg92r-5k4jq4ezk2ffchj913i5lta1r 172.25.15.2:2377

To add a manager to this swarm, run 'docker swarm join-token manager' and follow the instructions.

[root@server2 ~]#
Execute commands on other docker nodes according to the prompts: (other nodes must first install and start the docker service)
## server3
[root@server3 ~]# docker swarm join --token SWMTKN-1-4b7mohh0nx2k0nvqxsqanywz9iqkinajv8hsyh0e84brodg92r-5k4jq4ezk2ffchj913i5lta1r 172.25.15.2:2377	#Join cluster
This node joined a swarm as a worker.
## server4
[root@server4 ~]# docker swarm join --token SWMTKN-1-4b7mohh0nx2k0nvqxsqanywz9iqkinajv8hsyh0e84brodg92r-5k4jq4ezk2ffchj913i5lta1r 172.25.15.2:2377	#Join cluster
This node joined a swarm as a worker.


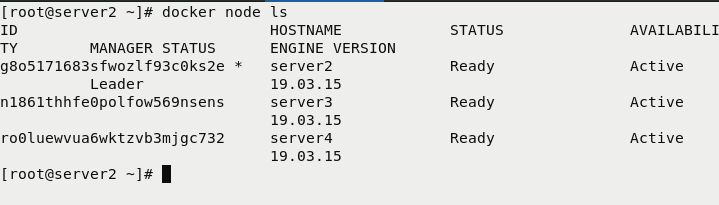
View cluster
[root@server2 ~]# docker node ls

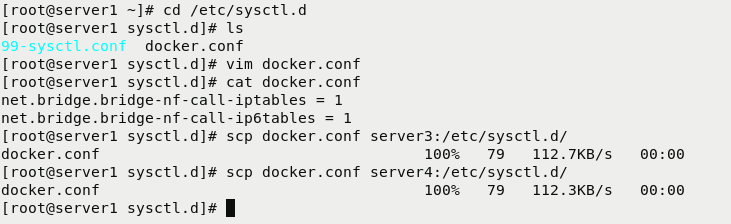
2. Ensure the normal operation of docker service
[root@server1 ~]# cd /etc/sysctl.d
[root@server1 sysctl.d]# ls
99-sysctl.conf  docker.conf
[root@server1 sysctl.d]# vim docker.conf
[root@server1 sysctl.d]# cat docker.conf
net.bridge.bridge-nf-call-iptables = 1
net.bridge.bridge-nf-call-ip6tables = 1
[root@server1 sysctl.d]# scp docker.conf server3:/etc/sysctl.d/
docker.conf                                    100%   79   112.7KB/s   00:00
[root@server1 sysctl.d]# scp docker.conf server4:/etc/sysctl.d/
docker.conf                                    100%   79   112.3KB/s   00:00
[root@server1 sysctl.d]#
3. Distribution of certificates
### Servers 2, 3 and 4 must have certificates
[root@server1 ~]# cd /etc/docker/
[root@server1 docker]# ls
certs.d  daemon.json  key.json
[root@server1 docker]# scp -r certs.d server2:/etc/docker/
ca.crt                                         100% 2106     3.8MB/s   00:00
[root@server1 docker]# scp -r certs.d server3:/etc/docker/
ca.crt                                         100% 2106     1.2MB/s   00:00
[root@server1 docker]# scp -r certs.d server4:/etc/docker/
ca.crt                                         100% 2106     2.1MB/s   00:00
[root@server1 docker]#

3, docker stack deployment
1. Parse and default pull warehouse (configure harbor warehouse)
### server 2, 3 and 4 must have
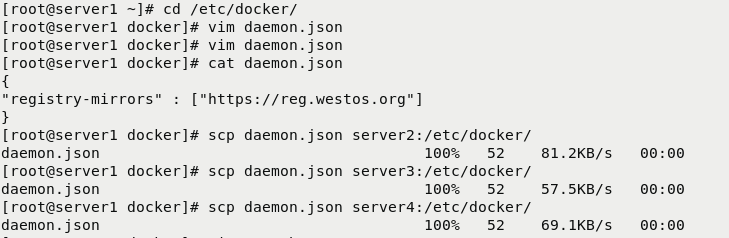
[root@server1 ~]# cd /etc/docker/
[root@server1 docker]# vim daemon.json
[root@server1 docker]# vim daemon.json
[root@server1 docker]# cat daemon.json
{
"registry-mirrors" : ["https://reg.westos.org"] # Configure the default warehouse as re westos. org
}
[root@server1 docker]# scp daemon.json server2:/etc/docker/
daemon.json 100% 52 81.2KB/s 00:00
[root@server1 docker]# scp daemon.json server3:/etc/docker/
daemon.json 100% 52 57.5KB/s 00:00
[root@server1 docker]# scp daemon.json server4:/etc/docker/
daemon.json 100% 52 69.1KB/s 00:00


server1 is configured as a haobor network warehouse
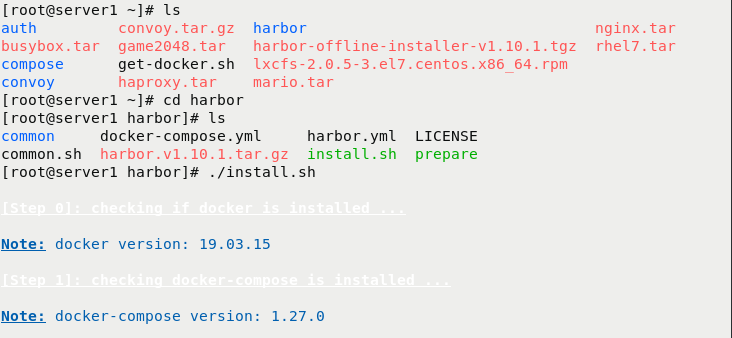
[root@server1 ~]# ls
auth         convoy.tar.gz  harbor                                nginx.tar
busybox.tar  game2048.tar   harbor-offline-installer-v1.10.1.tgz  rhel7.tar
compose      get-docker.sh  lxcfs-2.0.5-3.el7.centos.x86_64.rpm
convoy       haproxy.tar    mario.tar
[root@server1 ~]# cd harbor
[root@server1 harbor]# ls
common     docker-compose.yml     harbor.yml  LICENSE
common.sh  harbor.v1.10.1.tar.gz  install.sh  prepare
[root@server1 harbor]# ./install.sh 	#Run the script to install the haorbor warehouse


Import mirror
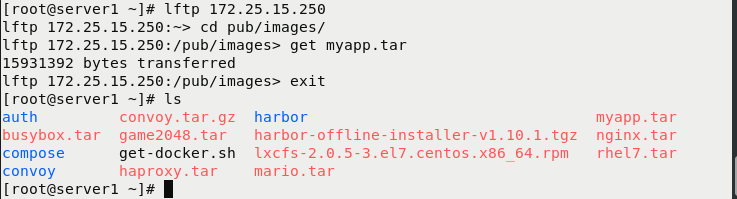
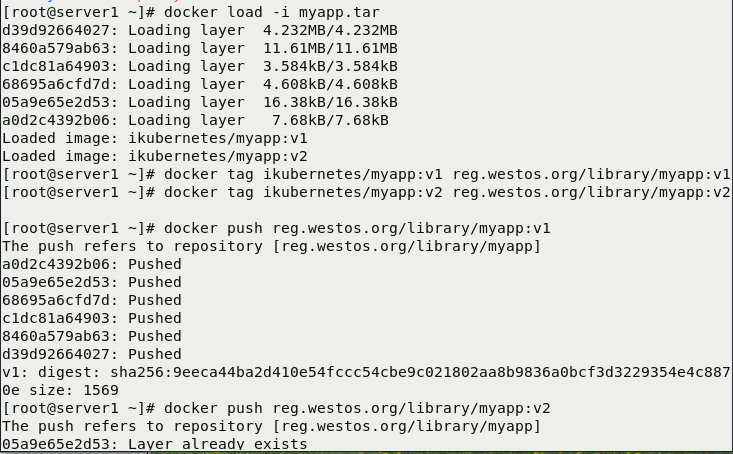
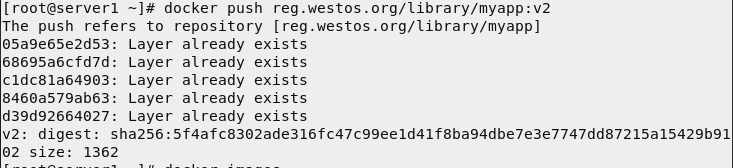
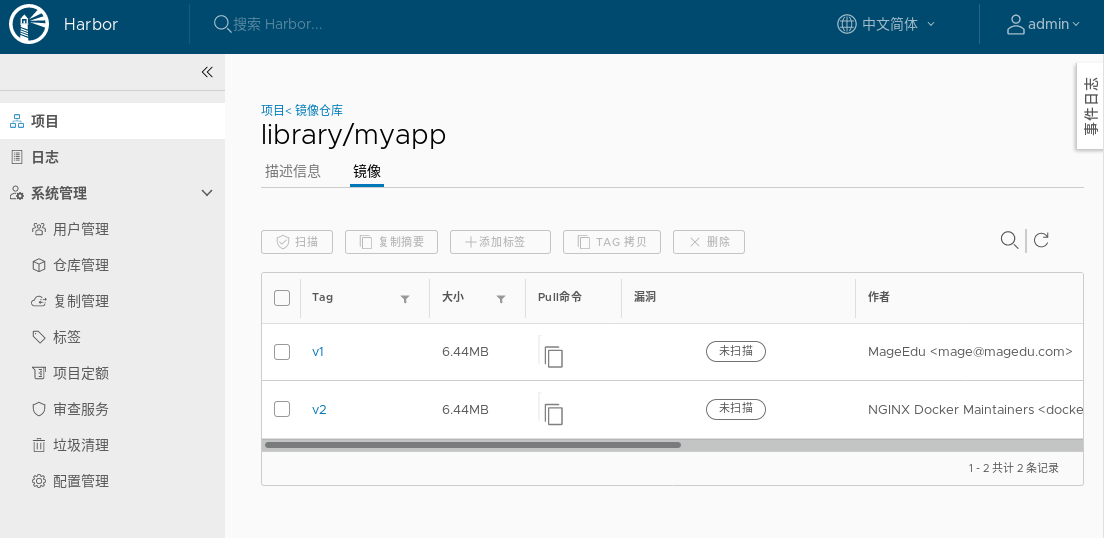
[root@server1 ~]# lftp 172.25.15.250
lftp 172.25.15.250:~> cd pub/images/
lftp 172.25.15.250:/pub/images> get myapp.tar 	#Download Image
15931392 bytes transferred
lftp 172.25.15.250:/pub/images> exit
[root@server1 ~]# ls
auth         convoy.tar.gz  harbor                                myapp.tar
busybox.tar  game2048.tar   harbor-offline-installer-v1.10.1.tgz  nginx.tar
compose      get-docker.sh  lxcfs-2.0.5-3.el7.centos.x86_64.rpm   rhel7.tar
convoy       haproxy.tar    mario.tar

[root@server1 ~]# docker load -i myapp.tar		#Import mirror
d39d92664027: Loading layer  4.232MB/4.232MB
8460a579ab63: Loading layer  11.61MB/11.61MB
c1dc81a64903: Loading layer  3.584kB/3.584kB
68695a6cfd7d: Loading layer  4.608kB/4.608kB
05a9e65e2d53: Loading layer  16.38kB/16.38kB
a0d2c4392b06: Loading layer   7.68kB/7.68kB
Loaded image: ikubernetes/myapp:v1
Loaded image: ikubernetes/myapp:v2
[root@server1 ~]# docker tag ikubernetes/myapp:v1 reg.westos.org/library/myapp:v1	#Modify the name and label
[root@server1 ~]# docker tag ikubernetes/myapp:v2 reg.westos.org/library/myapp:v2 	#Modify the name and label
[root@server1 ~]# docker push reg.westos.org/library/myapp:v1	#Incoming network warehouse
[root@server1 ~]# docker push reg.westos.org/library/myapp:v2	#Incoming network warehouse
2. Create cluster service:
Command interpretation:
The docker service create command creates a service
– name the service name is named my_cluster
– network specifies the network used by the service
Complex model
– replicas sets the number of examples started to 3
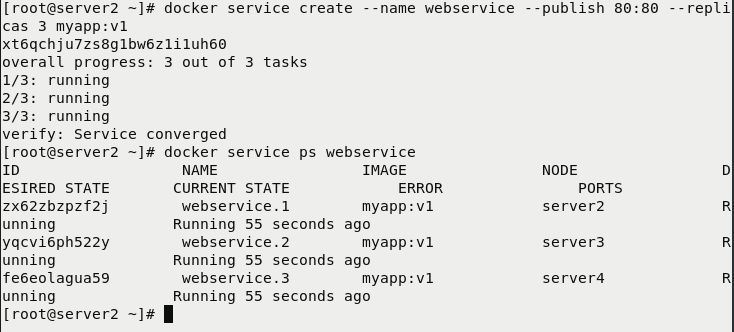
[root@server2 ~]# docker service create --name webservice --publish 80:80 --replicas 3 myapp:v1	#Create three clusters with myapp:v1 as the mirror
xt6qchju7zs8g1bw6z1i1uh60
overall progress: 3 out of 3 tasks
1/3: running
2/3: running
3/3: running
verify: Service converged
[root@server2 ~]#
[root@server2 ~]# docker service ps webservice 	#see
3. Load balancing
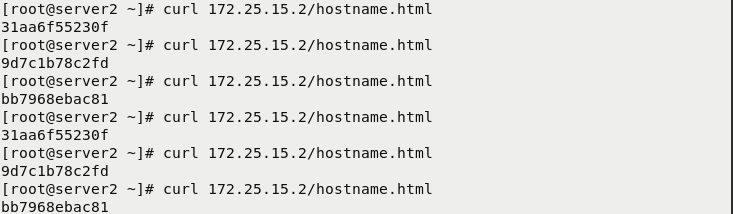
[root@server2 ~]# curl 172.25.15.2/hostname.html
31aa6f55230f
[root@server2 ~]# curl 172.25.15.2/hostname.html
9d7c1b78c2fd
[root@server2 ~]# curl 172.25.15.2/hostname.html
bb7968ebac81
[root@server2 ~]# curl 172.25.15.2/hostname.html
31aa6f55230f
[root@server2 ~]# curl 172.25.15.2/hostname.html
9d7c1b78c2fd
[root@server2 ~]# curl 172.25.15.2/hostname.html
bb7968ebac81
4. Elastic expansion
4.1 rolling update
Command mode, you need to create clusters and deploy monitoring in advance
- docker service update --image httpd --update-parallelism 2 --update-delay 5s my_cluster
- – image specifies the mirror to update
- – update parallelism specifies the maximum number of tasks to synchronize updates
- – update delay specifies the update interval
4.2 downloading images
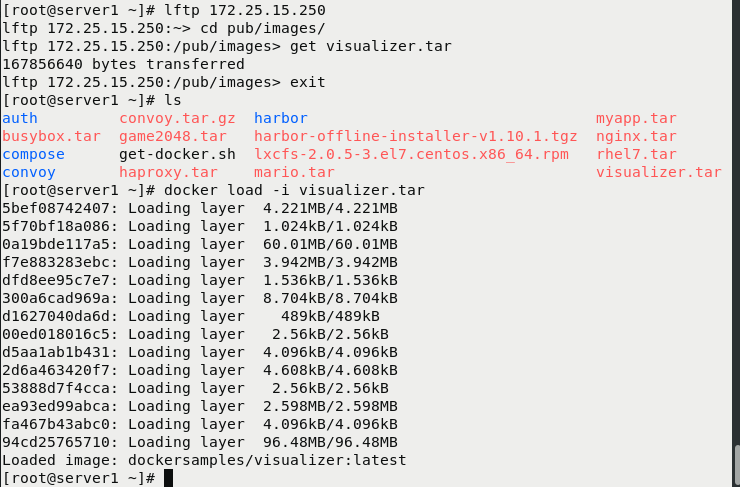
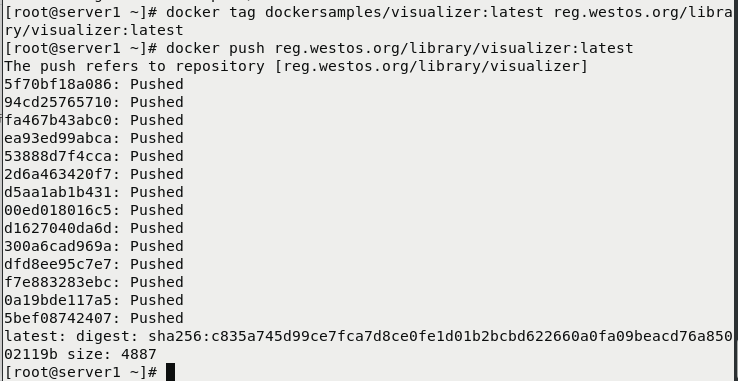
[root@server1 ~]# lftp 172.25.15.250
lftp 172.25.15.250:~> cd pub/images/
lftp 172.25.15.250:/pub/images> get visualizer.tar 	#Download Image Monitoring Software Package
167856640 bytes transferred
lftp 172.25.15.250:/pub/images> exit
[root@server1 ~]# ls
auth         convoy.tar.gz  harbor                                myapp.tar
busybox.tar  game2048.tar   harbor-offline-installer-v1.10.1.tgz  nginx.tar
compose      get-docker.sh  lxcfs-2.0.5-3.el7.centos.x86_64.rpm   rhel7.tar
convoy       haproxy.tar    mario.tar                             visualizer.tar
[root@server1 ~]# docker load -i visualizer.tar #Import mirror
[root@server1 ~]# docker tag dockersamples/visualizer:latest reg.westos.org/library/visualizer:latest		#Label and modify the name
[root@server1 ~]# docker push reg.westos.org/library/visualizer:latest		#Import warehouse
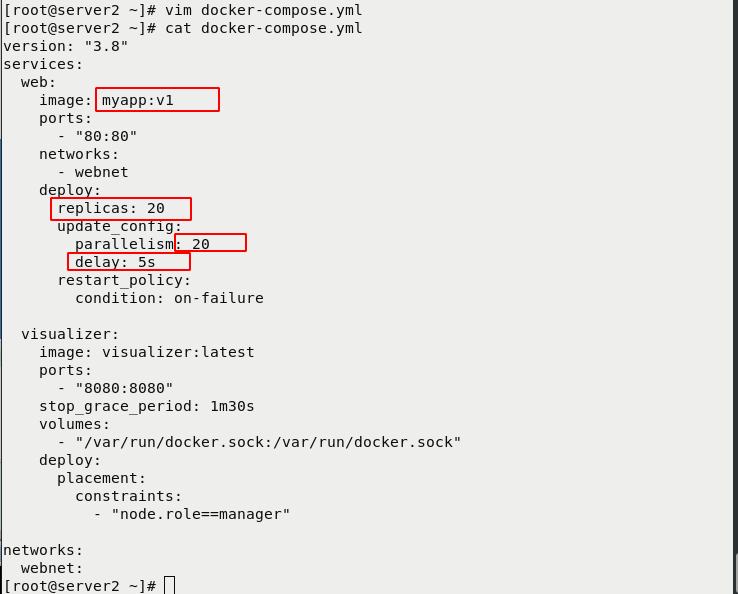
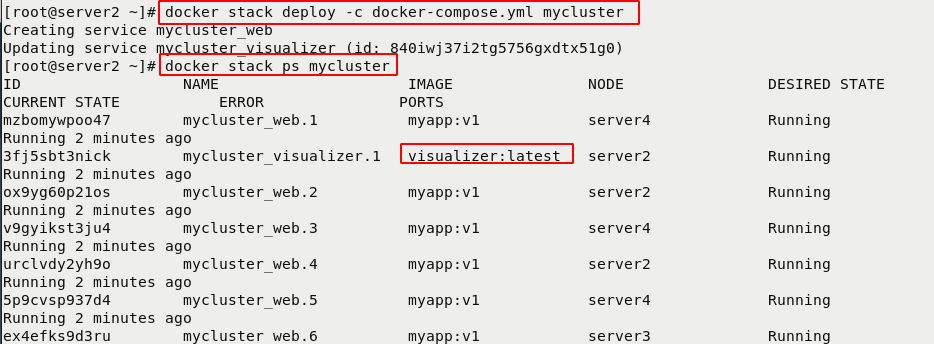
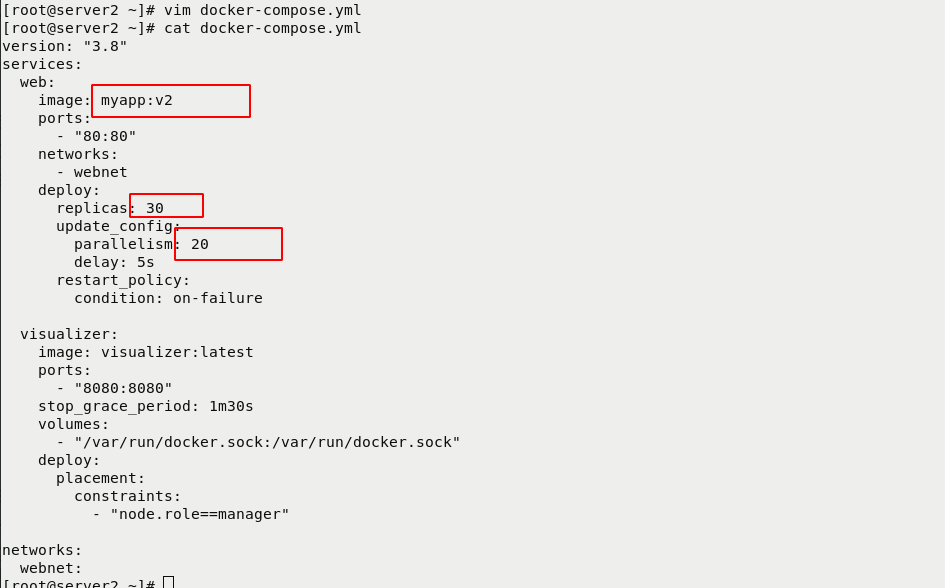
5. Create a cluster and monitor it
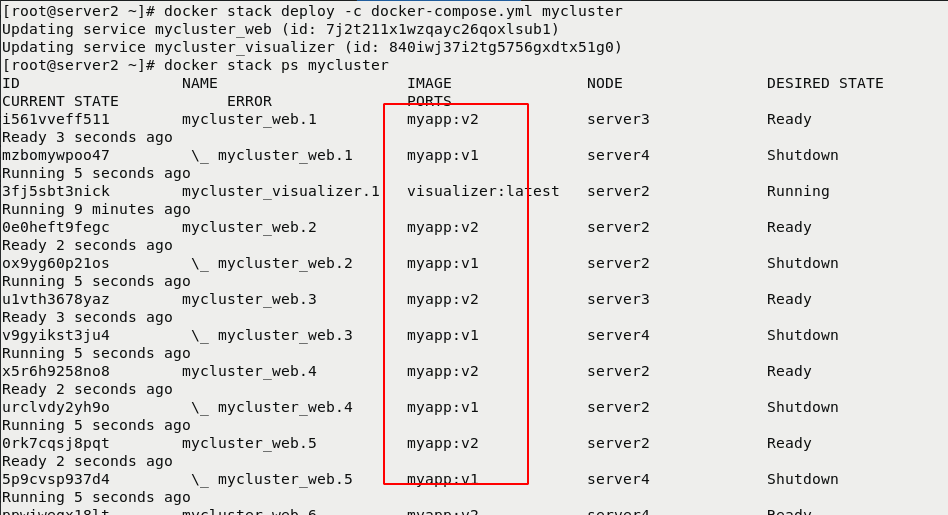
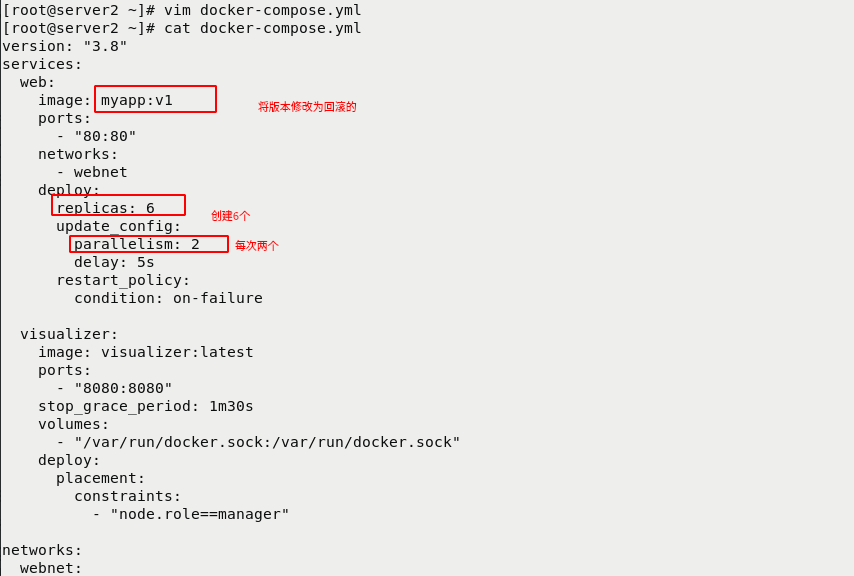
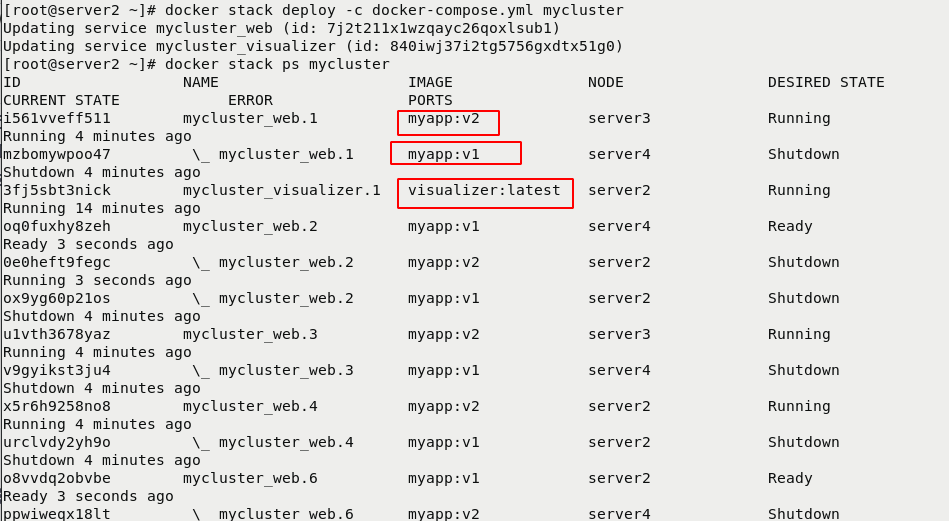
[root@server2 ~]# vim docker-compose.yml
[root@server2 ~]# cat docker-compose.yml
[root@server2 ~]# docker stack deploy -c docker-compose.yml mycluster	#Run the script to create a cluster and add monitoring
Creating service mycluster_web
Updating service mycluster_visualizer (id: 840iwj37i2tg5756gxdtx51g0)
[root@server2 ~]# docker stack ps mycluster
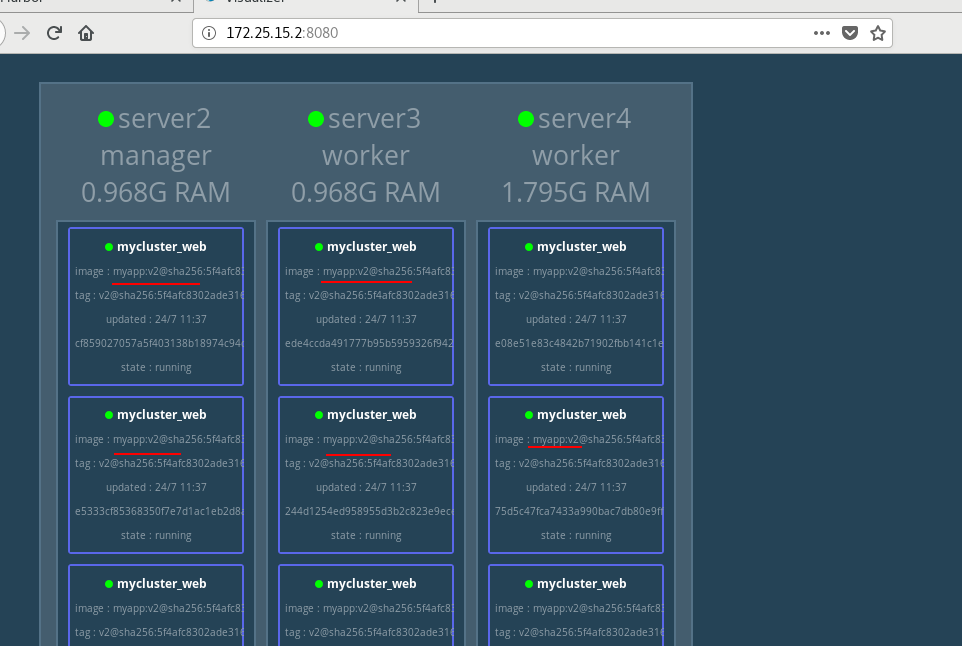
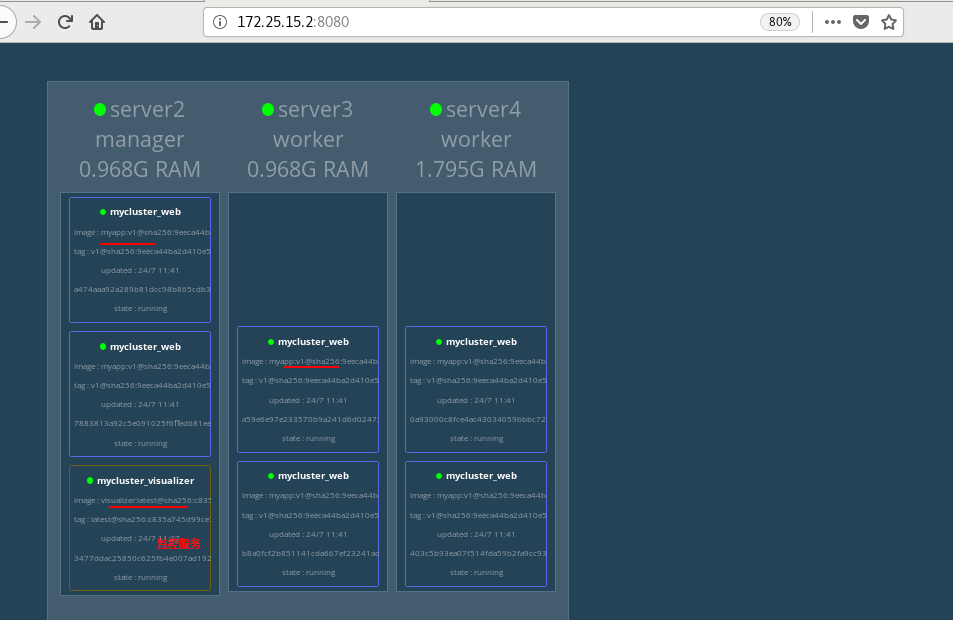
6. Browser view monitoring
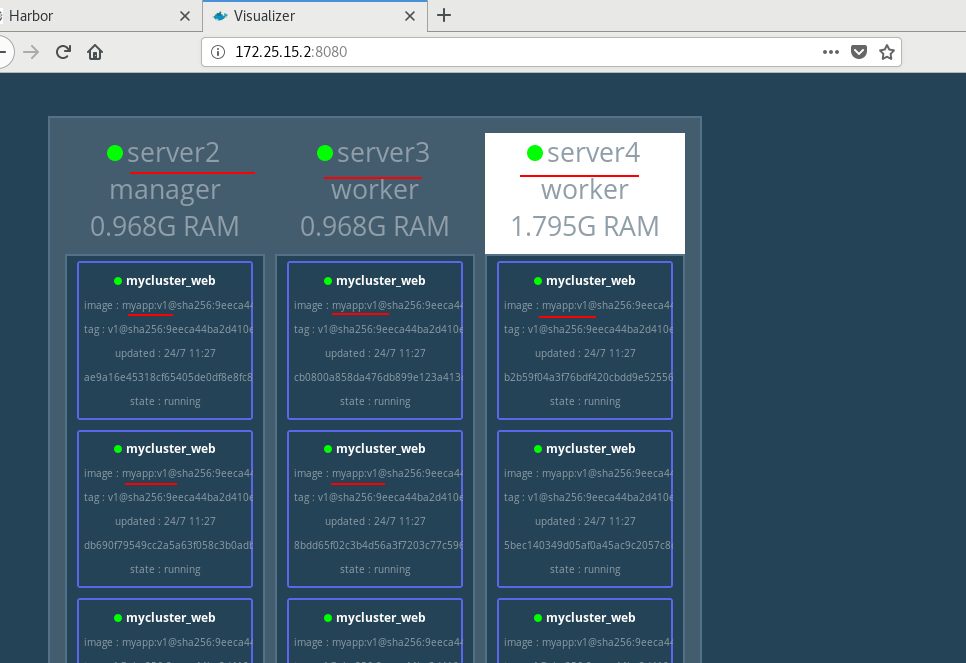
7. Update
8. Rollback
4, Portal visualization
1. Download the graphics service and import it into the harbor warehouse
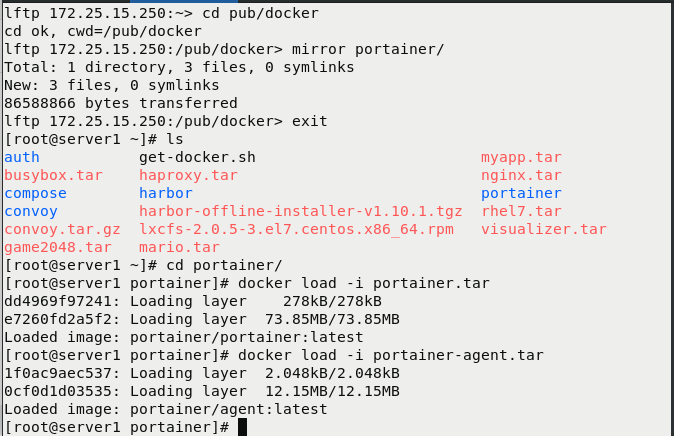
[root@server1 ~]# lftp 172.25.15.250
lftp 172.25.15.250:~> cd pub/docker
cd ok, cwd=/pub/docker
lftp 172.25.15.250:/pub/docker> mirror portainer/		#Download graphics services
Total: 1 directory, 3 files, 0 symlinks
New: 3 files, 0 symlinks
86588866 bytes transferred
lftp 172.25.15.250:/pub/docker> exit
[root@server1 ~]# ls
auth           get-docker.sh                         myapp.tar
busybox.tar    haproxy.tar                           nginx.tar
compose        harbor                                portainer
convoy         harbor-offline-installer-v1.10.1.tgz  rhel7.tar
convoy.tar.gz  lxcfs-2.0.5-3.el7.centos.x86_64.rpm   visualizer.tar
game2048.tar   mario.tar
[root@server1 ~]# cd portainer/
[root@server1 portainer]# docker load -i portainer.tar 	#Import mirror
dd4969f97241: Loading layer    278kB/278kB
e7260fd2a5f2: Loading layer  73.85MB/73.85MB
Loaded image: portainer/portainer:latest
[root@server1 portainer]# docker load -i portainer-agent.tar 	#Import mirror
1f0ac9aec537: Loading layer  2.048kB/2.048kB
0cf0d1d03535: Loading layer  12.15MB/12.15MB
Loaded image: portainer/agent:latest
[root@server1 portainer]#
New project, import image
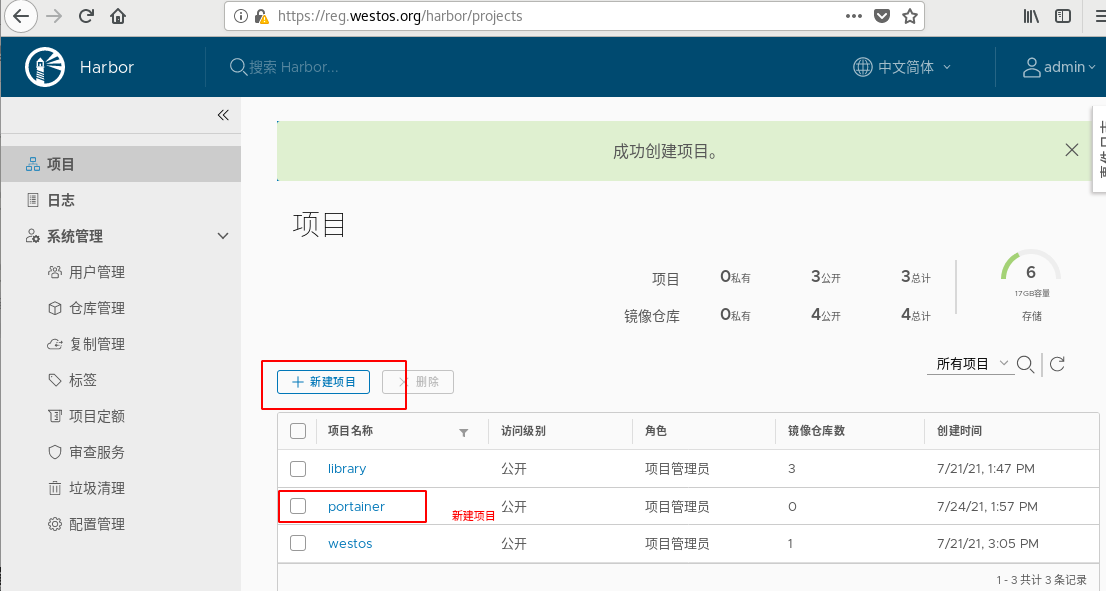
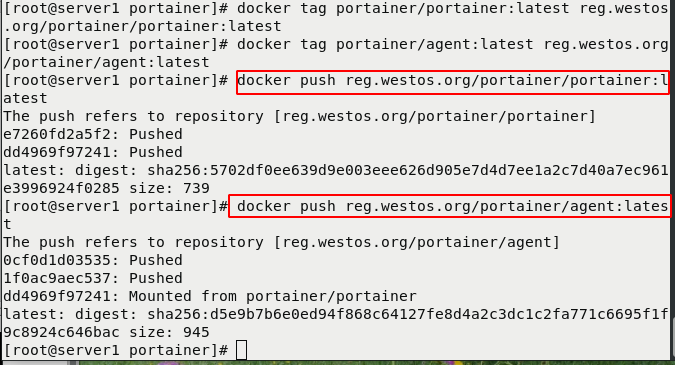
[root@server1 portainer]# docker tag portainer/agent:latest 	reg.westos.org/portainer/agent:latest	#Label and modify the name
[root@server1 portainer]# docker push reg.westos.org/portainer/portainer:latest	#Import to network warehouse

[root@server1 portainer]# docker push reg.westos.org/portainer/agent:latest	#Import to network warehouse
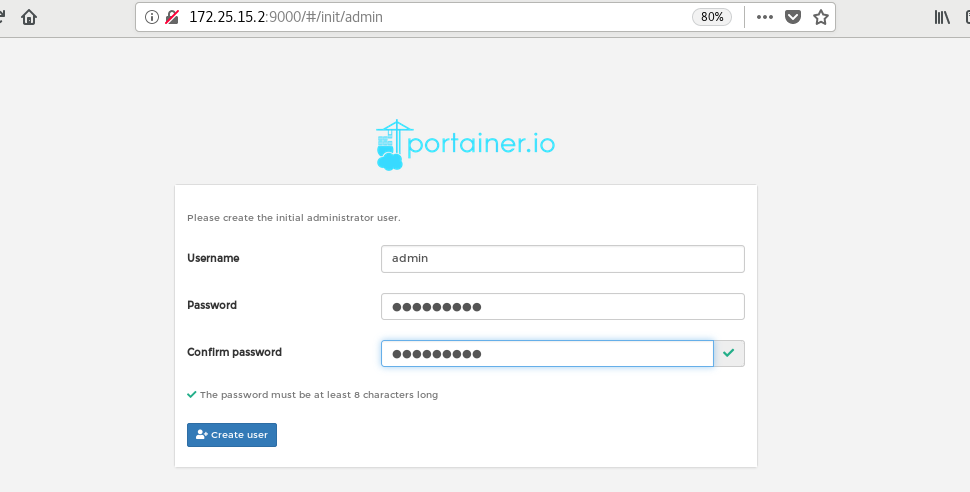
2. Start graphics
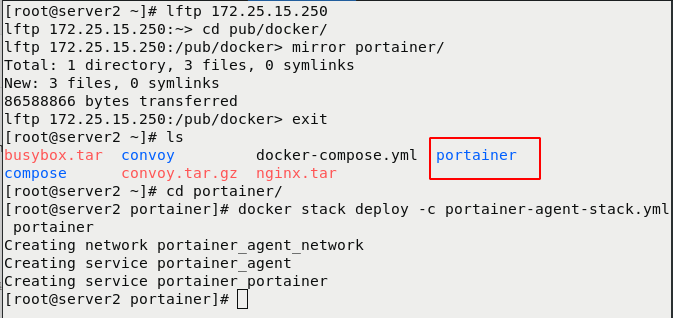
## Download service pack
[root@server2 ~]# lftp 172.25.15.250
lftp 172.25.15.250:~> cd pub/docker/
lftp 172.25.15.250:/pub/docker> mirror portainer/
Total: 1 directory, 3 files, 0 symlinks
New: 3 files, 0 symlinks
86588866 bytes transferred
lftp 172.25.15.250:/pub/docker> exit
[root@server2 ~]# ls
busybox.tar  convoy         docker-compose.yml  portainer
compose      convoy.tar.gz  nginx.tar
[root@server2 ~]# cd portainer/
[root@server2 portainer]# docker stack deploy -c portainer-agent-stack.yml portainer	#Start drawing
Creating network portainer_agent_network
Creating service portainer_agent
Creating service portainer_portainer
[root@server2 portainer]#
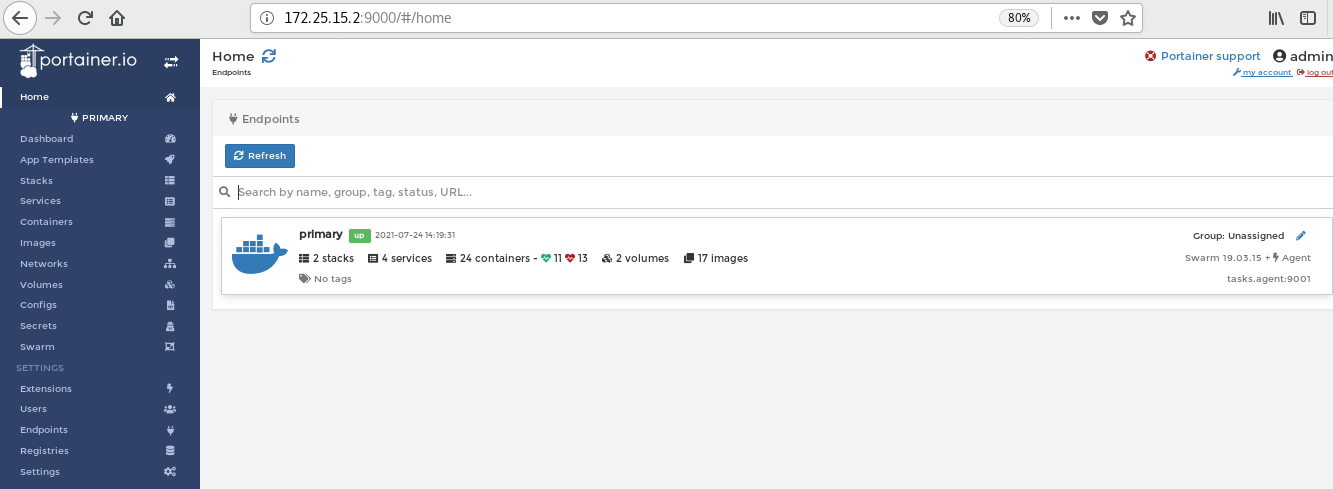
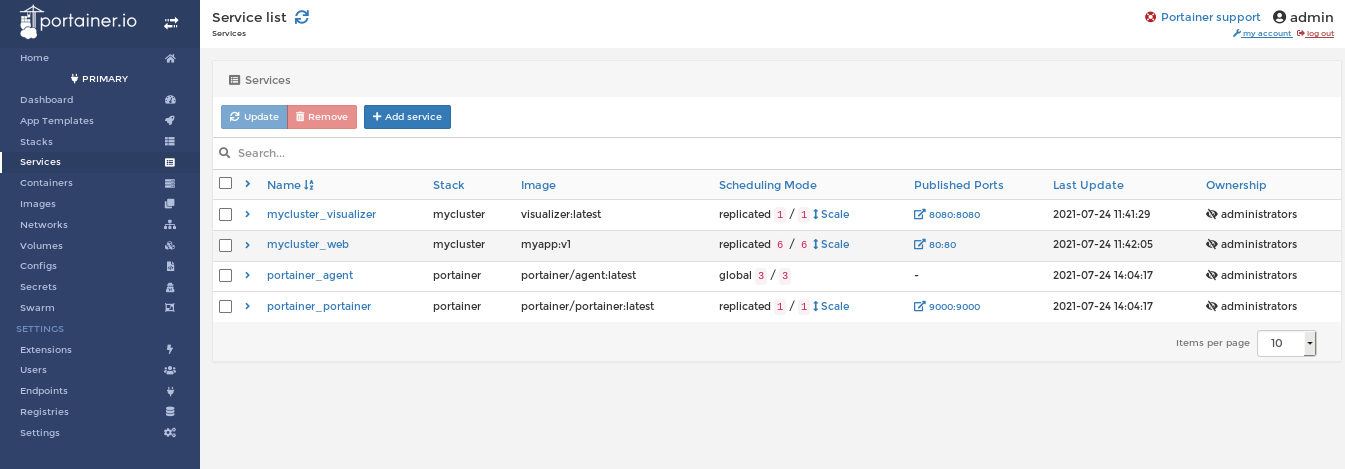
Start successful

Browser view