Catalogue of series articles
Docker01 - introduction, installation and use
catalogue
preface
A product goes from development to launch, from operating system, to operating environment, and then to application configuration. As the assistance between development + operation and maintenance, we need to be concerned about many problems, which is also a problem that many software companies have to face. Especially after the iteration of various versions, the compatibility of different versions of the environment is a test for the operation and maintenance personnel.
Docker has developed so rapidly that it provides a standardized solution for operation and maintenance. Therefore, docker has become one of the necessary skills for development, operation and maintenance, which greatly facilitates the solution of the application environment and version iteration.
This series of articles makes it easy for you to enter the world of docker!
1, Download MySQL image
stay Docker Hub Search the MySQL image on the website and select the image and version you want to download. Here, choose MySQL version 5.7 for download.


On the server with docker application, execute 'docker pull mysql:5.7' to download the image.
docker pull mysql:5.7
After downloading, use 'docker images' to view the image of the local download.
[root@VM-0-12-centos redis]# docker images
REPOSITORY          TAG                 IMAGE ID            CREATED             SIZE
docker.io/redis     latest              fad0ee7e917a        2 weeks ago         105 MB
docker.io/mysql     5.7                 2c9028880e58        5 weeks ago         447 MB
2, Start MySQL
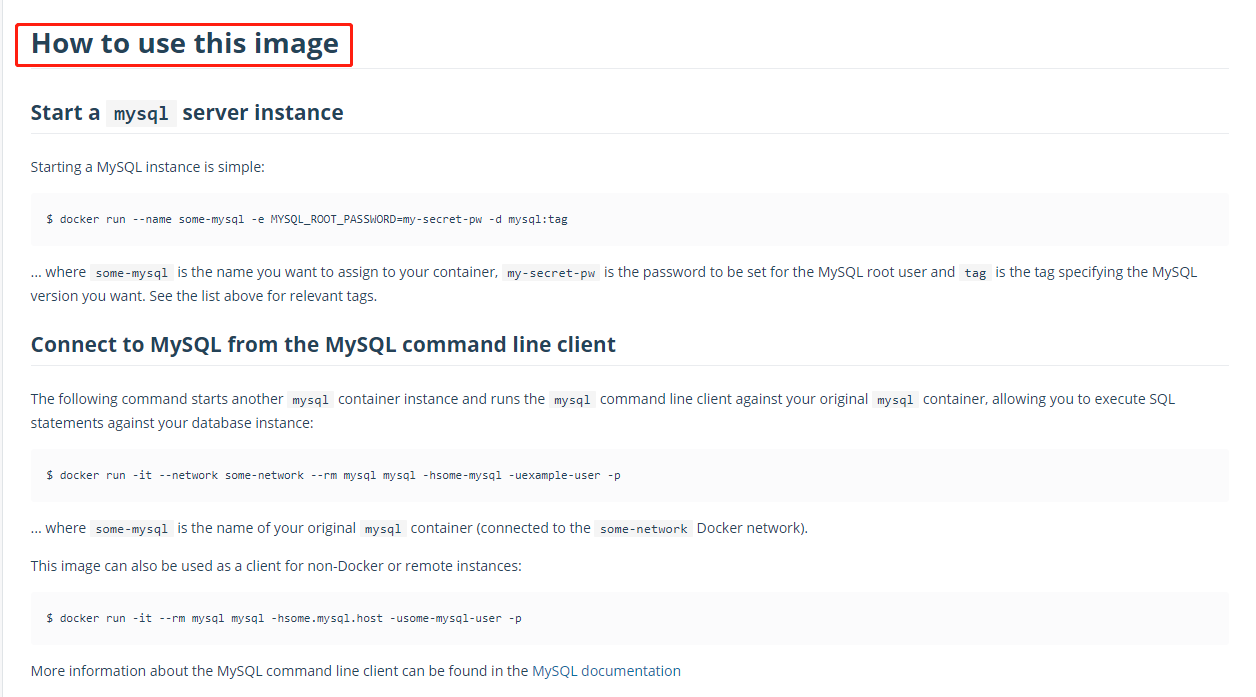
On the image page of Docker Hub, there are many examples of startup instructions for the image. You can refer to its startup instructions for parameter assembly.
For the convenience of later clusters, the startup command executed here is as follows:
[root@VM-0-12-centos v2]# docker run --name mysql01 -p 3306:3306 -v /app/config/mysql/v2/my.cnf:/etc/mysql/my.cnf -e MYSQL_ROOT_PASSWORD=123456 -d mysql:5.7
bc8c51a52d9c554be21c9d0a9c970a78791c8ce74c264bf59987ef1f5651f
Start command description:
- --name mysql01: Specifies the name of the container to be started, which cannot be repeated;
- -p 3306:3306: specify the access port of the application in the container and bind the port of the host so that the application in the container can be accessed through the host; (the first port is the host port, and the second port is the container application access port)
- -v /app/config/mysql/v2/my.cnf:/etc/mysql/my.cnf: plug-in file. Here, the MySQL configuration file started by docker is plug-in outside the host to facilitate the modification of the configuration file; (when the container is restarted, the specified plug-in files will be copied into the container and then started)
- -e MYSQL_ROOT_PASSWORD=123456: specify the connection password for mysql startup;
- -d: Start in background mode (start in daemon mode) to keep the program running all the time, otherwise the application will be closed after starting;
After the startup is completed, the container ID (bc8c51a52d9c554be21c9d0a9c970a78791c8ce74c264bf59987ef1f5651f) will be printed out. The high probability is that the startup is successful. You can view the launched container through 'docker ps'. If you can query your own application, it is successful!
[root@VM-0-12-centos redis]# docker ps
CONTAINER ID        IMAGE               COMMAND                  CREATED             STATUS              PORTS                               NAMES
81919b89283d        redis               "docker-entrypoint..."   58 minutes ago      Up 50 minutes       0.0.0.0:6379->6379/tcp              redis01
ced841c7f584        mysql:5.7           "docker-entrypoint..."   About an hour ago   Up About an hour    33060/tcp, 0.0.0.0:3307->3306/tcp   mysql02
bc8c51a52d9c        mysql:5.7           "docker-entrypoint..."   About an hour ago   Up About an hour    0.0.0.0:3306->3306/tcp, 33060/tcp   mysql01
If it is not started successfully, you can view the started container through 'docker ps -a' and the container log through 'docker logs container ID' to locate the reason;
3, MySQL connection usage
After the above steps are completed, you can use MySQL tool to connect the database and use the database
4, Build master-slave
According to the second step above, restart a mysql container service. Note that the container name, mapping port and plug-in configuration file should be changed
docker run --name mysql02 -p 3307:3306 -v /app/config/mysql/v2/my.cnf:/etc/mysql/my.cnf -e MYSQL_ROOT_PASSWORD=123456 -d mysql:5.7
ced841c7f584976554be21c9d0a9c970a78791c8ce74c264bf59987ef1fxetew
Start setting up master-slave replication:
1. Modify the configuration file of mysql01 host / APP / config / MySQL / V1 / my cnf
!includedir /etc/mysql/conf.d/
!includedir /etc/mysql/mysql.conf.d/
[mysqld]
# The same LAN should be unique
server-id=1
# Enable binary log function
log-bin=mysql-bin
Restart mysql01 container after modification
docker restart bc8c51a52d9c
2. Create the user and password used by slave replication and grant replication permission (you can use MySQL connection tool to connect and execute statements)
CREATE USER 'slave'@'%' IDENTIFIED BY '123456';
GRANT REPLICATION SLAVE, REPLICATION CLIENT ON *.* TO 'slave'@'%';

3. View mysql01 host binary log file name and copy location
show master status;
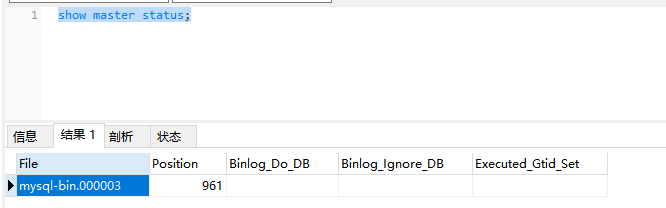
When the slave copy operation is not completed, please do not perform any operation on the host, otherwise the Position will change, and the slave copy operation will fail!
4. Execute the following command on mysql02 slave to start synchronous replication
change master to master_host='172.17.0.1', master_user='slave', master_password='123456', master_port=3306, master_log_file='mysql-bin.000003', master_log_pos=961, master_connect_retry=30;

start slave;
explain:
- master_host: the IP of msyql host server;
- master_user: copy user name;
- master_password: copy the password;
- master_port: access port of msyql host service;
- master_log_file: name of msyql binary log file; (use the result value file of the query in step 3)
- master_log_pos: the starting Position of the log file when copying starts; (use the result value Position of the query in step 3)
- master_connect_retry: the time interval between retries if the connection fails. The unit is seconds. The default is 60 seconds;
5. Check whether the synchronous replication of slave configuration is successful
Use 'show slave status' to view the replication status information of the slave. If both SlaveIORunning and slavesqlrrunning are Yes, it indicates that the master-slave replication is successfully set up

6. Practical operation verification