preface
This tutorial has been tested by practice for five times, and there will be various errors each time. However, it should not be a problem to install more times and find out the reasons more Baidu. The last installation takes 1 hour
There are no virtual machines, centos7 images and Oracle 11 installation packages. I've provided them to you. You're welcome
Link: https://pan.baidu.com/s/1zRcf959F3X2mJ5lfmZUY_A Extraction code: uh0z
Environmental preparation
1.CentOS7 / CentOS8 64 bit virtual machine environment with minimal installation requires graphical desktop
Prepare graphical desktop
Before installing oracle, Centos needs to install the desktop environment. If your machine has installed the desktop environment at the beginning, you can ignore this step. After I install the system here, the default is the command line interface. At this time, I need to manually install the user graphical interface.
Check the current operation level and the group s that can be installed:
[root@localhost ~]# systemctl get-default
[root@localhost ~]# yum grouplist
Install the GNOME package from the command line, which takes a long time:
[root@localhost ~]#yum groupinstall "GNOME Desktop" "Graphical Administration Tools"
# The running level of the update system is graphical Target, set the default startup graphical interface:
[root@localhost ~]#systemctl set-default graphical.target
[root@localhost ~]#ln -sf /lib/systemd/system/graphical.target /etc/systemd/system/default.target
[root@localhost ~]#systemctl get-default  #Check it
Restart the system reboot, and then you can enter the graphical interface and set the login password, language and time zone of ordinary users according to the prompts.
2.Oracle 11gR2 64 bit Linux Installation Package
Download the two installation packages
linux.x64_11gR2_database_1of2.zip
linux.x64_11gR2_database_2of2.zip
setup script
1. Turn off the firewall
[root@localhost ~]# systemctl stop firewalld.service
[root@localhost ~]# systemctl disable firewalld.service

[root@localhost etc]# vim /etc/selinux/config
 take SELINUX=active Change to SELINUX=disabled,Save exit
2. Install dependent packages
Execute the following command to install the dependent package.
[root@localhost ~]# yum install -y automake autotools-dev binutils bzip2 elfutils expat \
gawk gcc gcc-multilib g++-multilib lib32ncurses5 lib32z1 \
ksh less lib32z1 libaio1 libaio-dev libc6-dev libc6-dev-i386 \
libc6-i386 libelf-dev libltdl-dev libodbcinstq4-1 libodbcinstq4-1:i386 \
libpth-dev libpthread-stubs0-dev libstdc++5 make openssh-server rlwrap \
rpm sysstat unixodbc unixodbc-dev unzip x11-utils zlibc unzip cifs-utils \
libXext.x86_64  glibc.i686
If the above command reports an error, directly the following command.
[root@localhost ~]# yum -y install xz wget gcc-c++ ncurses ncurses-devel \
cmake make perl openssl openssl-devel gcc* libxml2 \
libxml2-devel curl-devel libjpeg* libpng* freetype* \
make gcc-c++ cmake bison perl perl-devel  perl perl-devel \
glibc-devel.i686 glibc-devel libaio readline-devel \
zlib.x86_64 zlib-devel.x86_64 libcurl-* net-tool*  \
sysstat lrzsz dos2unix telnet.x86_64 iotop unzip \
ftp.x86_64 xfs* expect vim psmisc openssh-client* \
libaio bzip2  epel-release automake binutils bzip2 \
elfutils expat gawk gcc  ksh less make openssh-server \
rpm sysstat unzip unzip cifs-utils libXext.x86_64  \
glibc.i686 binutils compat-libstdc++-33 \
elfutils-libelf elfutils-libelf-devel \
expat gcc gcc-c++ glibc glibc-common \
glibc-devel glibc-headers libaio \
libaio-devel libgcc libstdc++ libstdc++-devel \
make sysstat unixODBC unixODBC-devel libnsl
3. Create oracle user
1.[root@localhost etc]# groupadd oinstall
2.[root@localhost etc]# groupadd dba
# Add an oracle user whose initial group is oinstall to control the installation of software and patches; The additional group is dba, which is responsible for controlling the creation and management of database
3.[root@localhost etc]# useradd -g oinstall -G dba -m oracle
4.[root@localhost etc]# passwd oracle
 Change user oracle Your password.
New password:
Invalid password: password is less than 8 characters
 Re enter the new password:
passwd: All authentication tokens have been successfully updated.
5.[root@localhost etc]# groups oracle
oracle : oinstall dba
6.[root@localhost etc]# id oracle
uid=1001(oracle) gid=1001(oinstall) group=1001(oinstall),1002(dba)
After the above command is executed, set the password for oracle users. For example, the password I set here is 123456
#oracle is the database installation directory, and oraInventory stores all logs
[root@localhost data]# mkdir oracle
[root@localhost data]# mkdir oraInventory
[root@localhost data]# ls
oracle oraInventory
4. Unzip the Oracle database installation package
Upload the Oracle 11gR2 installation files (which can be uploaded using sftp) to the operation directory / data, and then extract the installation files to the directory in sequence.
[root@localhost data]# unzip linux.x64_11gR2_database_1of2.zip
[root@localhost data]# unzip linux.x64_11gR2_database_2of2.zip
#Automatically generated installation package directory database after extracting the installer
[root@localhost data]# ls
database  oracle  oraInventory
# And grant them the group to which the user belongs
[root@localhost src]# chown -R oracle:oinstall data/
# Authorize all files under data
[root@localhost src]# chmod -R 777 data/
5. Modify the operating system configuration
1. Write the server name to the hosts file to test whether ping sername returns 127.0.0.1
[root@localhost data]# echo '192.168.80.12 localhost localhost.localdomain' >> /etc/hosts
2. Set restrictions on oracle users to improve software performance
[root@localhost data]# vim /etc/security/limits.conf
 Add the following configuration items at the end of the file.
oracle soft nproc 2047
oracle hard nproc 16384
oracle soft nofile 1024
oracle hard nofile 65536
oracle soft stack 10240
oracle soft core unlimited
oracle hard core unlimited
oracle soft memlock 50000000
oracle hard memlock 50000000
3. Modify user login authentication
# Add two items
[root@localhost ~] vim /etc/pam.d/login
session required /lib64/security/pam_limits.so
session required pam_limits.so
4. Modify environment variables
Set environment variables (ORACLE_HOME is set as the default directory under the installation directory product)
After the default installation is completed, it is displayed in product/11.2.0/dbhome_1. If there is any difference, go back and modify
[root@localhost ~] vim /etc/profile
#oracle
export ORACLE_HOME=/usr/local/src/data/oracle/product/11.2.0/dbhome_1
export ORACLE_SID=orcl
if [ $USER = "oracle" ]; then
if [ $SHELL = "/bin/ksh" ]; then
ulimit -p 16384
ulimit -n 65536
else
ulimit -u 16384 -n 65536
fi
fi

[root@localhost ~] source /etc/profile
5. Modify Oracle user environment variables
[root@localhost ~] vim ~/.bash_profile

Add the following configuration items at the end of the file
export ORACLE_BASE=/usr/local/src/data/oracle
export ORACLE_HOME=$ORACLE_BASE/product/11.2.0/dbhome_1
export ORACLE_SID=orcl
export ORACLE_UNQNAME=orcl
export NLS_LANG=.AL32UTF8
export PATH=${PATH}:${ORACLE_HOME}/bin/:$ORACLE_HOME/lib64
export LD_LIBRARY_PATH=$ORACLE_HOME/lib:/lib:/usr/lib
export NLS_LANG=AMERICAN_AMERICA.ZHS16GBK

# Make the environment variable effective.
[root@localhost ~] source ~/.bash_profile
------------------------The preparation conditions have been completed and the installation is started---------------------------------------
Prepare for installation
- Installing Oracle from the desktop
Use the oracle user to log in to the desktop, open the terminal and run the installer
The DISPLAY variable is used to set where the graphics are displayed For example, CENTOS, you log in with the graphical interface, and DISPLAY is automatically set to DISPLAY=:0.0, which means to explicitly connect to the local monitor. Then go in through the terminal tool (e.g. xshell) and run the program of the graphical interface. If it is not set, the system does not allow the program to start.
[oracle@localhost database]$ su - root
Password:
Last login: Mon Apr 26 15:27:31 CST 2021 on pts/1
[root@localhost ~]# DISPLAY=:0.0
[root@localhost ~]# export DISPLAY
[root@localhost ~]# echo $DISPLAY
:0.0

# After executing the xhost + command (so that all customers can access it)
[root@localhost ~]# xhost
access control enabled, only authorized clients can connect
SI:localuser:root
[root@localhost ~]# xhost +
access control disabled, clients can connect from any host

Switch to oracle user
[root@localhost ~]# su - oracle
 Last login: April 26-15:33:42 CST 2021pts/1 upper
[oracle@oracle ~]$ DISPLAY=:0.0
[oracle@localhost ~]$ export DISPLAY
[oracle@localhost ~]$ echo $DISPLAY
:0.0
Really ready to start the installation
[oracle@localhost ~]$ cd /usr/local/src/data/database
# Modify the code temporarily, otherwise it will be garbled
[oracle@localhost database]$ export LANG=en_US.UTF-8
# Display the pop-up box. If it is not set, the pop-up box is particularly ugly
[oracle@localhost database]$ ./runInstaller -jreLoc /etc/alternatives/jre_1.8.0
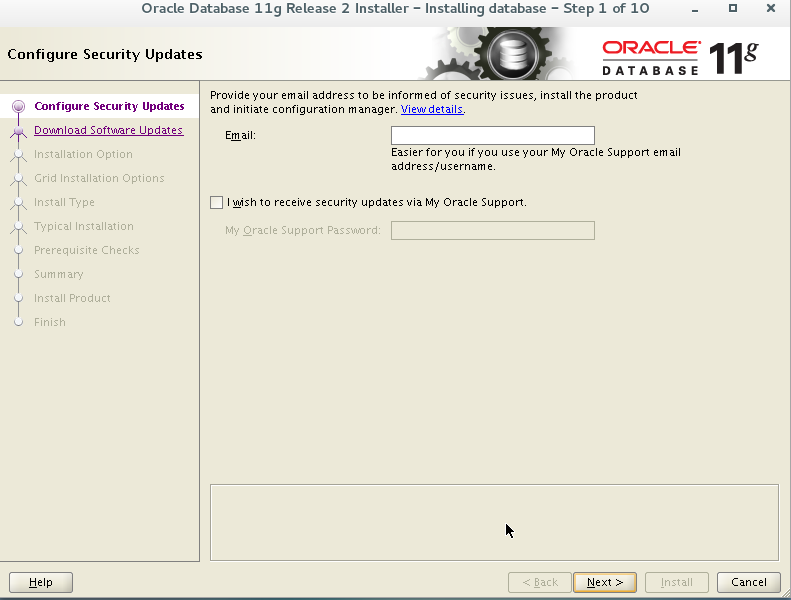
setup script
1. If you subscribe to e-mail, you can skip it and don't fill it in
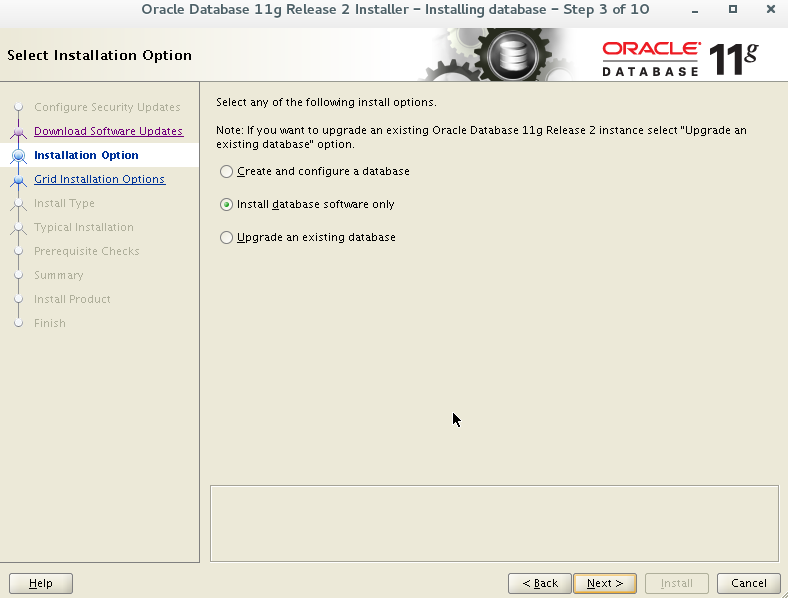
2. Select install database only here and configure initialization data later.
3. Select single instance installation.

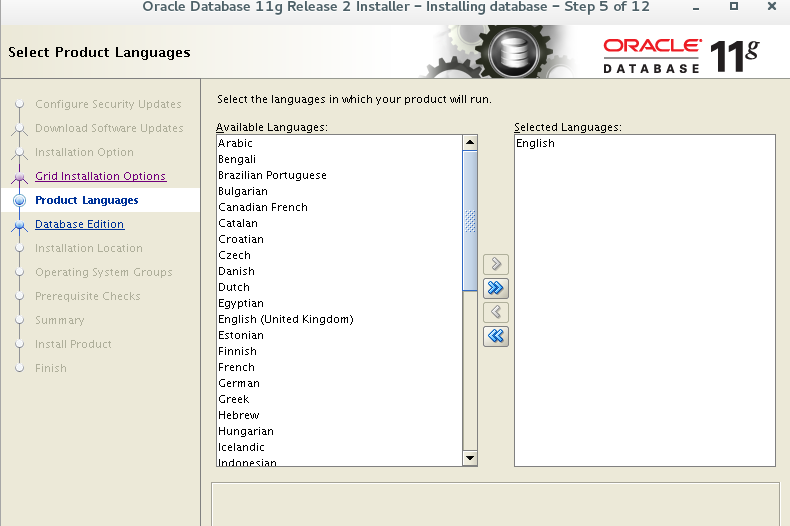
4. Default English
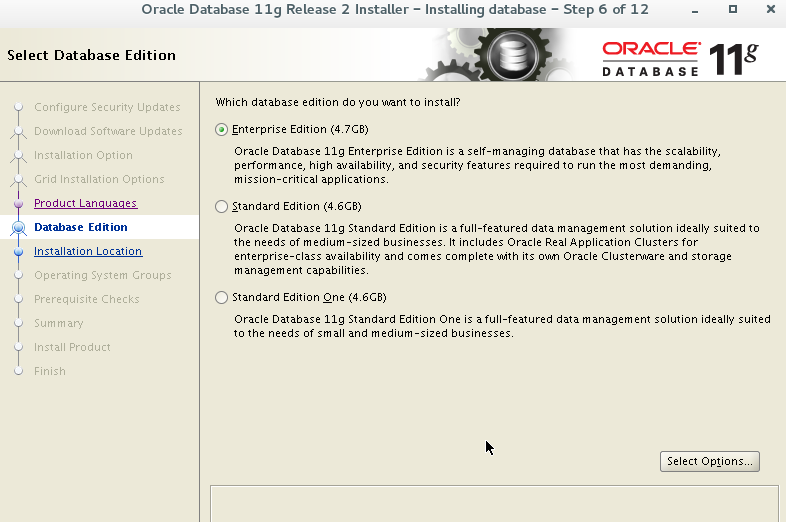
5. Default
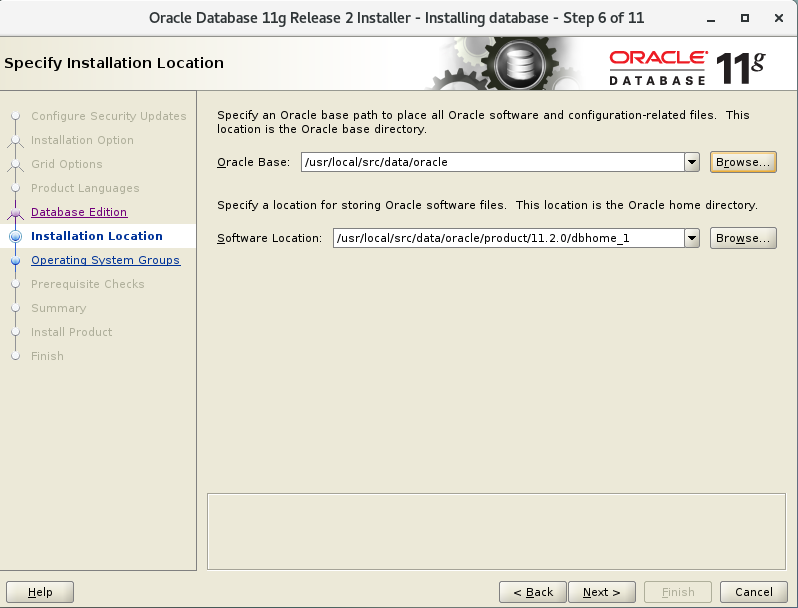
6. The corresponding directory information created at the beginning appears here and will be read automatically; If you don't remember to modify the path
7. Default
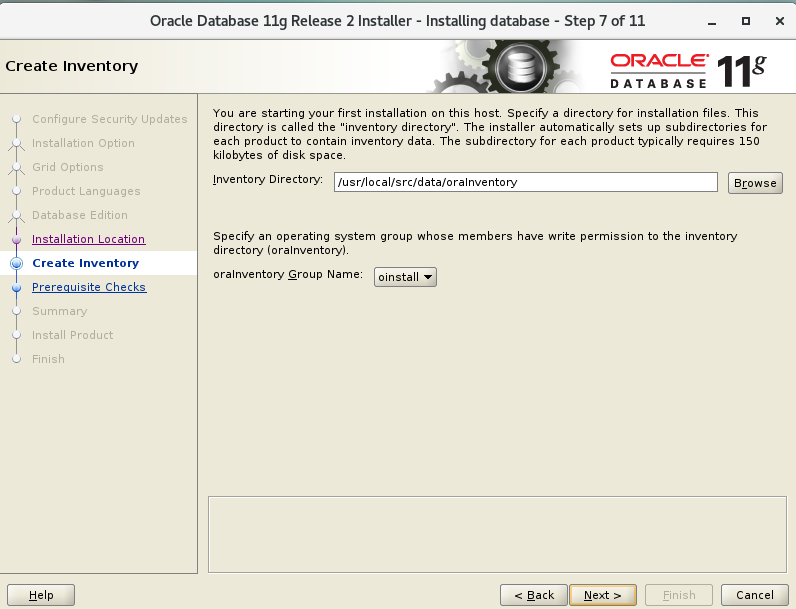
8. Select group as the previously created oinstall

9. Ignore these prompts directly (check ignore all)
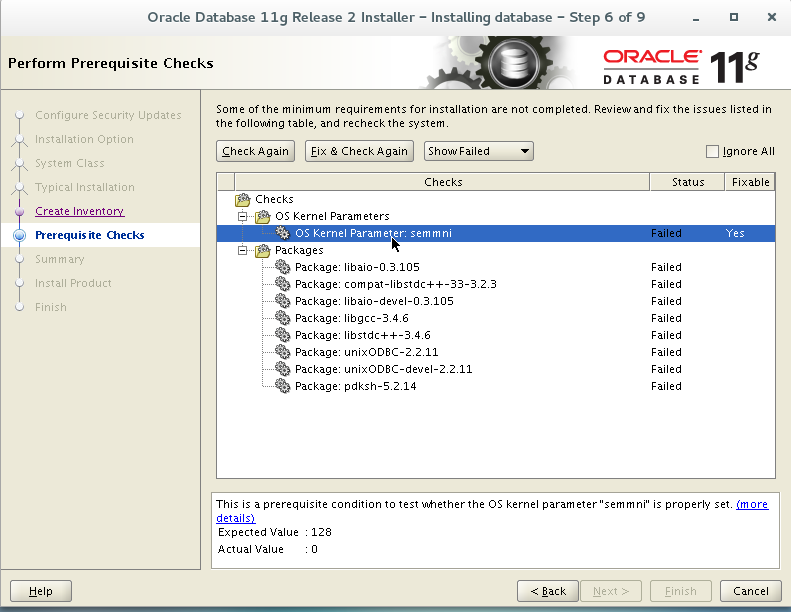
10. Ignore warnings directly
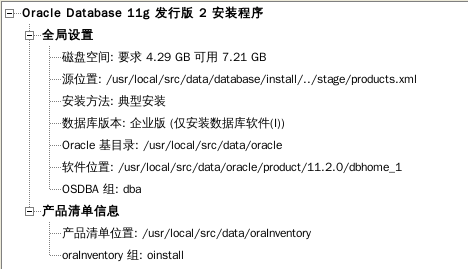

11 waiting for completion

Error: OUI-10182 The effective user ID does not match the owner of the file
Solution: use the root account to create the file orainst under / etc LOC and write the following:
[root@localhost etc]$ touch oraInst.loc
[root@localhost etc]$ vim oraInst.loc
inventory_loc=/usr/local/src/data/oraInventory(oraInventory (directory)
inst_group=oinstall
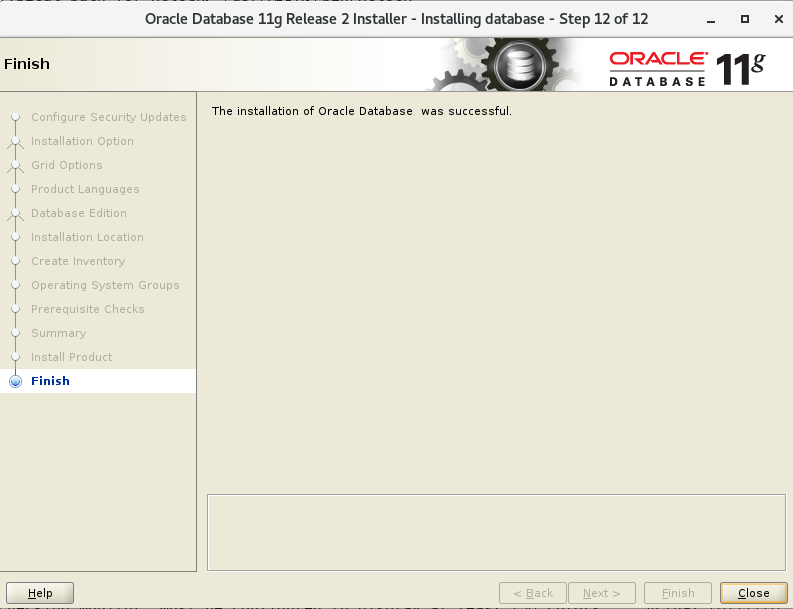
-------------------------This completes the installation, and then proceed to the configuration-------------------------------
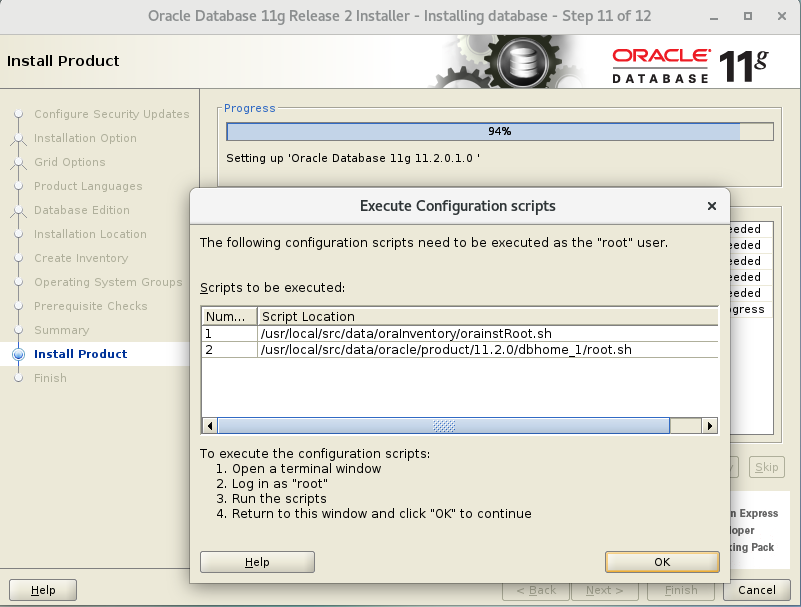
The installation is complete and the configuration is ready
According to the information prompt of the previous step, execute the following two lines of commands. The specific location needs to be determined according to your installation location:
[root@localhost ~]$ /usr/local/src/data/oraInventory/orainstRoot.sh
[root@localhost ~]$ /usr/local/src/data/oracle/product/11.2.0/dbhome_1/root.sh
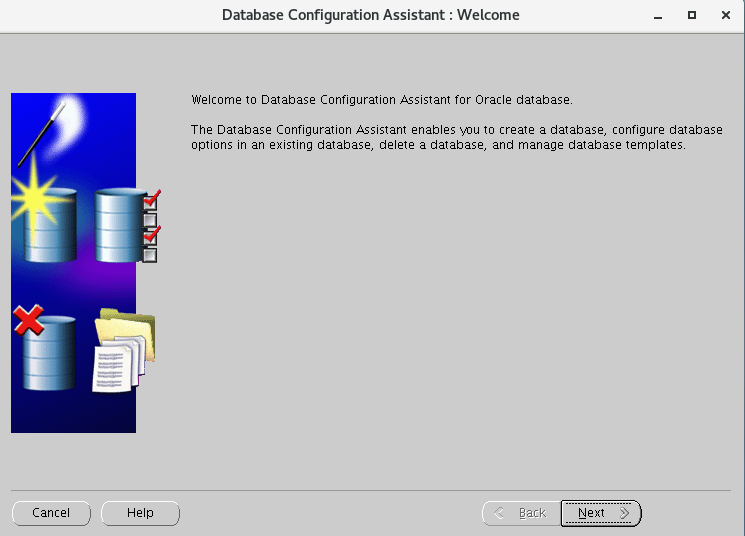
After the installation is completed, you need to create a database. In the same Oracle user desktop environment, reopen a terminal and enter the dbca command to pop up the corresponding database creation wizard.
[root@localhost ~]# su - oracle
 Last login: April 26-15:33:42 CST 2021pts/1 upper
[oracle@localhost ~]$ DISPLAY=:0.0
[oracle@localhost ~]$ export DISPLAY
[oracle@localhost ~]$ echo $DISPLAY
:0.0
[oracle@localhost ~]$ export LANG=en_US.UTF-8
[oracle@localhost ~]$ dbca -jreLoc /etc/alternatives/jre_1.8.0
Error: bash: dbca: command not found
Solution: check the configuration file ~ /. When an error is reported bash_profile, add the oracle configuration file again
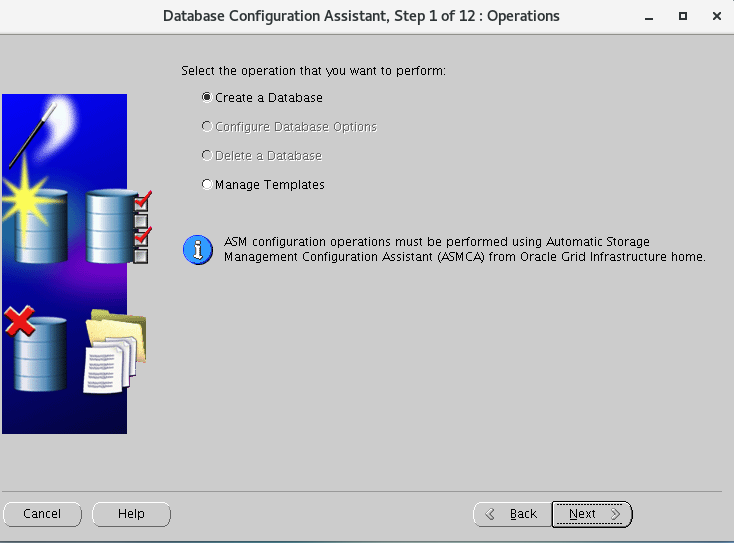
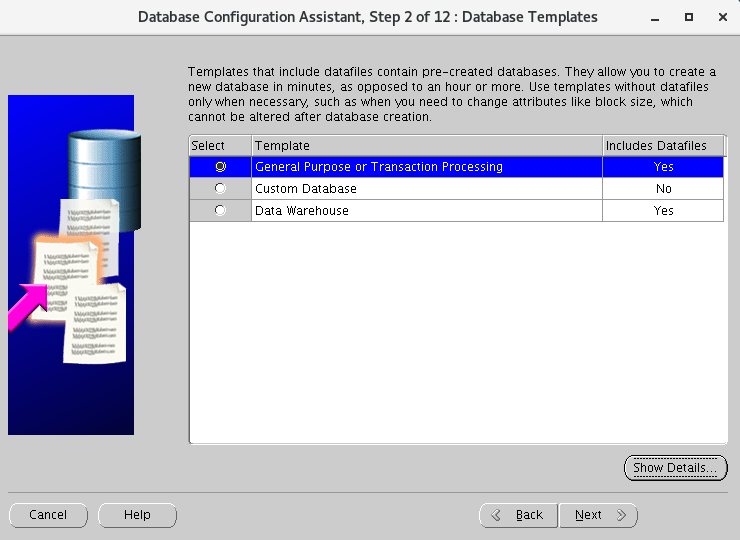
Select Create Database
Select the first row: general purpose or transaction
Line 2: custom database
Line 3: Data Warehouse
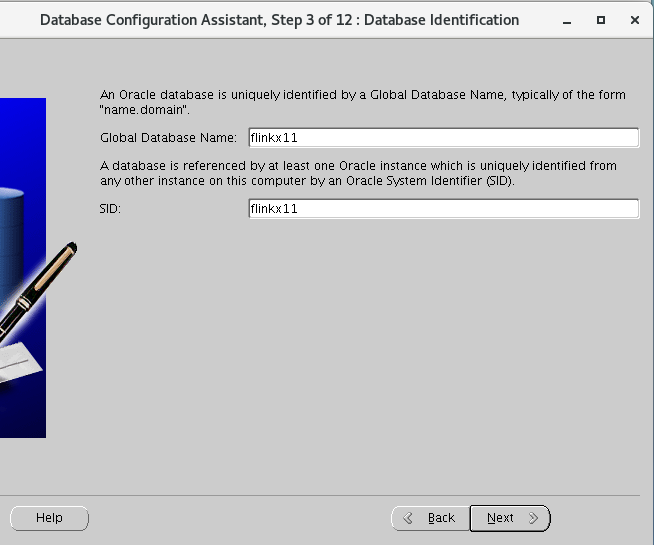
Fill in the global database and SID
No EM configuration, no resources

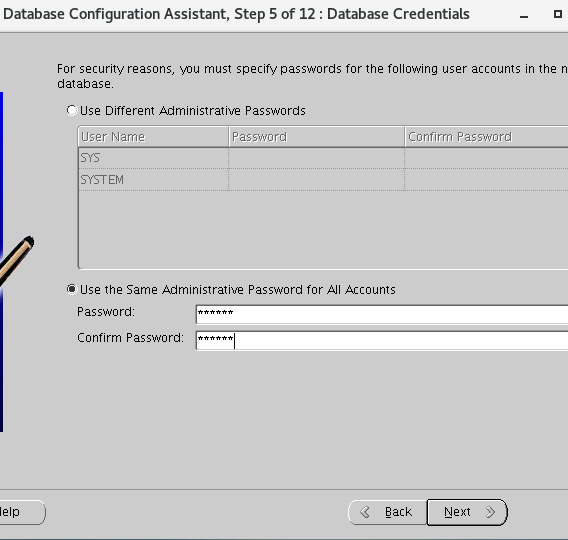
Select all accounts below to use the unified management command, or you can select different management commands above
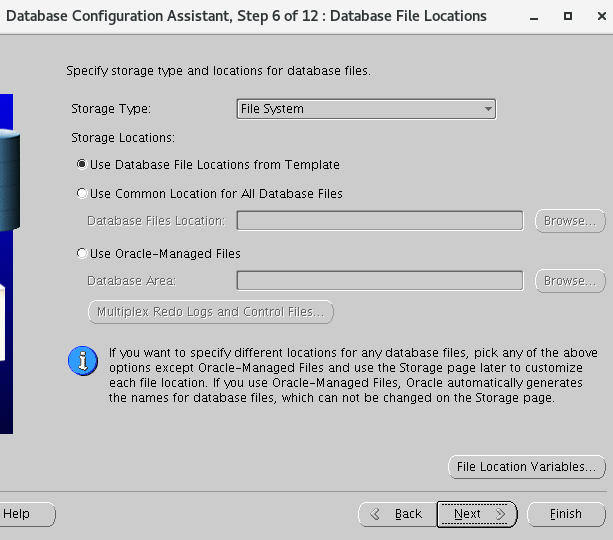
Use its default database file location
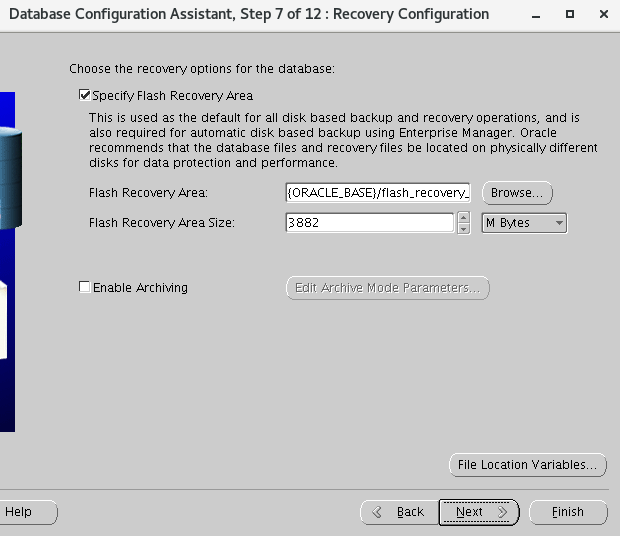
In the step of restoring the configuration, select the specified quick recovery area
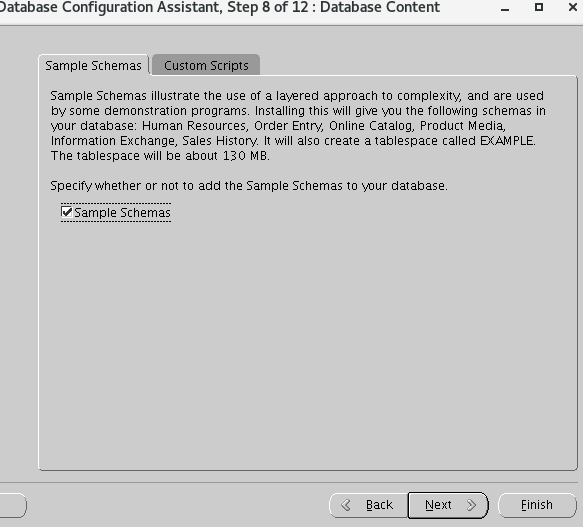
According to my own situation, I don't know what it means to add the instance scheme to the database, so I checked it
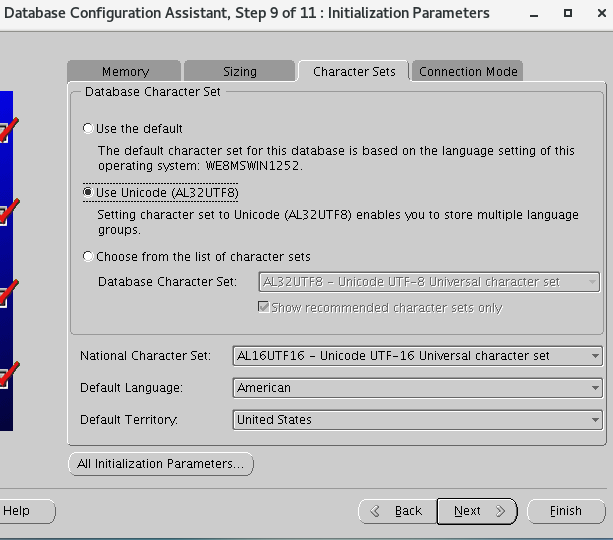
The above four: memory, resizing, character set and connection mode
It is better to use utf8 for character set (when there is Chinese, avoid garbled code)

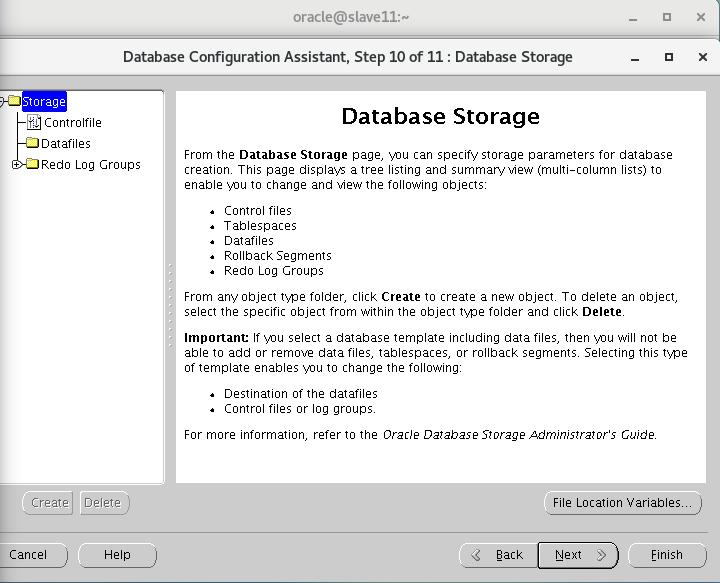
Database storage, direct to the next step
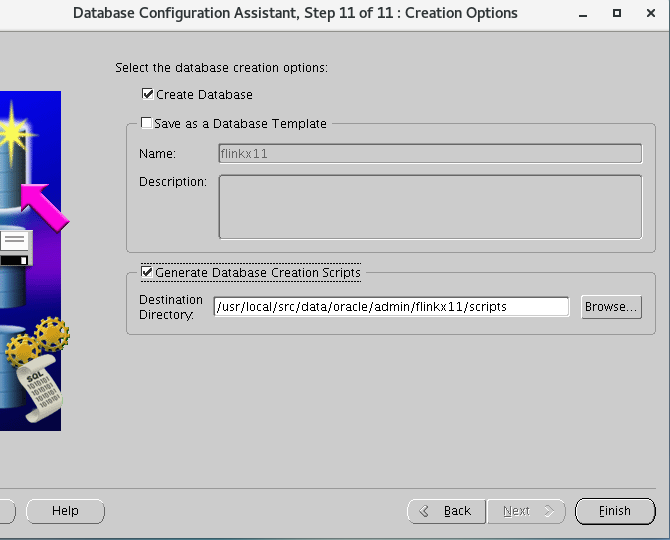
Select Create database and create database script
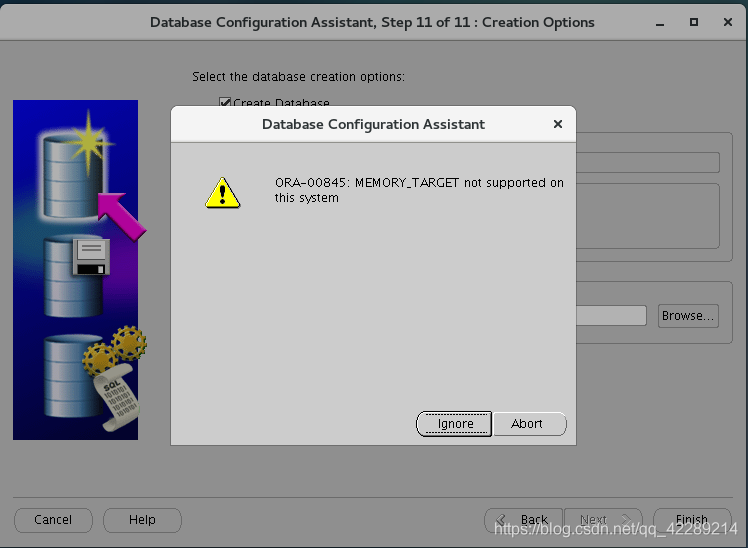
report errors:
Cause of failure:
New parameter memory for automatic memory management in oracle database 11g_ Target, which can automatically adjust SGA and PGA. This feature requires / dev/shm shared file system, and / dev/shm must be greater than MEMORY_TARGET, if / dev/shm is better than memory_ An error will be reported when target is small.
terms of settlement:
[root@localhost db_1]# vim /etc/fstab
 add to:
tmpfs /dev/shm tmpfs defaults,size=4G 0 0
[root@localhost db_1]# mount -a
[root@localhost db_1]# df -h
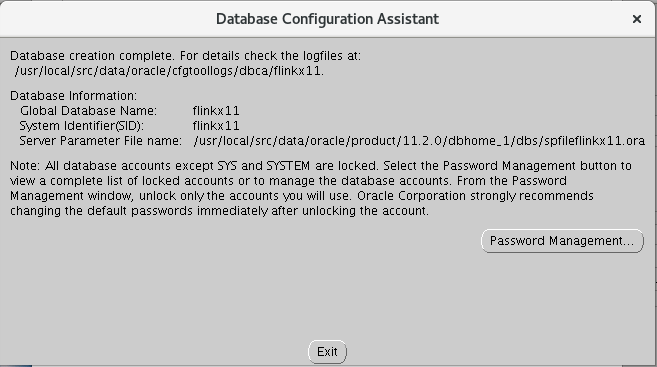
Click Password Management
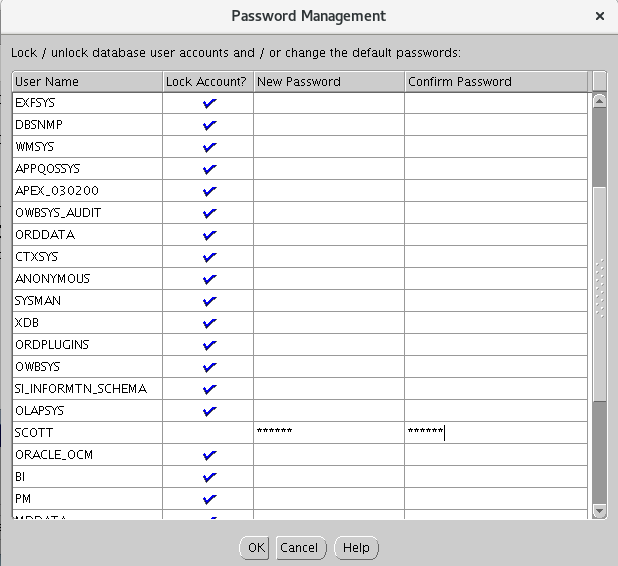
Unlock scott's account, remove the purple tick in front and enter the password. You can also enter the usual short password
--------------------------------------------It's done----------------------------------------------
Start database
1. Start the database
Start the installed database orcl.
Operating user oracle
 Start listening before remote connection
[oracle@localhost ~]# lsnrctl  start

The process of starting the database is as follows:
[oracle@localhost ~]# sqlplus /nolog

use dba Permission connection Oralce
SQL> connect / as sysdba

Start database
SQL> startup

Confirm the startup result:
ORACLE instance started.
Total System Global Area  534462464 bytes
Fixed Size                  2215064 bytes
Variable Size            373293928 bytes
Database Buffers          150994944 bytes
Redo Buffers                7958528 bytes
Database mounted.
Database opened.
2. Verify the database
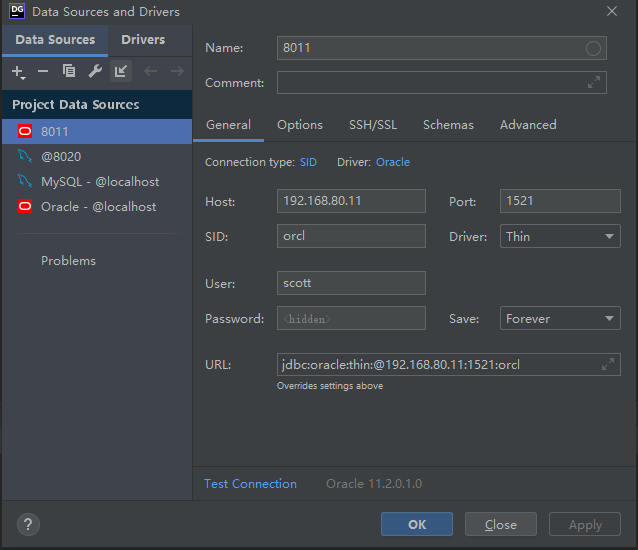
Here, we use DataGrid to connect to Oracle database, as shown below.
Here, the user name is scott and the password is 123456.
Next, click "connection test", as shown below.
report errors:
SQL> startup
ORA-01078: failure in processing system parameters
LRM-00109: could not open parameter file '/usr/local/src/data/oracle/product/11.2.0/dbhome_1/dbs/initorcl.ora'
solve:
If the solution doesn't work, try giving it to initorcl Ora authorization
[oracle@gettestlnx01 dbs]$ cd /usr/local/src/data/oracle/admin/flinkx11/pfile
[oracle@gettestlnx01 pfile]$ ls
init.ora.10262020153036
[oracle@gettestlnx01 pfile]$ cp init.ora.10262020153036 /usr/local/oracle/product/11.2.0/db_1/dbs/initorcl.ora
#If there is no initorcl Ora this file
Solution: set init ora. 10262020153036 after copying, rename it as initorcl Ora is enough
report errors:
SQL> startup
MEMORY_TARGET not supported on this system
New parameter memory for automatic memory management in oracle database 11g_ Target, which can automatically adjust SGA and PGA. This feature requires / dev/shm shared file system, and / dev/shm must be greater than MEMORY_TARGET, if / dev/shm is better than memory_ An error will be reported when target is small.
terms of settlement:
1.[root@localhost db_1]# df -h
 file system                 Capacity used available used% Mount point
devtmpfs                 1.9G     0  1.9G    0% /dev
tmpfs                    2.0G  1.1G  965M   53% /dev/shm
tmpfs                    1.9G   13M  1.9G    1% /run
tmpfs                    1.9G     0  1.9G    0% /sys/fs/cgroup
/dev/mapper/centos-root   17G   14G  3.6G   80% /
/dev/sda1               1014M  211M  804M   21% /boot
tmpfs                    378M   60K  378M    1% /run/user/0
/dev/sr0                 4.4G  4.4G     0  100% /run/media/root/CentOS 7 x86_64

2. #In order to ensure that the operating system can take effect after restart, the / etc/fstab file needs to be modified
[root@localhost db_1]# vim /etc/fstab
 add to:
tmpfs /dev/shm tmpfs defaults,size=4G 0 0
# Reload
3.[root@localhost db_1]# mount -a
[root@slave12 ~]# df -h
 file system                 Capacity used available used% Mount point
devtmpfs                 1.9G     0  1.9G    0% /dev
tmpfs                    4.0G  1.1G  3.0G   27% /dev/shm
tmpfs                    1.9G   13M  1.9G    1% /run
tmpfs                    1.9G     0  1.9G    0% /sys/fs/cgroup
/dev/mapper/centos-root   17G   14G  3.5G   80% /
/dev/sda1               1014M  211M  804M   21% /boot
tmpfs                    378M  8.0K  378M    1% /run/user/42
tmpfs                    378M     0  378M    0% /run/user/0

#If an error is still reported after adjustment, it means that / dev/shm is not big enough
Reference link:
https://blog.csdn.net/l1028386804/article/details/106313375/
https://www.cnblogs.com/hudong716/p/14705432.html
https://blog.csdn.net/csgd2000/article/details/100224722