1.Dubbo official website
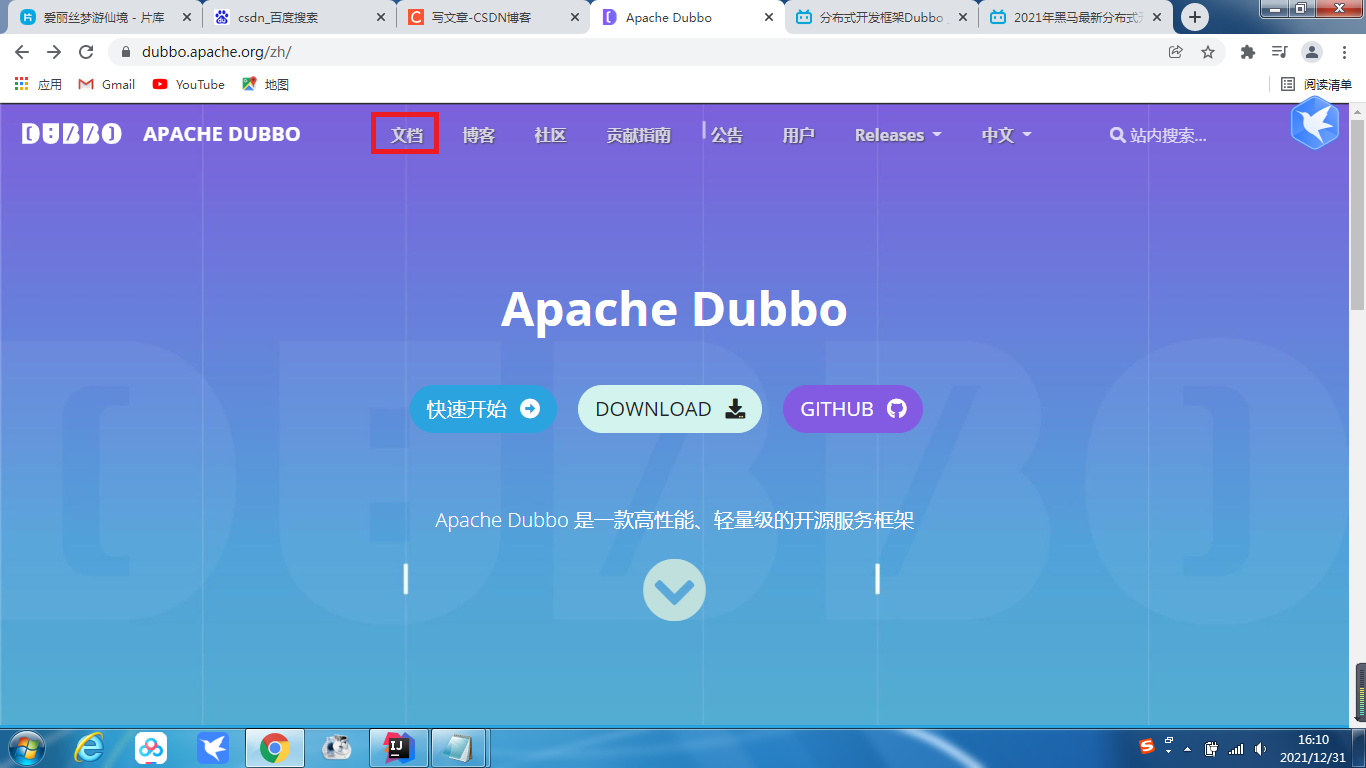
Dubbo official website home page
2. Click the document to have an in-depth understanding of dubbo;
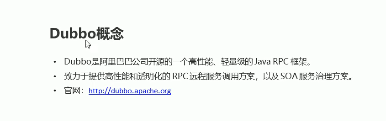
3. Introduction to Dubbo
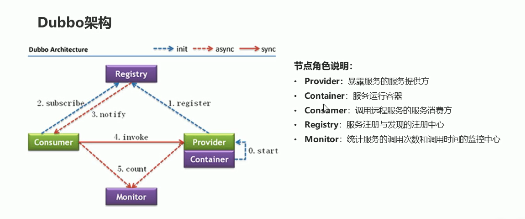
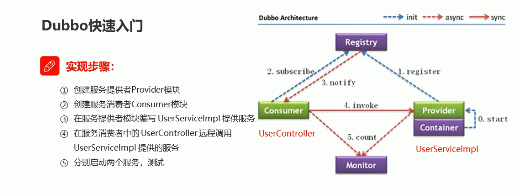
4. Dubbo architecture
5.Dubbo quick start
5.1 installation of zookeeper
Zookeeper is a registered software officially provided by Dubbo
(1) JDK installation
1) Before installing Zookeeper, you need to configure jdk7 or above in the system
jdk8 linux version
Download the corresponding version according to your own needs. What I download here is x64 tag. GZ compressed package
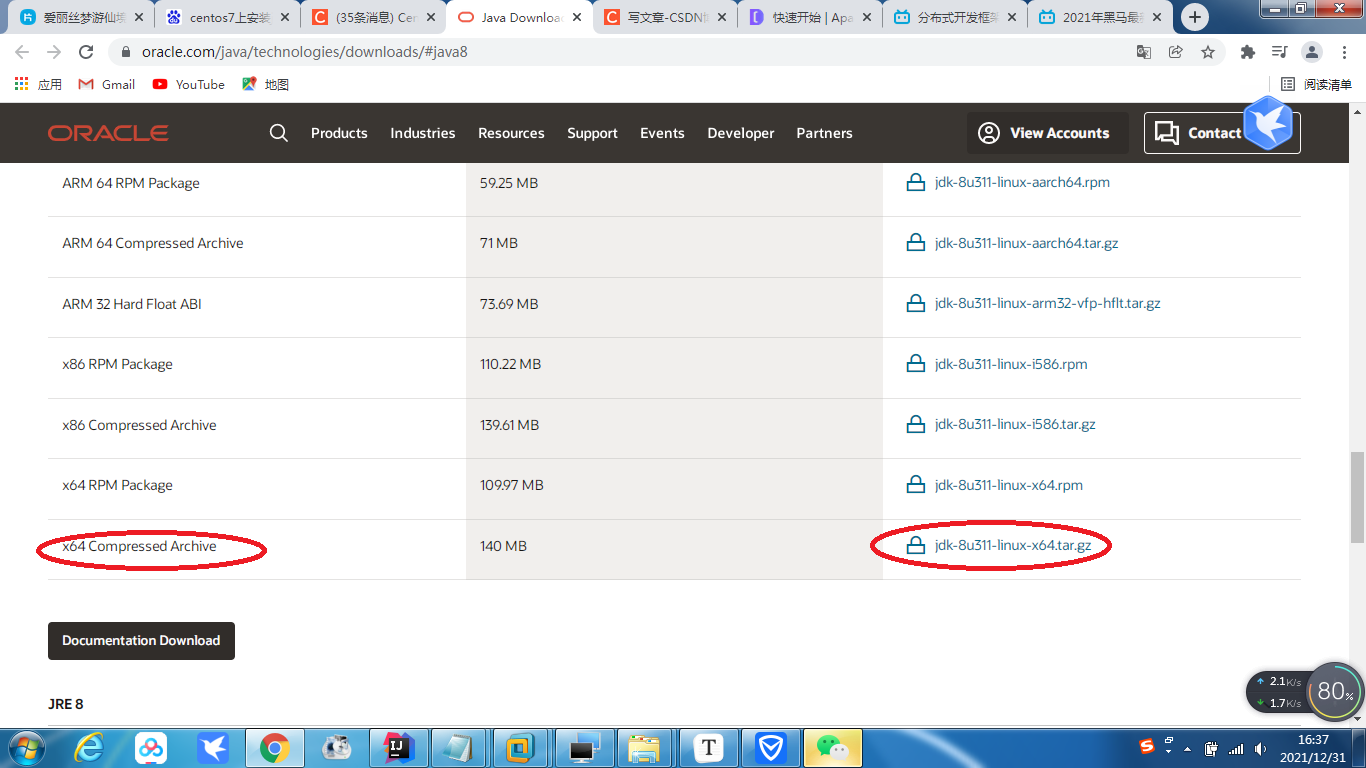
jdk8 Download
Link: https://pan.baidu.com/s/1FTSEoXzZboOdEhT40dlqsg
Extraction code: q230
2) The downloaded tar Upload the GZ compressed package to the linux server (I use CentOS 7 here)
3) Create a new java directory under / usr /; Upload the compressed package to / usr/java directory;
4) Extract to the current directory;
Decompression command: tar zxvf compressed package name (for example: tar zxvf jdk-8u311-linux-x64.tar.gz)
Delete command: rm -f compressed package name (for example, rm -f jdk-8u311-linux-x64.tar.gz)
After that, you can view the following directory

5) Next, the environment configuration
vi /etc/profile
Press insert or i to edit and add the following three lines:
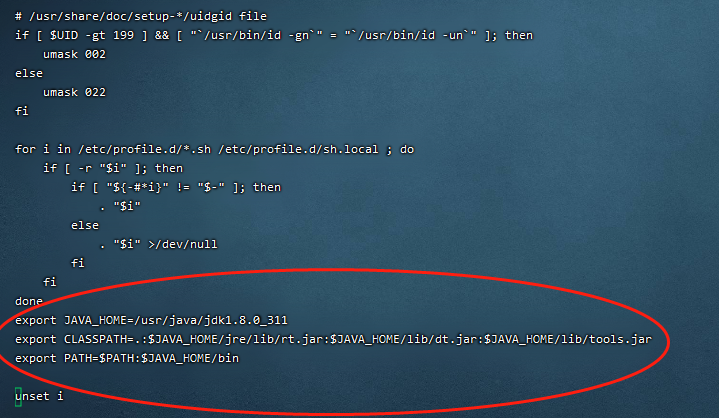
If you and I are the same file, you can copy my configuration;
export JAVA_HOME=/usr/java/jdk1.8.0_311
export CLASSPATH=.:$JAVA_HOME/jre/lib/rt.jar:$JAVA_HOME/lib/dt.jar:$JAVA_HOME/lib/tools.jar
export PATH=$PATH:$JAVA_HOME/bin
After editing,: wq save exit
6) Make the above configuration effective;
source /etc/profile
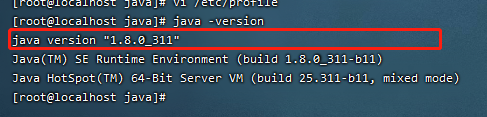
7) Test whether the installation is successful;
java -version #Test command
If the version number appears, it is proved to be successful, but if there is an error, check your jdk path configuration; Ensure that the path refers to the jdk file in the directory you just unzipped;
(2) Zookeeper installation
1) zookeeper installation package download
Link: https://pan.baidu.com/s/1ermCBTcnco7Ytec20foM4w
Extraction code: uhol
You can also go to the official website to download
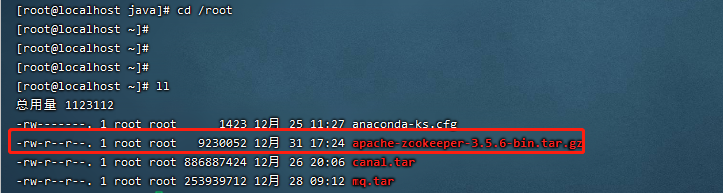
2) Upload to the server / root directory;
(1) Upload using the command line
#Upload zookeeper alt+p
put f:/setup/apache-zookeeper-3.5.6-bin.tar.gz
# f:/setup/apache-zookeeper-3.5.6-bin.tar.gz refers to the position of the compressed package on the machine, which can be adjusted according to your own needs
You can also upload files using visualization tools;
#Open the opt directory
cd /opt
#Create a zooKeeper directory
mkdir  zooKeeper
ll  #Check whether the directory was created successfully
cd ~  #Return to the root directory
#Move the zookeeper installation package to / opt/zooKeeper
mv apache-zookeeper-3.5.6-bin.tar.gz /opt/zooKeeper/
cd /opt/zooKeeper/
Unzip file
tar -zxvf apache-zookeeper-3.5.6-bin.tar.gz
To use, you also need to configure: first enter the file
cd apache-zookeeper-3.5.6-bin
ll   #Check which directories are included
cd conf/
cp zoo_sample.cfg zoo.cfg
Reopen a terminal:
cd /opt
cd zooKeeper/
mkdir zkdata
cd zkdata
pwd  #The zkdata full path is displayed, and Ctrl+C copy is selected
In the original first terminal:
vi zoo.cfg
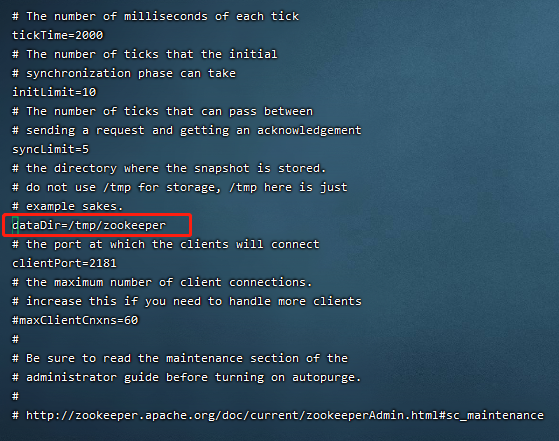
Replace the path marked in red above:
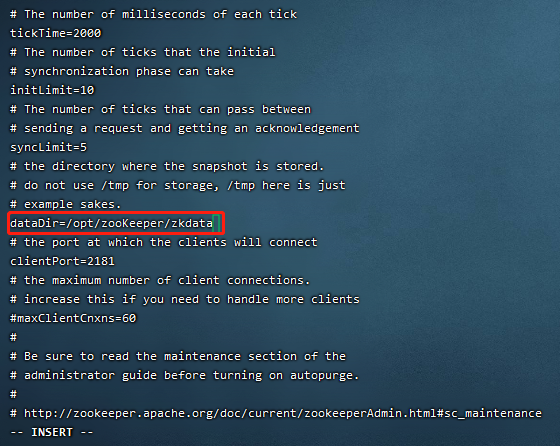
ESC: WQ save exit.
5.3 start zookpeer
cd /opt/zooKeeper/apache-zooKeeper-3.5.6-bin/bin/
ll  #Check whether there is zserver SH file exists
#start-up
 ./zkServer.sh  start
 #stop it
 ./zkServer.sh  stop
 #View status
  ./zkServer.sh status
The successful startup is as follows:

5.4 after zookeeper is started in the server, try coding locally in idea;
1) Create an Empty Project and change its name. My name here is Dubbo Pro;
2) Setting up jdk and maven
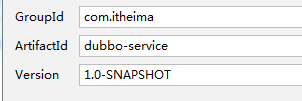
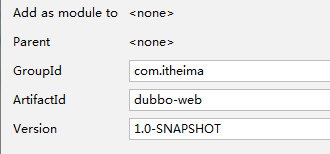
3) Create two maven modules
4) POM of Dubbo web and Dubbo service modules The following dependencies are introduced into the XML file:
    <properties>
        <spring.version>5.1.9.RELEASE</spring.version>
        <dubbo.version>2.7.4.1</dubbo.version>
        <zookeeper.version>4.0.0</zookeeper.version>

    </properties>

    <dependencies>
        <!-- servlet3.0 Canonical coordinates -->
        <dependency>
            <groupId>javax.servlet</groupId>
            <artifactId>javax.servlet-api</artifactId>
            <version>3.1.0</version>
            <scope>provided</scope>
        </dependency>
        <!--spring Coordinates of-->
        <dependency>
            <groupId>org.springframework</groupId>
            <artifactId>spring-context</artifactId>
            <version>${spring.version}</version>
        </dependency>
        <!--springmvc Coordinates of-->
        <dependency>
            <groupId>org.springframework</groupId>
            <artifactId>spring-webmvc</artifactId>
            <version>${spring.version}</version>
        </dependency>

        <!--journal-->
        <dependency>
            <groupId>org.slf4j</groupId>
            <artifactId>slf4j-api</artifactId>
            <version>1.7.21</version>
        </dependency>
        <dependency>
            <groupId>org.slf4j</groupId>
            <artifactId>slf4j-log4j12</artifactId>
            <version>1.7.21</version>
        </dependency>


        <!--Dubbo Start dependency, version 2.7 Later unified as rg.apache.dubb -->
        <dependency>
            <groupId>org.apache.dubbo</groupId>
            <artifactId>dubbo</artifactId>
            <version>${dubbo.version}</version>
        </dependency>
        <!--ZooKeeper Client implementation -->
        <dependency>
            <groupId>org.apache.curator</groupId>
            <artifactId>curator-framework</artifactId>
            <version>${zookeeper.version}</version>
        </dependency>
        <!--ZooKeeper Client implementation -->
        <dependency>
            <groupId>org.apache.curator</groupId>
            <artifactId>curator-recipes</artifactId>
            <version>${zookeeper.version}</version>
        </dependency>

    </dependencies>


    <build>
        <plugins>
            <!--tomcat plug-in unit-->
            <plugin>
                <groupId>org.apache.tomcat.maven</groupId>
                <artifactId>tomcat7-maven-plugin</artifactId>
                <version>2.1</version>
                <configuration>
                    <port>8000</port>
                    <path>/</path>
                </configuration>
            </plugin>
        </plugins>
    </build>
If dependency cannot be imported, you can try to change the next version number; However, to ensure that the large version remains unchanged, the small version can be slightly changed;
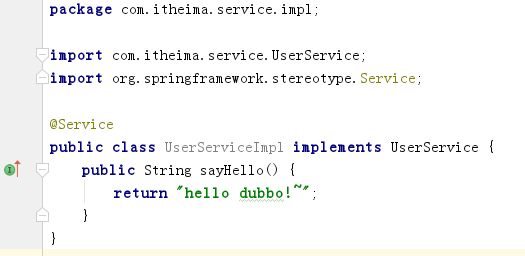
5) Create a new package in the src/main/java directory of the Dubbo service module: com itheima. Service, create a new UserService interface under this package;
Then on COM itheima. Create an impl package under Service, and then create a UserServiceImpl implementation class under this package to implement the UserService interface; And add @ Service to this implementation class
6) Under the resources of Dubbo service, you can create a new spring directory, and then create an ApplicationContext under the spring directory XML file; Introduce the following code into the file:
<?xml version="1.0" encoding="UTF-8"?>
<beans xmlns="http://www.springframework.org/schema/beans"
	xmlns:xsi="http://www.w3.org/2001/XMLSchema-instance"
	xmlns:dubbo="http://dubbo.apache.org/schema/dubbo"
	xsi:schemaLocation="
		http://www.springframework.org/schema/beans http://www.springframework.org/schema/beans/spring-beans.xsd
        http://dubbo.apache.org/schema/dubbo http://dubbo.apache.org/schema/dubbo/dubbo.xsd
	">


</beans>
7) Under the resources of Dubbo service, create a new log4j Properties file;
Write the following:
# DEBUG < INFO < WARN < ERROR < FATAL
# Global logging configuration
log4j.rootLogger=info, stdout,file
# My logging configuration...
#log4j.logger.com.tocersoft.school=DEBUG
#log4j.logger.net.sf.hibernate.cache=debug
## Console output...
log4j.appender.stdout=org.apache.log4j.ConsoleAppender
log4j.appender.stdout.layout=org.apache.log4j.PatternLayout
log4j.appender.stdout.layout.ConversionPattern=%5p %d %C: %m%n

log4j.appender.file=org.apache.log4j.FileAppender
log4j.appender.file.File=../logs/iask.log
log4j.appender.file.layout=org.apache.log4j.PatternLayout
log4j.appender.file.layout.ConversionPattern=%d{yyyy-MM-dd HH:mm:ss}  %l  %m%n
8) In resources / spring / ApplicationContext. Of Dubbo service XML file, add package scanning to scan the newly created package file;
<context:component-scan base-package="com.itheima.service"/>
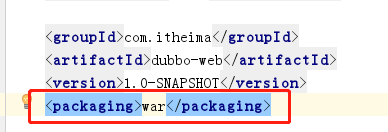
9) In the POM of Dubbo web module Add the packaging method war to the XML file
10) Create a new webapp directory in the src/main / folder of the Dubbo web module, a new WEB-INF directory in this directory, and a new web XML file, write the following contents;
<?xml version="1.0" encoding="UTF-8"?>
<web-app xmlns:xsi="http://www.w3.org/2001/XMLSchema-instance"
         xmlns="http://java.sun.com/xml/ns/javaee"
         xsi:schemaLocation="http://java.sun.com/xml/ns/javaee http://java.sun.com/xml/ns/javaee/web-app_2_5.xsd"
         version="2.5">


	<!-- spring -->
    <context-param>
        <param-name>contextConfigLocation</param-name>
        <param-value>classpath*:spring/applicationContext*.xml</param-value>
    </context-param>
    <listener>
        <listener-class>org.springframework.web.context.ContextLoaderListener</listener-class>
    </listener>

	<!-- Springmvc -->
    <servlet>
        <servlet-name>springmvc</servlet-name>
        <servlet-class>org.springframework.web.servlet.DispatcherServlet</servlet-class>
        <!-- Specify the configuration file to load through parameters contextConfigLocation load-->
        <init-param>
            <param-name>contextConfigLocation</param-name>
            <param-value>classpath:spring/springmvc.xml</param-value>
        </init-param>
    </servlet>

    <servlet-mapping>
        <servlet-name>springmvc</servlet-name>
        <url-pattern>*.do</url-pattern>
    </servlet-mapping>


</web-app>
11) In the POM of Dubbo web module Add module dependencies on Dubbo service in the XML file:
        <dependency>
            <groupId>com.itheima</groupId>
            <artifactId>dubbo-service</artifactId>
            <version>1.0-SNAPSHOT</version>
        </dependency>
12) In the resources directory of the Dubbo web module, create a new spring directory and log4j Properties file, and create a new springmvc XML file. The file contents are as follows:
<?xml version="1.0" encoding="UTF-8"?>
<beans xmlns="http://www.springframework.org/schema/beans"
       xmlns:xsi="http://www.w3.org/2001/XMLSchema-instance"
       xmlns:dubbo="http://dubbo.apache.org/schema/dubbo"
       xmlns:mvc="http://www.springframework.org/schema/mvc"
       xmlns:context="http://www.springframework.org/schema/context"
       xsi:schemaLocation="http://www.springframework.org/schema/beans http://www.springframework.org/schema/beans/spring-beans.xsd
        http://www.springframework.org/schema/mvc http://www.springframework.org/schema/mvc/spring-mvc.xsd
         http://dubbo.apache.org/schema/dubbo http://dubbo.apache.org/schema/dubbo/dubbo.xsd http://www.springframework.org/schema/context https://www.springframework.org/schema/context/spring-context.xsd">


</beans>
Then in log4j Add the following contents to the properties file:
# DEBUG < INFO < WARN < ERROR < FATAL
# Global logging configuration
log4j.rootLogger=info, stdout,file
# My logging configuration...
#log4j.logger.com.tocersoft.school=DEBUG
#log4j.logger.net.sf.hibernate.cache=debug
## Console output...
log4j.appender.stdout=org.apache.log4j.ConsoleAppender
log4j.appender.stdout.layout=org.apache.log4j.PatternLayout
log4j.appender.stdout.layout.ConversionPattern=%5p %d %C: %m%n

log4j.appender.file=org.apache.log4j.FileAppender
log4j.appender.file.File=../logs/iask.log
log4j.appender.file.layout=org.apache.log4j.PatternLayout
log4j.appender.file.layout.ConversionPattern=%d{yyyy-MM-dd HH:mm:ss}  %l  %m%n
13) Spring MVC under the spring of Dubbo web module Add the following content to the XML file:
  <mvc:annotation-driven />
   <context:component-scan base-  package="com.itheima.controller"/>
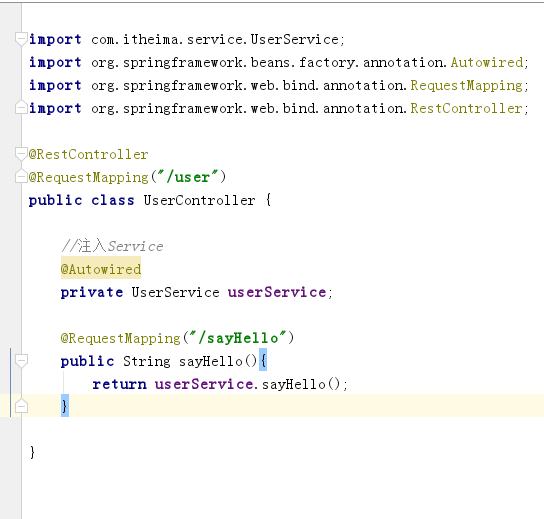
14) Create a new com. In the src/main/java / directory under the Dubbo web module itheima. Controller package, and then create a new UserController class under the package. The content of the class is as follows:
15) Dubbo service is dependent, so you need to install it first;
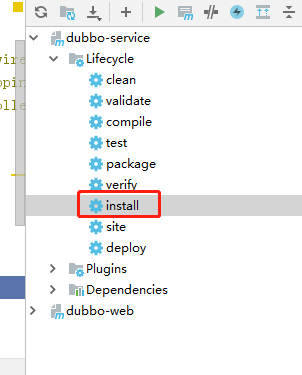
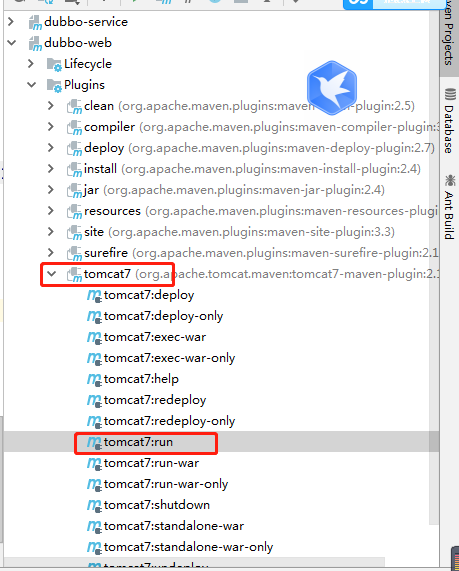
16) Then, run the Dubbo web module;
17) Open the browser and enter
http://localhost:8000/user/sayHello.do
Can be accessed;