This paper is based on linux system to build rabbitmq cluster. By default, the installation is completed. If it is not installed, you can go to RabbitMQ simple installation See how to install.
The following is the construction of single machine mode cluster
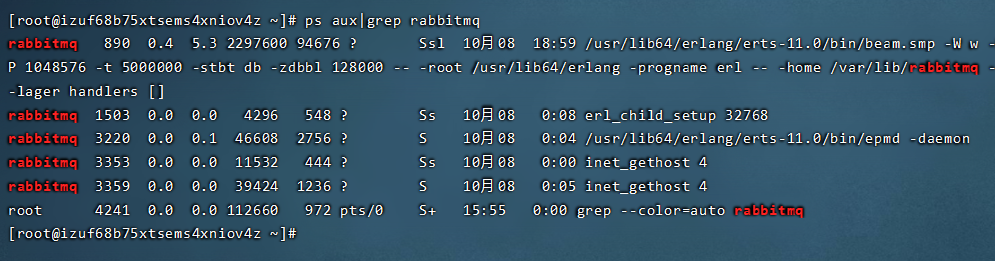
Check whether it is running
Make sure rabbitmq is running properly.
 ps aux|grep rabbitmq

perhaps

systemctl status rabbitmq-server^
Shut down service
systemctl stop rabbitmq-server
Single machine multi instance building
Scenario: suppose there are two nodes, rabbit-1 and rabbit-2. Rabbit-1 is the master node and rabbit-2 is the slave node.
Start command:
sudo RABBITMQ_NODE_PORT=5672 RABBITMQ_NODENAME=rabbit-1 rabbitmq-server start &
End command
rabbitmqctl -n rabbit-1 stop
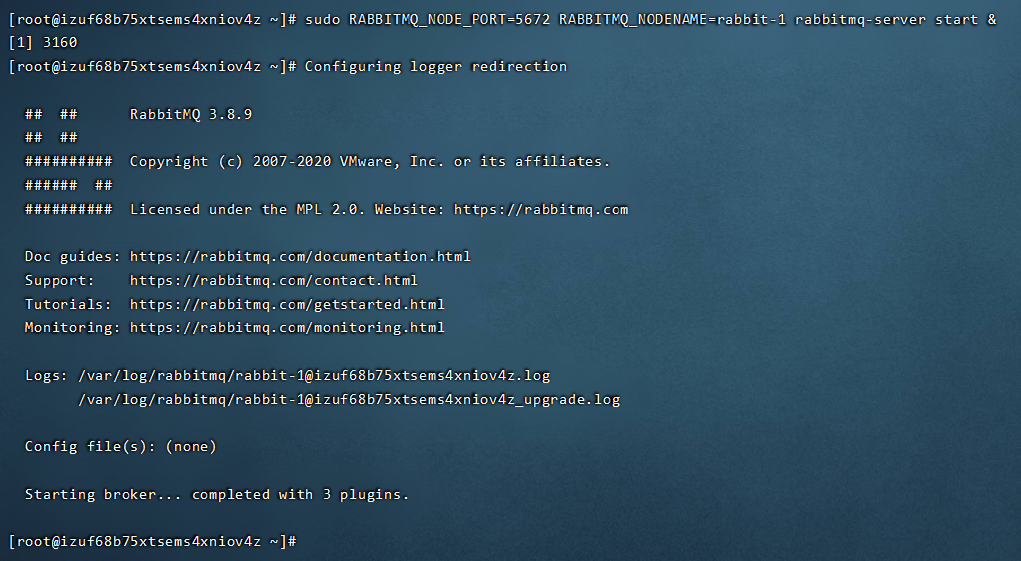
Start the first node rabbit-1
sudo RABBITMQ_NODE_PORT=5672 RABBITMQ_NODENAME=rabbit-1 rabbitmq-server start &
Start the second node rabbit-2
It should be noted that since the web side also has a port number, we need to reassign the port number to the web side.
sudo RABBITMQ_NODE_PORT=5673 RABBITMQ_SERVER_START_ARGS="-rabbitmq_management listener [{port,15673}] -rabbitmq_stomp tcp_listeners [61614] -rabbitmq_mqtt tcp_listeners [1884]" RABBITMQ_NODENAME=rabbit-2 rabbitmq-server start &
verification
ps aux|grep rabbitmq
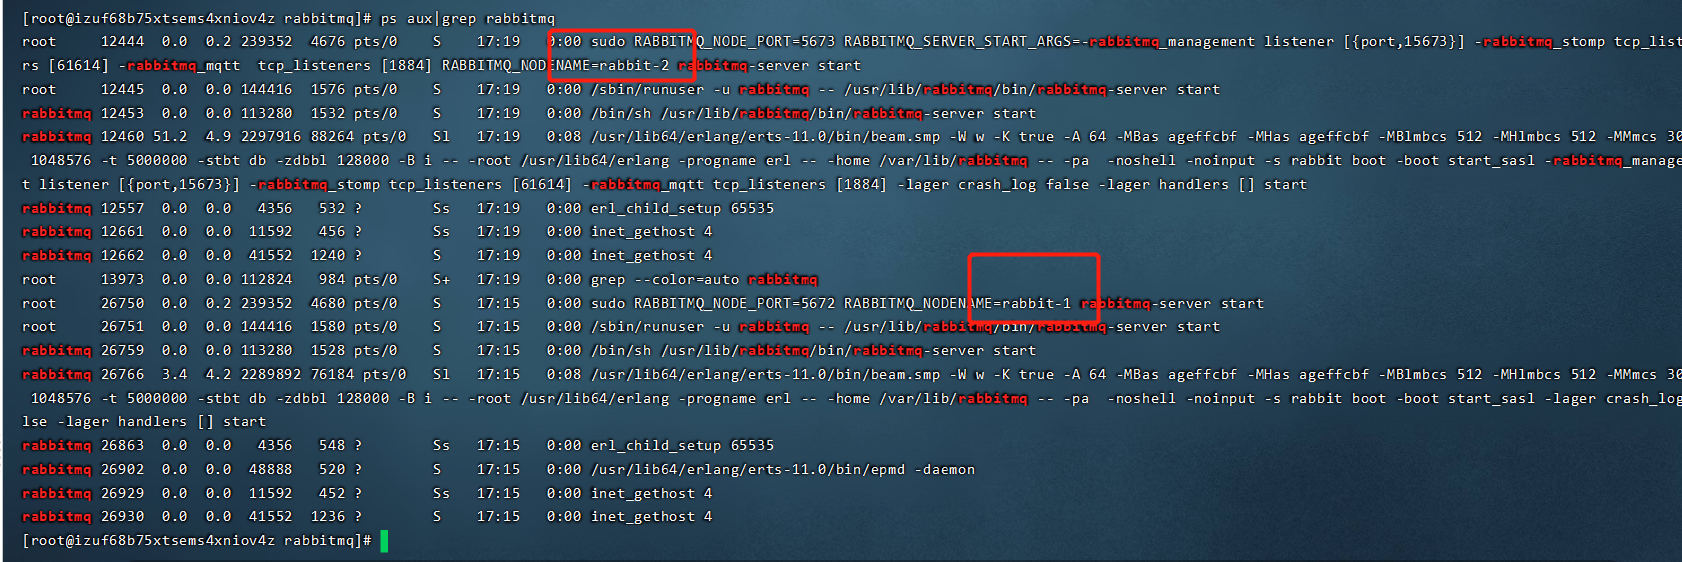
rabbit-1 as the master node
# Stop application
sudo rabbitmqctl -n rabbit-1  stop_app
# The purpose is to clear the historical data on the node (if it is not cleared, the node cannot be added to the cluster)
sudo rabbitmqctl -n rabbit-1 reset
# Start application
sudo rabbitmqctl -n rabbit-1 start_app
rabbit-2 as slave node
# Stop application
sudo rabbitmqctl -n rabbit-2  stop_app
# The purpose is to clear the historical data on the node (if it is not cleared, the node cannot be added to the cluster)
sudo rabbitmqctl -n rabbit-2 reset
# Join rabbit2 node to rabbit1 cluster (host name of server node server)
sudo rabbitmqctl -n rabbit-2 join_cluster rabbit-1@'server-node'
# Start application
sudo rabbitmqctl -n rabbit-2 start_app
The selected is the host name of your server, which can be modified by yourself.
After root @.

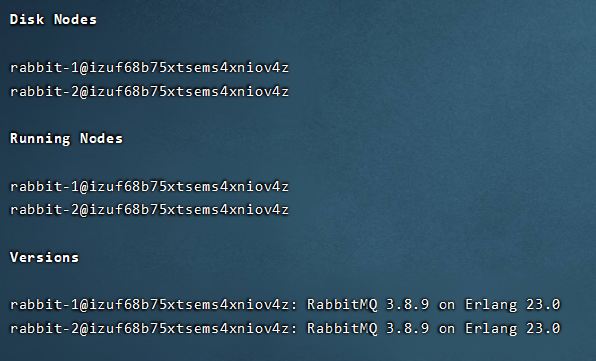
Validation cluster
sudo rabbitmqctl cluster_status -n rabbit-1
If you need the third point, just repeat the steps of the rabbit-2 node.
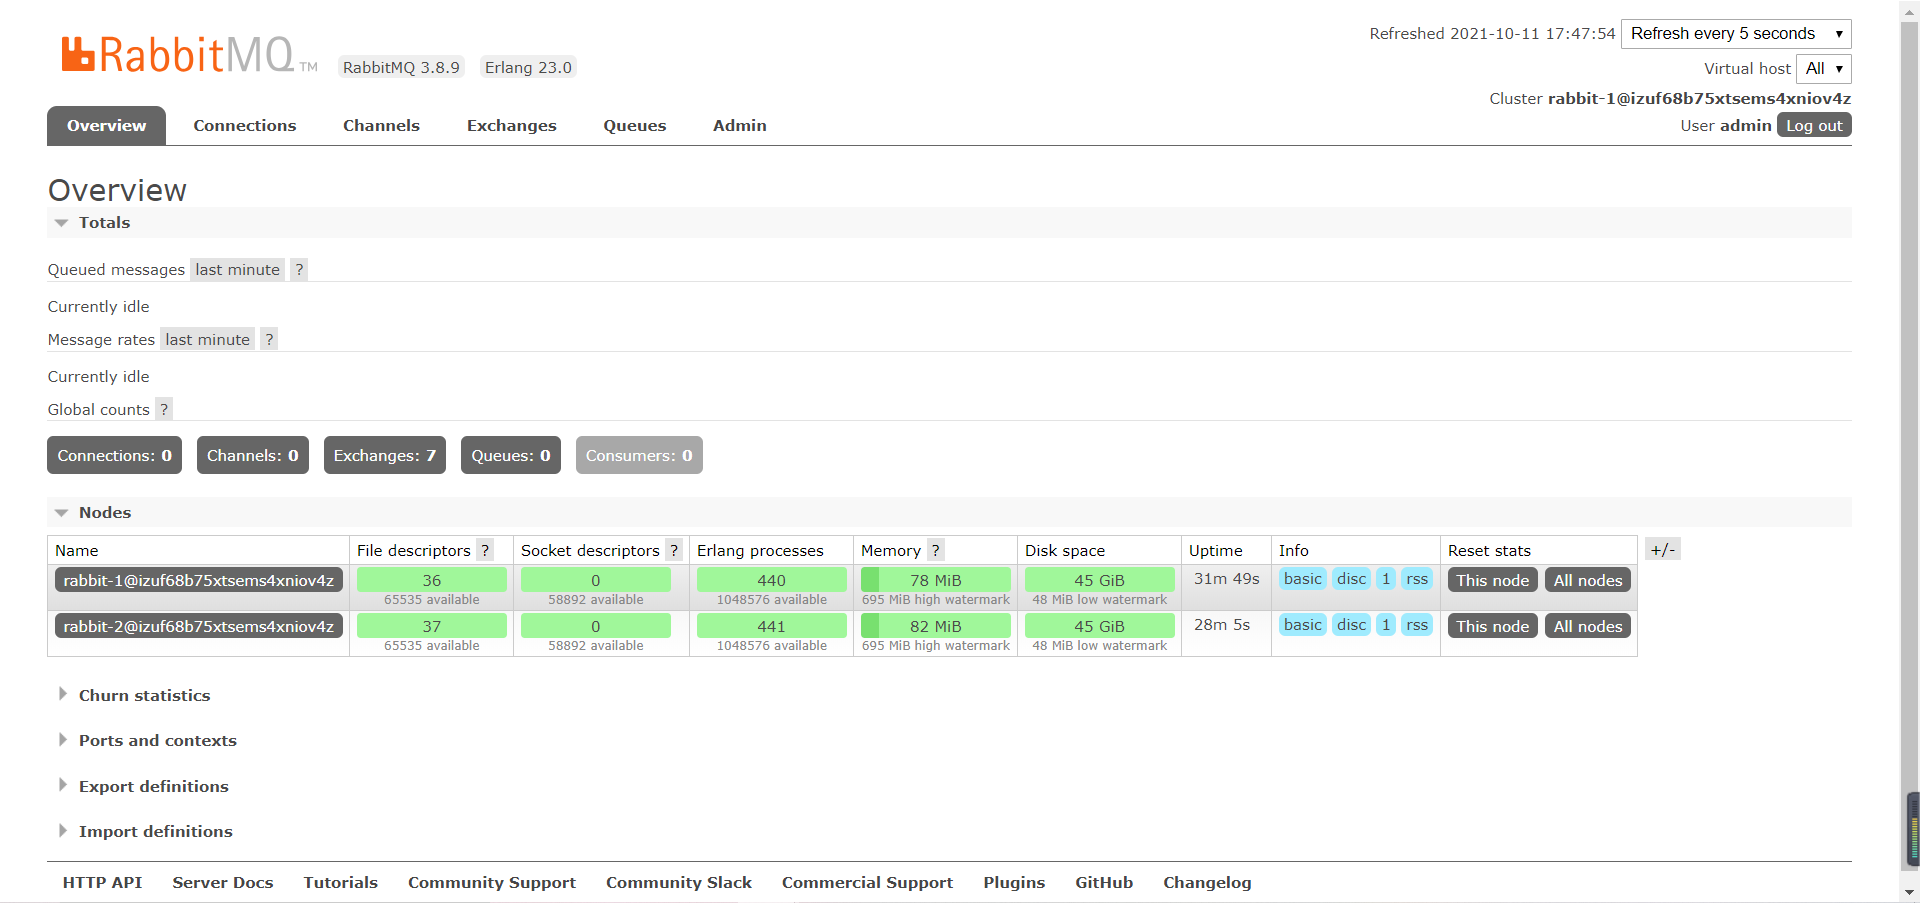
web Monitoring
First, you need to add users and weights to the two nodes.
rabbitmqctl -n rabbit-1 add_user admin admin
#Operation authority
rabbitmqctl -n rabbit-1 set_user_tags admin administrator
#Resource permissions
rabbitmqctl -n rabbit-1 set_permissions -p / admin ".*" ".*" ".*"

rabbitmqctl -n rabbit-2 add_user admin admin
#Operation authority
rabbitmqctl -n rabbit-2 set_user_tags admin administrator
#Resource permissions
rabbitmqctl -n rabbit-2 set_permissions -p / admin ".*" ".*" ".*"
After the user is created, we can log in to the web side. If it is an ECS, pay attention to the port number in the security group. The cluster information indicates success. This cluster mode belongs to the metadata sharing mode. Therefore, when we create a queue at one node, the other node will automatically create a queue.
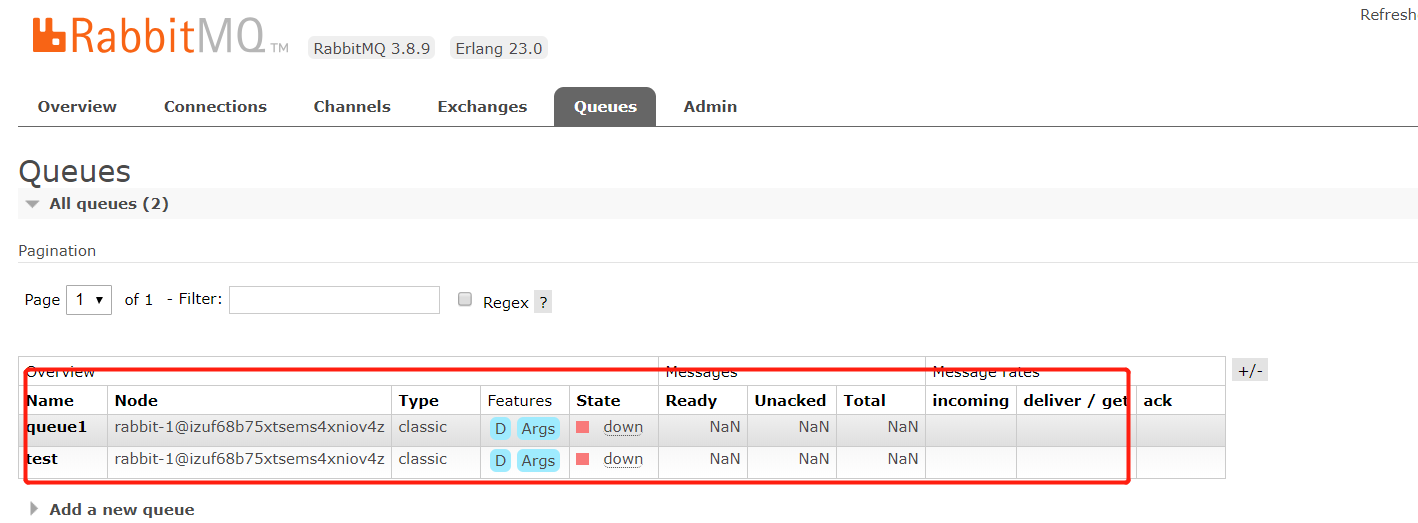
What happens if one of the nodes goes down?
We can manually turn off the slave node, and then we can find that the slave node stop will be displayed in the master node, but the switch and queue still exist.

However, in this mode, if we manually close the master node, we will find that the queues in the slave node have stopped. Therefore, this cluster mode is not commonly used in our work.

Multi machine deployment cluster
If multiple servers are used to build a cluster, we need to read the cookie of one node and copy it to other nodes (whether nodes can communicate through cookies)
The cookie is stored in / var/lib/rabbitmq/.erlang.cookie.
For example, the host names are rabbit-1 and rabbit-2 respectively
- Start each node one by one
- Configure the hots file of each node (vim /etc/hosts)
ip1:rabbit-1
ip2:rabbit-2
Refer to stand-alone mode for other steps.