Author: SRE operation and maintenance blog
Blog address: https://www.cnsre.cn/
Article address: https://www.cnsre.cn/posts/220110850573/
Related topics: https://www.cnsre.cn/tags/eks/
Learning objectives
- Deploy Amazon EFS CSI driver in EKS to
- Verify the EFS and verify that it is working properly
- Create EFS based static and dynamic storage
prerequisite
- EKS cluster
- AWS CLI if you have not installed it, please check Installing, updating, and uninstalling AWS CLI . After installing AWS CLI, configure it.
- If kubectl is not installed, please check Install kubectl.
Create IAM policy
Create IAM policies and assign them to IAM roles. This policy will allow the Amazon EFS driver to interact with the file system.
1. View the IAM policy document below or Policy document.
{{< notice warning ">}}
Recommended view Policy document . Get policy document.
{{< /notice >}}
{
"Version": "2012-10-17",
"Statement": [
{
"Effect": "Allow",
"Action": [
"elasticfilesystem:DescribeAccessPoints",
"elasticfilesystem:DescribeFileSystems"
],
"Resource": "*"
},
{
"Effect": "Allow",
"Action": [
"elasticfilesystem:CreateAccessPoint"
],
"Resource": "*",
"Condition": {
"StringLike": {
"aws:RequestTag/efs.csi.aws.com/cluster": "true"
}
}
},
{
"Effect": "Allow",
"Action": "elasticfilesystem:DeleteAccessPoint",
"Resource": "*",
"Condition": {
"StringEquals": {
"aws:ResourceTag/efs.csi.aws.com/cluster": "true"
}
}
}
]
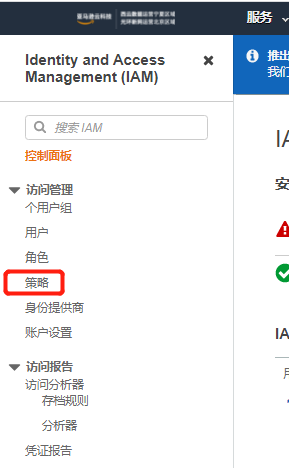
}2. In IAM strategy Create policy in
stay Identity and Access Management (IAM) Click policies in the, and then click create policies in the next step

Click json, fill in the IAM policy, and then click the next: tab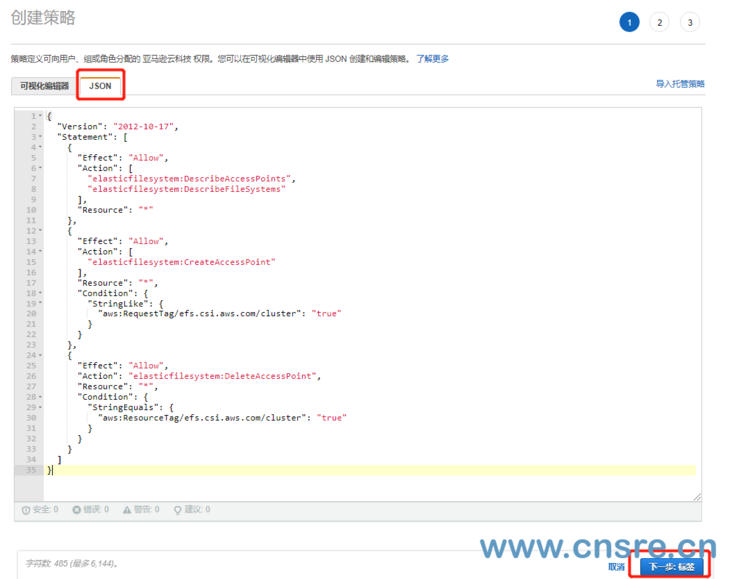
In the next tab, you can fill it in according to your own situation, and then click Next: approve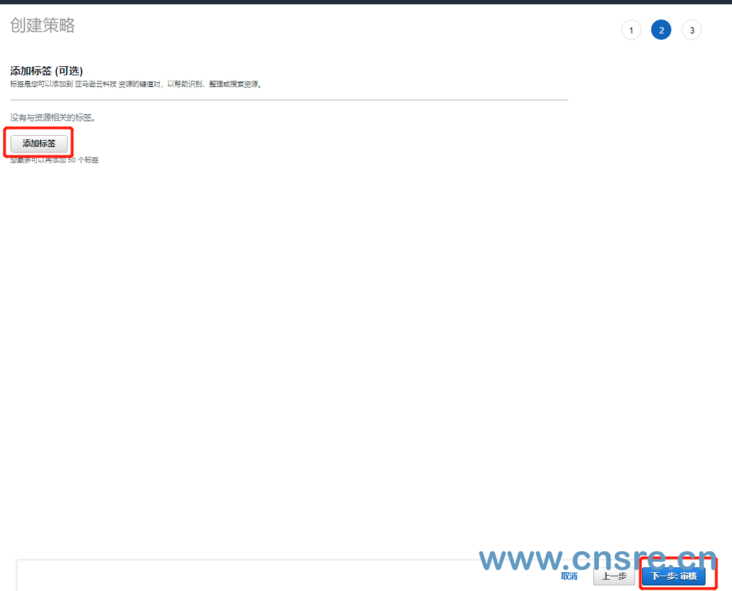
Fill in Amazon eks in the name_ EFS_ CSI_ Driver_ Policy
{{< notice warning ">}}
You can use Amazon eks_ EFS_ CSI_ Driver_ The policy is changed to a different name, but if it is changed, make sure to change it in subsequent steps.
{{< /notice >}}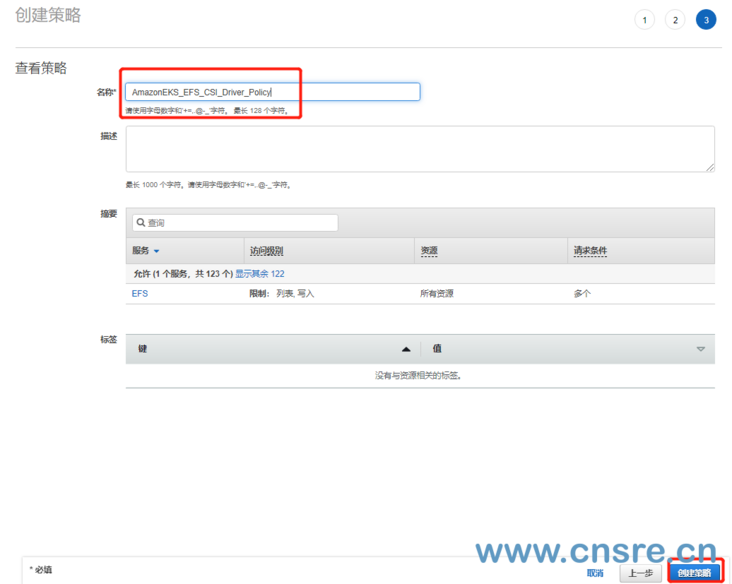
Attach efs policy to eks node role
The efs policy we just created Amazon eks_ efs_ CSI_ Driver_ Policy attached to eks_ In the role of node, ensure that eks node has efs permission.
{{< notice warning ">}}
If you created eks before, there will be a role named eksctl - < eks name > - nodegrou nodeinstancerole XXXXXXXX in your role.
{{< /notice >}}
stay role Search for node in and click eksctl - < eks name > - nodegrou nodeinstancerole XXXXXXXX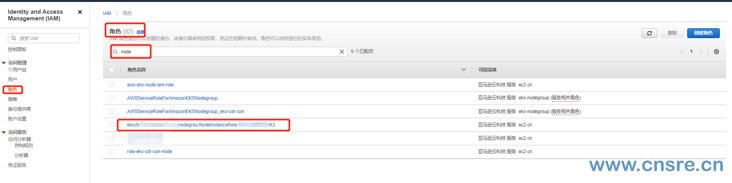
Click attach policy in the role
The EFS policy created before the search is Amazon eks_ EFS_ CSI_ Driver_ Policy, then select it and click the attached policy at the bottom.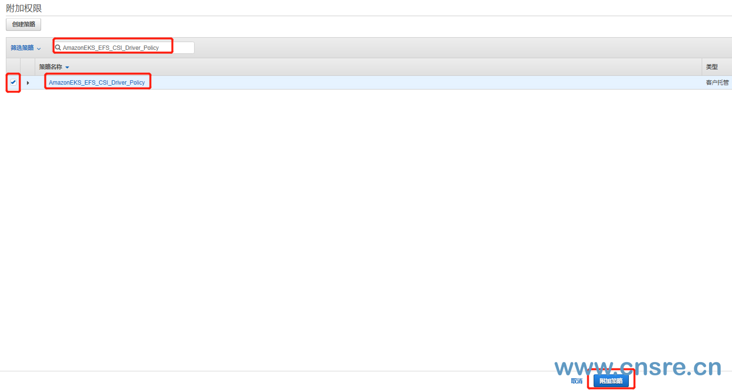
Install Amazon EFS driver
Install the Amazon EFS CSI driver using the Helm or yaml manifest.
The helm deployment method will not be described in detail here. It mainly introduces yaml list deployment
{{< notice warning ">}}
Be sure to change the image address to your region Amazon EKS add on container image address
{{< /notice >}}
yaml inventory deployment
{{< notice info "prompt" >}}
Because of the problem of github network. If the deployment does not respond when executing again, please terminate the operation and try to deploy several more times
{{< /notice >}}
kubectl apply -k "github.com/kubernetes-sigs/aws-efs-csi-driver/deploy/kubernetes/overlays/stable/?ref=release-1.3"
The output is as follows:
serviceaccount/efs-csi-controller-sa created
serviceaccount/efs-csi-node-sa created
clusterrole.rbac.authorization.k8s.io/efs-csi-external-provisioner-role created
clusterrolebinding.rbac.authorization.k8s.io/efs-csi-provisioner-binding created
deployment.apps/efs-csi-controller created
daemonset.apps/efs-csi-node created
csidriver.storage.k8s.io/efs.csi.aws.com created
Check whether the drive operates normally
kubectl  get  pods -A|grep  efs
kube-system                    efs-csi-controller-56f6dc4c76-2lvqf               3/3     Running     0          3m32s
kube-system                    efs-csi-controller-56f6dc4c76-dxkwl               3/3     Running     0          3m32s
kube-system                    efs-csi-node-9ttxp                                3/3     Running     0          3m32s
kube-system                    efs-csi-node-hsn94                                3/3     Running     0          3m32s
{{< notice warning ">}}
Although the display here works normally, you still need to modify the image address. Otherwise, after creating pv and pvc, an error will occur when they are mounted in the pod. (this error will be recorded separately later)
{{< /notice >}}
Modify EFS CSI node driver
kubectl edit daemonsets.apps -n kube-system efs-csi-node
Locate the AWS EFS CSI driver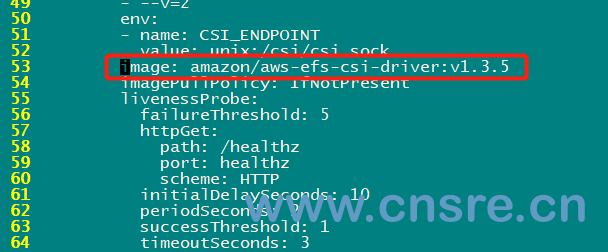
Then change the mirror to 918309763551 dkr. ecr. cn-north-1. amazonaws. com. cn/eks/aws-efs-csi-driver:v1. three point three
The details are as follows
Create Amazon EFS file system
Create Amazon EFS file system for Amazon EKS cluster
Search EFS in the console, click OK, and then enter EFS console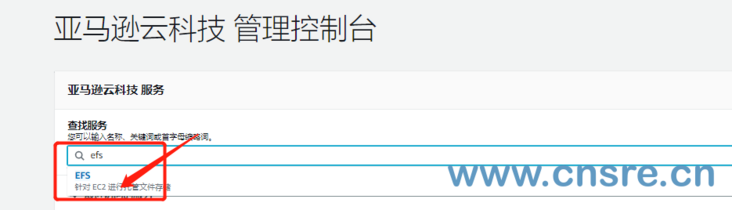
Click create file system in the console
Name: fill in according to your own situation
VPC: it must be created under the same VPC as eks
Availability and persistence: follow the prompts and instructions to create what you need
If there are more requirements, you can click Customize to set more policies, such as throughput, encryption, backup, etc
Finally, click create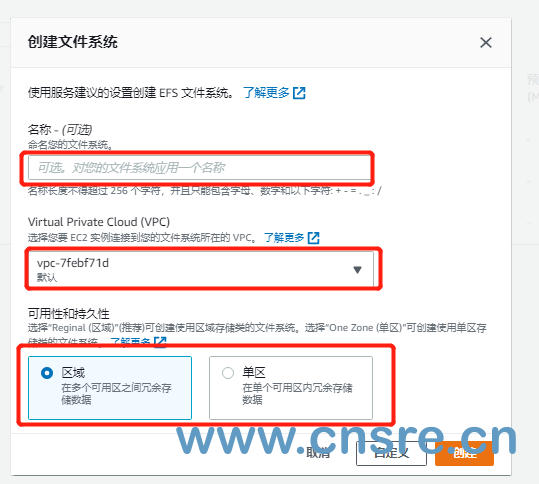
Create inbound rule
Allow inbound NFS traffic from CIDR of EKS cluster VPC
Select the network -- > Security Group in the EFS just created, and then copy the ID sg-152XXX of the security group
Find the network and security in EC2, select the security group, and then search sg-152XXX in the search box to select the security group. And select inbound rules 
The EKS cluster is allowed to access NFS(2049) port traffic in the inbound rule.
Deploy sample application
{{< tabs deploy static provisioning content deploy dynamic provisioning >}}
{{< tab >}}
Deploy static provisioning
Deploy a sample application that uses the persistent volume you created
This process utilizes data from Amazon EFS Container Storage Interface (CSI) driver Of GitHub repository Multiple pods read and write many Example to use a statically preset Amazon EFS persistent volume and access it from multiple pods using the ReadWriteMany access mode.
take Amazon EFS Container Storage Interface (CSI) driver Clone the GitHub repository to your local system.
git clone https://github.com/kubernetes-sigs/aws-efs-csi-driver.git
Navigate to multiple_pods sample directory.
cd aws-efs-csi-driver/examples/kubernetes/multiple_pods/
Retrieve your Amazon EFS file system ID. You can find this information in the Amazon EFS console or use the following AWS CLI commands.
aws efs describe-file-systems --query "FileSystems[*].FileSystemId" --output text
Output:
fs-<582a03f3>
Edit specs / PV Yaml file and replace the volumeHandle value with your Amazon EFS file system ID.
apiVersion: v1
kind: PersistentVolume
metadata:
  name: efs-pv
spec:
  capacity:
    storage: 5Gi
  volumeMode: Filesystem
  accessModes:
    - ReadWriteMany
  persistentVolumeReclaimPolicy: Retain
  storageClassName: efs-sc
  csi:
    driver: efs.csi.aws.com
    volumeHandle: fs-<582a03f3>
be careful
Since Amazon EFS is an elastic file system, it does not enforce any file system capacity limits. When the system is created, the actual storage capacity values in the persistent volume and persistent volume declaration are not used. However, since storage capacity is a required field in Kubernetes, you must specify a valid value, for example, 5Gi in this example. This value does not limit the size of the Amazon EFS file system.
Deploy EFS SC storage classes, EFS claim persistent volume declarations, and EFS PV persistent volumes from the specs directory.
kubectl apply -f specs/pv.yaml
kubectl apply -f specs/claim.yaml
kubectl apply -f specs/storageclass.yaml
Lists the persistent volumes in the default namespace. Find persistent volumes with default / EFS claim declarations.
kubectl get pv -w
Output:
NAME     CAPACITY   ACCESS MODES   RECLAIM POLICY   STATUS   CLAIM               STORAGECLASS   REASON   AGE
efs-pv   5Gi        RWX            Retain           Bound    default/efs-claim   efs-sc                  2m50s
Do not proceed to the next step until the STATUS changes to Bound.
Deploy the app1 and app2 sample applications from the specs directory.
kubectl apply -f specs/pod1.yaml
kubectl apply -f specs/pod2.yaml
View the Pod in the default namespace and wait for the STATUS of app1 and app2 pods to change to Running STATUS.
kubectl get pods --watch
be careful
It may take several minutes for Pod to reach Running status.
Describes the persistent volume.
kubectl describe pv efs-pv
Output:
Name:            efs-pv
Labels:          none
Annotations:     kubectl.kubernetes.io/last-applied-configuration:
                   {"apiVersion":"v1","kind":"PersistentVolume","metadata":{"annotations":{},"name":"efs-pv"},"spec":{"accessModes":["ReadWriteMany"],"capaci...
                 pv.kubernetes.io/bound-by-controller: yes
Finalizers:      [kubernetes.io/pv-protection]
StorageClass:    efs-sc
Status:          Bound
Claim:           default/efs-claim
Reclaim Policy:  Retain
Access Modes:    RWX
VolumeMode:      Filesystem
Capacity:        5Gi
Node Affinity:   none
Message:
Source:
    Type:              CSI (a Container Storage Interface (CSI) volume source)
    Driver:            efs.csi.aws.com
    VolumeHandle:      fs-582a03f3
    ReadOnly:          false
    VolumeAttributes:  none
Events:                none
Amazon EFS file system ID S are listed as VolumeHandle.
Verify that app1 Pod successfully writes data to the volume.
kubectl exec -ti app1 -- tail /data/out1.txt
Output:
...
Mon Mar 22 18:18:22 UTC 2021
Mon Mar 22 18:18:27 UTC 2021
Mon Mar 22 18:18:32 UTC 2021
Mon Mar 22 18:18:37 UTC 2021
...
Verify that the data displayed by app2 Pod in the volume is the same as the data written by app1 to the volume.
kubectl exec -ti app2 -- tail /data/out1.txt
Output:
...
Mon Mar 22 18:18:22 UTC 2021
Mon Mar 22 18:18:27 UTC 2021
Mon Mar 22 18:18:32 UTC 2021
Mon Mar 22 18:18:37 UTC 2021
...
When the experiment is complete, remove the resources for this sample application for cleanup.
kubectl delete -f specs/
You can also manually delete the file systems and security groups you create.
{{< /tab >}}
{{< tab >}}Deploy dynamic provisioning
Prerequisite
You must use the Amazon EFS CSI driver version 1.2x or later, which requires a cluster version 1.17 or later. To update the cluster, see Update cluster.
Deploy a sample application that uses persistent volumes created by the controller
This process utilizes data from Amazon EFS Container Storage Interface (CSI) driver Of GitHub repository Dynamic preset Example. It passes Amazon EFS access point And Pod use persistent volume claim (PVC) to dynamically create a persistent volume.
Create a storage class for EFS. For all parameters and configuration options, see on GitHub Amazon EFS CSI driver.
Download the StorageClass list for Amazon EFS.
curl -o storageclass.yaml https://raw.githubusercontent.com/kubernetes-sigs/aws-efs-csi-driver/master/examples/kubernetes/dynamic_provisioning/specs/storageclass.yaml
- Edit the corresponding file and replace the value of fileSystemId with your file system ID.
Deploy storage classes.
kubectl apply -f storageclass.yaml
Test automatic presets by deploying pods that utilize PersistentVolumeClaim:
Download a manifest that will deploy a Pod and a persistent volume claim.
curl -o pod.yaml https://raw.githubusercontent.com/kubernetes-sigs/aws-efs-csi-driver/master/examples/kubernetes/dynamic_provisioning/specs/pod.yaml
Deploy the Pod using the PersistentVolumeClaim used by the sample application and Pod.
kubectl apply -f pod.yaml
Determines the name of the Pod that runs the controller.
kubectl get pods -n kube-system | grep efs-csi-controller
output
efs-csi-controller-74ccf9f566-q5989   3/3     Running   0          40m
efs-csi-controller-74ccf9f566-wswg9   3/3     Running   0          40m
After a few seconds, you can observe that the controller begins to accept the changes (edited to improve readability). Replace 74ccf9f566-q5989 with the value from a Pod in the previous command output.
kubectl logs efs-csi-controller-74ccf9f566-q5989 \
    -n kube-system \
    -c csi-provisioner \
    --tail 10
output
...
1 controller.go:737] successfully created PV pvc-5983ffec-96cf-40c1-9cd6-e5686ca84eca for PVC efs-claim and csi volume name fs-95bcec92::fsap-02a88145b865d3a87
If you do not see the previous output, run the previous command using one of the other controller pods.
Confirm that a persistent volume with status Bound to PersistentVolumeClaim has been created:
kubectl get pv
output
NAME                                       CAPACITY   ACCESS MODES   RECLAIM POLICY   STATUS   CLAIM               STORAGECLASS   REASON   AGE
pvc-5983ffec-96cf-40c1-9cd6-e5686ca84eca   20Gi       RWX            Delete           Bound    default/efs-claim   efs-sc                  7m57s
View details about the created PersistentVolumeClaim.
kubectl get pvc
output
NAME        STATUS   VOLUME                                     CAPACITY   ACCESS MODES   STORAGECLASS   AGE
efs-claim   Bound    pvc-5983ffec-96cf-40c1-9cd6-e5686ca84eca   20Gi       RWX            efs-sc         9m7s
View the status of the sample application Pod.
kubectl get pods -o wide
output
NAME          READY   STATUS    RESTARTS   AGE   IP               NODE                                           NOMINATED NODE   READINESS GATES
efs-example   1/1     Running   0          10m   192.168.78.156   ip-192-168-73-191.us-west-2.compute.internal   <none>           <none>
Confirm that the data has been written to the volume.
kubectl exec efs-app -- bash -c "cat data/out"
output
...
Tue Mar 23 14:29:16 UTC 2021
Tue Mar 23 14:29:21 UTC 2021
Tue Mar 23 14:29:26 UTC 2021
Tue Mar 23 14:29:31 UTC 2021
...
- (optional) terminate the Amazon EKS node running the Pod and wait for the Pod to be rescheduled. Alternatively, you can delete the Pod and redeploy it. Complete step 7 again and confirm that the output contains the previous output.
{{< /tab >}}
{{< /tabs >}}
Author: SRE operation and maintenance blog
Blog address: https://www.cnsre.cn/
Article address: https://www.cnsre.cn/posts/220110850573/
Related topics: https://www.cnsre.cn/tags/eks/