brief introduction
Full text search is the most common requirement, open source Elasticsearch (hereinafter referred to as Elastic) is the first choice of full-text search engine. It can quickly store, search and analyze massive data.
At the bottom of elastic is the open source library Lucene. However, you can't use Lucene directly. You must write your own code to call its interface. Elastic is the package of Lucene and provides the operation interface of REST API, which can be used out of the box.
Basic concepts
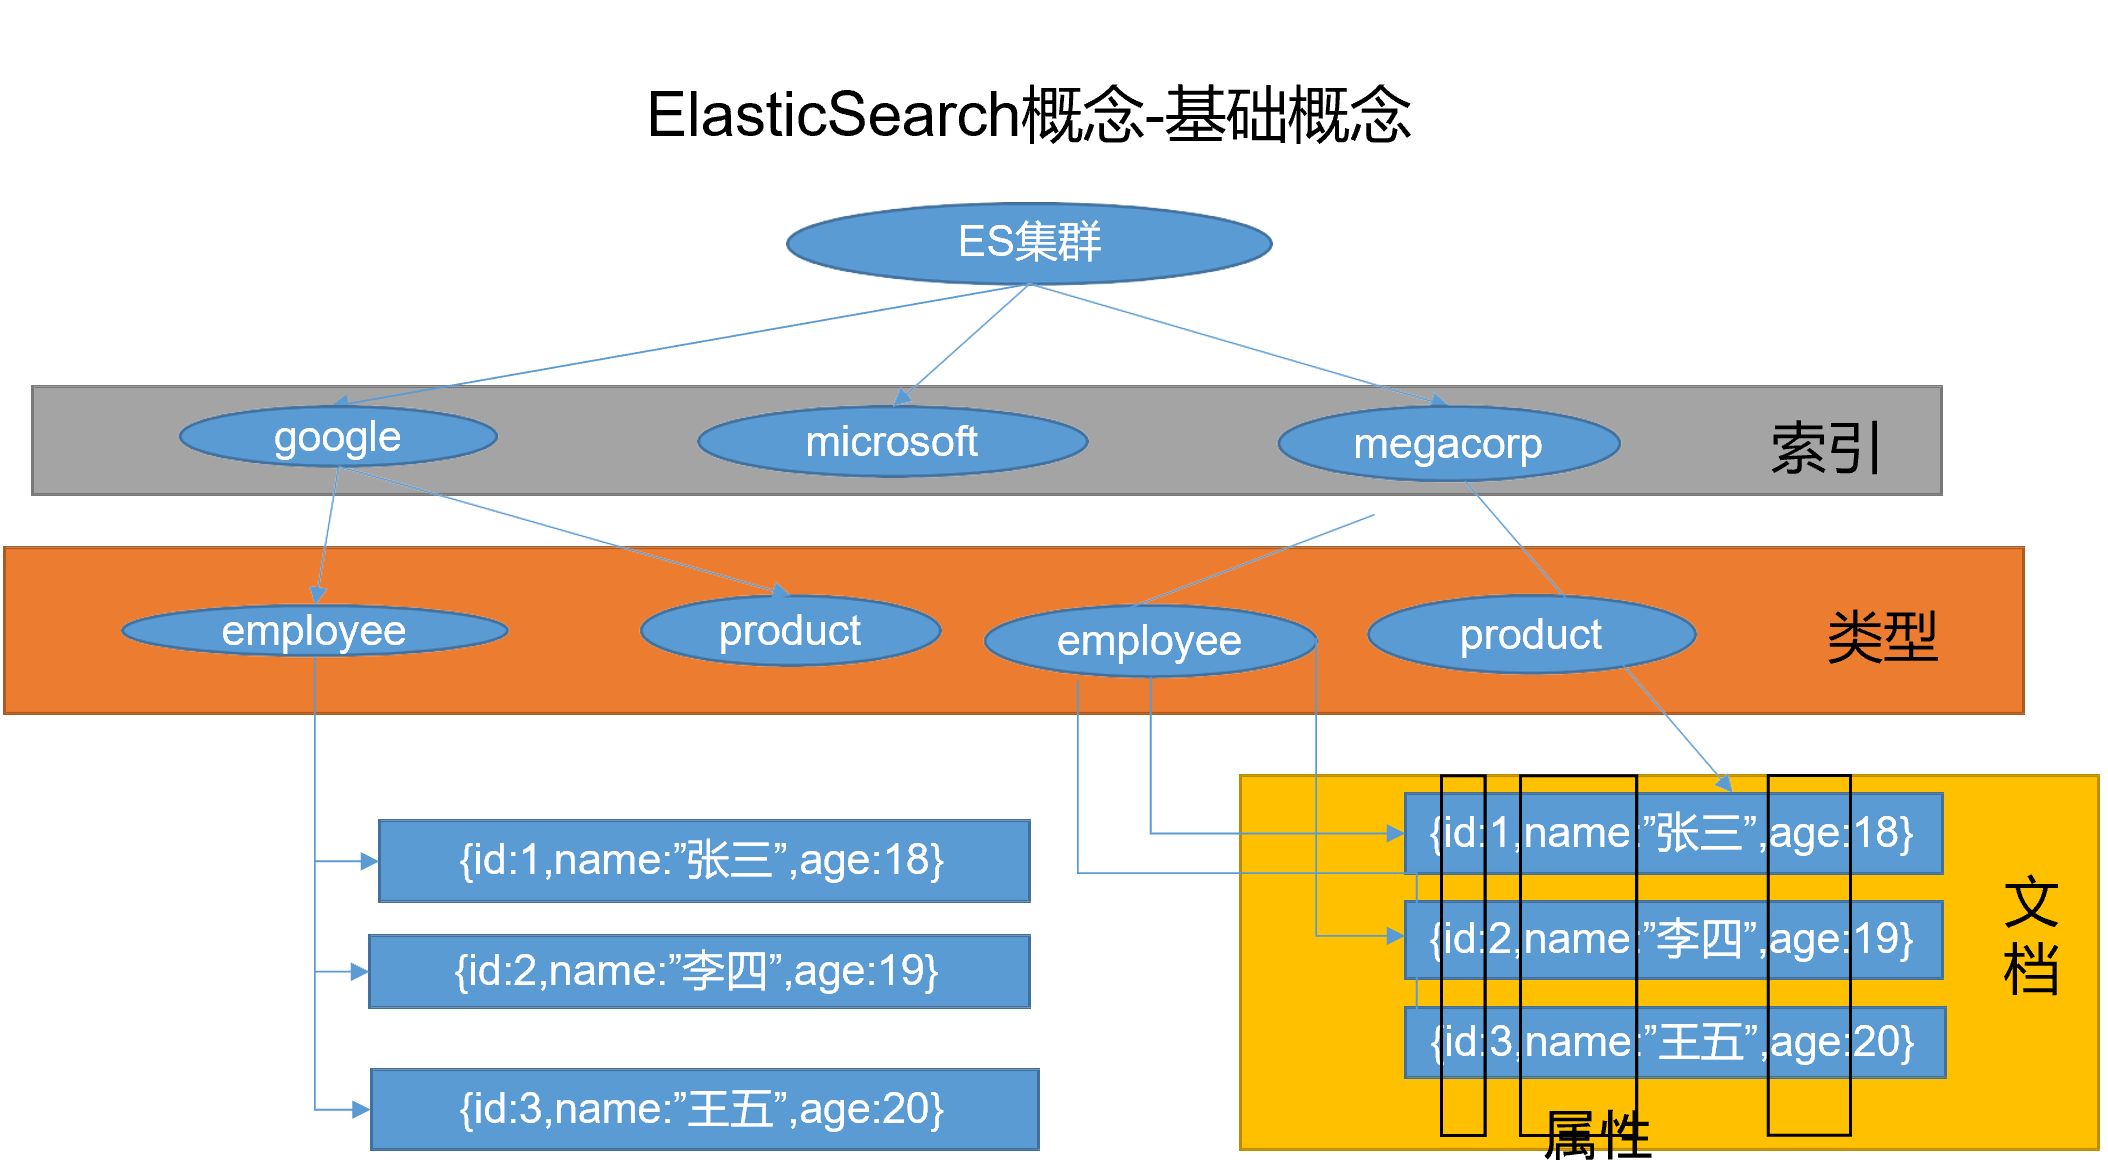
Index (index)
Elastic will index all fields and write an Inverted Index after processing. When searching for data, directly search the index.
Therefore, the top-level unit of Elastic data management is called Index. It is synonymous with a single database. The name of each Index (i.e. database) must be lowercase.
- Verb, equivalent to mysql insert
- Noun, equivalent to mysql database
Type
In Index, you can define one or more types.
Similar to MySQL's Table, each type of data is stored together.
In elasticsearch6 After 0, the Type is removed.

Document
A data of a certain Type saved under an Index. The Document is in JSON format. The Document is like the data of each row in a Table in MySQL, and the field is the attribute in the Document.
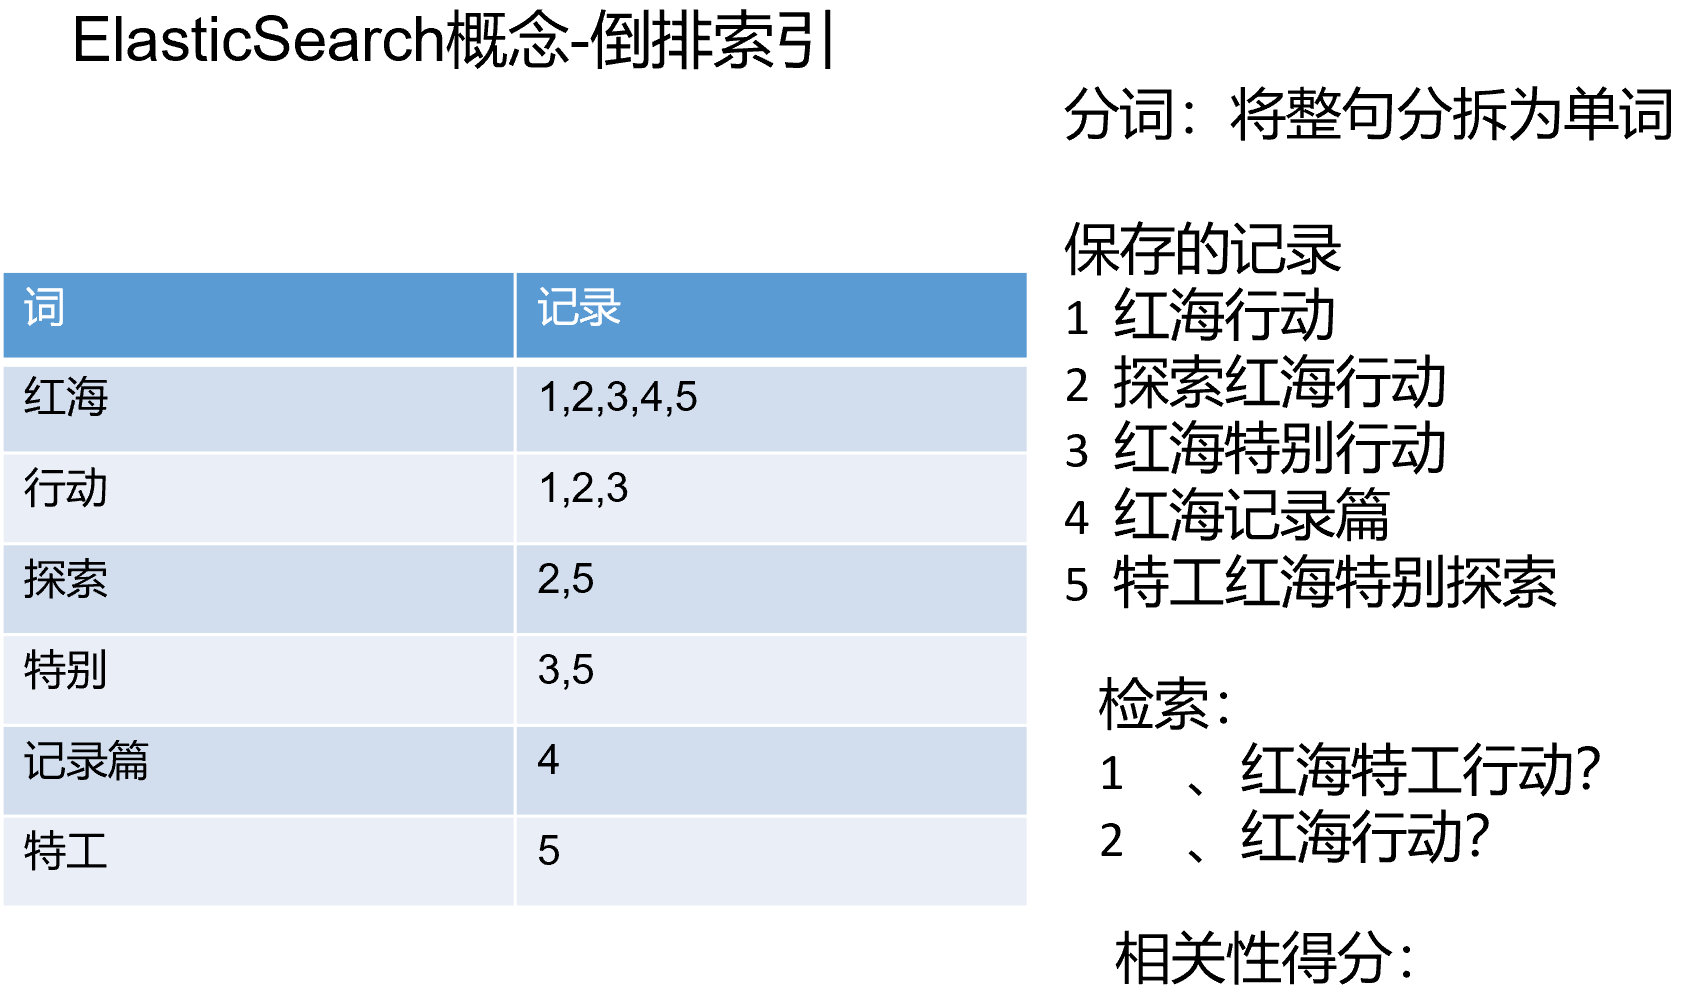
Inverted index
Docker installation Elasticsearch and Kibana
1. Download the image file
# Storing and retrieving data
docker pull elasticsearch:7.4.2

# Visual retrieval data
docker pull kibana:7.4.2
2. Configure the attached data folder
# Create profile directory
mkdir -p /mydata/elasticsearch/config

# Create data directory
mkdir -p /mydata/elasticsearch/data

# Make the files in the / mydata/elasticsearch / folder readable and writable
chmod -R 777 /mydata/elasticsearch/

# Configure any machine to access elasticsearch
echo "http.host: 0.0.0.0" >/mydata/elasticsearch/config/elasticsearch.yml
3. Start Elasticsearch
docker run --name elasticsearch -p 9200:9200 -p 9300:9300 \
-e "discovery.type=single-node" \
-e ES_JAVA_OPTS="-Xms64m -Xmx512m" \
-v /mydata/elasticsearch/config/elasticsearch.yml:/usr/share/elasticsearch/config/elasticsearch.yml \
-v /mydata/elasticsearch/data:/usr/share/elasticsearch/data \
-v /mydata/elasticsearch/plugins:/usr/share/elasticsearch/plugins \
-d elasticsearch:7.4.2
- -p 9200:9200 -p 9300:9300: two ports are exposed. 9200 is used for HTTP REST API requests. 9300 is the communication port between ES in the distributed cluster state;
- -E "discovery. Type = single node": es runs as a single node
- -e ES_JAVA_OPTS="-Xms64m -Xmx128m": set startup to occupy memory. If it is not set, it may occupy all memory of the current system
- -v: Mount the configuration file, data file and plug-in data in the container to the local folder;
- -d elasticsearch:7.6.2: specify the image to start
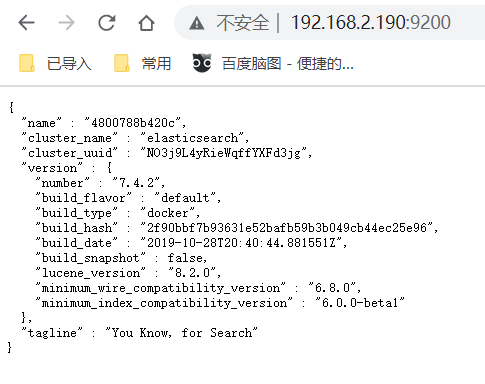
Access your own virtual machine IP:9200, and see the returned json data, indicating that the startup is successful.
4. Set Elasticsearch to start with Docker
# Currently, Docker starts automatically, so ES is also started automatically
docker update elasticsearch --restart=always
5. Start visual Kibana
docker run --name kibana \
-e ELASTICSEARCH_HOSTS=http://192.168.2.190:9200 \
-p 5601:5601 \
-d kibana:7.4.2
-e ELASTICSEARCH_HOSTS=``http://192.168.2.190:9200: Set the IP address of your virtual machine here
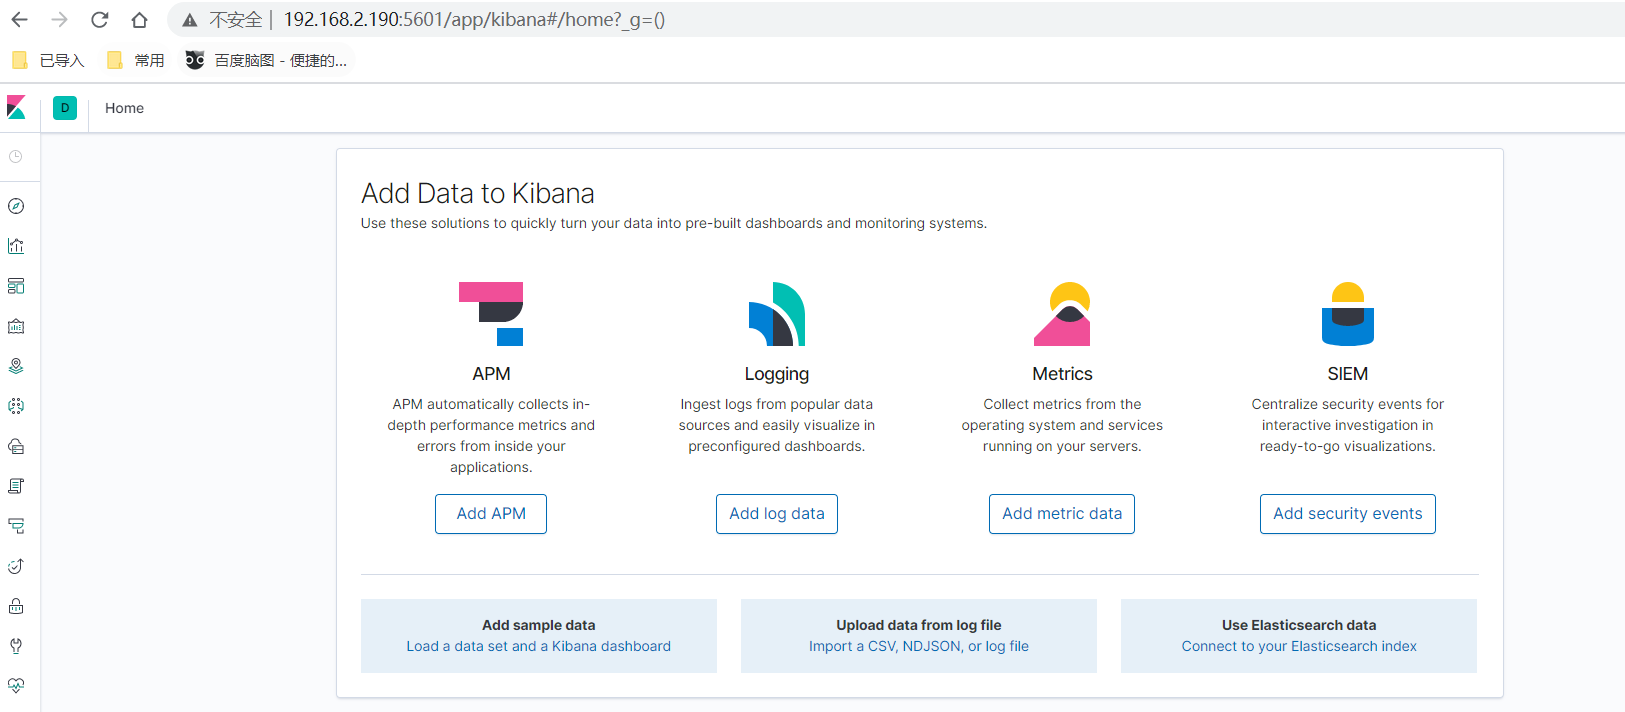
Browser input 192.168.2.190:5601 test:
6. Set Kibana to start with Docker
# Currently, Docker starts automatically, so kibana also starts automatically
docker update kibana --restart=always