In my previous article“ Elasticsearch: Cluster backup Snapshot and Restore API ”, I will describe in detail how to backup and restore the desired index or cluster state using the snapshot and restore API interfaces officially provided by Elastic.
In today's article, we will use another method to backup and restore an index in an elastic search cluster.
First, we install the following packages on our Linux machine:
apt-get update
apt-get install curl jq npm
Next, we install the elasticdump NPM installation package:
sudo npm install elasticdump --global
We can use the following command to get help information of elasticdump command:
elasticdump --help
Let's first test whether our Linux machine can correctly connect to the Elasticsearch server:
curl -u elastic:password -X GET "http://192.168.0.3:9200"
In the above command, we need to modify the above user name and password according to our cluster configuration. You also need to modify the above IP address according to your own situation.
$ curl -u elastic:password -X GET "http://192.168.0.3:9200"
{
  "name" : "liuxg",
  "cluster_name" : "elasticsearch",
  "cluster_uuid" : "-vtUaRdHSnGJb5XdGC32bA",
  "version" : {
    "number" : "7.13.0",
    "build_flavor" : "default",
    "build_type" : "tar",
    "build_hash" : "5ca8591c6fcdb1260ce95b08a8e023559635c6f3",
    "build_date" : "2021-05-19T22:22:26.081971330Z",
    "build_snapshot" : false,
    "lucene_version" : "8.8.2",
    "minimum_wire_compatibility_version" : "6.8.0",
    "minimum_index_compatibility_version" : "6.0.0-beta1"
  },
  "tagline" : "You Know, for Search"
}
In our Kibana, let's create an index called twitter:
POST _bulk
{ "index" : { "_index" : "twitter", "_id": 1} }
{"user":"Double elm-Zhang San","message":"It's a nice day today. Go out and have a look","uid":2,"age":20,"city":"Beijing","province":"Beijing","country":"China","address":"Haidian District, Beijing, China","location":{"lat":"39.970718","lon":"116.325747"}}
{ "index" : { "_index" : "twitter", "_id": 2 }}
{"user":"Dongcheng District-Lao Liu","message":"Let's go, the next stop is Yunnan!","uid":3,"age":30,"city":"Beijing","province":"Beijing","country":"China","address":"No. 3, Santao, taijichang, Dongcheng District, Beijing, China","location":{"lat":"39.904313","lon":"116.412754"}}
{ "index" : { "_index" : "twitter", "_id": 3} }
{"user":"Dongcheng District-Li Si","message":"happy birthday!","uid":4,"age":30,"city":"Beijing","province":"Beijing","country":"China","address":"Dongcheng District, Beijing, China","location":{"lat":"39.893801","lon":"116.408986"}}
{ "index" : { "_index" : "twitter", "_id": 4} }
{"user":"Chaoyang District-Lao Jia","message":"123,gogogo","uid":5,"age":35,"city":"Beijing","province":"Beijing","country":"China","address":"Jianguomen, Chaoyang District, Beijing, China","location":{"lat":"39.718256","lon":"116.367910"}}
{ "index" : { "_index" : "twitter", "_id": 5} }
{"user":"Chaoyang District-Lao Wang","message":"Happy BirthDay My Friend!","uid":6,"age":50,"city":"Beijing","province":"Beijing","country":"China","address":"International trade, Chaoyang District, Beijing, China","location":{"lat":"39.918256","lon":"116.467910"}}
{ "index" : { "_index" : "twitter", "_id": 6} }
{"user":"Hongqiao-Lao Wu","message":"Friends are here. Today is my birthday. Friends are here,what birthday happy That's it!","uid":7,"age":90,"city":"Shanghai","province":"Shanghai","country":"China","address":"Minhang District, Shanghai, China","location":{"lat":"31.175927","lon":"121.383328"}}
We use the bulk interface to batch import six documents. So we created an index called twitter.
Because my cluster has been configured with security, I created the following auth INI file, and its contents are as follows:
auth.ini
$ pwd
/home/liuxg/tmp
liuxg@liuxgu:~/tmp$ ls auth.ini
auth.ini
liuxg@liuxgu:~/tmp$ cat auth.ini
user=elastic
password=password
We then create a backup for the twitter index. At auth In the directory where ini is located, run the following command:
elasticdump --httpAuthFile auth.ini --input=http://192.168.0.3:9200/twitter --output=/tmp/backup.json --type=data
$ elasticdump --httpAuthFile auth.ini --input=http://192.168.0.3:9200/twitter --output=/tmp/backup.json --type=data
Wed, 21 Jul 2021 02:07:09 GMT | starting dump
Wed, 21 Jul 2021 02:07:09 GMT | got 6 objects from source elasticsearch (offset: 0)
Wed, 21 Jul 2021 02:07:09 GMT | sent 6 objects to destination file, wrote 6
Wed, 21 Jul 2021 02:07:09 GMT | got 0 objects from source elasticsearch (offset: 6)
Wed, 21 Jul 2021 02:07:09 GMT | Total Writes: 6
Wed, 21 Jul 2021 02:07:09 GMT | dump complete
As shown above, our backup The JSON file is located in / TMP / backup. JSP JSON location. Let's look at the contents of this document:
cat /tmp/backup.json | jq
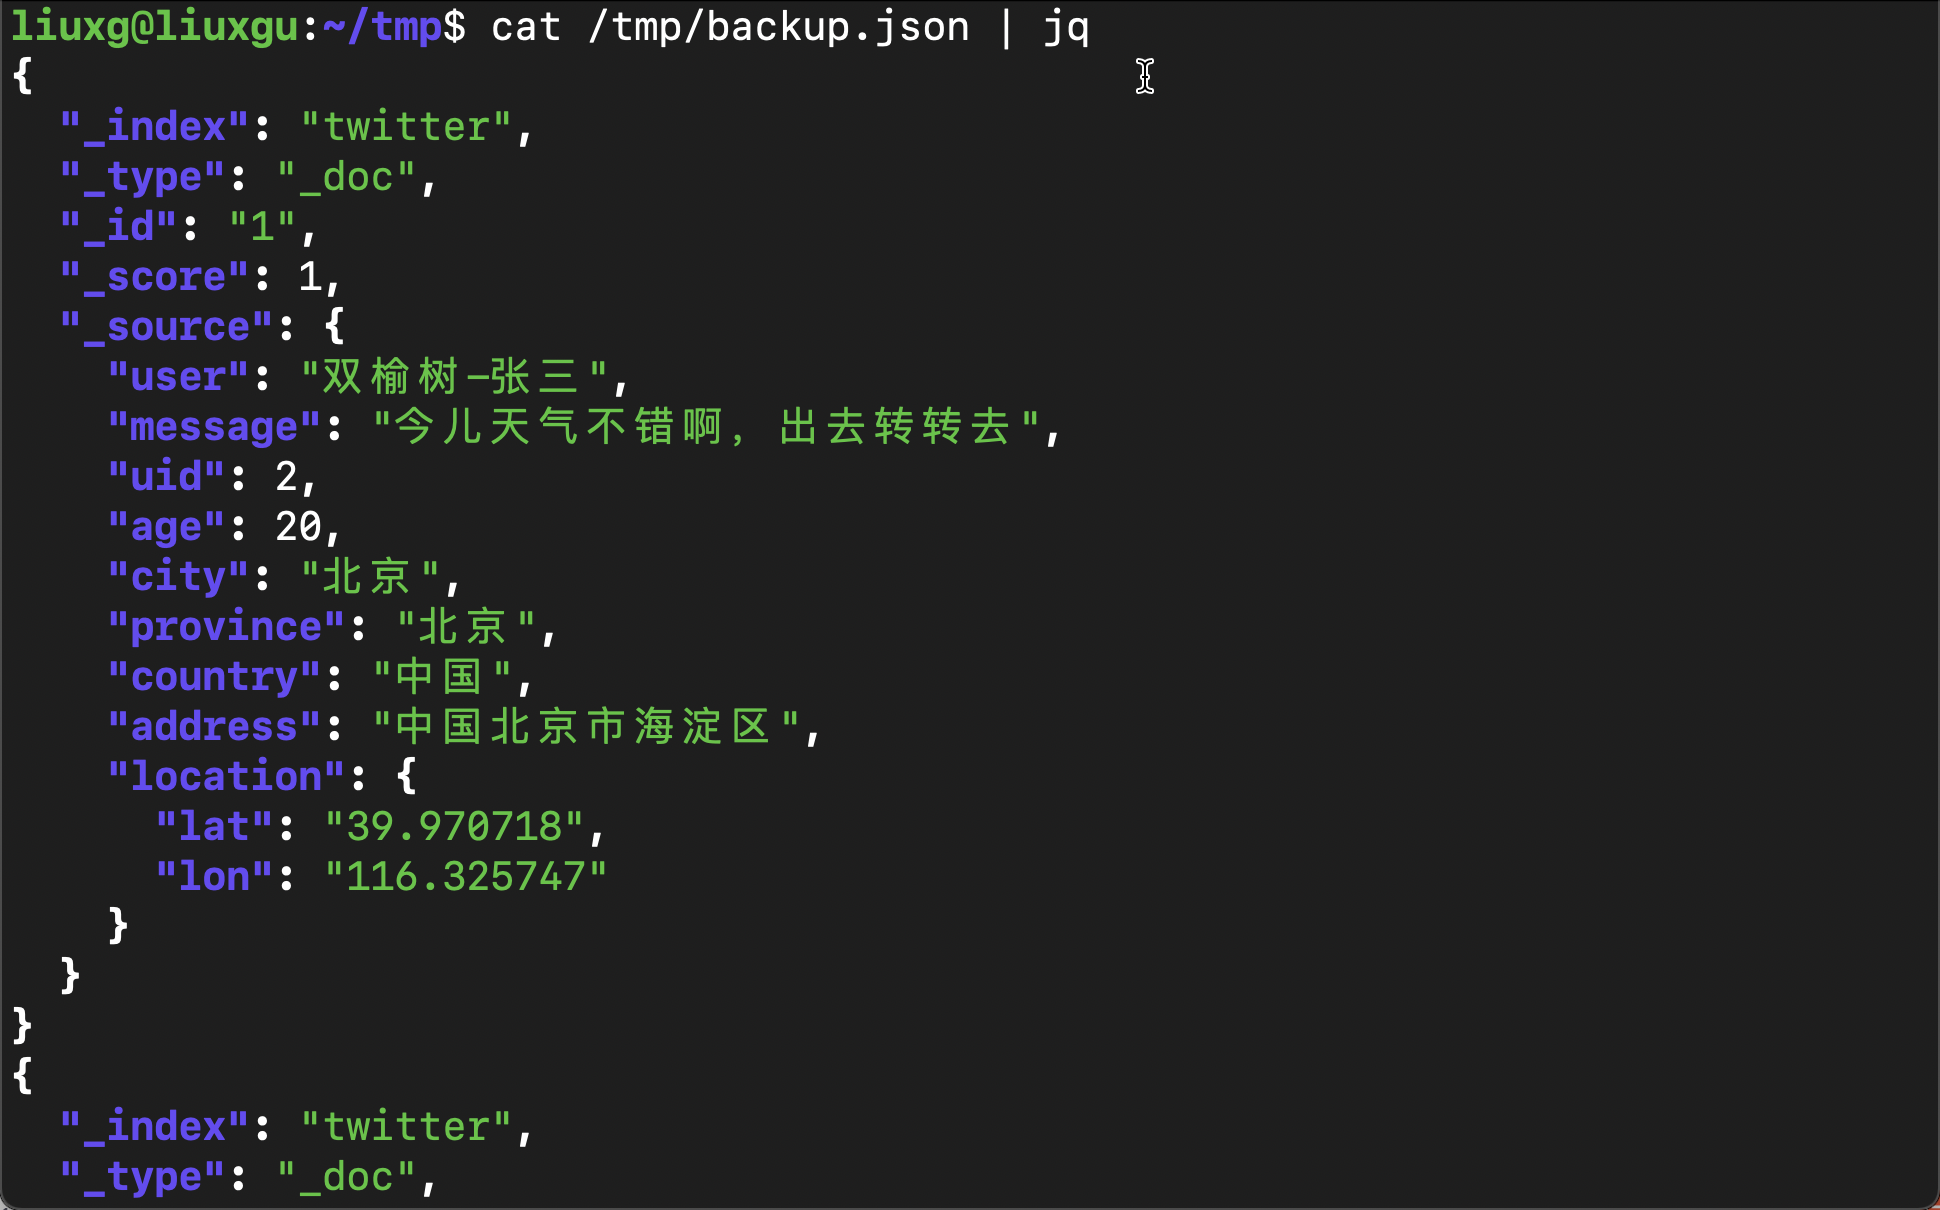
Obviously, in the above file, it contains six documents we previously imported into the} twitter index.
If you have seen the above output, then I congratulate you. You have successfully backed up your index.
Next, let's use the elasticdump command to restore the previously backed up documents. We use the following command:
elasticdump --httpAuthFile auth.ini --input=/tmp/backup.json --output=http://192.168.0.3:9200/twitter1 --type=data
In order not to overwrite the previous twitter index, I set the restored index to twitter 1. Before running the above instructions, remember to correct the above IP address according to your own situation.
Run the above command:
$ elasticdump --httpAuthFile auth.ini --input=/tmp/backup.json --output=http://192.168.0.3:9200/twitter1 --type=data
Wed, 21 Jul 2021 02:21:19 GMT | starting dump
Wed, 21 Jul 2021 02:21:19 GMT | got 6 objects from source file (offset: 0)
Wed, 21 Jul 2021 02:21:20 GMT | sent 6 objects to destination elasticsearch, wrote 6
Wed, 21 Jul 2021 02:21:20 GMT | got 0 objects from source file (offset: 6)
Wed, 21 Jul 2021 02:21:20 GMT | Total Writes: 6
Wed, 21 Jul 2021 02:21:20 GMT | dump complete
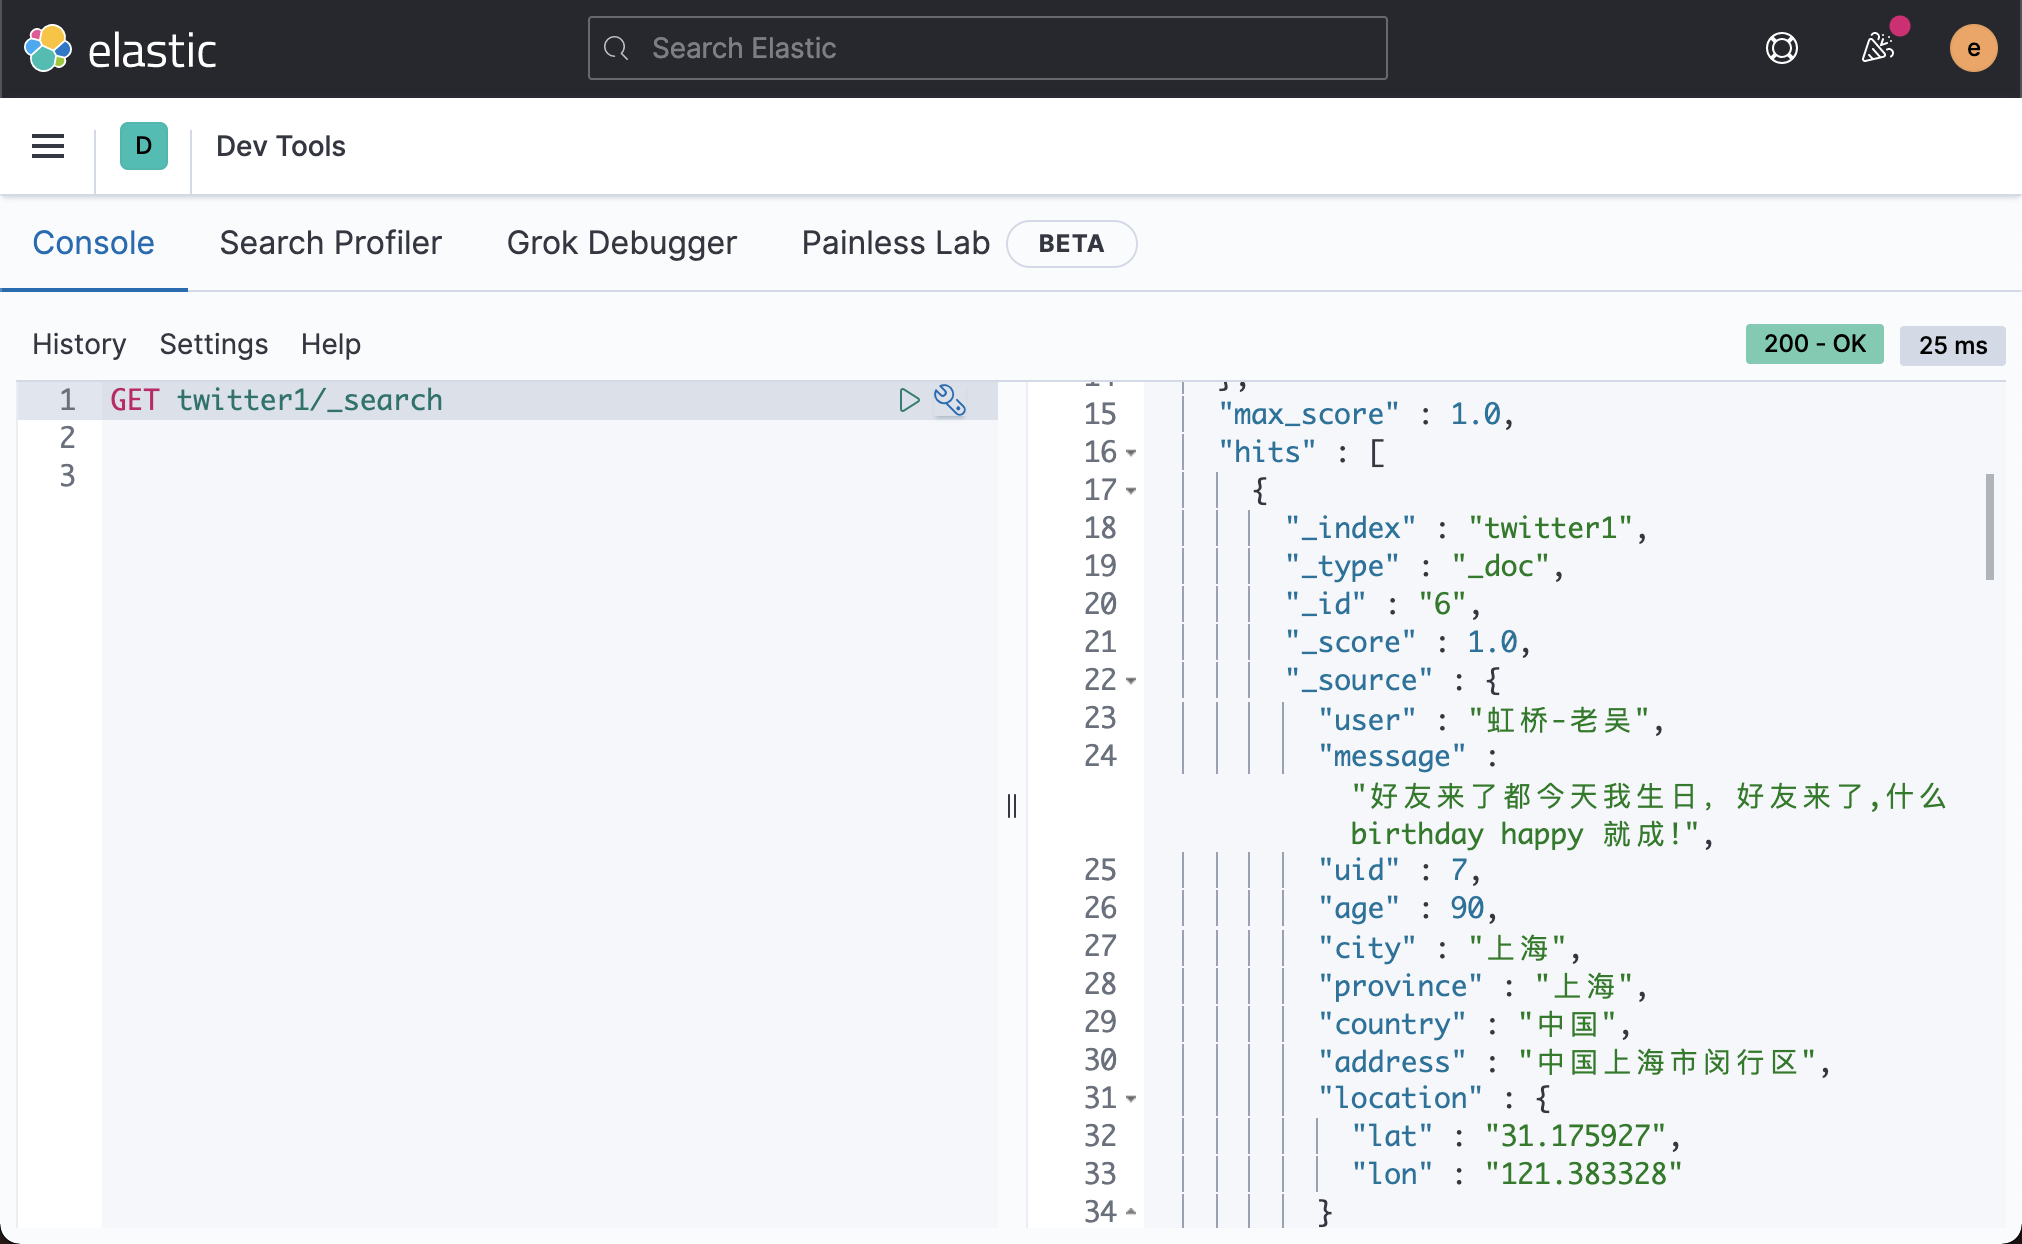
Use the following command to view:
curl -u elastic:password -X GET "http://192.168.0.3:9200/twitter1/_search?pretty=true&q=*:*"
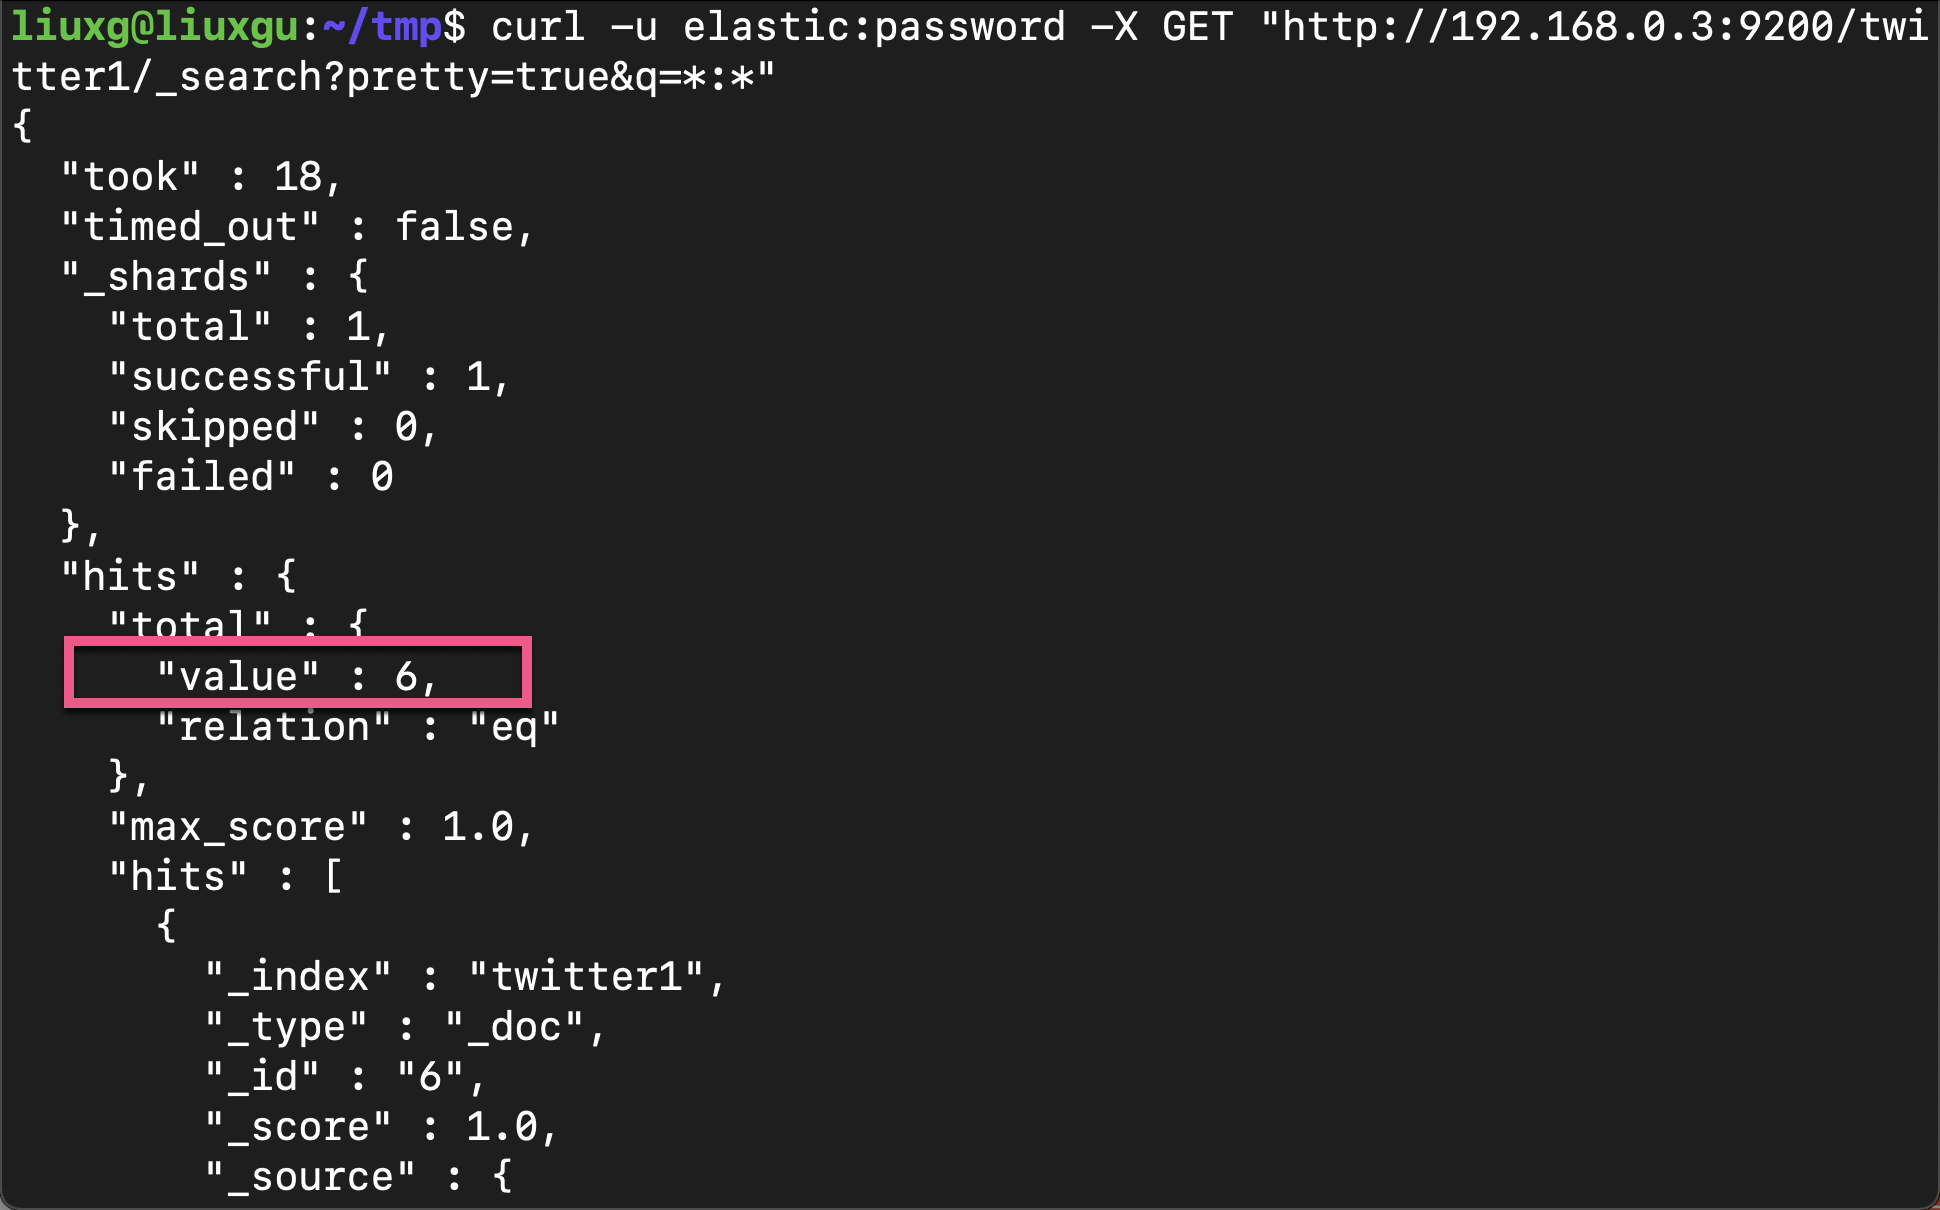
Above, we can see that there are six documents. It shows that we have correctly restored the previously backed up index twitter.