In my previous article:
-
Elastic Stack 8.0 installation - protecting your Elastic Stack is now easier than ever
-
Elastic: use Docker to install Elastic Stack 8.0 and start using it
I described in detail how to install a single node Elastic Stack. In today's tutorial, I detail how to install a three node Elasticsearch cluster. I will use Docker for deployment.
First, we use the following command to create the first Elasticsearch node:
docker network create elastic
docker pull docker.elastic.co/elasticsearch/elasticsearch:8.0.0
docker run -e ES_JAVA_OPTS="-Xms1g -Xmx1g" --name es-node01 --net elastic -p 9200:9200 -p 9300:9300 -it docker.elastic.co/elasticsearch/elasticsearch:8.0.0
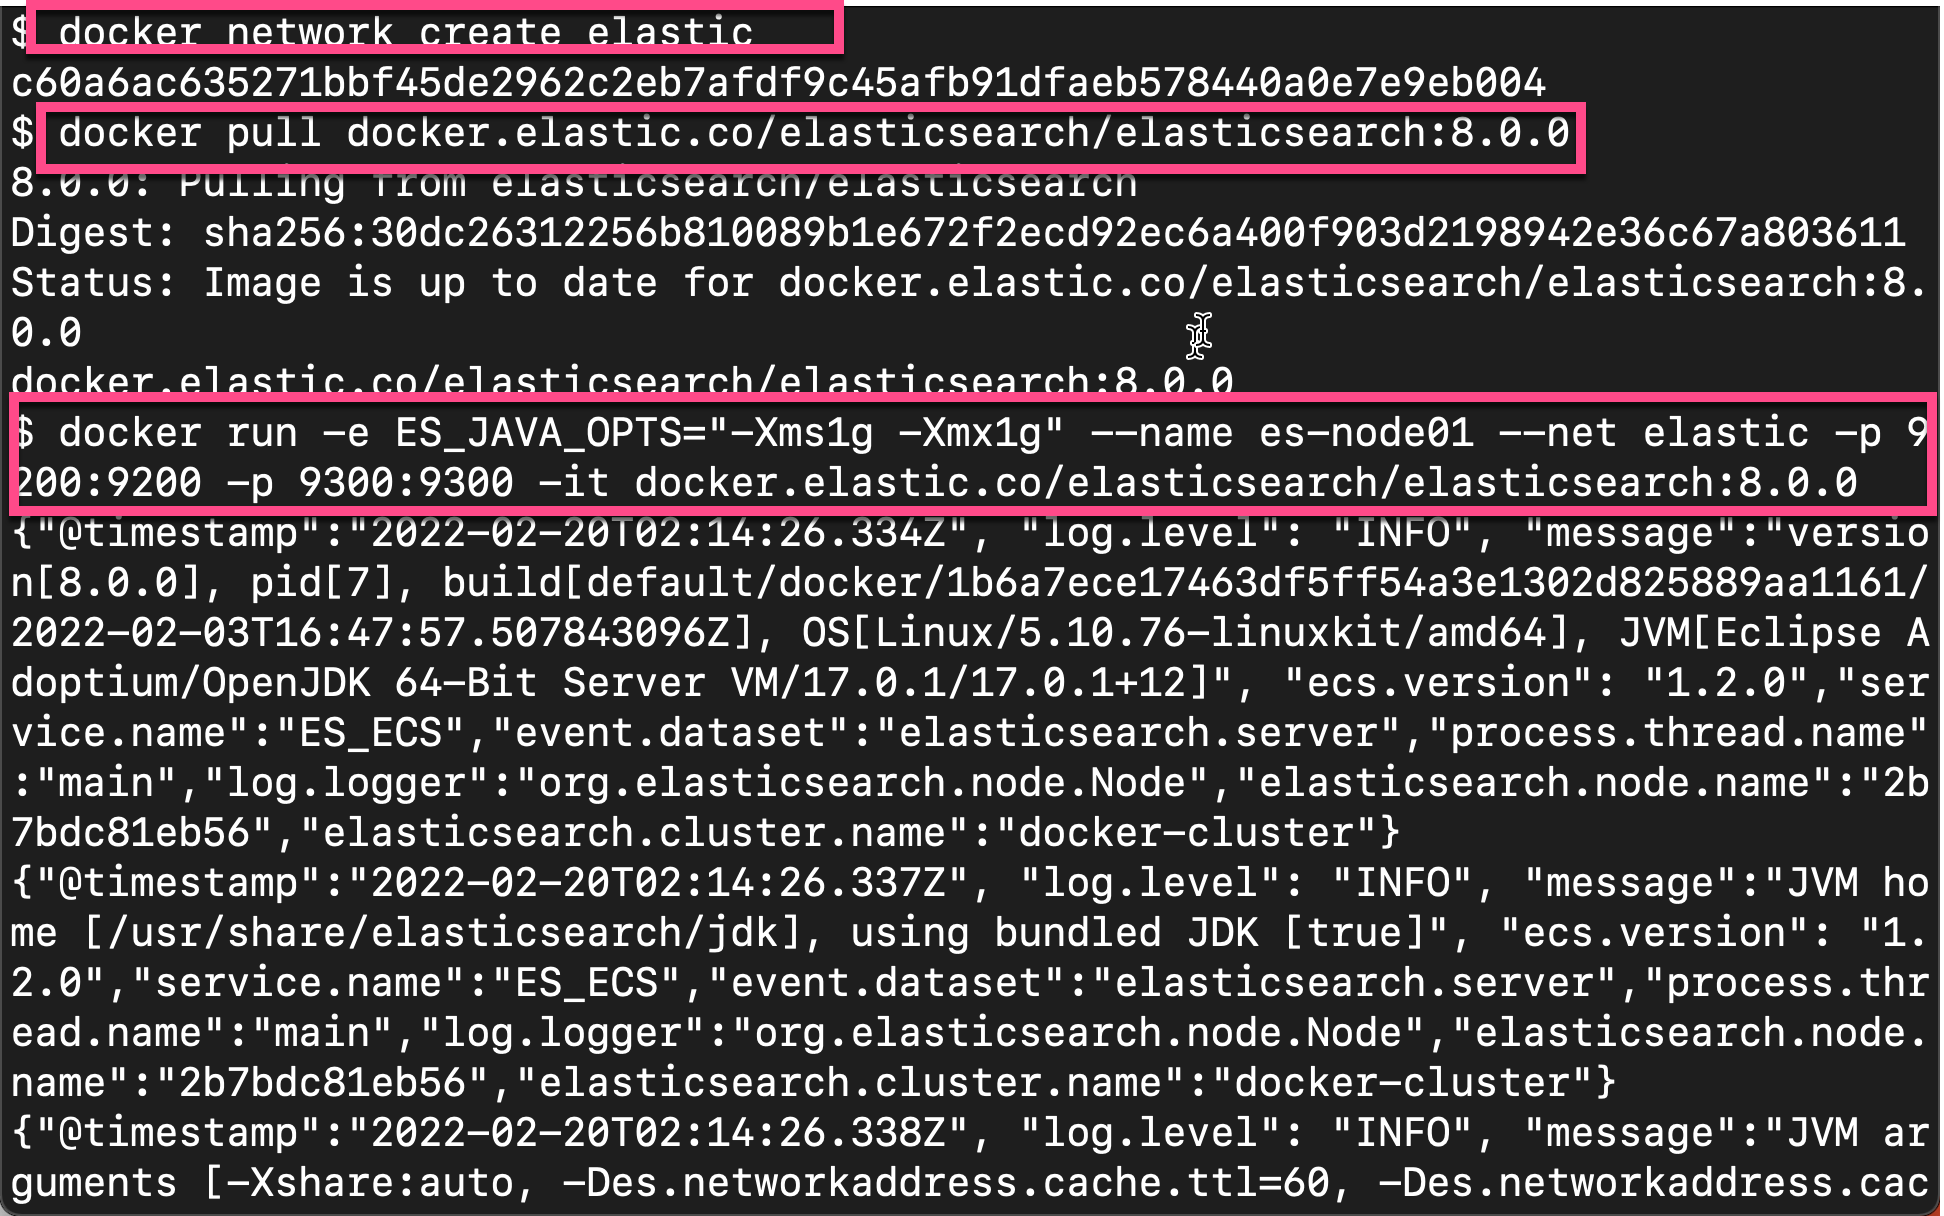
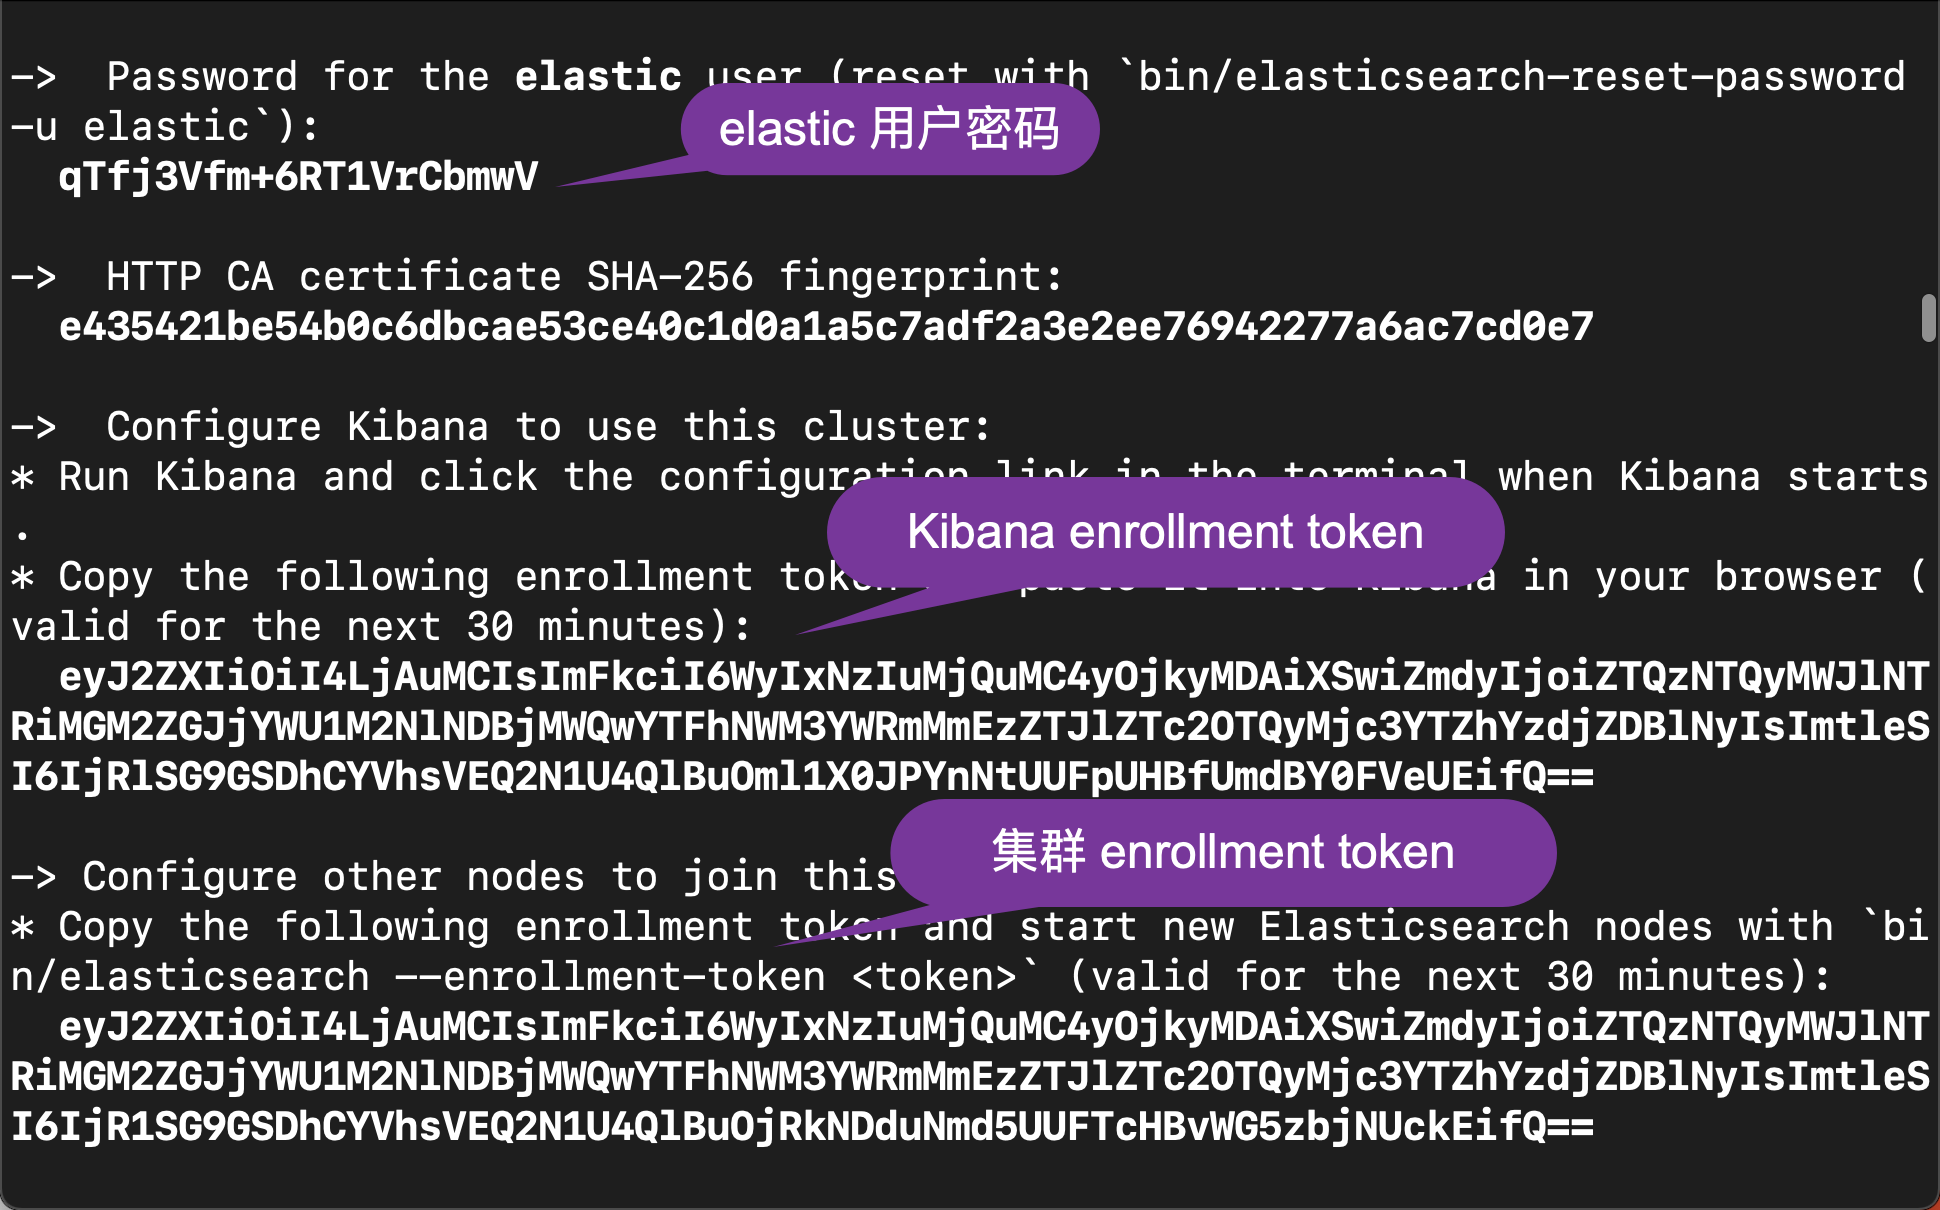
During startup, we can see the following output:
If you can't see the output above, please turn it up until you can find the output like above.
After Elasticsearch is started, we can use the following command to check:
curl --insecure --user elastic:qTfj3Vfm+6RT1VrCbmwV https://localhost:9200
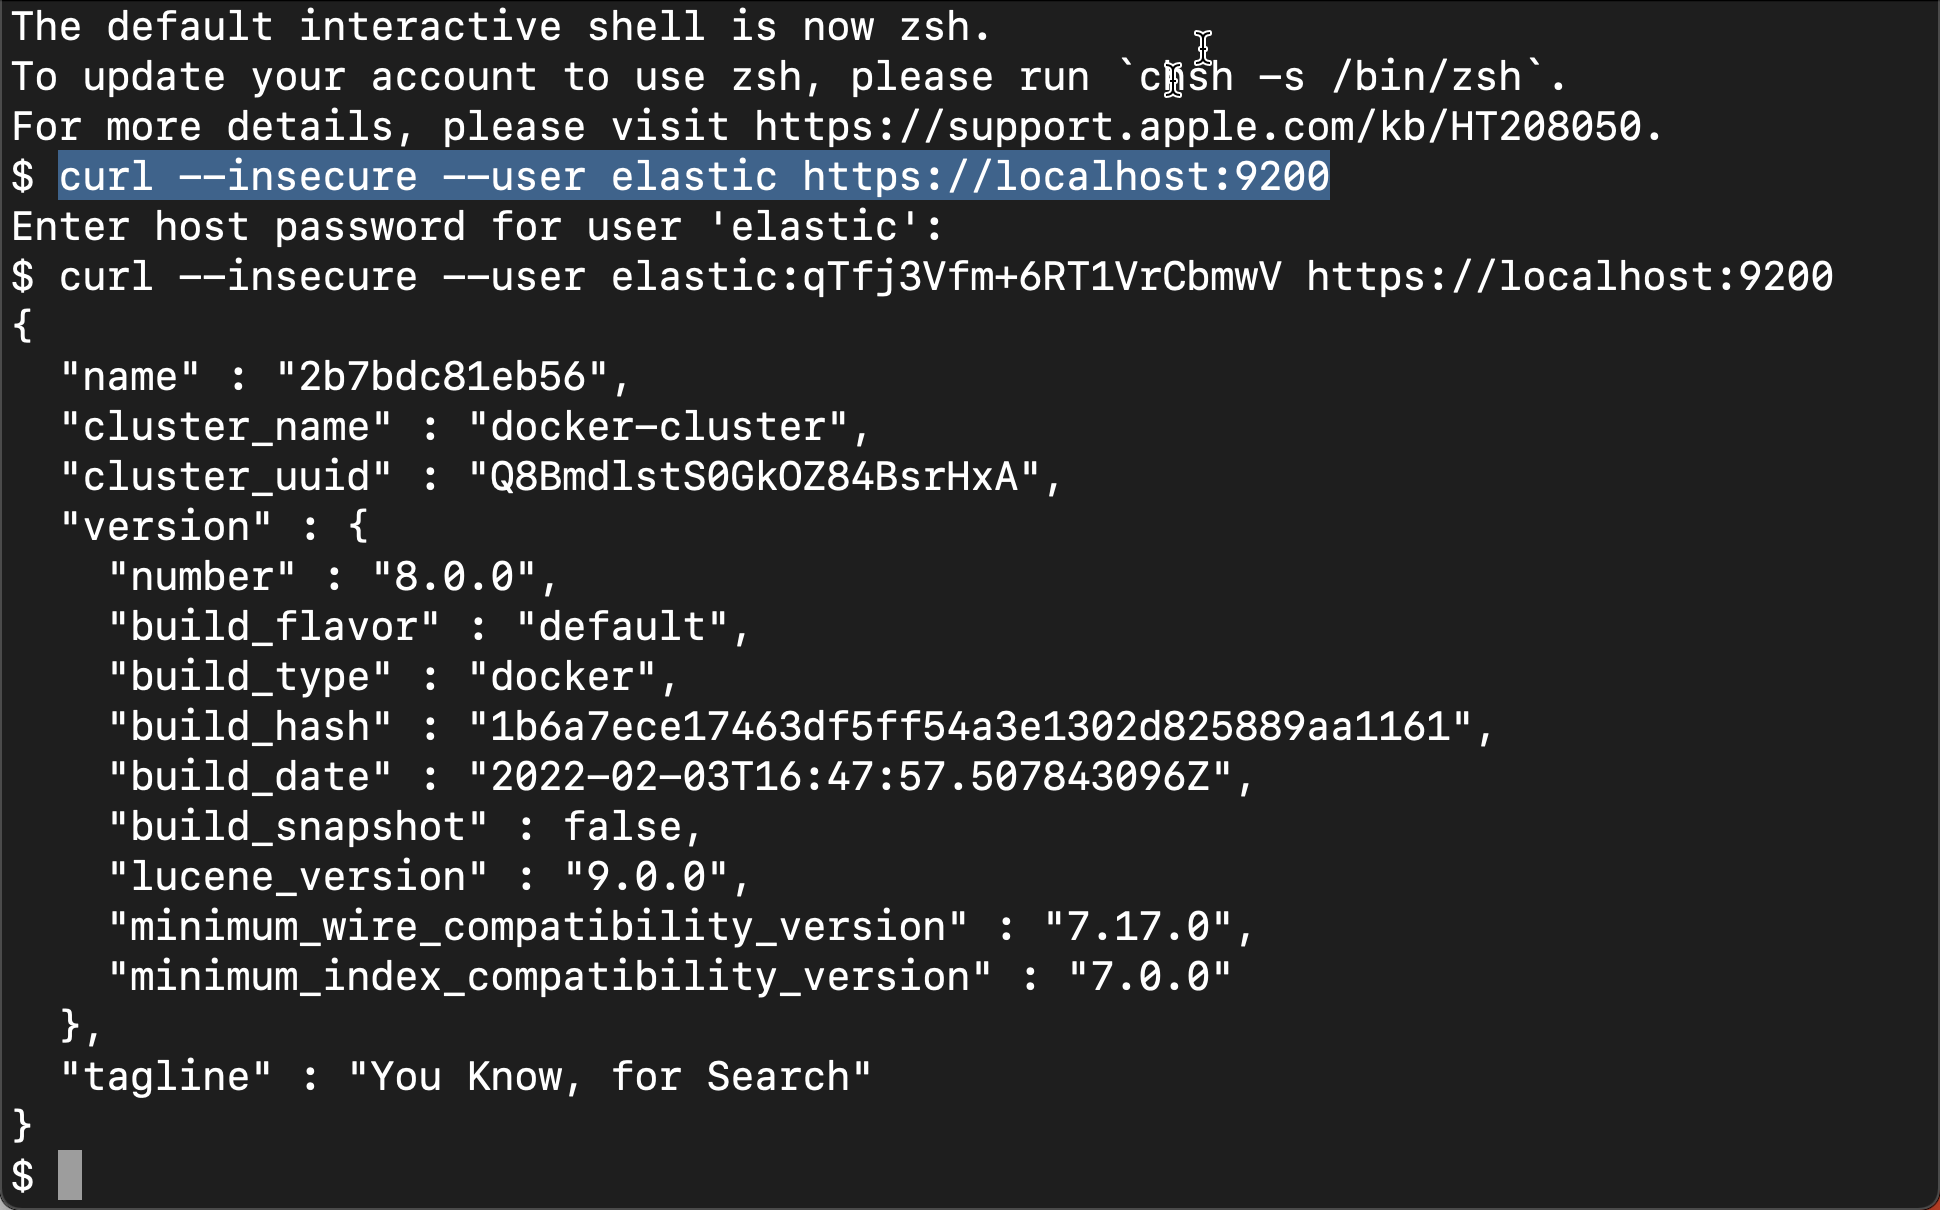
Since it is a self signed certificate, we can use -- insecure to perform the above operations. Of course, we can also follow my previous article“ Elastic: use Docker to install Elastic Stack 8.0 and start using it ”As described in:
curl -X GET --cacert ./http_ca.crt -u elastic:qTfj3Vfm+6RT1VrCbmwV https://localhost:9200/
We need to copy out the certificate http_ca.crt. Please note that the password above is the one displayed when Elasticsearch starts.
From the above output, we can see that we have successfully started the first node. We can use the following command to view:
curl --insecure --user elastic:qTfj3Vfm+6RT1VrCbmwV https://localhost:9200/_cat/nodes
$ curl --insecure --user elastic:qTfj3Vfm+6RT1VrCbmwV https://localhost:9200/_cat/nodes
172.24.0.2 56 30 0 0.04 0.03 0.04 cdfhilmrstw * 2b7bdc81eb56
Next, we use the following command to create the second node:
docker run -e ENROLLMENT_TOKEN="eyJ2ZXIiOiI4LjAuMCIsImFkciI6WyIxNzIuMjQuMC4yOjkyMDAiXSwiZmdyIjoiZTQzNTQyMWJlNTRiMGM2ZGJjYWU1M2NlNDBjMWQwYTFhNWM3YWRmMmEzZTJlZTc2OTQyMjc3YTZhYzdjZDBlNyIsImtleSI6IjR1SG9GSDhCYVhsVEQ2N1U4QlBuOjRkNDduNmd5UUFTcHBvWG5zbjNUckEifQ==" -e ES_JAVA_OPTS="-Xms1g -Xmx1g" --name es-node02 --net elastic -it docker.elastic.co/elasticsearch/elasticsearch:8.0.0
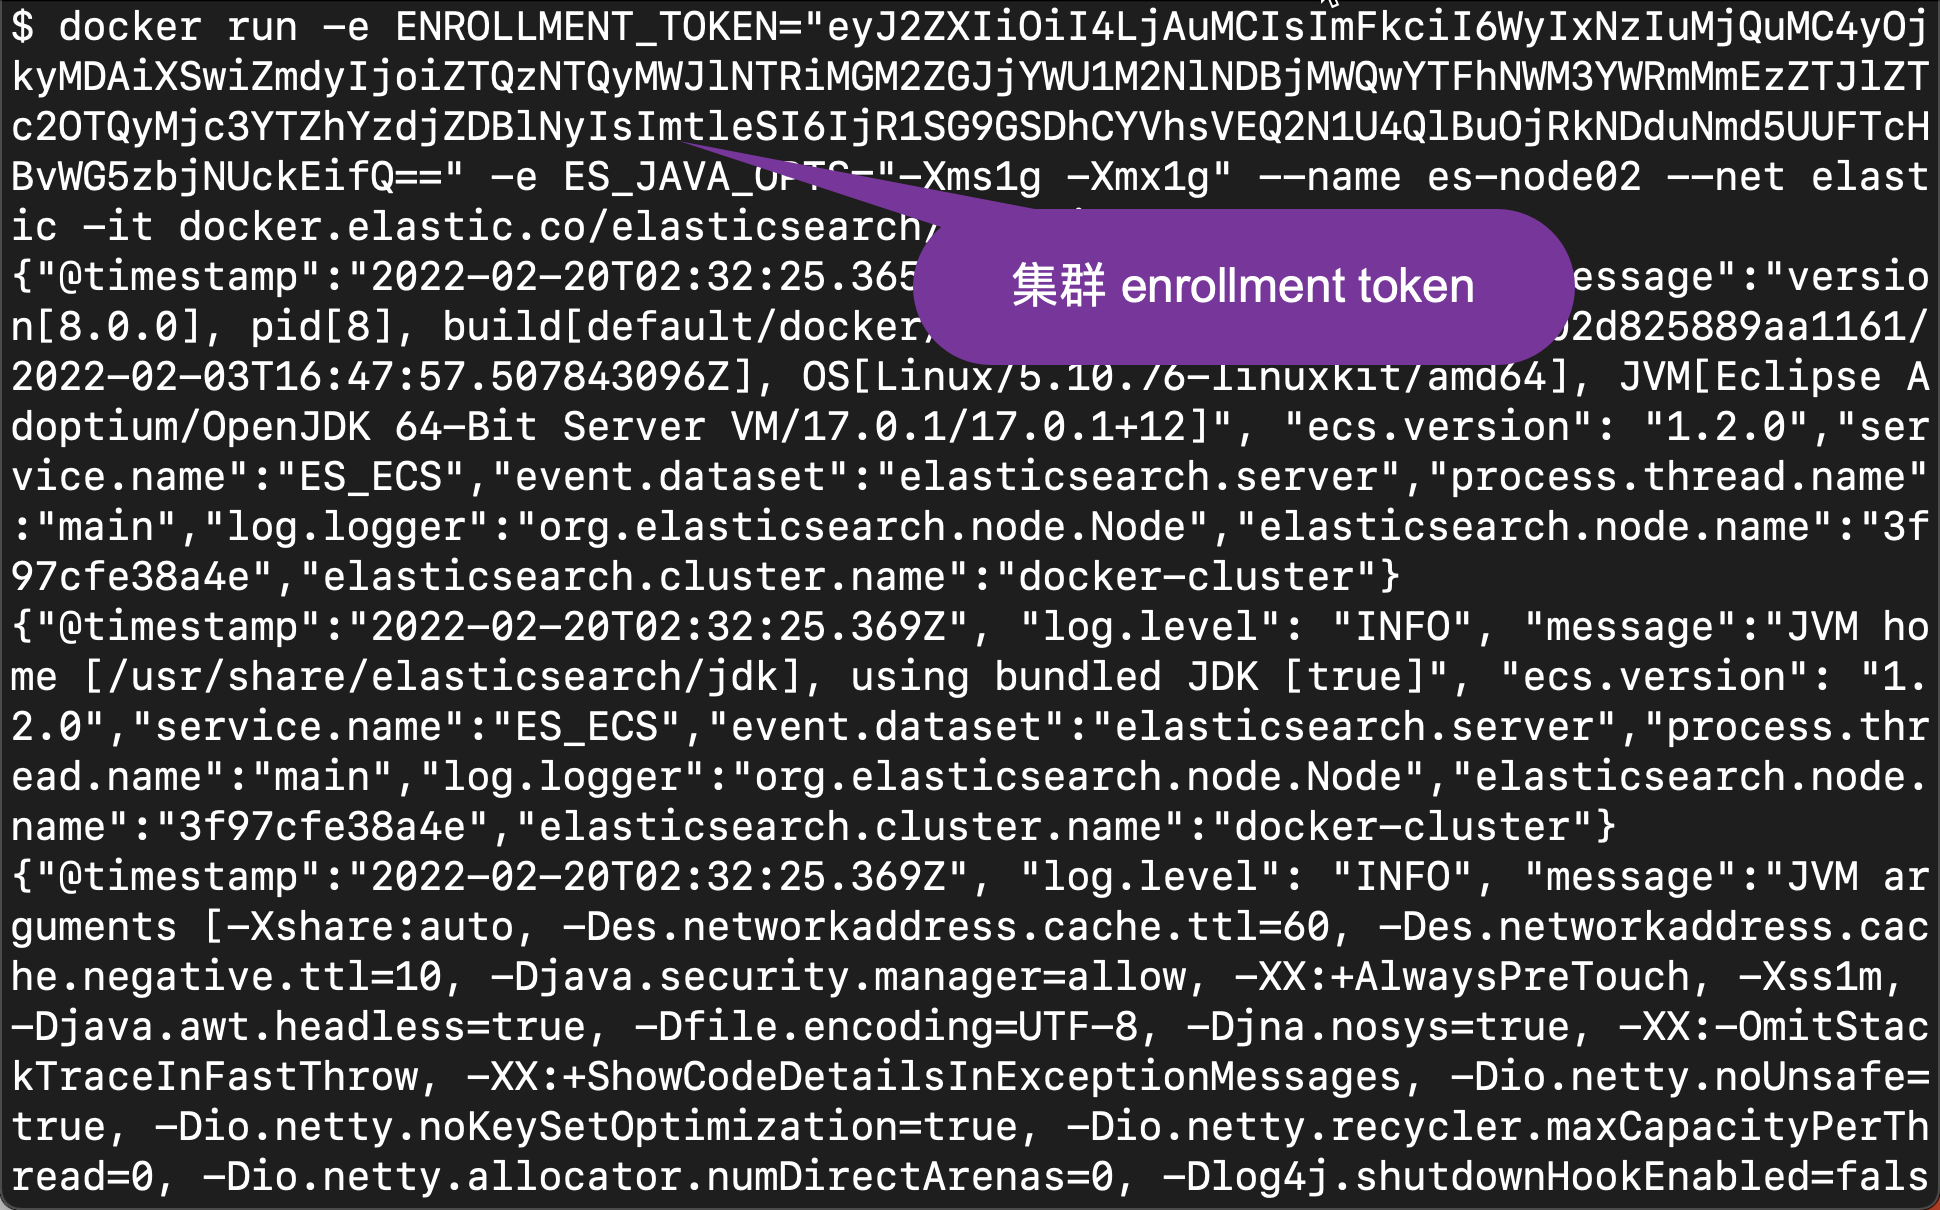
In the above, we used the cluster enrollment token when the first node was started, and we omitted the port mapping.
After the node is fully started, we will use the following command to check again:
curl --insecure --user elastic:qTfj3Vfm+6RT1VrCbmwV https://localhost:9200/_cat/nodes
$ curl --insecure --user elastic:qTfj3Vfm+6RT1VrCbmwV https://localhost:9200/_cat/nodes
172.24.0.2 21 42 1 0.03 0.10 0.06 cdfhilmrstw * 2b7bdc81eb56
172.24.0.3 11 42 1 0.03 0.10 0.06 cdfhilmrstw - 3f97cfe38a4e
At this time, we can see a cluster with two nodes.
We use the same method to start the third node. Run the following command:
docker run -e ENROLLMENT_TOKEN="eyJ2ZXIiOiI4LjAuMCIsImFkciI6WyIxNzIuMjQuMC4yOjkyMDAiXSwiZmdyIjoiZTQzNTQyMWJlNTRiMGM2ZGJjYWU1M2NlNDBjMWQwYTFhNWM3YWRmMmEzZTJlZTc2OTQyMjc3YTZhYzdjZDBlNyIsImtleSI6IjR1SG9GSDhCYVhsVEQ2N1U4QlBuOjRkNDduNmd5UUFTcHBvWG5zbjNUckEifQ==" -e ES_JAVA_OPTS="-Xms1g -Xmx1g" --name es-node03 --net elastic -it docker.elastic.co/elasticsearch/elasticsearch:8.0.0
Let's run the above command again to check:
curl --insecure --user elastic:qTfj3Vfm+6RT1VrCbmwV https://localhost:9200/_cat/nodes
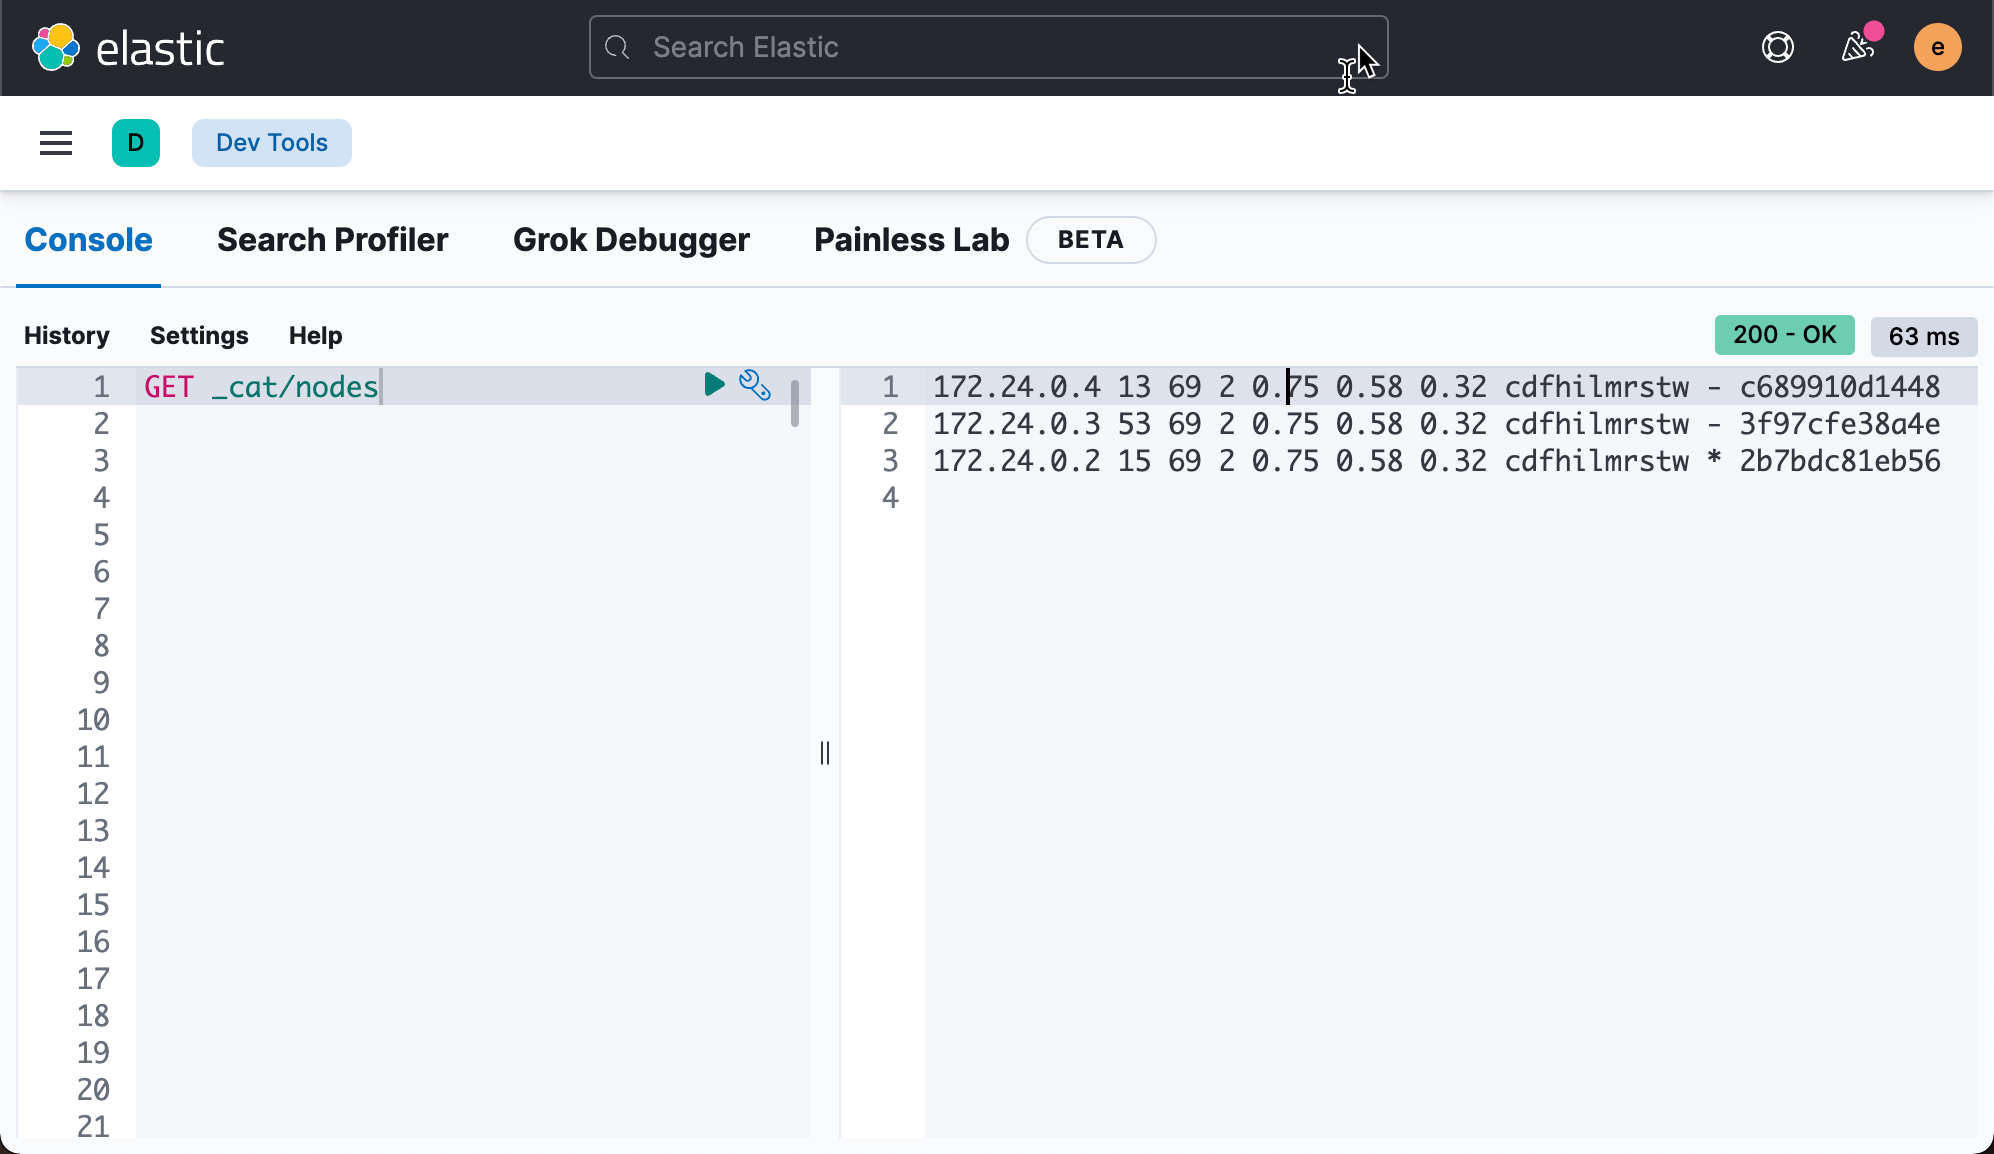
$ curl --insecure --user elastic:qTfj3Vfm+6RT1VrCbmwV https://localhost:9200/_cat/nodes
172.24.0.4 54 55 15 1.41 0.42 0.17 cdfhilmrstw - c689910d1448
172.24.0.3 34 55  5 1.41 0.42 0.17 cdfhilmrstw - 3f97cfe38a4e
172.24.0.2 60 55  5 1.41 0.42 0.17 cdfhilmrstw * 2b7bdc81eb56
At this time, we can see a cluster with three nodes. We can view the running containers through docker:
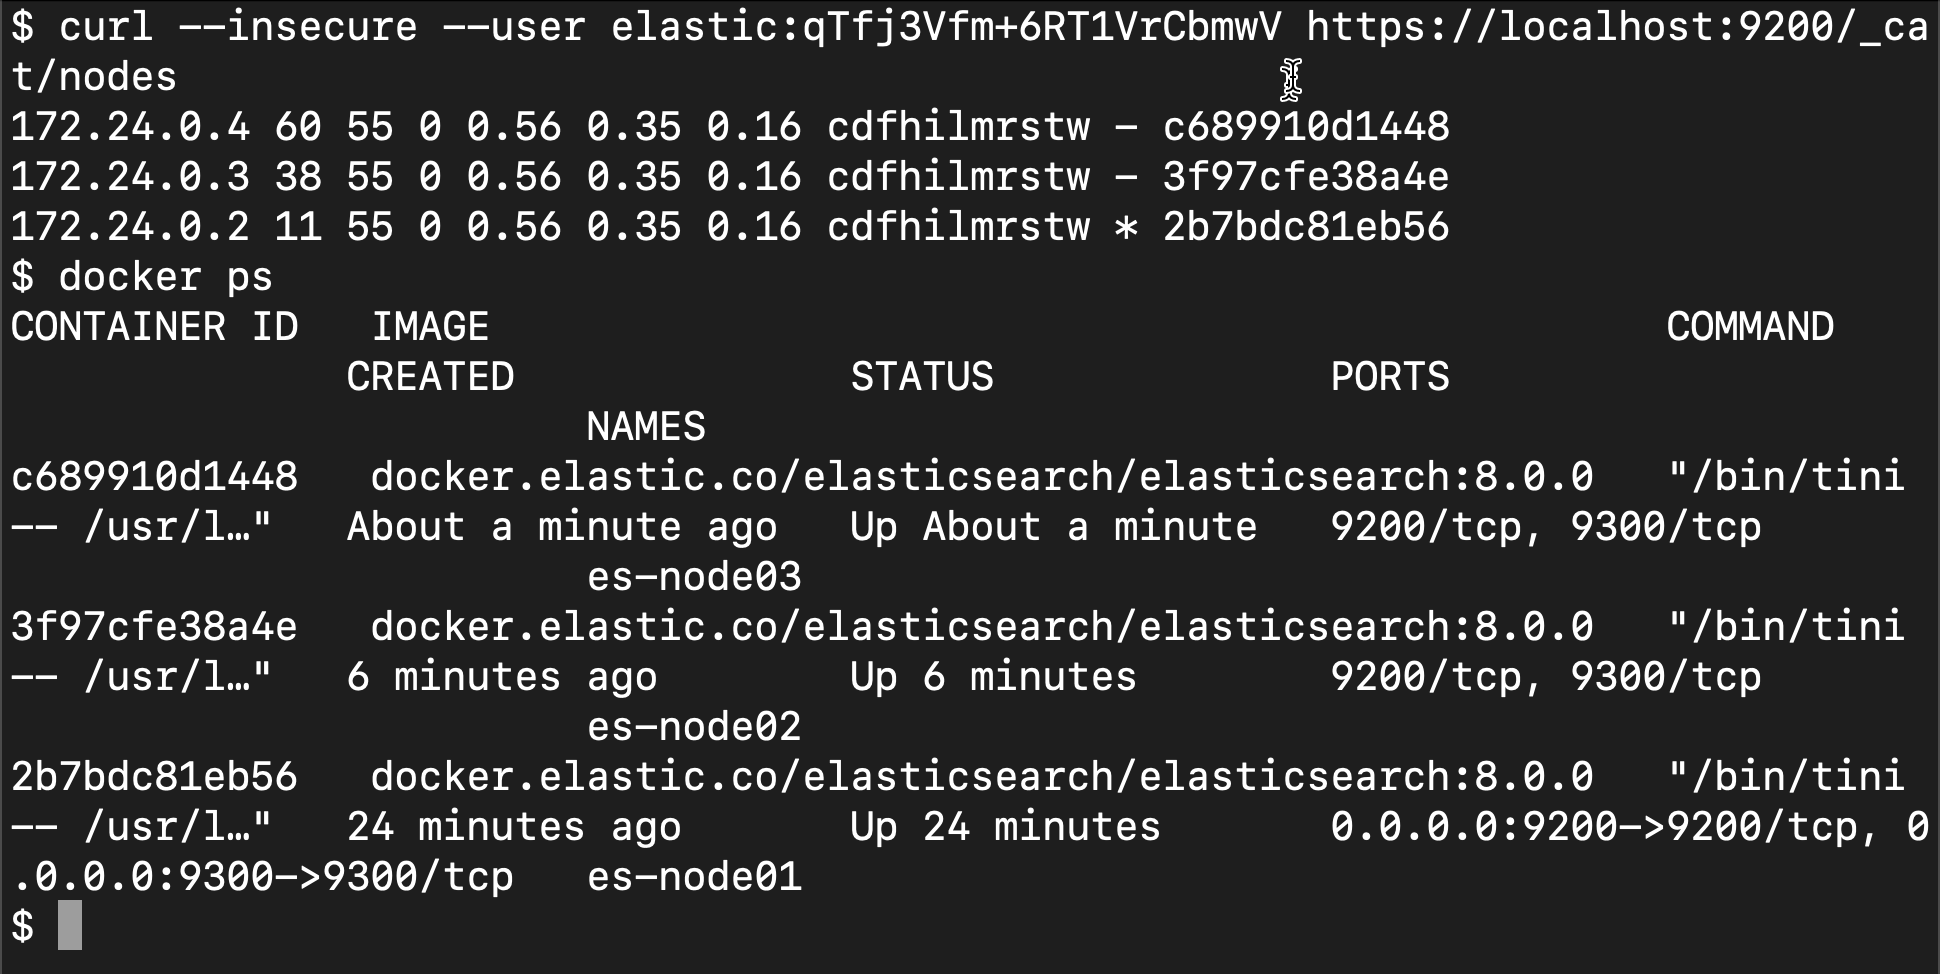
We can see that three containers are running.
Let's start Kibana next:
docker run -e SERVER_PUBLICBASE_URL="http://liuxg.com:5601" --name kib-01 --net elastic -p 5601:5601 -it docker.elastic.co/kibana/kibana:8.0.0
We can see the following output:
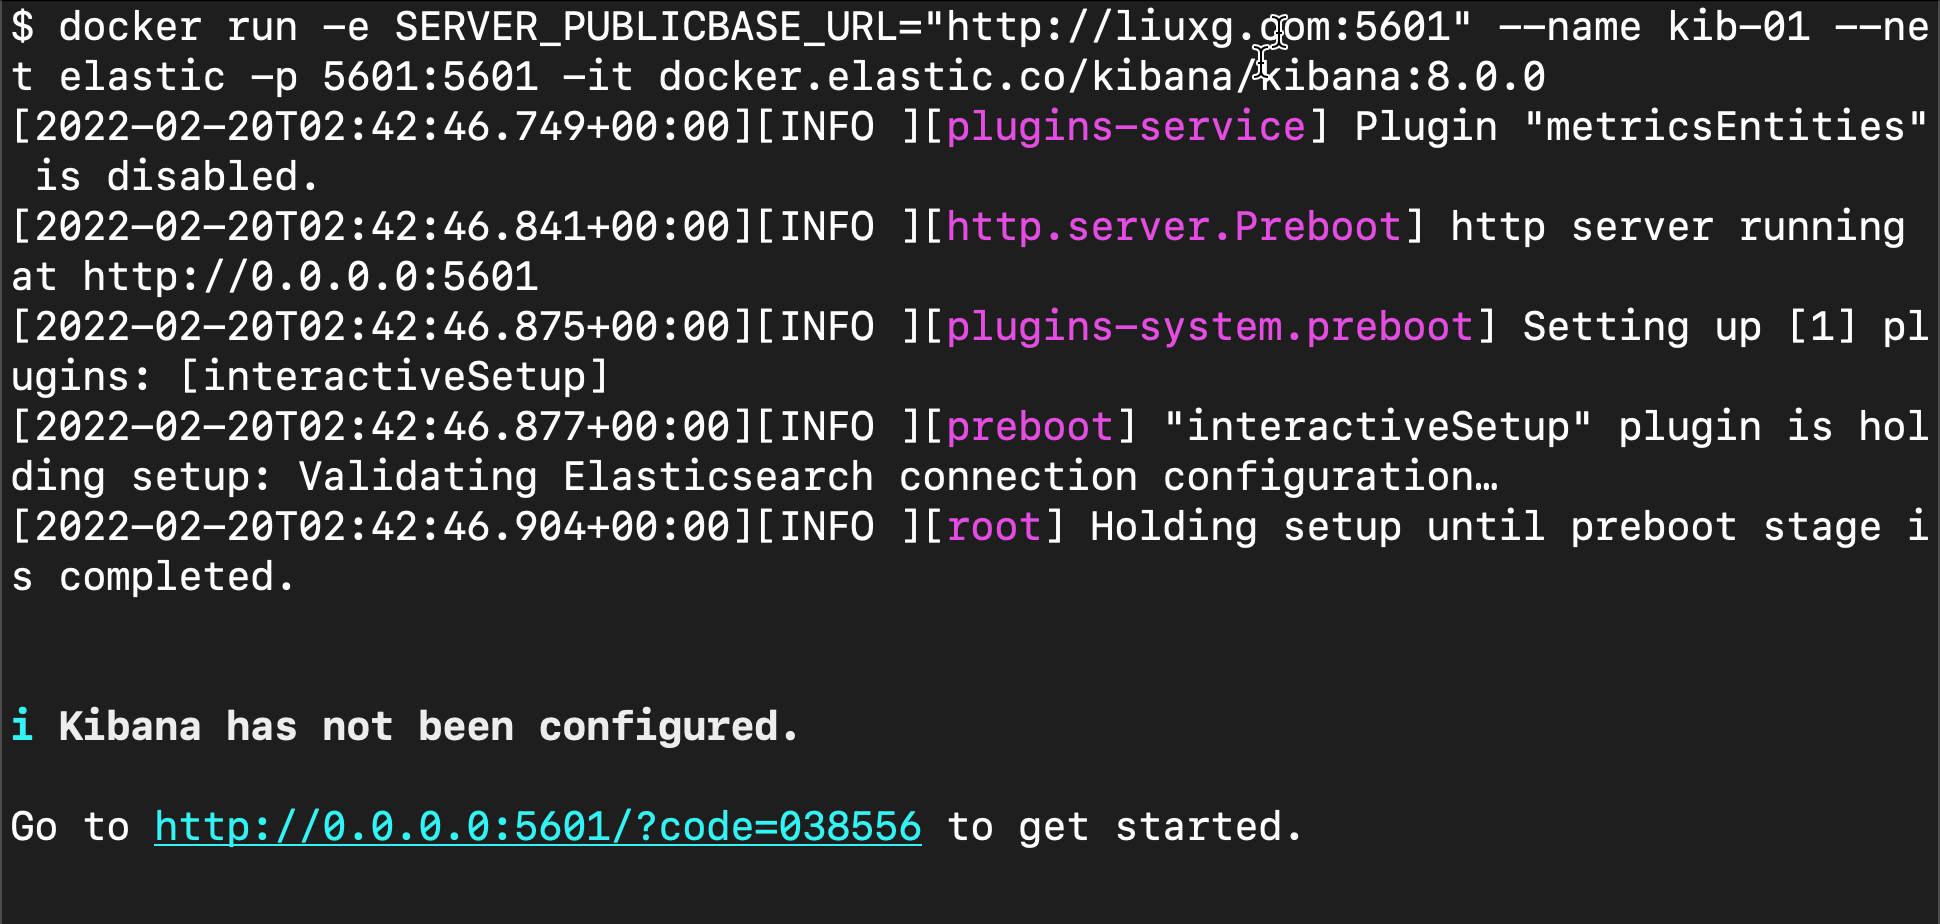
Above, I defined "server"_ PUBLICBASE_ URL, although this is unnecessary. You need to define your favorite domain name in / etc/hosts on your computer.
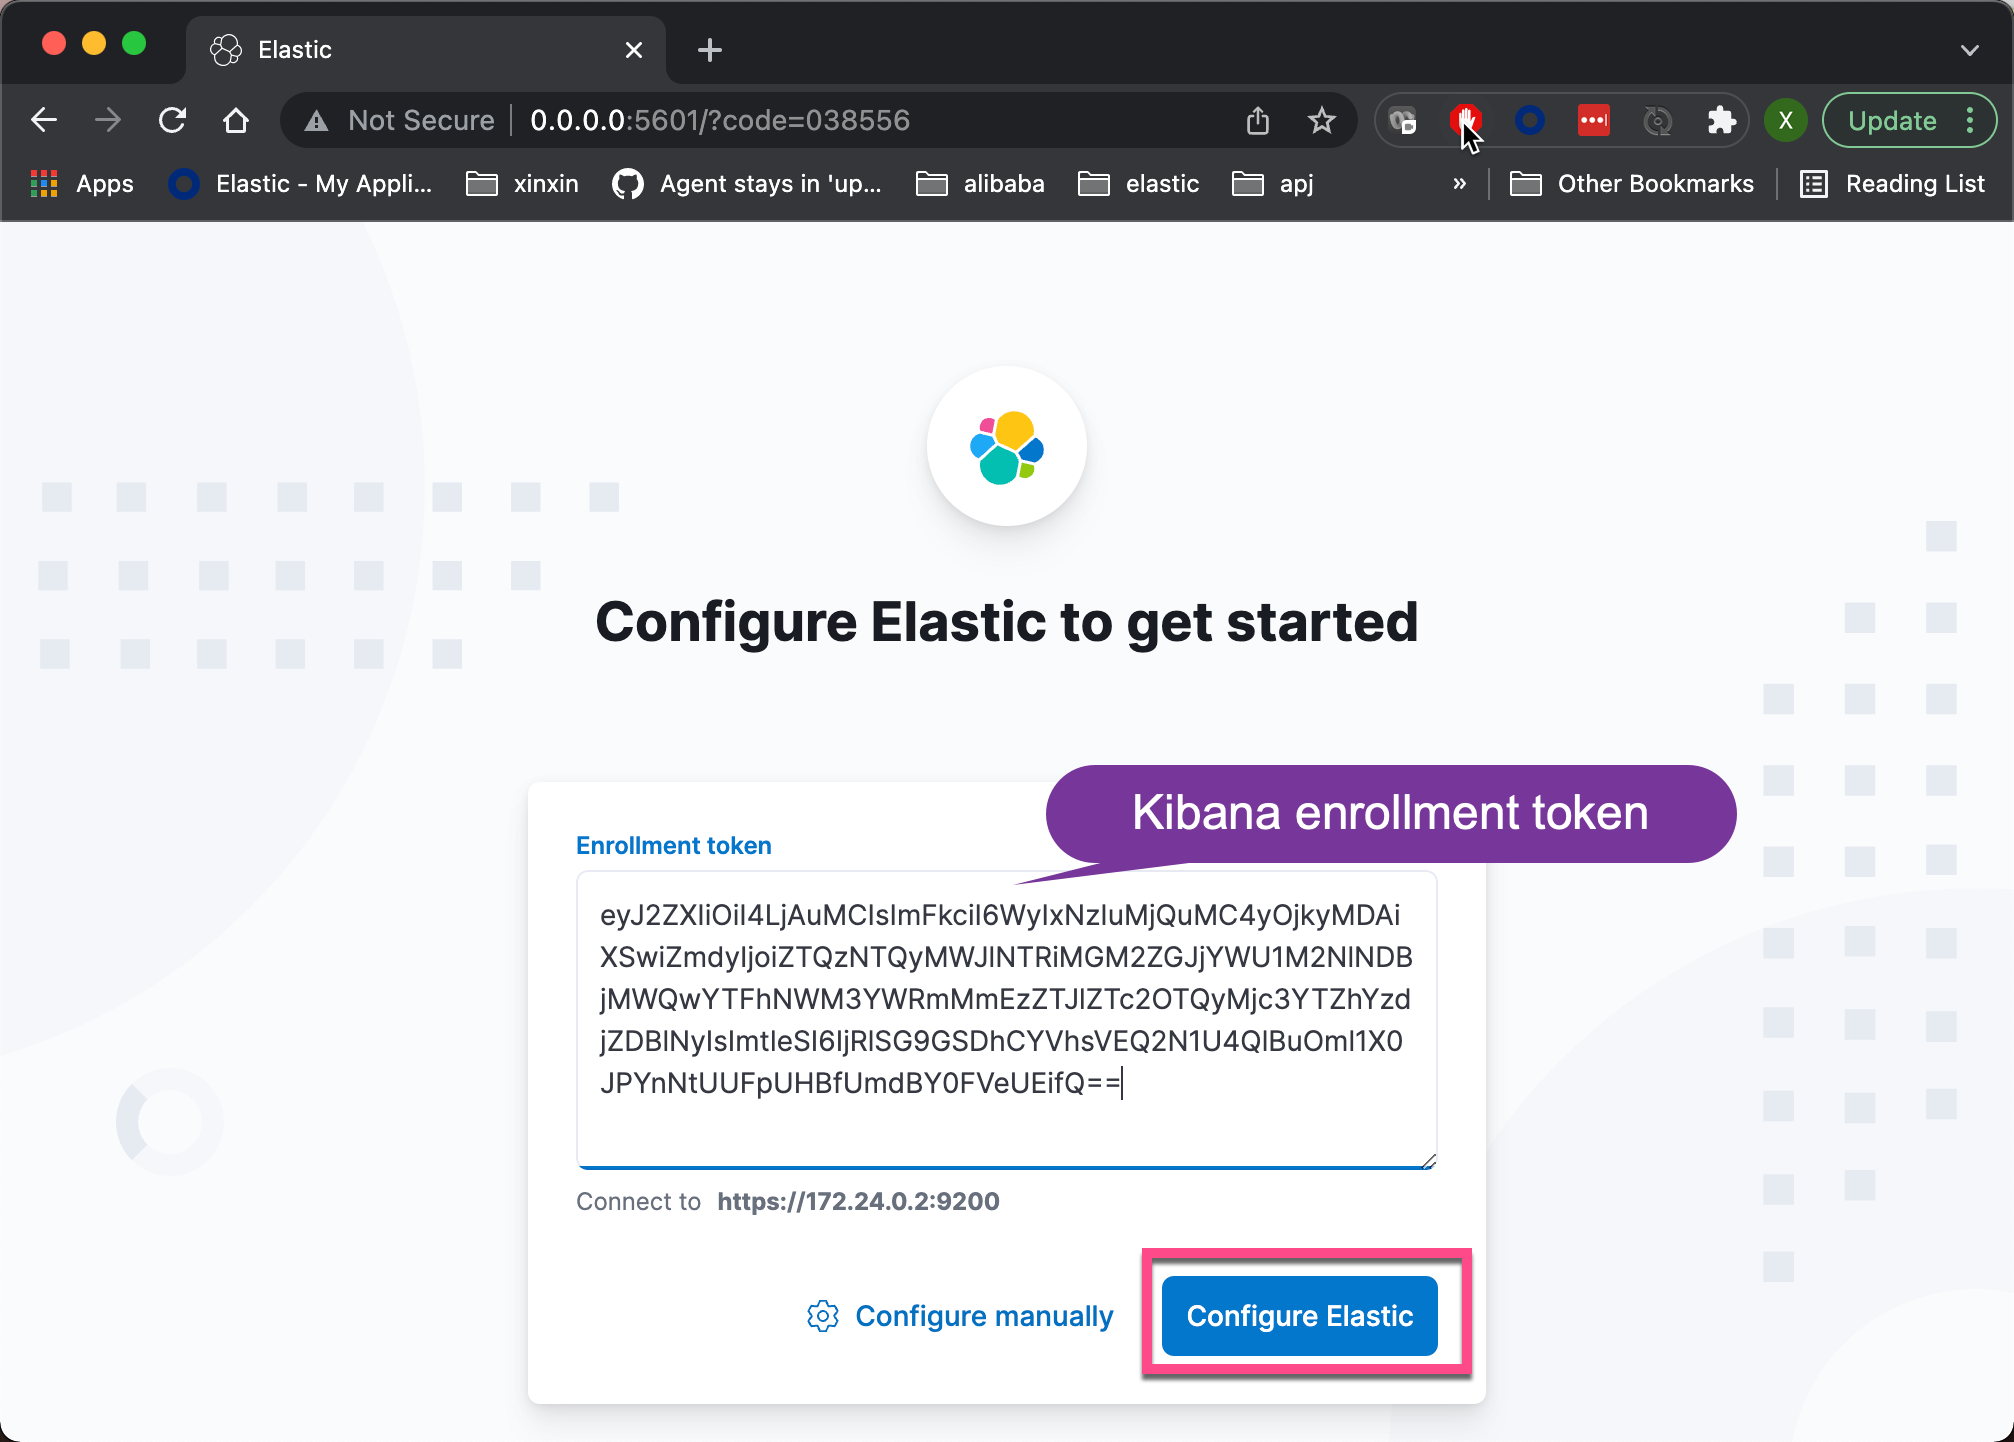
As shown above, it outputs a link http://0.0.0.0:5601/?code=038556 Let's enter in the browser:
The above enrollment token is valid for 30 minutes after the first Elasticsearch is started. The above token will be invalid after 30 minutes. If this happens, we can use the following method to generate a new token:
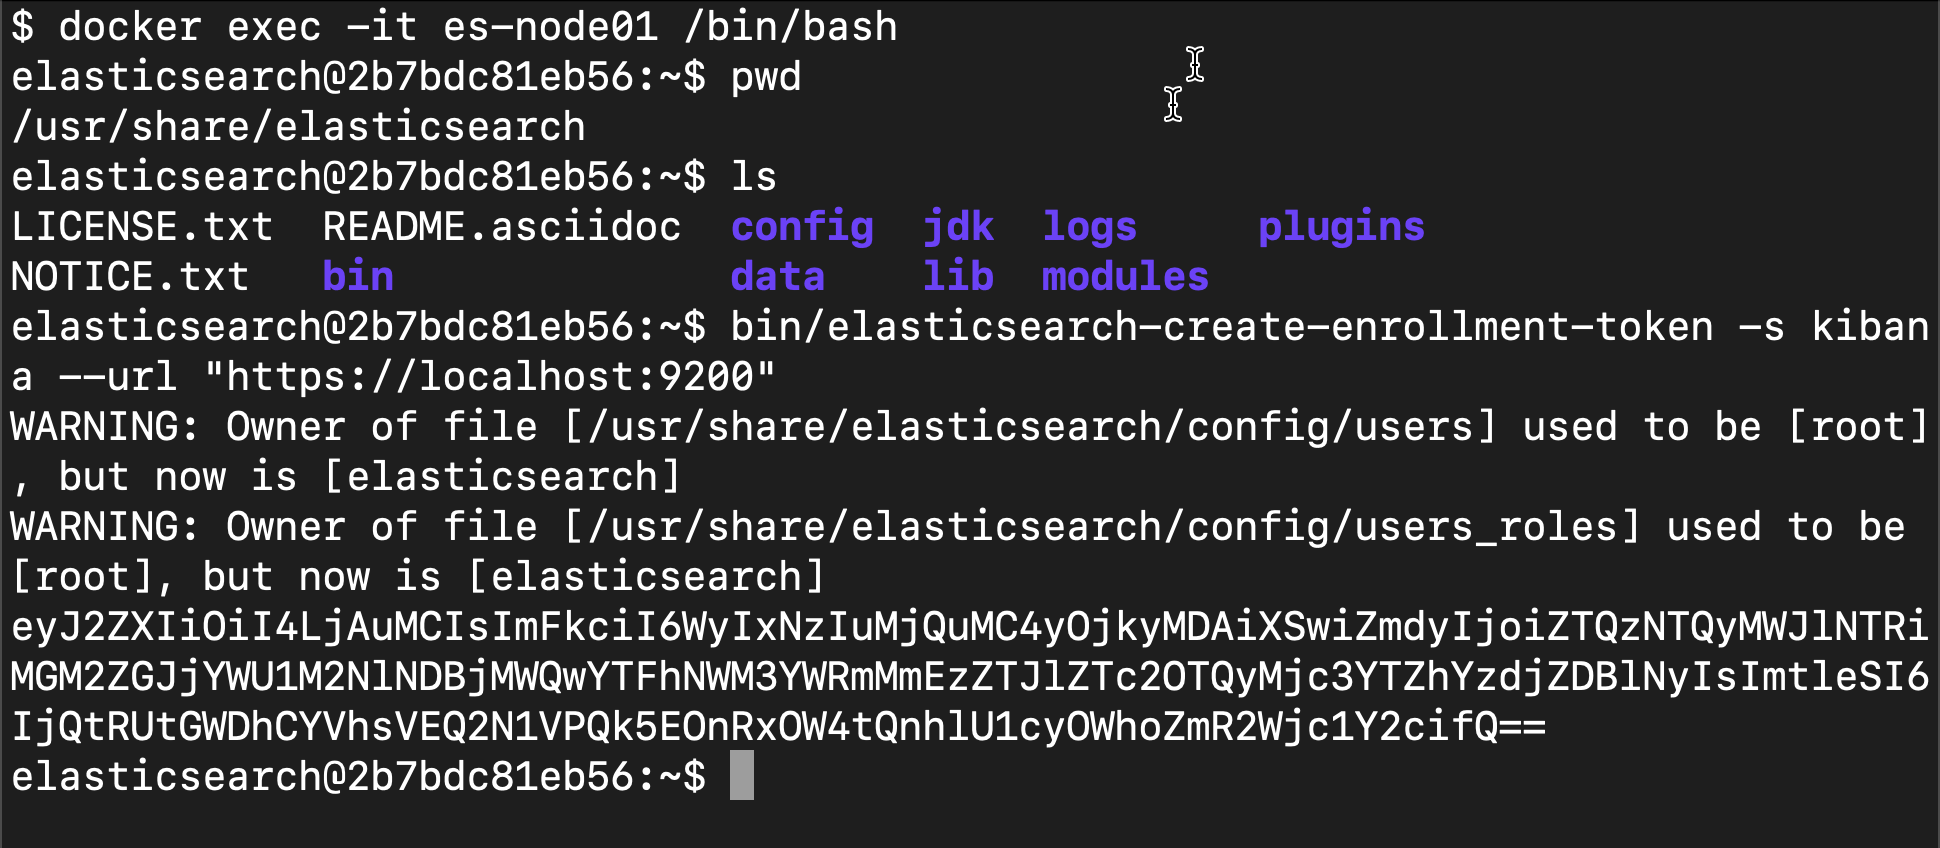
Similarly, some time of the node enrollment token is 30 minutes. You can use the following method to generate it:
bin/elasticsearch-create-enrollment-token -s node

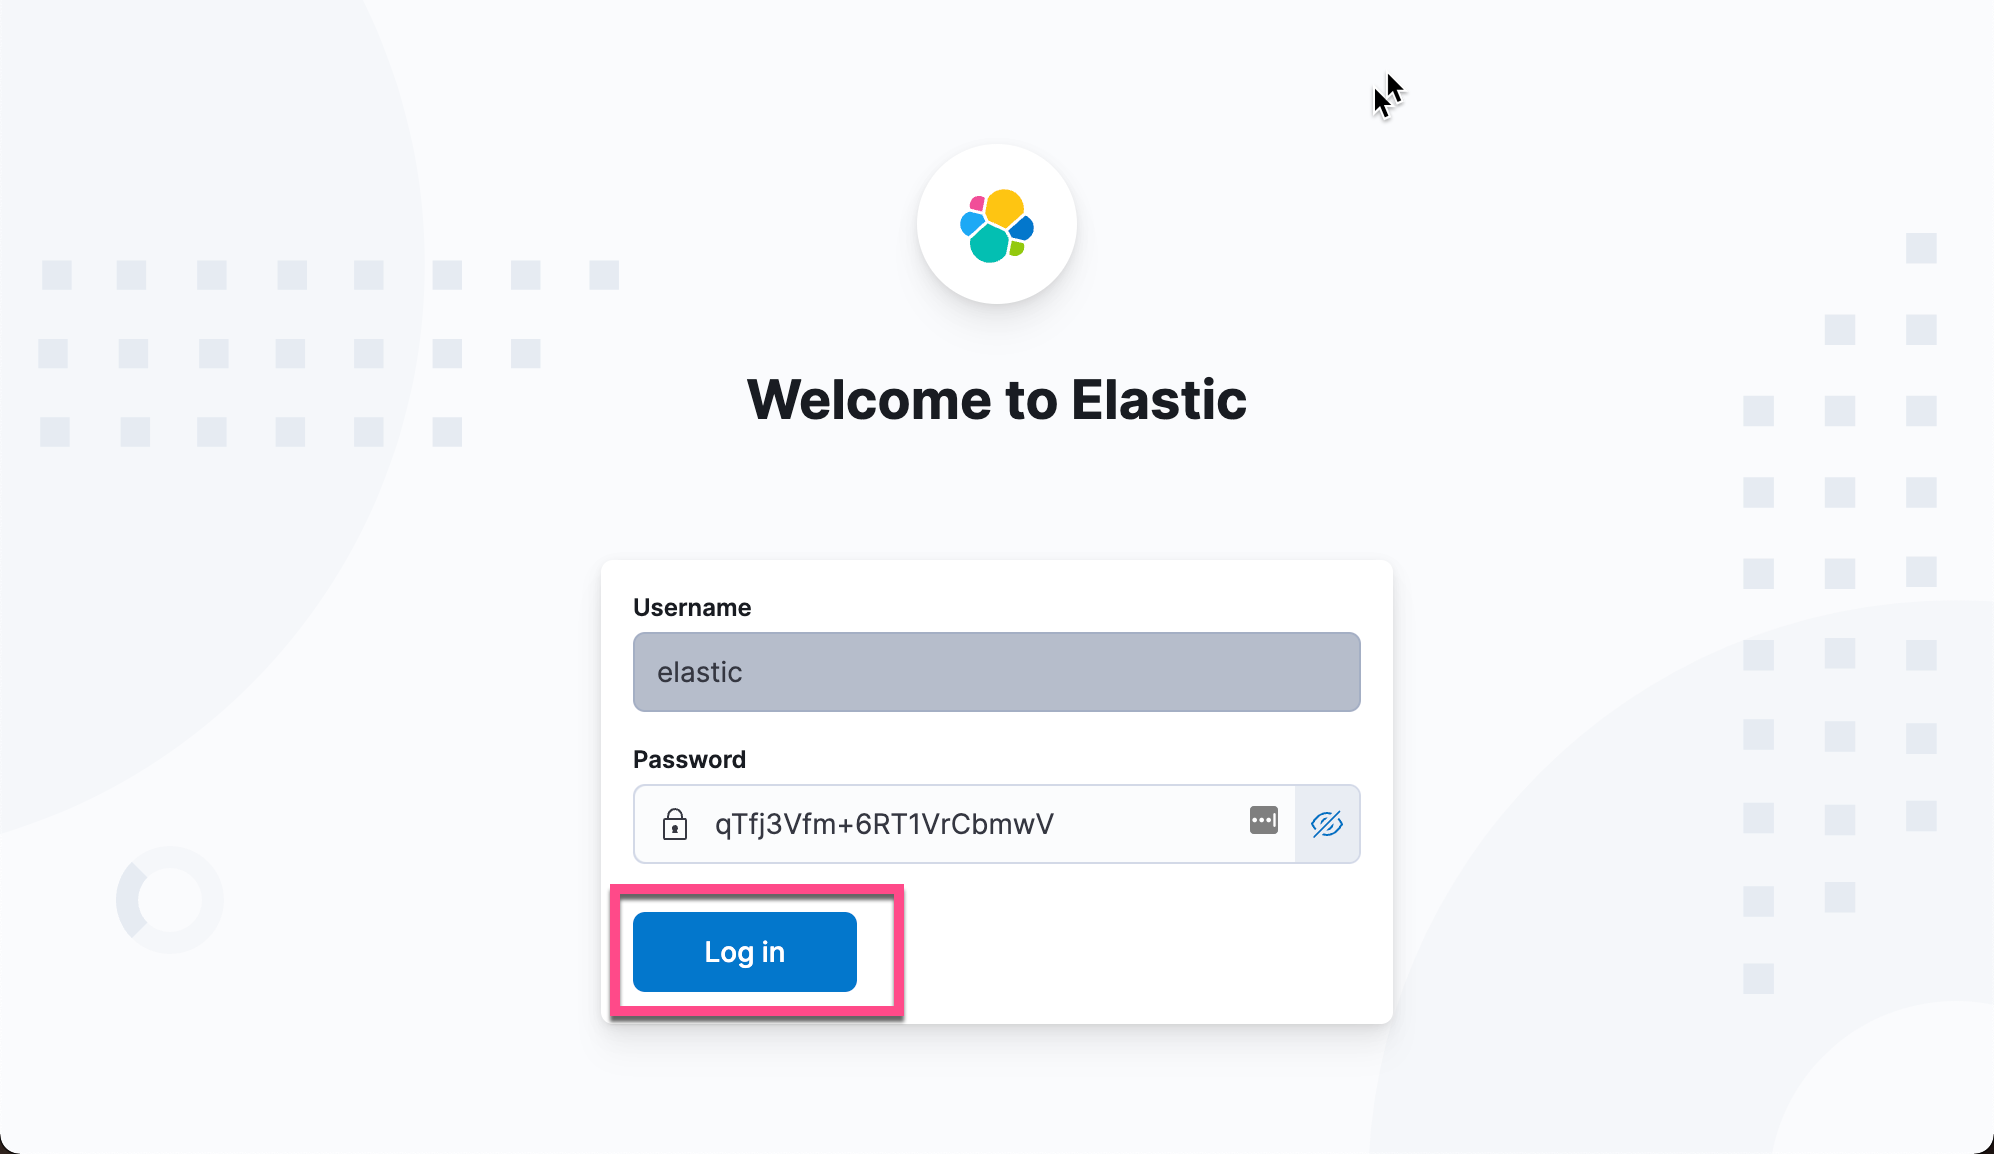
Next, we enter the password of our previous elastic user in Kibana's interface:
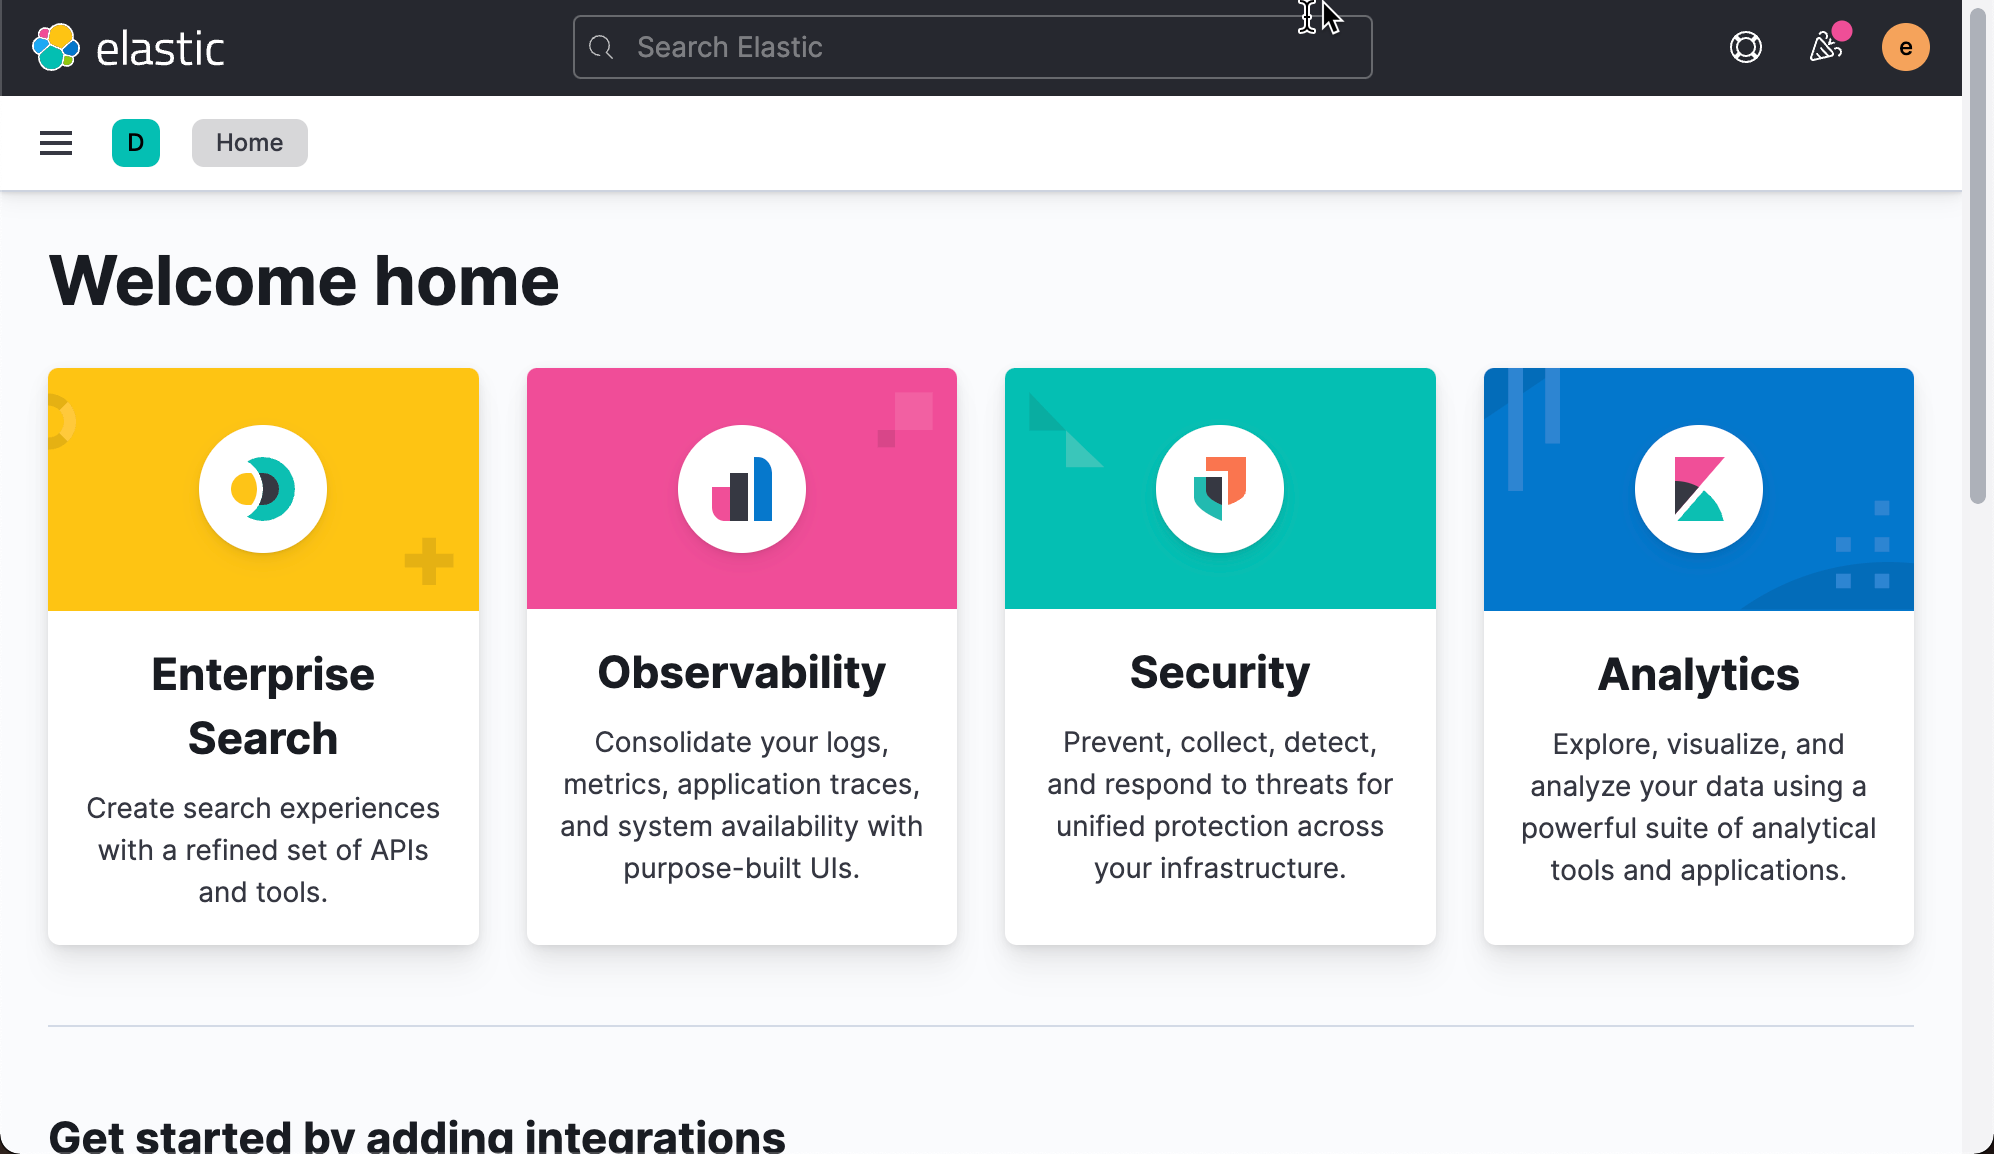
So we go to Kibana's interface. We can view the clusters of three nodes created by the following methods:
If we want to clean up the clusters that have been created so far. We can do the following actions. Let's first look at the containers that have been created:
docker ps
$ docker ps
CONTAINER ID   IMAGE                                                 COMMAND                  CREATED          STATUS          PORTS                                            NAMES
6eb0fc34ee9c   docker.elastic.co/kibana/kibana:8.0.0                 "/bin/tini -- /usr/l..."   22 minutes ago   Up 22 minutes   0.0.0.0:5601->5601/tcp                           kib-01
c689910d1448   docker.elastic.co/elasticsearch/elasticsearch:8.0.0   "/bin/tini -- /usr/l..."   27 minutes ago   Up 27 minutes   9200/tcp, 9300/tcp                               es-node03
3f97cfe38a4e   docker.elastic.co/elasticsearch/elasticsearch:8.0.0   "/bin/tini -- /usr/l..."   32 minutes ago   Up 32 minutes   9200/tcp, 9300/tcp                               es-node02
2b7bdc81eb56   docker.elastic.co/elasticsearch/elasticsearch:8.0.0   "/bin/tini -- /usr/l..."   50 minutes ago   Up 50 minutes   0.0.0.0:9200->9200/tcp, 0.0.0.0:9300->9300/tcp   es-node01
We stop all containers:
$ docker stop kib-01
kib-01
$ docker stop es-node03
es-node03
$ docker stop es-node02
es-node02
$ docker stop es-node01
es-node01
We can use the following command to completely delete the container and network:
$ docker network rm elastic
elastic
$ docker rm es-node01
es-node01
$ docker rm es-node02
es-node02
$ docker rm es-node03
es-node03
This frees up all our resources.