Build ES development environment.
Installation instructions
- Environment: centos7
Java : java8
elasticsearch-6.5.4
- Download address
$ cd ~
$ cd download
$ wget https://artifacts.elastic.co/downloads/elasticsearch/elasticsearch-6.5.4.tar.gz
-
Pre-installation Conditions
Note: The article has been configured by default version 1.8 jdk, if not, please configure it first!- Install git
- Installing node.js (elastic searc-head must)
- Install net-tools
-
Reference material
https://www.cnblogs.com/--1024/p/9306661.html?tdsourcetag=s_pctim_aiomsg -
Installation Directory Description
The installation directories are in the / opt / elastic search directory, including elastic search, elastic search-head
So this document installs elastic search, ik, elastic search-head
- Installation steps
- Installation Configuration ES
1). New elastic search directory
cd /opt
sudo mkdir elasticsearch
Unzip ES to the bottom of the / opt / elastic search directory
cd download
sudo tar -xvf elasticsearch-6.5.4.tar.gz -C /opt/elasticsearch/
2. Elastic search configuration
Modify elastic search.yml
cd /opt/elasticsearch/elasticsearch-6.5.4/config
sudo vim elasticsearch.yml
Modify the following items (configure the cluster name, where the port defaults to 9200, and change http.port if necessary)
cluster.name: xxx-es

network.host: 0.0.0.0

path.logs: /home/apps/elasticsearch-6.3.1/logs

path.data: /home/apps/elasticsearch-6.3.1/data   #By default, there is no directory, so you need to manually create new mkdir data

//Add the following two configurations (cross-domain access)
http.cors.enabled: true

http.cors.allow-origin: "*"
Save the changes.
3. New startup user (root role is not allowed after ES5.0)
#Add user
adduser centos

#Set password
passwd centos

#To grant authorization
chown -R centos /centos elasticsearch

#Switching users
su centos

#start-up
cd /opt/elasticsearch/elasticsearch-6.5.4/bin
./elasticsearch
Startup may report the following error: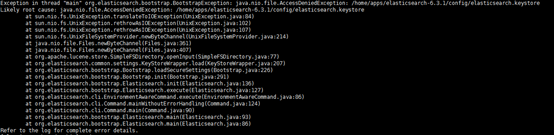
Switch back to the root role and authorize the user once more. It may be that the file is newly created at startup and has no privileges.
su root
chown -R centos /opt/elasticsearch/elasticsearch-6.5.4
Error Solution
Start again and find that the error is still reported
Cause: Local file cannot be created. The maximum number of files that users can create is too small.
Solution:
# Switch back to the root account, or change it in sudo mode
su root
 # Modify the limits.conf file
vi /etc/security/limits.conf
 Add the following configuration at the bottom of the file
* soft nofile 65536
* hard nofile 131072
* soft nproc 2048
* hard nproc 4096
Switch back to the elastic search account, start ES again, and report a mistake
Cause: Max virtual memory is too small
Solution:
# Switch to root account
su root
 # Modify sysctl.conf
vi /etc/sysctl.conf
 Add the following configuration
vm.max_map_count=655360
Execute sysctl -p to refresh the configuration. Switch back to the elastic search user and start ES again
Another case is that the actual machine memory is very small, resulting in insufficient startup memory.
Solution: Configure jvm usage size
There is a jvm.options under the config file by modifying the configuration information.
Configure the size according to the actual situation. The default configuration in ES is 1G.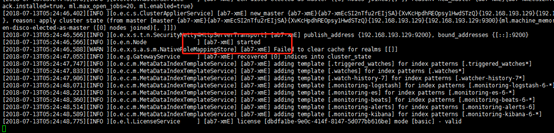
Start successfully! Let's open the browser and visit it.~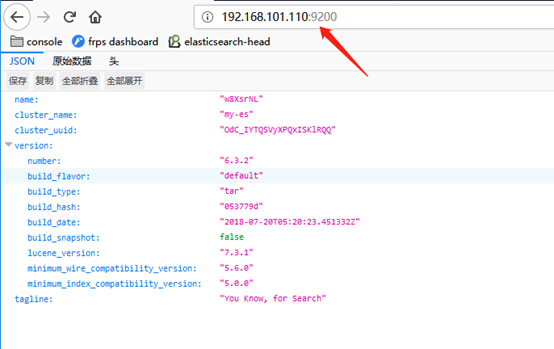
Ps: Firewall configuration
We have configured all the nodes to be accessible before, and also configure the cross-domain. Why can't we open it?
Don't forget there's still a firewall. The 9200 external access port needs to be opened
Enter the following commands in the console
#Open port 9200
firewall-cmd --zone=public --add-port=9200/tcp --permanen

#Refresh configuration
firewall-cmd --reload
Okay, so that's the end of the configuration of ~ES.
- Install IK word segmenter
- download
Select Version Website
https://github.com/medcl/elasticsearch-analysis-ik/releases
6.5.4 Download link:
https://github-production-release-asset-2e65be.s3.amazonaws.com/2993595/c26d1080-0662-11e9-8126-57843dc6fdd2?X-Amz-Algorithm=AWS4-HMAC-SHA256&X-Amz-Credential=AKIAIWNJYAX4CSVEH53A%2F20190130%2Fus-east-1%2Fs3%2Faws4_request&X-Amz-Date=20190130T031318Z&X-Amz-Expires=300&X-Amz-Signature=14938947077b9df77552345a3e199240bb9489f8abfc0c4ac2f1173ea2d0fb3b&X-Amz-SignedHeaders=host&actor_id=22309140&response-content-disposition=attachment%3B%20filename%3Delasticsearch-analysis-ik-6.5.4.zip&response-content-type=application%2Foctet-stream
Download ik word segmenter
cd download
wget https://github-production-release-asset-2e65be.s3.amazonaws.com/2993595/c26d1080-0662-11e9-8126-57843dc6fdd2?X-Amz-Algorithm=AWS4-HMAC-SHA256&X-Amz-Credential=AKIAIWNJYAX4CSVEH53A%2F20190127%2Fus-east-1%2Fs3%2Faws4_request&X-Amz-Date=20190127T040443Z&X-Amz-Expires=300&X-Amz-Signature=f202316c2c3cf8a0ec2492698d4ef67eaa23e10c8b8d7a84e8814e68d320352d&X-Amz-SignedHeaders=host&actor_id=22309140&response-content-disposition=attachment%3B%20filename%3Delasticsearch-analysis-ik-6.5.4.zip&response-content-type=application%2Foctet-stream
2) Installation and deployment
// move
mv elasticsearch-analysis-ik-6.5.4.zip /opt/elasticsearch/elasticsearch-6.5.4/plugins/
cd /opt/elasticsearch/elasticsearch-6.5.4/plugins/ik
// decompression
unzip elasticsearch-analysis-ik-6.5.4.zip
// Delete old files
sudo rm -rf elasticsearch-analysis-ik-6.5.4.zip
Once configured, restart ES and load the ik segmenter automatically.
- Install elastic search-head
Download elastic search-head
cd  /opt/ elasticsearch
git clone https://github.com/mobz/elasticsearch-head
Arrange and configure environment information such as node.js (ps: install node JS and npm in yum mode).
Reference material:
https://blog.csdn.net/lu_embedded/article/details/79138650
https://blog.csdn.net/xiao_jun_0820/article/details/50838185
Install Node.js from the EPEL Library
An effective and simple way to install Node.js is to download and install it from the official library. First, make sure you have access to the EPEL library. You can install it by running the following commands.
sudo yum install epel-release
Now you can install Node.js using the yum command
sudo yum install nodejs
Because I need to manage the node packages during the development process, I also need to install the new public management package manager, using the following commands. (Note: Since the new version of nodejs has integrated npm, this step can be ignored.)
sudo yum install npm
Check:
# node --version
v6.12.2
# npm --version
3.10.10
As you can see, if installed in this way, the version is old.
Install grunt to start head
# Install grunt command-line tool grunt-cli
npm install -g grunt-cli
# Installing grunt and its plug-ins
npm install grunt --save-dev
# View the installation version
grunt -version
Ps: There may be license issues when installing:
Reference: https://www.cnblogs.com/shengulong/p/6224908.html
Processing method:
Open the package.json file in the elastic search-head directory, find the license location, and modify it to the presence of Identifier on the website above.
Configure connection information
vi Gruntfile.js
Configure firewall after saving, open 9100 port, input in console
firewall-cmd --zone=public --add-port=9100/tcp --permanent
firewall-cmd --reload
Start head
grunt server
Errors will be reported at startup
These are referenced in Gruntfile.js and downloaded separately. ok
The way to do this is to install the grunt - ** above.
npm install grunt-contrib-copy
npm install grunt-contrib-concat
npm install grunt-contrib-uglify
npm install grunt-css
Install sudo npm install grunt-contrib-jasmine Times
The solution is:
sudo npm install phantomjs-prebuilt@2.1.16 --ignore-scripts
Enter in the browser http://192.168.101.110:9100
Installation completed!