1, Elasticsearch installation
1.1 Linux Installation
- Download address
- Other software download pages
- Note that the java environment must be installed first (es7 requires JDK11 +). If it is not installed, es has its own JDK11, which can be configured before running
- Unzip elasticsearch and rename
tar -zxvf elasticsearch-7.8.0-linux-x86_64.tar.gz -C /opt
cd /opt
mv elasticsearch-7.8.0 es
- Create es users and user groups. Es is not allowed to run with root
group add es
useradd es -g es
passwd es
chown -R es:es es
- After extracting elasticsearch, modify config / elasticsearch YML file
- If it is a stand-alone node, it does not need to be modified
- Allow Internet access is configured below
cluster.name: elasticsearch
node.name: node-1
network.host: 0.0.0.0
http.port: 9200
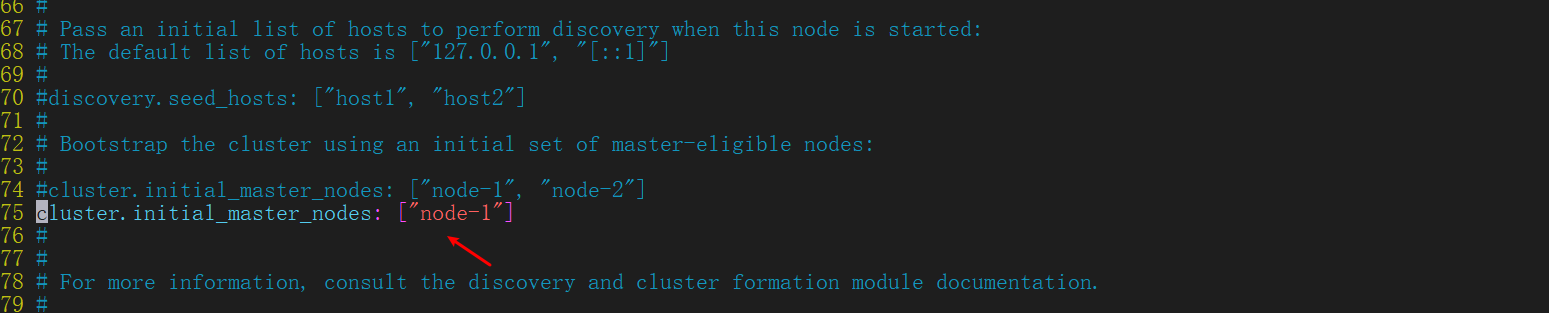
cluster.initial_master_nodes: ["node-1"]
http.cors.enabled: true
http.cors.allow-origin: "*"
- Just run bin/elasticsearch directly
cd /opt/es/bin
su es
./elasticsearch -d
- If you want to run Elasticsearch in the background as a daemon, you can add the parameter - d later
- By default, ports 9200 and 9300 will be occupied after startup. If there is a firewall or security group, it needs to run through
- 9300: communication port
- 9200: http port
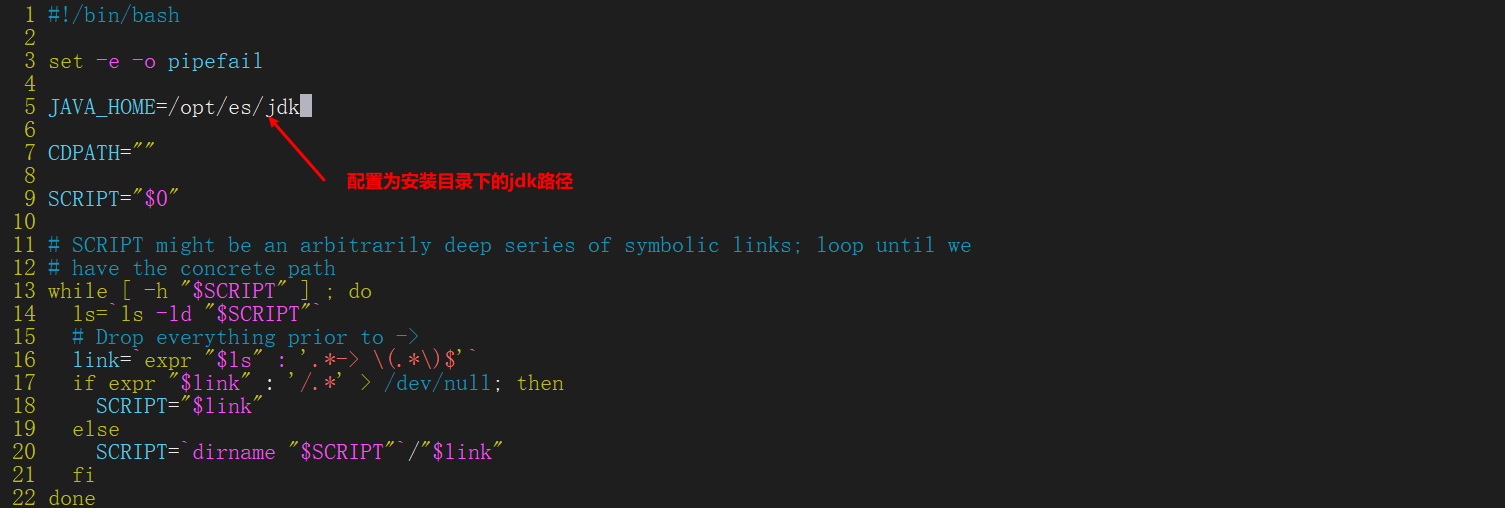
- es7 + requires that the JDK version be at least 11, so an error may be reported when starting, so either upgrade the JDK version or configure es to run the JDK version
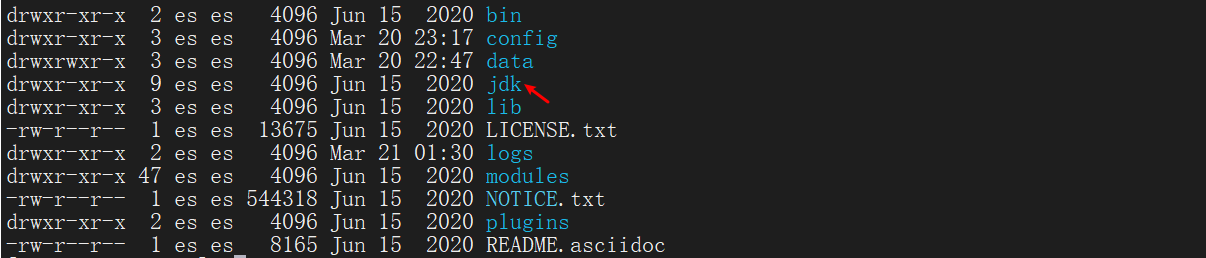
- JDK11 is already included in the ES installation directory
- Modify bin / elasticsearch Env and configure Java in this directory_ The home path is the jdk path under ES
| catalogue | meaning |
|---|
| bin | Executable script directory |
| config | configure directory |
| jdk | Built in JDK directory |
| lib | Class library |
| logs | Log directory |
| modules | Module directory |
| plugins | Plug in directory |
1.2 Windows installation
- Download the windows version of elasticsearch
- Unzip the package
- Run bin / elasticsearch Bat can be started
1.3 Docker installation
- Download the docker elasticsearch file
docker pull elasticsearch:7.8.0
- Reference documents
- Start es
- If it is a single node, you must add * * -e "discovery. Type = single node" * *, otherwise you need to specify the node name
- For details, please refer to the es official docker document
docker run -d --name es -p 9200:9200 -p 9300:9300 -e ES_JAVA_OPTS="-Xms512m -Xmx512m" -e "discovery.type=single-node" <ImageId>
- Start result

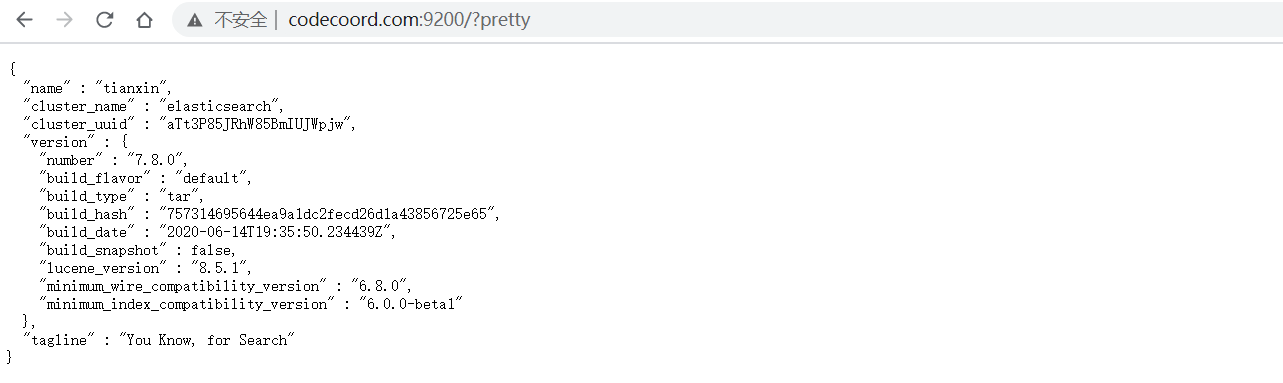
1.4 connection test
- browser: http://localhost:9200/?pretty
- Linux:
curl http://localhost:9200/?pretty
{
	"name": "tianxin",
	"cluster_name": "elasticsearch",
	"cluster_uuid": "aTt3P85JRhW85BmIUJWpjw",
	"version": {
		"number": "7.8.0",
		"build_flavor": "default",
		"build_type": "tar",
		"build_hash": "757314695644ea9a1dc2fecd26d1a43856725e65",
		"build_date": "2020-06-14T19:35:50.234439Z",
		"build_snapshot": false,
		"lucene_version": "8.5.1",
		"minimum_wire_compatibility_version": "6.8.0",
		"minimum_index_compatibility_version": "6.0.0-beta1"
	},
	"tagline": "You Know, for Search"
}
2, Elasticsearch Internet access
- After the ES installation is completed, it can only be accessed locally by default. If external access is required, external network access needs to be configured
- Modify config / elasticsearch. In the es directory YML file, network Set host to machine ip
- network. Host: < IP address >
- If you want all addresses to be accessible, you can configure 0.0.0.0
- cluster.initial_master_nodes: ["node-1"]
- Configure single node startup
cluster.name: elasticsearch
node.name: node-1
network.host: 0.0.0.0
http.port: 9200
cluster.initial_master_nodes: ["node-1"]
http.cors.enabled: true
http.cors.allow-origin: "*"
- After the configuration is completed, restart the ES, and then access it through the Internet
3, Elasticsearch plug-in installation
3.1 installation of head plug-in
- Since the elasticsearch head plug-in is written in nodejs language, nodejs and grunt need to be installed before installing elasticsearch head
- Download the nodejs package, extract any directory, and then configure the environment variables
- vim /etc/profile
- Add the following environment variables
- source /etc/profile
export NODE_HOME=/opt/node
export PATH=$PATH:$NODE_HOME/bin
- View the version after node installation
[root@tianxin node]# node -v
v14.15.4
- Install grunt directly using npm
npm install -g grunt-cli
[root@tianxin node]# npm install -g grunt-cli
npm WARN deprecated resolve-url@0.2.1: https://github.com/lydell/resolve-url#deprecated
npm WARN deprecated urix@0.1.0: Please see https://github.com/lydell/urix#deprecated
/opt/node/bin/grunt -> /opt/node/lib/node_modules/grunt-cli/bin/grunt
+ grunt-cli@1.3.2
added 153 packages from 126 contributors in 31.658s
[root@tianxin node]# grunt --version
grunt-cli v1.3.2
- Create a new dashboard/head folder (optional) in the es installation directory, and pull elasticsearch head to the head folder
git clone https://gitee.com/tianxincoord/elasticsearch-head.git
- Install the head plug-in
- Taobao image can be installed
npm install -g cnpm --registry=https://registry.npm.taobao.org
- head plug-in installation
# npm installation
cd elasticsearch-head/
npm install
npm run start
# cnpm installation
cd elasticsearch-head/
cnpm install
cnpm run start
- After installation, open port 9100 to access

- config/elasticsearch.yml needs to be configured to allow cross domain, otherwise it cannot connect
http.cors.enabled: true
http.cors.allow-origin: "*"
4, Elasticsearch FAQ
- java.lang.RuntimeException: can not run elasticsearch as root
- You can't run es as root user. You need to use es, so you can switch su es and run it again
- ERROR: [1] bootstrap checks failed
[1]: the default discovery settings are unsuitable for production use; at least one of [discovery.seed_hosts, discovery.seed_providers, cluster.initial_master_nodes] must be configured
- es requires discovery seed_ hosts,discovery.seed_providers, cluster.initial_master_nodes must configure one of them
- For example, select one of the following configurations and restart after configuration
- cluster.initial_master_nodes: ["node-1"]
- discovery.seed_hosts: ["172.16.127.129"]
- Java HotSpot™ 64-Bit Server VM warning: Option UseConcMarkSweepGC was deprecated in version 9.0 and will likely be removed in a future release.
- UseConcMarkSweepGC garbage collector is no longer recommended and will be deleted later
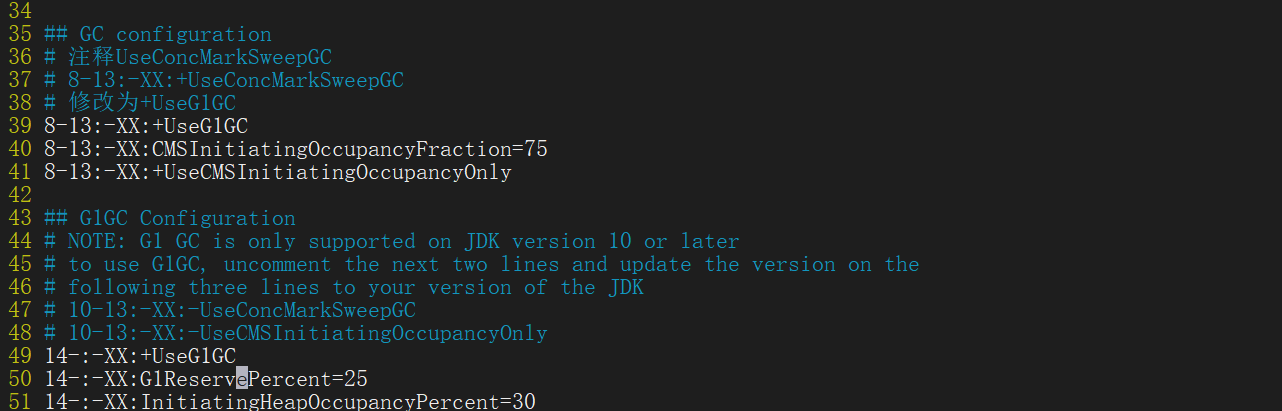
- Modify config / JVM Options to modify the garbage collector
# Note UseConcMarkSweepGC
# 8-13:-XX:+UseConcMarkSweepGC
# Change to + UseG1GC
8-13:-XX:+UseG1GC
- max file descriptors [4096] for elasticsearch process is too low,increase to at least [65535]
- Modify * * / etc / security / limits Conf * *, add the following configuration
- *Indicates all users. If a single user is required, specify a specific user name
es soft nofile 65535
es hard nofile 65535
- Modify / etc / security / limits d/20-nproc. Conf file, add the following configuration
# Add the following at the end of the document
# Limit on the number of files that can be opened per process
es soft nofile 65536
es hard nofile 65536
# Operating system level limit on the number of processes created per user
* hard nproc 4096
# Note: * all user names of Linux with table
- max virtual memory areas vm.max_map_count [65530] is too low, increase to at least [262144]
- The configured virtual memory is too small. It needs to be in * * / etc / sysctl Conf * * increase virtual memory
# Edit profile
vim /etc/sysctl.conf
# Add virtual memory configuration
vm.max_map_count=262144
# Reload configuration
sysctl -p