Part 4: ElasticSearch environment
4.1 related concepts
4.1.1 single machine & cluster
- When a single ElasticSearch server provides services, it often has the maximum load capacity. If it exceeds this threshold, the performance of the server will be greatly reduced or even unavailable. Therefore, in the production environment, it usually runs in the specified server cluster.
- In addition to load capacity, single point servers also have other problems
- Limited storage capacity of a single machine
- Single server is prone to single point of failure and cannot achieve high availability
- The concurrent processing capability of single service is limited
- When configuring a server cluster, there is no limit on the number of nodes in the cluster. If there are more than or equal to 2 nodes, it can be regarded as a cluster. Generally, considering high performance and high availability, the number of nodes in the cluster is more than 3
4.1.2 Cluster
- A cluster is organized by one or more server nodes to jointly hold the whole data and provide indexing and search functions together. An elasticsearch cluster has a unique name ID, which is "elasticsearch" by default. This name is very important because a node can only join a cluster by specifying the name of the cluster.
4.1.3 Node
- The cluster contains many servers, and a node is one of them. As a part of the cluster, it stores data and participates in the indexing and search functions of the cluster.
- A node is also identified by a name. By default, this name is the name of a random Marvel comic character, which will be given to the node at startup. This name is very important for management, because in this management process, you will determine which servers in the network correspond to which nodes in the ElasticSearch cluster.
- A node can join a specified cluster by configuring the cluster name. By default, if you don't have any elasticsearch nodes running in your network, any node will be scheduled to join a cluster called "elasticsearch", which means that if you start several nodes in your network and assume that they can find each other, They will automatically form and join a cluster called "elastic search".
- In a cluster, you can have as many nodes as you want.
4.2 Linux stand alone
- Using VMware 15 Pro virtual machine
- Link: https://pan.baidu.com/s/1FYuUxFIYo7ARUUYWMyv1AA Extraction code: gqru
- Using CentOS7 mirroring
- Link: https://pan.baidu.com/s/16mKfHgby5jlPk9GMxnCnhw Extraction code: egaf
4.2.1 software download
- ES address: https://www.elastic.co/cn/downloads/past-releases/elasticsearch-7-8-0

Software installation
-
Decompression software
-
Upload the downloaded package to Linux and unzip it
tar -zxvf elasticsearch-7.8.0-linux-x86_64.tar.gz
-
Rename
mv elasticsearch-7.8.0 es
-

-
-
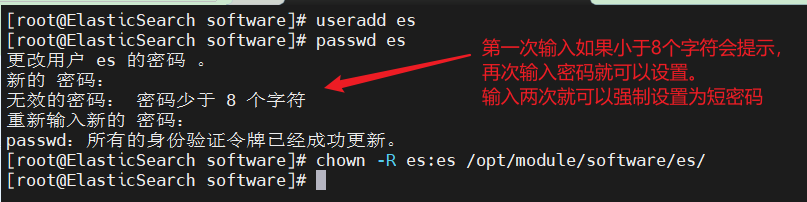
Create user
-
Because of security problems, ElasticSearch does not allow the root user in Linux to run directly, so you need to create a new user and create a new user in the root user
useradd es # New es user (name can be customized)
passwd es # Set password for es

# If the setting is wrong, you can delete it before proceeding
userdel -r es # delete
chown -R es:es /opt/module/software/es # Set es user's operation permission for this folder
-
-
-
Modify profile
-
./config/elasticsearch.yml (can be added directly at the end)
cluster.name: test-elasticsearch-cluster # Configure cluster name (with default value)
node.name: node01 # Configure current node name
network.host: 0.0.0.0 # Configure IP address
http.port: 9200	# Configure port number
cluster.initial_master_nodes: ["node01"] # Specifies the collection of node names that exist in the cluster
-
Modify / etc / security / limits conf
# Set a limit on the number of files each process can open
es		 soft    nofile          65536
es       hard	 nofile          65536
-
Modify / etc / security / limits d/20-nproc. conf
# Set a limit on the number of files each process can open
es	 soft    nofile          65536
es   hard	 nofile          65536
# Operating system level limit on the number of processes created by each user
*	 hard	 nproc		 4096
# *Represents all Linux user names
-
Modify / etc / sysctl conf
# The number of Vmas (virtual several inch areas) that a process can own. The default value is 65536
vm.max_map_count=655360
-
Reload (execute directly from the command line)
sysctl -p
-
4.2.3 startup software
-
Start with ES user
-
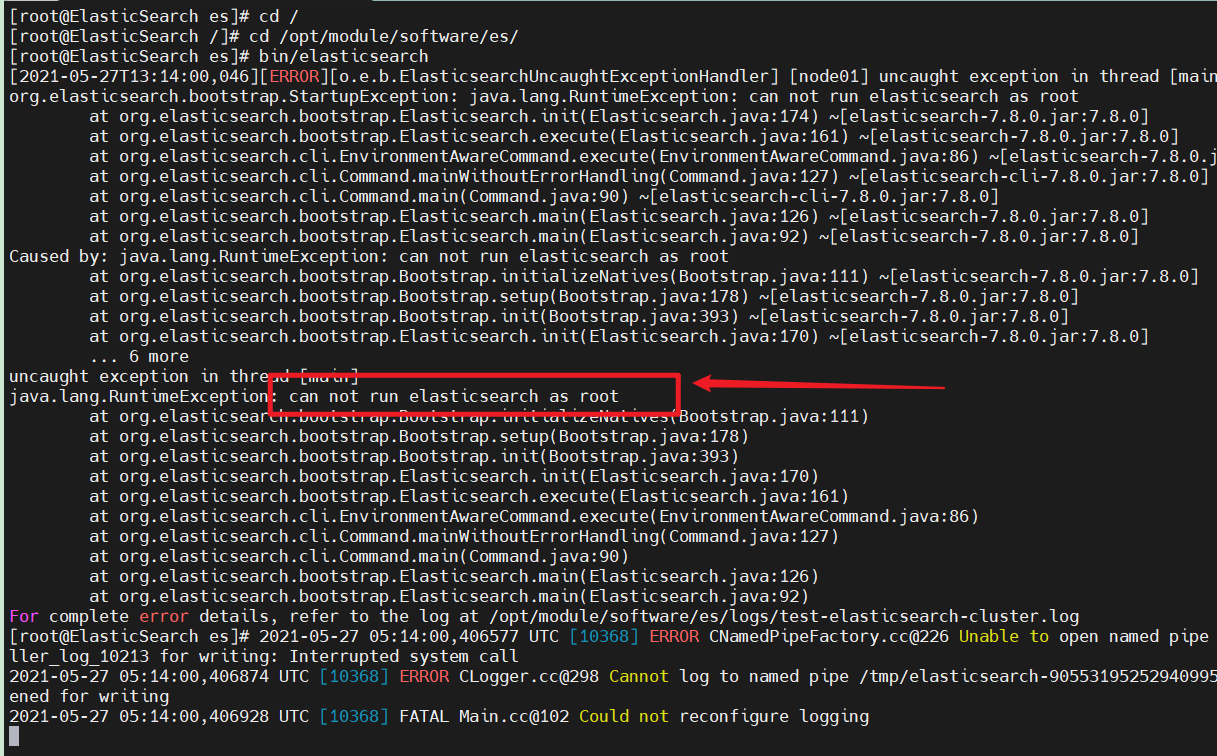
During startup, the file will be generated dynamically. If the users of the file do not match, an error will occur and the user and user group need to be modified again
- ES does not allow root user to start
-
Use the su command to switch to the previously created ES user and restart
-
Found another problem: AccesDeniedException exception
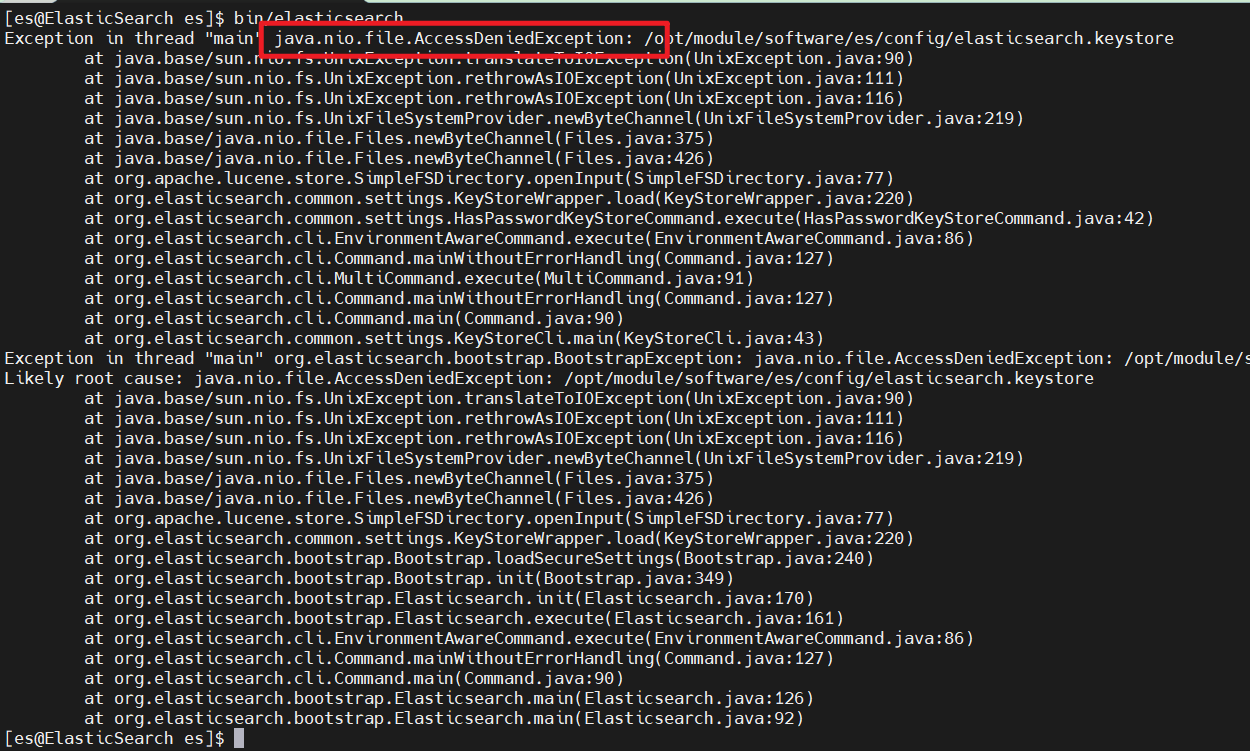
- This is because es will dynamically generate some files during startup, but the generated files do not have permission to operate for ES users, so we need to re execute the authorization command
-
Execute the authorization command (you need to switch to the root user to execute it)
chown -R es:es /opt/module/software/es
-
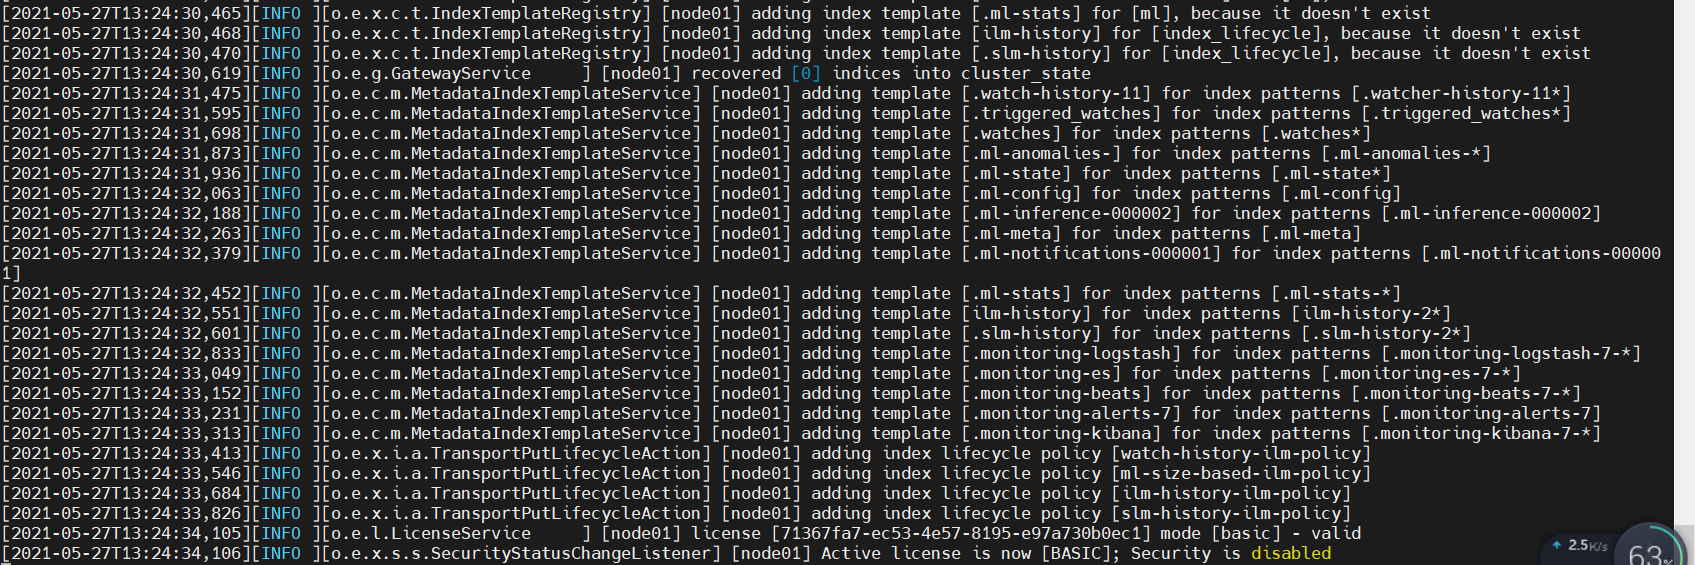
Start again (switch to es user)
- Start successful
- It is found that es will occupy the current window after it is started. We can choose to start in the background
- bin/elasticsearch -d


4.2.4 software testing
-
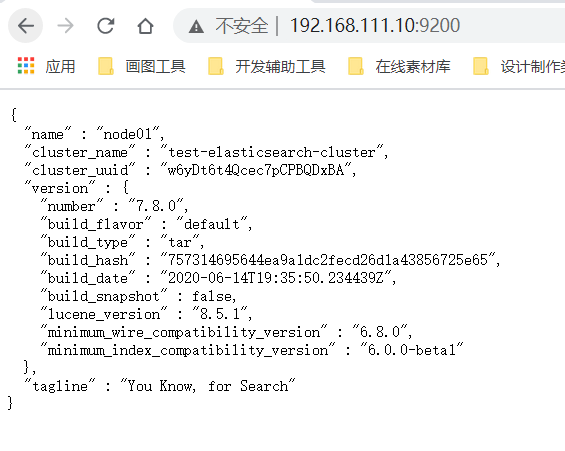
Use the browser to access: http: / / your Linux IP address: 9200/

- It is found that the browser has not responded because the firewall of Linux has blocked it
-
Simple way
-
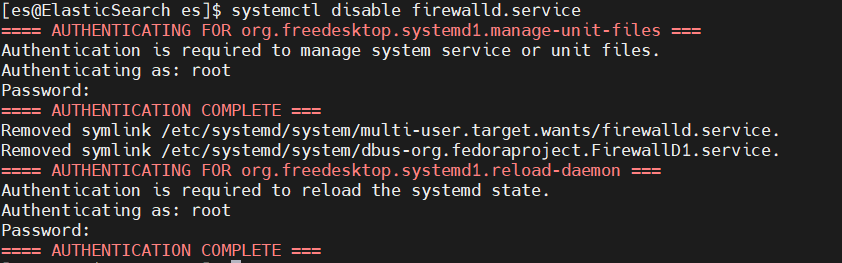
You can directly close the firewall or open the corresponding port. Choose close here
# Temporarily turn off the firewall and automatically resume the next boot
systemctl stop firewalld
# Permanent shutdown (restart without recovery)
systemctl disable firewalld.service
# Permanently open
systemctl enable firewalld.service
-
-
When closing the firewall, you do not use the root user. You need to enter the password several times
-
-
Browser test again
4.3 Linux Cluster
- Preparation environment: three Linux, and then write xsync script (the function is to distribute files on different Linux). You can also copy three copies without writing
4.3.1 software download
- ES address: https://www.elastic.co/cn/downloa ,ds/past-releases/elasticsearch-7-8-0
4.3.2 software installation
4.3.2.1 decompression software
-
Unzip, rename, and distribute to other machines (02 and 03)
# decompression
tar -zxvf elasticsearch-7.8.0-linux-x86_64.tar.gz
# Rename
mv elasticsearch-7.8.0 es-cluster
# Distribute files (just enter the confirmation information yes and password)
xsync es-cluster
4.3.2.2 create user
-
Due to security problems, ES does not allow the root user to run directly. Create a new user on the other two nodes, which is renamed es here
useradd es # New es user
passwd es # Set password
userdel -r es # If the setting is wrong, it can be deleted
chown -R es:es /opt/module/software/es-cluster # Set es user's access rights to files and modify them dynamically according to their own path
4.3.2.3 modify configuration file
-
After modifying a machine's file, distribute it, and then make some modifications on other nodes
-
Modify es cluster / config / elasticsearch YML, and then distribute the document
# ======================== Elasticsearch Configuration =========================
#
# NOTE: Elasticsearch comes with reasonable defaults for most settings.
#       Before you set out to tweak and tune the configuration, make sure you
#       understand what are you trying to accomplish and the consequences.
#
# The primary way of configuring a node is via this file. This template lists
# the most important settings you may want to configure for a production cluster.
#
# Please consult the documentation for further information on configuration options:
# https://www.elastic.co/guide/en/elasticsearch/reference/index.html
#
# ---------------------------------- Cluster -----------------------------------
#
# Use a descriptive name for your cluster:
#
#cluster.name: my-application
# Configure cluster name
cluster.name: test-cluster
#
# ------------------------------------ Node ------------------------------------
#
# Use a descriptive name for the node:
#
#node.name: node-1
# Configure node information. Each node name cannot be duplicate
node.name: node01
# Are you qualified as the master node and data node
node.master: true
node.data: true
#
# Add custom attributes to the node:
#
#node.attr.rack: r1
#
# ----------------------------------- Paths ------------------------------------
#
# Path to directory where to store the data (separate multiple locations by comma):
#
#path.data: /path/to/data
#
# Path to log files:
#
#path.logs: /path/to/logs
#
# ----------------------------------- Memory -----------------------------------
#
# Lock the memory on startup:
#
#bootstrap.memory_lock: true
#
# Make sure that the heap size is set to about half the memory available
# on the system and that the owner of the process is allowed to use this
# limit.
#
# Elasticsearch performs poorly when the system is swapping the memory.
#
# ---------------------------------- Network -----------------------------------
#
# Set the bind address to a specific IP (IPv4 or IPv6):
#
#network.host: 192.168.0.1
# ip address, each node is different
network.host: 192.168.111.10
#
# Set a custom port for HTTP:
#
#http.port: 9200
# Set port number
http.port: 9200
#
# For more information, consult the network module documentation.
#
# --------------------------------- Discovery ----------------------------------
#
# Pass an initial list of hosts to perform discovery when this node is started:
# The default list of hosts is ["127.0.0.1", "[::1]"]
# es7. New configuration after X, node discovery
discovery.seed_hosts: ["192.168.111.10:9300", "192.168.111.11:9300","192.168.111.12:9300"]
#
# Bootstrap the cluster using an initial set of master-eligible nodes:
# es7. The configuration is added after X. This configuration is required to elect a master when initializing a new cluster
cluster.initial_master_nodes: ["node01"]
#
# For more information, consult the discovery and cluster formation module documentation.
#
# ---------------------------------- Gateway -----------------------------------
#
# Block initial recovery after a full cluster restart until N nodes are started:
#
gateway.recover_after_nodes: 2
network.tcp.keep_alive: true
network.tcp.no_delay: true
transport.tcp.compress: true
#
# For more information, consult the gateway module documentation.
#
# ---------------------------------- Various -----------------------------------
#
# Require explicit names when deleting indices:
#
#action.destructive_requires_name: true


# The head plug-in needs to open these two settings
http.cors.allow-origin: "*"
http.cors.enabled: true
http.max_content_length: 200mb

# The number of data tasks started simultaneously in the cluster is 2 by default
cluster.routing.allocation.cluster_concurrent_rebalance: 16
# The number of concurrent recovery threads when adding or deleting nodes and load balancing. The default is 4
cluster.routing.allocation.node_concurrent_recoveries: 16
# When initializing data recovery, the number of concurrent recovery threads is 4 by default
cluster.routing.allocation.node_initial_primaries_recoveries: 16
- Then execute xsync to distribute to other machines, and then modify the node name and ip address
-
Modify / etc / security / limits Conf, and then distribute the file
es               soft    nofile          65536
es               hard    nofile          65536
-
Modify / etc / security / limits d/20-nproc. Conf, and then distribute the file
# Limit on the number of files that can be opened per process
es       soft    nofile          65536
es       hard    nofile          65536
# Operating system level limit on the number of processes created by each user
*        hard    nproc           4096
# *Represents all user names for Linux
-
Modify / etc / sysctl Conf, and then distribute the file
# The number of Vmas (virtual memory areas) a process can own. The default value is 65536
vm.max_map_count=655360
-
To reload on each machine, you need to switch the root user
sysctl -p
4.3.3 startup software
- Start ES on three machines respectively
- Problems encountered
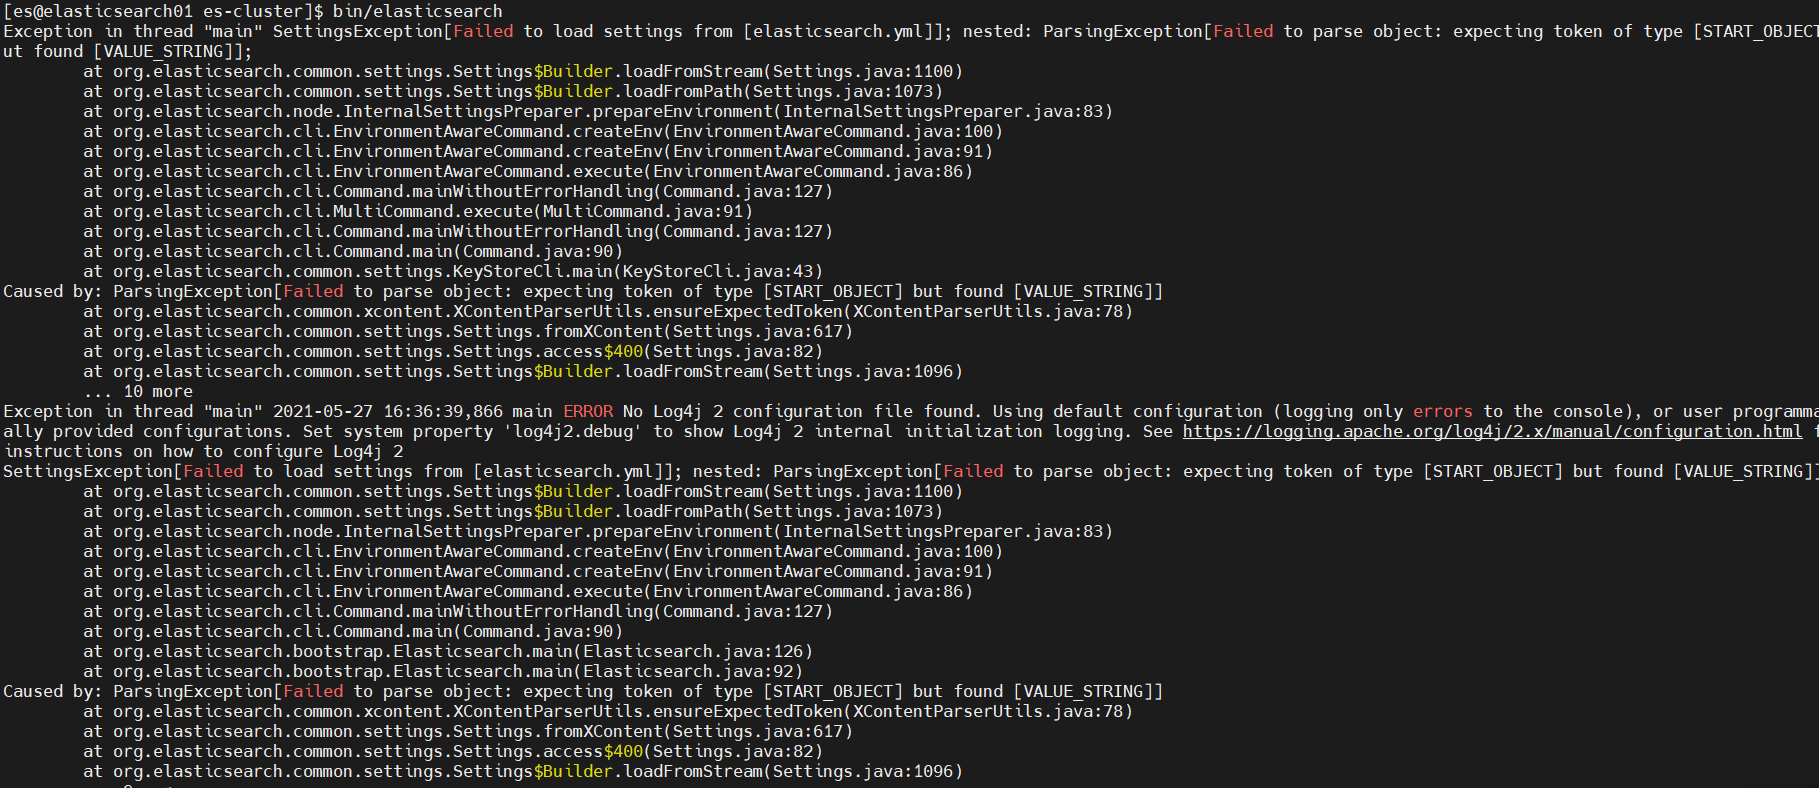
- elasticsearch. There is a problem with YML. When configuring the K:V value, there should be a space after the colon
- Start successful


4.3.4 test cluster
- Browser access: http://192.168.111.10:9200/_cat/nodes
- ip according to their own Linux decision
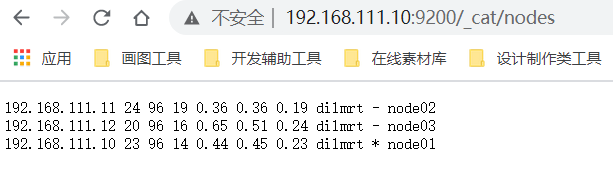
- ip according to their own Linux decision