First official account [learning embedded]
preface
I happened to see the esp32 development board that has eaten ash for many years. First blow the dust on the board, then find a USB cable and connect it to the computer. The light is on. Well, it works.
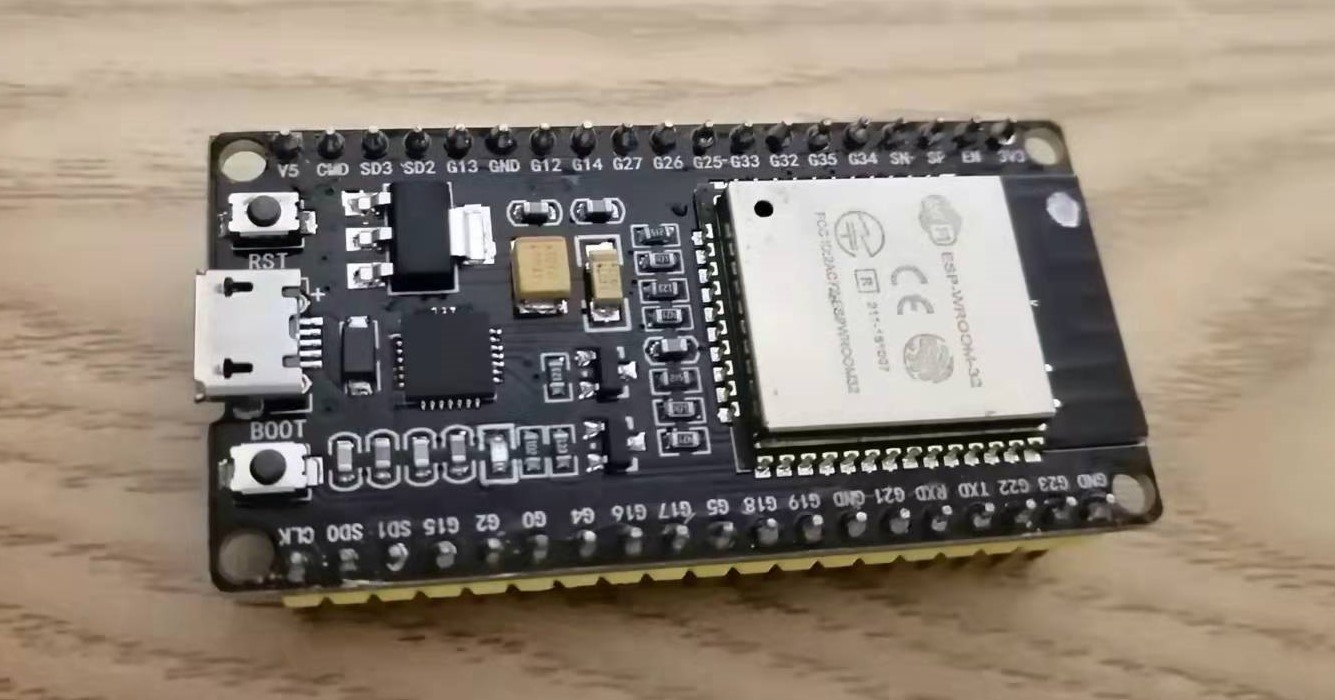
This board was bought in 2018. I haven't played this board for more than three years. I don't know how many versions of the development software package on Lexin's official website have been updated.
Shangguan checked the information online, tried to build the latest ESP-IDF development environment under Windows, and was ready to play this high-performance development board.
Of course, how can the first test program be less than Hello world.
OK, let's go.
Environmental construction preparation
1. Install necessary tools
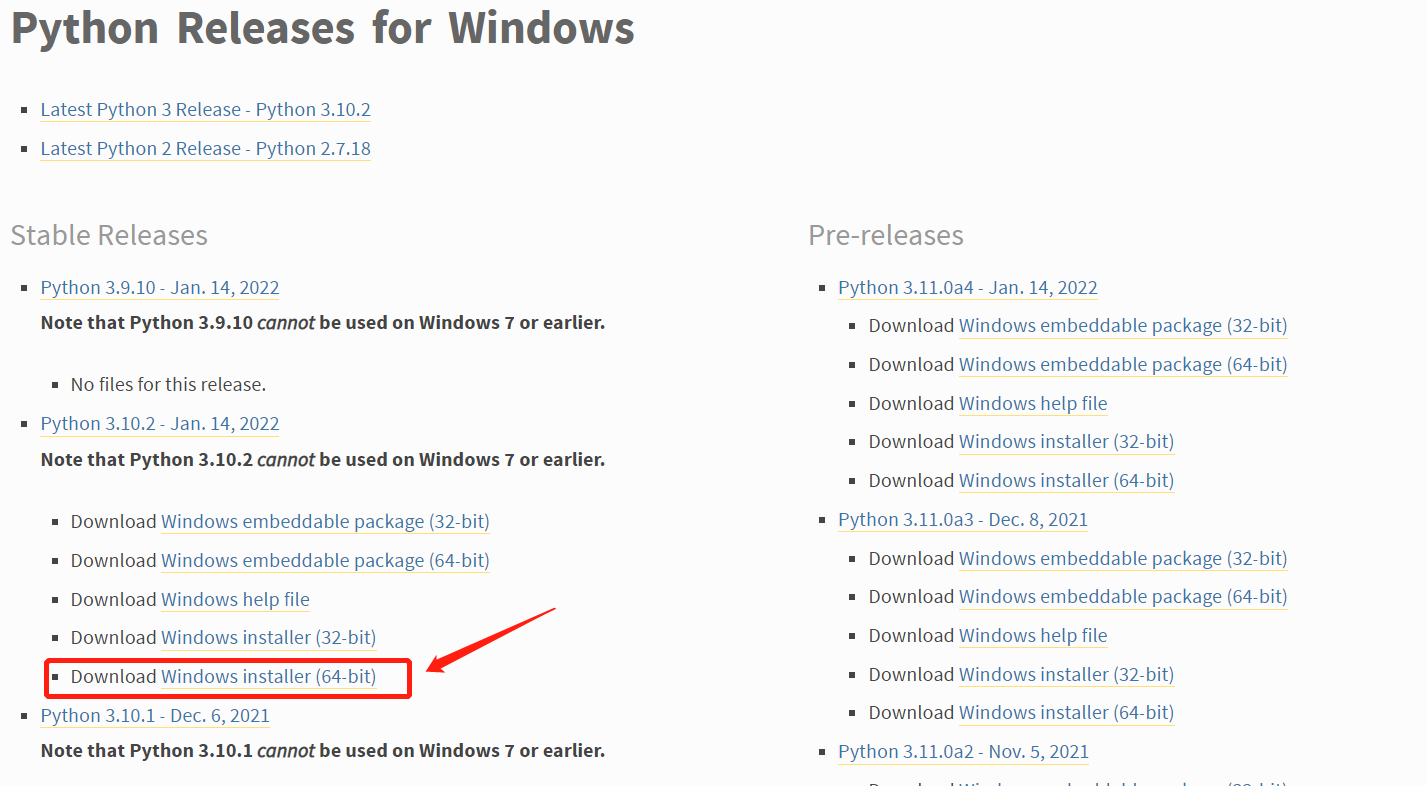
First, you need to install pthon on your PC. the python version must be above 3.0, otherwise an error will occur. Skip this step if Python is already installed.
You can download the python installation package on the python official website. The website is as follows (copy it to the browser and open it):
https://www.python.org/downloads/windows/
My computer is 64 bit Windows10, so download the 64 bit python installation package.
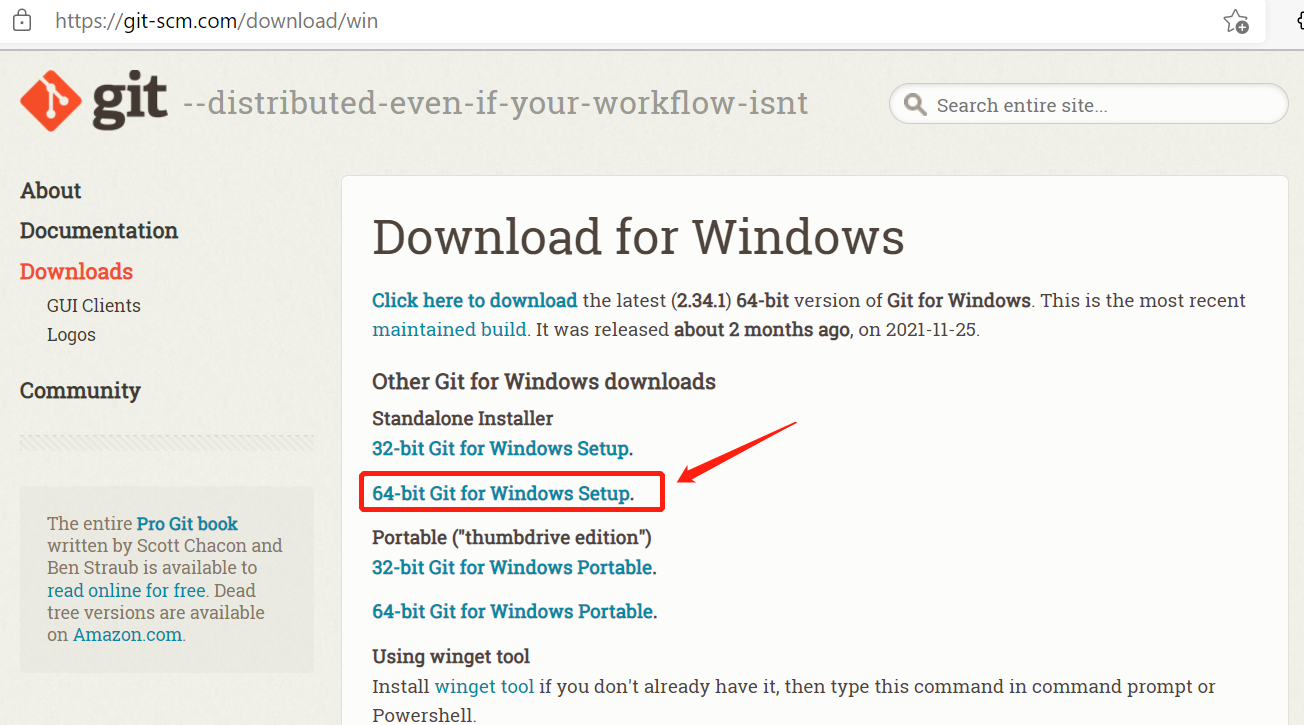
Second, install git. Download the git installation package. The download website is as follows (copy it to the browser and open it):
https://git-scm.com/download/win
Select to download the corresponding installation package according to the Windows version.
2. Download the idf development software package
Open the official website, find the download location of ESP-IDF development kit, and click download
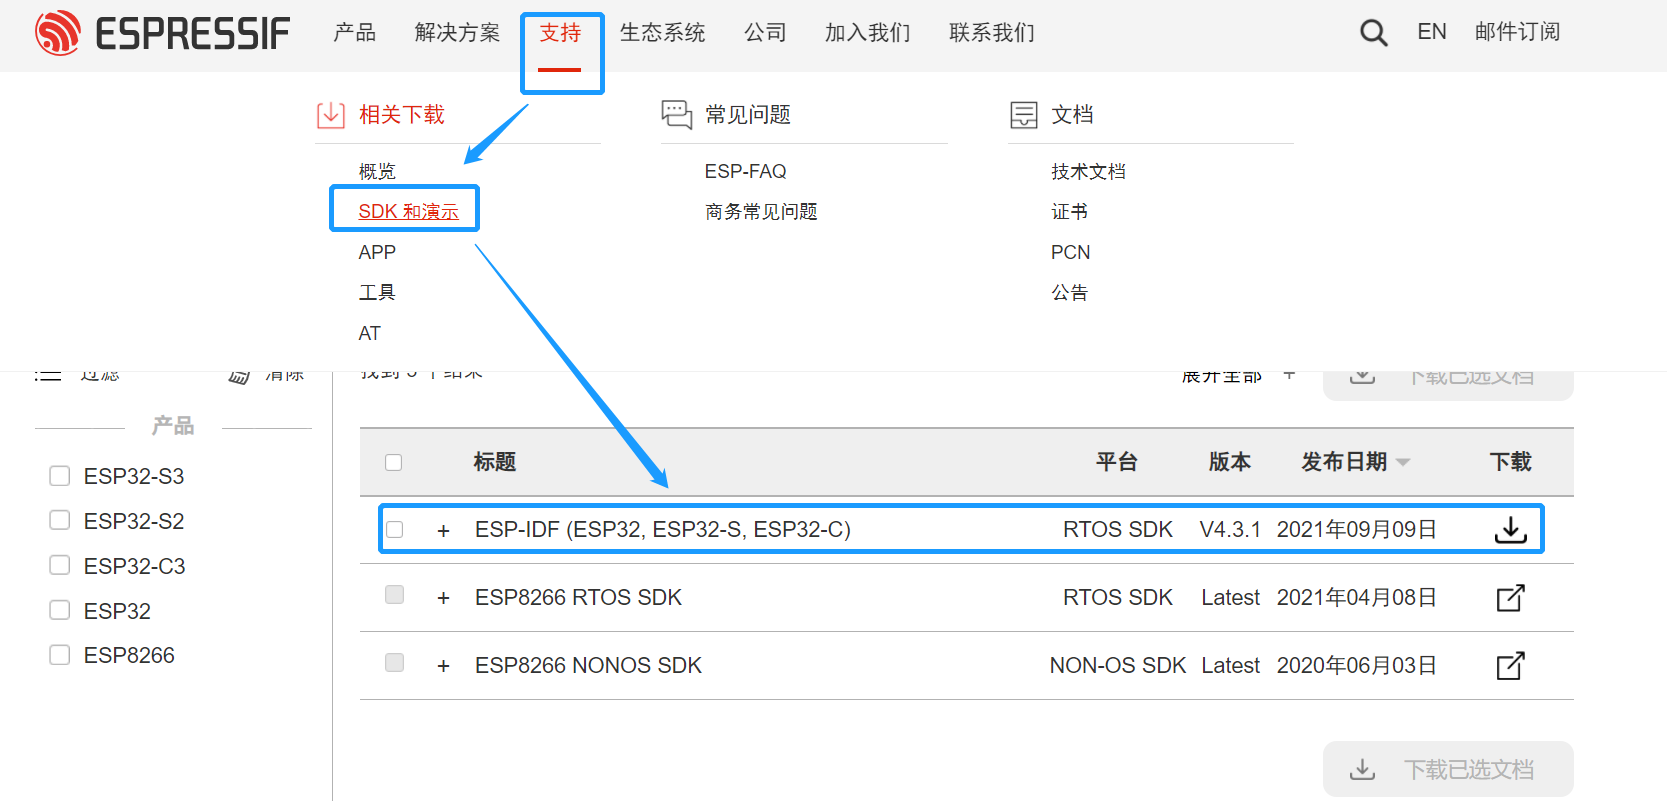
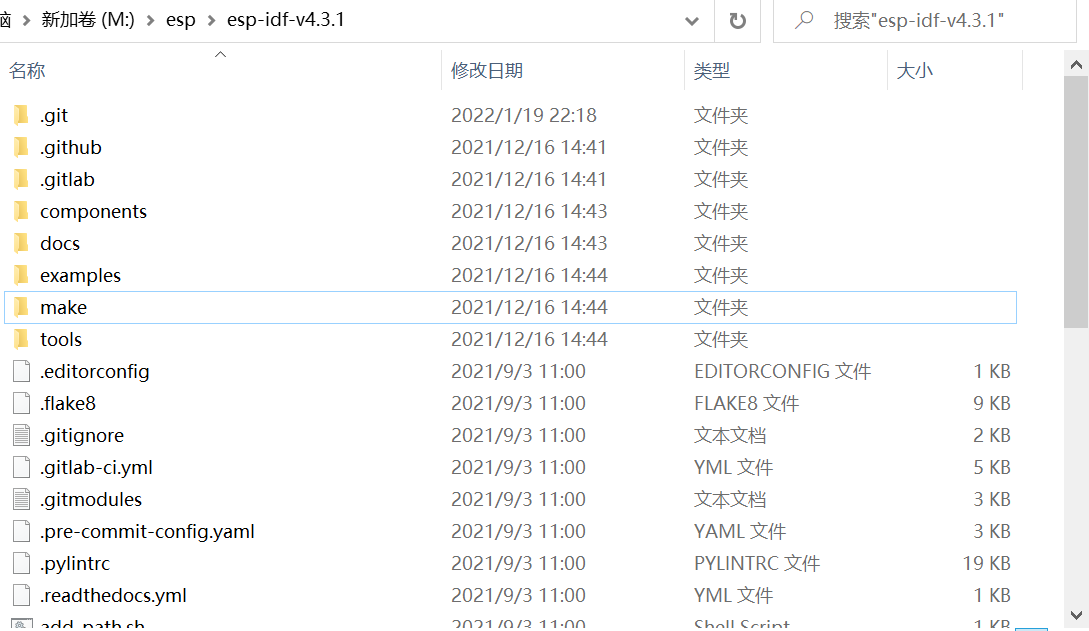
After downloading, unzip it and put it in the path without spaces.
Configure development environment
In addition to ESP-IDF itself, you also need to install various tools used by ESP-IDF, such as compiler, debugger, Python package, etc.
These tools can be installed manually through command scripts.
Open the cmd command terminal, enter the idf directory, and then execute the following instructions to automatically install the tools required by the software package:
install.bat
Start automatic download and installation of tools:
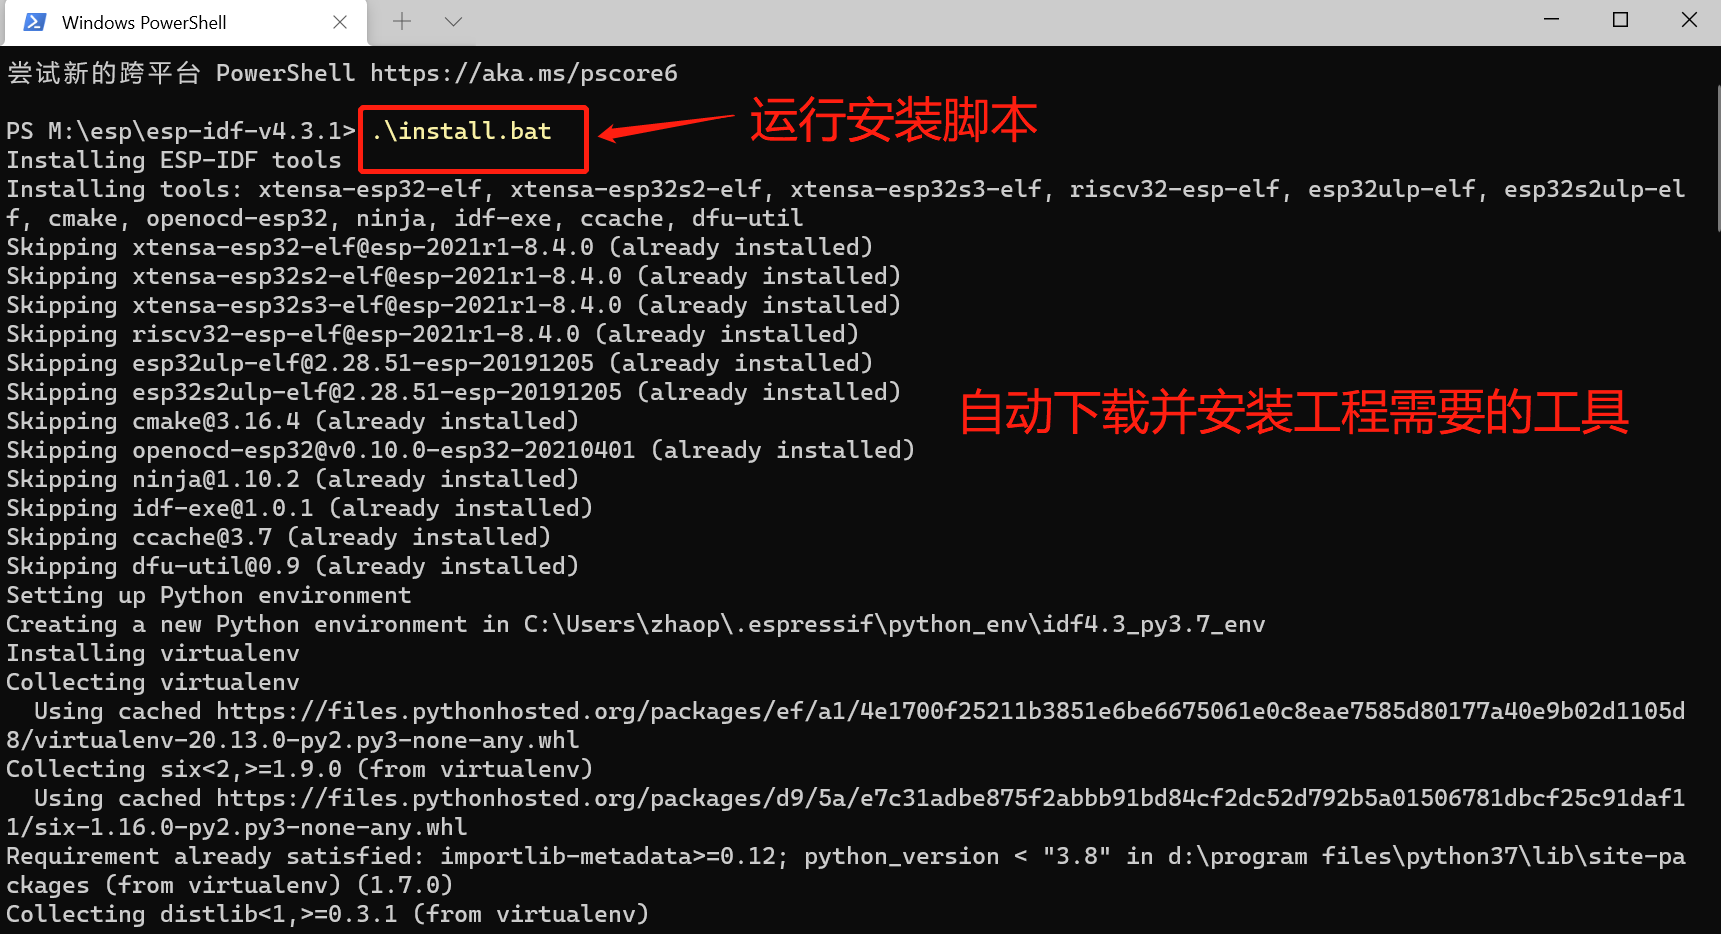
This process is time-consuming and patient.
After the installation is completed, the prompt is as follows
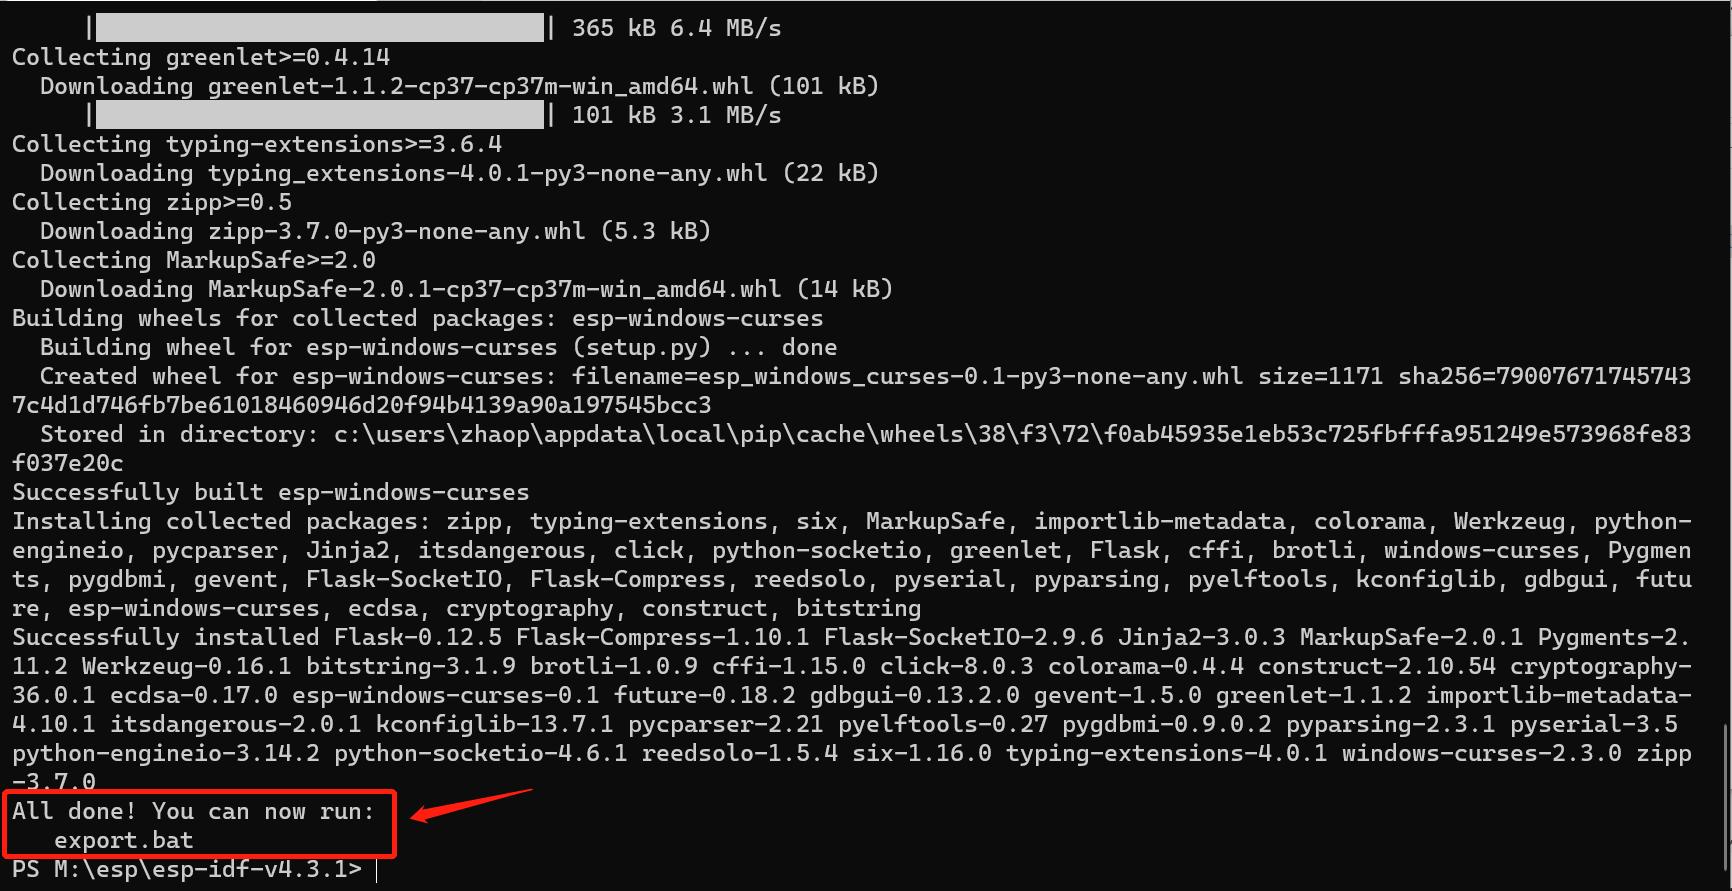
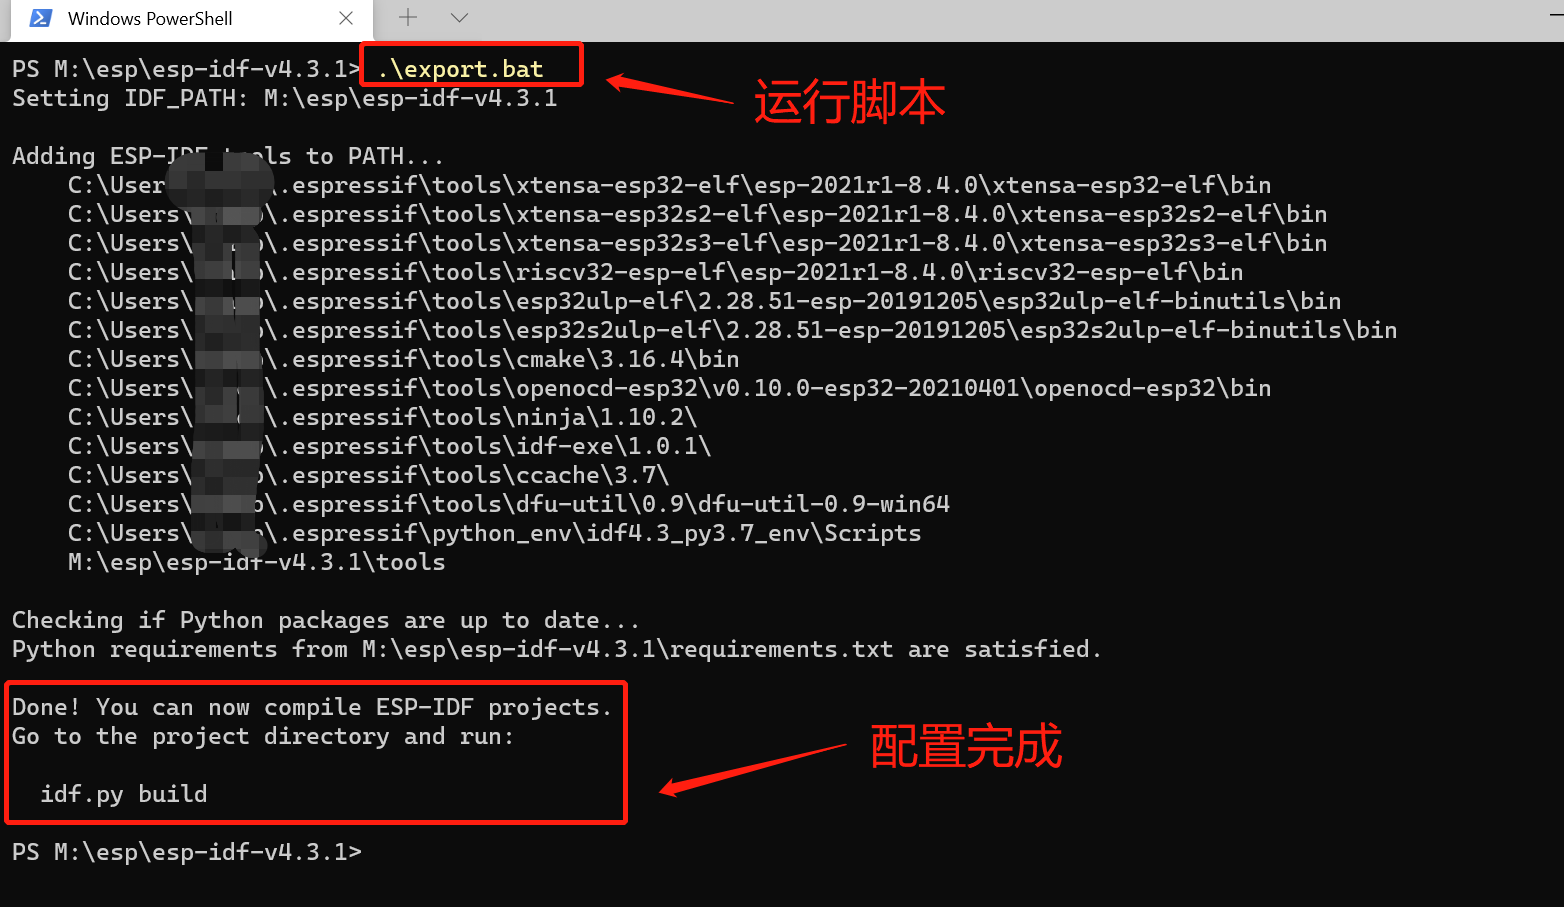
Then, follow the prompts and run the following script. Set environment variables.
exoprt.bat
Note that each time you open the command terminal, you need to run this script file to add IDF tools to the PATH environment variable.
In this way, you can use the script tool provided by IDF in the current command terminal window.
Test IDF environment
Sample code in IDF development kit < esp-idf-v4 3.1\examples\get-started\hello_world >, copy hello_ The world directory to esp-idf-v4 3.1 under the folder where the directory is located:
The sample program code is as follows:
#include <stdio.h>
#include "sdkconfig.h"
#include "freertos/FreeRTOS.h"
#include "freertos/task.h"
#include "esp_system.h"
#include "esp_spi_flash.h"

void app_main(void)
{
	/* Print Hello world */
  printf("Hello world!\n");

  /* Print chip information */
  esp_chip_info_t chip_info;
  esp_chip_info(&chip_info);
  printf("This is %s chip with %d CPU core(s), WiFi%s%s, ",
  CONFIG_IDF_TARGET, chip_info.cores,
  (chip_info.features & CHIP_FEATURE_BT) ? "/BT" : "",
  (chip_info.features & CHIP_FEATURE_BLE) ? "/BLE" : "");

	/* Print chip version */
  printf("silicon revision %d, ", chip_info.revision);

  printf("%dMB %s flash\n", spi_flash_get_chip_size() / (1024 * 1024),
  (chip_info.features & CHIP_FEATURE_EMB_FLASH) ? "embedded" : "external");

  printf("Minimum free heap size: %d bytes\n", esp_get_minimum_free_heap_size());

	/* Restart after 10 seconds countdown */
  for (int i = 10; i >= 0; i--)
  {
    printf("Restarting in %d seconds...\n", i);
    vTaskDelay(1000 / portTICK_PERIOD_MS);
  }
  printf("Restarting now.\n");
  fflush(stdout);
  esp_restart();
}
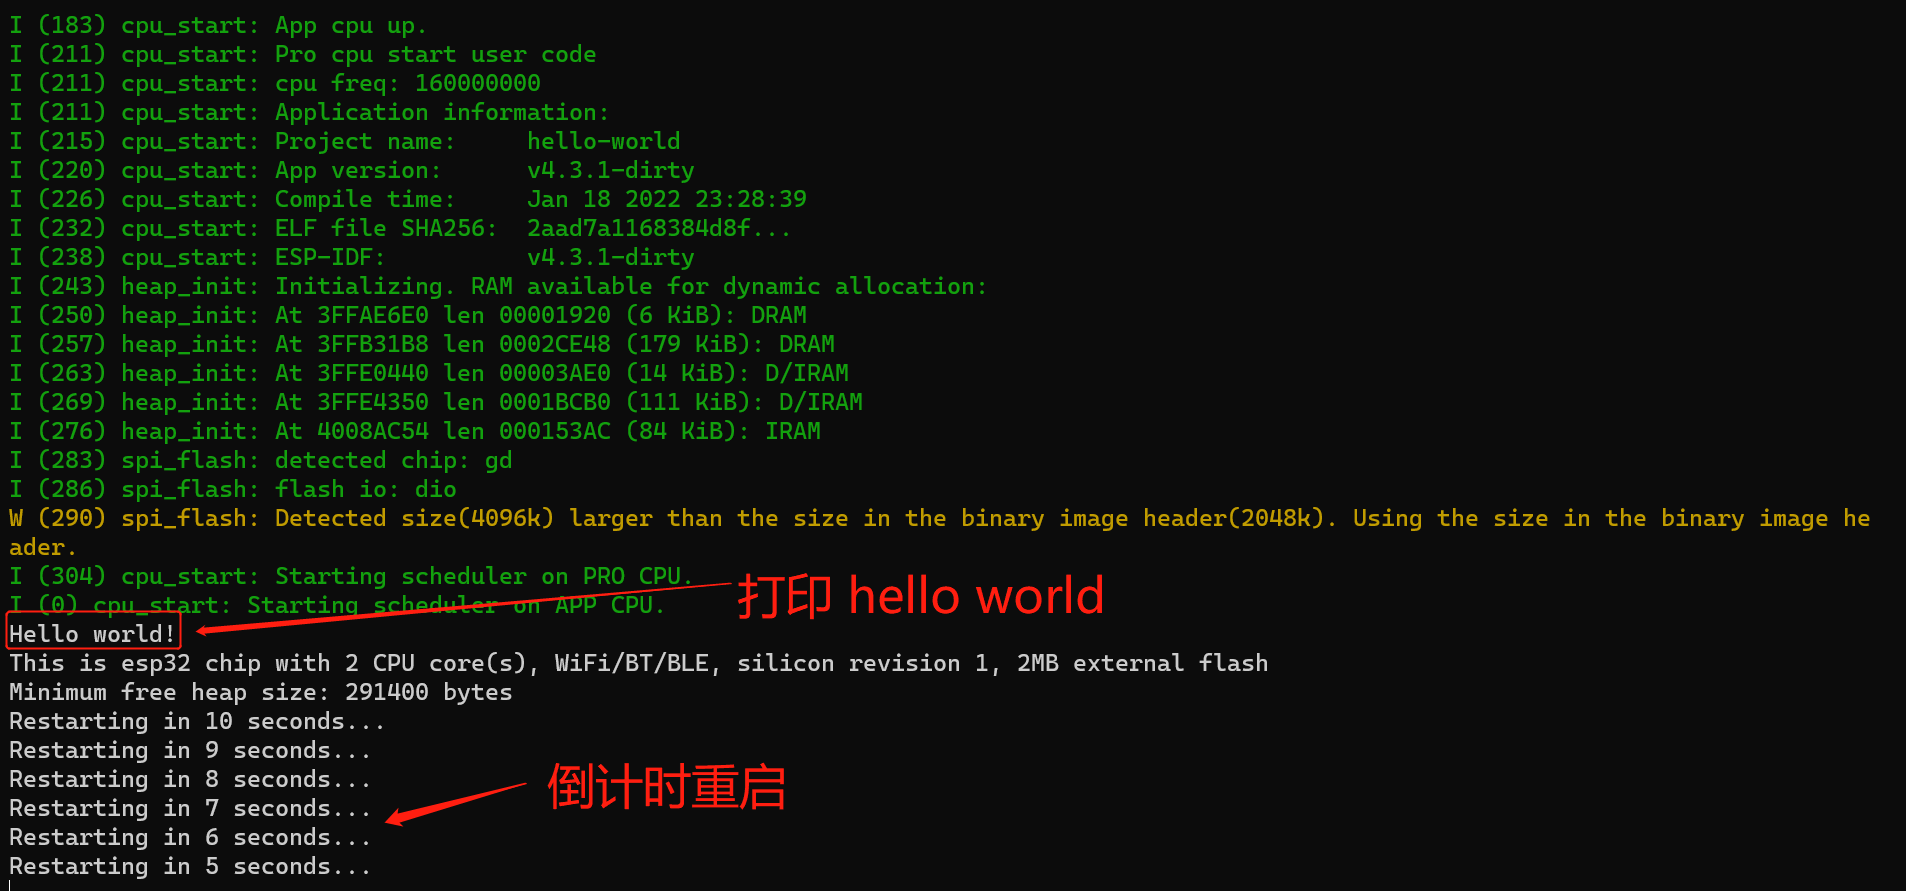
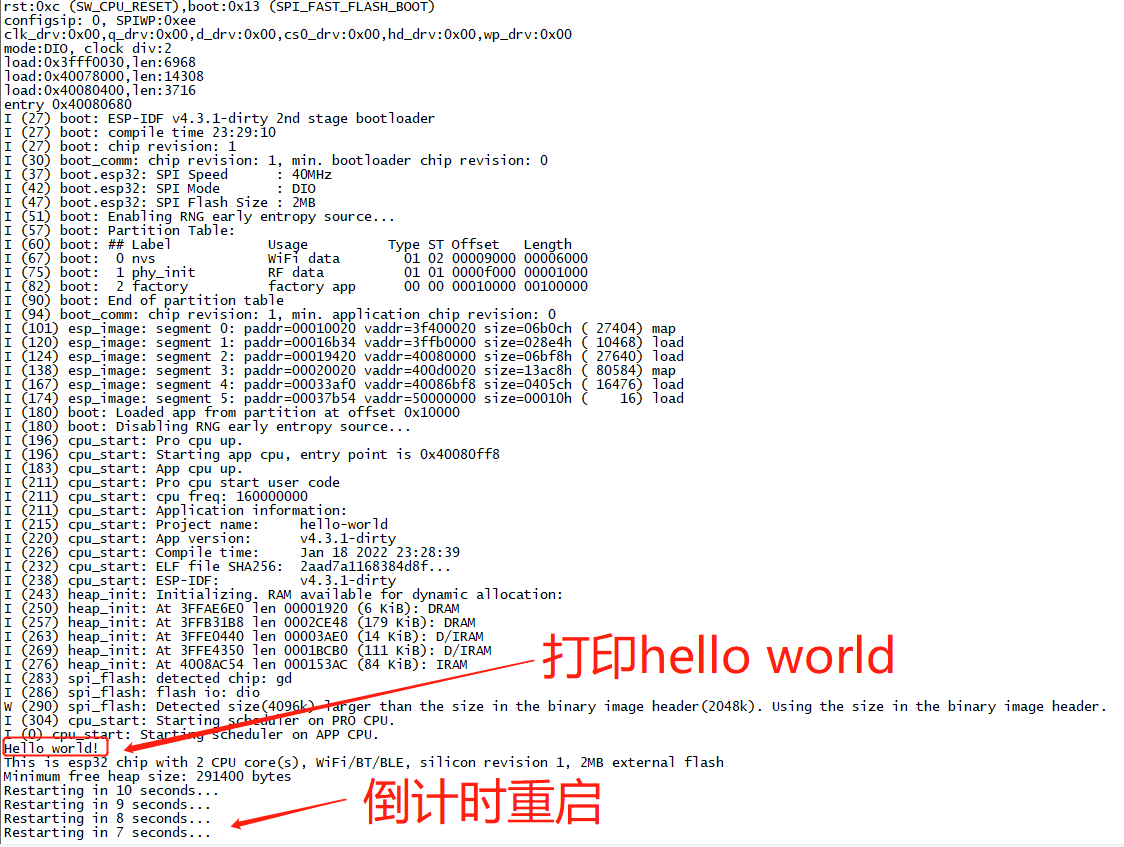
The functions of the sample code are:
- Print Hello world first!
- Then print the chip information
- Then, after a countdown of 10 seconds, restart
Command the terminal to enter the hello world Directory.
First, configure the target chip (the development board used in this paper is esp32):
idf.py set-target esp32

Then run the following command to compile the project:
idf.py build
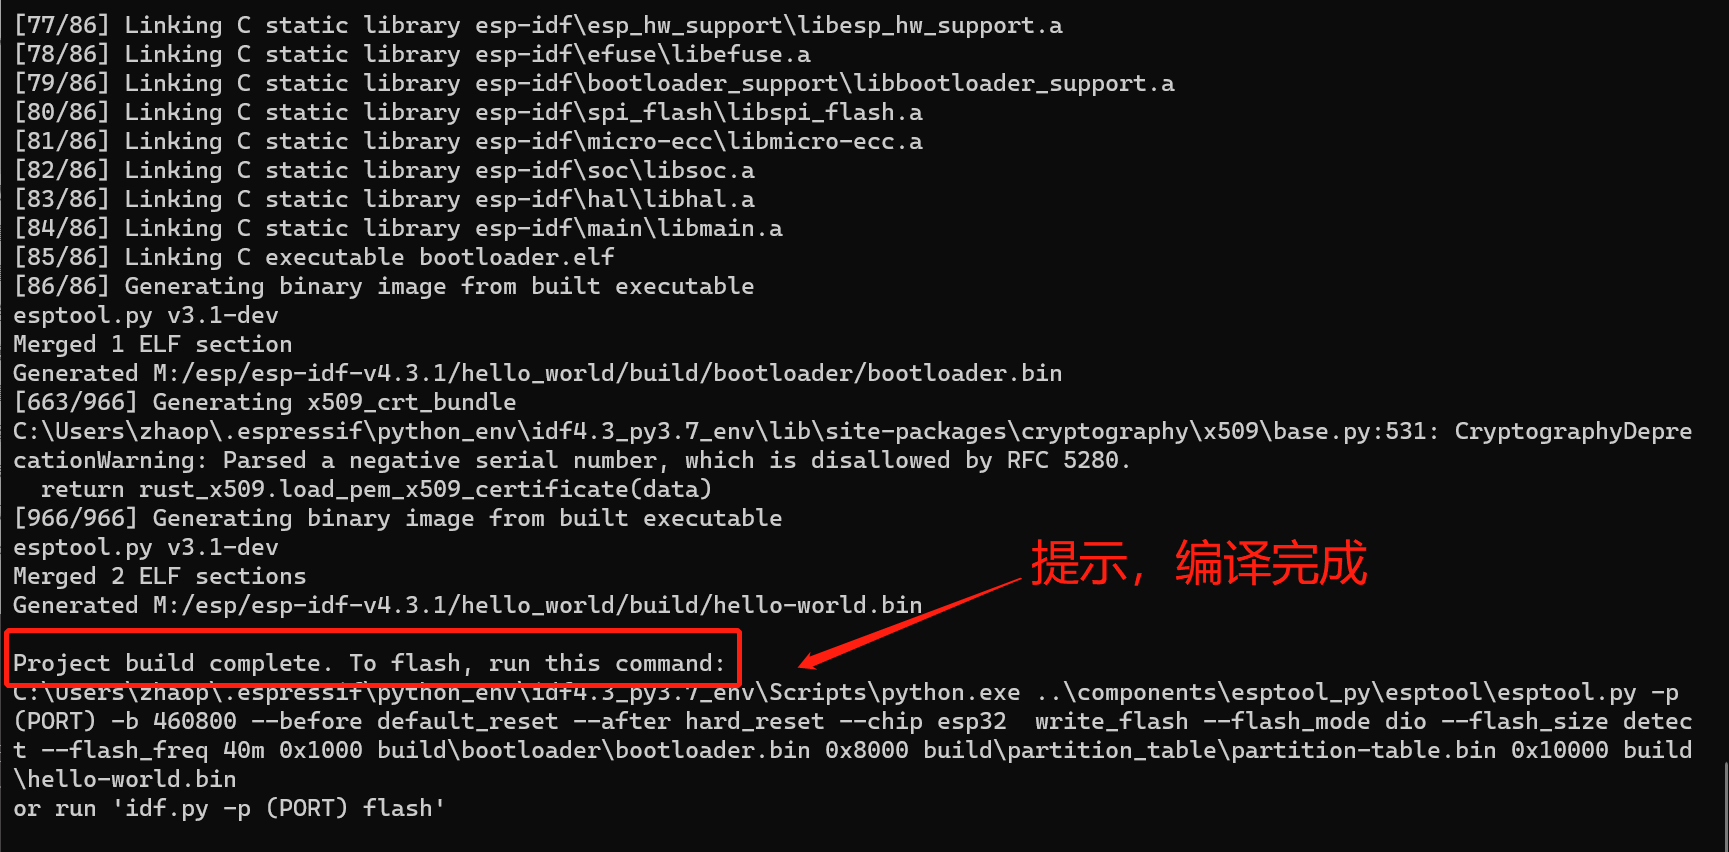
Start compiling project code
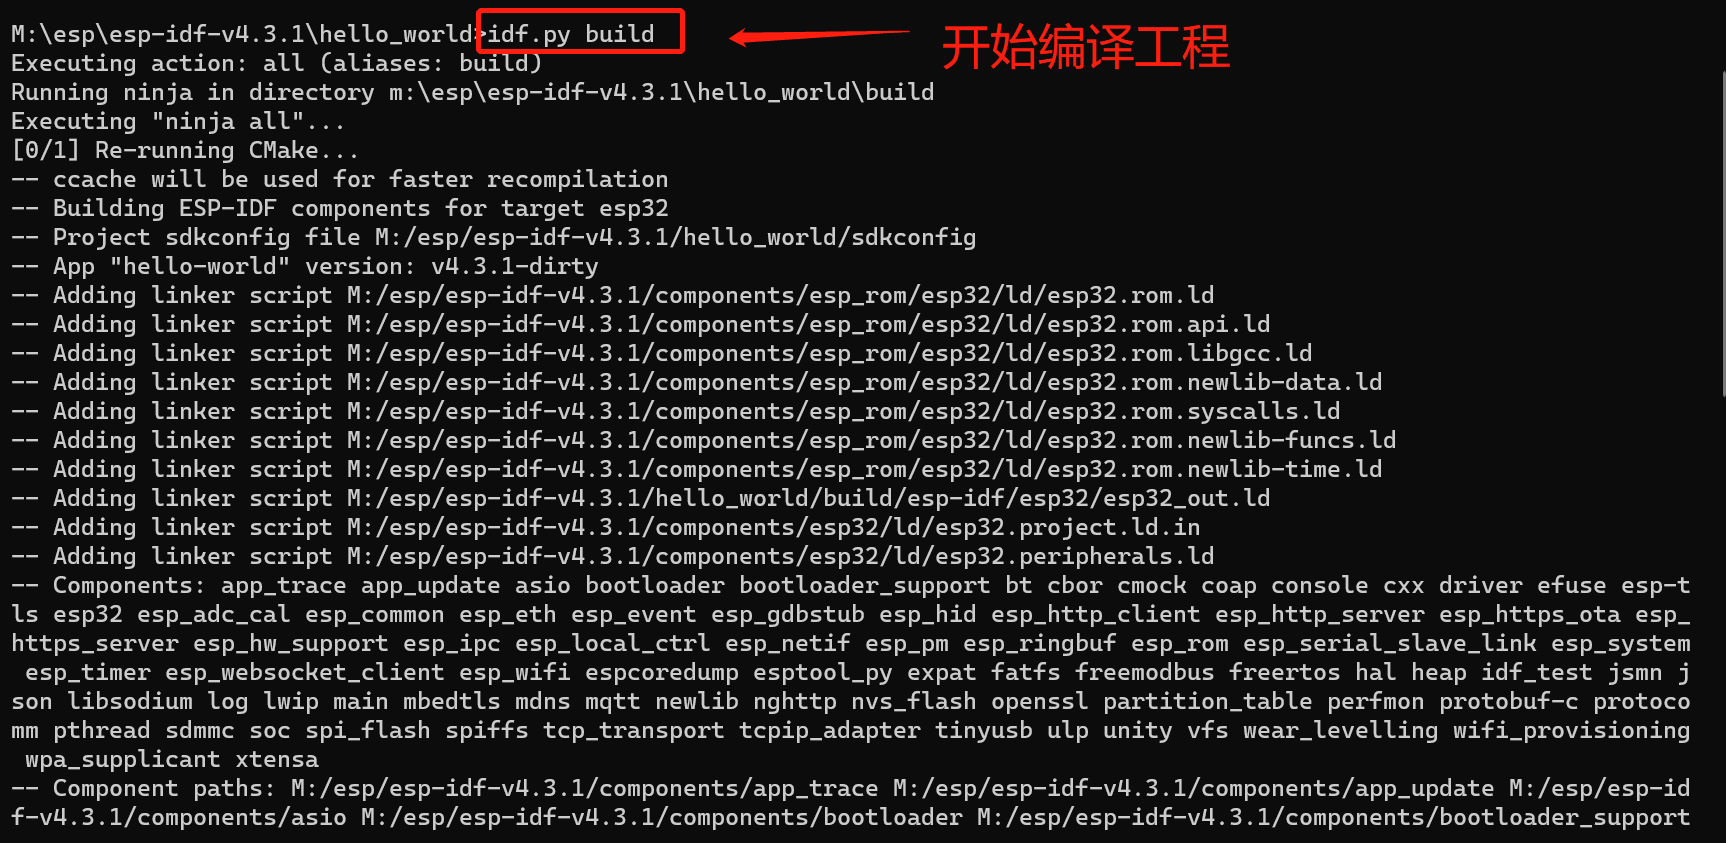
The compilation is completed as follows:
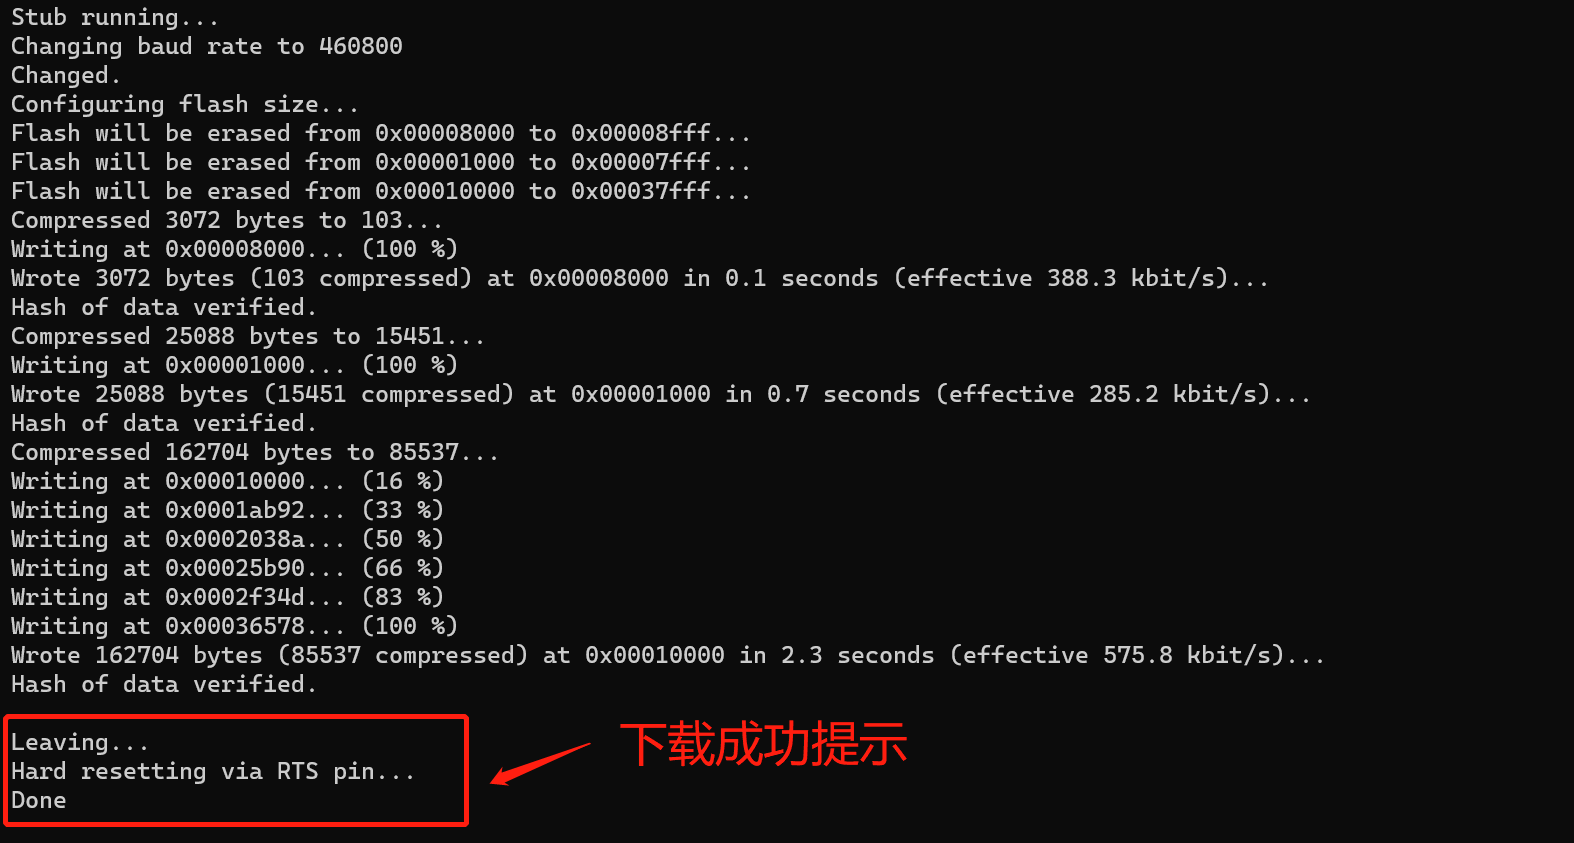
When downloading the program, pull down the GPIO0 pin, press the reset button to make the module enter the serial port boot state, wait for the upper computer to connect and download the program.
Then enter the following command to start downloading the program, where PORT is the PC end string slogan (for example, COM2):
idf.py -p PORT flash
After the download is successful, the prompt information is as follows:
After the program is downloaded successfully, pull up GPIO0 (or disconnect the grounding connection), reset the development board and check the operation.
1. IDF monitor to view operation information
Enter the following command in the command terminal, where PORT is the serial PORT number of PC
idf.py -p PORT monitor
Monitor the operation of "hello_world" project
2. The serial port assistant checks the operation information
Open the PC serial port debugging assistant and press the reset button.
OK, the program has been downloaded successfully and is running on the ESP32 development board.
The official account [learn Embedded] together, get more exciting content.