First of all, I would like to thank Dr. Xu for providing the video tutorial. My blog record is also a self summary of learning from Dr. Xu. The learning video link website of Laoxu B station is as follows: WebGPU graphics programming - free video tutorial (1): building a development environment_ Beep beep beep_ bilibili
Before creating, you need to install the following WebGPU development tools
Visual Studio Code (https://code.visualstudio.com)
Node.js (https://nodejs.org)
TypeScript (programming language)
Webpack (modular bundle)
Chrome Canary (https://www.google.com/chrome/canary)
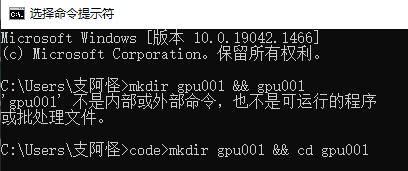
1, Create a folder using the command line
Because I am a novice, I used the command line to create a folder for the first time, so the first creation failed because there was no > code command;
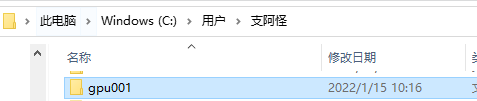
In the second line, the gpu001 folder is created successfully. Go to your file path to view it;
Enter the command character:
>code>mkdir gpu001 && cd gpu001
2. You need to continue to use the command line to configure your package JSON file
Enter the command character:
npm init -y
Initialize the application, which will produce a package JSON file, which is used to store the dependencies of various software packages;
This step will automatically configure the package for you JSON file, you can see the configuration file in the file directory;
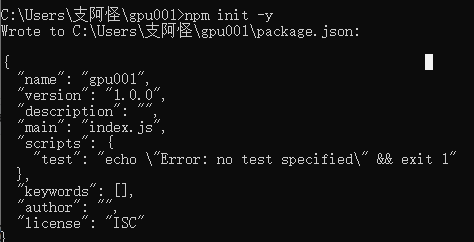
Display configuration succeeded

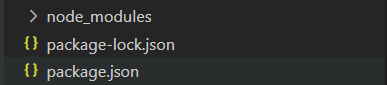
3, You need to enter vs code for configuration
New Terminal - install package
I didn't have any problems during the installation
//Install jQuery
npm i jquery @types/jquery

//When installing webgpu, it should be noted that webgpu is unstable and the API is updated almost once a week
npm i @webgpu/types

//Install node package
npm i @types/node
//Install CSS and ts loader npm i css-loader ts-loader //Install typescript npm i typescript
//Install the webpack command line file
npm i webpack webpack-cli

After successful configuration, you can see the node folder and package lock json
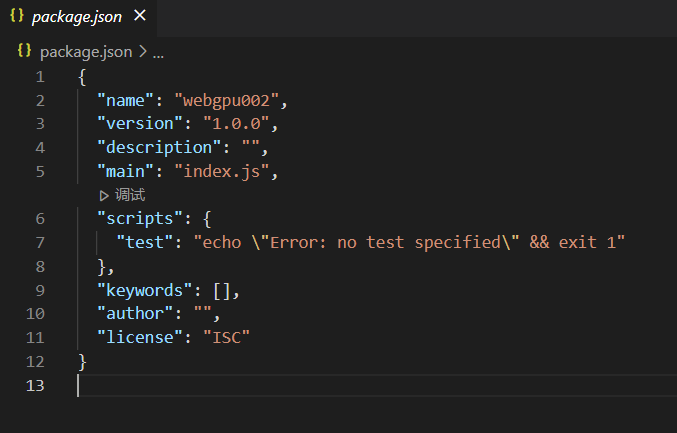
4, I need your understanding of package Modify the JSON file
These three lines of commands enable us to run webpack in different modes
dev development mode
prod production mode
watch monitoring mode
Replace "scripts" {} with
  "scripts": {

    "dev": "webpack --mode development",

    "prod": "webpack --mode production",

    "watch": "webpack --watch --mode production"

  },
Before and after replacement

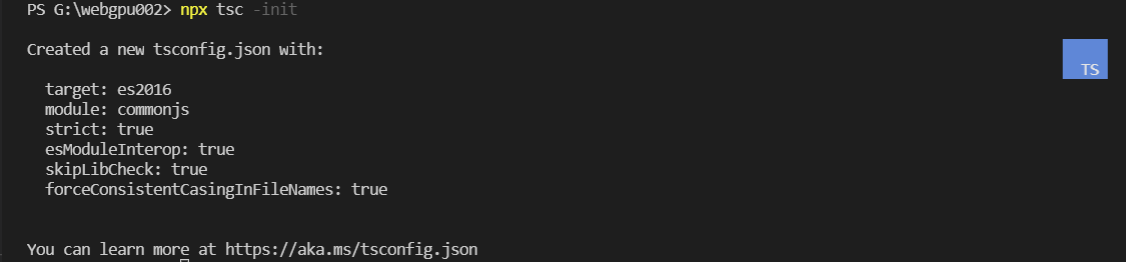
V. you need to generate the ts configuration file tsconfig json
Use the terminal to write code for creation. It is worth noting that the code given in Dr. Xu's tutorial is tsc -init, but my system prohibits running scripts, but it doesn't matter. I have found a solution;
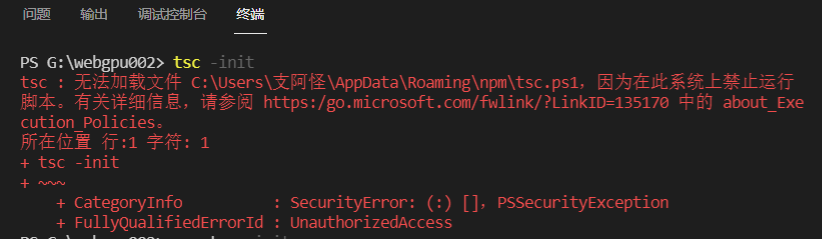
//Use this command line to solve the above problem
npx tsc -init
npm has added NPX command since version 5.2. For specific usage, please refer to this blog: http://www.ruanyifeng.com/blog/2019/02/npx.html
Generated tsconfig The JSON file needs to replace the code as follows:
{

  "compilerOptions": {

   "rootDir": "src",//Next, create a new src folder

   "outDir": "dist",//Next, create a new dist folder

   "target": "es6",

   "lib": [

   "es2017",

  "dom"

 ],

   "types": [

   "node",

   "@webgpu/types"

 ],

 "module": "es2015",

 "esModuleInterop": true,

   "strict": true,

   "sourceMap": true

   },

   "exclude": [

   "node_modules"

   ]

  }
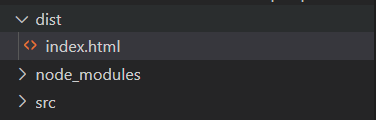
6, After the replacement is completed, create two new folders. You need to create a new index under src and dist HTML file
index. The HTML code is as follows:
<!DOCTYPE html>
<head>
<meta charset="utf-8">
<meta http-equiv="x-UA-Compatible "content="IE=edge">
<title>WebGPU Step-by-step </title>
<meta name="description" content="">
<meta name="viewport content=width=device-width, initial-scale=1">

</head>
<bod>
    <h1>My first WebGPU page:</h1>
    <h2 id="id-gpu-check"></h2> //Whether the browser supports webgpu and prints the inspection results
    <script src="main.bundle.js"></script>


</bod>
</html>
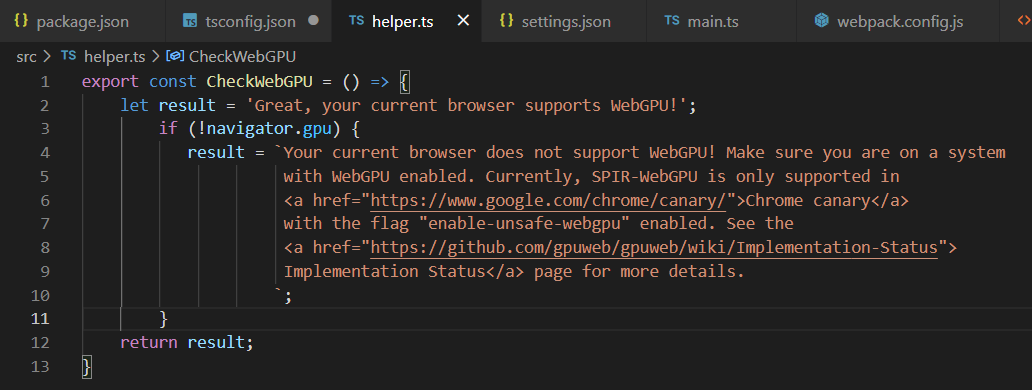
7, Manually create a new helper TS file
Create a helper. In the src folder TS file, which determines whether your browser supports webgpu;
The code is as follows:
export const CheckWebGPU = () => {
    let result = 'Great, your current browser supports WebGPU!';
        if (!navigator.gpu) {
           result = `Your current browser does not support WebGPU! Make sure you are on a system
                     with WebGPU enabled. Currently, SPIR-WebGPU is only supported in
                     <a href="https://www.google.com/chrome/canary/">Chrome canary</a>
                     with the flag "enable-unsafe-webgpu" enabled. See the
                     <a href="https://github.com/gpuweb/gpuweb/wiki/Implementation-Status">
                     Implementation Status</a> page for more details.
                    `;
        }
    return result;
}
VIII. Manually create an application entry main TS file
//Import jquery library;
import $ from 'jquery';

//The CheckWebGPU function is introduced, which is defined in the helper file;
import { CheckWebGPU } from './helper';

//Import the string generated by the CheckWebGPU function into html and print it < H2 >
$('#id-gpu-check').html(CheckWebGPU());
9, Manually create a new webpack confjg. JS file
Create under root directory
The code is as follows:
const path = require("path");
const bundleOutputDir = "./dist";  //Generated under dist folder

module.exports = {
    entry: {
        main: "./src/main"    //The main entry end is defined in the sec/main file
    },
    output: {
        filename: "[name].bundle.js",   //The outlet end is defined in
        path: path.join(__dirname, bundleOutputDir),
        publicPath: 'public/dist/'
    },
    devtool: "source-map",
    resolve: {
        extensions: ['.js', '.ts']
    },
    module: {
        rules: [
            {
                test: /\.js$/,
                exclude: ['/node_modules/']
            },
            { test: /\.tsx?$/, loader: "ts-loader" },
            {
                test: /\.css$/,
                sideEffects: true,
                loader: "css-loader"
            }
        ]
    }
};
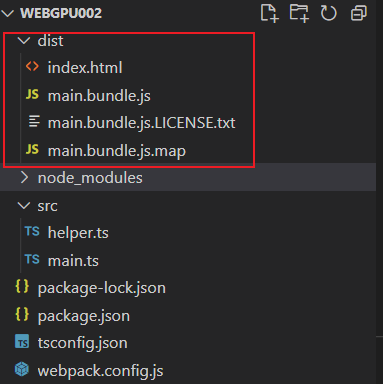
X. package the file to generate main bundle. JS file succeeded
npm run prod
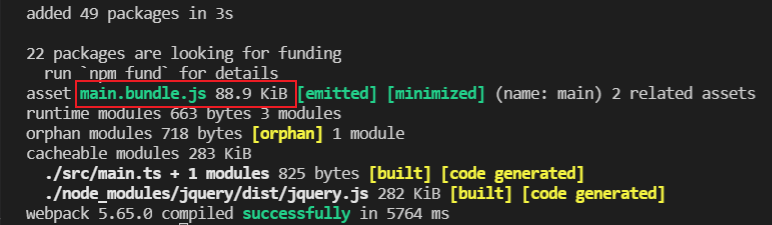
There will be three more files in dist folder, main bundle. JS files are very important because they are referenced in html files;
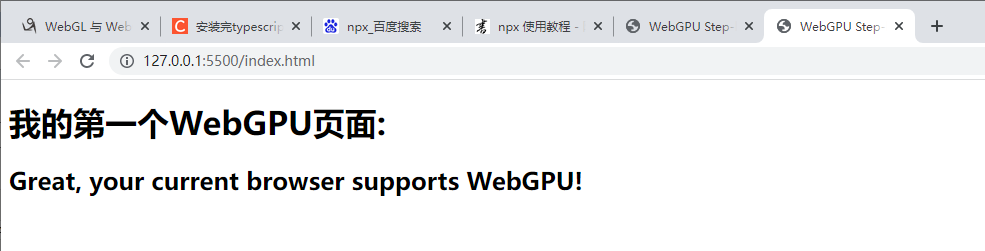
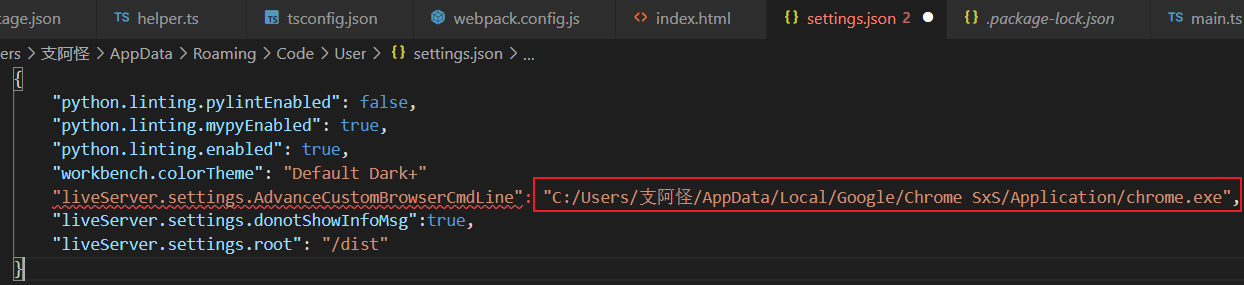
Xi. Display the browser, search the live server plug-in in the store, and go to setting JSON file, and CustomBrowser defines the local location of your browser;
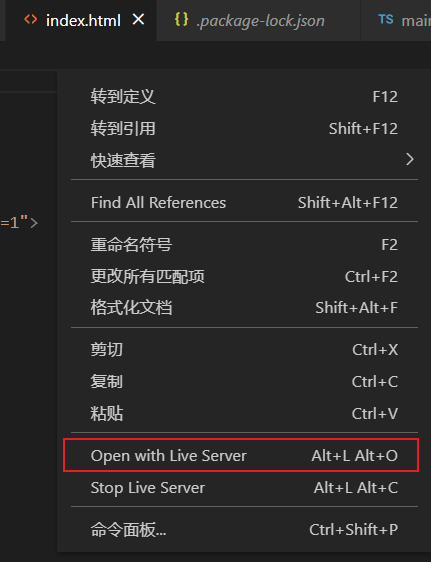
After installation, return to the html file, right-click the pop-up menu and select Open with Live Server. The page opens successfully. Note that you must install Chrome Canary and use this browser to successfully enable webgpu.
Congratulations! This page represents the success of your webgpu activation, which is also the success of my implementation after careful study. However, the relationship between file relations and various references needs to be understood by ourselves. It will be very painful at the beginning, but in fact, if you understand the principle, you will suddenly realize it, stick to it and become a cow of new technology!