This article is reproduced for bloggers and follows the CC 4.0 by-sa copyright agreement.
Links to this article: https://blog.csdn.net/qq_36845328/article/details/89060067
Build the first project, File -> New -> Project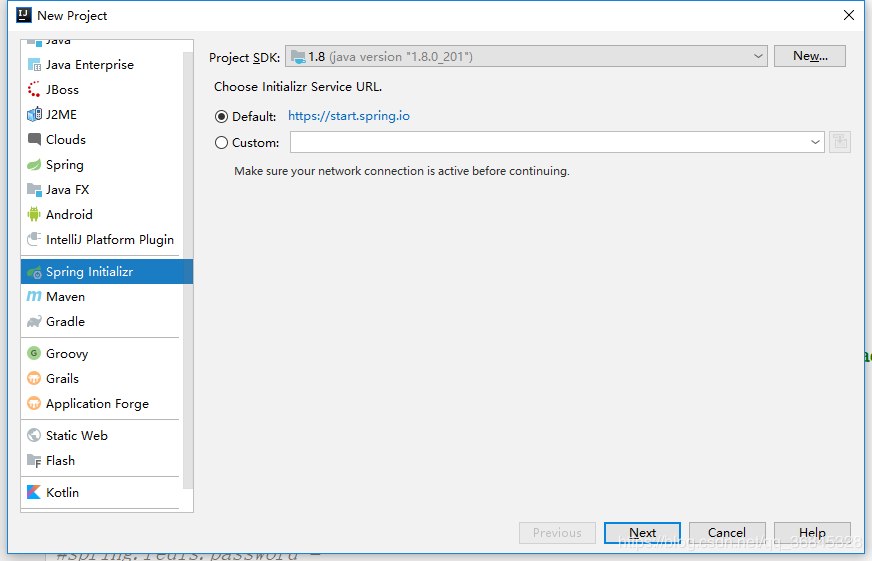
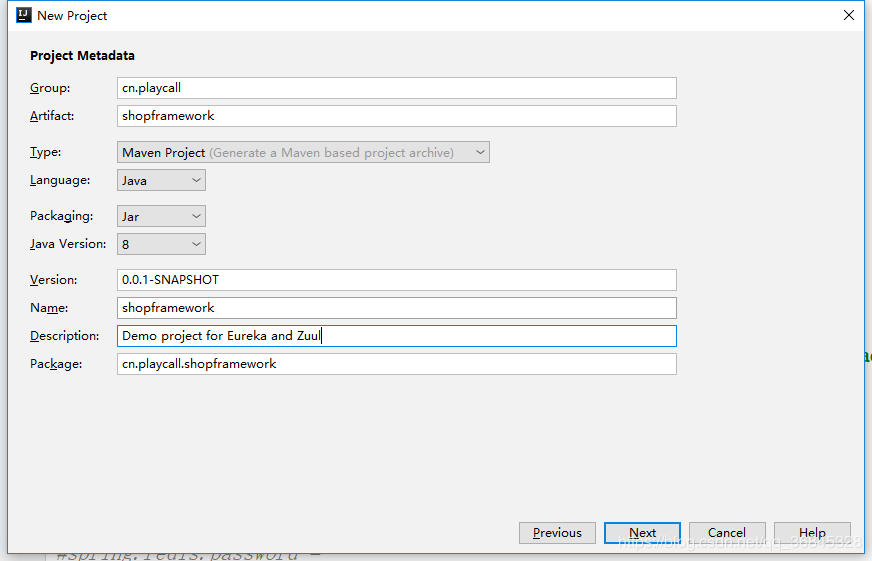
Instead of choosing an extra dependency, here we create a parent module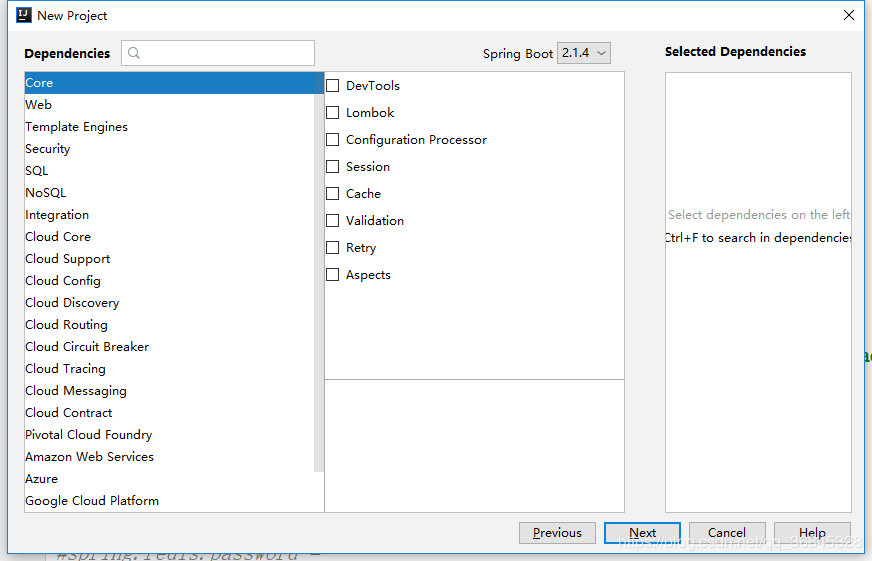
next all the way until the project is created
- Create sub-module, eureka registry
New Submodule on Project, New -> Moudle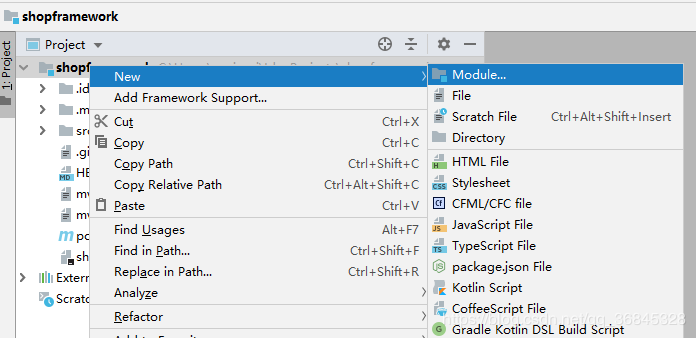
Follow the first step to select the Spring Initialize project to build
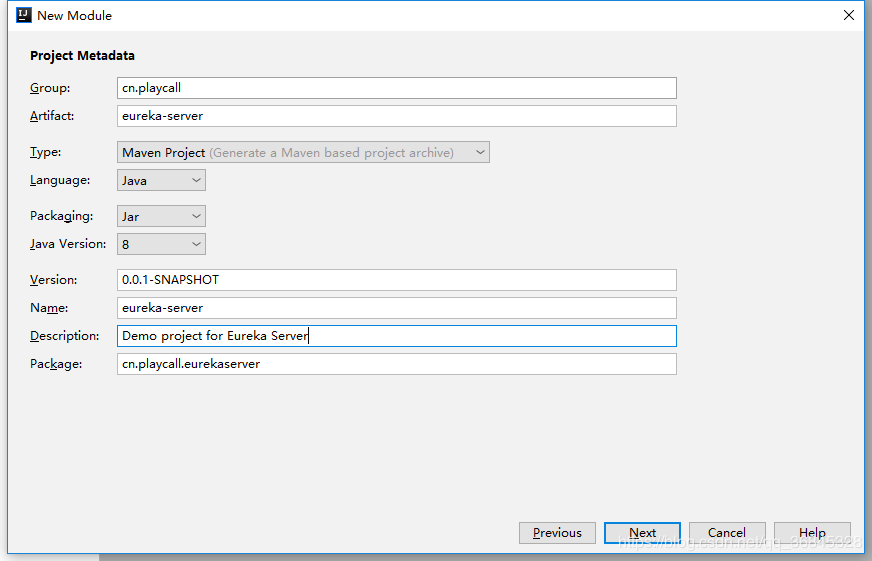
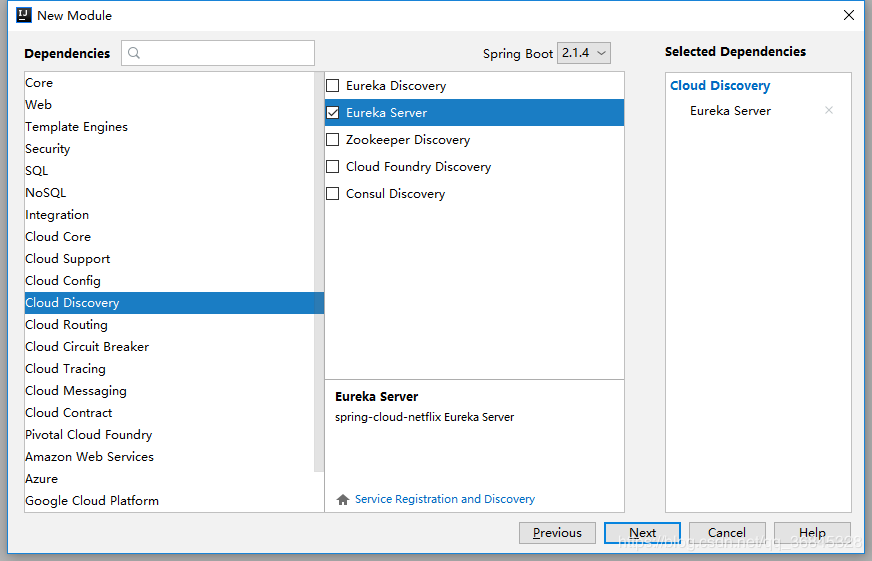
Choice Dependency
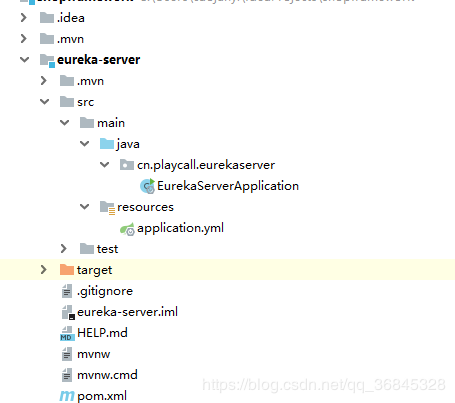
Add the comment @EnableEurekaServer to the startup class of the EurekaServer registration service
package cn.playcall.eurekaserver;

import org.springframework.boot.SpringApplication;
import org.springframework.boot.autoconfigure.SpringBootApplication;
import org.springframework.cloud.netflix.eureka.server.EnableEurekaServer;

@SpringBootApplication
@EnableEurekaServer
public class EurekaServerApplication {

    public static void main(String[] args) {
        SpringApplication.run(EurekaServerApplication.class, args);
    }

}
Write an application.yml configuration file, or use application.properties
  # Service listening port
    server:
      port: 8040

    eureka:
      instance:
        hostname: localhost
      client:
        register-with-eureka: false # Registration to the eureka center is prohibited. Currently this app is Eureka Server, so you don't need to register yourself
    fetch-registry: false # Getting files from the center is prohibited. This is a single Eureka Server.
                          # Set to false without synchronizing data from other Eureka Server nodes
  serviceUrl:
    defaultZone: http://${eureka.instance.hostname}:${server.port}/eureka/
Run the startup class and open http://localhost:8040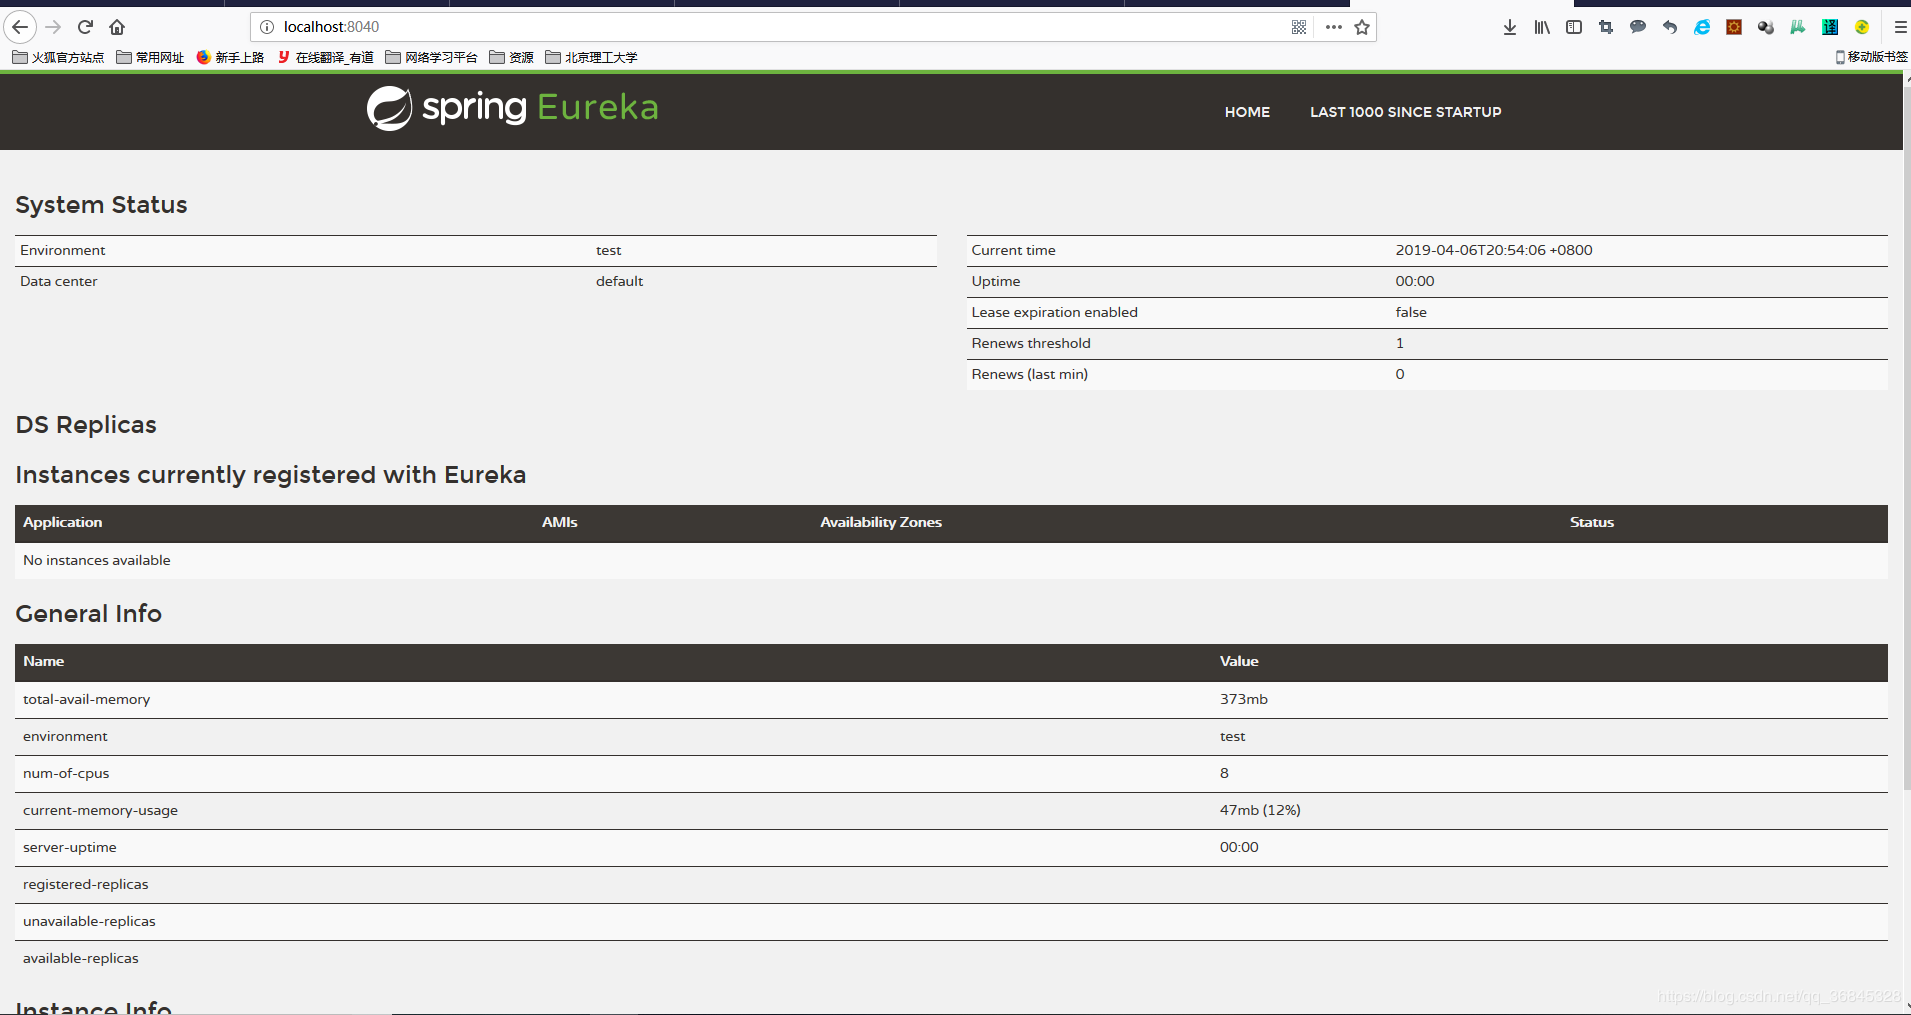
You can see that there are currently no registered services, so let's write a registered service class
- Registration Services
Follow the previous steps to create a new sub-module serviceA
Choose the corresponding dependency - remember to choose the web, which is actually the development module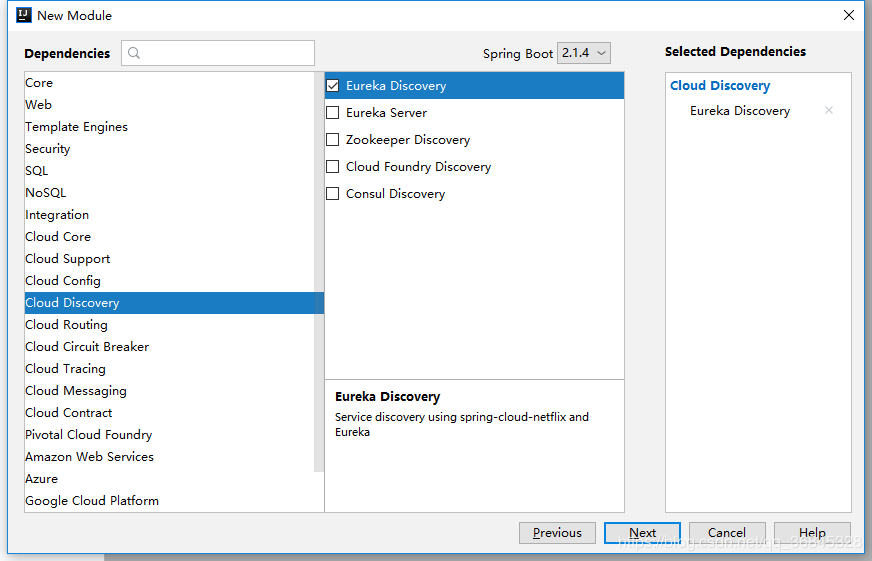
Add Comment @EnableEurekaClient
package cn.playcall.servicea;

import org.springframework.boot.SpringApplication;
import org.springframework.boot.autoconfigure.SpringBootApplication;
import org.springframework.cloud.netflix.eureka.EnableEurekaClient;

@SpringBootApplication
@EnableEurekaClient
public class ServiceAApplication {

    public static void main(String[] args) {
        SpringApplication.run(ServiceAApplication.class, args);
    }

}
Write the corresponding configuration file
spring:
  application:
    name: service-a # Service Name

# Service Registration Center
eureka:
  client:
    serviceUrl:
      defaultZone: http://localhost:8040/eureka

server:
  port: 8041
Run the startup class, open the Eureka Server page, and you can see that the server has been successfully registered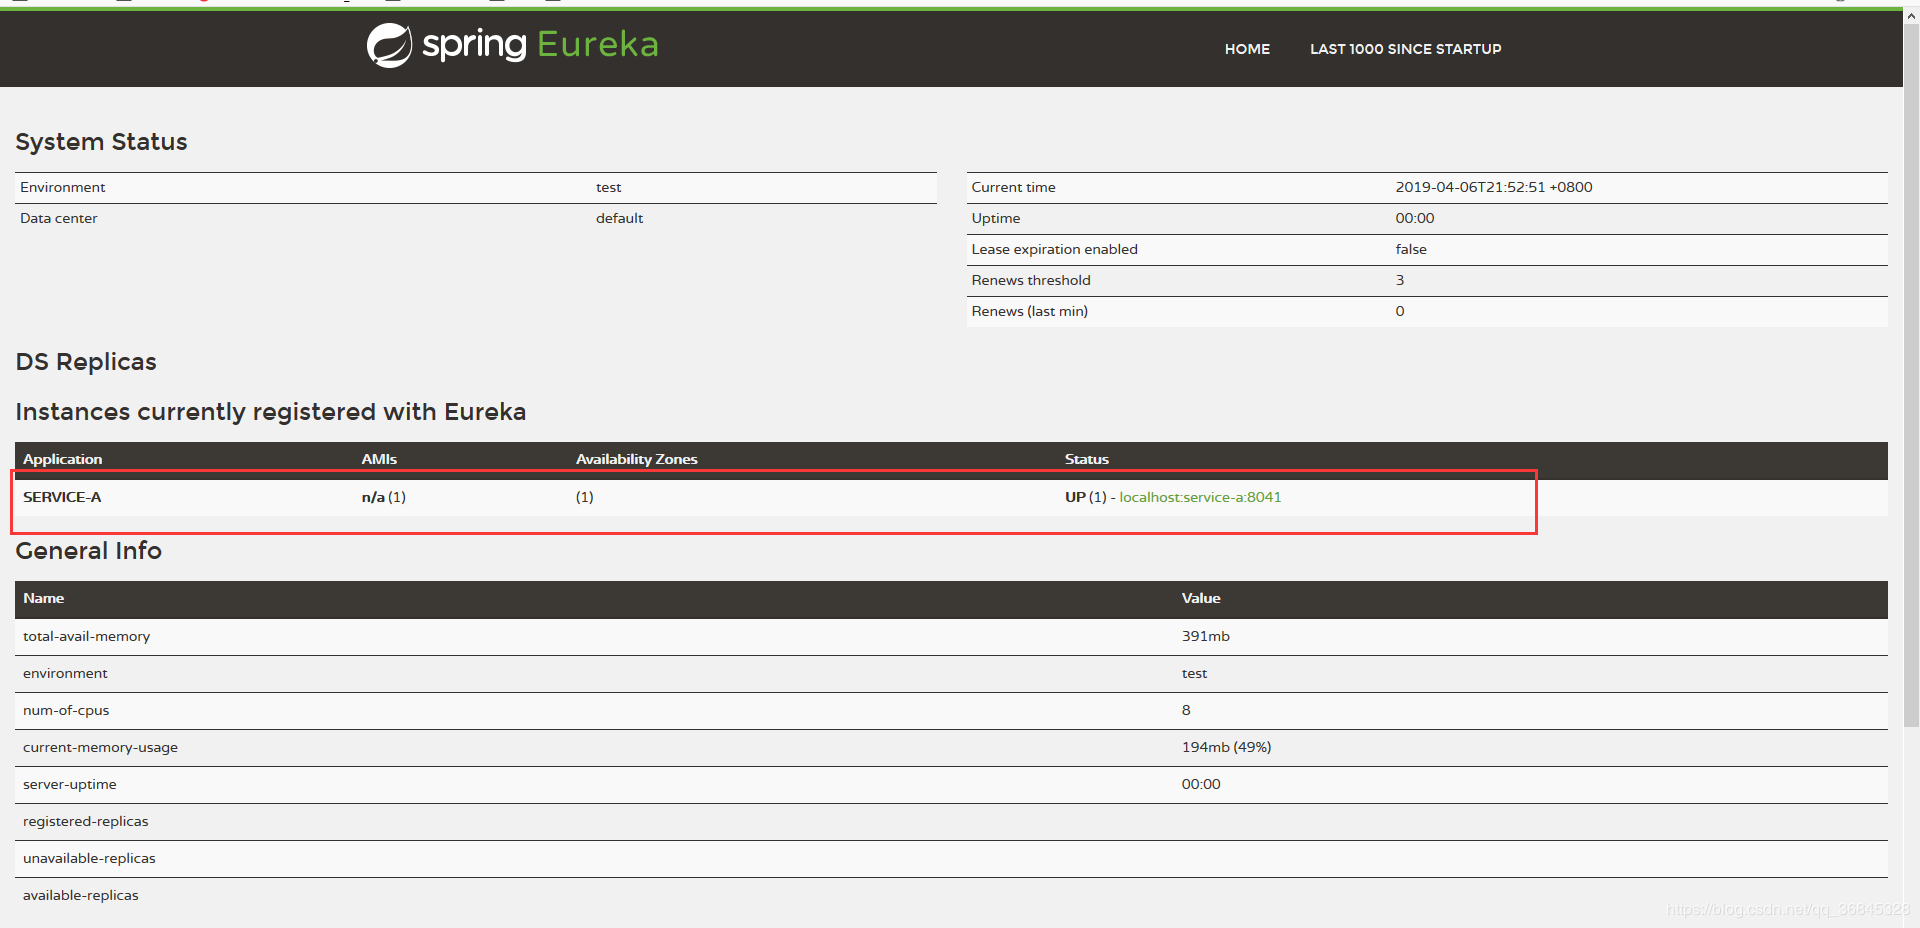
Let's write a simple control class that will be used in later stages, but for now, let's briefly validate the service functionality through the service provider's address.
Access http://localhost:8041/hi
The server side is OK.
Follow the steps above to create another service-b.
3. Gateway
Create a new sub-module and set up a gateway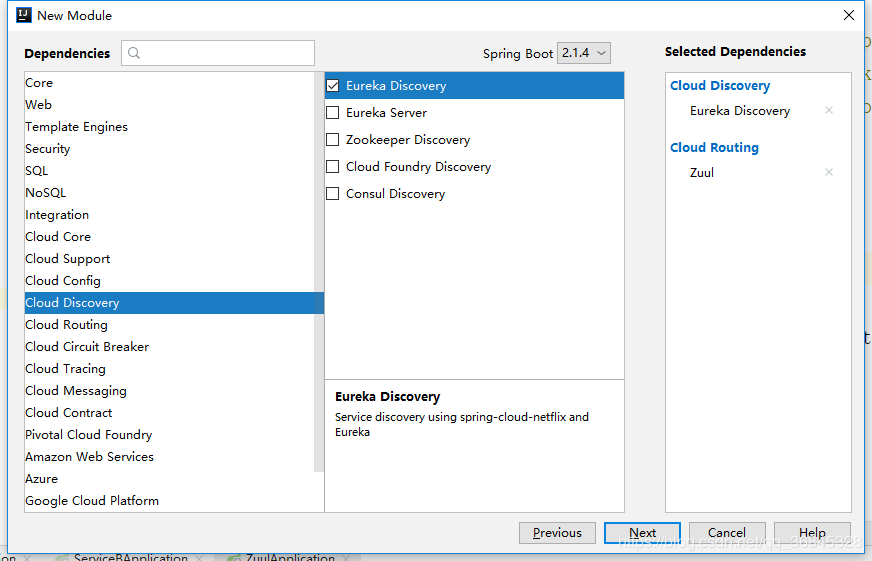
Add the annotations @EnableZuulProxy and @EnableEurekaClient to the startup class, register the zuul gateway service with eureka, and invoke other services through the service name
import org.springframework.boot.SpringApplication;
import org.springframework.boot.autoconfigure.SpringBootApplication;
import org.springframework.cloud.netflix.eureka.EnableEurekaClient;
import org.springframework.cloud.netflix.zuul.EnableZuulProxy;

@SpringBootApplication
@EnableZuulProxy
@EnableEurekaClient
public class ZuulApplication {

    public static void main(String[] args) {
        SpringApplication.run(ZuulApplication.class, args);
    }

}
Write a configuration file
server:
  port: 8043
spring:
  application:
    name: service-zuul
eureka:
  client:
    serviceUrl:
      defaultZone: http://localhost:8040/eureka
    register-with-eureka: true
    fetch-registry: true
zuul:
  routes:
    api-a:
      serviceId: service-a
      path: /api-a/**
    api-b:
      serviceId: service-b
      path: /api-b/**
Open http://localhost:8043/api-a/hi and http://localhost:8043/api-b/hi in the browser and you can see that the corresponding service can forward

3.1 zuul Configuration Multiple Instances
But now a single route points to a single service. In a distributed scenario, we may have multiple nodes for a service. How can we use zuul for simple load balancing?We'll make a slight change to the configuration file that provided the service and set the service name to the same.
After the modification, the two services have the same service name except for the different ports.
eureka:
  client:
    serviceUrl:
      defaultZone: http://localhost:8040/eureka
    register-with-eureka: true
    fetch-registry: true
zuul:
  routes:
    api-a:
      serviceId: comput-service
      path: /api/**
This makes it easy to poll by repeatedly opening http://localhost:8043/api/hi

If you want to develop a better load balancing strategy, you need to use something else, such as ribbon, which is not shown here.
--------
Copyright Statement: This is an original article by CSDN blogger "Four5Fire", which follows the CC 4.0 by-sa copyright agreement. Please attach a link to the original source and this statement.
Original link: https://blog.csdn.net/qq_36845328/article/details/89060067