1 Introduction
Redis is a high-performance NoSQL database and is often used as a cache in major Internet architectures.This article describes how to integrate Spring Data Redis in Springboot and work with Repository.
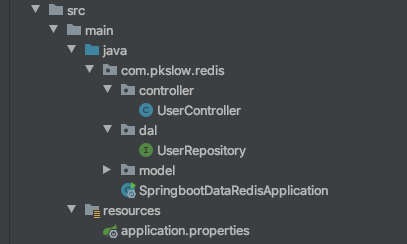
The code structure is as follows:
2 Integration process
2.1 Install Redis Database
To save time, install it directly from Docker, refer to the article: Docker installs Redis and introduces beautiful visualization clients to work with Can be quickly installed and viewed and manipulated using the client.
2.2 Introducing Related Dependencies
We introduced the dependency of Springboot Web to start REST services.Spring Data Redis-related dependencies also need to be introduced.Finally, you need commons-pool2, or you won't be able to start because of a missing class.
<dependency>
  <groupId>org.springframework.boot</groupId>
  <artifactId>spring-boot-starter-web</artifactId>
</dependency>
<dependency>
  <groupId>org.springframework.boot</groupId>
  <artifactId>spring-boot-starter-data-redis</artifactId>
</dependency>
<dependency>
  <groupId>org.apache.commons</groupId>
  <artifactId>commons-pool2</artifactId>
</dependency>
2.3 Configure connection information
Configure Redis's connection information, which is related to your configuration at the time of installation, as well as the connection pool. The configuration and related explanations are as follows:
# Redis database index, default 0
spring.redis.database=0
# Redis Port
spring.redis.port=6379
# Redis Server Host
spring.redis.host=localhost
# Maximum Connections in Connection Pool
spring.redis.lettuce.pool.max-active=8
# Connection pool maximum idle
spring.redis.lettuce.pool.max-idle=8
# Connection pool minimum idle
spring.redis.lettuce.pool.min-idle=2
# Connection pool maximum blocking wait time
spring.redis.lettuce.pool.max-wait=1ms
# timeout
spring.redis.lettuce.shutdown-timeout=100ms
2.4 Create entity classes
The type of data stored in Redis can be a custom class, note that you need to annotate @RedisHash and @Id.The data stored in Redis is of Set type.
The code is as follows:
package com.pkslow.redis.model;

import org.springframework.data.annotation.Id;
import org.springframework.data.redis.core.RedisHash;
import java.util.Date;

@RedisHash("User")
public class User {
    @Id
    private String userId;
    private String name;
    private Integer age;
    private Date createTime = new Date();

    public String getUserId() {
        return userId;
    }

    public void setUserId(String userId) {
        this.userId = userId;
    }

    public String getName() {
        return name;
    }

    public void setName(String name) {
        this.name = name;
    }

    public Integer getAge() {
        return age;
    }

    public void setAge(Integer age) {
        this.age = age;
    }

    public Date getCreateTime() {
        return createTime;
    }

    public void setCreateTime(Date createTime) {
        this.createTime = createTime;
    }
}
2.5 Database Access Layer UserRepository Interface
Just inherit the CrudRepository interface directly without implementing it yourself. Note the generic types of CrudRepository <User, String>
package com.pkslow.redis.dal;

import com.pkslow.redis.model.User;
import org.springframework.data.repository.CrudRepository;

public interface UserRepository extends CrudRepository<User, String> {
}
2.6 Implement Controller
Controller implements RESTful-style add-delete checks, which can be used to manipulate user repository injection:
package com.pkslow.redis.controller;

import com.pkslow.redis.dal.UserRepository;
import com.pkslow.redis.model.User;
import org.springframework.beans.factory.annotation.Autowired;
import org.springframework.web.bind.annotation.*;

@RestController
@RequestMapping("/user")
public class UserController {
    @Autowired
    private final UserRepository userRepository;

    public UserController(UserRepository userRepository) {
        this.userRepository = userRepository;
    }

    @GetMapping("")
    public Iterable<User> getAllUsers() {
        return userRepository.findAll();
    }

    @GetMapping("/{userId}")
    public User getByUserId(@PathVariable String userId) {
        return userRepository.findById(userId).orElse(new User());
    }

    @PostMapping("")
    public User addNewUser(@RequestBody User user) {
        return userRepository.save(user);
    }

    @DeleteMapping("/{userId}")
    public String delete(@PathVariable String userId) {
        User user = new User();
        user.setUserId(userId);
        userRepository.deleteById(userId);
        return "deleted: " + userId;
    }

    @PutMapping("")
    public User update(@RequestBody User user) {
        return userRepository.save(user);
    }
}
3 Postman interface test
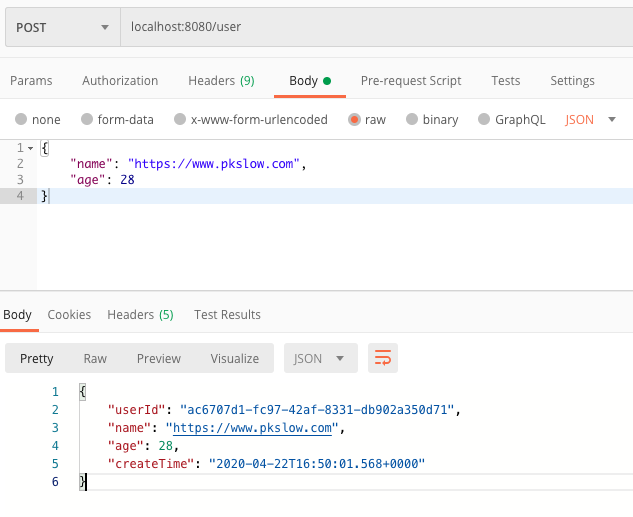
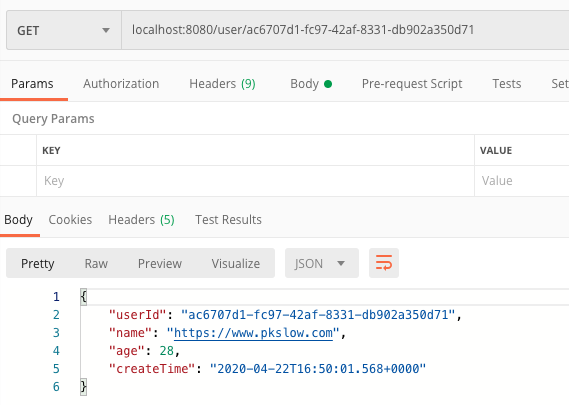
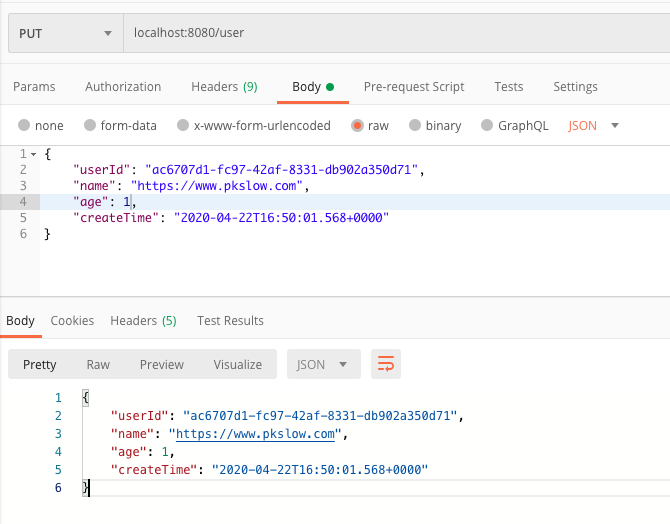
This article uses Postman for testing, and the results show GMT time, with each functional test as follows:
(1) Add User
(2) Query specific Users based on UserId
(3) Modify User
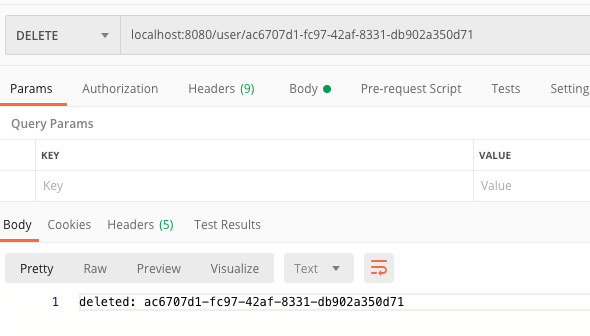
(4) Delete a User
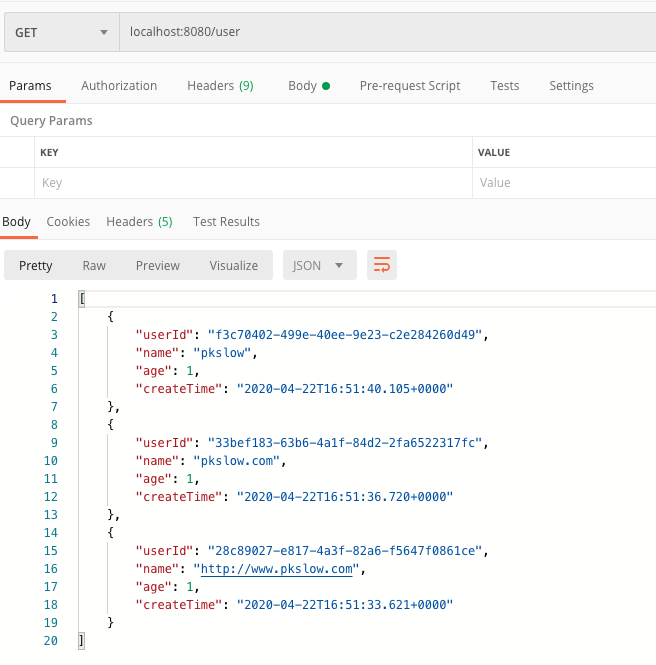
(5) Query all User s
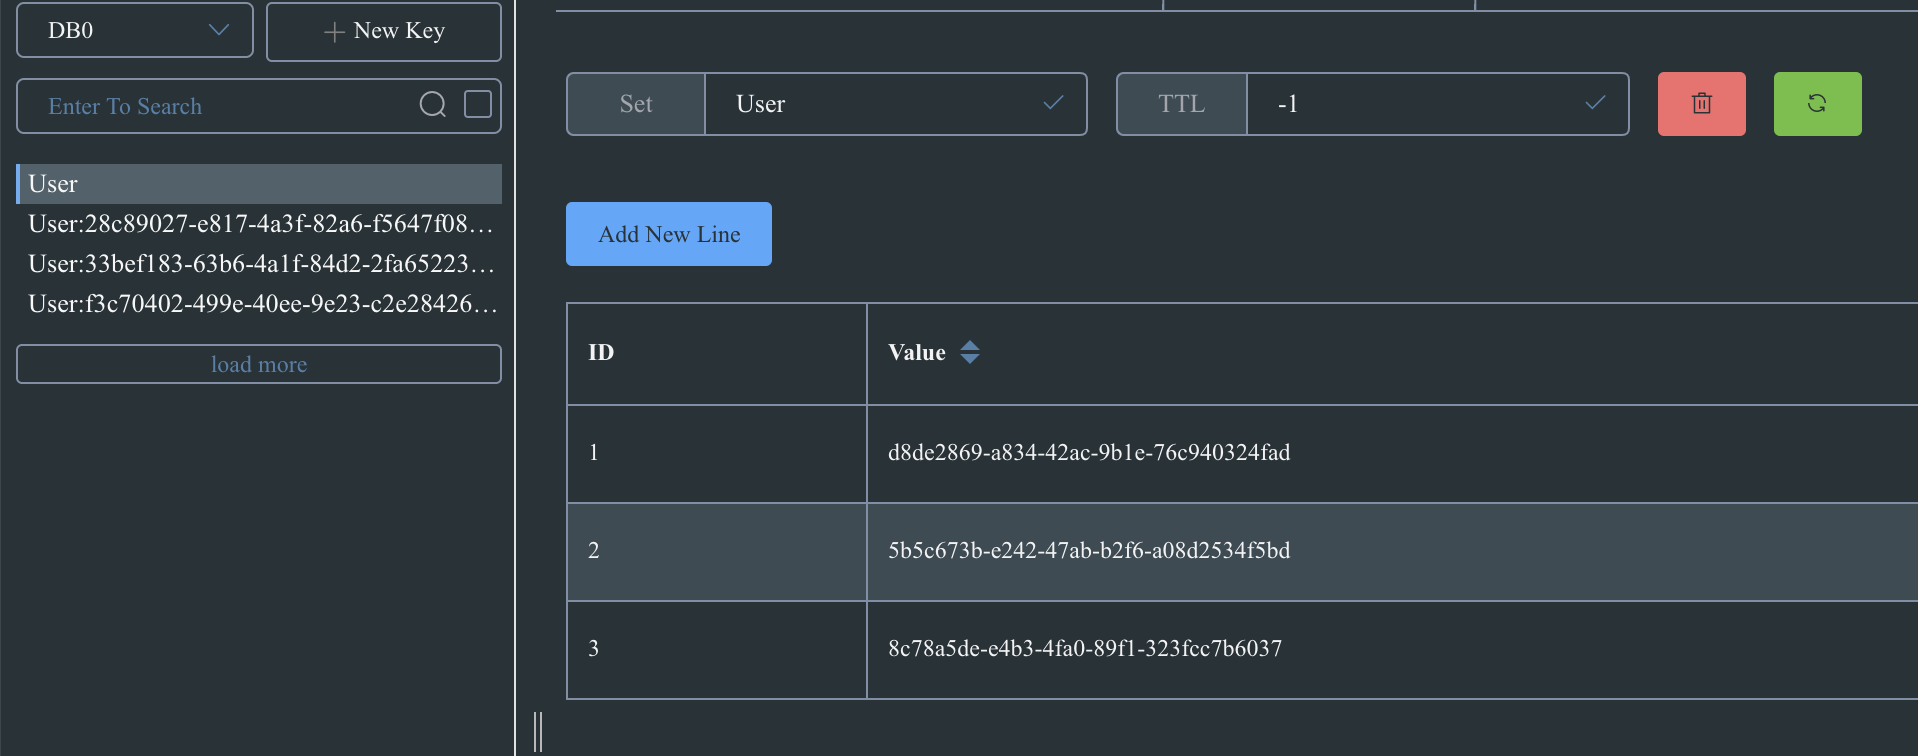
The data in Redis is as follows:
4 Summary
This article provides an example of how to integrate Springboot and Redis, using the Repository approach.Detailed code is available in the Pumpkin Slow Public Reply <SpringbootRedisRepository>
Welcome to Slow pumpkin www.pkslow.com Get more great articles!
Welcome to the WeChat Public Number <Pumpkin Slow>, it will be updated for you continuously.

Read more, share more; write more, organize more.