
preface
If you take the task of compiling and building an operating system from the source code as a cook's table, Linux From Scratch (LFS) is a "recipe". Starting today, I'm going to write a series of tutorials, step by step, starting with the source code of open source software (chef's "food") and based on the latest version of LFS (chef's latest "recipe") )Compile a Linux operating system that can run, build a Linux operating system that can be used as a daily desktop, package it into a Linux operating system that can be installed on the computer, and let you make a GNU/Linux distribution as easy as Deepin Linux. This is not only the process of our practice step by step, but also the process of our gradual in-depth learning. I hope that after this process, our technology and ability can contribute to the GNU/Linux operating system, or even go further, and compile our own operating system as a part.
The following is the Linux system I have compiled and built based on LFS-11.0-systemd (hereinafter referred to as LFS11.0). It is flawless, started, logged in, and even online. See the following figure.
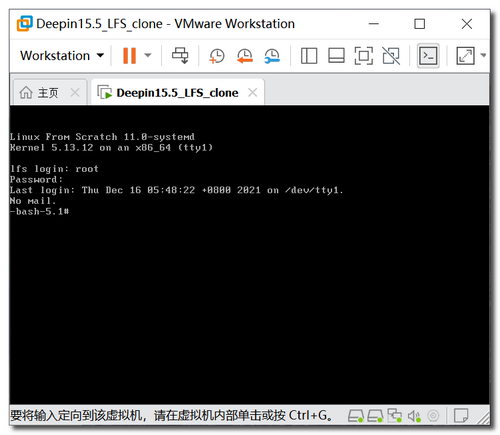
Are you excited? Don't worry. Follow me. You only need 2 hours. Don't be surprised. Just 2 hours. You can compile and build a running Linux operating system. As the beginning of the series of tutorials from LFS to your own Linux distribution, this article will aim at the least difficult and most clear steps, and experience it with you in one step, based on lfs11 0 compile and build a running Linux system to give you a preliminary understanding of LFS; Strive to lead you to success, so that you can build confidence and get a sense of achievement.
Section I: LFS preparation
If a worker wants to do well, he must sharpen his tools first. In order to compile and build your Linux operating system smoothly, we should make some preparations to avoid problems in the process and start over again. In this case, we can't complete our LFS in 2 hours.
-
Platform preparation: on any hard disk of our daily computer equipped with windows operating system, Prepare not less than 200G of hard disk space for storing virtual machines (in this era of terabytes of computer hard disk, you'd better prepare more for future compilation, especially if you need to take snapshots all the way). Download the virtual machine software VMware Workstation Pro 15.5.0( Click here to download )And install. Due to Windows10 system, it is better than VMware Workstation Pro 15.5 Earlier versions of 0 can no longer be used under Windows10 system. If you have installed a newer version, you can skip this step. In addition, please note whether hibernation is set for your computer power management. If so, please cancel this setting.
-
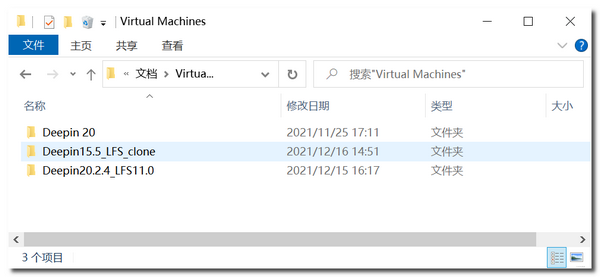
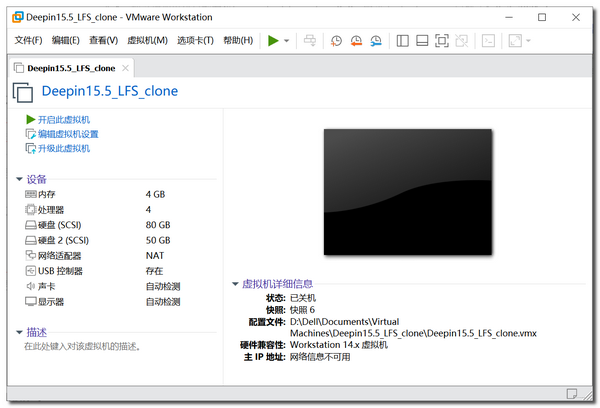
Virtual machine preparation: I have configured the virtual machine needed to compile and build the Linux system (i.e. host), and upload the virtual machine Deepin to my Baidu network disk. What you need to do is download the virtual machine( Click here to download , extract code lfse), and decompress it to the prepared hard disk space. For example, the following figure (not completely consistent, the same below).
-
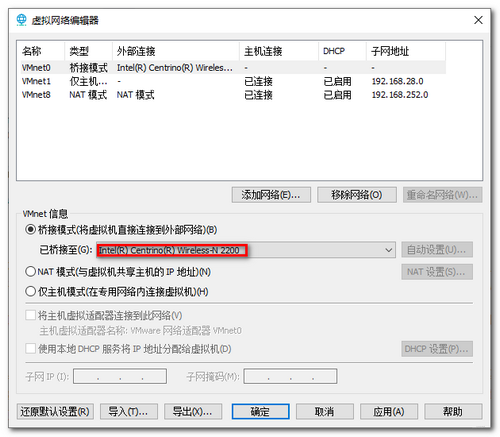
Open the virtual machine: use the virtual machine software VMware Workstation to open the downloaded and decompressed virtual machine Deepin (just like opening the doc document with the software Word, search and open the directory layer by layer step), check whether the network connection is bridged before startup, and set the bridging mode to "bridged to < network card for your physical machine >" For example, my virtual machine has been bridged to my computer network card Intel(R) Centrino(R) Wireless-N 2200.
-
Start the virtual machine: start the virtual machine deepin and log in. The user name and password are lfser. If your computer has more than 8G and CPU memory over 8 threads, adjust the virtual machine memory to half of the computer memory and half the number of CPU cores to the number of computer threads before opening the virtual machine Deepin, so as to improve the experience and make it more fluent.
-
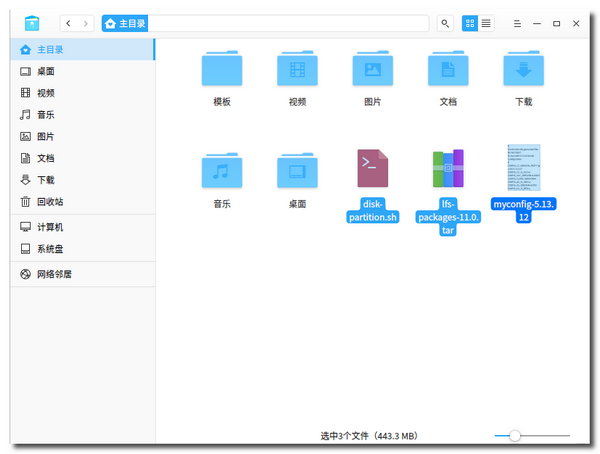
Copy the necessary files in the virtual machine Deepin: the hard disk partition script disk partition. In the folder LFS-11.0-systemd on the desktop of the virtual machine Deepin Sh. LFS source code package lfs-packages-11.0 Tar and kernel configuration file myconfig-5.13 12 and other files are copied to lfser's home (i.e. home directory). LFS-11.0-systemd family bucket folder. In addition to these three files, LFS11.0 manual, reference documents, LFS11.0 source code, etc. are included.
-
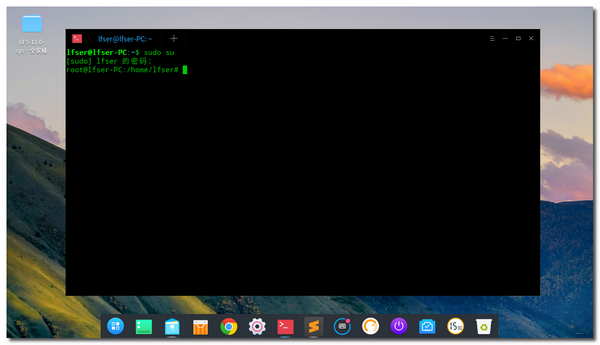
Open the terminal in the virtual machine Deepin: double click the icon on the Dock at the bottom of the virtual machine Deepin desktop to open the deep terminal. Enter the code sudo su in the opened depth terminal and enter the system administrator password lfser according to the requirements of the terminal, as shown in the following figure.
-
Open the source code: find the file LFS from the folder LFS-11.0-systemd on the desktop_ code-4.2. 0. Double click and select display. The system will automatically load the code editor sublime and open the code file.
So far, we call lfs11 All the preparations for 0 have been completed.
Section 2: complete your lfs11 in one step 0
In this section, we complete lfs11 by copying and pasting 0 Our is based on lfs11 0 compiles and constructs its own Linux operating system in the virtual machine Deepin.
- Copy and paste code to complete LFS in one step: open the code file LFS in the code editor sublime_ code-4.2. Copy all the code in 0 and paste it into the deep terminal that has obtained administrator permission by entering sudo su command. This step: Ctrl + C & Ctrl + V is enough. You just have to wait. The deep terminal keeps running the entered code until the LFS is completed and the virtual machine is shut down. For some host computers, the terminal will stop running when the shell is switched. If it stops running, please continue to copy and paste the subsequent code from the stop. Where it may stop, it has been indicated in the code that the subsequent code shall be pasted after the operation is completed.

When the deep terminal runs these codes, you will continue to see the following scrolling screen on the terminal during continuous source code compilation and Linux system construction.

During this period, you should not shut down (neither your computer nor the virtual machine Deepin should be shut down), do not enter any characters in the deep terminal, and try not to open other windows in the virtual machine Deepin. You'd better minimize the virtual machine Deepin to the taskbar of your computer to avoid problems caused by insufficient memory or high CPU occupation of the virtual machine Deepin.
In order to intuitively understand what the deep terminal has done during the 2 hours of operation of the virtual machine Deepin, I am based on lfs11 0 and some of the code with appropriate adjustments are pasted below. This article does not do detailed in-depth analysis (that is what the next article will show you). If you don't want to know for the time being, you can pass by.
#############################################################
#####                LFS,let's go!                      #####
#############################################################

##########       II. Preparing for the Build       ##########

########## Chapter 2. Preparing the Host System

# sudo su

# apt-get update

# The software to be installed on the host other than Deepin15 is determined according to different host computers
# apt-get install  bison texinfo g++ -y

# ln -fs /bin/bash /bin/sh

#############################################################
#####      Dividing line (here, the above code has been run in the preparation phase)     #####
#############################################################

fdisk -l

bash disk-partition.sh

mkfs -v -t ext4 /dev/sdb1

mkswap /dev/sdb2

##########

export LFS=/mnt/lfs

##########

mkdir -pv $LFS
mount -v -t ext4 /dev/sdb1 $LFS

/sbin/swapon -v /dev/sdb2

########## Chapter 3. Packages and Patches

mkdir -v $LFS/sources

chmod -v a+wt $LFS/sources

# Note the directory name after decompression
tar xvf lfs-packages-11.0.tar
cp -R 11.0/* $LFS/sources
cp myconfig-5.13.12 $LFS/sources
rm -rf 11.0

pushd $LFS/sources
md5sum -c md5sums
popd

########## Chapter 4. Final Preparations

mkdir -pv $LFS/{etc,var} $LFS/usr/{bin,lib,sbin}

for i in bin lib sbin; do
  ln -sv usr/$i $LFS/$i
done

case $(uname -m) in
  x86_64) mkdir -pv $LFS/lib64 ;;
esac

mkdir -pv $LFS/tools

##########

groupadd lfs
useradd -s /bin/bash -g lfs -m -k /dev/null lfs
echo "lfs:lfser" | chpasswd

chown -v lfs $LFS/{usr{,/*},lib,var,etc,bin,sbin,tools}
case $(uname -m) in
  x86_64) chown -v lfs $LFS/lib64 ;;
esac

chown -v lfs $LFS/sources

[ ! -e /etc/bash.bashrc ] || mv -v /etc/bash.bashrc /etc/bash.bashrc.NOUSE

su - lfs

##########

cat > ~/.bash_profile << "EOF"
exec env -i HOME=$HOME TERM=$TERM PS1='\u:\w\$ ' /bin/bash
EOF

cat > ~/.bashrc << "EOF"
set +h
umask 022
LFS=/mnt/lfs
LC_ALL=POSIX
LFS_TGT=$(uname -m)-lfs-linux-gnu
PATH=/usr/bin
if [ ! -L /bin ]; then PATH=/bin:$PATH; fi
PATH=$LFS/tools/bin:$PATH
CONFIG_SITE=$LFS/usr/share/config.site
export LFS LC_ALL LFS_TGT PATH CONFIG_SITE
EOF

source ~/.bash_profile

##########        III. Building the LFS Cross Toolchain and Temporary Tools mportant Preliminary Material      ##########

########## Chapter 5. Compiling a Cross-Toolchain

# Set 4-thread compilation. Specifically, set MAKEFLAGS according to the number of threads available to the host
export MAKEFLAGS='-j4'

cd $LFS/sources

##########

tar xvf binutils-2.37.tar.xz
cd  binutils-2.37

mkdir -v build
cd       build

../configure --prefix=$LFS/tools \
             --with-sysroot=$LFS \
             --target=$LFS_TGT   \
             --disable-nls       \
             --disable-werror

make

make install -j1

# Exit the build directory
cd ..

cd ..
rm -rf  binutils-2.37

##########
#
#
#
#               Omit 3000 lines in the middle
#
#
#
##########

grub-install /dev/sdb

cat > /boot/grub/grub.cfg << "EOF"
# Begin /boot/grub/grub.cfg
set default=0
set timeout=5

insmod ext2
set root=(hd0,1)

menuentry "GNU/Linux, Linux 5.13.12-lfs-11.0-systemd" {
        linux   /boot/vmlinuz-5.13.12-lfs-11.0-systemd root=/dev/sdb1 ro tsc=reliable pmtmr=0x0
}
EOF

##########       Chapter 11. The End

echo 11.0-systemd > /etc/lfs-release

cat > /etc/lsb-release << "EOF"
DISTRIB_ID="Linux From Scratch"
DISTRIB_RELEASE="11.0-systemd"
DISTRIB_CODENAME="KhaKha"
DISTRIB_DESCRIPTION="Linux From Scratch"
EOF

cat > /etc/os-release << "EOF"
NAME="Linux From Scratch"
VERSION="11.0-systemd"
ID=lfs
PRETTY_NAME="Linux From Scratch 11.0-systemd"
VERSION_CODENAME="KhaKha"
EOF

##########

logout

#############################################################
######  Deepin15 For the external host, you need to paste the subsequent codes after running   #####
#############################################################

umount -Rv $LFS

shutdown now

#############################################################
#####                 LFS,that's enjoy!                 #####
#############################################################

# 1. By adding the kernel startup parameter tsc=reliable pmtmr=0x0, the problem of clocksource is solved (4.0.2-2021.12.13)
# 2. Change to unattended version for compiling in Deepin 15.5 (4.1.1-2021.12.16)
# 3. Change the default kernel configuration file to myconfig-5.13 12(4.1.2-2021.12.16)
# 4. Correct inetutils configuration code error (4.1.3-2021.12.20)
# 5. Correct two missing commands during glibc installation (4.1.3-2021.12.21)
# 6,myconfig-5.13.12 add CONFIG_RANDOM_TRUST_CPU=y (4.1.3-2021.12.22)
# 7. Corrected the location of the command to create / etc/passwd, / etc/group files, and the command to switch directories during gcc installation (4.1.4-2021.12.25)
# 8. The basic network configuration is modified, the name of the network adapter is named by predictable device instead of traditional name, and DNS is configured by system resolved (4.1.5-2021.12.27)
All the codes that need to be copied and pasted to the deep terminal have been uploaded to Baidu online disk and can be downloaded( Click here to download , extraction code lfse), read it in advance before the beginning of the next article and compare it with lfs11 Compare the 0 manual to see what's different. Note that the best tool to open and edit code is various code editors, whether in your computer's Windows system or virtual machine Deepin. sublime is recommended; Never use Word, WPS and other document editors to open and edit the code; The code copied in web pages and PDF documents also needs to be pasted in the code editor and checked before use.
After your virtual machine runs for 2 hours, it is based on lfs11 The Linux system of 0 has been built, and the virtual machine Deepin will automatically shut down and wait for you to turn on your Linux system. (if your virtual machine window is minimized to your computer's taskbar, double-click the virtual machine Icon on the taskbar) you will see the following window.
Section 3: start your LFS system
As I said in the previous section, your computer (of course, the virtual machine Deepin) has completely compiled and built a Linux operating system based on LFS11.0 after copying and pasting all the code into the deep terminal and running for about 2 hours. Then, what has the deep terminal done and what changes have taken place in your computer?
The following figure shows the system directory when our virtual machine Deepin was just started.
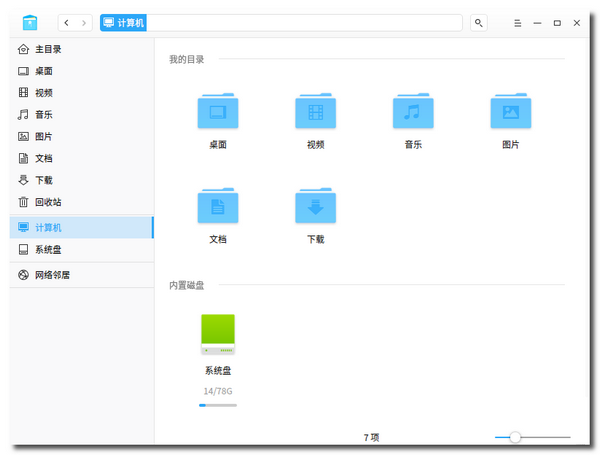
It can be seen that there is only one built-in disk: system disk.
The next figure is based on lfs11 0 system directory of the virtual machine Deepin after compiling and building the Linux operating system:
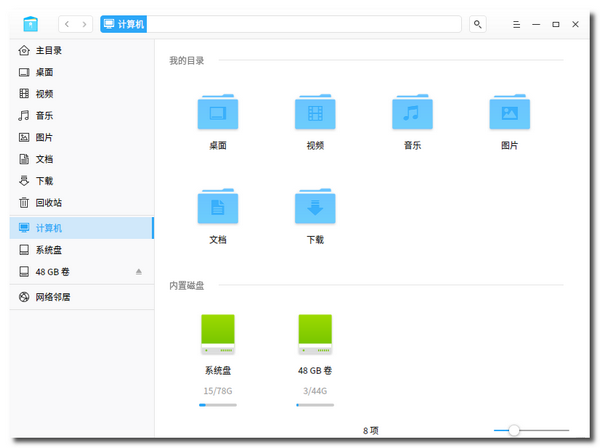
It can be seen that there are two built-in disks: system disk 48GB volume (it can be seen from the name that it has been partitioned, formatted and mounted), there is an extra 48GB volume of built-in disk. This extra built-in disk is that we partition the second hard disk already on the virtual machine by copying and pasting the code to the deep terminal and pressing enter, format and mount the partition, and form a hard disk partition that can be used by the computer Area.
Then, what is in the hard disk partition (48GB volume) that has just been partitioned and formatted? Let's look at the figure below.
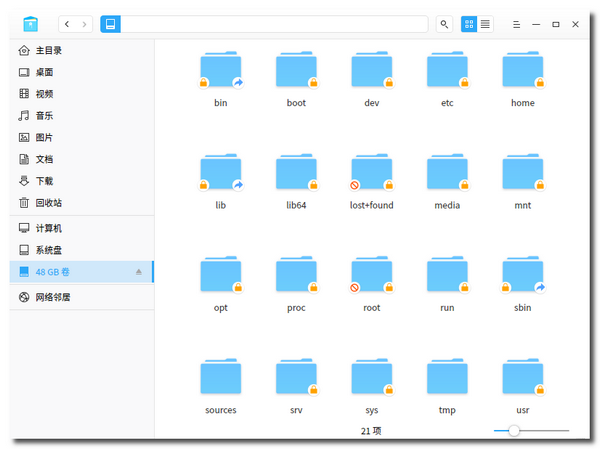
Wow, it is no longer just formatted and empty. There are a series of directories such as bin, boot and home, just like a complete Linux operating system. Yes, this is the Linux system compiled and built by the deep terminal after running for 2 hours, just waiting for you to start it.
Now, follow me to start your Linux system.
-
Enter the BIOS setting state of the virtual machine Deepin: the default BIOS setting of our virtual machine Deepin starts from the first hard disk, If you boot the virtual machine (Deepin, of course), you are still running the Deepin operating system installed on the first hard disk, not the Linux system you compiled and built. Next, let's set it. Click the start button in the menu bar of the virtual machine software VMware Workstation (red arrow) the down arrow on the right will show the Startup menu. Select the option "enter firmware when power is on" in this menu, and the virtual machine Deepin will enter the BIOS setting state.

-
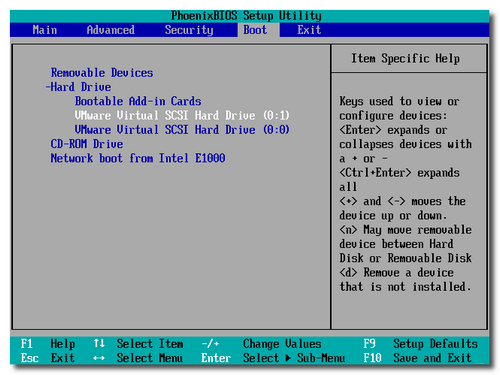
Set the virtual machine Deepin to start from the second hard disk: enter the BIOS setting state, set it to the state as shown in the figure below, with the second hard disk Hard Drive (0,1) on and the first hard disk Hard Drive (0,0), save and exit, and the virtual machine Deepin will restart automatically.
-
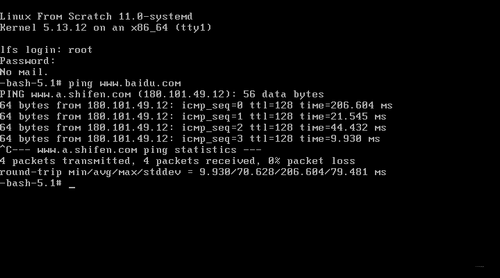
Log in to your Linux system: after the BIOS of the virtual machine Deepin is set, saved and exited, Your computer (virtual machine Deepin) will restart automatically, and soon enter your Linux system login status. Enter the user name root (no other user has been created, now you can only log in as root) and password lfser (I set this password in the code. You can set any password in the code, or enter the command passwd root to reset it after logging in). Your Linux system has really logged in successfully.

-
Try your Linux system: after successful login, in addition to the login information, the computer displays a black screen. Can she really be used by us? Can you connect to the network? We enter the command ping www.baidu.com in the computer Com to check whether the network is connected and see what happens. Oh, she has connected to the Internet. ping out Baidu's website and has received 4 packets. Of course, she can receive more packets, but I artificially stopped the process by pressing Ctrl+C.
That's Wonderful! This is really an exciting moment.
I have exported and uploaded the LFS 11.0 virtual machine stripped of the host system to Baidu network disk. Welcome to download and try( Click here to download , extraction code lfse). After opening the LFS 11.0 system, compare / etc/fstab with / boot / grub / grub The differences between the two CFG files and the two files formed during LFS. Think about why you should make these changes to pave the way for subsequent learning.
epilogue
Together with me, step by step, you really compiled and constructed your Linux operating system from the source code. Although the system is still very thin and has not many functions, it can not input and display Chinese characters, and there is no window; The compilation and construction process of your Linux operating system is to use my configured virtual machine Deepin according to lfs11 0 manual, and pasted the modified code directly to the deep terminal. You have experienced the process of compiling and constructing Linux system. You don't know the principle of compiling and constructing.
This is what I will continue to do with you in the future: learn more about the compilation and construction process from the source code to your Linux system, and build a functional Linux system based on BLFS, Load your Linux system into U SB flash disk and use it on other computers (not virtual machines, nor limited to your own computer) for others, until you finally construct a Linux operating system with complete package management mechanism as easy as Deepin Linux.
By the way, I would like to praise Deepin Linux. Among the GNU/Linux operating systems I have tried, this Linux system is the most grounded. It can be used out of the box. Chinese, input method and conventional software are all done. When I use this system for LFS, I only made three simple settings: first, I installed the sublime code editor through the deep software store; 2, The necessary software of three LFS compilation environments such as g + + is installed through the deep terminal; 3, The direction of sh through the depth terminal is changed from dash to bash. This system is also very beautiful. It is used to have the feeling of Apple system. It really deserves to be the leader of our autonomous operating system!
If we go through the whole process step by step, I believe it will be beneficial to you and me. We can deeply understand the construction principle of the operating system, and have the ability to contribute to the great free and open source software GNU/Linux, or even go further to create an operating system completely for us. Wait for that day!