1. Application background
In industrial projects, it is often necessary to use machine vision combined with man-machine interface to develop specific and process oriented projects. In machine vision, Halcon is undoubtedly a powerful visual product that can be quickly applied to the project, and WPF is a sharp weapon to solve the man-machine interface. Therefore, it is of great practical significance to understand how to import the visual application developed by HDevelop into the WPF project developed by VS. HDevelop continuously provides powerful visual algorithms and programming tools. At the same time, it also provides program encapsulation and export to include net Framework. Based on this, this paper records this process for future reference.
2. Development tools and platforms
Interface: vs2017 + net framework4 8 + WPF
Vision: hdevelop version 13.0 (27.10.2016) + halon 13.0.1.1 (14.06.2017)
Windows: Windows10 enterprise + Intel i5-7300HQ 2.5GHz + RAM 8GB + x64
3. Steps and results
- HDevelop code
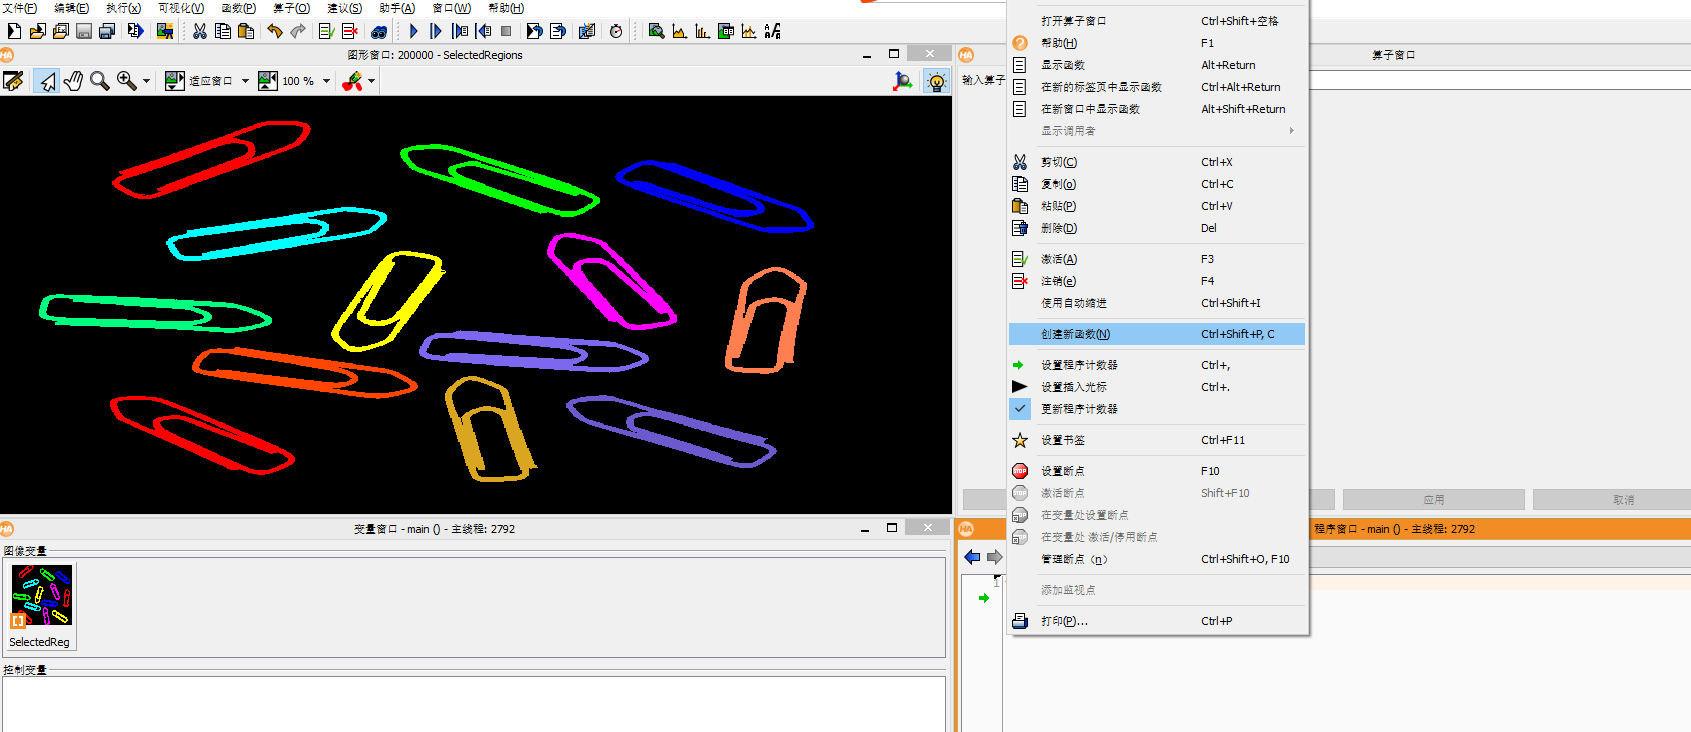
- Create a new function named test
-
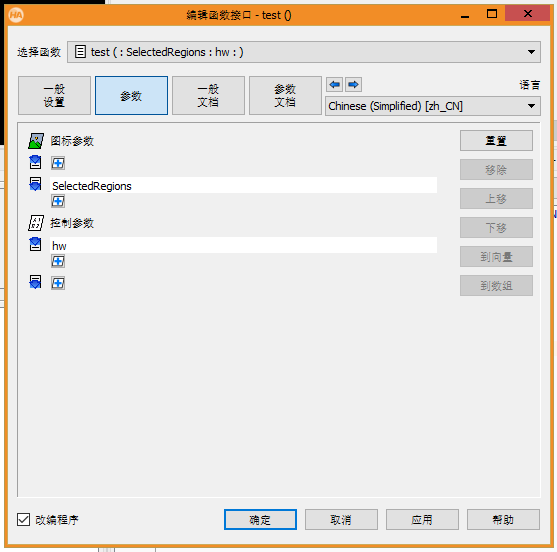
- Set the test function parameters as shown in the following figure:
-
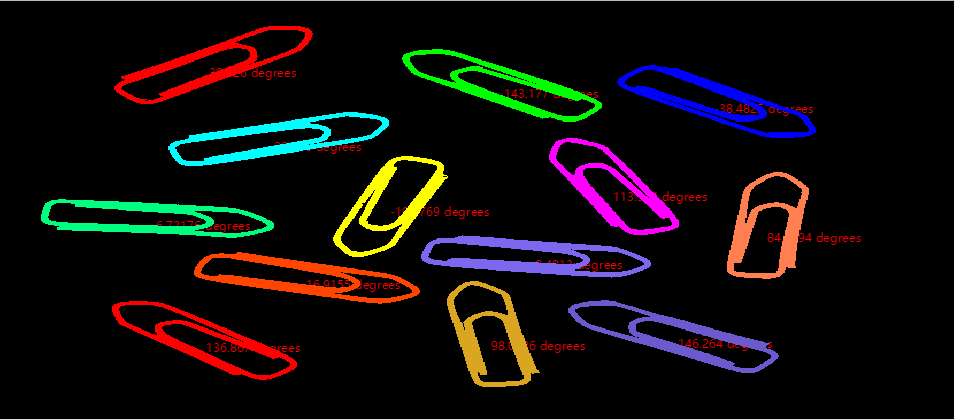
- Edit the test function code, identify the pin shown in the figure below, and output the direction and angle of each pin
 1 read_image (Clip, 'C:/Users/Public/Documents/MVTec/HALCON-13.0/examples/images/clip.png')
 2 threshold (Clip, Region, 10, 56)
 3 connection (Region, ConnectedRegions)
 4 select_shape (ConnectedRegions, SelectedRegions, 'area', 'and', 4100, 5964)
 5 orientation_region (SelectedRegions, Phi)
 6 area_center (SelectedRegions, Area, Row, Column)
 7 for Index := 0 to |Phi|-1 by 1
 8   set_tposition(hw,Row[Index],Column[Index])
 9   write_string(hw,deg(Phi[Index])+' degrees')
10 endfor
11 dev_display(SelectedRegions)
12 return ()
-
- Edit the Main function, call the test function, and get the output shown in the figure below after running
1 test (SelectedRegions, 200000)
-
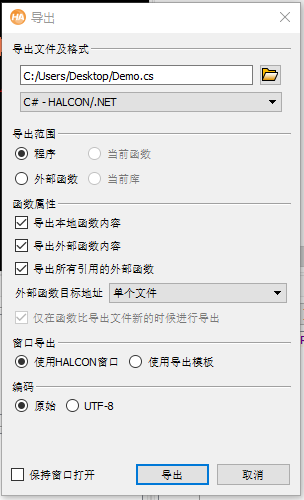
- Derived procedure
- C# code
-
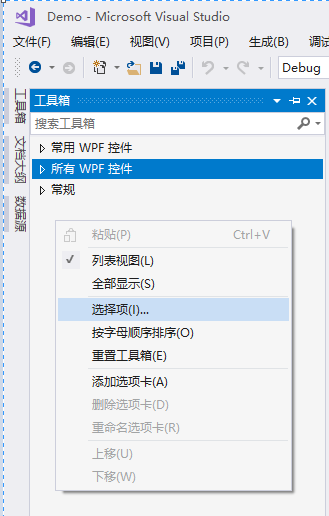
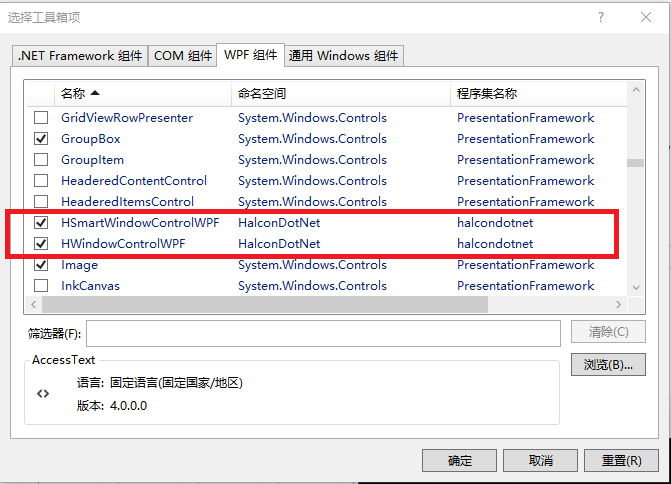
- VS toolbox, right click to add corresponding tools
-
- The new WPF project code is as follows
 1 <Window
 2         xmlns="http://schemas.microsoft.com/winfx/2006/xaml/presentation"
 3         xmlns:x="http://schemas.microsoft.com/winfx/2006/xaml"
 4         xmlns:d="http://schemas.microsoft.com/expression/blend/2008"
 5         xmlns:mc="http://schemas.openxmlformats.org/markup-compatibility/2006"
 6         xmlns:local="clr-namespace:Demo"
 7         xmlns:HalconDotNet="clr-namespace:HalconDotNet;assembly=halcondotnet" x:Class="Demo.MainWindow"
 8         mc:Ignorable="d"
 9         Title="MainWindow" Height="450" Width="800"
10         AllowsTransparency="False"
11     >
12     <Grid>
13         <StackPanel>
14             <HalconDotNet:HSmartWindowControlWPF x:Name="HalconDemo" Height="300" Foreground="#FFFF0202" />
15             <Button x:Name="LoadPic" Width="100" Height="50" Content="Load" Click="LoadPic_Click"/>
16         </StackPanel>
17     </Grid>
18 </Window>
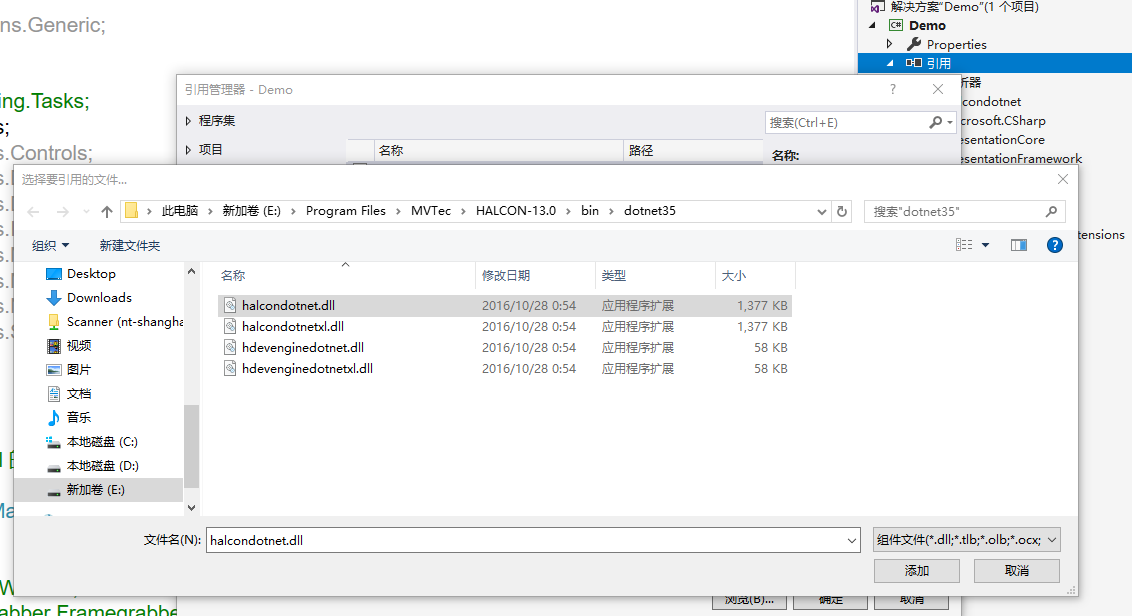
Add Halcon reference and install directory \ bin \ dotnet35 \ halcondotnet dll. As follows:
The background code is as follows:
 1 using HalconDotNet;
 2 using System;
 3 using System.Collections.Generic;
 4 using System.Linq;
 5 using System.Text;
 6 //using System.Threading.Tasks;
 7 using System.Windows;
 8 using System.Windows.Controls;
 9 using System.Windows.Data;
10 using System.Windows.Documents;
11 using System.Windows.Input;
12 using System.Windows.Media;
13 using System.Windows.Media.Imaging;
14 using System.Windows.Navigation;
15 using System.Windows.Shapes;
16
17 namespace Demo
18 {
19     /// <summary>
20     /// MainWindow.xaml Interactive logic
21     /// </summary>
22     public partial class MainWindow : Window
23     {
24         /*
25         private HWindow Window;
26         private HFramegrabber Framegrabber;
27         private HImage Img;
28
29         private HTuple ImgType, ImgWidth, ImgHeight;
30         */
31
32
33
34         public MainWindow()
35         {
36             InitializeComponent();
37
38             InitializeUserComponent();
39         }
40
41         private void InitializeUserComponent()
42         {
43
44         }
45
46         private void LoadPic_Click(object sender, RoutedEventArgs e)
47         {
48             HObject hObject;
49             HDevelopExport hDevelopExport = new HDevelopExport();
50             hDevelopExport.test(out hObject,HalconDemo.HalconWindow);
51
52             HImage hImage = new HImage("C:/Users/Public/Documents/MVTec/HALCON-13.0/examples/images/clip.png");
53             HalconDemo.SetFullImagePart(hImage);
54             HalconDemo.HalconWindow.DispObj(hObject);
55
56
57
58         }
59     }
60
61
62 }
-
- C# code exported from HDevelop before import
-
- F5 operation results are shown in the figure below

4. Summary
The key points of the whole process are recorded as follows:
- The Halcon installation directory \ Program Files\MVTec\HALCON-13,0\bin\dotnet35 supports this version net Framework3. WPF project of version 5 and above;
- The code exported from HDevelop and imported into Visual Studio. The content in action() is the test code of Main program in Halcon, which may need to be commented out according to the actual situation;
- The window handle used for testing in HDevelop may need to be passed in through parameters in WPF environment, and the relevant code needs to be modified;
- When calling the wrapped Halcon function in the WPF environment, it is necessary to export the HObject object, and then display the corresponding object through the DispObj method, otherwise it may cause the image to not be displayed.
- Calling SetFullImagePart method can make the picture adaptive to the control window;