Because the file system is needed for the recent project, fastdfs+nginx is selected, but various errors are reported during the installation process. Here, record the stepped pits. The method I introduce below is verified by myself. As long as the installed version is consistent with mine, it should be no problem. Errors are reported during installation. Most of them are version problems. Please replace the version for installation and try to select a new version
1. Download the required software and toolkit
github by fastdfs Author: github.com/happyfish10... All required software packages can be downloaded here
The corresponding version I installed: fastdfs-6.07 fastdfs-nginx-module-1.22 nginx-1.10. one
Download the corresponding software package. The following is the download address of the required software
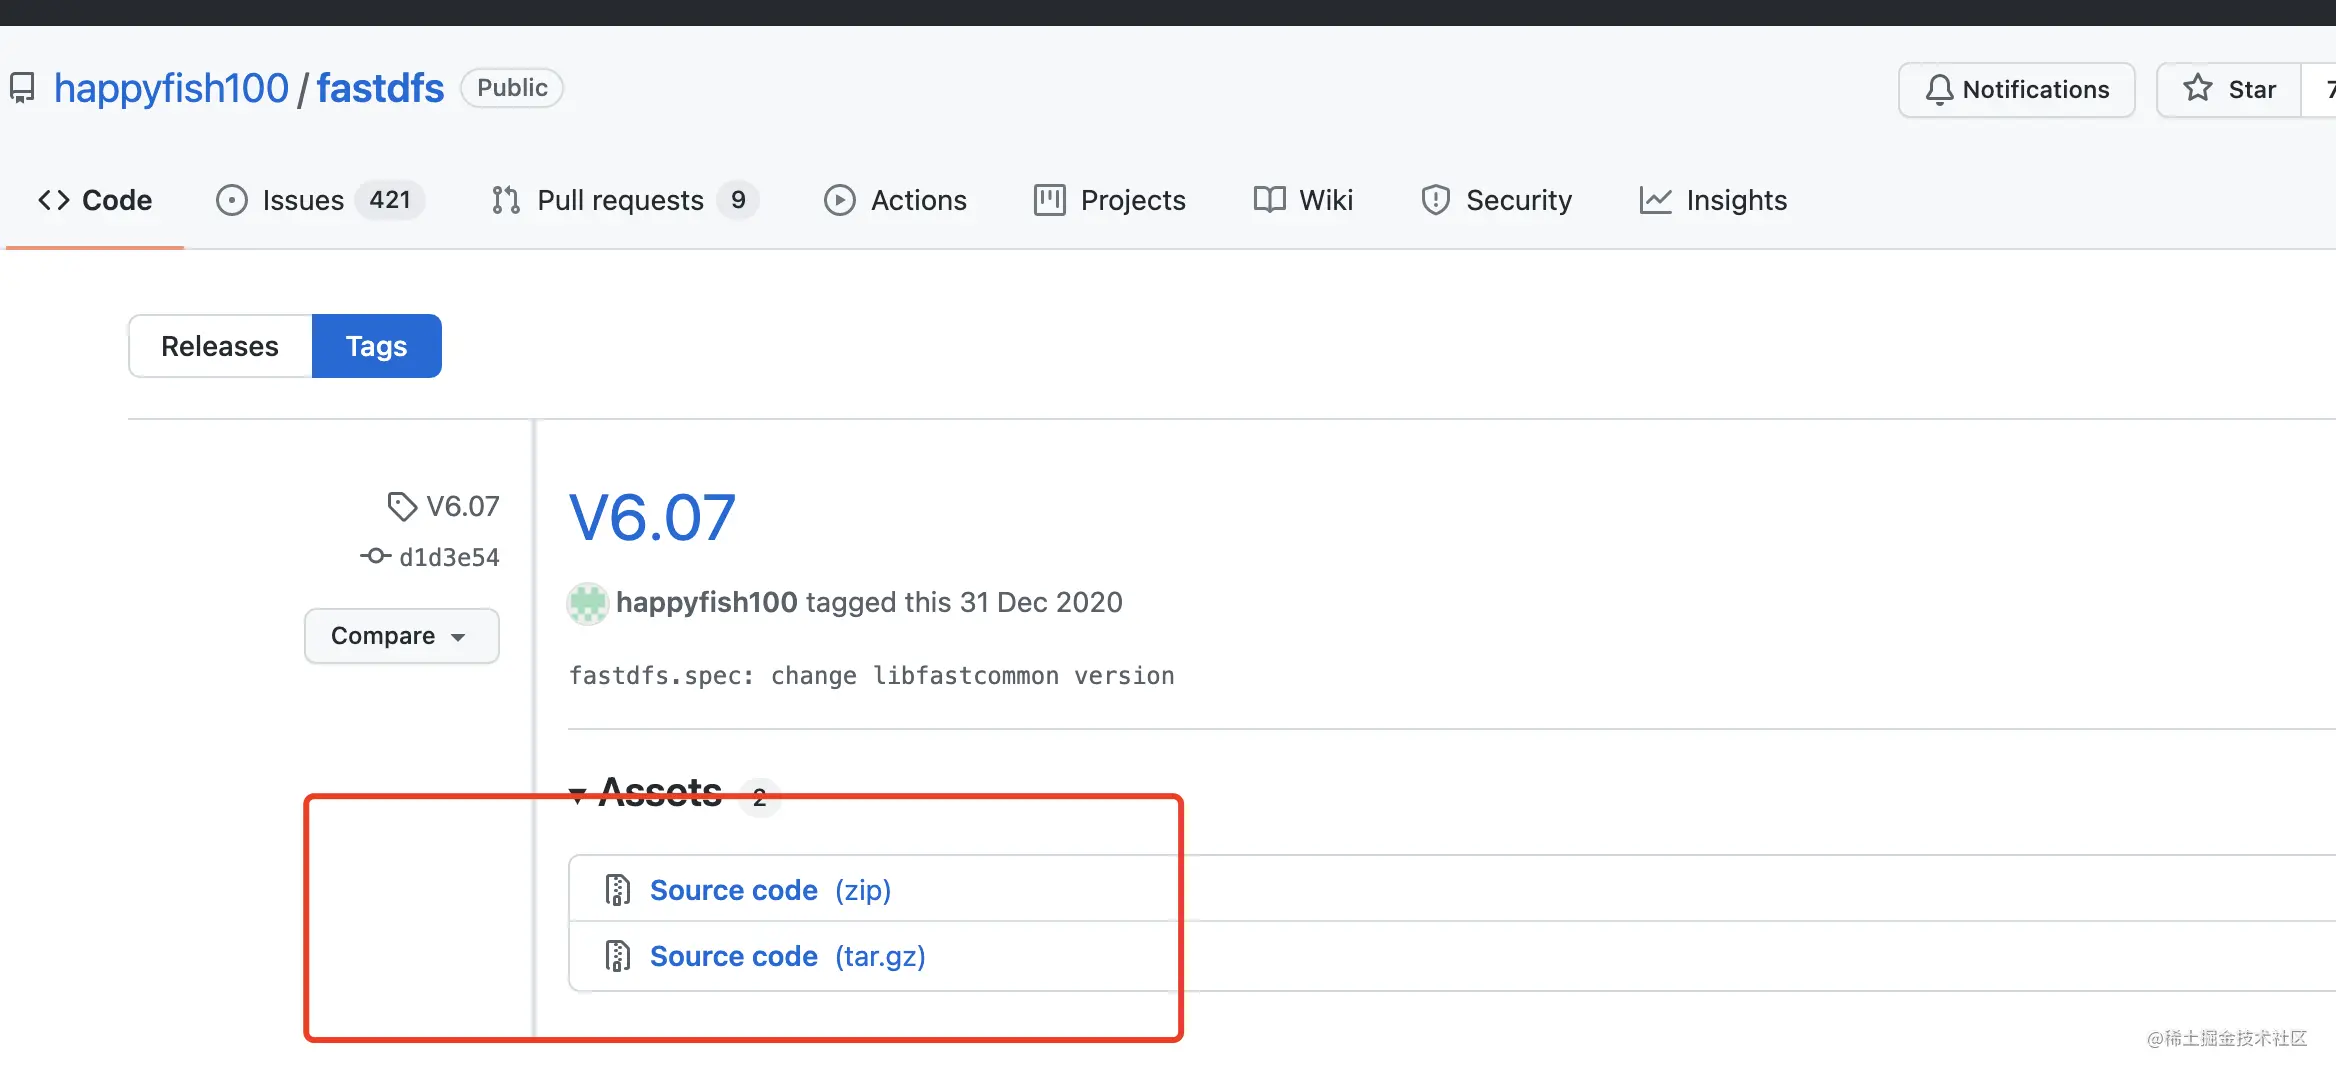
fastdfs v6.07
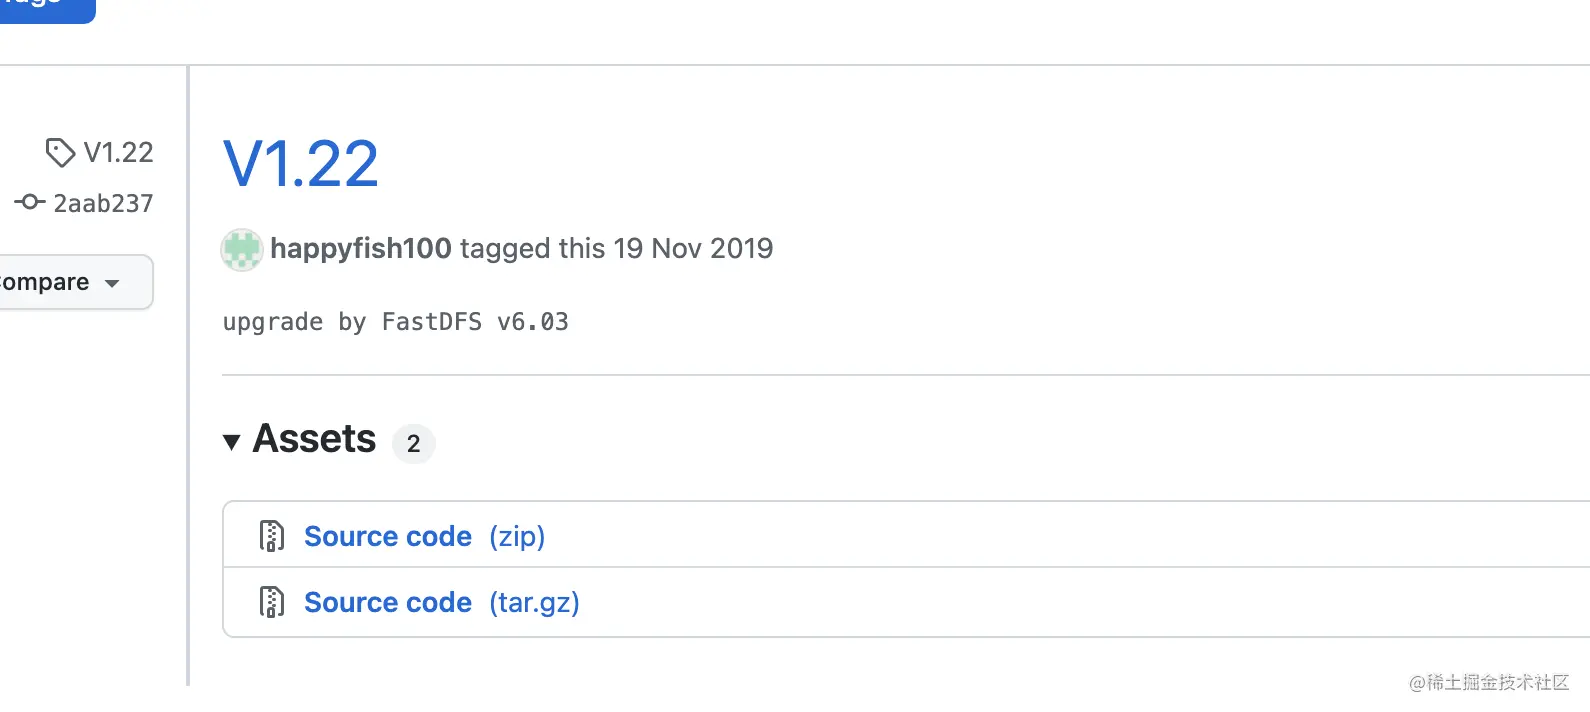
Fastdfs-nginx-module v1.22
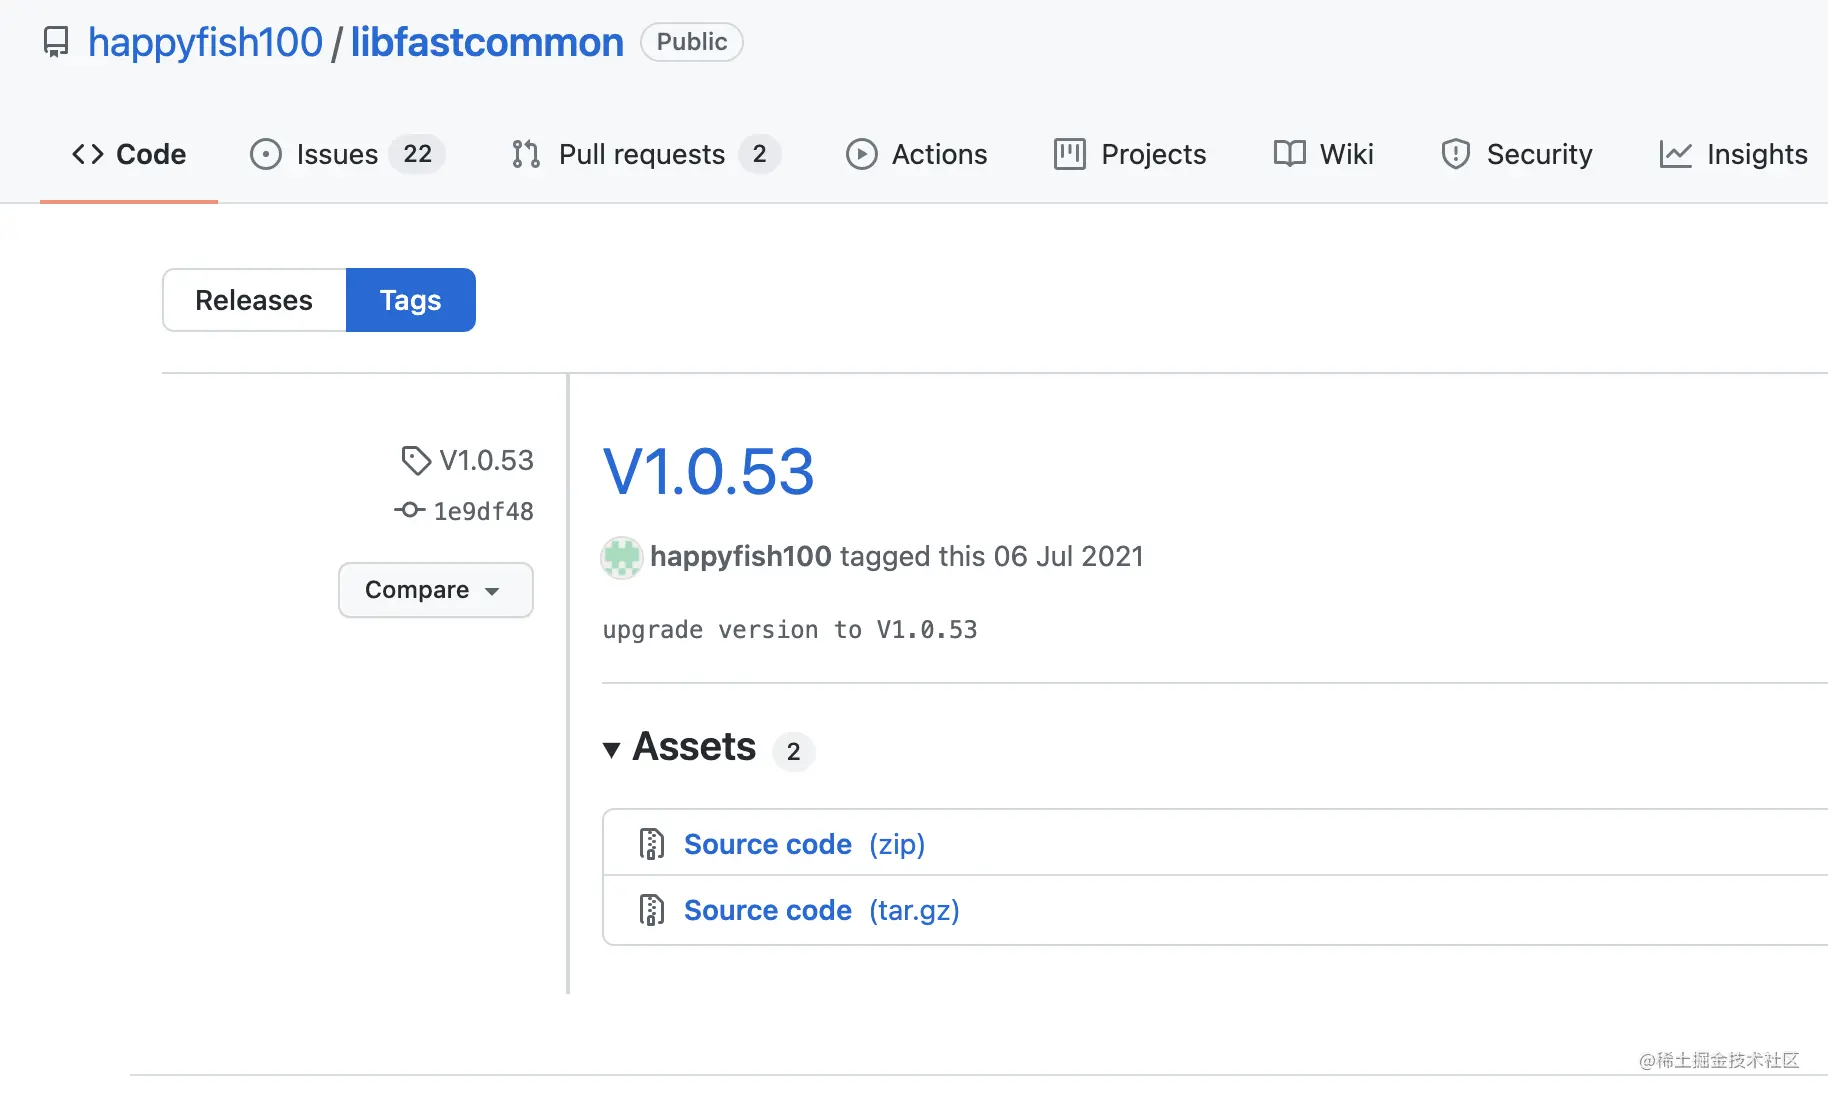
libfastcommon v1.0.53
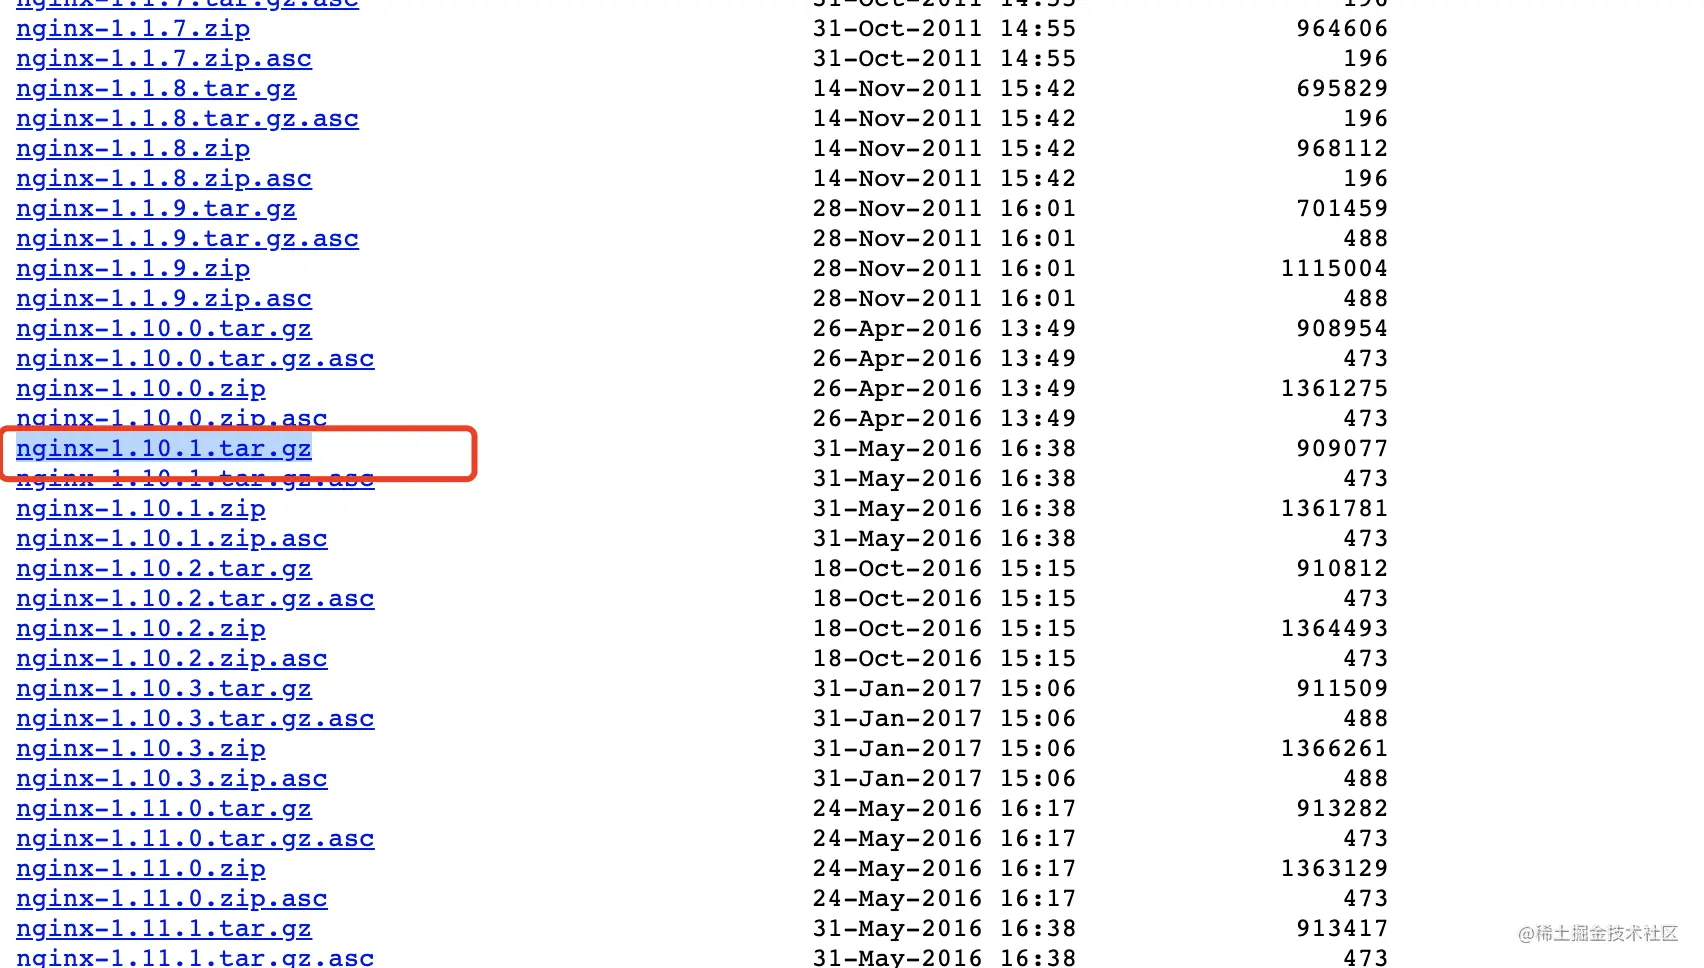
nginx 1.10.1
Now start the installation
Create a new fastdfs folder in the / usr/local/src directory to store the source code of all software packages required for installation
[root@VM-16-12-centos ~]# mkdir /usr/local/src/fastdfs
[root@VM-16-12-centos ~]# cd /usr/local/src/fastdfs/
[root@VM-16-12-centos fastdfs]#
Copy code
First install the base environment
yum -y install zlib zlib-devel pcre pcre-devel gcc gcc-c++ openssl openssl-devel libevent libevent-devel perl unzip net-tools wget
 Copy code
Download the software packages required for fastdfs installation. Here are all the software packages. Please go to the link provided above to download

Now start the installation
First install libfastcommon
tar -zxvf libfastcommon-1.0.53.tar.gz #Unzip package
cd libfastcommon-1.0.53/ # Enter directory
./make.sh  #compile
./make.sh install # install
 Copy code
Verify that the installation was successful

Add soft connection
ln -s /usr/lib64/libfastcommon.so /usr/local/lib/libfastcommon.so
ln -s /usr/lib64/libfastcommon.so /usr/lib/libfastcommon.so
ln -s /usr/lib64/libfdfsclient.so /usr/local/lib/libfdfsclient.so
ln -s /usr/lib64/libfdfsclient.so /usr/lib/libfdfsclient.so
 Copy code
Installing fastdfs
tar -zxvf fastdfs-6.07.tar.gz #decompression
cd fastdfs-6.07/ #Enter the decompression directory
./make.sh #compile
./make.sh install #install
 Copy code
fastdfs is installed in the / etc/fdfs directory by default
cd /etc/fdfs/ ##Enter the installation directory
#Make all cp one copy of the following three configuration files
cp storage.conf.sample  storage.conf
cp tracker.conf.sample tracker.conf
cp client.conf.sample  client.conf
 Copy code
Configure tracker service
Create a new storage directory for fastdfs data. Here is my storage location

To modify the tracker configuration file, you need to modify the following configuration items
base_path = /home/yuqing/fastdfs is modified to base_path = /usr/fdfs_data (corresponding to your own directory)
http.server_port = 8080 is modified to http server_ Port = 8888 (port corresponding to HTTP service)
Start the tracker service

Configure storage
vim /etc/fdfs/storage.conf
 Copy code
Modify the following configuration items
base_path = /home/yuqing / modified to base_path = /usr/fdfs_data
store_ path0 = /usr/fdfs_ Modify data / storage to store_path0 = /usr/fdfs_data/storage
tracker_server = 192.168.1.2:22122 changed to tracker_server = server ip:22122
http.server_port = 8080 is modified to http server_ port = 8888
Start the storage service
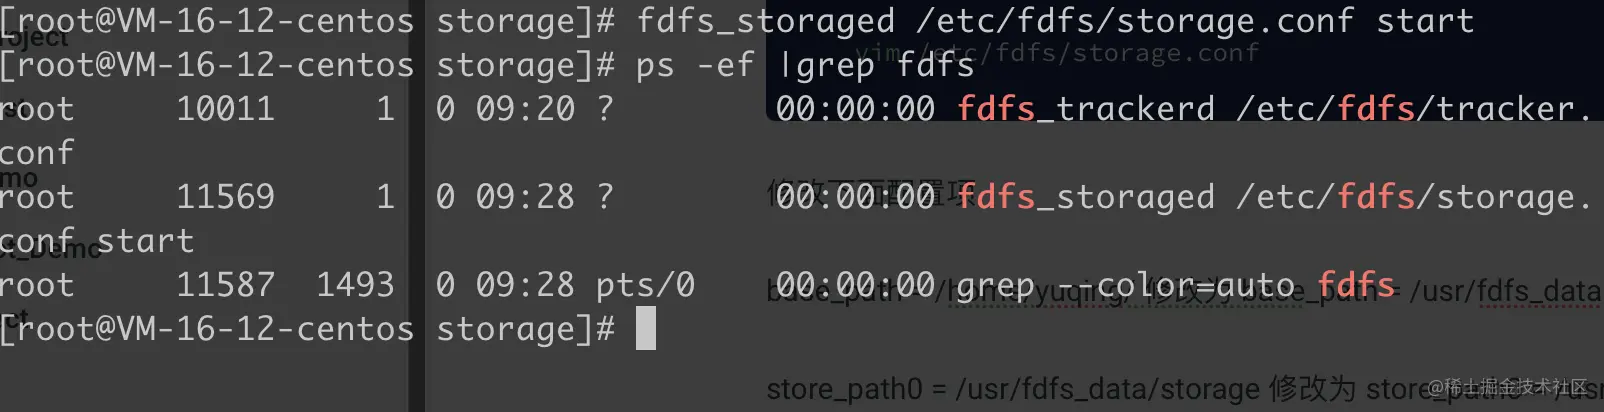
Next, configure the client service test upload function
vim /etc/fdfs/client.conf
 Copy code
Modify the following configuration items
base_path = /usr/fdfs_data
tracker_server = 192.168.0.196:22122 changed to tracker_server = server ip:22122
http_tracker_server_port =80 changed to http_tracker_server_port = 8888
Test upload file

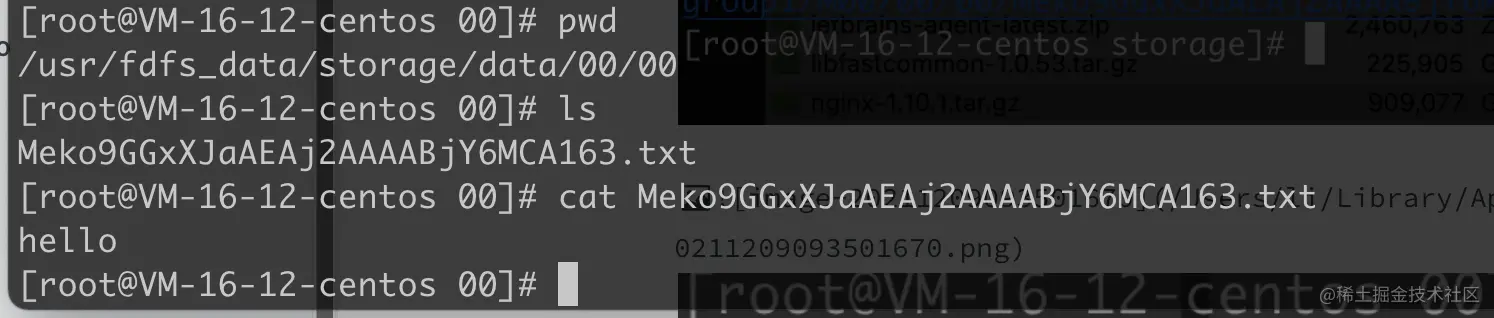
Copy the two configuration files in the conf directory of the fastdfs source code to the / etc/fdfs directory
cp /usr/local/src/fastdfs/fastdfs-6.07/conf/http.conf  /etc/fdfs/
 cp /usr/local/src/fastdfs/fastdfs-6.07/conf/mime.types  /etc/fdfs/
Copy code
Configure Nginx to integrate fastdfs Nginx module access
Configure fastdfs nginx module
tar -zxvf fastdfs-nginx-module-1.20.tar.gz ##decompression
tar -zxvf nginx-1.10.1.tar.gz
cd ./nginx-1.10.1
./configure --prefix=/usr/local/nginx  --add-module=/usr/local/src/fastdfs/fastdfs-nginx-module-1.22/src
make
make install

Copy code
Modify fastdfs-nginx-module-1.22/src/mod_ fastdfs. The conf configuration file and copy it to the / etc/fdfs directory
Modify the following items
base_path=/usr/fdfs_data
tracker_server = server ip:22122 corresponds to the ip of the tracker service
store_path0=/usr/fdfs_data/storage
url_have_group_name = true
Configure nginx agent
vim /usr/local/nginx/conf/nginx/conf
 Copy code
nginx.conf
server {
        listen       8888;
        server_name  localhost;
        location / {
            root   html;
            index  index.html index.htm;
        }
        location /group1/M00{
                 ngx_fastdfs_module;
        }
        error_page   500 502 503 504  /50x.html;
        location = /50x.html {
            root   html;
        }

Copy code
start nginx
/usr/local/nginx/sbin/nginx
 Copy code
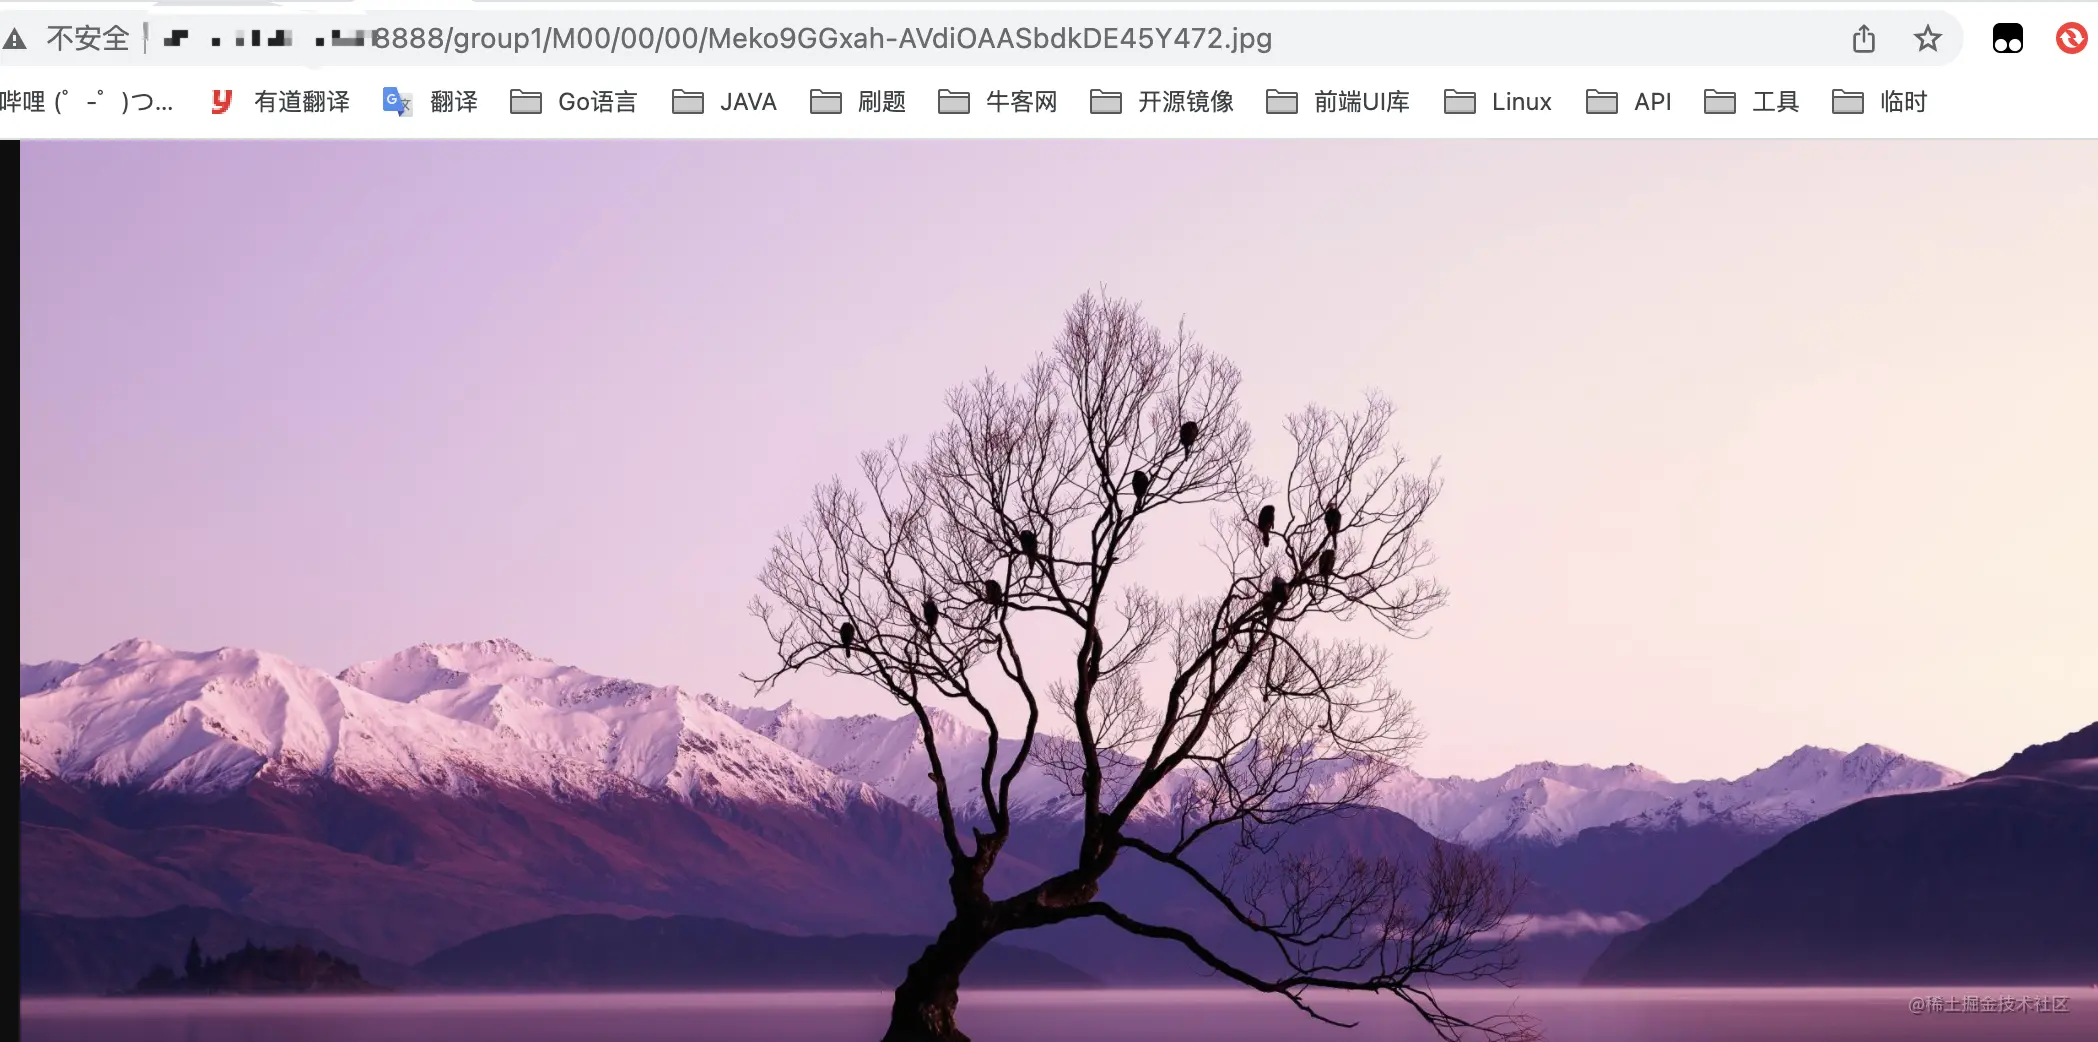
Test upload a picture

Use nginx to access uploaded pictures
Installation complete!!!
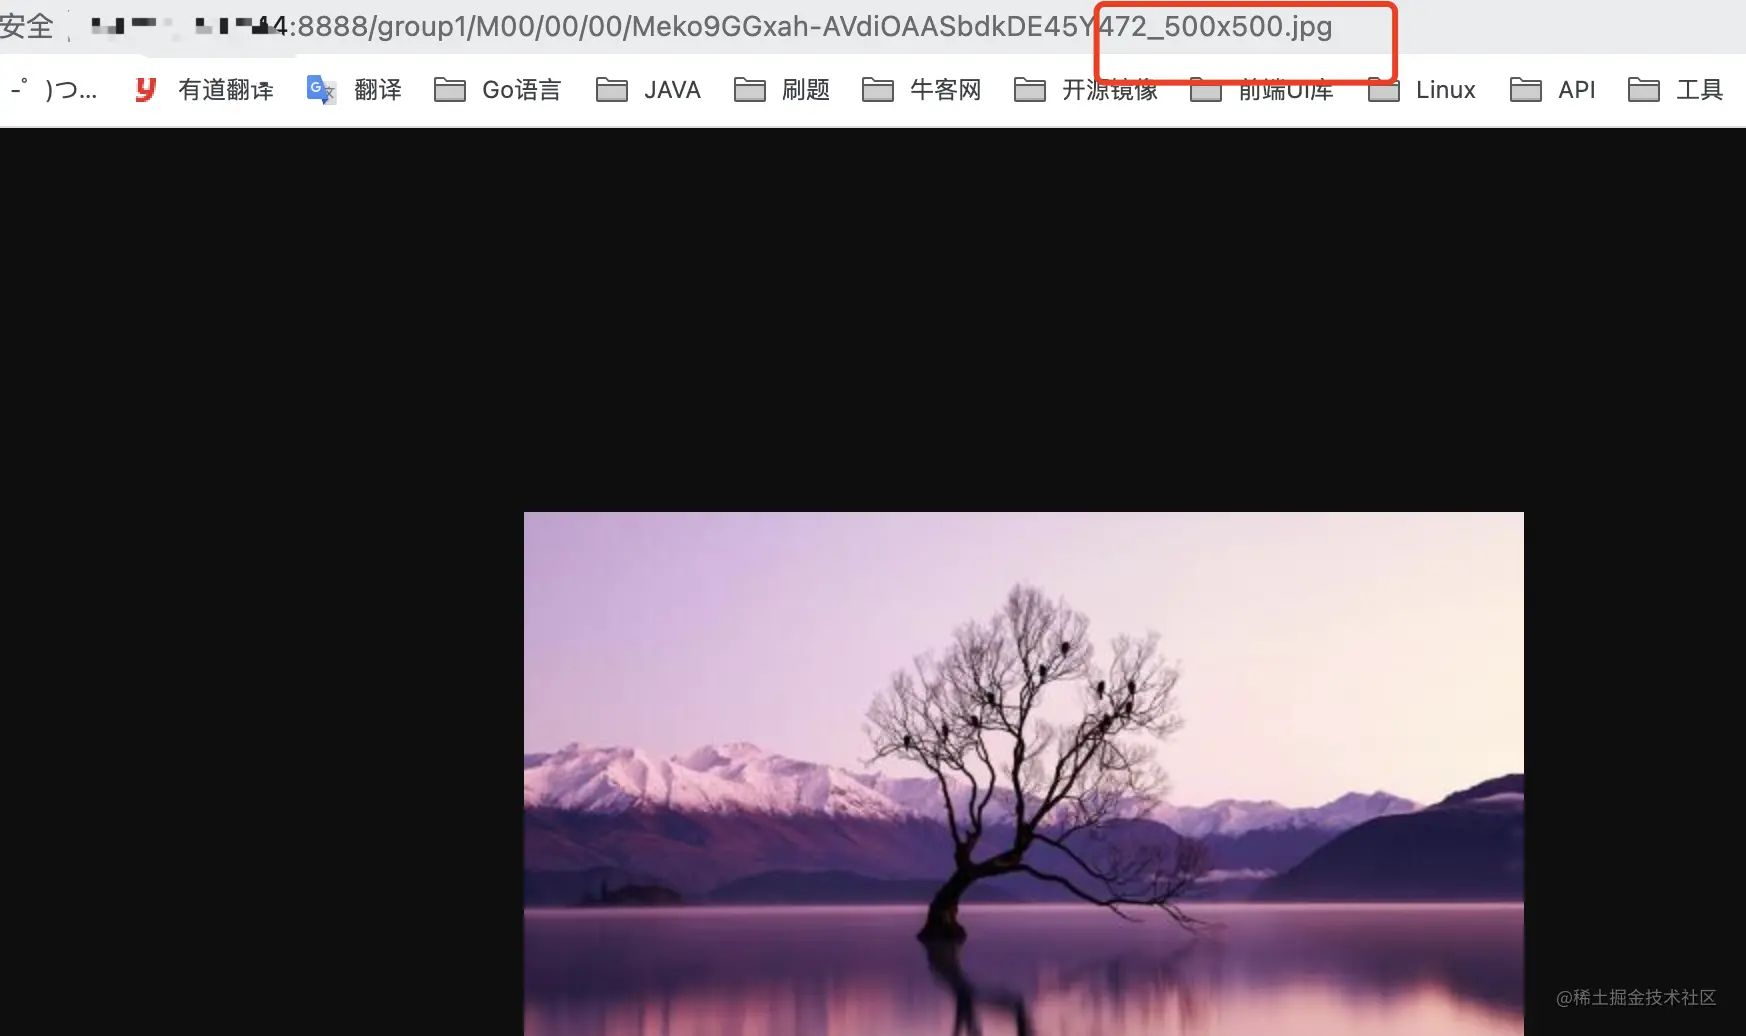
Let's start adding picture compression
Re enter the nginx source directory
yum install gd gd-devel ## Install required dependencies
cd /usr/local/src/fastdfs/nginx-1.10.1
/usr/local/nginx/sbin/nginx -s stop #Stop nginx service
./configure --prefix=/usr/local/nginx --with-http_image_filter_module \
  --add-module=/usr/local/src/fastdfs/fastdfs-nginx-module-1.22/src/
  make
  make install
Copy code
View modules installed by nginx
  /usr/local/nginx/sbin/nginx -V
 Copy code

Modify nginx configuration file
 location ~group1/M00/(.+)_(\d+)x(\d+)\.(jpg|gif|png){
             ngx_fastdfs_module;
             set $w $2;
             set $h $3;
          image_filter resize $w $h;
            image_filter_buffer 10M;
          rewrite group1/M00(.+)_(\d+)x(\d+)\.(jpg|gif|png)$ group1/M00$1.$4 break;
  }
 location ~/group([0-9])/{
        ngx_fastdfs_module;
}
Copy code
Restart nginx

Access uploaded pictures
be accomplished!!!!