The previous document (super detailed document 1 from introduction to mastery of spring cloud) has made a brief introduction and application explanation of springboot / spring cloud. Next, we will continue to introduce the subsequent applications of spring cloud.
Lesson 12: distributed locks
This talent course is about the distributed architecture based on Spring Cloud, which also brings thread safety problems. For example, in a mall system, the ordering process may be completed by different micro services. In the case of high concurrency, there will be problems if you do not lock, while the traditional locking method is only for a single architecture, which is not suitable for distributed architecture, Distributed locks are needed.
There are many ways to realize distributed lock. Combined with my actual project and current technology trend, this paper realizes several popular distributed lock schemes through examples, and finally compares different schemes.
Redis based distributed lock
Using SETNX and SETEX
Basic commands mainly include:
- SETNX(SET If Not Exists): it can be set if and only if the Key does not exist. Otherwise, no action will be taken.
- SETEX: timeout can be set
The principle is: set the Key value through SETNX to obtain the lock, and then enter the dead cycle. Judge each cycle. If there is a Key, continue the cycle. If there is no Key, jump out of the cycle. After the current task is completed, delete the Key to release the lock.
This method may lead to deadlock. In order to avoid this situation, you need to set the timeout.
Next, see the specific implementation steps.
1. Create a Maven project and create it in POM XML adds the following dependencies:
<parent>
        <groupId>org.springframework.boot</groupId>
        <artifactId>spring-boot-starter-parent</artifactId>
        <version>2.0.2.RELEASE</version>
        <relativePath/> <!-- lookup parent from repository -->
    </parent>

    <properties>
        <project.build.sourceEncoding>UTF-8</project.build.sourceEncoding>
        <project.reporting.outputEncoding>UTF-8</project.reporting.outputEncoding>
        <java.version>1.8</java.version>
    </properties>

    <dependencies>
        <dependency>
        <groupId>org.springframework.boot</groupId>
        <artifactId>spring-boot-starter-test</artifactId>
        <scope>test</scope>
        </dependency>

        <!-- open web-->
        <dependency>
            <groupId>org.springframework.boot</groupId>
            <artifactId>spring-boot-starter-web</artifactId>
        </dependency>

        <!-- redis-->
        <dependency>
            <groupId>org.springframework.boot</groupId>
            <artifactId>spring-boot-starter-data-redis</artifactId>
        </dependency>
    </dependencies>
2. Create startup class application java:
@SpringBootApplication
public class Application {

    public static void main(String[] args) {
        SpringApplication.run(Application.class,args);
    }

}
3. Add the configuration file application yml:
server:
  port: 8080
spring:
  redis:
    host: localhost
    port: 6379
4. Create a global lock class lock java:
/**
 * Global lock, including the name of the lock
 */
public class Lock {
    private String name;
    private String value;

    public Lock(String name, String value) {
        this.name = name;
        this.value = value;
    }

    public String getName() {
        return name;
    }

    public String getValue() {
        return value;
    }

}
5. Create distributed lock class distributedlockhandler java:
@Component
public class DistributedLockHandler {

    private static final Logger logger = LoggerFactory.getLogger(DistributedLockHandler.class);
    private final static long LOCK_EXPIRE = 30 * 1000L;//The lock holding time of a single service is 30s to prevent deadlock
    private final static long LOCK_TRY_INTERVAL = 30L;//The default is to try once every 30ms
    private final static long LOCK_TRY_TIMEOUT = 20 * 1000L;//Default attempt 20s

    @Autowired
    private StringRedisTemplate template;

    /**
     * Attempt to acquire global lock
     *
     * @param lock Lock name
     * @return true Acquisition succeeded, false acquisition failed
     */
    public boolean tryLock(Lock lock) {
        return getLock(lock, LOCK_TRY_TIMEOUT, LOCK_TRY_INTERVAL, LOCK_EXPIRE);
    }

    /**
     * Attempt to acquire global lock
     *
     * @param lock    Lock name
     * @param timeout Gets the timeout in ms
     * @return true Acquisition succeeded, false acquisition failed
     */
    public boolean tryLock(Lock lock, long timeout) {
        return getLock(lock, timeout, LOCK_TRY_INTERVAL, LOCK_EXPIRE);
    }

    /**
     * Attempt to acquire global lock
     *
     * @param lock        Lock name
     * @param timeout     Timeout to acquire lock
     * @param tryInterval How many milliseconds do I try to get once
     * @return true Acquisition succeeded, false acquisition failed
     */
    public boolean tryLock(Lock lock, long timeout, long tryInterval) {
        return getLock(lock, timeout, tryInterval, LOCK_EXPIRE);
    }

    /**
     * Attempt to acquire global lock
     *
     * @param lock           Lock name
     * @param timeout        Timeout to acquire lock
     * @param tryInterval    How many milliseconds do I try to get once
     * @param lockExpireTime Lock expiration
     * @return true Acquisition succeeded, false acquisition failed
     */
    public boolean tryLock(Lock lock, long timeout, long tryInterval, long lockExpireTime) {
        return getLock(lock, timeout, tryInterval, lockExpireTime);
    }


    /**
     * Operate redis to obtain global lock
     *
     * @param lock           Lock name
     * @param timeout        Gets the timeout for the
     * @param tryInterval    How many ms attempts
     * @param lockExpireTime Lock expiration time after successful acquisition
     * @return true Acquisition succeeded, false acquisition failed
     */
    public boolean getLock(Lock lock, long timeout, long tryInterval, long lockExpireTime) {
        try {
            if (StringUtils.isEmpty(lock.getName()) || StringUtils.isEmpty(lock.getValue())) {
                return false;
            }
            long startTime = System.currentTimeMillis();
            do{
                if (!template.hasKey(lock.getName())) {
                    ValueOperations<String, String> ops = template.opsForValue();
                    ops.set(lock.getName(), lock.getValue(), lockExpireTime, TimeUnit.MILLISECONDS);
                    return true;
                } else {//Existence lock
                    logger.debug("lock is exist!!!");
                }
                if (System.currentTimeMillis() - startTime > timeout) {//Try to jump out of the loop directly after exceeding the set value
                    return false;
                }
                Thread.sleep(tryInterval);
            }
            while (template.hasKey(lock.getName())) ;
        } catch (InterruptedException e) {
            logger.error(e.getMessage());
            return false;
        }
        return false;
    }

    /**
     * Release lock
     */
    public void releaseLock(Lock lock) {
        if (!StringUtils.isEmpty(lock.getName())) {
            template.delete(lock.getName());
        }
    }

}
6. Finally, create HelloController to test distributed locks.
@RestController
public class HelloController {

    @Autowired
    private DistributedLockHandler distributedLockHandler;

    @RequestMapping("index")
    public String index(){
        Lock lock=new Lock("lynn","min");
        if(distributedLockHandler.tryLock(lock)){
            try {
                //To demonstrate the effect of the lock, sleep 5000 milliseconds here
                System.out.println("Execution method");
                Thread.sleep(5000);
            }catch (Exception e){
                e.printStackTrace();
            }
            distributedLockHandler.releaseLock(lock);
        }
        return "hello world!";
    }
}
7. Test.
Start application Java, visit the browser twice in a row: http://localhost:8080/index , the console can find that the "execution method" is printed once, indicating that the next thread is locked. After 5 seconds, the "execution method" is printed again, indicating that the lock is successfully released.
Distributed locks created in this way have the following problems:
- In the case of high concurrency, if two threads enter the loop at the same time, locking may fail.
- SETNX is a time-consuming operation, because it needs to judge whether the Key exists, because there will be performance problems.
Therefore, Redis officially recommends Redlock to implement distributed locks.
Using Redlock
The implementation of distributed lock through Redlock is more reliable than other algorithms. Continue to transform the code of the previous example.
1.pom.xml adds the following dependencies:
<dependency>
            <groupId>org.redisson</groupId>
            <artifactId>redisson</artifactId>
            <version>3.7.0</version>
        </dependency>
2. Add the following categories:
/**
 * Logic to be processed after lock acquisition
 */
public interface AquiredLockWorker<T> {
    T invokeAfterLockAquire() throws Exception;
}
/**
 * Get lock management class
 */
public interface DistributedLocker {

    /**
     * Acquire lock
     * @param resourceName  Lock name
     * @param worker Processing class after obtaining lock
     * @param <T>
     * @return Data to be returned after processing specific business logic
     * @throws UnableToAquireLockException
     * @throws Exception
     */
    <T> T lock(String resourceName, AquiredLockWorker<T> worker) throws UnableToAquireLockException, Exception;

    <T> T lock(String resourceName, AquiredLockWorker<T> worker, int lockTime) throws UnableToAquireLockException, Exception;

}
/**
 * Exception class
 */
public class UnableToAquireLockException extends RuntimeException {

    public UnableToAquireLockException() {
    }

    public UnableToAquireLockException(String message) {
        super(message);
    }

    public UnableToAquireLockException(String message, Throwable cause) {
        super(message, cause);
    }
}
/**
 * Get RedissonClient connection class
 */
@Component
public class RedissonConnector {
    RedissonClient redisson;
    @PostConstruct
    public void init(){
        redisson = Redisson.create();
    }

    public RedissonClient getClient(){
        return redisson;
    }

}
@Component
public class RedisLocker  implements DistributedLocker{

    private final static String LOCKER_PREFIX = "lock:";

    @Autowired
    RedissonConnector redissonConnector;
    @Override
    public <T> T lock(String resourceName, AquiredLockWorker<T> worker) throws InterruptedException, UnableToAquireLockException, Exception {

        return lock(resourceName, worker, 100);
    }

    @Override
    public <T> T lock(String resourceName, AquiredLockWorker<T> worker, int lockTime) throws UnableToAquireLockException, Exception {
        RedissonClient redisson= redissonConnector.getClient();
        RLock lock = redisson.getLock(LOCKER_PREFIX + resourceName);
        // Wait for 100 seconds seconds and automatically unlock it after lockTime seconds
        boolean success = lock.tryLock(100, lockTime, TimeUnit.SECONDS);
        if (success) {
            try {
                return worker.invokeAfterLockAquire();
            } finally {
                lock.unlock();
            }
        }
        throw new UnableToAquireLockException();
    }
}
3. Modify HelloController:
@RestController
public class HelloController {

    @Autowired
    private DistributedLocker distributedLocker;

    @RequestMapping("index")
    public String index()throws Exception{
        distributedLocker.lock("test",new AquiredLockWorker<Object>() {

            @Override
            public Object invokeAfterLockAquire() {
                try {
                    System.out.println("Execution method!");
                    Thread.sleep(5000);
                }catch (Exception e){
                    e.printStackTrace();
                }
                return null;
            }

        });
        return "hello world!";
    }
}
4. According to the test method in the previous section, we found that the distributed lock is also effective.
Redlock is a scheme officially recommended by Redis, so it has high reliability.
Distributed lock based on Database
Based on database tables
Its basic principle is similar to that of SETNX of Redis. In fact, it is to create a distributed lock table. After locking, we will add a record to the table and delete the data when releasing the lock. I won't mention the specific implementation one by one here.
It also has some problems:
- There is no failure time, which is easy to cause deadlock;
- Depending on the availability of the database, once the database is hung, the lock will not be available immediately;
- This lock can only be non blocking, because once the insert operation of data fails, an error will be reported directly. The thread that has not obtained the lock will not enter the queue. To obtain the lock again, it is necessary to trigger the operation of obtaining the lock again;
- The lock is non reentrant, and the same thread cannot obtain the lock again before releasing the lock. Because the data in the database already exists.
Optimistic lock
The basic principle is: optimistic locking is generally realized through version, that is, a version field is created in the database table. If each update is successful, version+1. When reading the data, we will read out the version field together. Each update will compare the version number. If it is consistent, perform this operation, otherwise the update fails!
Pessimistic lock (exclusive lock)
See the following description for the implementation steps.
1. Create a database table:
CREATE TABLE `methodLock` (
  `id` int(11) NOT NULL AUTO_INCREMENT COMMENT 'Primary key',
  `method_name` varchar(64) NOT NULL DEFAULT '' COMMENT 'Locked method name',
  `desc` varchar(1024) NOT NULL DEFAULT 'Remark information',
  `update_time` timestamp NOT NULL DEFAULT CURRENT_TIMESTAMP ON UPDATE CURRENT_TIMESTAMP COMMENT 'Save data time, automatically generated',
  PRIMARY KEY (`id`),
  UNIQUE KEY `uidx_method_name` (`method_name `) USING BTREE
) ENGINE=InnoDB DEFAULT CHARSET=utf8 COMMENT='Methods in locking';
2. The distributed lock is realized through the exclusive lock of the database.
The MySQL based InnoDB engine can use the following methods to implement the locking operation:
public boolean lock(){
    connection.setAutoCommit(false)
    while(true){
        try{
            result = select * from methodLock where method_name=xxx for update;
            if(result==null){
                return true;
            }
        }catch(Exception e){

        }
        sleep(1000);
    }
    return false;
}
3. We can think that the thread that obtains the exclusive lock can obtain the distributed lock. After obtaining the lock, we can execute the business logic of the method. After executing the method, we can unlock it through the following methods:
public void unlock(){
    connection.commit();
}
Distributed lock based on Zookeeper
Introduction to ZooKeeper
ZooKeeper is a distributed and open source distributed application coordination service. It is an open source implementation of Google Chubby and an important component of Hadoop and Hbase. It is a software that provides consistency services for distributed applications. Its functions include configuration maintenance, domain name service, distributed synchronization, group service, etc.
Implementation principle of distributed lock
The implementation principle is:
- Create a node, if it is called lock. The node type is Persistent
- Whenever the process needs to access shared resources, it will call the lock() or tryLock() method of the distributed lock to obtain the lock. At this time, the corresponding sequential sub node will be established under the lock node created in the first step. The node type is temporary sequential node (EPHEMERAL_SEQUENTIAL), which forms a specific name+lock + sequence number.
- After establishing the child node, sort all the child nodes starting with name under the lock to determine whether the sequence number of the child node just established is the smallest node. If it is the smallest node, obtain the lock to access resources.
- If it is not the node, obtain the previous order node of the node, and monitor whether the node has a registered listening event. At the same time, it is blocked here. Wait for the listening event to occur and obtain lock control.
- When the shared resource is called, the unlock() method is called to close the ZooKeeper, thus triggering the listening event and releasing the lock.
The distributed locks implemented are concurrent locks that are accessed strictly in sequence.
code implementation
We continue to transform the project of this paper.
1. Create DistributedLock class:
public class DistributedLock implements Lock, Watcher{
    private ZooKeeper zk;
    private String root = "/locks";//root
    private String lockName;//Symbol of competitive resources
    private String waitNode;//Wait for the previous lock
    private String myZnode;//Current lock
    private CountDownLatch latch;//Counter
    private CountDownLatch connectedSignal=new CountDownLatch(1);
    private int sessionTimeout = 30000;
    /**
     * Before creating a distributed lock, please confirm that the zookeeper service configured by config is available
     * @param config localhost:2181
     * @param lockName Competitive resource flag, lockName cannot contain words_ lock_
     */
    public DistributedLock(String config, String lockName){
        this.lockName = lockName;
        // Create a connection to the server
        try {
            zk = new ZooKeeper(config, sessionTimeout, this);
            connectedSignal.await();
            Stat stat = zk.exists(root, false);//This goes without Watcher
            if(stat == null){
                // Create root node
                zk.create(root, new byte[0], ZooDefs.Ids.OPEN_ACL_UNSAFE, CreateMode.PERSISTENT);
            }
        } catch (IOException e) {
            throw new LockException(e);
        } catch (KeeperException e) {
            throw new LockException(e);
        } catch (InterruptedException e) {
            throw new LockException(e);
        }
    }
    /**
     * zookeeper Monitor for node
     */
    public void process(WatchedEvent event) {
        //For establishing connection
        if(event.getState()== Event.KeeperState.SyncConnected){
            connectedSignal.countDown();
            return;
        }
        //Flag for other threads to relinquish locks
        if(this.latch != null) {
            this.latch.countDown();
        }
    }

    public void lock() {
        try {
            if(this.tryLock()){
                System.out.println("Thread " + Thread.currentThread().getId() + " " +myZnode + " get lock true");
                return;
            }
            else{
                waitForLock(waitNode, sessionTimeout);//Waiting lock
            }
        } catch (KeeperException e) {
            throw new LockException(e);
        } catch (InterruptedException e) {
            throw new LockException(e);
        }
    }
    public boolean tryLock() {
        try {
            String splitStr = "_lock_";
            if(lockName.contains(splitStr))
                throw new LockException("lockName can not contains \\u000B");
            //Create temporary child node
            myZnode = zk.create(root + "/" + lockName + splitStr, new byte[0], ZooDefs.Ids.OPEN_ACL_UNSAFE,CreateMode.EPHEMERAL_SEQUENTIAL);
            System.out.println(myZnode + " is created ");
            //Take out all child nodes
            List<String> subNodes = zk.getChildren(root, false);
            //Remove all locks of lockName
            List<String> lockObjNodes = new ArrayList<String>();
            for (String node : subNodes) {
                String _node = node.split(splitStr)[0];
                if(_node.equals(lockName)){
                    lockObjNodes.add(node);
                }
            }
            Collections.sort(lockObjNodes);

            if(myZnode.equals(root+"/"+lockObjNodes.get(0))){
                //If it is the smallest node, it means to obtain the lock
                System.out.println(myZnode + "==" + lockObjNodes.get(0));
                return true;
            }
            //If it is not the smallest node, find a node 1 smaller than yourself
            String subMyZnode = myZnode.substring(myZnode.lastIndexOf("/") + 1);
            waitNode = lockObjNodes.get(Collections.binarySearch(lockObjNodes, subMyZnode) - 1);//Previous child node found
        } catch (KeeperException e) {
            throw new LockException(e);
        } catch (InterruptedException e) {
            throw new LockException(e);
        }
        return false;
    }
    public boolean tryLock(long time, TimeUnit unit) {
        try {
            if(this.tryLock()){
                return true;
            }
            return waitForLock(waitNode,time);
        } catch (Exception e) {
            e.printStackTrace();
        }
        return false;
    }
    private boolean waitForLock(String lower, long waitTime) throws InterruptedException, KeeperException {
        Stat stat = zk.exists(root + "/" + lower,true);//Register to listen at the same time.
        //Judge whether a node smaller than yourself exists. If it does not exist, you do not need to wait for the lock and register to listen
        if(stat != null){
            System.out.println("Thread " + Thread.currentThread().getId() + " waiting for " + root + "/" + lower);
            this.latch = new CountDownLatch(1);
            this.latch.await(waitTime, TimeUnit.MILLISECONDS);//Wait, you should always wait for other threads to release the lock
            this.latch = null;
        }
        return true;
    }
    public void unlock() {
        try {
            System.out.println("unlock " + myZnode);
            zk.delete(myZnode,-1);
            myZnode = null;
            zk.close();
        } catch (InterruptedException e) {
            e.printStackTrace();
        } catch (KeeperException e) {
            e.printStackTrace();
        }
    }
    public void lockInterruptibly() throws InterruptedException {
        this.lock();
    }
    public Condition newCondition() {
        return null;
    }

    public class LockException extends RuntimeException {
        private static final long serialVersionUID = 1L;
        public LockException(String e){
            super(e);
        }
        public LockException(Exception e){
            super(e);
        }
    }
}
2. Transform hellocontroller java:
@RestController
public class HelloController {

    @RequestMapping("index")
    public String index()throws Exception{
        DistributedLock lock   = new DistributedLock("localhost:2181","lock");
        lock.lock();
        //shared resource
        if(lock != null){
            System.out.println("Execution method");
            Thread.sleep(5000);
            lock.unlock();
        }
        return "hello world!";
    }
}
3. According to the test of Redis distributed lock method in this paper, we found that the lock was also successfully added.
summary
The following conclusions can be drawn from the above examples:
- Implementing distributed locking through database is the most unreliable way. It relies heavily on database and has low performance, which is not conducive to dealing with high concurrency scenarios.
- Through Redis's Redlock and ZooKeeper to lock, the performance has been greatly improved.
- For Redlock, a great God once questioned its implementation of distributed locks, but Redis officials did not recognize its statement. The so-called public said public and women said women were right. There is no best solution for distributed locks, only the most suitable one. It is most reasonable to adopt different solutions according to different projects.
Lesson 13: distributed transactions
First of all, we should know that transactions are generated to ensure the consistency of data. As the name suggests, distributed transaction is to ensure data consistency among different databases, servers and applications.
Why do you need distributed transactions?
The most traditional architecture is a single architecture. The data is stored in a database. The transactions of the database can meet our requirements. With the continuous expansion of business and the continuous increase of data, a single database has reached a bottleneck. Therefore, we need to divide the database into databases and tables. In order to ensure data consistency, data between different databases may be successful or failed at the same time. Otherwise, some dirty data may be generated or bugs may be bred.
In this case, the idea of distributed transaction came into being.
Application scenario
Distributed transactions have a wide range of application scenarios, and I can't give examples one by one. This paper lists common scenarios so that readers can consider distributed transactions when they use some scenarios in actual projects.
payment
The most classic scenario is payment. A payment is to deduct money from the buyer's account and add money to the seller's account. These operations must be performed in one transaction, either all of them succeed or all of them fail. The buyer's account belongs to the buyer center, which corresponds to the buyer database, while the seller's account belongs to the seller center, which corresponds to the seller's database. The operation of different databases must introduce distributed transactions.
Order online
When a buyer places an order on an e-commerce platform, it often involves two actions: one is to deduct inventory, and the other is to update the order status. Inventory and orders generally belong to different databases, and distributed transactions need to be used to ensure data consistency.
bank transfer
Account A transfers to account B. the actual operation is that account A subtracts the corresponding amount and account B increases the corresponding amount. On the premise of separate databases and tables, account A and account B may be stored in different databases. At this time, distributed transactions need to be used to ensure database consistency. Otherwise, the possible consequence is that A deducts money, B does not increase money, or B increases money, A does not deduct money.
Spring boot integrates Atomikos to implement distributed transactions
Introduction to Atomikos
Atomikos is an open source transaction manager that provides value-added services for the Java platform.
Here are some features included in this open source version:
- Full crash / restart recovery;
- Compatible with standard JTA API of SUN company;
- Nested transactions;
- Provides built-in JDBC adapters for XA and non XA.
Note: the xa protocol was first proposed by Tuxedo and handed over to the X/Open organization as the interface standard between resource manager (database) and transaction manager. At present, Oracle, Informix, DB2, Sybase and other major database manufacturers provide xa support. xa protocol uses two-phase commit to manage distributed transactions. xa interface provides a standard interface for communication between resource manager and transaction manager. The xa protocol includes two sets of functions to {xa_ Beginning with , ax_ At the beginning.
Concrete implementation
1. Create two local databases: test01 and test02, and create the same database table:

2. Transform the project in the previous part in POM XML adds the following dependencies:
<dependency>
            <groupId>org.springframework.boot</groupId>
            <artifactId>spring-boot-starter-jta-atomikos</artifactId>
        </dependency>

        <dependency>
            <groupId>org.mybatis.spring.boot</groupId>
            <artifactId>mybatis-spring-boot-starter</artifactId>
            <version>1.1.1</version>
        </dependency>
        <dependency>
            <groupId>mysql</groupId>
            <artifactId>mysql-connector-java</artifactId>
            <version>5.1.40</version>
        </dependency>
3. Modify the configuration file application YML as follows:
server:
  port: 8080
spring:
  redis:
    host: localhost
    port: 6379
mysql:
  datasource:
    test1:
      url: jdbc:mysql://localhost:3306/test01?useUnicode=true&characterEncoding=utf-8
      username: root
      password: 1qaz2wsx
      minPoolSize: 3
      maxPoolSize: 25
      maxLifetime: 20000
      borrowConnectionTimeout: 30
      loginTimeout: 30
      maintenanceInterval: 60
      maxIdleTime: 60
      testQuery: select 1
    test2:
      url: jdbc:mysql://localhost:3306/test02?useUnicode=true&characterEncoding=utf-8
      username: root
      password: 1qaz2wsx
      minPoolSize: 3
      maxPoolSize: 25
      maxLifetime: 20000
      borrowConnectionTimeout: 30
      loginTimeout: 30
      maintenanceInterval: 60
      maxIdleTime: 60
      testQuery: select 1
4. Create the following classes:
@ConfigurationProperties(prefix = "mysql.datasource.test1")
@SpringBootConfiguration
public class DBConfig1 {

    private String url;
    private String username;
    private String password;
    private int minPoolSize;
    private int maxPoolSize;
    private int maxLifetime;
    private int borrowConnectionTimeout;
    private int loginTimeout;
    private int maintenanceInterval;
    private int maxIdleTime;
    private String testQuery;
    public String getUrl() {
        return url;
    }
    public void setUrl(String url) {
        this.url = url;
    }
    public String getUsername() {
        return username;
    }
    public void setUsername(String username) {
        this.username = username;
    }
    public String getPassword() {
        return password;
    }
    public void setPassword(String password) {
        this.password = password;
    }
    public int getMinPoolSize() {
        return minPoolSize;
    }
    public void setMinPoolSize(int minPoolSize) {
        this.minPoolSize = minPoolSize;
    }
    public int getMaxPoolSize() {
        return maxPoolSize;
    }
    public void setMaxPoolSize(int maxPoolSize) {
        this.maxPoolSize = maxPoolSize;
    }
    public int getMaxLifetime() {
        return maxLifetime;
    }
    public void setMaxLifetime(int maxLifetime) {
        this.maxLifetime = maxLifetime;
    }
    public int getBorrowConnectionTimeout() {
        return borrowConnectionTimeout;
    }
    public void setBorrowConnectionTimeout(int borrowConnectionTimeout) {
        this.borrowConnectionTimeout = borrowConnectionTimeout;
    }
    public int getLoginTimeout() {
        return loginTimeout;
    }
    public void setLoginTimeout(int loginTimeout) {
        this.loginTimeout = loginTimeout;
    }
    public int getMaintenanceInterval() {
        return maintenanceInterval;
    }
    public void setMaintenanceInterval(int maintenanceInterval) {
        this.maintenanceInterval = maintenanceInterval;
    }
    public int getMaxIdleTime() {
        return maxIdleTime;
    }
    public void setMaxIdleTime(int maxIdleTime) {
        this.maxIdleTime = maxIdleTime;
    }
    public String getTestQuery() {
        return testQuery;
    }
    public void setTestQuery(String testQuery) {
        this.testQuery = testQuery;
    }

}
@ConfigurationProperties(prefix = "mysql.datasource.test2")
@SpringBootConfiguration
public class DBConfig2 {

    private String url;
    private String username;
    private String password;
    private int minPoolSize;
    private int maxPoolSize;
    private int maxLifetime;
    private int borrowConnectionTimeout;
    private int loginTimeout;
    private int maintenanceInterval;
    private int maxIdleTime;
    private String testQuery;
    public String getUrl() {
        return url;
    }
    public void setUrl(String url) {
        this.url = url;
    }
    public String getUsername() {
        return username;
    }
    public void setUsername(String username) {
        this.username = username;
    }
    public String getPassword() {
        return password;
    }
    public void setPassword(String password) {
        this.password = password;
    }
    public int getMinPoolSize() {
        return minPoolSize;
    }
    public void setMinPoolSize(int minPoolSize) {
        this.minPoolSize = minPoolSize;
    }
    public int getMaxPoolSize() {
        return maxPoolSize;
    }
    public void setMaxPoolSize(int maxPoolSize) {
        this.maxPoolSize = maxPoolSize;
    }
    public int getMaxLifetime() {
        return maxLifetime;
    }
    public void setMaxLifetime(int maxLifetime) {
        this.maxLifetime = maxLifetime;
    }
    public int getBorrowConnectionTimeout() {
        return borrowConnectionTimeout;
    }
    public void setBorrowConnectionTimeout(int borrowConnectionTimeout) {
        this.borrowConnectionTimeout = borrowConnectionTimeout;
    }
    public int getLoginTimeout() {
        return loginTimeout;
    }
    public void setLoginTimeout(int loginTimeout) {
        this.loginTimeout = loginTimeout;
    }
    public int getMaintenanceInterval() {
        return maintenanceInterval;
    }
    public void setMaintenanceInterval(int maintenanceInterval) {
        this.maintenanceInterval = maintenanceInterval;
    }
    public int getMaxIdleTime() {
        return maxIdleTime;
    }
    public void setMaxIdleTime(int maxIdleTime) {
        this.maxIdleTime = maxIdleTime;
    }
    public String getTestQuery() {
        return testQuery;
    }
    public void setTestQuery(String testQuery) {
        this.testQuery = testQuery;
    }

}
@SpringBootConfiguration
@MapperScan(basePackages = "com.lynn.demo.test01", sqlSessionTemplateRef = "sqlSessionTemplate")
public class MyBatisConfig1 {

    // Configure data sources
    @Primary
    @Bean(name = "dataSource")
    public DataSource dataSource(DBConfig1 config) throws SQLException {
        MysqlXADataSource mysqlXaDataSource = new MysqlXADataSource();
        mysqlXaDataSource.setUrl(config.getUrl());
        mysqlXaDataSource.setPinGlobalTxToPhysicalConnection(true);
        mysqlXaDataSource.setPassword(config.getPassword());
        mysqlXaDataSource.setUser(config.getUsername());
        mysqlXaDataSource.setPinGlobalTxToPhysicalConnection(true);

        AtomikosDataSourceBean xaDataSource = new AtomikosDataSourceBean();
        xaDataSource.setXaDataSource(mysqlXaDataSource);
        xaDataSource.setUniqueResourceName("dataSource");

        xaDataSource.setMinPoolSize(config.getMinPoolSize());
        xaDataSource.setMaxPoolSize(config.getMaxPoolSize());
        xaDataSource.setMaxLifetime(config.getMaxLifetime());
        xaDataSource.setBorrowConnectionTimeout(config.getBorrowConnectionTimeout());
        xaDataSource.setLoginTimeout(config.getLoginTimeout());
        xaDataSource.setMaintenanceInterval(config.getMaintenanceInterval());
        xaDataSource.setMaxIdleTime(config.getMaxIdleTime());
        xaDataSource.setTestQuery(config.getTestQuery());
        return xaDataSource;
    }
    @Primary
    @Bean(name = "sqlSessionFactory")
    public SqlSessionFactory sqlSessionFactory(@Qualifier("dataSource") DataSource dataSource)
            throws Exception {
        SqlSessionFactoryBean bean = new SqlSessionFactoryBean();
        bean.setDataSource(dataSource);
        return bean.getObject();
    }

    @Primary
    @Bean(name = "sqlSessionTemplate")
    public SqlSessionTemplate sqlSessionTemplate(
            @Qualifier("sqlSessionFactory") SqlSessionFactory sqlSessionFactory) throws Exception {
        return new SqlSessionTemplate(sqlSessionFactory);
    }
}
@SpringBootConfiguration
//basePackages should be configured separately. If they are placed in the same folder, an error may be reported
@MapperScan(basePackages = "com.lynn.demo.test02", sqlSessionTemplateRef = "sqlSessionTemplate2")
public class MyBatisConfig2 {

    // Configure data sources
    @Bean(name = "dataSource2")
    public DataSource dataSource(DBConfig2 config) throws SQLException {
        MysqlXADataSource mysqlXaDataSource = new MysqlXADataSource();
        mysqlXaDataSource.setUrl(config.getUrl());
        mysqlXaDataSource.setPinGlobalTxToPhysicalConnection(true);
        mysqlXaDataSource.setPassword(config.getPassword());
        mysqlXaDataSource.setUser(config.getUsername());
        mysqlXaDataSource.setPinGlobalTxToPhysicalConnection(true);

        AtomikosDataSourceBean xaDataSource = new AtomikosDataSourceBean();
        xaDataSource.setXaDataSource(mysqlXaDataSource);
        xaDataSource.setUniqueResourceName("dataSource2");

        xaDataSource.setMinPoolSize(config.getMinPoolSize());
        xaDataSource.setMaxPoolSize(config.getMaxPoolSize());
        xaDataSource.setMaxLifetime(config.getMaxLifetime());
        xaDataSource.setBorrowConnectionTimeout(config.getBorrowConnectionTimeout());
        xaDataSource.setLoginTimeout(config.getLoginTimeout());
        xaDataSource.setMaintenanceInterval(config.getMaintenanceInterval());
        xaDataSource.setMaxIdleTime(config.getMaxIdleTime());
        xaDataSource.setTestQuery(config.getTestQuery());
        return xaDataSource;
    }

    @Bean(name = "sqlSessionFactory2")
    public SqlSessionFactory sqlSessionFactory(@Qualifier("dataSource2") DataSource dataSource)
            throws Exception {
        SqlSessionFactoryBean bean = new SqlSessionFactoryBean();
        bean.setDataSource(dataSource);
        return bean.getObject();
    }

    @Bean(name = "sqlSessionTemplate2")
    public SqlSessionTemplate sqlSessionTemplate(
            @Qualifier("sqlSessionFactory2") SqlSessionFactory sqlSessionFactory) throws Exception {
        return new SqlSessionTemplate(sqlSessionFactory);
    }
}
On COM lynn. demo. Test01 and com lynn. demo. Create the following mapper s in TEST02:
@Mapper
public interface UserMapper1 {

    @Insert("insert into test_user(name,age) values(#{name},#{age})")
    void addUser(@Param("name")String name,@Param("age") int age);
}
@Mapper
public interface UserMapper2 {

    @Insert("insert into test_user(name,age) values(#{name},#{age})")
    void addUser(@Param("name") String name,@Param("age") int age);
}
Create a service class:
@Service
public class UserService {

    @Autowired
    private UserMapper1 userMapper1;
    @Autowired
    private UserMapper2 userMapper2;

    @Transactional
    public void addUser(User user)throws Exception{
        userMapper1.addUser(user.getName(),user.getAge());
        userMapper2.addUser(user.getName(),user.getAge());
    }
}
5. Create a unit test class for testing:
@RunWith(SpringJUnit4ClassRunner.class)
@SpringBootTest(classes = Application.class)
public class TestDB {

    @Autowired
    private UserService userService;

    @Test
    public void test(){
        User user = new User();
        user.setName("lynn");
        user.setAge(10);
        try {
            userService.addUser(user);
        }catch (Exception e){
            e.printStackTrace();
        }
    }
}
After testing, if there is no error, the data will be added to the two database tables respectively. If there is an error, the data will not be added.
Lesson 14: detailed explanation of Spring Cloud instance - basic framework construction (I)
Through the previous study of basic components, we can use these components to build a relatively complete microservice architecture. In order to consolidate our previous knowledge, starting from this article, we will lead you to build a complete microservice architecture with a practical case (the code of this article has been placed in Github Up).
requirement analysis
A product to be realized in this paper is the news portal. First, we need to analyze its needs. The functions of this news portal include the following:
- Register login
- News list
- User comments
product design
According to the demand analysis, we can carry out product design, mainly prototype design. Let's take a look at the general prototype design drawing first.
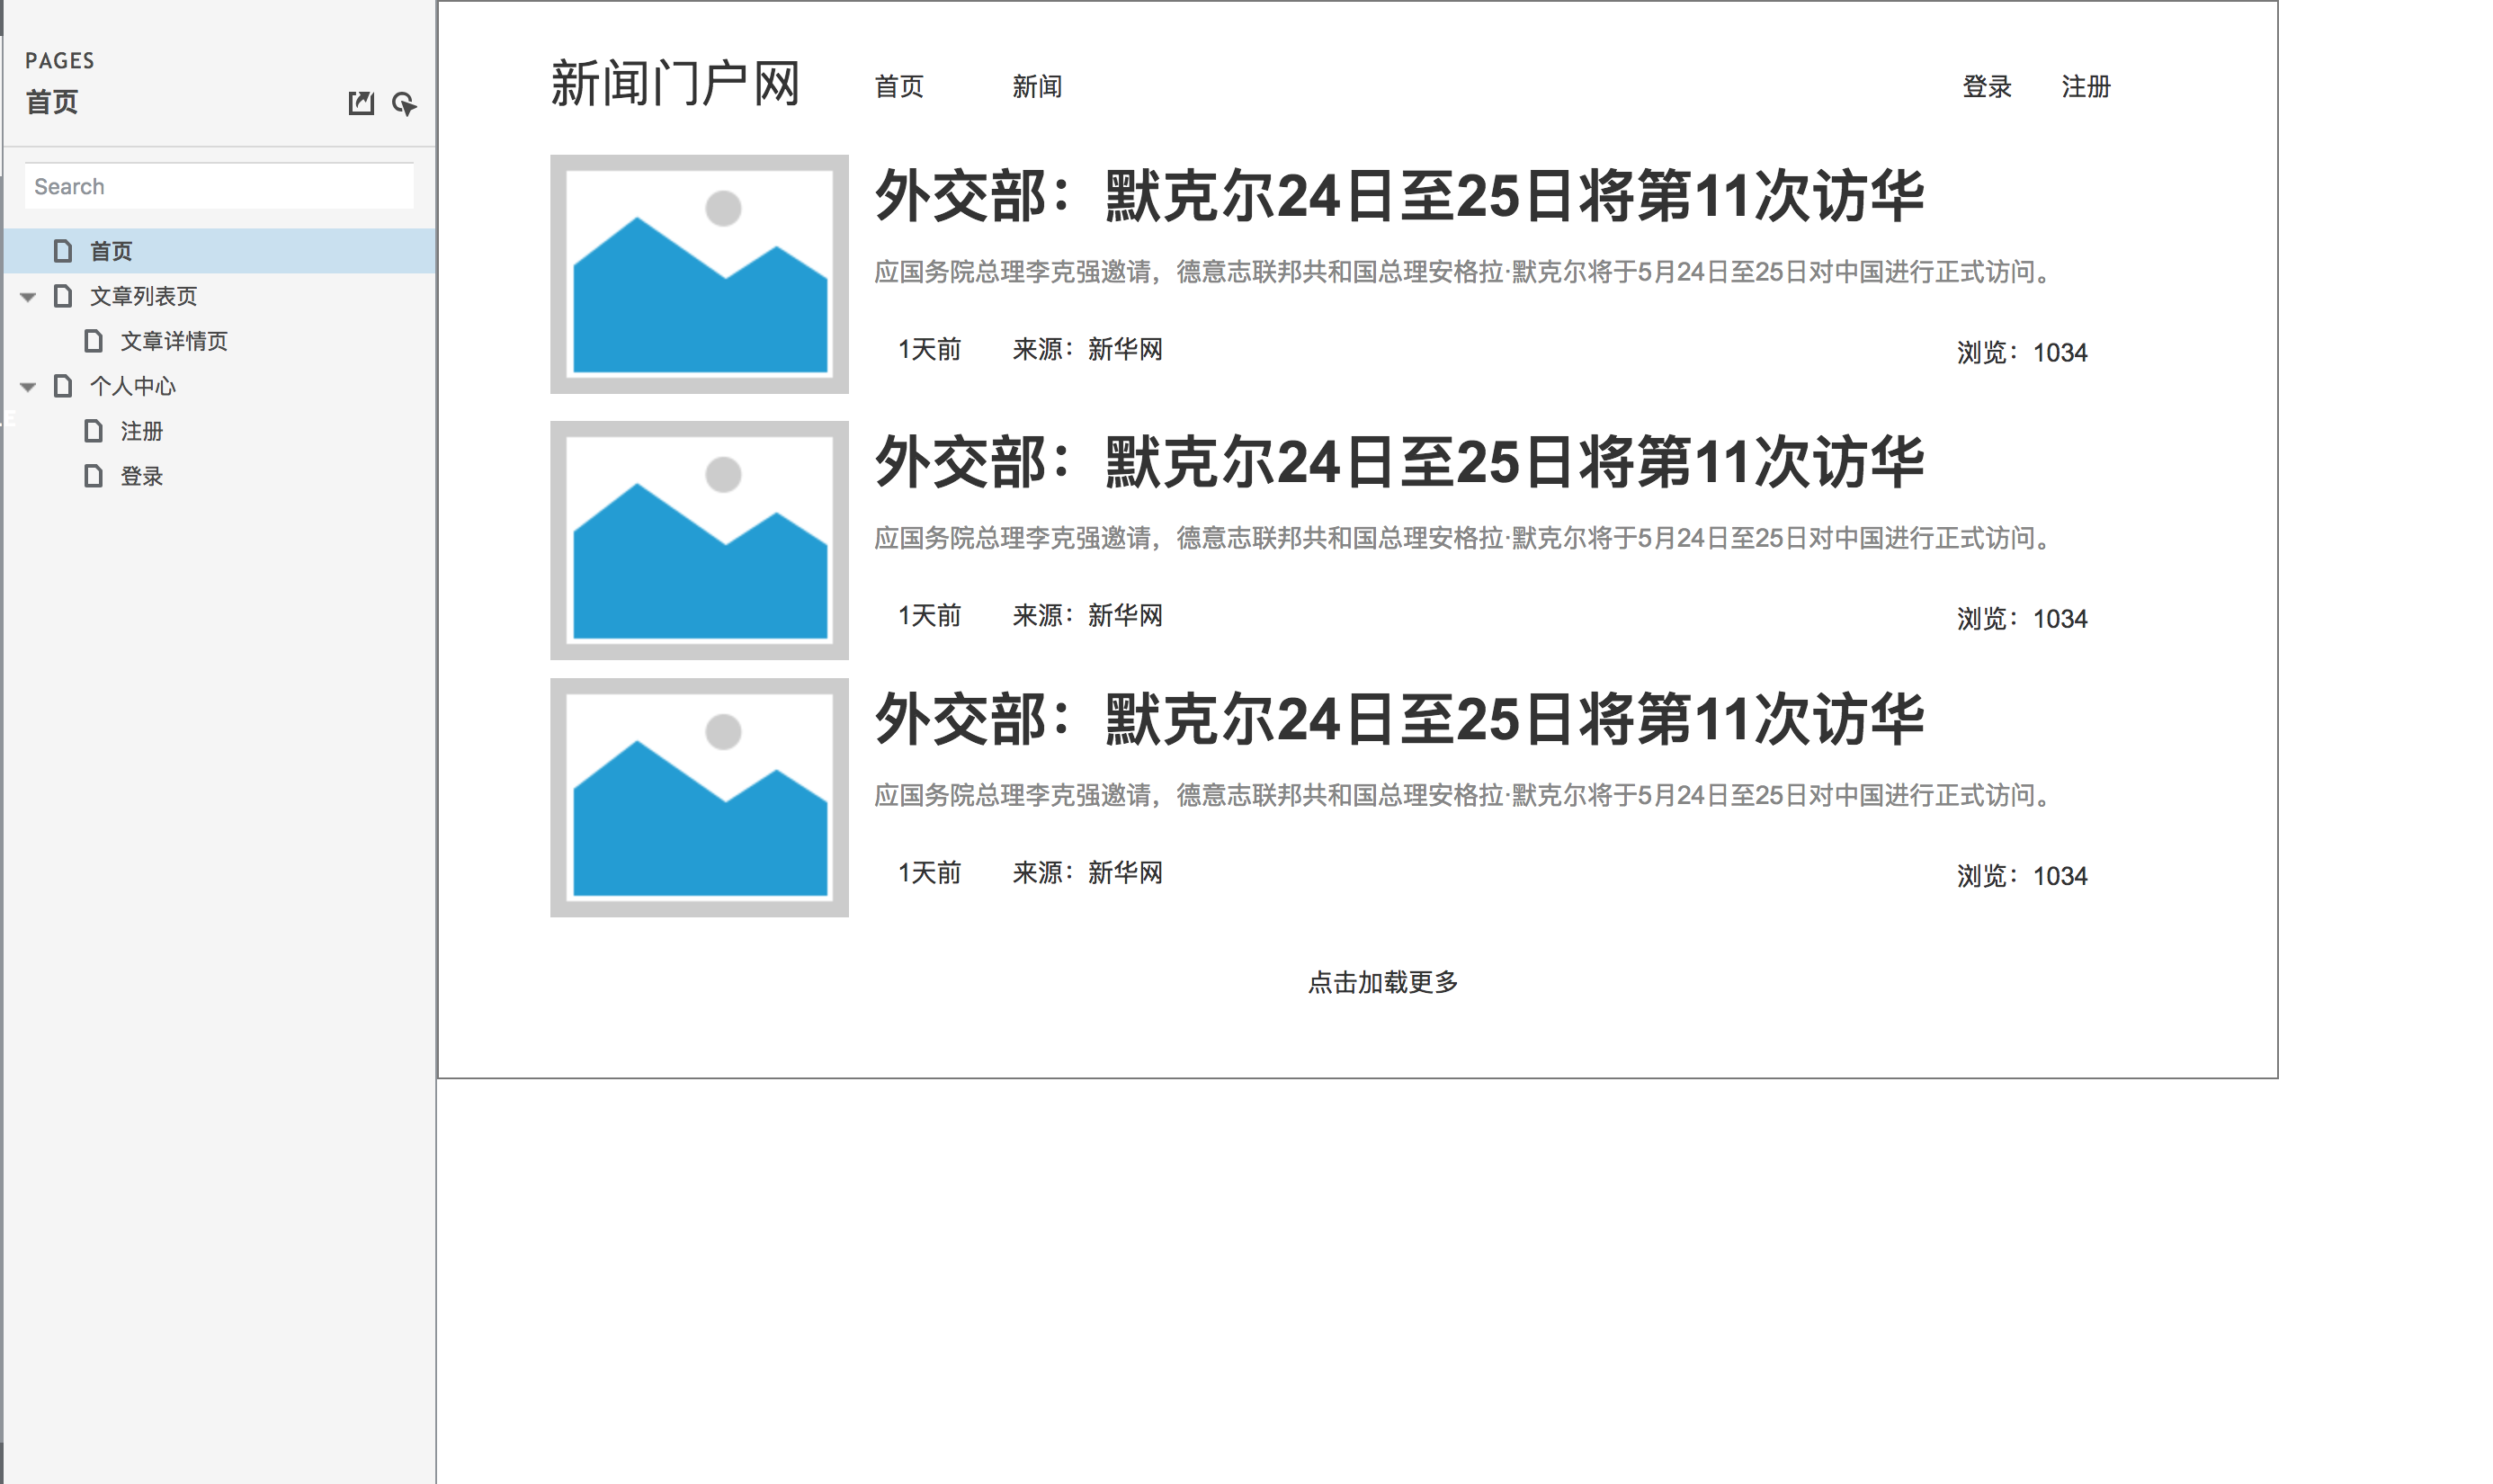
Home page prototype design
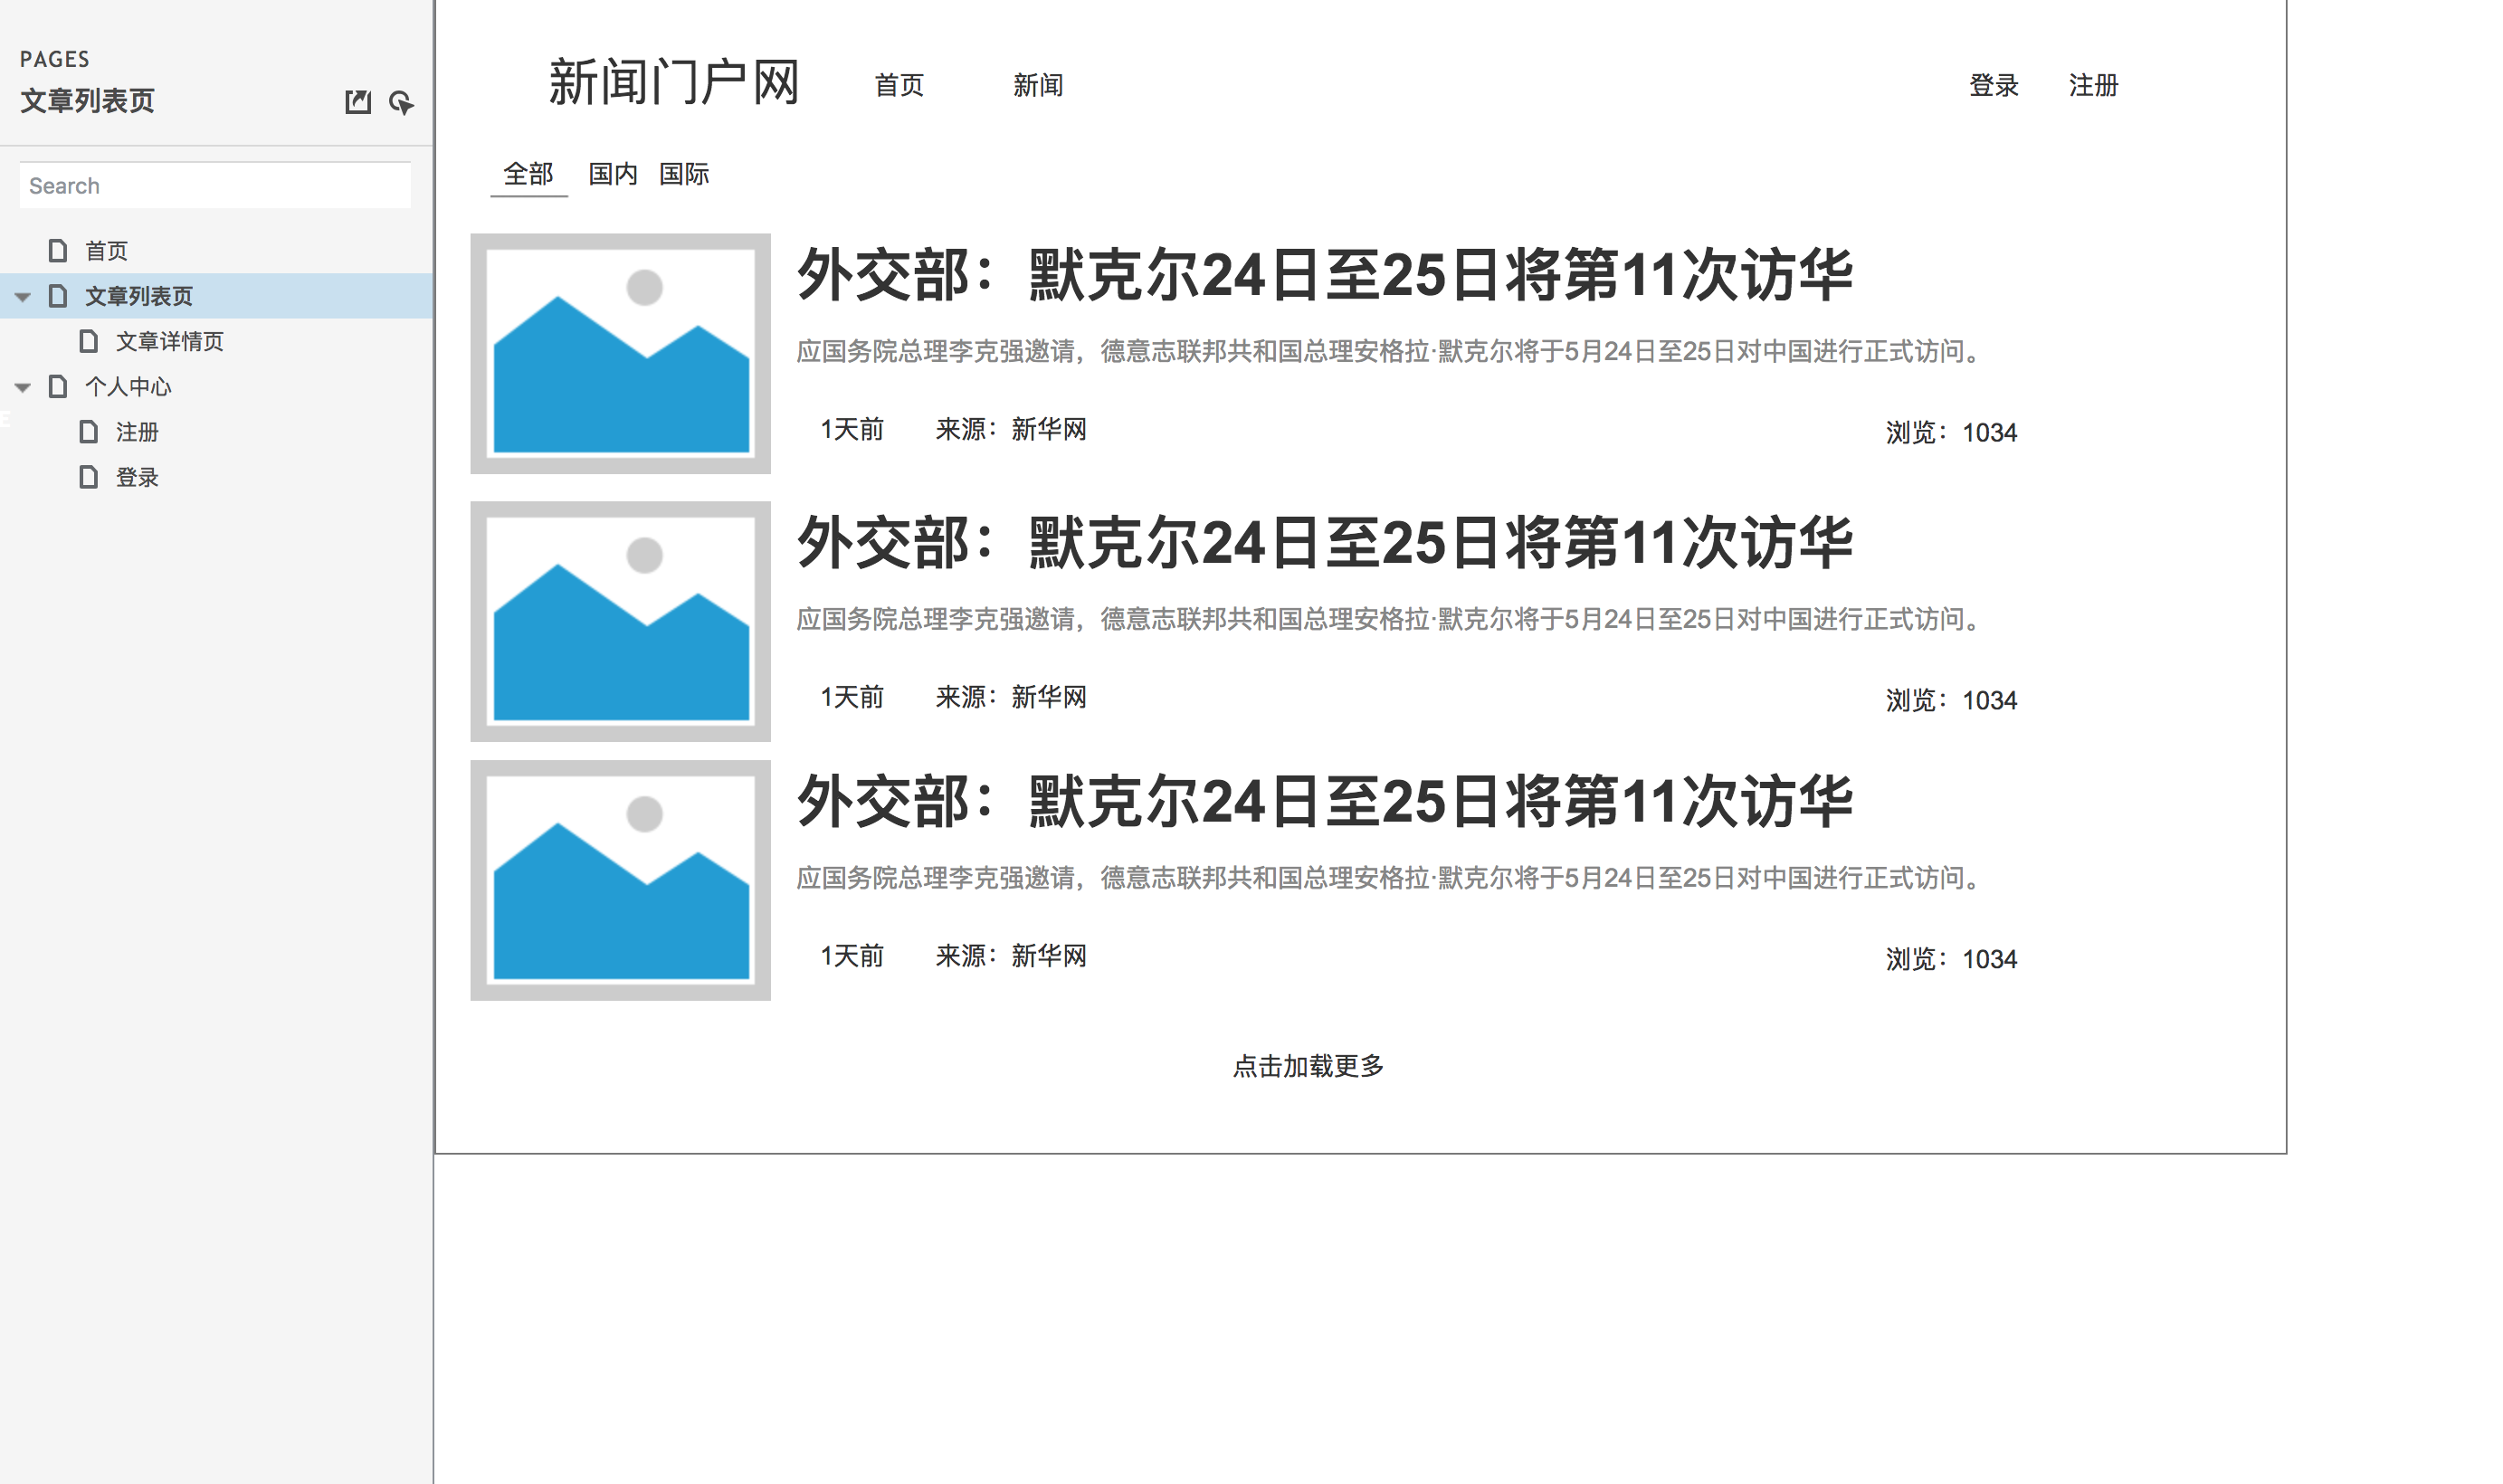
Prototype design drawing of article list page
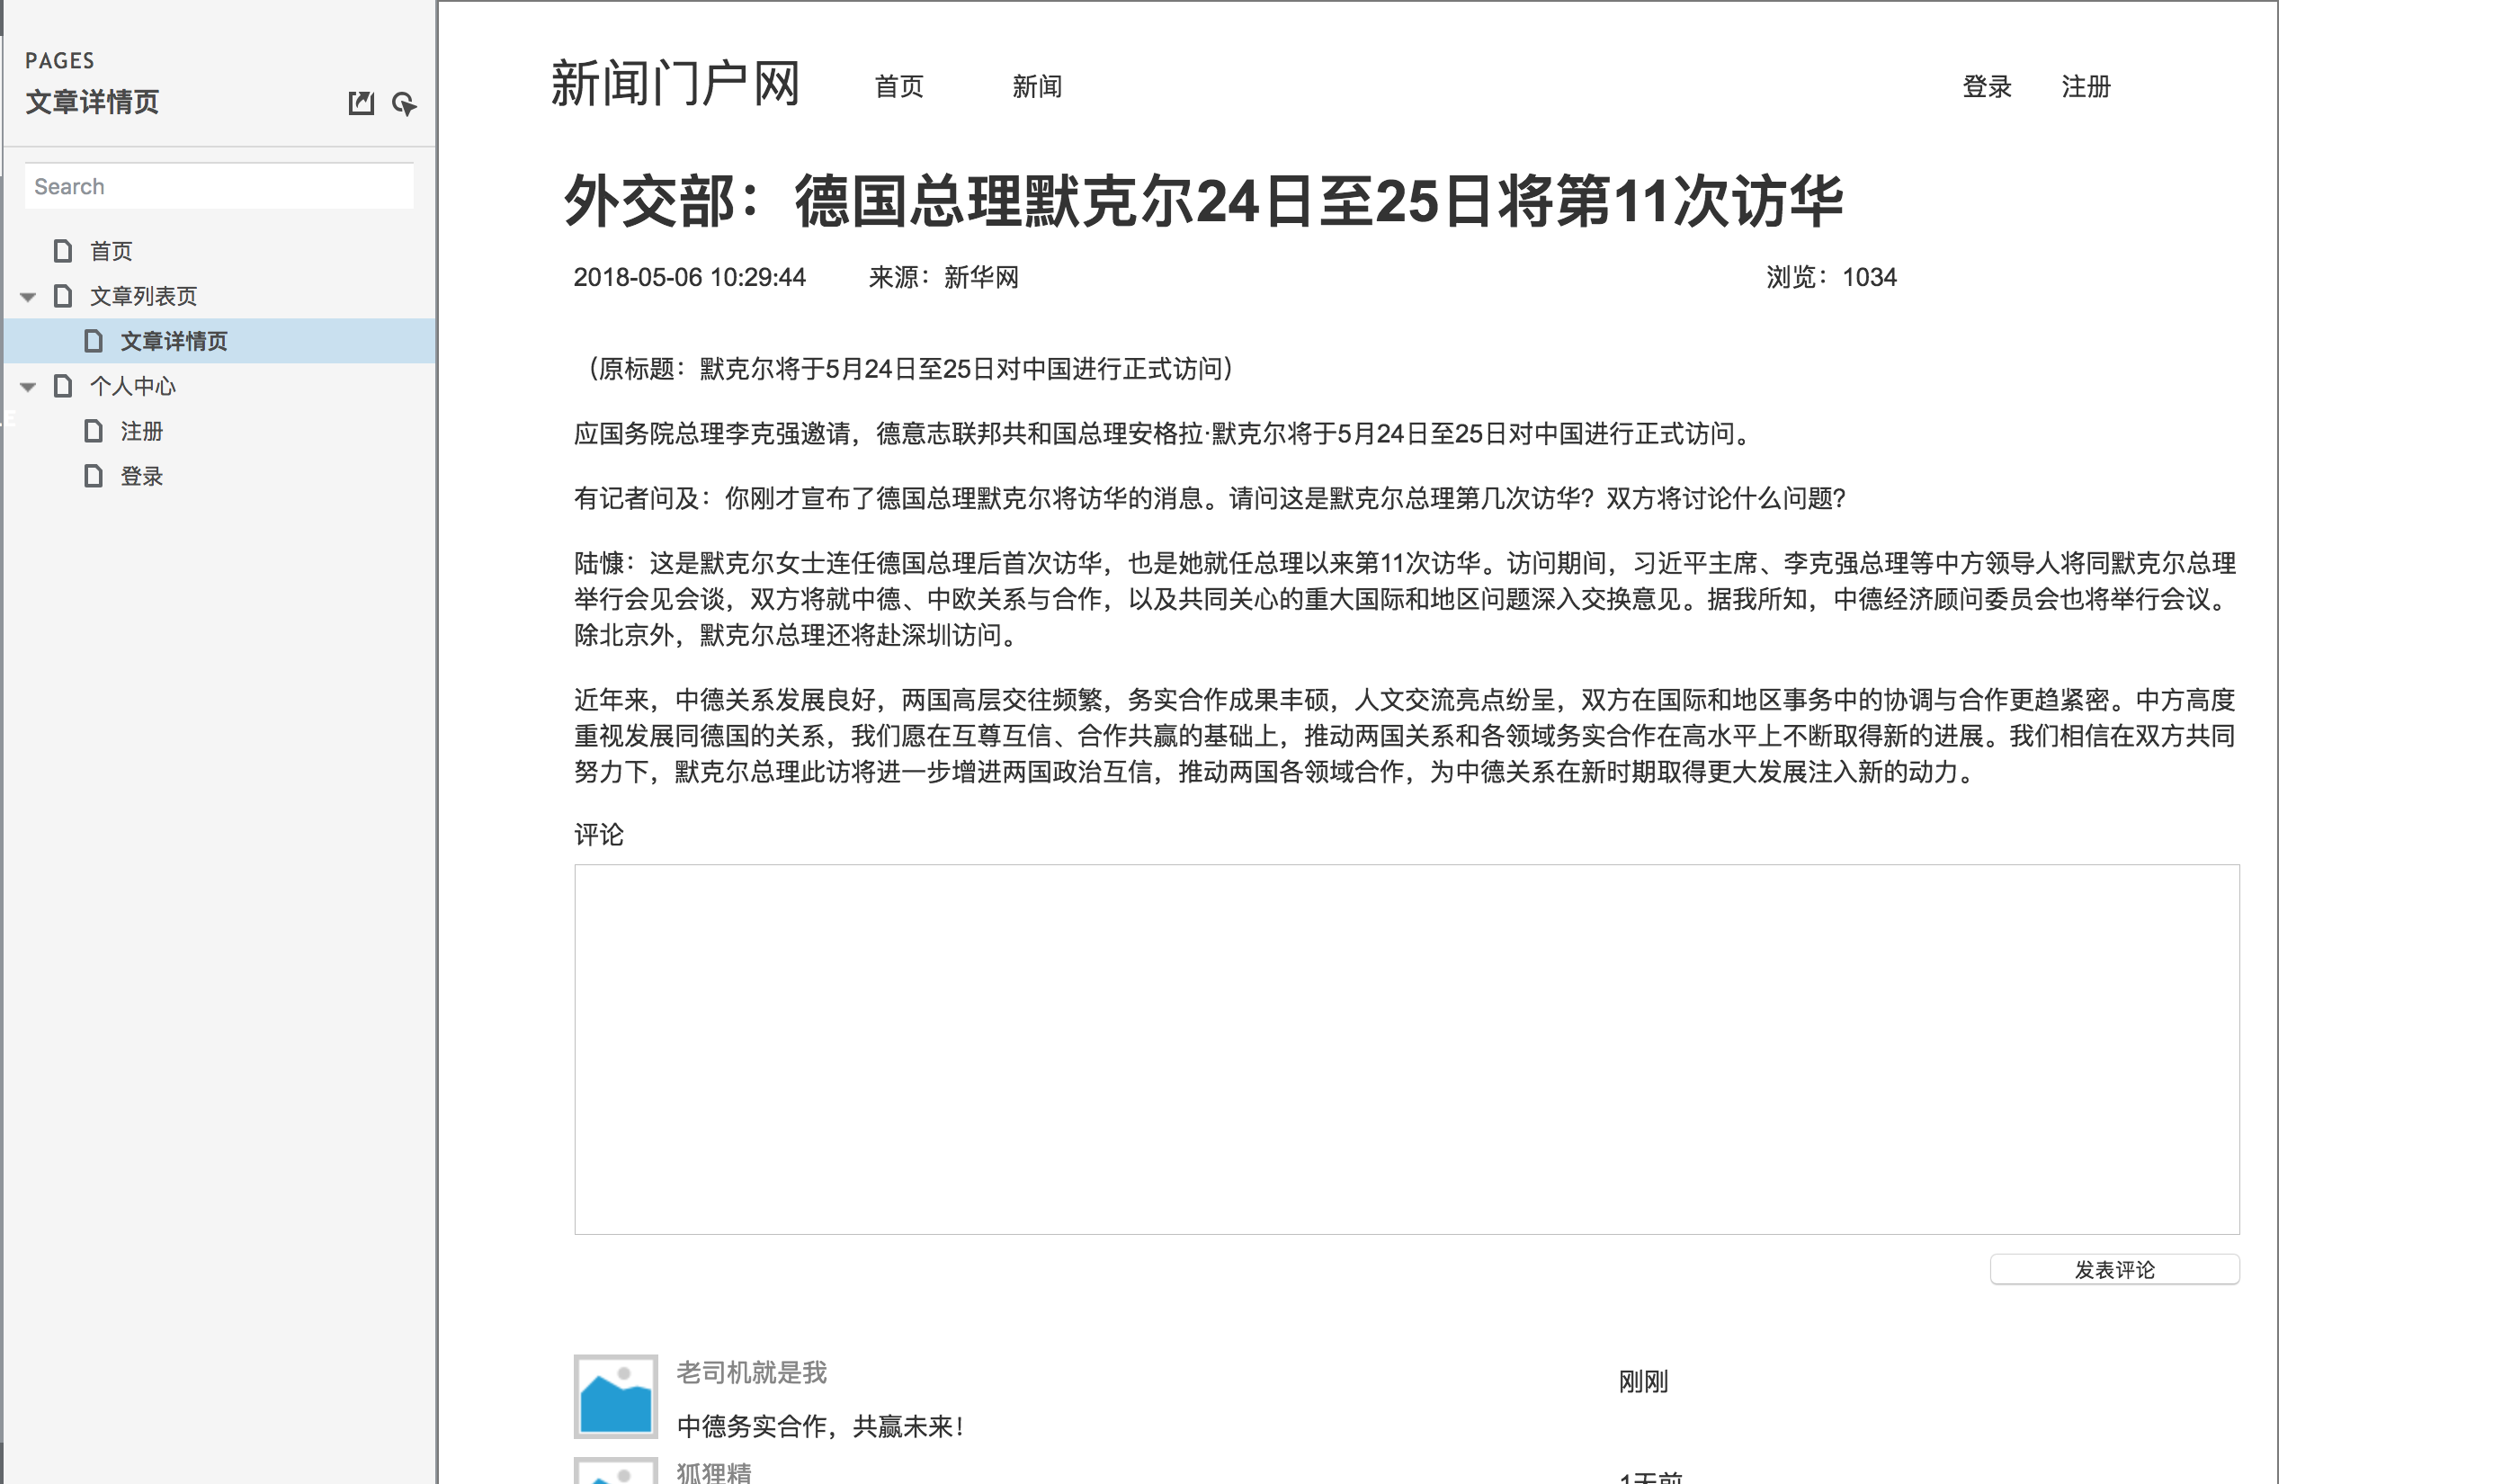
Article details page prototype design
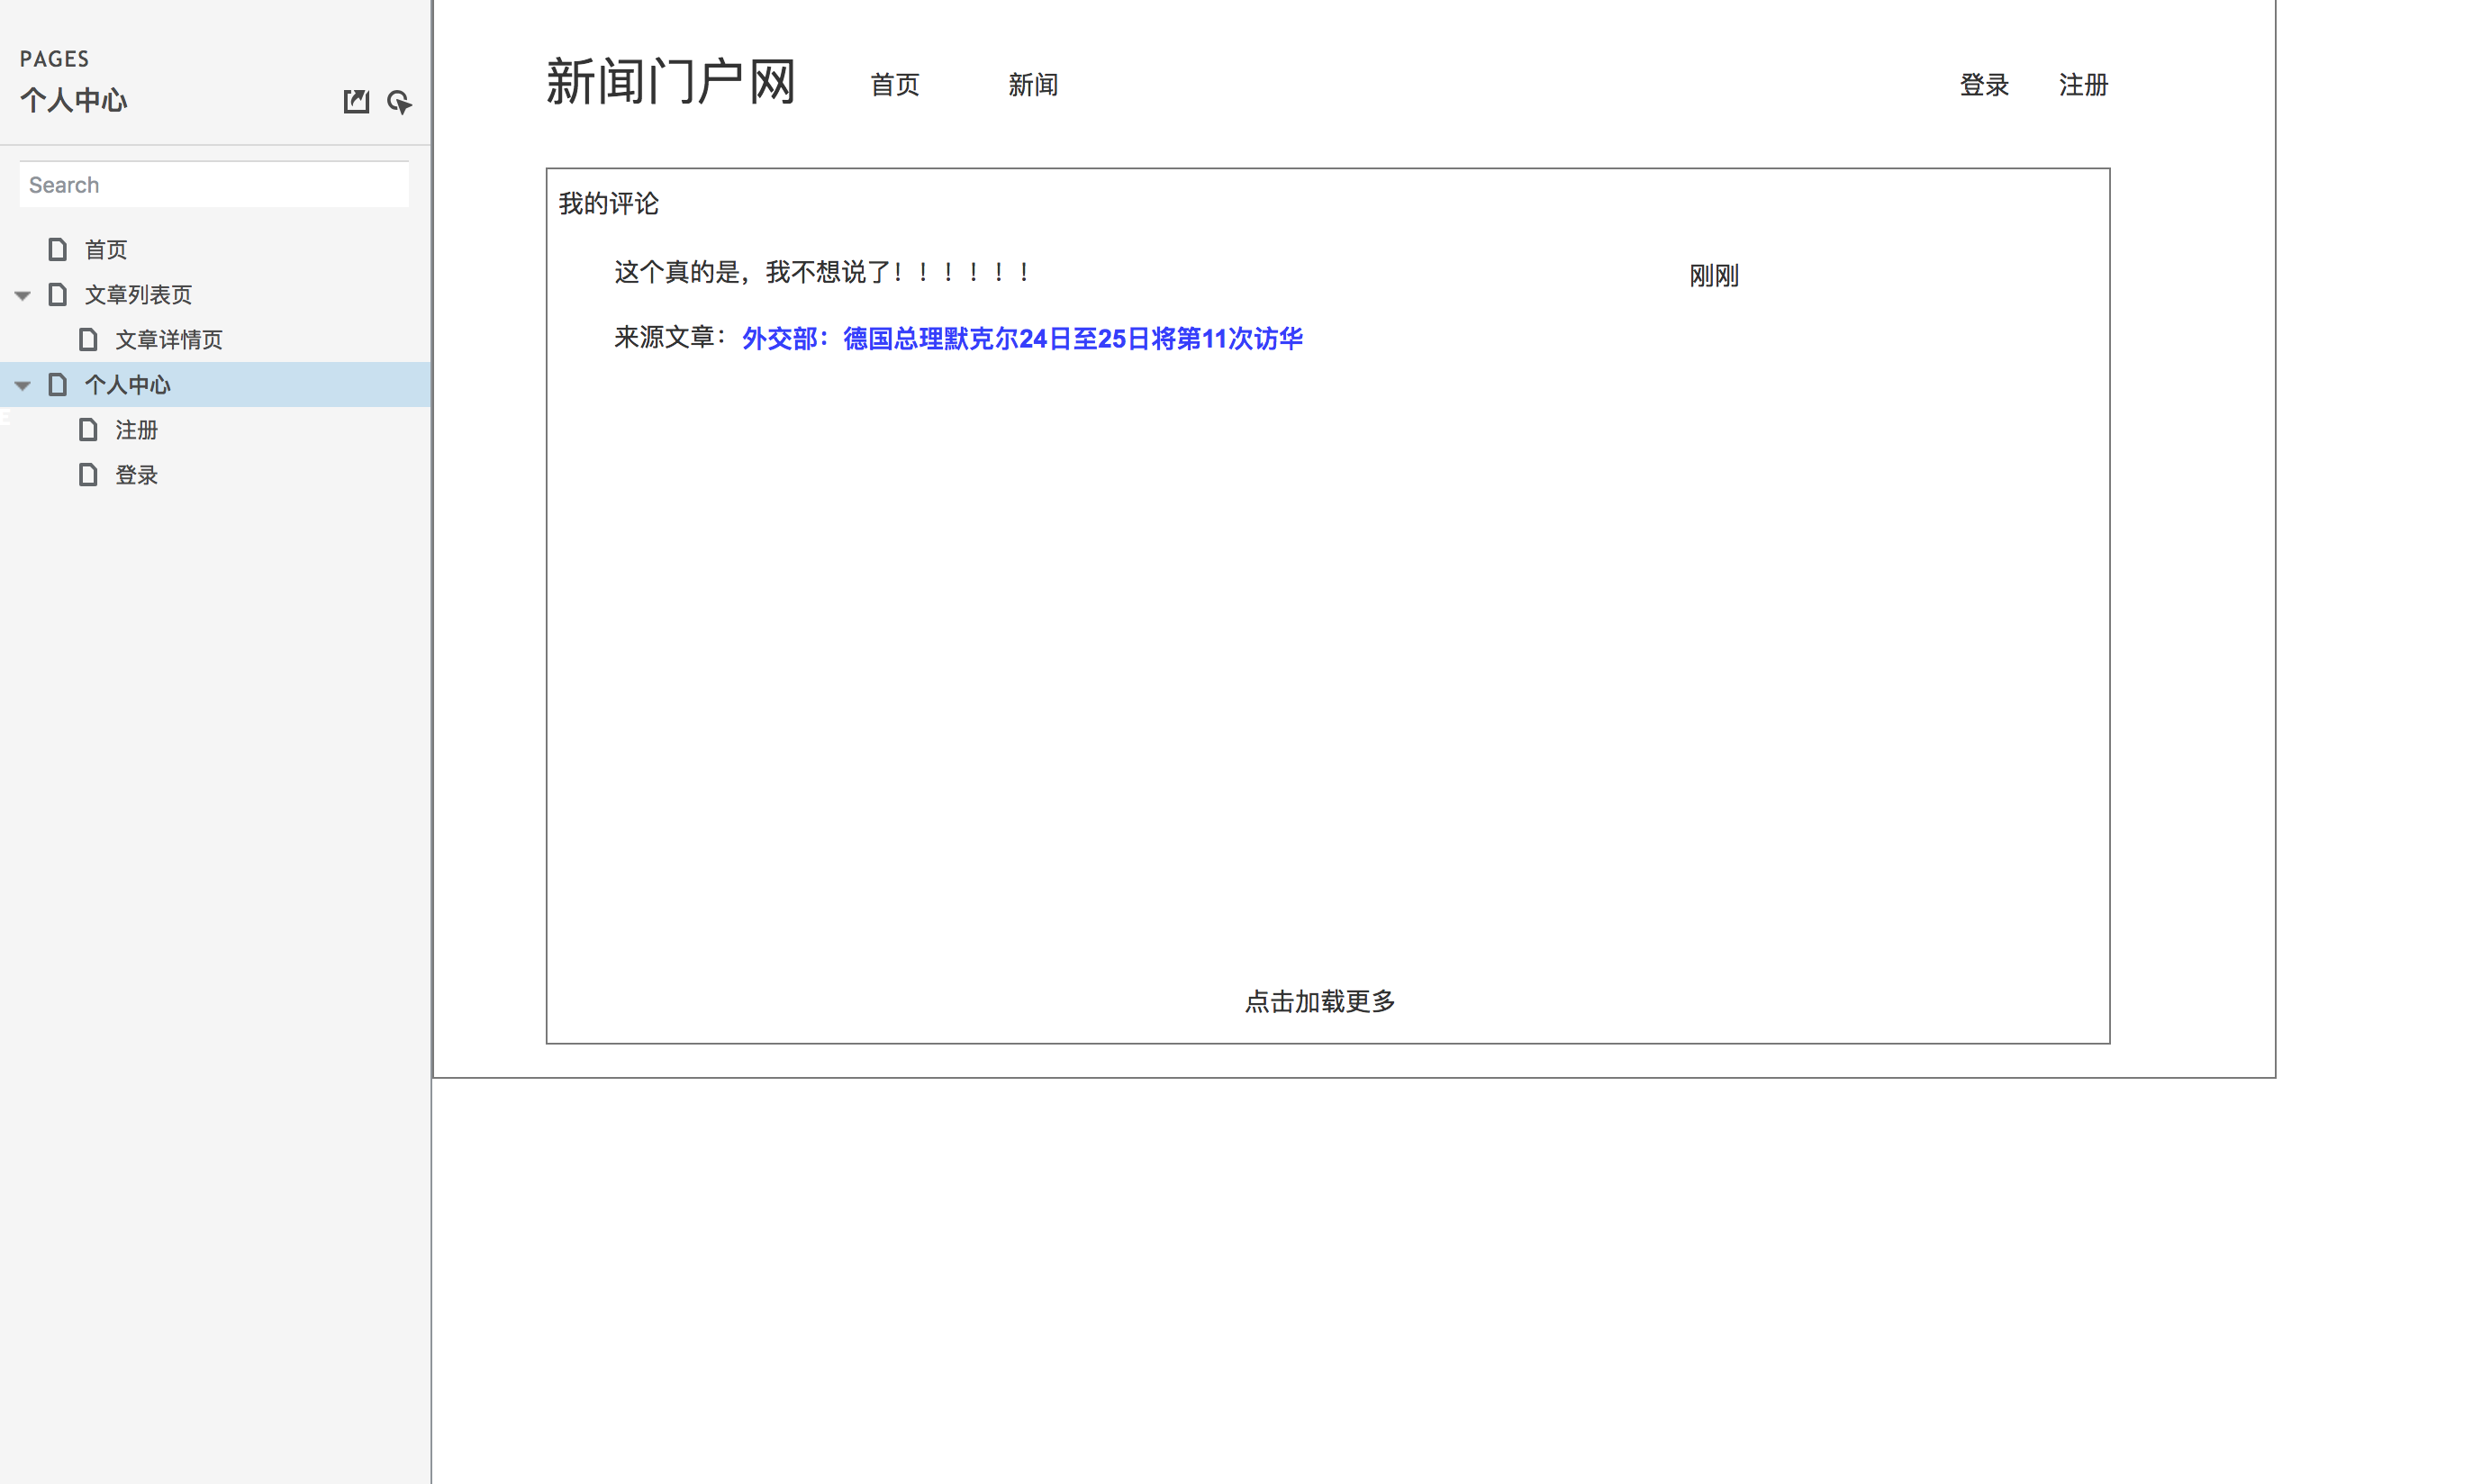
Prototype design of personal center page
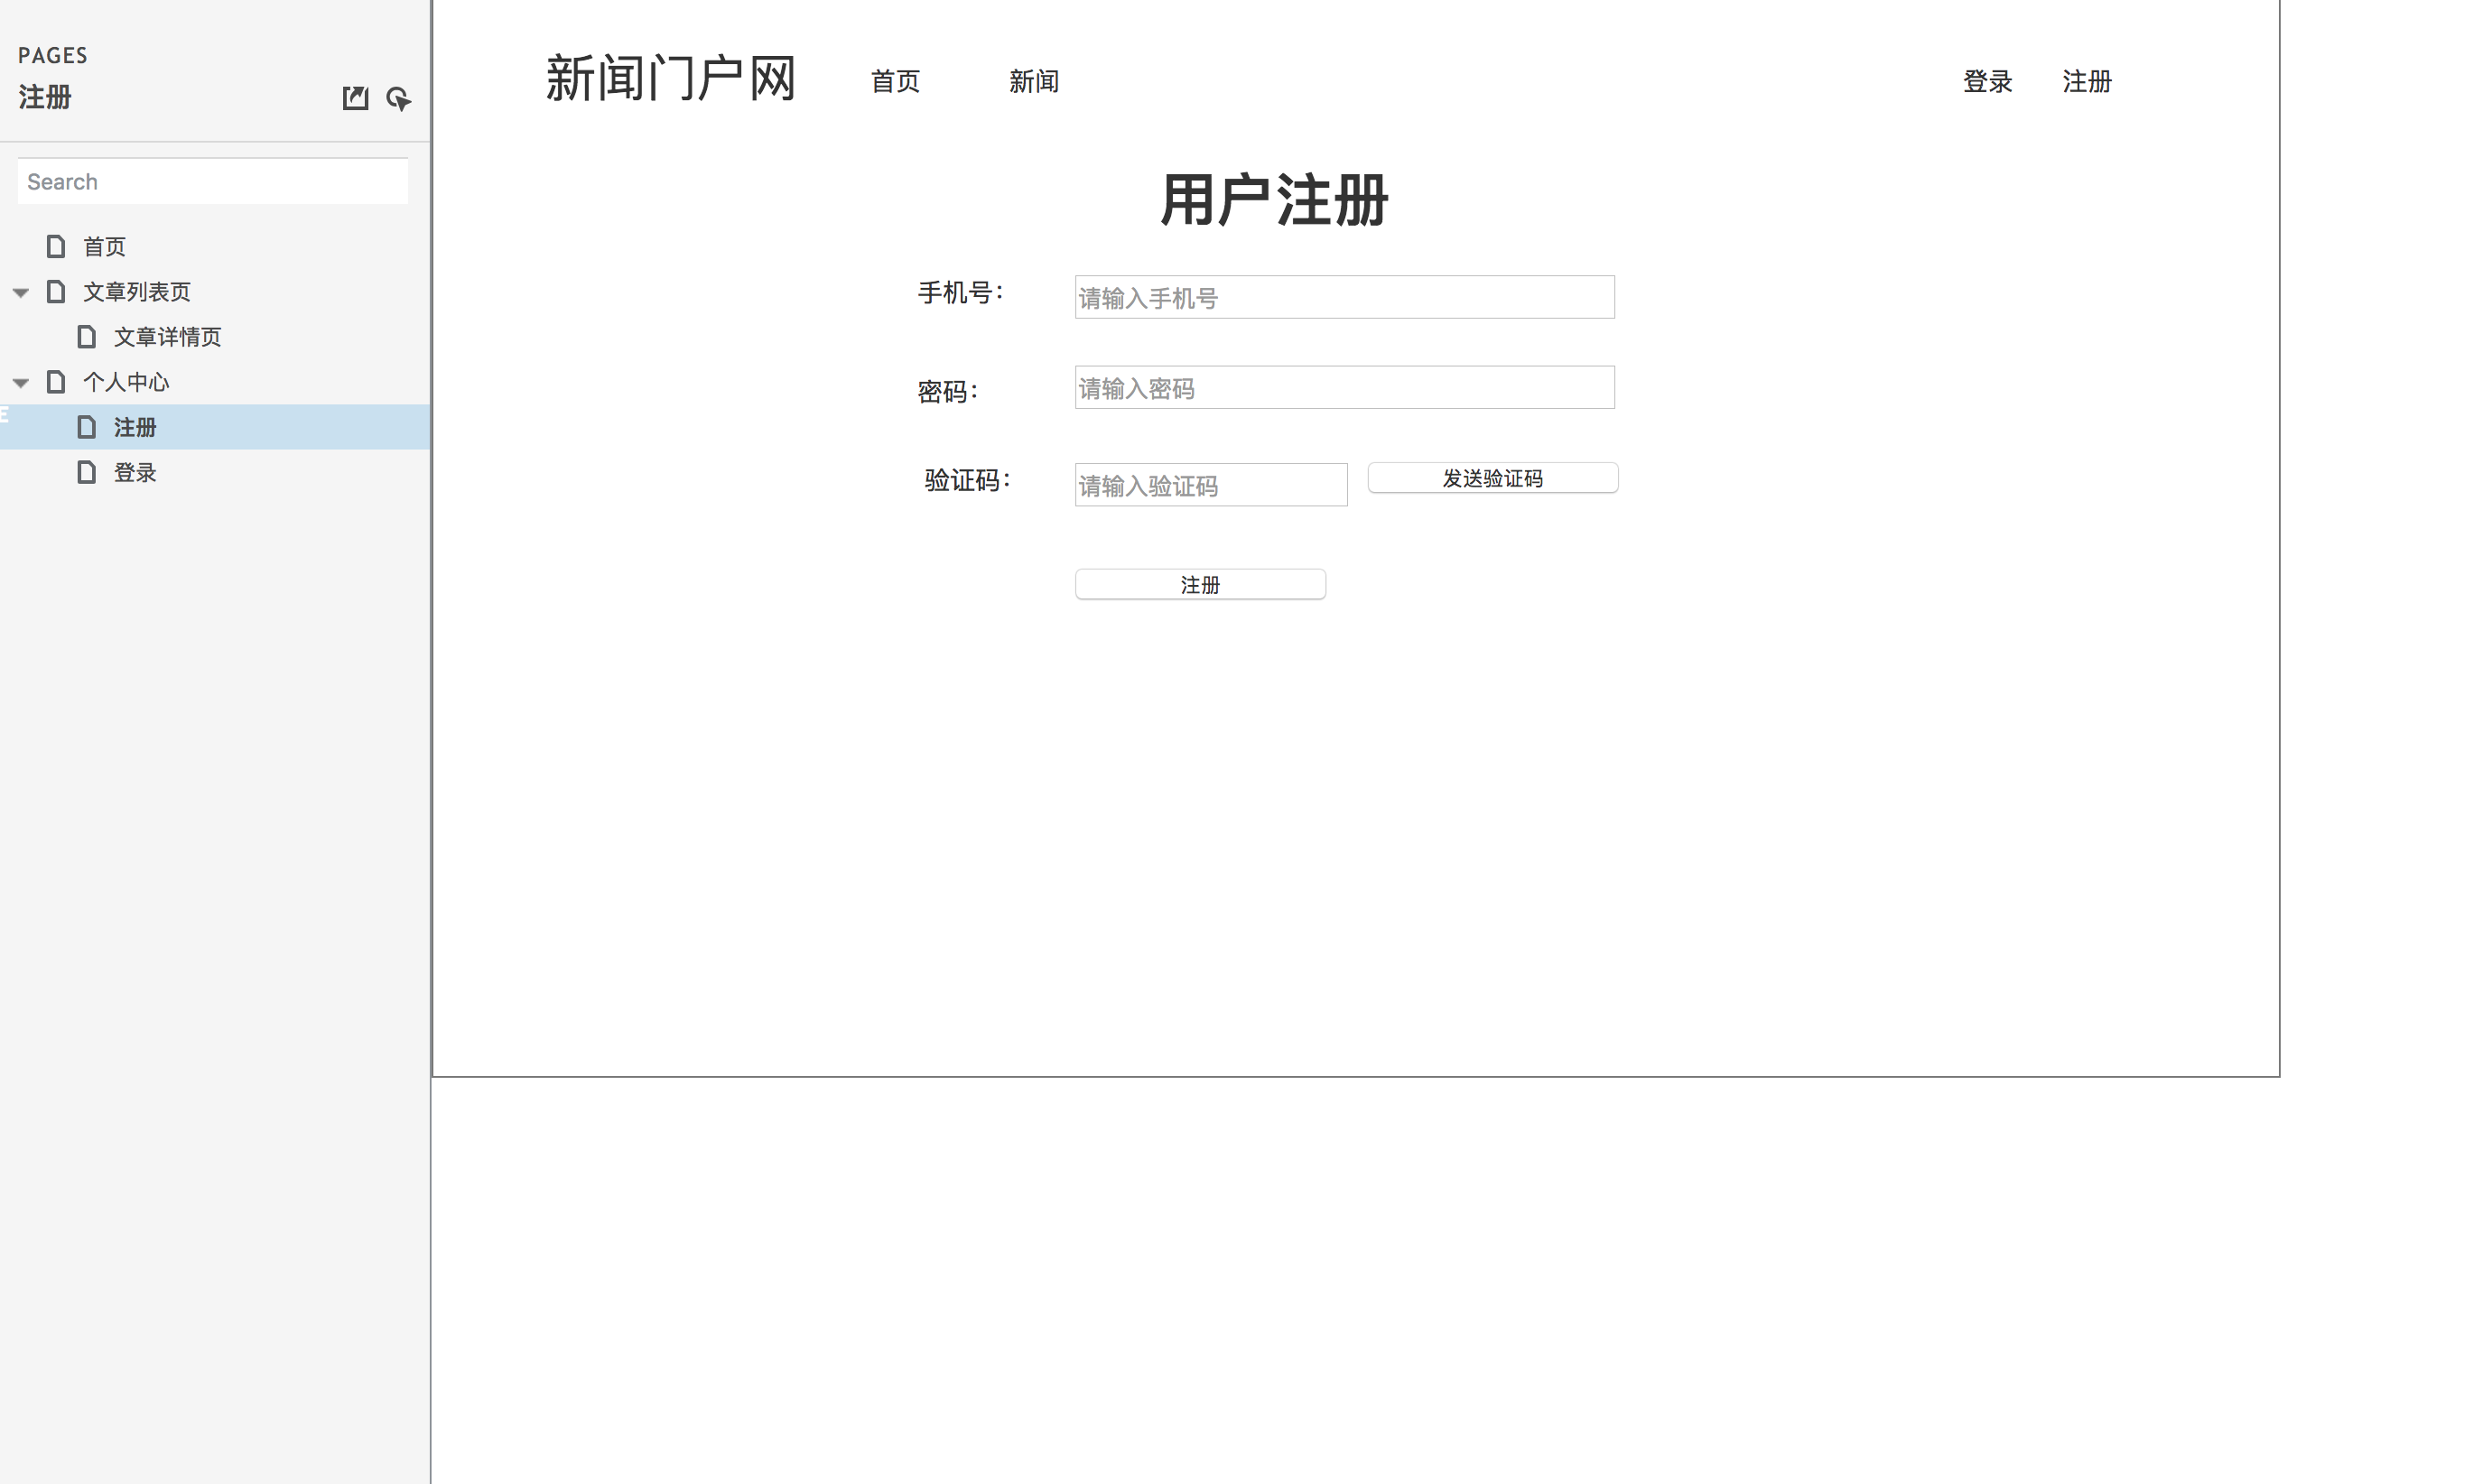
User registration page prototype
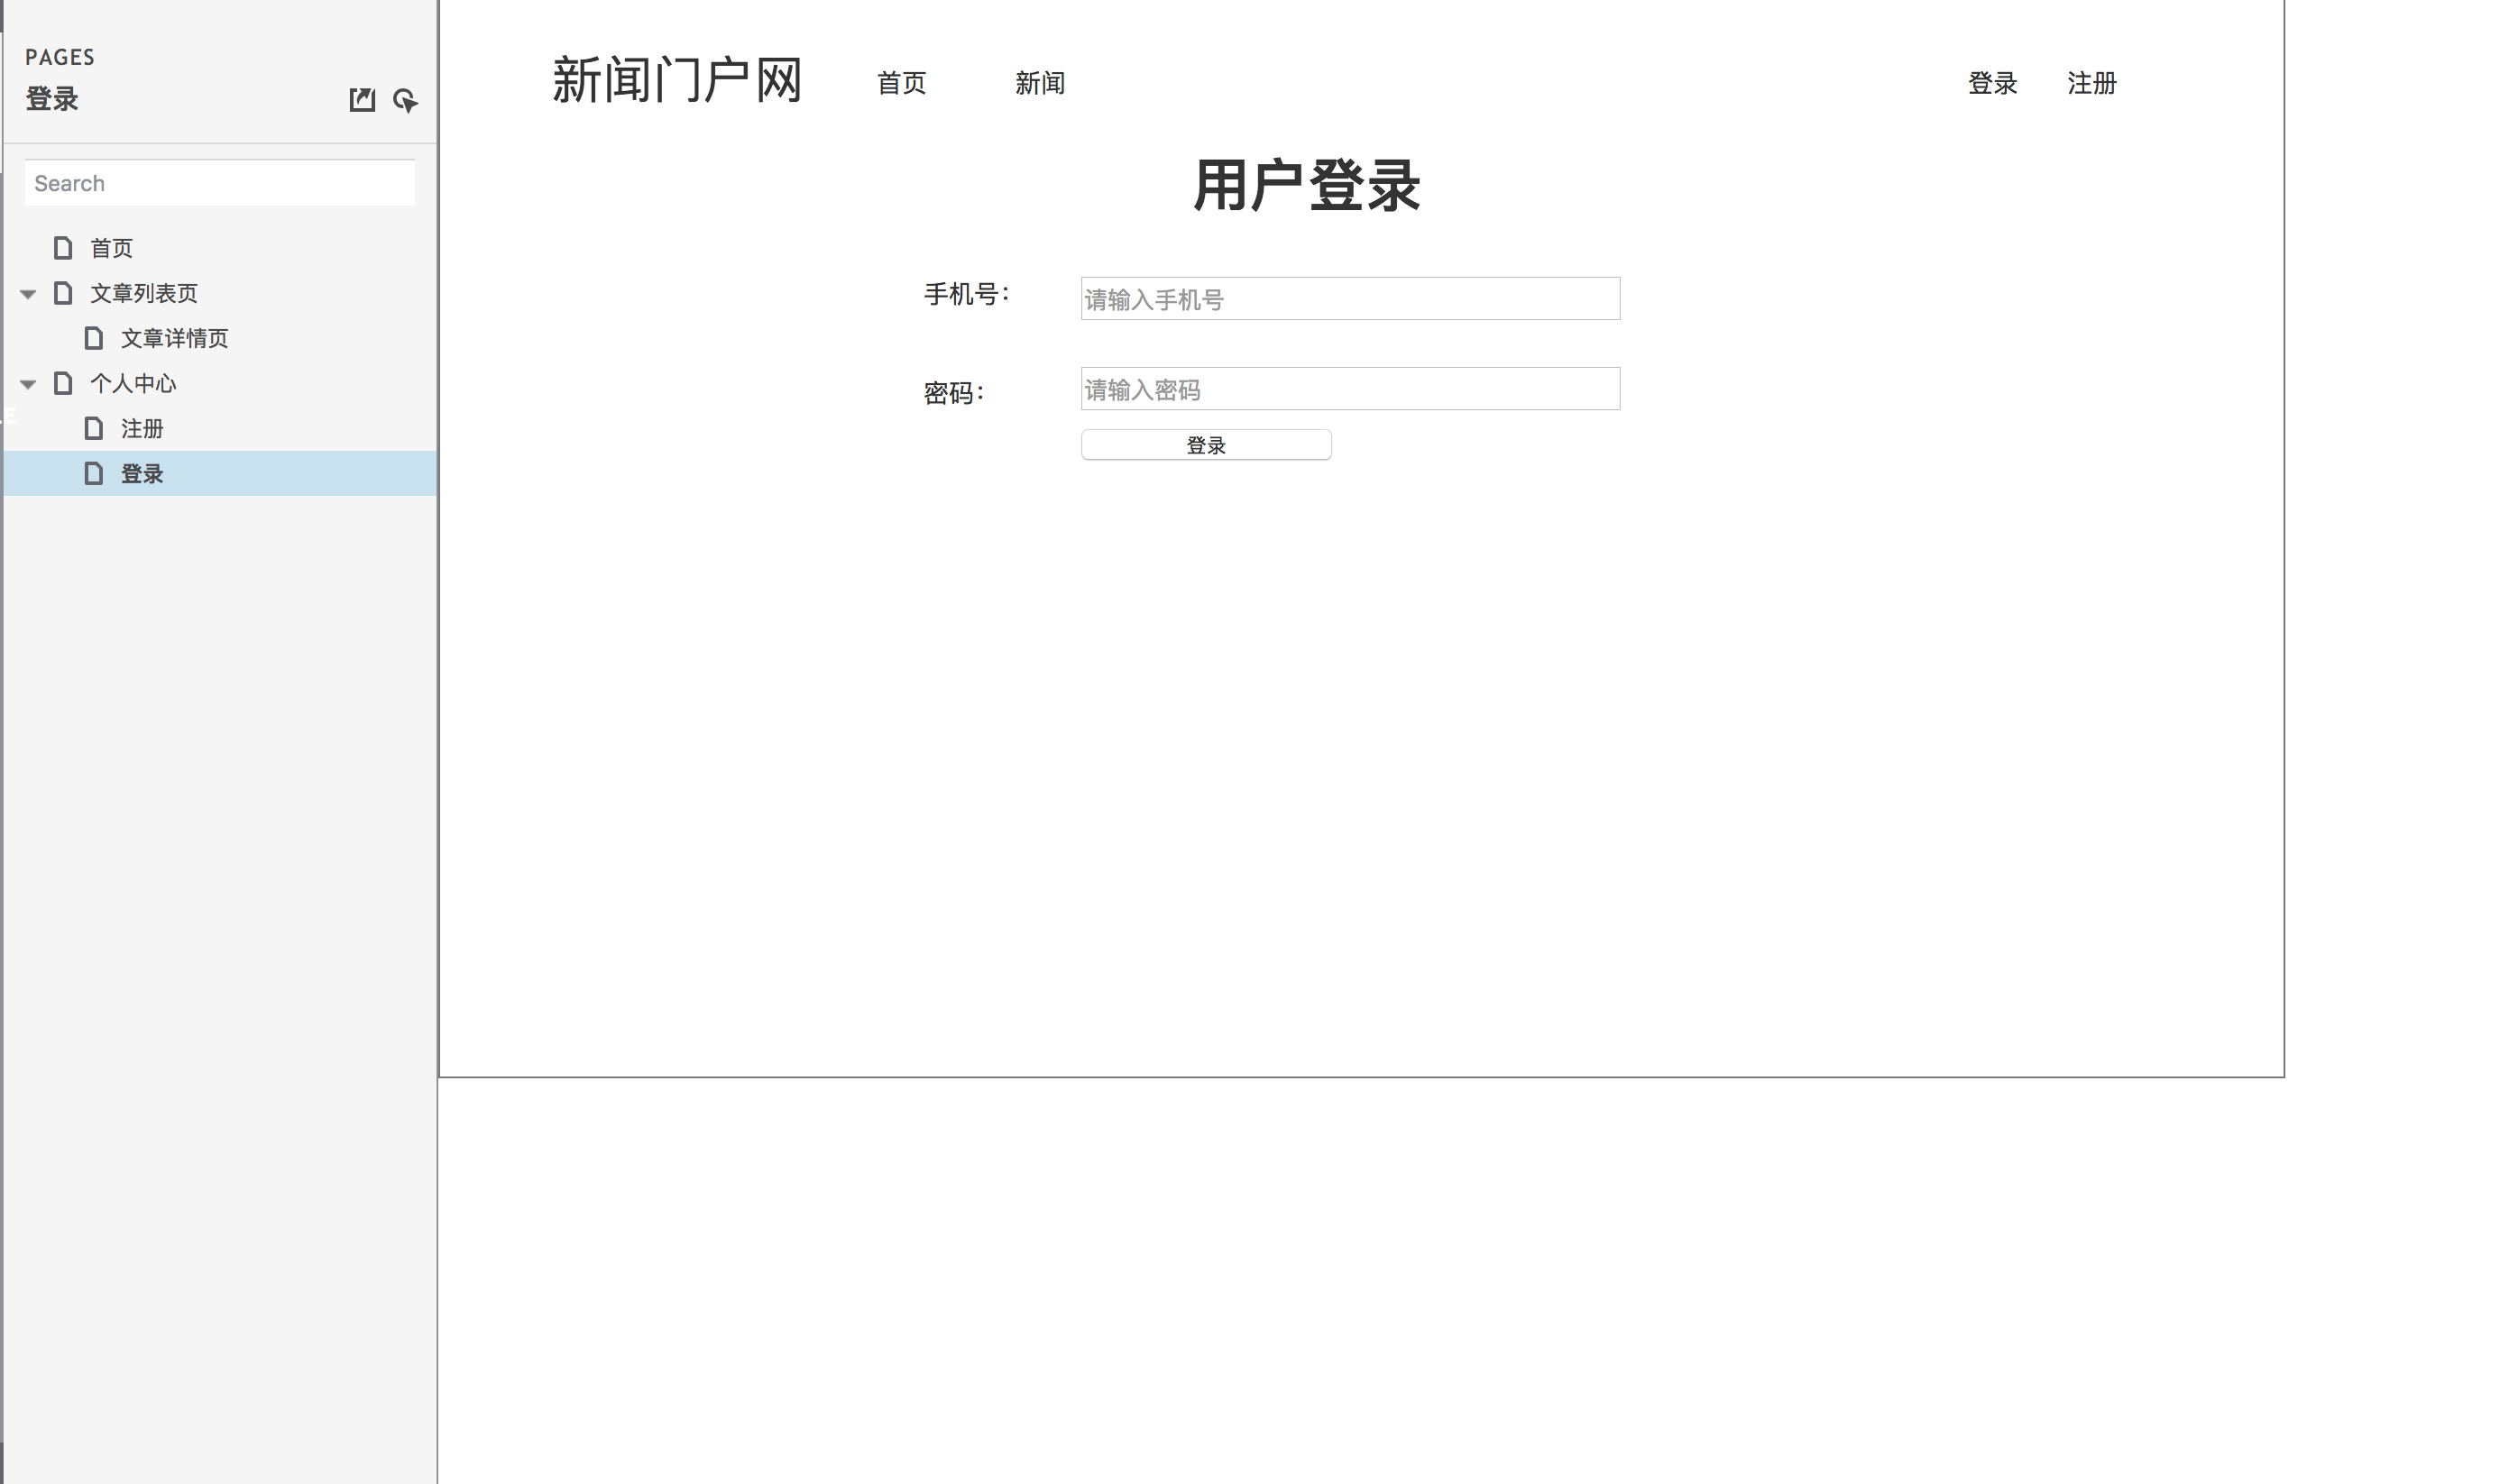
Prototype design of user login page
Database design
According to the prototype design drawing, we can analyze the data structure to design the database:
/*
 Navicat Premium Data Transfer

 Source Server         : local
 Source Server Type    : MySQL
 Source Server Version : 50709
 Source Host           : localhost:3306
 Source Schema         : news_db

 Target Server Type    : MySQL
 Target Server Version : 50709
 File Encoding         : 65001

 Date: 07/06/2018 21:15:58
*/

SET NAMES utf8mb4;
SET FOREIGN_KEY_CHECKS = 0;

-- ----------------------------
-- Table structure for news_article
-- ----------------------------
DROP TABLE IF EXISTS `news_article`;
CREATE TABLE `news_article` (
  `id` bigint(16) NOT NULL AUTO_INCREMENT COMMENT 'Self increasing ID',
  `gmt_create` datetime DEFAULT NULL COMMENT 'Creation time',
  `gmt_modified` datetime DEFAULT NULL COMMENT 'Modification time',
  `title` varchar(64) DEFAULT NULL COMMENT 'title',
  `summary` varchar(256) DEFAULT NULL COMMENT 'abstract',
  `pic_url` varchar(256) DEFAULT NULL COMMENT 'picture',
  `view_count` int(8) DEFAULT NULL COMMENT 'Number of views',
  `source` varchar(32) DEFAULT NULL COMMENT 'source',
  `content` text COMMENT 'Article content',
  `category_id` bigint(16) DEFAULT NULL COMMENT 'classification ID',
  `is_recommend` tinyint(1) DEFAULT '0' COMMENT 'Recommended',
  PRIMARY KEY (`id`)
) ENGINE=InnoDB DEFAULT CHARSET=utf8mb4;

-- ----------------------------
-- Table structure for news_captcha
-- ----------------------------
DROP TABLE IF EXISTS `news_captcha`;
CREATE TABLE `news_captcha` (
  `id` bigint(16) NOT NULL AUTO_INCREMENT COMMENT 'Self increasing ID',
  `gmt_create` datetime DEFAULT CURRENT_TIMESTAMP COMMENT 'Creation time',
  `gmt_modified` datetime DEFAULT CURRENT_TIMESTAMP ON UPDATE CURRENT_TIMESTAMP COMMENT 'Modification time',
  `mobile` varchar(16) DEFAULT NULL COMMENT 'cell-phone number',
  `code` varchar(8) DEFAULT NULL COMMENT 'Verification Code',
  PRIMARY KEY (`id`)
) ENGINE=InnoDB DEFAULT CHARSET=utf8mb4;

-- ----------------------------
-- Table structure for news_category
-- ----------------------------
DROP TABLE IF EXISTS `news_category`;
CREATE TABLE `news_category` (
  `id` bigint(16) NOT NULL AUTO_INCREMENT COMMENT 'Self increasing ID',
  `gmt_create` datetime DEFAULT CURRENT_TIMESTAMP COMMENT 'Creation time',
  `gmt_modified` datetime DEFAULT CURRENT_TIMESTAMP ON UPDATE CURRENT_TIMESTAMP COMMENT 'Modification time',
  `name` varchar(16) DEFAULT NULL COMMENT 'Category name',
  `parent_id` bigint(16) NOT NULL DEFAULT '0' COMMENT 'Category parent  ID(0 (top level classification)',
  PRIMARY KEY (`id`)
) ENGINE=InnoDB DEFAULT CHARSET=utf8mb4;

-- ----------------------------
-- Table structure for news_comment
-- ----------------------------
DROP TABLE IF EXISTS `news_comment`;
CREATE TABLE `news_comment` (
  `id` bigint(16) NOT NULL AUTO_INCREMENT COMMENT 'Self increasing ID',
  `gmt_create` datetime DEFAULT CURRENT_TIMESTAMP COMMENT 'Creation time',
  `gmt_modified` datetime DEFAULT CURRENT_TIMESTAMP ON UPDATE CURRENT_TIMESTAMP COMMENT 'Modification time',
  `article_id` bigint(16) DEFAULT NULL COMMENT 'article ID',
  `content` varchar(256) DEFAULT NULL COMMENT 'Comment content',
  `parent_id` bigint(16) NOT NULL DEFAULT '0' COMMENT 'Superior comments ID(0 (top level comments)',
  PRIMARY KEY (`id`)
) ENGINE=InnoDB DEFAULT CHARSET=utf8mb4;

-- ----------------------------
-- Table structure for news_user
-- ----------------------------
DROP TABLE IF EXISTS `news_user`;
CREATE TABLE `news_user` (
  `id` bigint(16) NOT NULL AUTO_INCREMENT COMMENT 'Self increasing ID',
  `gmt_create` datetime DEFAULT CURRENT_TIMESTAMP COMMENT 'Creation time',
  `gmt_modified` datetime DEFAULT CURRENT_TIMESTAMP ON UPDATE CURRENT_TIMESTAMP COMMENT 'Modification time',
  `mobile` varchar(16) DEFAULT NULL COMMENT 'cell-phone number',
  `password` varchar(64) DEFAULT NULL COMMENT 'Code( SHA1 Encryption)',
  PRIMARY KEY (`id`)
) ENGINE=InnoDB DEFAULT CHARSET=utf8mb4;

SET FOREIGN_KEY_CHECKS = 1;
Architecture diagram design
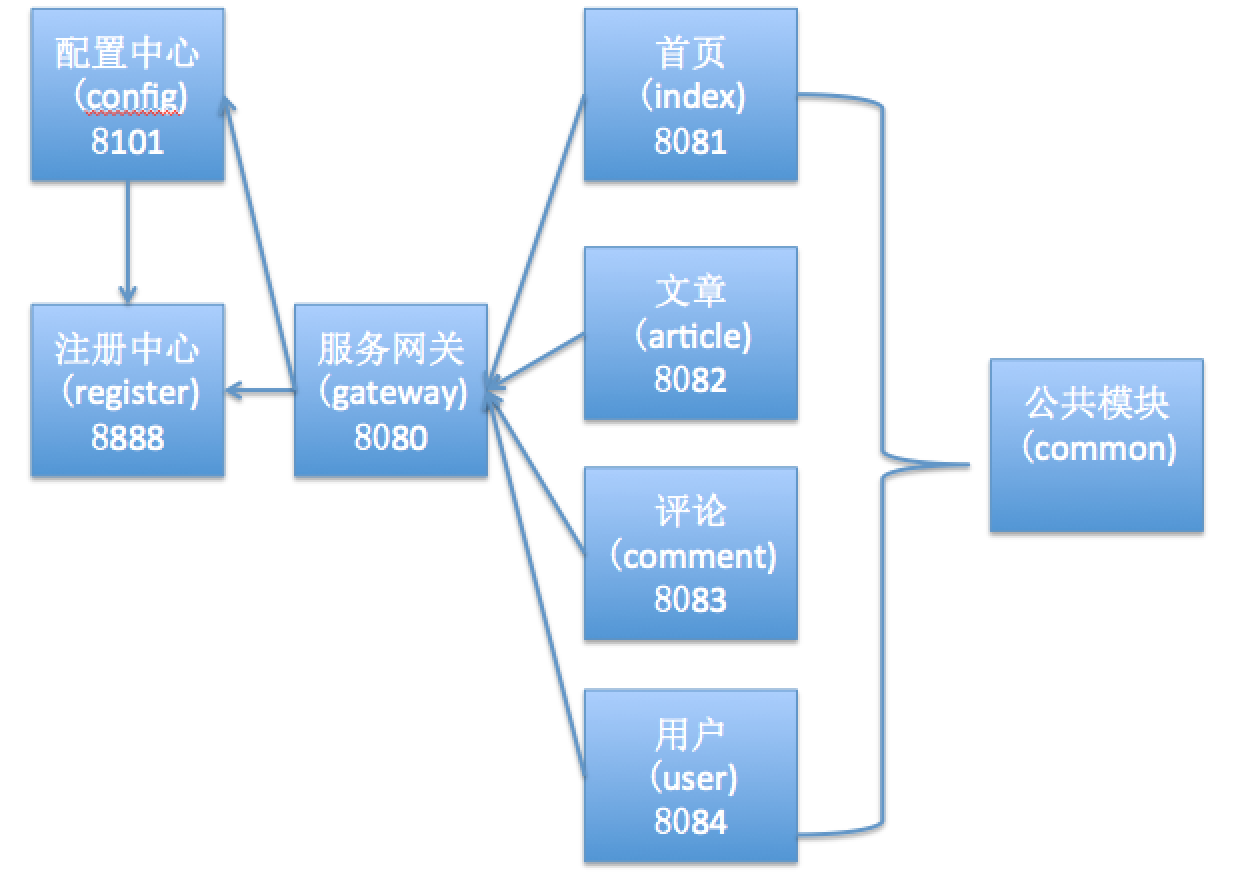
For modern microservice architecture, we'd better design the architecture diagram before building the project, because there are many microservice projects and the relationship is complex. With the architecture diagram, it is more convenient for us to design the architecture. Please see the architecture diagram of this example below:
Frame construction
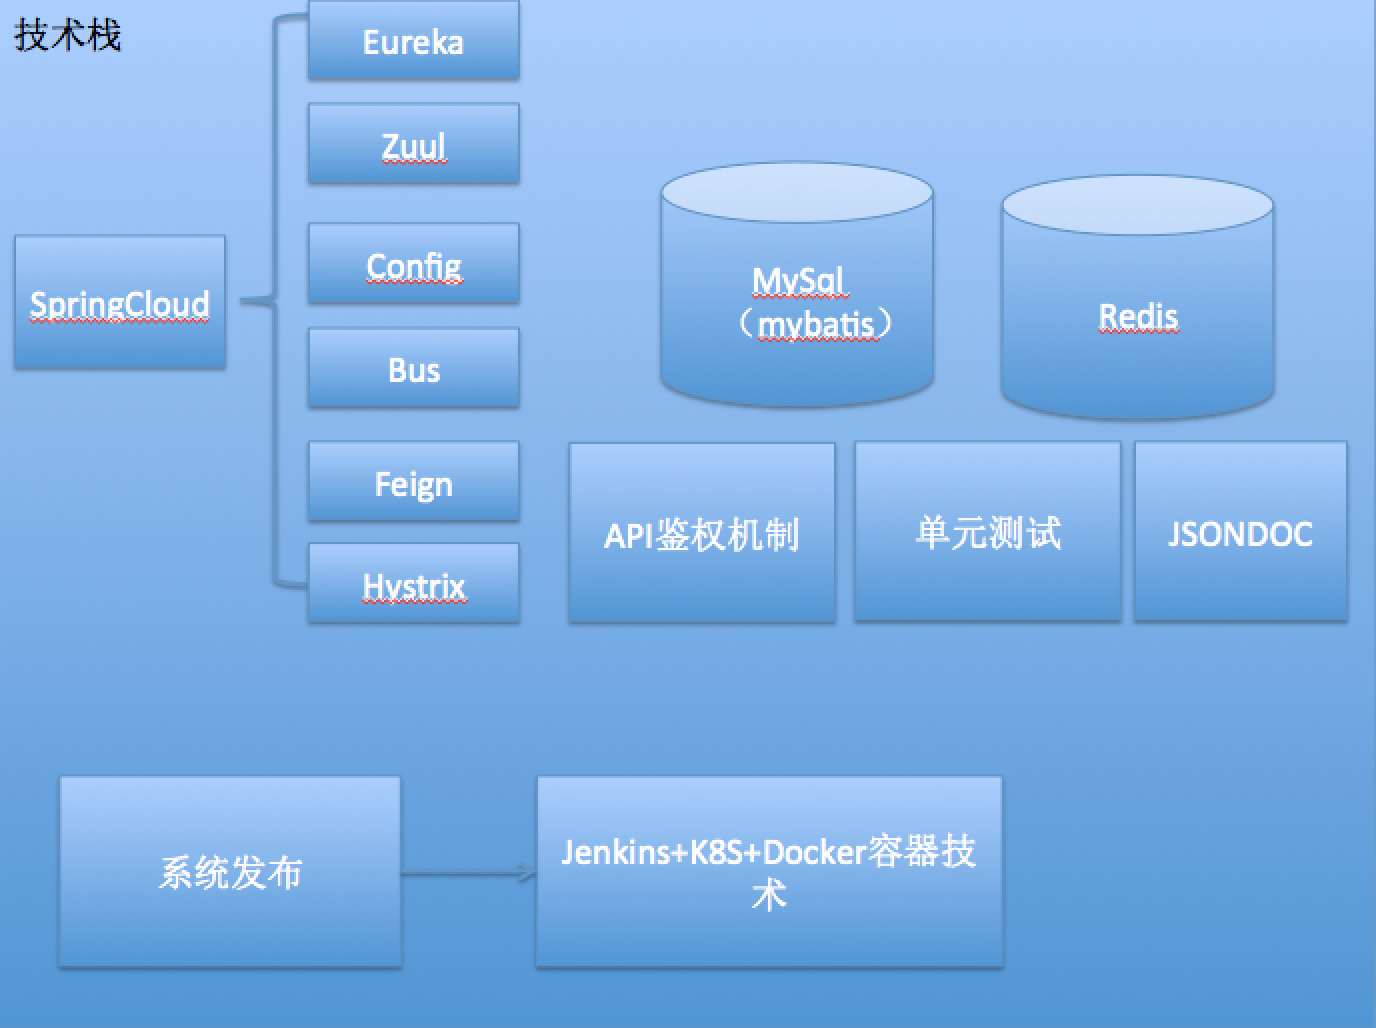
According to the architecture diagram, we can start to build the framework. First, we need to select the technology, that is, what technology needs to be integrated. In this example, we will be able to see the technologies such as registration center, configuration center, service gateway, Redis, MySQL and API authentication. Please see the specific code below.
Screenshot of architecture diagram:
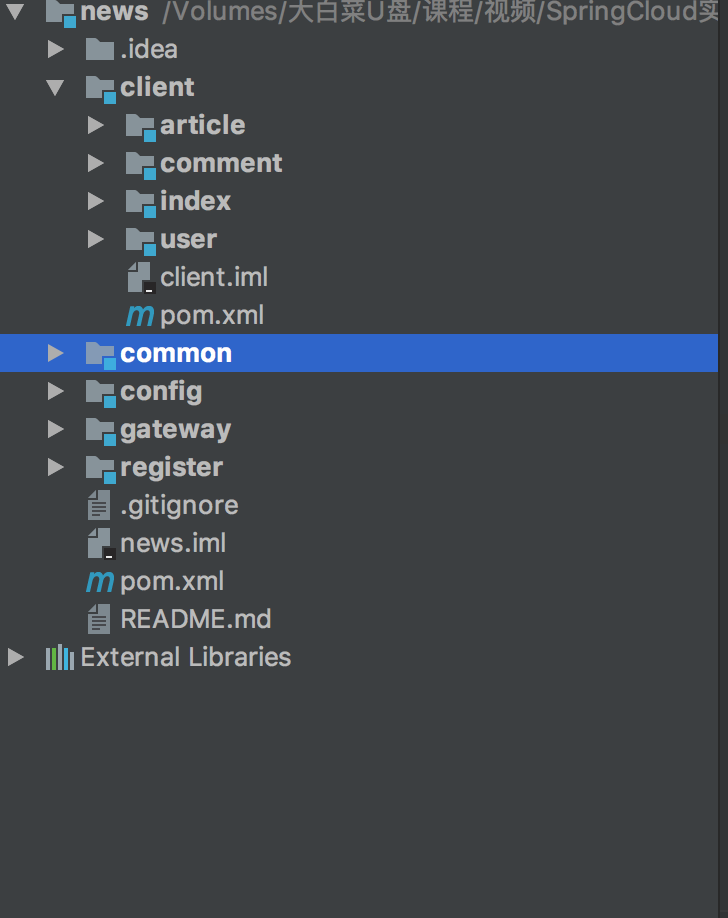
We know that the microservice architecture is actually composed of multiple projects. According to the architecture diagram, we can create all projects first:
Among them, common is not a project, but a public class library. All projects rely on it. We can put public code under common, such as string processing, date processing, Redis processing, JSON processing, etc.
Client includes client project. config is the configuration center, gateway is the service gateway, and register is the registration center.
In this paper, we first build the registration center, configuration center and service gateway.
1. Registration Center
First create the startup class:
package com.lynn.register;

import org.springframework.boot.SpringApplication;
import org.springframework.boot.autoconfigure.SpringBootApplication;
import org.springframework.cloud.netflix.eureka.server.EnableEurekaServer;

@EnableEurekaServer
@SpringBootApplication
public class Application {

    public static void main(String[] args) {
        SpringApplication.run(Application.class,args);
    }
}
Then create a YAML configuration file:
server:
  port: 8888
spring:
  application:
    name: register
  profiles:
    active: dev
eureka:
  server:
    #Turn on self-protection
    enable-self-preservation: true
  instance:
    #Register with IP address
    preferIpAddress: true
    hostname: ${spring.cloud.client.ipAddress}
    instanceId: ${spring.cloud.client.ipAddress}:${server.port}
  client:
    registerWithEureka: false
    fetchRegistry: false
    serviceUrl:
      defaultZone: http://${eureka.instance.hostname}:${server.port}/eureka/
2. Configuration center
To create a startup class:
package com.lynn.config;

import org.springframework.boot.SpringApplication;
import org.springframework.boot.autoconfigure.SpringBootApplication;
import org.springframework.cloud.config.server.EnableConfigServer;
import org.springframework.cloud.netflix.eureka.EnableEurekaClient;

@SpringBootApplication
@EnableEurekaClient
@EnableConfigServer
public class Application {

    public static void main(String[] args) {
        SpringApplication.run(Application.class,args);
    }
}
Create YAML profile:
server:
  port: 8101
spring:
  application:
    name: config
  profiles:
    active: dev
  cloud:
    config:
      server:
        git:
          uri: https://github. COM / springcloudlynn / springcloudactivity # configure git warehouse address
          searchPaths: repo #Configure warehouse Path
          username: springcloudlynn #User name to access git repository
          password: ly123456 #User password to access git warehouse
      label: master #Configure branch of warehouse
eureka:
  instance:
    hostname: ${spring.cloud.client.ipAddress}
    instanceId: ${spring.cloud.client.ipAddress}:${server.port}
  client:
    serviceUrl:
      defaultZone: http://localhost:8888/eureka/
3. Service gateway
We continue to write the service gateway.
The first is the startup class:
package com.lynn.gateway;

import org.springframework.boot.SpringApplication;
import org.springframework.boot.autoconfigure.SpringBootApplication;
import org.springframework.cloud.netflix.eureka.EnableEurekaClient;
import org.springframework.cloud.netflix.zuul.EnableZuulProxy;

@EnableEurekaClient
@SpringBootApplication
@EnableZuulProxy
public class Application {
    public static void main(String[] args) {
        SpringApplication.run(Application.class,args);
    }
}
The configuration of the service gateway can be pulled down through the configuration center. The following is the configuration file code. At this time, the name of the configuration file is bootstrap yml:
spring:
  application:
    name: gateway
  profiles:
    active: dev
  cloud:
    config:
      name: gateway,eureka,key
      label: master
      discovery:
        enabled: true
        serviceId: config
eureka:
  client:
    serviceUrl:
      defaultZone: http://localhost:8888/eureka/
The basic framework of this paper is built here, and we will continue to build the basic framework later.
Lesson 15: detailed explanation of Spring Cloud instance - basic framework construction (II)
Then in the previous article, we will continue to build the basic framework. In this paper, we will build the client basic module, integrated fuse and integrated persistence layer framework Mybatis.
In the previous article, we have built the configuration center, so all the projects built since then are to put the configuration file on Git (Click here Get the Git warehouse address of the course configuration file) and pull the configuration file from the Git warehouse through the configuration center.
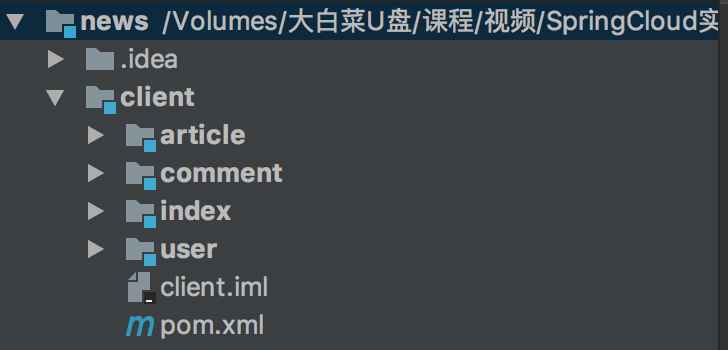
Client basic module
In order to facilitate the readability of the application, we first create a project with packaging pom under the top-level project, named client, and then create our client module under client, as shown in the figure:
The pom content of client is as follows:
<?xml version="1.0" encoding="UTF-8"?>
<project xmlns="http://maven.apache.org/POM/4.0.0"
         xmlns:xsi="http://www.w3.org/2001/XMLSchema-instance"
         xsi:schemaLocation="http://maven.apache.org/POM/4.0.0 http://maven.apache.org/xsd/maven-4.0.0.xsd">
    <parent>
        <artifactId>news</artifactId>
        <groupId>com.lynn</groupId>
        <version>1.0-SNAPSHOT</version>
    </parent>
    <modelVersion>4.0.0</modelVersion>
    <artifactId>client</artifactId>
    <description>client</description>
    <modules>
        <module>index</module>
        <module>article</module>
        <module>comment</module>
        <module>user</module>
    </modules>
    <packaging>pom</packaging>
    <dependencies>
        <dependency>
            <groupId>com.lynn</groupId>
            <artifactId>common</artifactId>
            <version>1.0-SNAPSHOT</version>
        </dependency>
    </dependencies>
</project>
Then continue to create the client project: index (home page), article (article), comment (comment), user (user).
We first create some public yaml files under the Git Repository: Eureka YML, the code is as follows:
eureka:
  instance:
    hostname: ${spring.cloud.client.ipAddress}
    instanceId: ${spring.cloud.client.ipAddress}:${server.port}
Then create a startup class in each client module and add the following:
@SpringBootApplication
@EnableEurekaClient
public class Application {

    public static void main(String[] args) {
        SpringApplication.run(Application.class,args);
    }
}
Finally, create a bootstrap under each client project YML configuration file, create each client module's own configuration item in Git warehouse, and add corresponding content. Next, let's look at the code content to be added under each client.
- home page
Bootstrap.com under the homepage client The code of the YML configuration file is as follows:
spring:
  cloud:
    config:
      name: index,eureka
      label: master
      discovery:
        enabled: true
        serviceId: config
eureka:
  client:
    serviceUrl:
      defaultZone: http://localhost:8888/eureka/
Homepage configuration item index Add the following code to YML:
server:
  port: 8081
spring:
  application:
    name: index
  profiles:
    active: dev
- article
Article bootstrap. Client The code of the YML configuration file is as follows:
spring:
  cloud:
    config:
      name: article,eureka
      label: master
      discovery:
        enabled: true
        serviceId: config
eureka:
  client:
    serviceUrl:
      defaultZone: http://localhost:8888/eureka/
Article configuration item article Add the following code to YML:
server:
  port: 8082
spring:
  application:
    name: article
  profiles:
    active: dev
- comment
Comment on the bootstrap under the client The code of the YML configuration file is as follows:
spring:
  cloud:
    config:
      name: comment,eureka
      label: master
      discovery:
        enabled: true
        serviceId: config
eureka:
  client:
    serviceUrl:
      defaultZone: http://localhost:8888/eureka/
Comment configuration item comment Add the following code to YML:
server:
  port: 8083
spring:
  application:
    name: comment
  profiles:
    active: dev
- user
Bootstrap. On the user's client The code of the YML configuration file is as follows:
spring:
  cloud:
    config:
      name: user,eureka
      label: master
      discovery:
        enabled: true
        serviceId: config
eureka:
  client:
    serviceUrl:
      defaultZone: http://localhost:8888/eureka/
User configuration item user Add the following code to YML:
server:
  port: 8084
spring:
  application:
    name: user
  profiles:
    active: dev
Fuse
The fuse mechanism can effectively improve the robustness of the application. Feign calls can also be monitored through the Hystrix Dashboard, so that we can observe the stability of the service at any time. Therefore, it is necessary to integrate the fuse. This example will integrate feign and Hystrix framework.
First, add a dependency in the pom of the client (because all clients need to rely on it, they can rely on it in the client). The code is as follows:
<dependency>
            <groupId>org.springframework.cloud</groupId>
            <artifactId>spring-cloud-starter-feign</artifactId>
        </dependency>
        <dependency>
            <groupId>org.springframework.cloud</groupId>
            <artifactId>spring-cloud-starter-hystrix</artifactId>
        </dependency>
        <dependency>
            <groupId>org.springframework.cloud</groupId>
            <artifactId>spring-cloud-starter-hystrix-dashboard</artifactId>
        </dependency>
        <dependency>
            <groupId>org.springframework.boot</groupId>
            <artifactId>spring-boot-starter-actuator</artifactId>
        </dependency>
Next, add an annotation to the startup class of each client module. The code is as follows:
@SpringBootApplication
@EnableEurekaClient
@EnableFeignClients
@EnableHystrixDashboard
@EnableCircuitBreaker
public class Application {

    public static void main(String[] args) {
        SpringApplication.run(Application.class,args);
    }
}
Let's start a client to see the effect.
Start register, config and index successively, and access the address: http://localhost:8081/hystrix , you can see the interface as shown in the following figure:
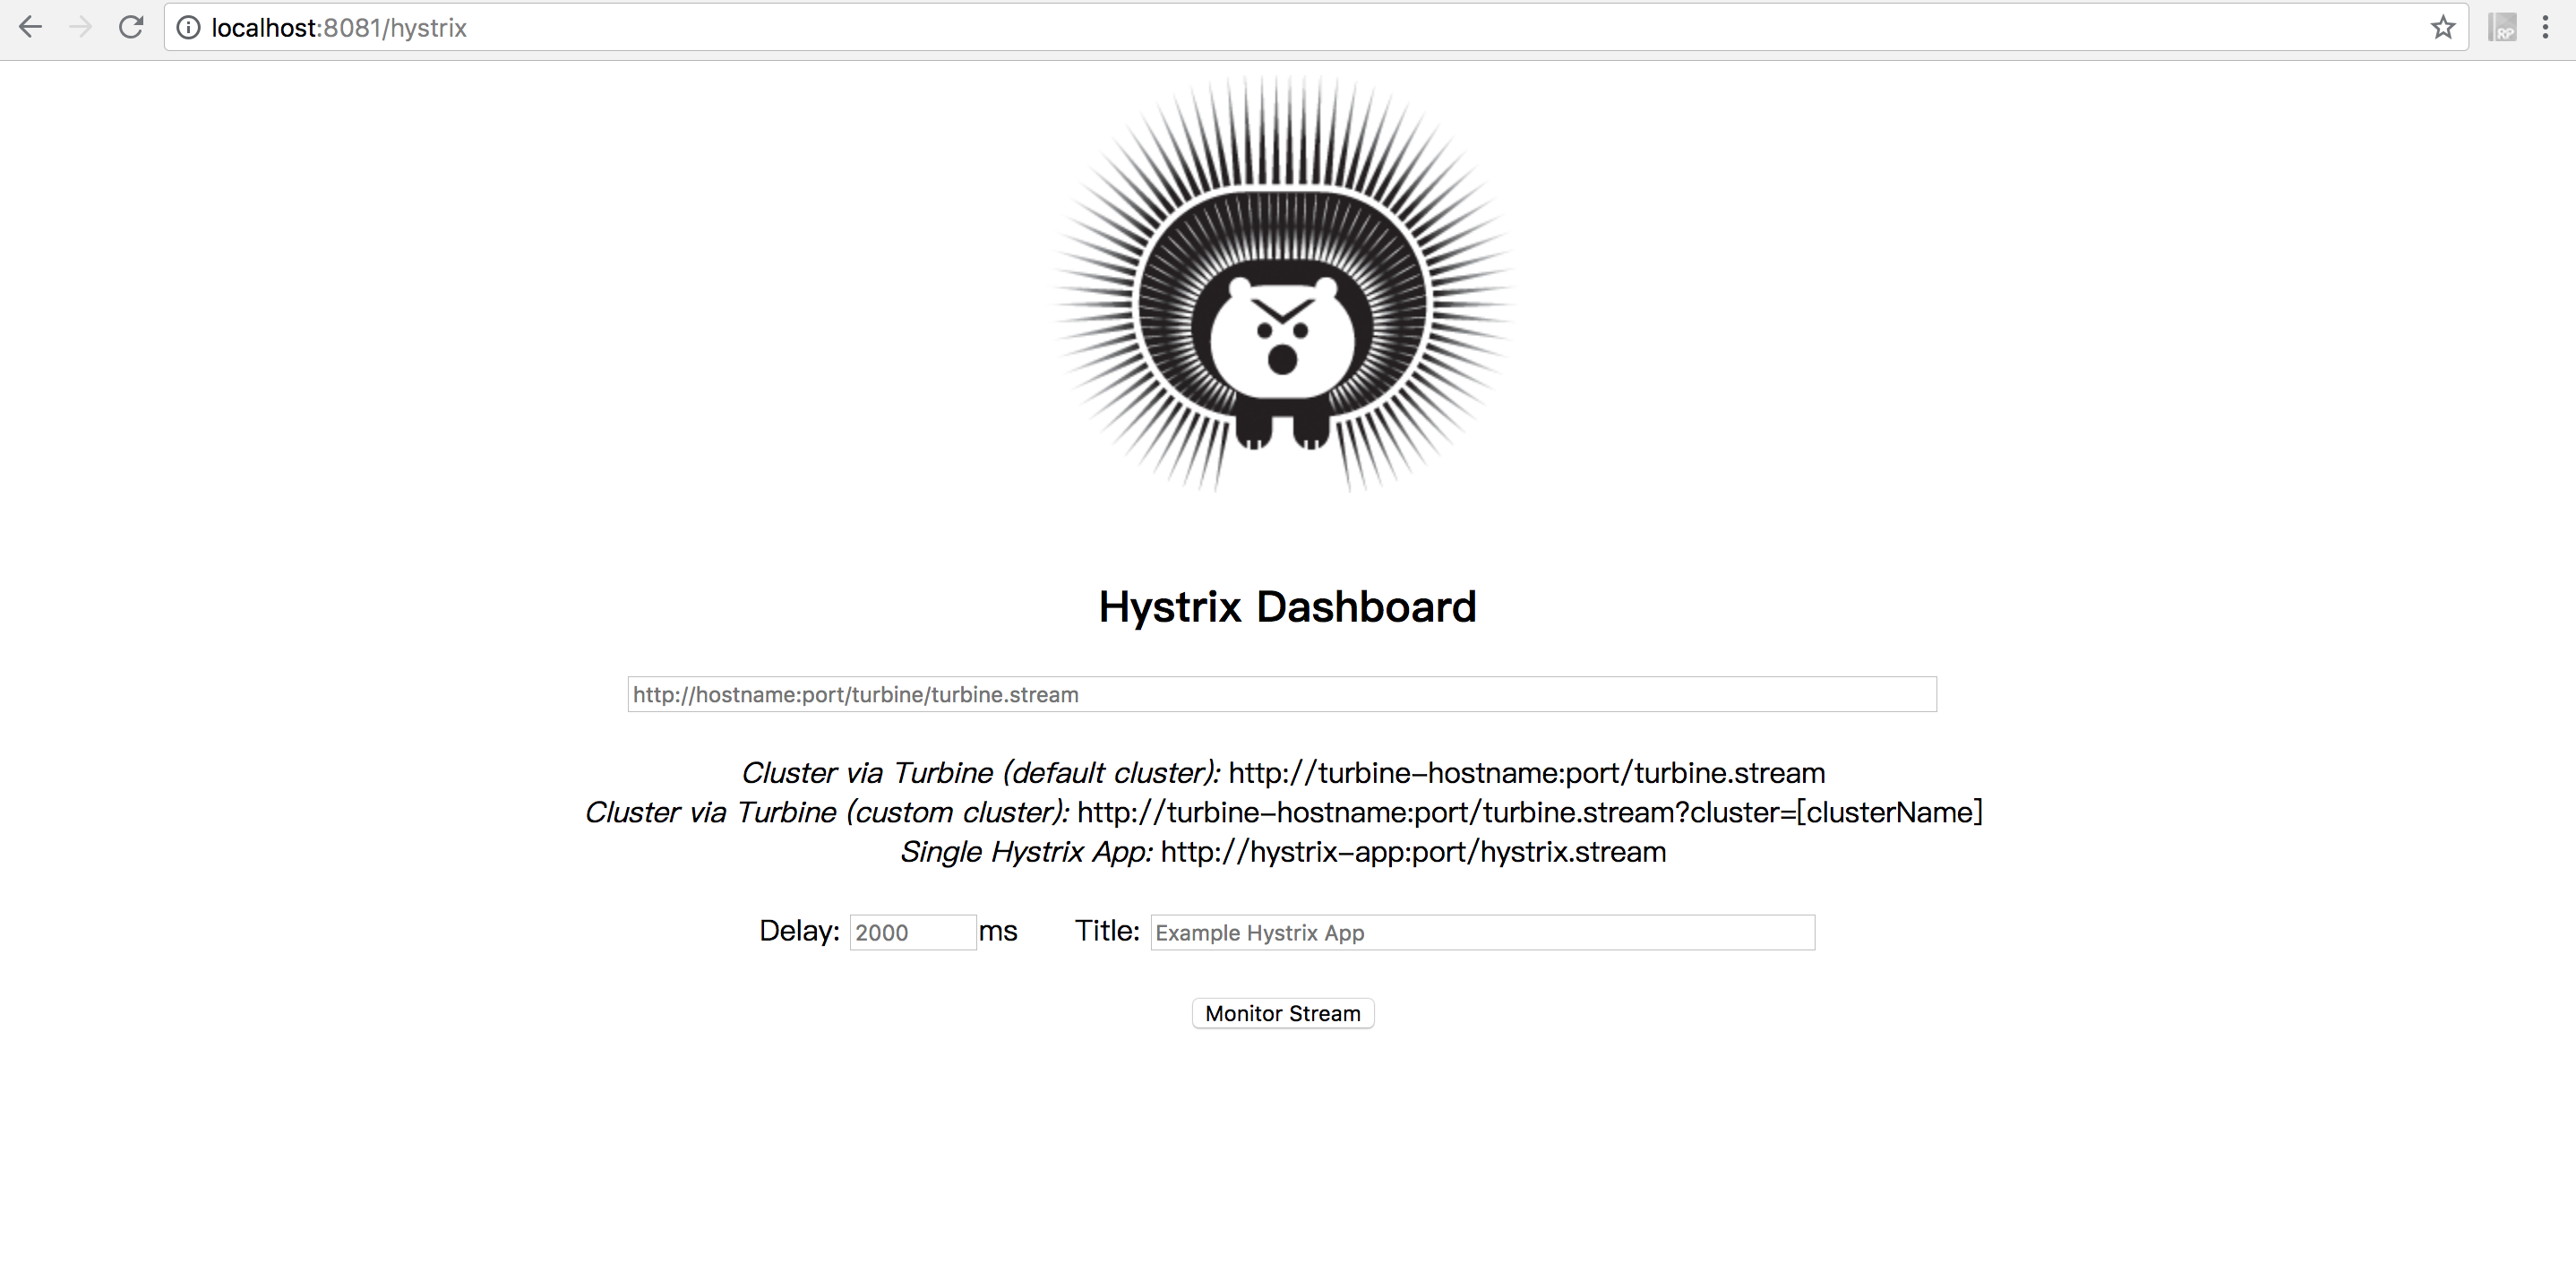
It shows that we have successfully integrated the Hystrix Dashboard.
Persistence layer framework Mybatis
A Web application cannot avoid database operation, so we continue to integrate the database framework. This application adopts the Mybatis framework, and the connection pool uses Alibaba's Druid framework.
First, add dependencies under client:
<dependency>
            <groupId>org.mybatis.spring.boot</groupId>
            <artifactId>mybatis-spring-boot-starter</artifactId>
            <version>1.1.1</version>
        </dependency>
        <dependency>
            <groupId>mysql</groupId>
            <artifactId>mysql-connector-java</artifactId>
            <version>5.1.40</version>
        </dependency>
        <dependency>
            <groupId>com.alibaba</groupId>
            <artifactId>druid-spring-boot-starter</artifactId>
            <version>1.1.10</version>
        </dependency>
Then create the configuration file database. In Git warehouse yml:
spring:
  datasource:
    url: jdbc:mysql://localhost:3306/news_db?useUnicode=true&characterEncoding=UTF-8&useSSL=true
    username: root
    password: ******
    type: com.alibaba.druid.pool.DruidDataSource
    druid:
      initial-size: 5
      max-active: 20
      min-idle: 5
      max-wait: 60000
      pool-prepared-statements: true
      max-pool-prepared-statement-per-connection-size: 100
      max-open-prepared-statements: 20
      validation-query: SELECT 1 FROM DUAL
      validation-query-timeout: 30
      test-on-borrow: false
      test-on-return: false
      test-while-idle: true
      time-between-eviction-runs-millis: 60000
      min-evictable-idle-time-millis: 300000
      filters: stat,wall,log4j
      filter:
        stat:
          log-slow-sql: true
          slow-sql-millis: 2000
      web-stat-filter:
        enable: true
      stat-view-servlet:
        enabled: true
        #druid console username and password
        login-username: druid_admin
        login-password: 123456
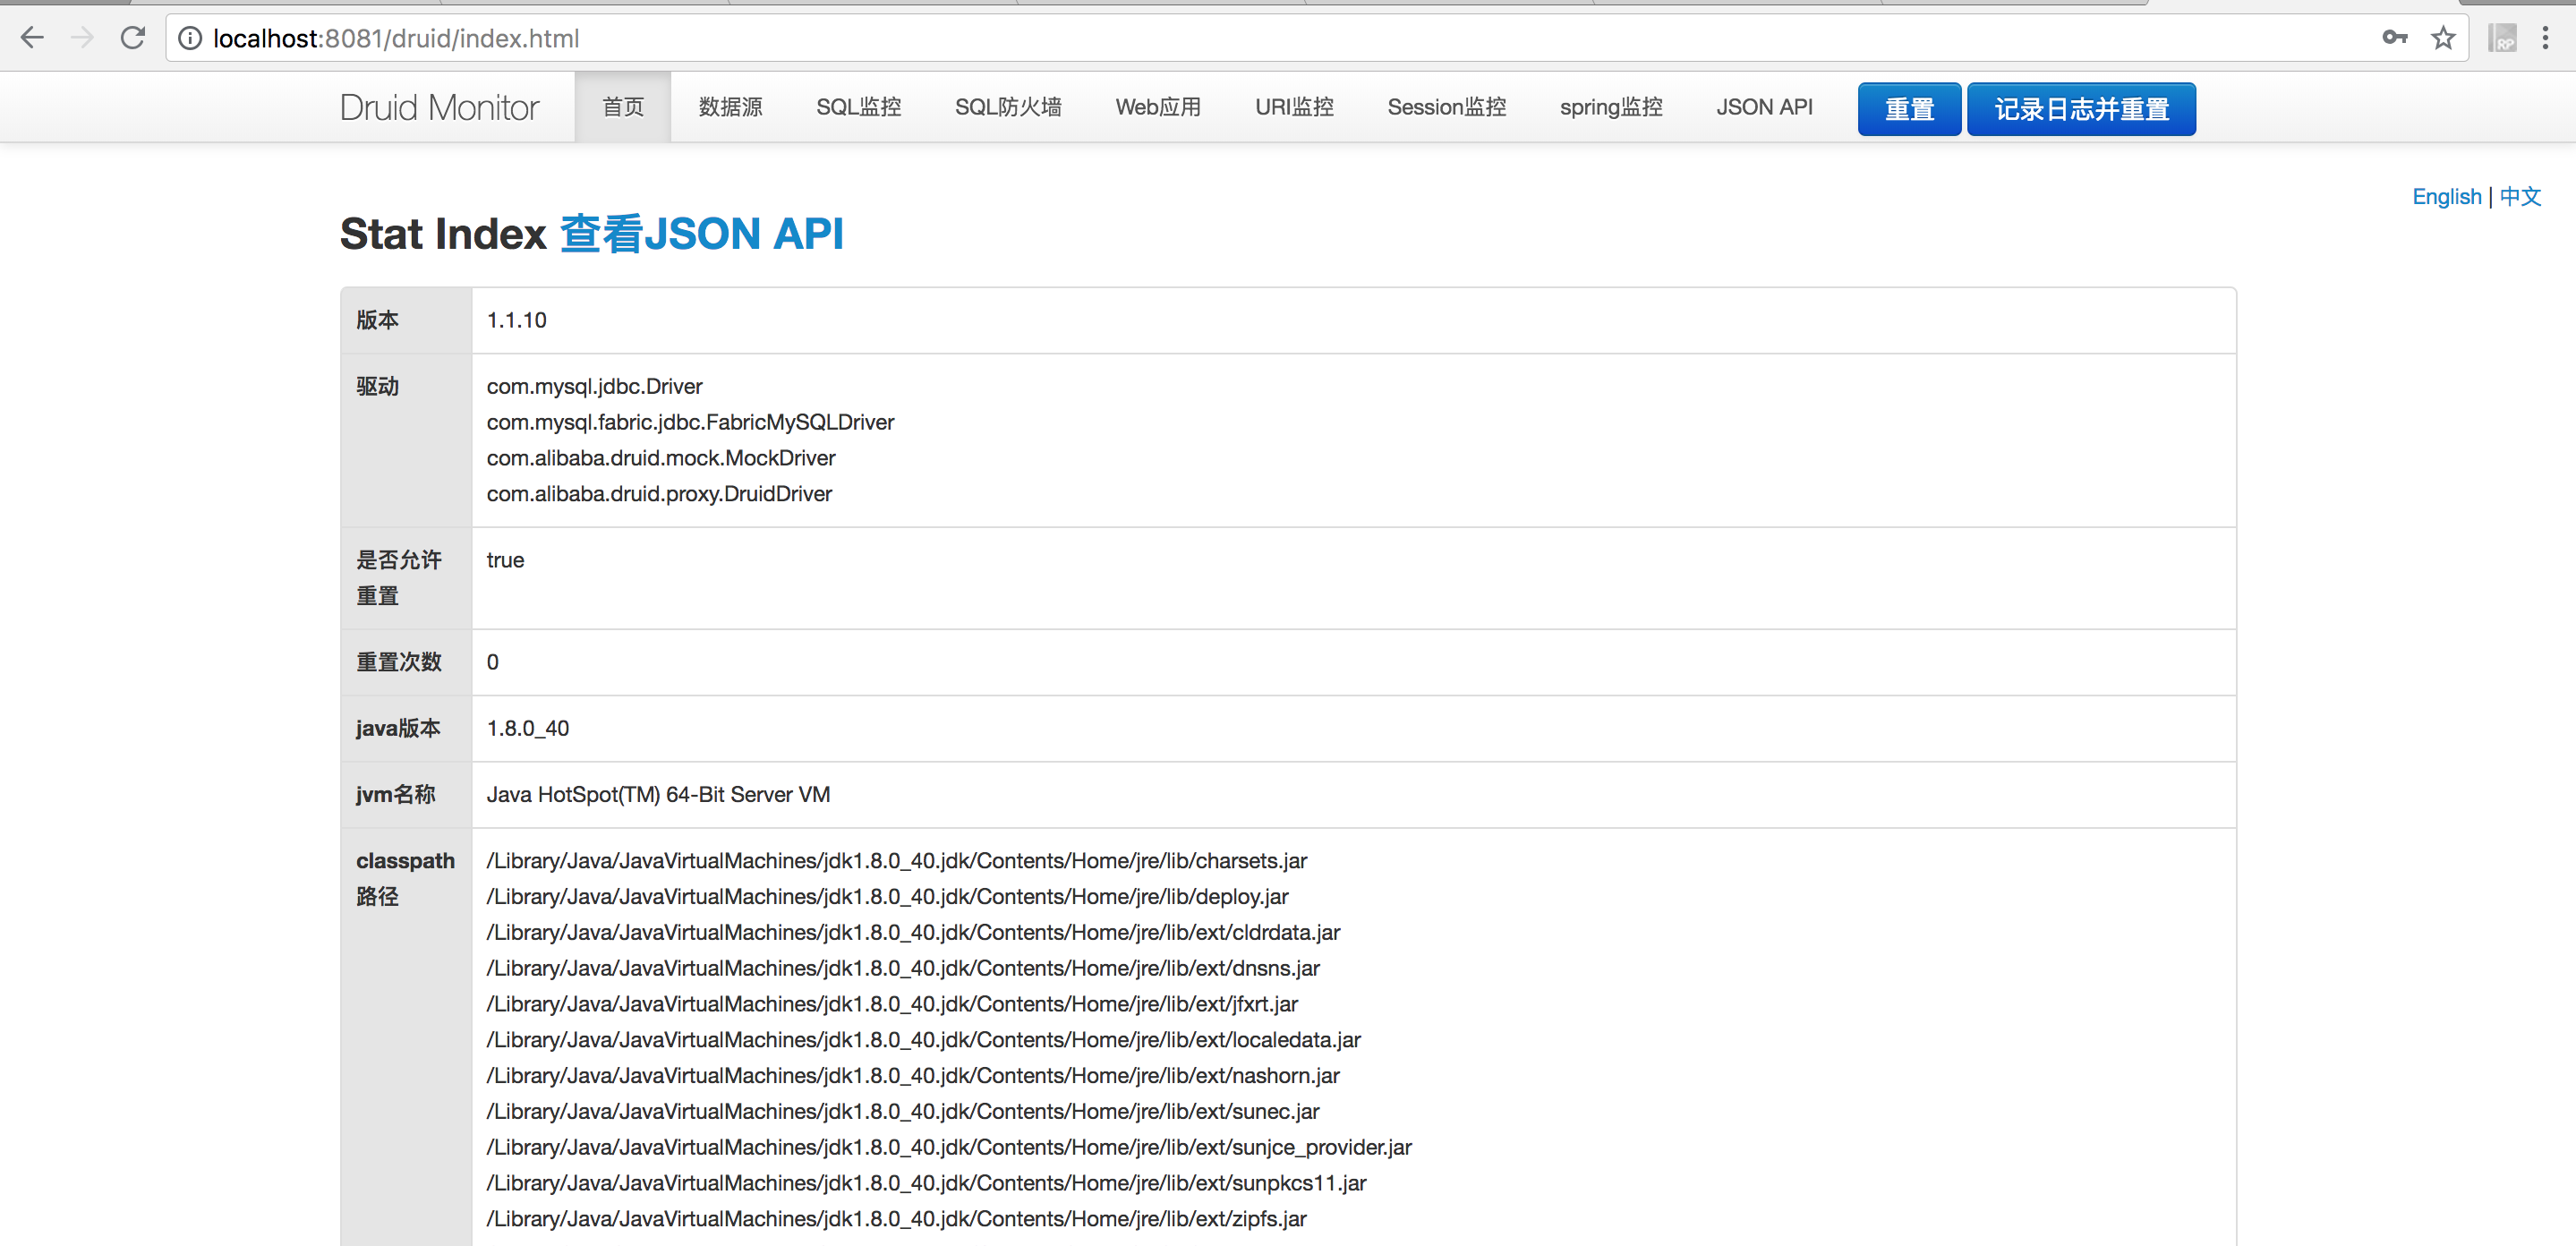
Start register, config and index, and then access: http://localhost:8081/druid , enter the user name and password set in the configuration file to enter the following interface:
Lesson 16: detailed explanation of Spring Cloud instance - basic framework construction (III)
In this paper, we will integrate Redis and implement API authentication mechanism.
Redis integration
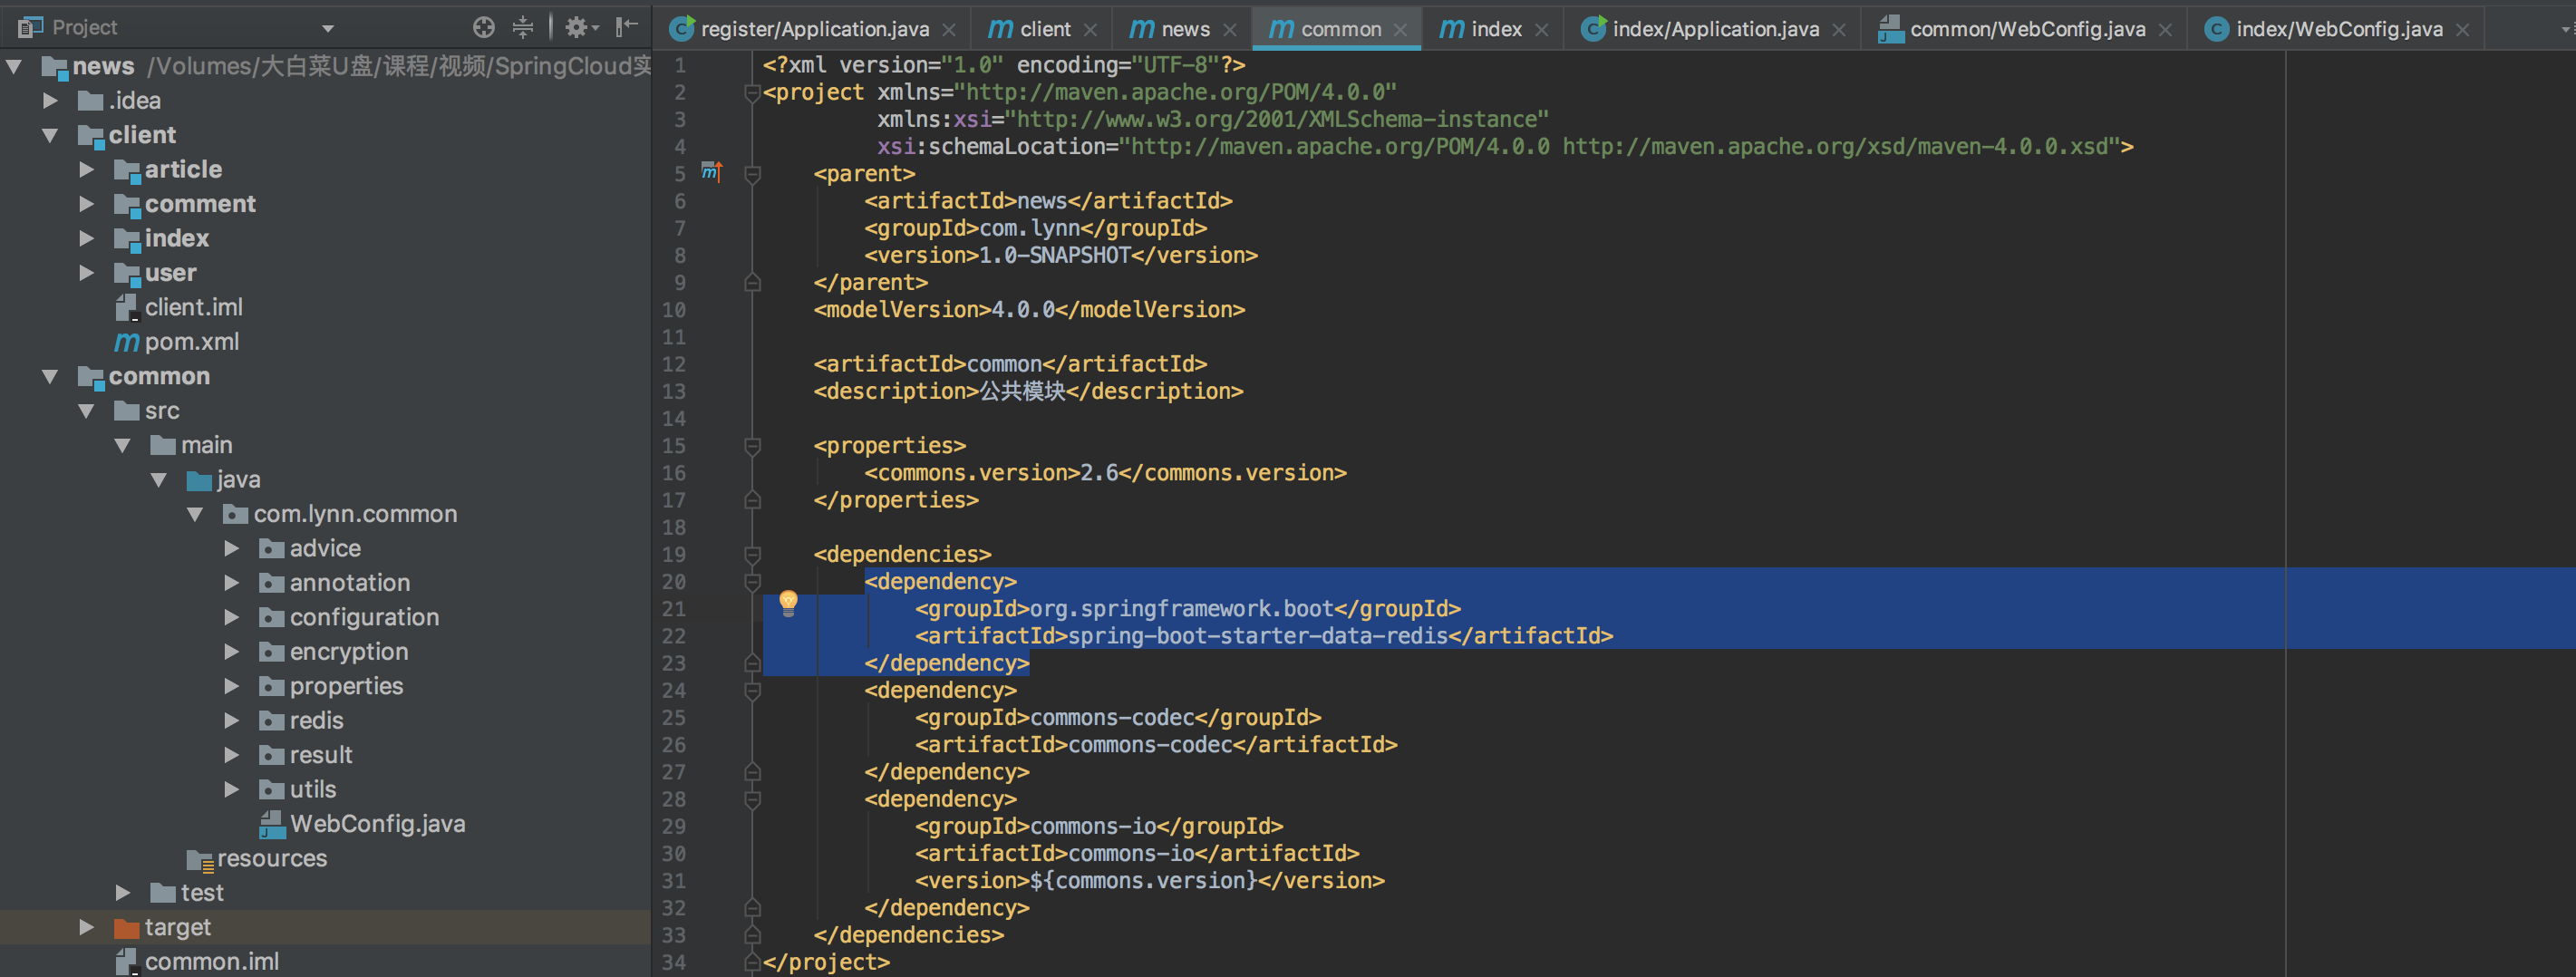
Integrating Redis with Spring Boot is quite simple. You only need to add the following dependencies in pom:
<dependency>
            <groupId>org.springframework.boot</groupId>
            <artifactId>spring-boot-starter-data-redis</artifactId>
        </dependency>
Since Redis may be used in each module, we can consider putting Redis dependencies under the common project:
Then create a class to implement basic Redis operations:
@Component
public class Redis {

    @Autowired
    private StringRedisTemplate template;

    /**
     * expire Is the expiration time in seconds
     *
     * @param key
     * @param value
     * @param expire
     */
    public void set(String key, String value, long expire) {
        template.opsForValue().set(key, value, expire, TimeUnit.SECONDS);
    }

    public void set(String key, String value) {
        template.opsForValue().set(key, value);
    }

    public Object get(String key) {
        return template.opsForValue().get(key);
    }

    public void delete(String key) {
        template.delete(key);
    }
}
If a specific module needs to operate, Redis also needs to configure the connection information of Redis in the configuration file. Here, we create a yaml file Redis in Git warehouse Yaml and add the following:
spring:
  redis:
    host: localhost
    port: 6379
    password:
Finally, you need to operate the bootstrap of Redis project Add the Redis configuration file name to the YML file, as follows:
spring:
  cloud:
    config:
      #Join redis here
      name: user,eureka,feign,database,redis,key
      label: master
      discovery:
        enabled: true
        serviceId: config
eureka:
  client:
    serviceUrl:
      defaultZone: http://localhost:8888/eureka/
In this way, the Redis class is injected where the project wants to operate Redis:
@Autowired
    private Redis redis;
However, an error will be reported when starting the project. The reason is that CommonScan starts scanning from the project root directory by default. The root package name of our project is: com lynn. xxx (where xxx is the project name), and Redis class is on COM lynn. Common, so we need to manually specify the package name to start scanning. We found that both have com Lynn, so specify comm.lynn.
Add the following notes to the Application class of each project:
@SpringBootApplication
@EnableEurekaClient
@EnableFeignClients
@EnableHystrixDashboard
@EnableCircuitBreaker
@ComponentScan(basePackages = "com.lynn")
public class Application {

    public static void main(String[] args) {
        SpringApplication.run(Application.class,args);
    }
}
API authentication
Since the development of the Internet, it has evolved from the traditional front-end unified architecture to today's front-end separated architecture. Most of the initial front-end Web pages are generated by dynamic Web page technologies such as JSP, ASP and PHP. The front-end and back-end are very coupled, which is not conducive to expansion. There are many front-end branches, such as Web front-end, Android end, iOS end, and even the Internet of things. The advantage of separating the front end from the back end is that the back end only needs to implement a set of interfaces, and all front ends can be common.
The transmission of the front and back ends through HTTP also brings some security problems, such as packet capture, simulation request, flood attack, parameter hijacking, web crawler and so on. How to effectively intercept illegal requests and protect the rights and interests of legitimate requests is what this article needs to discuss.
Based on years of experience in Internet back-end development, I have summarized the following ways to improve network security:
- Adopt HTTPS protocol;
- The key is stored in the server rather than the client, and the client should dynamically obtain the key from the server;
- Request the privacy interface and verify its legitimacy by using the Token mechanism;
- Verify the validity of the request parameters;
- Sign and authenticate the request parameters to prevent the parameters from being tampered with;
- Encrypt the input and output parameters, the client encrypts the input parameters, and the server encrypts the output parameters.
Next, the above expansion methods will be described in detail.
HTTP VS HTTPS
The ordinary HTTP protocol is transmitted in clear text, and does not provide any way of data encryption. It is easy to interpret the transmission message. The HTTPS protocol adds the SSL layer based on HTTP, and the SSL layer verifies the identity of the server through the certificate, encrypts the communication between the browser and the server, and protects the data security in the transmission process.
Dynamic key acquisition
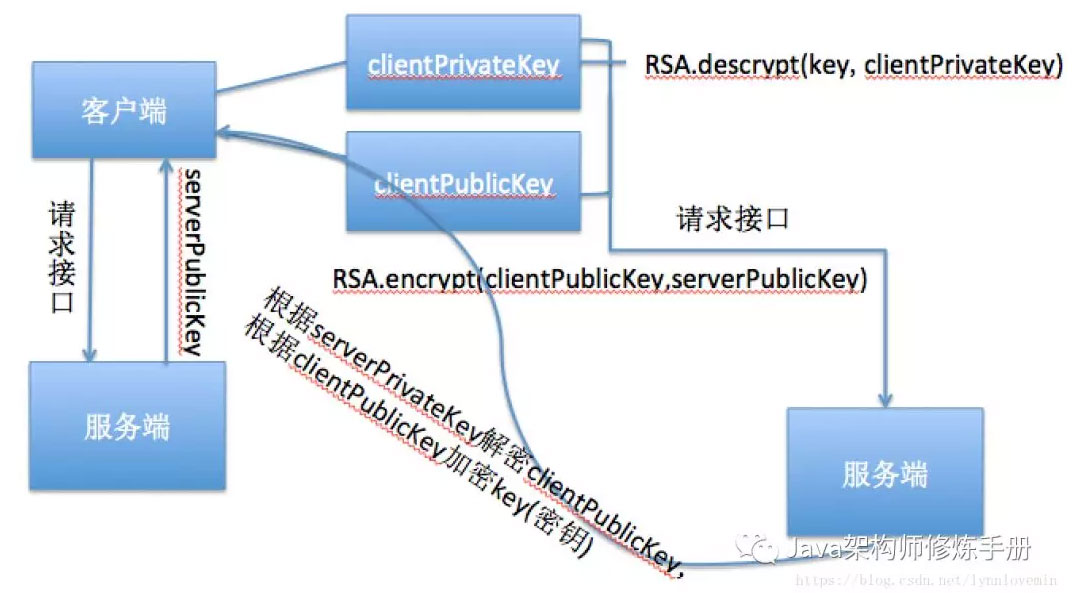
The reversible encryption algorithm needs to be encrypted and decrypted through the key. If it is directly placed on the client, it is easy to get the key after decompilation, which is quite unsafe. Therefore, it is considered to put the key on the server, and the server provides an interface to let the client dynamically obtain the key. The specific methods are as follows:
- The client first generates a set of public-private key pairs (clientPublicKey and clientPrivateKey) of the client through RSA algorithm;
- Call the getRSA interface, and the server will return serverPublicKey;
- After the client gets the serverPublicKey, use serverPublicKey as the public key and clientPublicKey as the plaintext to encrypt the clientPublicKey. Call the getKey interface to transfer the encrypted clientPublicKey to the server. After receiving the request, the server will transfer the encrypted RSA key to the client;
- After the client gets it, it decrypts it with the clientPrivateKey as the private key to get the final key. This process ends.
Note: the data mentioned above cannot be saved to the file, but must be saved to the memory, because only when it is saved to the memory, the hacker can not get these core data. Therefore, before using the obtained key, judge whether the key in the memory exists. If it does not exist, it needs to be obtained.
For ease of understanding, I drew a simple flow chart:
So how to implement it? Please see the following code (similarly, we put these common methods under the common class library).
Global key configuration, so the encryption algorithm uses a unified key
api:
  encrypt:
    key: d7b85c6e414dbcda
The company key information of this configuration is test data and cannot be used directly. Please regenerate the public-private key by yourself.
rsa:
  publicKey: MIGfMA0GCSqGSIb3DQEBAQUAA4GNADCBiQKBgQCcZlkHaSN0fw3CWGgzcuPeOKPdNKHdc2nR6KLXazhhzFhe78NqMrhsyNTf3651acS2lADK3CzASzH4T0bT+GnJ77joDOP+0SqubHKwAIv850lT0QxS+deuUHg2+uHYhdhIw5NCmZ0SkNalw8igP1yS+2TEIYan3lakPBvZISqRswIDAQAB
  privateKey: MIICeAIBADANBgkqhkiG9w0BAQeFAcSCAmIwggJeAgEAAoGBAJxmWQdpI3R/DcJYaDNy4944o900od1zadHootdrOGHMWF7vw2oyuGzI1N/frmxoVLaUAMrcLMBLMfhPRtP4acnvuOgM4/7RKq5scrAAi/znSVPRDFL5165QeDb64diF2EjDk0KZnRKQ1qXDyKA/XJL7ZMQhhqfeVqQ8G9khKpGzAgMBAAECgYEAj+5AkGlZj6Q9bVUez/ozahaF9tSxAbNs9xg4hDbQNHByAyxzkhALWVGZVk3rnyiEjWG3OPlW1cBdxD5w2DIMZ6oeyNPA4nehYrf42duk6AI//vd3GsdJa6Dtf2has1R+0uFrq9MRhfRunAf0w6Z9zNbiPNSd9VzKjjSvcX7OTsECQQD20kekMToC6LZaZPr1p05TLUTzXHvTcCllSeXWLsjVyn0AAME17FJRcL9VXQuSUK7PQ5Lf5+OpjrCRYsIvuZg9AkEAojdC6k3SqGnbtftLfGHMDn1fe0nTJmL05emwXgJvwToUBdytvgbTtqs0MsnuaOxMIMrBtpbhS6JiB5Idb7GArwJAfKTkmP5jFWT/8dZdBgFfhJGv6FakEjrqLMSM1QT7VzvStFWtPNYDHC2b8jfyyAkGvpSZb4ljZxUwBbuh5QgM4QJBAJDrV7+lOP62W9APqdd8M2X6gbPON3JC09EW3jaObLKupTa7eQicZsX5249IMdLQ0A43tanez3XXo0ZqNhwT8wcCQQDUubpNLwgAwN2X7kW1btQtvZW47o9CbCv+zFKJYms5WLrVpotjkrCgPeuloDAjxeHNARX8ZTVDxls6KrjLH3lT
 <dependency>
            <groupId>commons-codec</groupId>
            <artifactId>commons-codec</artifactId>
        </dependency>
        <dependency>
            <groupId>commons-io</groupId>
            <artifactId>commons-io</artifactId>
            <version>2.6</version>
        </dependency>
public class AesEncryptUtils {

    private static final String KEY = "d7585fde114abcda";
    private static final String ALGORITHMSTR = "AES/CBC/NoPadding";    public static String base64Encode(byte[] bytes) {        return Base64.encodeBase64String(bytes);
    }    public static byte[] base64Decode(String base64Code) throws Exception {        return Base64.decodeBase64(base64Code);
    }    public static byte[] aesEncryptToBytes(String content, String encryptKey) throws Exception {
        KeyGenerator kgen = KeyGenerator.getInstance("AES");
        kgen.init(128);
        Cipher cipher = Cipher.getInstance(ALGORITHMSTR);
        cipher.init(Cipher.ENCRYPT_MODE, new SecretKeySpec(encryptKey.getBytes(), "AES"));        return cipher.doFinal(content.getBytes("utf-8"));
    }    public static String aesEncrypt(String content, String encryptKey) throws Exception {        return base64Encode(aesEncryptToBytes(content, encryptKey));
    }    public static String aesDecryptByBytes(byte[] encryptBytes, String decryptKey) throws Exception {
        KeyGenerator kgen = KeyGenerator.getInstance("AES");
        kgen.init(128);
        Cipher cipher = Cipher.getInstance(ALGORITHMSTR);
        cipher.init(Cipher.DECRYPT_MODE, new SecretKeySpec(decryptKey.getBytes(), "AES"));        byte[] decryptBytes = cipher.doFinal(encryptBytes);        return new String(decryptBytes);
    }    public static String aesDecrypt(String encryptStr, String decryptKey) throws Exception {        return aesDecryptByBytes(base64Decode(encryptStr), decryptKey);
    }    public static void main(String[] args) throws Exception {
        String content = "{name:\"lynn\",id:1}";
        System.out.println("Before encryption:" + content);

        String encrypt = aesEncrypt(content, KEY);
        System.out.println(encrypt.length() + ":After encryption:" + encrypt);

        String decrypt = aesDecrypt("H9pGuDMV+iJoS8YSfJ2Vx0NYN7v7YR0tMm1ze5zp0WvNEFXQPM7K0k3IDUbYr5ZIckTkTHcIX5Va/cstIPrYEK3KjfCwtOG19l82u+x6soa9FzAtdL4EW5HAFMmpVJVyG3wz/XUysIRCwvoJ20ruEwk07RB3ojc1Vtns8t4kKZE=", "d7b85f6e214abcda");
        System.out.println("After decryption:" + decrypt);
    }
}public class RSAUtils {

    public static final String CHARSET = "UTF-8";    public static final String RSA_ALGORITHM = "RSA";    public static Map<String, String> createKeys(int keySize){        //Create a KeyPairGenerator object for the RSA algorithm
        KeyPairGenerator kpg;        try{
            kpg = KeyPairGenerator.getInstance(RSA_ALGORITHM);
        }catch(NoSuchAlgorithmException e){            throw new IllegalArgumentException("No such algorithm-->[" + RSA_ALGORITHM + "]");
        }        //Initialize the KeyPairGenerator object and the key length
        kpg.initialize(keySize);        //Generate key pair
        KeyPair keyPair = kpg.generateKeyPair();        //Get public key
        Key publicKey = keyPair.getPublic();
        String publicKeyStr = Base64.encodeBase64String(publicKey.getEncoded());        //Get private key
        Key privateKey = keyPair.getPrivate();
        String privateKeyStr = Base64.encodeBase64String(privateKey.getEncoded());
        Map<String, String> keyPairMap = new HashMap<>(2);
        keyPairMap.put("publicKey", publicKeyStr);
        keyPairMap.put("privateKey", privateKeyStr);        return keyPairMap;
    }    /**
     * Get public key
     * @param publicKey Key string (base64 encoded)
     * @throws Exception
     */
    public static RSAPublicKey getPublicKey(String publicKey) throws NoSuchAlgorithmException, InvalidKeySpecException {        //Obtain the public Key object through the Key instruction encoded by X509
        KeyFactory keyFactory = KeyFactory.getInstance(RSA_ALGORITHM);
        X509EncodedKeySpec x509KeySpec = new X509EncodedKeySpec(Base64.decodeBase64(publicKey));
        RSAPublicKey key = (RSAPublicKey) keyFactory.generatePublic(x509KeySpec);        return key;
    }    /**
     * Get private key
     * @param privateKey Key string (base64 encoded)
     * @throws Exception
     */
    public static RSAPrivateKey getPrivateKey(String privateKey) throws NoSuchAlgorithmException, InvalidKeySpecException {        //Obtain the private Key object through the PKCS#8 encoded Key instruction
        KeyFactory keyFactory = KeyFactory.getInstance(RSA_ALGORITHM);
        PKCS8EncodedKeySpec pkcs8KeySpec = new PKCS8EncodedKeySpec(Base64.decodeBase64(privateKey));
        RSAPrivateKey key = (RSAPrivateKey) keyFactory.generatePrivate(pkcs8KeySpec);        return key;
    }    /**
     * Public key encryption
     * @param data
     * @param publicKey
     * @return
     */
    public static String publicEncrypt(String data, RSAPublicKey publicKey){        try{
            Cipher cipher = Cipher.getInstance(RSA_ALGORITHM);
            cipher.init(Cipher.ENCRYPT_MODE, publicKey);            return Base64.encodeBase64String(rsaSplitCodec(cipher, Cipher.ENCRYPT_MODE, data.getBytes(CHARSET), publicKey.getModulus().bitLength()));
        }catch(Exception e){            throw new RuntimeException("Encrypted string[" + data + "]Exception encountered while", e);
        }
    }    /**
     * Private key decryption
     * @param data
     * @param privateKey
     * @return
     */

    public static String privateDecrypt(String data, RSAPrivateKey privateKey){        try{
            Cipher cipher = Cipher.getInstance(RSA_ALGORITHM);
            cipher.init(Cipher.DECRYPT_MODE, privateKey);            return new String(rsaSplitCodec(cipher, Cipher.DECRYPT_MODE, Base64.decodeBase64(data), privateKey.getModulus().bitLength()), CHARSET);
        }catch(Exception e){            throw new RuntimeException("Decrypt string[" + data + "]Exception encountered while", e);
        }
    }    /**
     * Private key encryption
     * @param data
     * @param privateKey
     * @return
     */

    public static String privateEncrypt(String data, RSAPrivateKey privateKey){        try{
            Cipher cipher = Cipher.getInstance(RSA_ALGORITHM);
            cipher.init(Cipher.ENCRYPT_MODE, privateKey);            return Base64.encodeBase64String(rsaSplitCodec(cipher, Cipher.ENCRYPT_MODE, data.getBytes(CHARSET), privateKey.getModulus().bitLength()));
        }catch(Exception e){            throw new RuntimeException("Encrypted string[" + data + "]Exception encountered while", e);
        }
    }    /**
     * Public key decryption
     * @param data
     * @param publicKey
     * @return
     */

    public static String publicDecrypt(String data, RSAPublicKey publicKey){        try{
            Cipher cipher = Cipher.getInstance(RSA_ALGORITHM);
            cipher.init(Cipher.DECRYPT_MODE, publicKey);            return new String(rsaSplitCodec(cipher, Cipher.DECRYPT_MODE, Base64.decodeBase64(data), publicKey.getModulus().bitLength()), CHARSET);
        }catch(Exception e){            throw new RuntimeException("Decrypt string[" + data + "]Exception encountered while", e);
        }
    }    private static byte[] rsaSplitCodec(Cipher cipher, int opmode, byte[] datas, int keySize){        int maxBlock = 0;        if(opmode == Cipher.DECRYPT_MODE){
            maxBlock = keySize / 8;
        }else{
            maxBlock = keySize / 8 - 11;
        }
        ByteArrayOutputStream out = new ByteArrayOutputStream();        int offSet = 0;        byte[] buff;        int i = 0;        try{            while(datas.length > offSet){                if(datas.length-offSet > maxBlock){
                    buff = cipher.doFinal(datas, offSet, maxBlock);
                }else{
                    buff = cipher.doFinal(datas, offSet, datas.length-offSet);
                }
                out.write(buff, 0, buff.length);
                i++;
                offSet = i * maxBlock;
            }
        }catch(Exception e){            throw new RuntimeException("The encryption and decryption threshold is["+maxBlock+"]An exception occurred while retrieving data for", e);
        }        byte[] resultDatas = out.toByteArray();
        IOUtils.closeQuietly(out);        return resultDatas;
    }    public static void main(String[] args) throws Exception{
        Map<String, String> keyMap = RSAUtils.createKeys(1024);
        String  publicKey = keyMap.get("publicKey");
        String  privateKey = "MIICeAIBADANBgkqhkiG9w0BAQEFAASCAmIwggJeAgEAAoGBAJxmWQdpI3R/DcJYaDNy4944o900od1zadHootdrOGHMWF7vw2oyuGzI1N/frmxoVLaUAMrcLMBLMfhPRtP4acnvuOgM4/7RKq5scrAAi/znSVPRDFL5165QeDb64diF2EjDk0KZnRKQ1qXDyKA/XJL7ZMQhhqfeVqQ8G9khKpGzAgMBAAECgYEAj+5AkGlZj6Q9bVUez/ozahaF9tSxAbNs9xg4hDbQNHByAyxzkhALWVGZVk3rnyiEjWG3OPlW1cBdxD5w2DIMZ6oeyNPA4nehYrf42duk6AI//vd3GsdJa6Dtf2has1R+0uFrq9MRhfRunAf0w6Z9zNbiPNSd9VzKjjSvcX7OTsECQQD20kekMToC6LZaZPr1p05TLUTzXHvTcCllSeXWLsjVyn0AAME17FJRcL9VXQuSUK7PQ5Lf5+OpjrCRYsIvuZg9AkEAojdC6k3SqGnbtftLfGHMDn1fe0nTJmL05emwXgJvwToUBdytvgbTtqs0MsnuaOxMIMrBtpbhS6JiB5Idb7GArwJAfKTkmP5jFWT/8dZdBgFfhJGv6FYkEjrqLMSM1QT7VzvStFWtPNYDHC2b8jfyyAkGvpSZb4ljZxUwBbuh5QgM4QJBAJDrV7+lOP62W9APqdd8M2X6gbPON3JC09EW3jaObLKupTa7eQicZsX5249IMdLQ0A43tanez3XXo0ZqNhwT8wcCQQDUubpNLwgAwN2X7kW1btQtvZW47o9CbCv+zFKJYms5WLrVpotjkrCgPeuloDAjxeHNARX8ZTVDxls6KrjLH3lT";
        System.out.println("Public key: \n\r" + publicKey);
        System.out.println("Private key: \n\r" + privateKey);

        System.out.println("Public key encryption - private key decryption");
        String str = "The forbidden guards standing in front of the Daming gate didn't receive it in advance\n" +                "Relevant orders, but seeing a large number of well-dressed officials coming, it was too late\n" +                "I thought it was really a grand ceremony, so I didn't ask. Enter the Daming gate\n" +                "It is the imperial city. The civil and military officials saw that the atmosphere was calm before the Duanmen Meridian Gate,\n" +                "There was no sign of court meeting up and down the city tower. There were few cases. Stand in line and roll call\n" +                "The "Great Han General", the imperial censor and the former Imperial Guard, also disappeared\n" +                "They speculated and asked each other: is the so-called afternoon Dynasty falsely spread?";
        System.out.println("\r Plaintext:\r\n" + str);
        System.out.println("\r Plaintext size:\r\n" + str.getBytes().length);
        String encodedData = RSAUtils.publicEncrypt(str, RSAUtils.getPublicKey(publicKey));
        System.out.println("Ciphertext:\r\n" + encodedData);
        String decodedData = RSAUtils.privateDecrypt("X4hHPa9NjPd5QJGPus+4+hWmOzbWg7oCJ1+Vc+7dHW81nEhkYnJpFyV5xcDkg70N2Mym+YAJ1PvYY9sQWf9/EkUE61TpUKBmDaGWLjEr3A1f9cKIelqLKLsJGdXEOr7Z55k4vYFvA7N3Vf5KQo3NrouvIT4wR+SjH4tDQ8tNh3JH8BvXLtXqGa2TCK2z1AzHNgYzcLCrqDasd7UDHRPZPiW4thktM/whjBn0tU9B/kKjAjLuYttKLEmy5nT7v7u16aZ6ehkk+kzvuCXF%2B3RsqraISDPbsTki2agJyqsycRx3w7CvKRyUbZhFaNcWigOwmcbZVoiom+ldh7Vh6HYqDA==", RSAUtils.getPrivateKey(privateKey));
        System.out.println("Decrypted text: \r\n" + decodedData);

    }
}/**
 * Private key input parameter (actually the public key generated by the client after the client encrypts the public key returned by the server)
 */public class KeyRequest {

    /**
     * Encrypted public key generated by the client
     */
    @NotNull
    private String clientEncryptPublicKey;    public String getClientEncryptPublicKey() {        return clientEncryptPublicKey;
    }    public void setClientEncryptPublicKey(String clientEncryptPublicKey) {        this.clientEncryptPublicKey = clientEncryptPublicKey;
    }
}/**
 * RSA Generated public-private key output parameters
 */public class RSAResponse extends BaseResponse{

    private String serverPublicKey;    private String serverPrivateKey;    public static class Builder{
        private String serverPublicKey;        private String serverPrivateKey;        public Builder setServerPublicKey(String serverPublicKey){            this.serverPublicKey = serverPublicKey;            return this;
        }        public Builder setServerPrivateKey(String serverPrivateKey){            this.serverPrivateKey = serverPrivateKey;            return this;
        }        public RSAResponse build(){            return new RSAResponse(this);
        }

    }    public static Builder options(){        return new Builder();
    }    public RSAResponse(Builder builder){        this.serverPrivateKey = builder.serverPrivateKey;        this.serverPublicKey = builder.serverPublicKey;
    }    public String getServerPrivateKey() {        return serverPrivateKey;
    }    public String getServerPublicKey() {        return serverPublicKey;
    }
}/**
 * Private key output parameters
 */public class KeyResponse extends BaseResponse{

    /**
     * The key shared by all encryption algorithms of the whole system
     */
    private String key;    public static class Builder{
        private String key;        public Builder setKey(String key){            this.key = key;            return this;
        }        public KeyResponse build(){            return new KeyResponse(this);
        }
    }    public static Builder options(){        return new Builder();
    }    private KeyResponse(Builder builder){        this.key = builder.key;
    }    public String getKey() {        return key;
    }

}/**
 * API Transmission encryption and decryption related interfaces
 */public interface EncryptOpenService {

    /**
     * Generate RSA public private key
     * @return
     */
    SingleResult<RSAResponse> getRSA();    /**
     * Obtain the key for encryption and decryption
     * @param request
     * @return
     */
    SingleResult<KeyResponse> getKey(KeyRequest request) throws Exception;
}
@Servicepublic class EncryptOpenServiceImpl implements EncryptOpenService{

    @Value("${rsa.publicKey}")    private String publicKey;    @Value("${rsa.privateKey}")    private String privateKey;    @Value("${api.encrypt.key}")    private String key;    @Override
    public SingleResult<RSAResponse> getRSA() {
        RSAResponse response = RSAResponse.options()
                .setServerPublicKey(publicKey)
                .build();        return SingleResult.buildSuccess(response);
    }    @Override
    public SingleResult<KeyResponse> getKey(KeyRequest request)throws Exception {
        String clientPublicKey = RSAUtils.privateDecrypt(request.getClientEncryptPublicKey(), RSAUtils.getPrivateKey(privateKey));
        String encryptKey = RSAUtils.publicEncrypt(key,RSAUtils.getPublicKey(clientPublicKey));
        KeyResponse response = KeyResponse.options()
                .setKey(encryptKey)
                .build();        return SingleResult.buildSuccess(response);
    }
}
@RestController
@RequestMapping("open/encrypt")
public class EncryptController {

    @Autowired
    private EncryptOpenService encryptOpenService;
    @RequestMapping(value = "getRSA",method = RequestMethod.POST)    //@DisabledEncrypt
    public SingleResult<RSAResponse> getRSA(){
        return encryptOpenService.getRSA();
    }
    @RequestMapping(value = "getKey",method = RequestMethod.POST)    //@DisabledEncrypt
    public SingleResult<KeyResponse> getKey(@Valid @RequestBody KeyRequest request)throws Exception{
        return encryptOpenService.getKey(request);
    }
}
Validity verification of interface request
For some private interfaces (i.e. those that must be logged in to be called), we need to verify their legitimacy, that is, only logged in users can call them successfully. The specific ideas are as follows:
- After calling the login or registration interface successfully, the server will return Token (set a shorter effective time) and refreshToken (set a longer effective time);
- Every time the privacy interface requests the interface, it carries a Token on the request header, such as the header("Token", token). If the server returns 403 error, it calls the refreshToken interface to obtain a new Token and call the interface again. If the refreshToken interface continues to return 403, it jumps to the login interface.
This algorithm is relatively simple, so there is no specific implementation here.
Validation of input parameters
Generally, the client will verify the validity of parameters. This is only to reduce the pressure on the server. For the verification done by ordinary users, if hackers call the interface address directly, they can bypass the verification of the client. At this time, it is required that our server should also do the same verification.
Spring MVC provides special annotations for verification. We can realize unified parameter verification through AOP. Please see the code below:
<dependency>
            <groupId>org.springframework.boot</groupId>
            <artifactId>spring-boot-starter-aop</artifactId>
        </dependency>
@Aspect
@Component
public class WebExceptionAspect {

    private static final Logger logger = LoggerFactory.getLogger(WebExceptionAspect.class);    //All methods annotated with RequestMapping are blocked
    @Pointcut("@annotation(org.springframework.web.bind.annotation.RequestMapping)")    private void webPointcut() {
    }    /**
     * Intercept web layer exceptions, record Exception logs, and return friendly information to the front end. At present, only exceptions are intercepted. Whether to intercept errors needs to be considered again
     *
     * @param e
     *            Exception object
     */
    @AfterThrowing(pointcut = "webPointcut()", throwing = "e")    public void handleThrowing(Exception e) {
        e.printStackTrace();
        logger.error("Exception found!" + e.getMessage());
        logger.error(JSON.toJSONString(e.getStackTrace()));        try {            if(StringUtils.isEmpty(e.getMessage())){
                writeContent(JSON.toJSONString(SingleResult.buildFailure()));
            }else {
                writeContent(JSON.toJSONString(SingleResult.buildFailure(Code.ERROR,e.getMessage())));
            }
        }catch (Exception ex){
            ex.printStackTrace();
        }
    }    /**
     * Output content to browser
     *
     * @param content
     *            Output content
     */
    private void writeContent(String content)throws Exception {
        HttpServletResponse response = ((ServletRequestAttributes) RequestContextHolder.getRequestAttributes())
                .getResponse();
        response.reset();
        response.setCharacterEncoding("UTF-8");
        response.setHeader("Content-Type", "text/plain;charset=UTF-8");
        response.setHeader("icop-content-type", "exception");
        response.getWriter().print(content);
        response.getWriter().close();
    }
}
stay controller Provide common methods:

protected void validate(BindingResult result){
        if(result.hasFieldErrors()){
            List<FieldError> errorList = result.getFieldErrors();
            errorList.stream().forEach(item -> Assert.isTrue(false,item.getDefaultMessage()));
        }
    }
The input parameters of each interface need to be annotated with @ Valid, and the BindResult class is added after the parameters:
@RequestMapping(value = "/hello",method = RequestMethod.POST)
public SingleResult<String> hello(@Valid @RequestBody TestRequest request, BindingResult result){
        validate(result);        r
        eturn "name="+name;

public class TestRequest{

    @NotNull(message = "name Cannot be empty")    private String name;    public String getName() {        return name;
    }    public void setName(String name) {        this.name = name;
    }
}
Input parameter signature authentication
The interface we requested is transmitted through HTTP/HTTPS. Once the parameters are intercepted, they are likely to be tampered with by hackers and returned to the server. In order to prevent this, we need to sign and authenticate the parameters to ensure the legitimacy of the returned parameters. The specific ideas are as follows.
Before requesting the interface, the token, Timstamp and the parameters required by the interface are arranged in ascending ASCII order and spliced into url = key1 = value1 & key2 = Value2, such as name = XXX & timestamp = XXX & token = XXX. MD5 (url+salt) is performed to obtain the Signature. The token, Signature and timestamp are placed in the request header and passed to the server, such as header ("token", token) header(“timestamp”,timestamp),header(“Signature”,signature).
Note: salt is the key obtained dynamically.
See the specific implementation below, which should be handled uniformly in the Interceptor:
public class ApiInterceptor implements HandlerInterceptor {

    private static final Logger logger = LoggerFactory.getLogger(ApiInterceptor.class);    private String salt="ed4ffcd453efab32";    @Override
    public boolean preHandle(HttpServletRequest request, HttpServletResponse response, Object o) throws Exception {
        logger.info("Entry interceptor");
        request.setCharacterEncoding("UTF-8");
        response.setCharacterEncoding("UTF-8");
        response.setHeader("Content-Type", "application/json;charset=utf8");
        StringBuilder urlBuilder = getUrlAuthenticationApi(request);        //Here is the MD5 encryption algorithm
        String sign = MD5(urlBuilder.toString() + salt);
        String signature = request.getHeader("signature");
        logger.info("Signature passed in before encryption" + signature);
        logger.info("Signature after backend encryption" + sign);        if(sign.equals(signature)){            return true;
        }else {            //Signature error
          response.getWriter().print("Signature error");
            response.getWriter().close();            return false;
        }
    }    private StringBuilder getUrlAuthenticationApi(HttpServletRequest request) {
        Enumeration<String> paramesNames = request.getParameterNames();
        List<String> nameList = new ArrayList<>();
        nameList.add("token");
        nameList.add("timestamp");        while (paramesNames.hasMoreElements()){
            nameList.add(paramesNames.nextElement());
        }
        StringBuilder urlBuilder = new StringBuilder();
        nameList.stream().sorted().forEach(name -> {            if ("token".equals(name) || "timestamp".equals(name)){                if("token".equals(name) && null ==request.getHeader(name)){                    return;
                }
                urlBuilder.append('&');
                urlBuilder.append(name).append('=').append(request.getHeader(name));
            }            else {
                urlBuilder.append('&');
                urlBuilder.append(name).append('=').append(request.getParameter(name));
            }
        });
        urlBuilder.deleteCharAt(0);
        logger.info("url : " + urlBuilder.toString());        return urlBuilder;
    }    @Override
    public void postHandle(HttpServletRequest httpServletRequest, HttpServletResponse httpServletResponse, Object o, ModelAndView modelAndView) throws Exception {

    }    @Override
    public void afterCompletion(HttpServletRequest httpServletRequest, HttpServletResponse httpServletResponse, Object o, Exception e) throws Exception {

    }
}
Input / output parameter encryption
In order to protect data, such as anti crawler, the input and output parameters need to be encrypted. The client encrypts the input parameters and sends them back to the server, which decrypts the input parameters and executes the request; When the server returns the data, it encrypts it. After the client gets the data, it decrypts the data and obtains the final data. In this way, even if others know the parameter address, they cannot simulate the request data.
So far, the basic framework has been built. In the next chapter, we will start to realize the specific requirements.
Lesson 17: detailed explanation of Spring Cloud instance - business code implementation
At the beginning of this article, we will implement specific business. Due to the length problem, this article will post some example codes, and the rest will provide general ideas.
Common module
Our interfaces will be placed under different projects, in which there will be public code. Here, we consider abstracting the public code and placing it under the common module.
Bean
The interfaces we provide are divided into input parameters (request) and output parameters (response). The input parameters are passed in when the client requests, and the output parameters are the data returned by the back-end interface. When defining the interface, we'd better put the input parameters and output parameters under the request and response packages, and abstract the Base class under the defined Bean, as shown in the following code:
package com.lynn.common.model;

public abstract class BaseModel {

    private Long id;

    public Long getId() {
        return id;
    }

    public void setId(Long id) {
        this.id = id;
    }
}
package com.lynn.common.model.response;

import com.lynn.common.model.BaseModel;

public abstract class BaseResponse extends BaseModel{

}
package com.lynn.common.model.request;

public abstract class BaseRequest {
}
Service and Controller
Similarly, we can define BaseService and BaseController to implement public methods in BaseService:
package com.lynn.common.service;

import com.lynn.common.encryption.Algorithm;
import com.lynn.common.encryption.MessageDigestUtils;

public abstract class BaseService {

    /**
     * Cipher encryption algorithm
     * @param password
     * @return
     */
    protected String encryptPassword(String password){
        return MessageDigestUtils.encrypt(password, Algorithm.SHA1);
    }

    /**
     * Generate a Token for API authentication
     * @param mobile
     * @param password
     * @return
     */
    protected String getToken(String mobile,String password){
        return MessageDigestUtils.encrypt(mobile+password, Algorithm.SHA1);
    }
}
We can also write public methods in BaseController:
package com.lynn.common.controller;

import org.springframework.util.Assert;
import org.springframework.validation.BindingResult;
import org.springframework.validation.FieldError;

import java.util.List;

public abstract class BaseController {

    /**
     * Validity verification of interface input parameters
     *
     * @param result
     */
    protected void validate(BindingResult result){
        if(result.hasFieldErrors()){
            List<FieldError> errorList = result.getFieldErrors();
            errorList.stream().forEach(item -> Assert.isTrue(false,item.getDefaultMessage()));
        }
    }
}
Next, we can realize the specific business.
User module
According to the prototype design provided in lesson 14, we can analyze that the user module has the following interfaces:
- Sign in
- register
- Get user comments
Next, let's implement the specific business (taking login as an example). First, Bean:
package com.lynn.user.model.bean;

import com.lynn.common.model.BaseModel;

public class UserBean extends BaseModel{

    private String mobile;

    private String password;

    public String getMobile() {
        return mobile;
    }

    public void setMobile(String mobile) {
        this.mobile = mobile;
    }

    public String getPassword() {
        return password;
    }

    public void setPassword(String password) {
        this.password = password;
    }
}
package com.lynn.user.model.request;

import org.hibernate.validator.constraints.NotEmpty;

public class LoginRequest {

    @NotEmpty
    private String mobile;

    @NotEmpty
    private String password;

    public String getMobile() {
        return mobile;
    }

    public void setMobile(String mobile) {
        this.mobile = mobile;
    }

    public String getPassword() {
        return password;
    }

    public void setPassword(String password) {
        this.password = password;
    }
}
The second is Mapper (the framework adopts the annotation method of Mybatis):
package com.lynn.user.mapper;

import com.lynn.user.model.bean.UserBean;
import org.apache.ibatis.annotations.Mapper;
import org.apache.ibatis.annotations.Select;

import java.util.List;

@Mapper
public interface UserMapper {

    @Select("select id,mobile,password from news_user where mobile = #{mobile} and password = #{password}")
    List<UserBean> selectUser(String mobile,String password);
}
Then Service (specific business implementation):
package com.lynn.user.service;

import com.lynn.common.result.Code;
import com.lynn.common.result.SingleResult;
import com.lynn.common.service.BaseService;
import com.lynn.user.mapper.UserMapper;
import com.lynn.user.model.bean.UserBean;
import com.lynn.user.model.request.LoginRequest;
import com.lynn.user.model.response.TokenResponse;
import org.springframework.beans.factory.annotation.Autowired;
import org.springframework.stereotype.Service;
import org.springframework.transaction.annotation.Transactional;

import java.util.List;

@Transactional(rollbackFor = Exception.class)
@Service
public class UserService extends BaseService{

    @Autowired
    private UserMapper userMapper;

    public SingleResult<TokenResponse> login(LoginRequest request){
        List<UserBean> userList = userMapper.selectUser(request.getMobile(),request.getPassword());
        if(null != userList && userList.size() > 0){
            String token = getToken(request.getMobile(),request.getPassword());
            TokenResponse response = new TokenResponse();
            response.setToken(token);
            return SingleResult.buildSuccess(response);
        }else {
            return SingleResult.buildFailure(Code.ERROR,"Incorrect mobile phone number or password!");
        }
    }
The interface we write should be provided to the client for calling, so finally, we need to add a Controller:
package com.lynn.user.controller;

import com.lynn.common.controller.BaseController;
import com.lynn.common.result.SingleResult;
import com.lynn.user.model.request.LoginRequest;
import com.lynn.user.model.response.TokenResponse;
import com.lynn.user.service.UserService;
import org.springframework.beans.factory.annotation.Autowired;
import org.springframework.validation.BindingResult;
import org.springframework.web.bind.annotation.RequestBody;
import org.springframework.web.bind.annotation.RequestMapping;
import org.springframework.web.bind.annotation.RestController;

import javax.validation.Valid;

@RequestMapping("user")
@RestController
public class UserController extends BaseController {

    @Autowired
    private UserService userService;

    @RequestMapping("login")
    public SingleResult<TokenResponse> login(@Valid @RequestBody LoginRequest request, BindingResult result){
        //The validate method must be called to verify the validity of input parameters
        validate(result);
        return userService.login(request);
    }
}
Such a complete login interface is written.
In order to verify whether there is a problem with the interface we write, we can conduct unit test through JUnit:
package com.lynn.user.test;

import com.lynn.user.Application;
import com.lynn.user.model.request.LoginRequest;
import com.lynn.user.service.UserService;
import org.junit.Test;
import org.junit.runner.RunWith;
import org.springframework.beans.factory.annotation.Autowired;
import org.springframework.boot.test.context.SpringBootTest;
import org.springframework.test.context.junit4.SpringJUnit4ClassRunner;

@RunWith(SpringJUnit4ClassRunner.class)
@SpringBootTest(classes = Application.class)
public class TestDB {

    @Autowired
    private UserService userService;

    @Test
    public void test(){
        try {
            LoginRequest request = new LoginRequest();
            request.setMobile("13800138000");
            request.setPassword("1");
            System.out.println(userService.login(request));
        }catch (Exception e){
            e.printStackTrace();
        }
    }
}
summary
Before defining an interface, first analyze the input parameters and output parameters of the interface, define them in request and response respectively, and add verification annotations in request, such as NotNull (cannot be null), NotEmpty (cannot be empty), etc.
When defining a specific interface, the parameter is the corresponding request, and the return value is , singleresult < response > or , multiresult < response >, which implements the specific logic according to the specific business.
Finally, adding Controller is the code that calls Service. The method parameter needs to add @Valid, so that the parameter validation will take effect. Before calling Service, the validate(BindResult) method will throw out the abnormal parameter. Finally, we conduct unit testing through JUnit.
Lesson 18: detailed explanation of Spring Cloud instance - system release
After the interface development is completed and the test is passed, the system can be released in many ways. This paper lists the main release methods one by one for your reference.
Java command line startup
This method is relatively simple. Since Tomcat is built into Spring Boot by default, we only need to package it into Jar and start the Jar package through Java command, that is, our application.
First, add (except Client) to each subproject under news:
<packaging>jar</packaging>
This means that we are packaged as Jar packages.
Secondly, we are in the POM of each Jar project (excluding Commmon) The following contents are added to the XML:
<build>
        <!-- jar The package name is generally the same as our project name -->
        <finalName>user</finalName>
        <sourceDirectory>${project.basedir}/src/main/java</sourceDirectory>
        <testSourceDirectory>${project.basedir}/src/test/java</testSourceDirectory>
        <resources>
            <resource>
                <directory>src/main/resources</directory>
                <filtering>true</filtering>
            </resource>
        </resources>
        <plugins>
            <plugin>
                <groupId>org.springframework.boot</groupId>
                <artifactId>spring-boot-maven-plugin</artifactId>
                <configuration>
                    <fork>true</fork>
                    <mainClass>com.lynn.${project.build.finalName}.Application</mainClass>
                </configuration>
                <executions>
                    <execution>
                        <goals>
                            <goal>repackage</goal>
                        </goals>
                    </execution>
                </executions>
            </plugin>
            <plugin>
                <artifactId>maven-resources-plugin</artifactId>
                <version>2.5</version>
                <configuration>
                    <encoding>UTF-8</encoding>
                    <useDefaultDelimiters>true</useDefaultDelimiters>
                </configuration>
            </plugin>
            <plugin>
                <groupId>org.apache.maven.plugins</groupId>
                <artifactId>maven-surefire-plugin</artifactId>
                <version>2.18.1</version>
                <configuration>
                    <skipTests>true</skipTests>
                </configuration>
            </plugin>
            <plugin>
                <groupId>org.apache.maven.plugins</groupId>
                <artifactId>maven-compiler-plugin</artifactId>
                <configuration>
                    <source>1.8</source>
                    <target>1.8</target>
                </configuration>
                <executions>
                    <!-- The replacement will be replaced maven Specially treated default-compile -->
                    <execution>
                        <id>default-compile</id>
                        <phase>none</phase>
                    </execution>
                    <!-- The replacement will be replaced maven Specially treated default-testCompile -->
                    <execution>
                        <id>default-testCompile</id>
                        <phase>none</phase>
                    </execution>
                    <execution>
                        <id>java-compile</id>
                        <phase>compile</phase>
                        <goals> <goal>compile</goal> </goals>
                    </execution>
                    <execution>
                        <id>java-test-compile</id>
                        <phase>test-compile</phase>
                        <goals> <goal>testCompile</goal> </goals>
                    </execution>
                </executions>
            </plugin>
        </plugins>
    </build>
Then execute "maven clean package" to name the package:
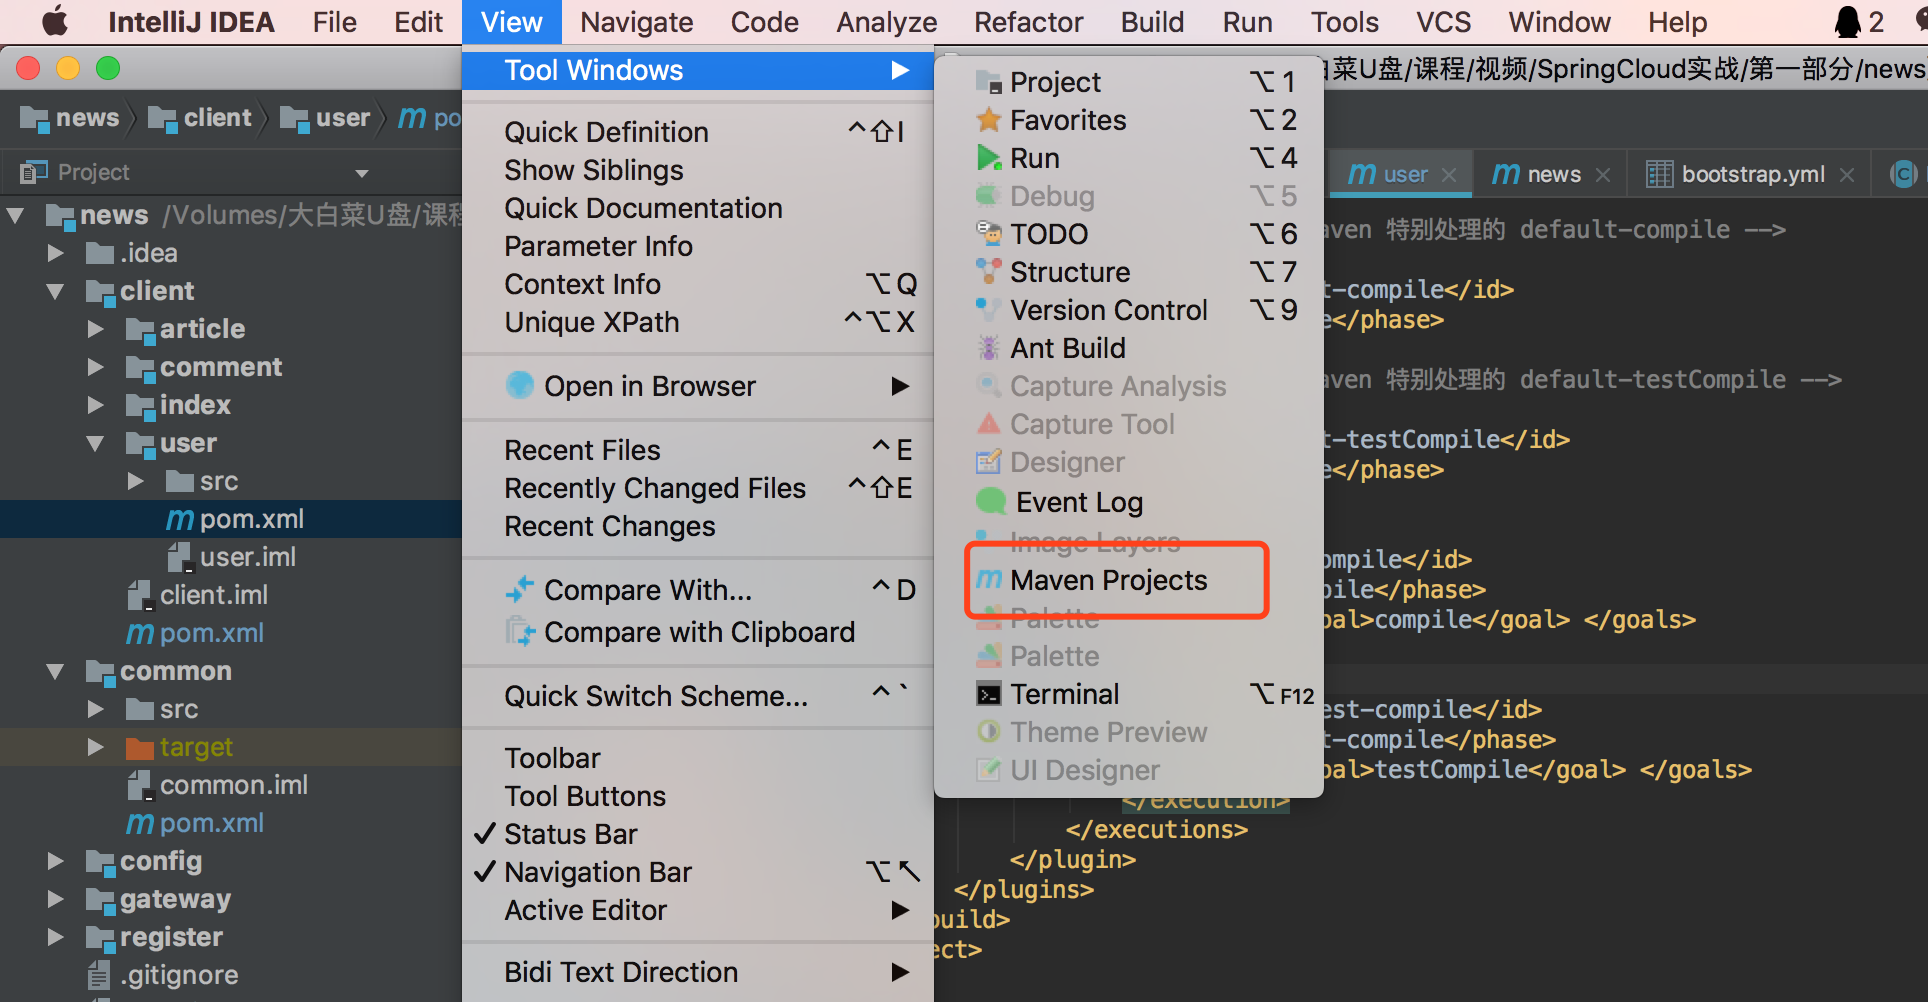
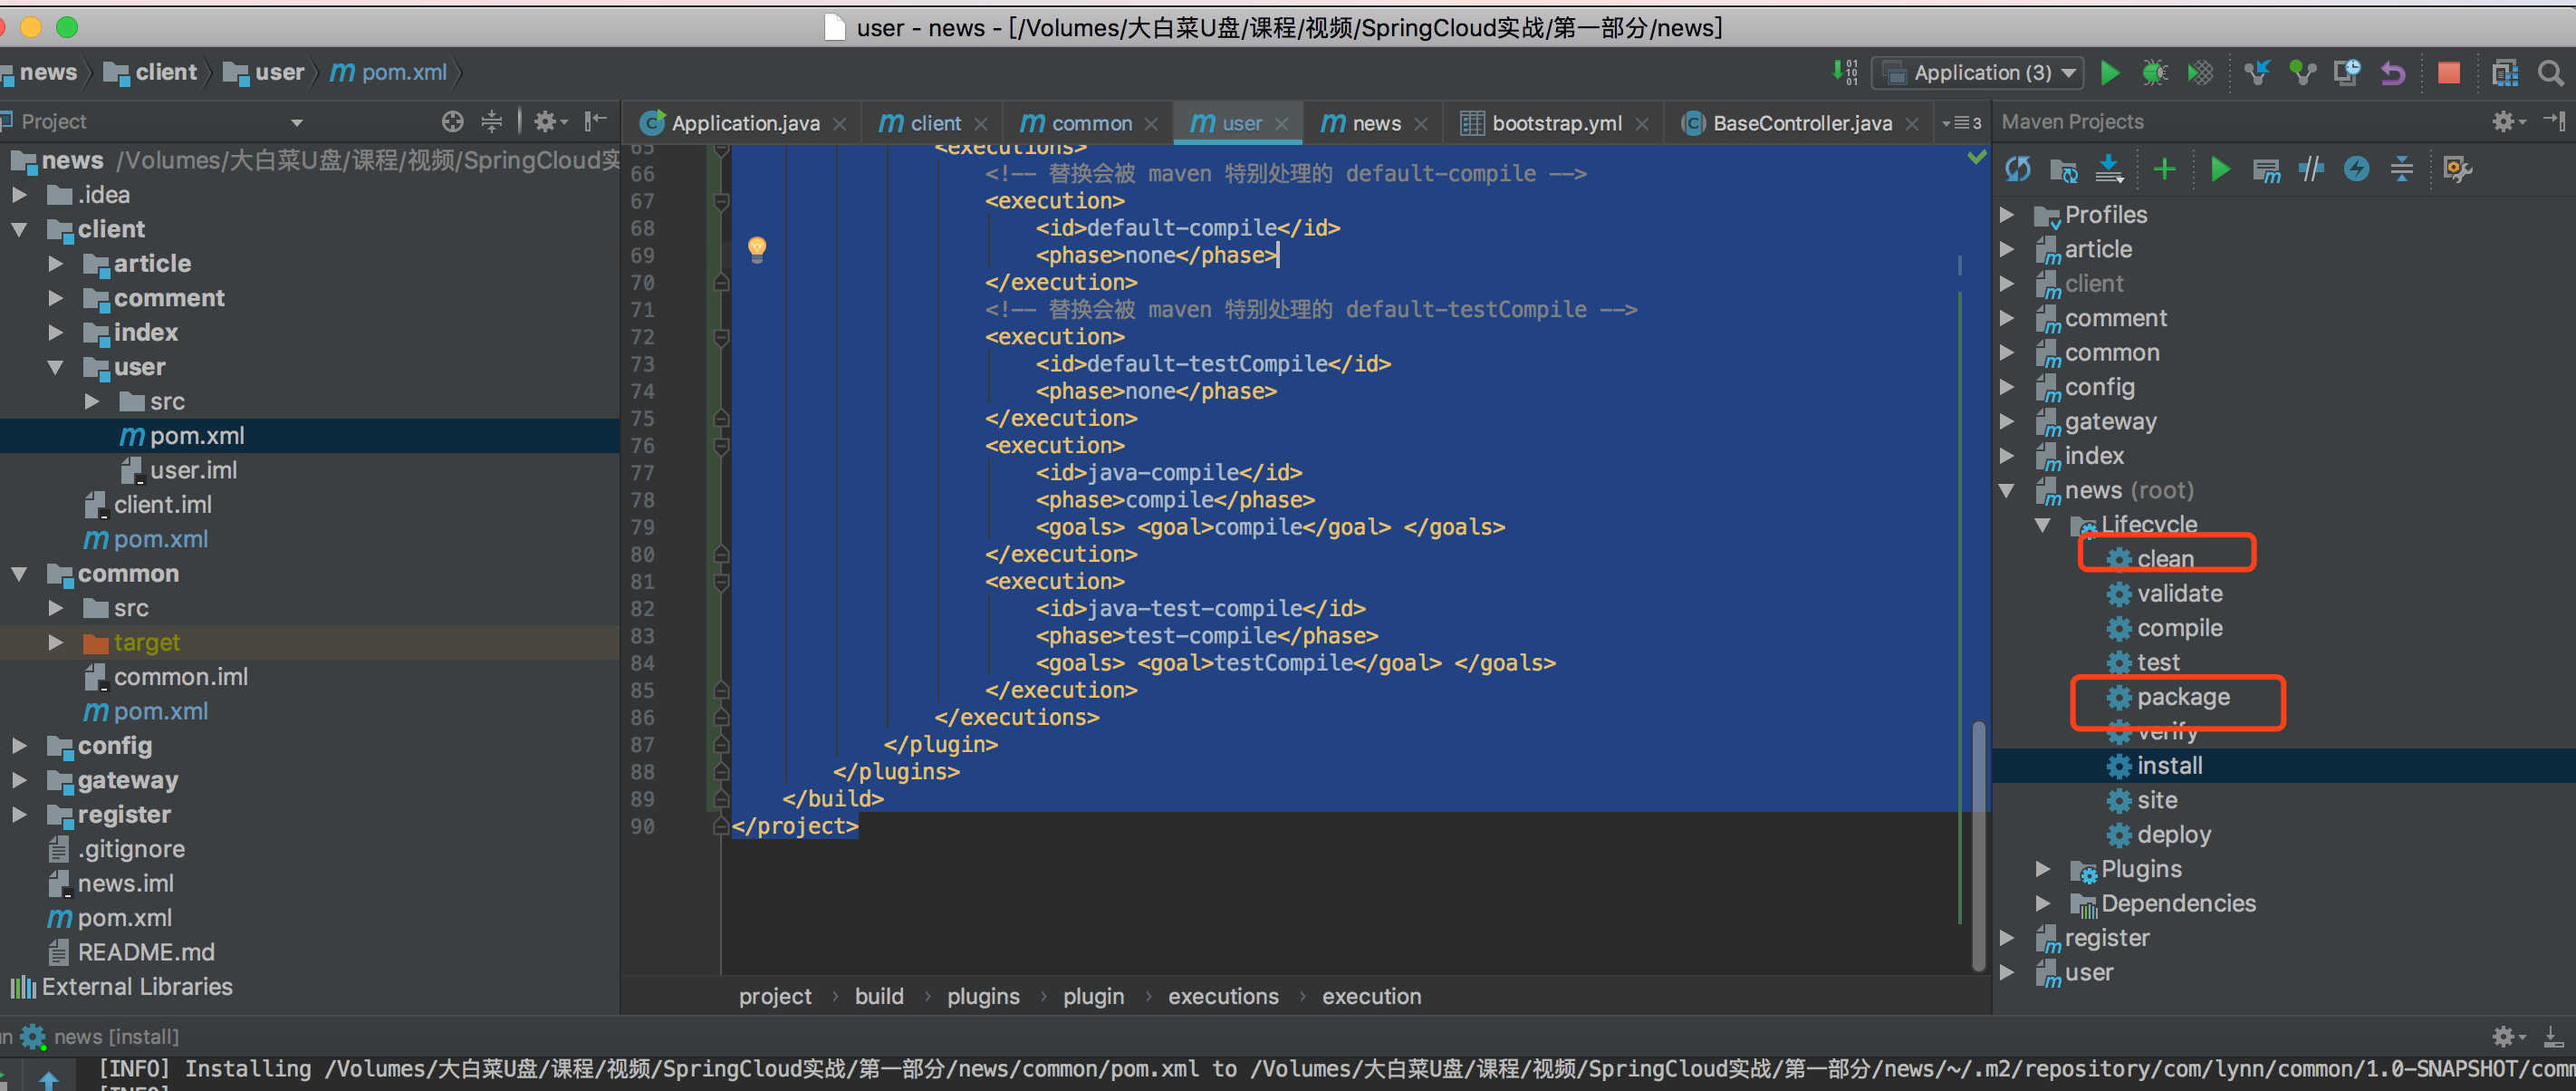
The first run may take some time, because all dependent packages need to be downloaded from Maven warehouse, and the packaging will be faster in the future. After a period of time, the packaging will be completed:
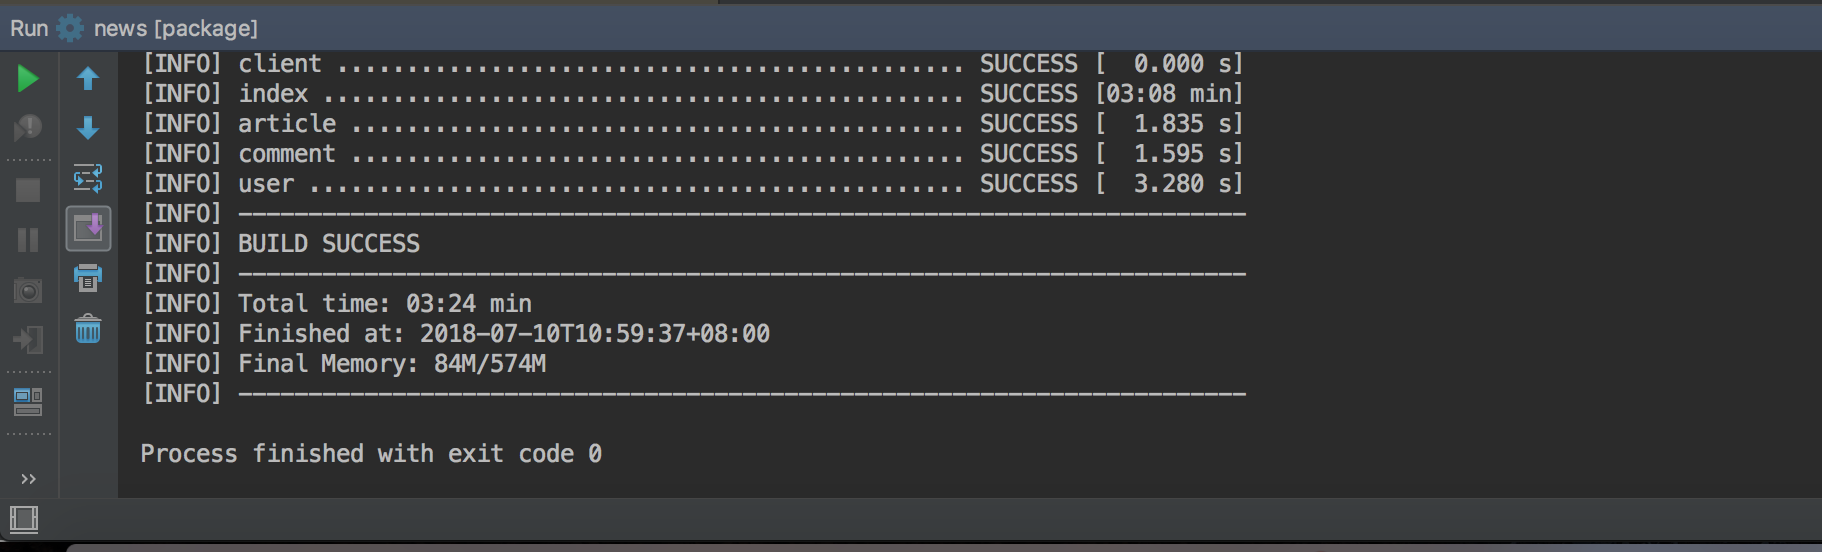
Finally, we upload the jar package to the server and start register in turn jar,config.jar,gateway.jar,article.jar,comment.jar,index.jar,user.jar. The startup command is:
nohup java -server -jar xxx.jar &
Start Jar with nohup command to make Jar run in the background. Otherwise, the program will exit automatically after the shell interface exits.
Tomcat startup
In addition to Tomcat that comes with Spring Boot, we can also install Tomcat ourselves for deployment.
First, transform the project, change all < packaging > jar < / packaging > to < packaging > war < / packaging >, and remove the built-in Tomcat:
<dependency>
            <groupId>org.springframework.boot</groupId>
            <artifactId>spring-boot-starter-tomcat</artifactId>
            <scope>provided</scope>
        </dependency>
Modify build:
<build>
        <!-- file name -->
        <finalName>register</finalName>
        <resources>
            <resource>
                <directory>src/main/resources</directory>
                <filtering>true</filtering>
            </resource>
        </resources>
        <plugins>
            <plugin>
                <groupId>org.springframework.boot</groupId>
                <artifactId>spring-boot-maven-plugin</artifactId>
            </plugin>
            <plugin>
                <artifactId>maven-resources-plugin</artifactId>
                <version>2.5</version>
                <configuration>
                    <encoding>UTF-8</encoding>
                </configuration>
            </plugin>
            <plugin>
                <groupId>org.apache.maven.plugins</groupId>
                <artifactId>maven-surefire-plugin</artifactId>
                <version>2.18.1</version>
                <configuration>
                    <skipTests>true</skipTests>
                </configuration>
            </plugin>
        </plugins>
    </build>
Then modify the startup class application java:
public class Application extends SpringBootServletInitializer{

    public static void main(String[] args) {
        SpringApplication.run(Application.class,args);
    }

    @Override
    protected SpringApplicationBuilder configure(SpringApplicationBuilder application) {
        return application.sources(Application.class);
    }
}
In this way, the War package will be generated after packaging. The packaging method is the same as above.
We upload War to Tomcat on the server to start the project through Tomcat.
Jenkins Automated Deployment
What we have built is a set of micro service architecture. There may be hundreds of projects in the real environment. If they are all packaged, uploaded and released manually, the workload is undoubtedly huge. At this point, we need to consider automated deployment.
Jenkins has come into our vision. It is an open source software project. It is a continuous integration tool developed based on Java. It is used to monitor continuous and repeated work. It aims to provide an open and easy-to-use software platform to make continuous integration of software possible.
Next, let's take a look at how to realize the automatic deployment of the system through Jenkins.
install
Please install Jenkins in Baidu by yourself. This article will not explain it in detail.
Note: after installation, at least Maven, SSH, Git and SVN plug-ins need to be installed.
Create task
After installation, visit Jenkins and log in to see the following interface:

(1) Click system management - > system settings to add server SSH information:

(2) Click system management - > global tool configuration to configure JDK and Maven:
(3) Click new task, enter the task name, and select to build a Maven style software:
(4) Click OK to proceed to the next step:
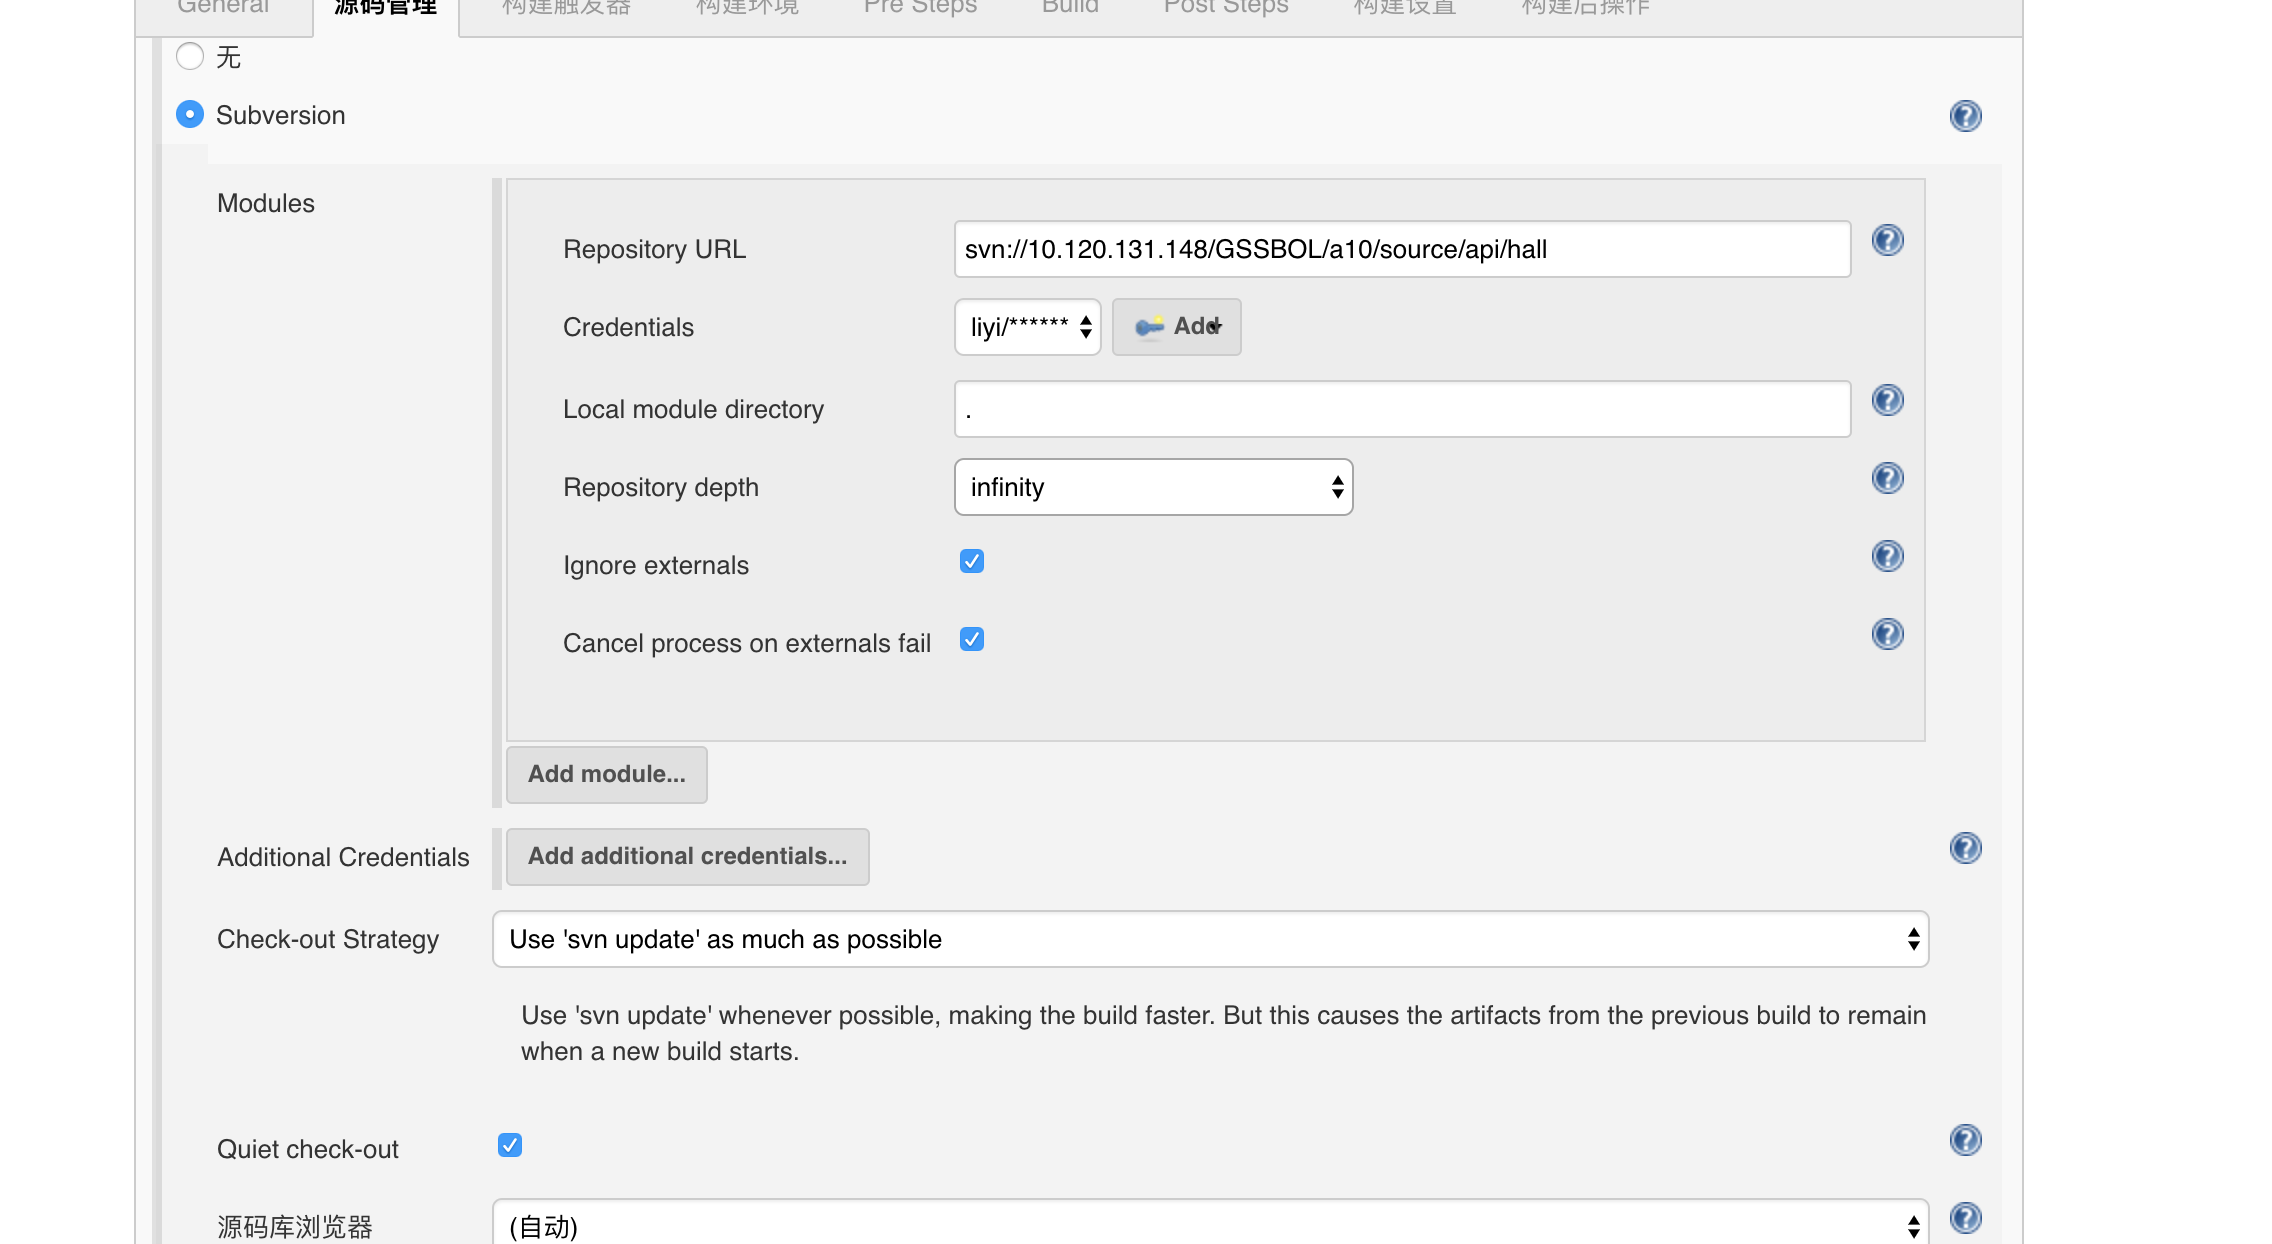
Here, take SVN as an example (if the code is on Git, the operation is similar). Fill the SVN address and SVN account information of the source code into the text box in turn.
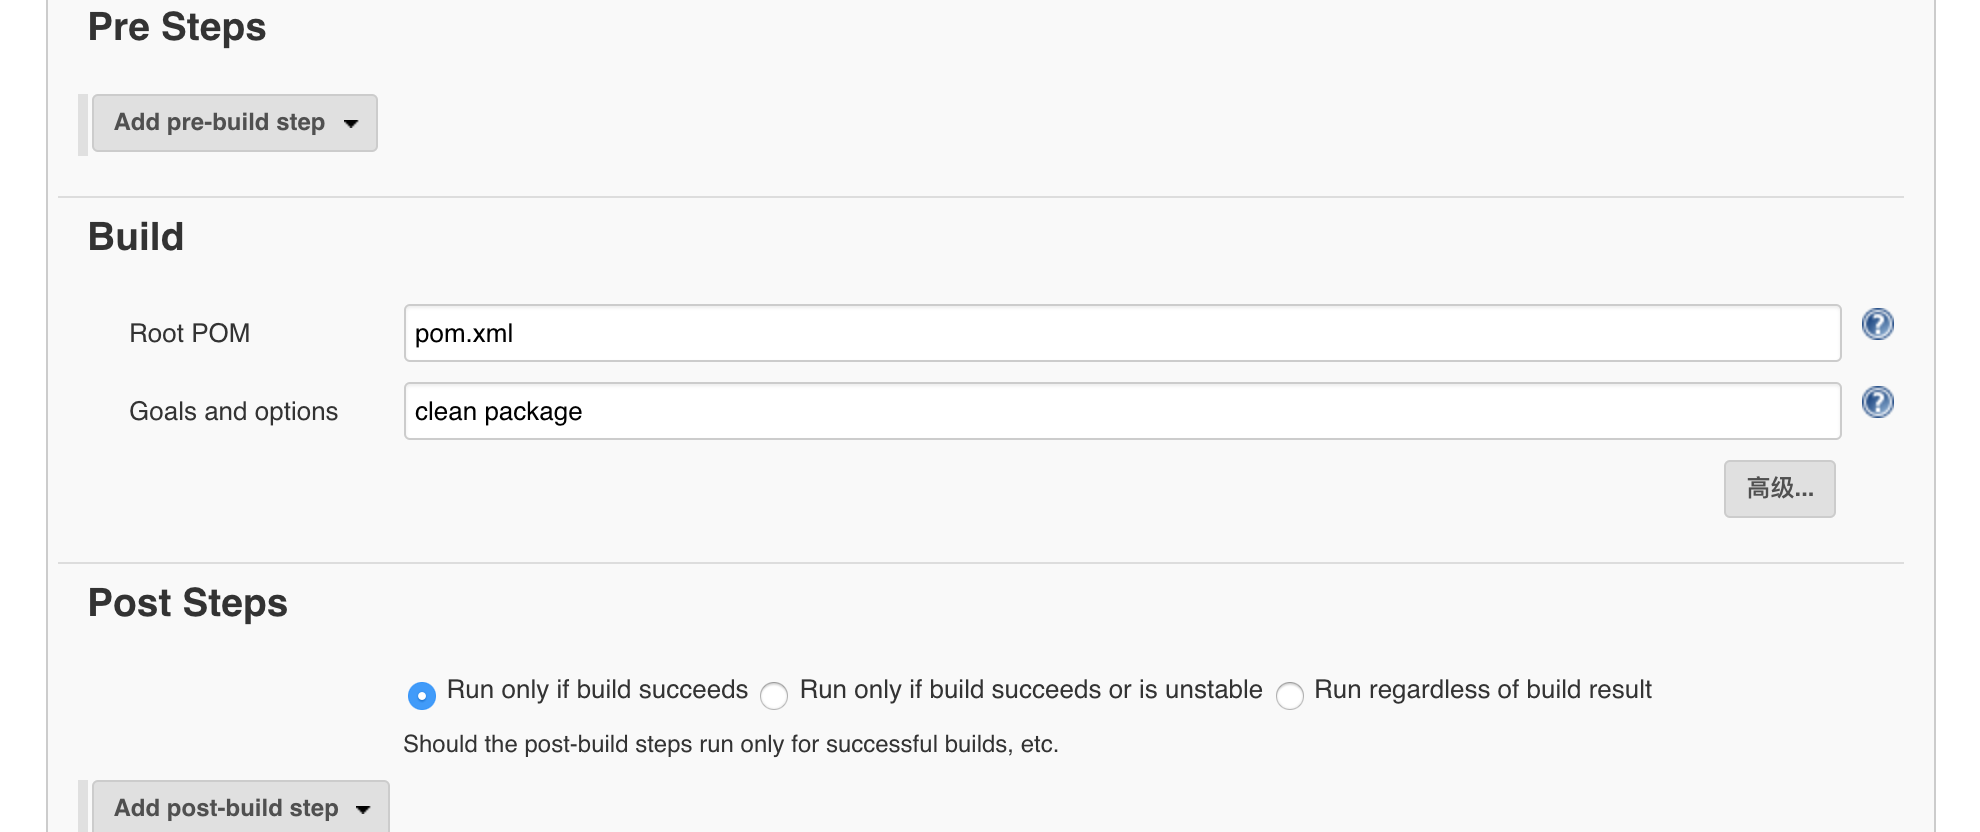
Fill in Maven's Build command under Build.
Fill in the "post construction operation" as shown in the figure:
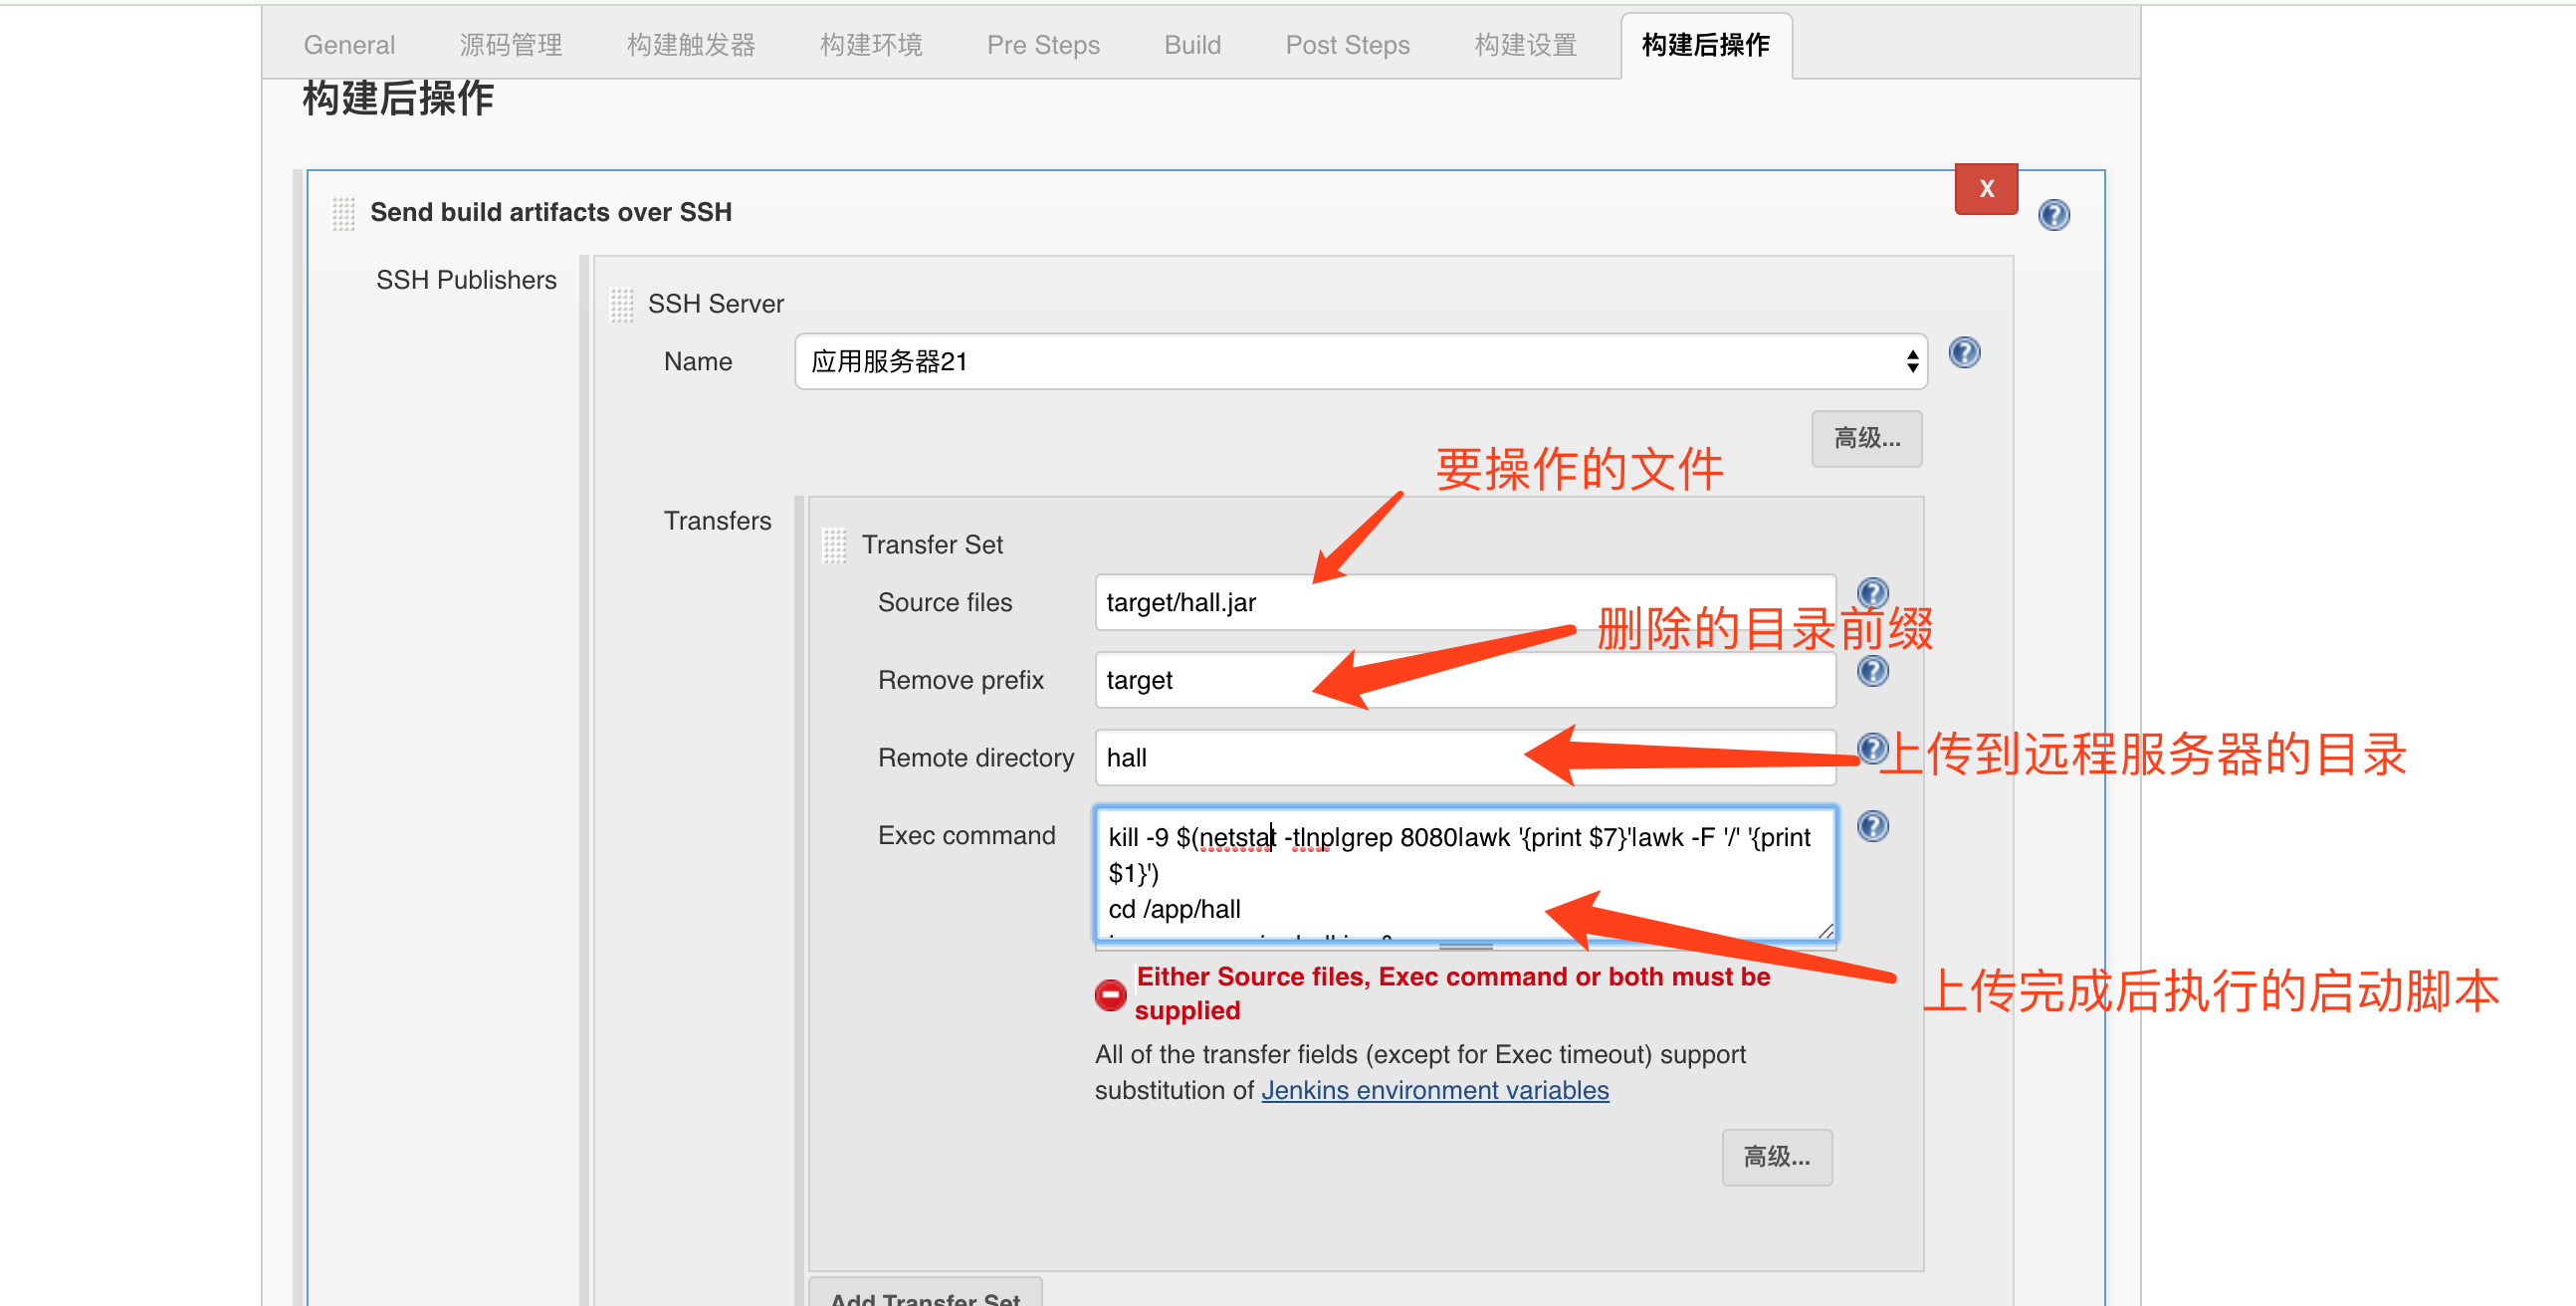
Examples of startup scripts are as follows:
kill -9 $(netstat -tlnp|grep 8080|awk '{print $7}'|awk -F '/' '{print $1}')
cd /app/hall
java -server -jar hall.jar &
Click save.
Manual build
After the task is created, click "build now" to automatically build and start our application, and you can see the build log in real time:
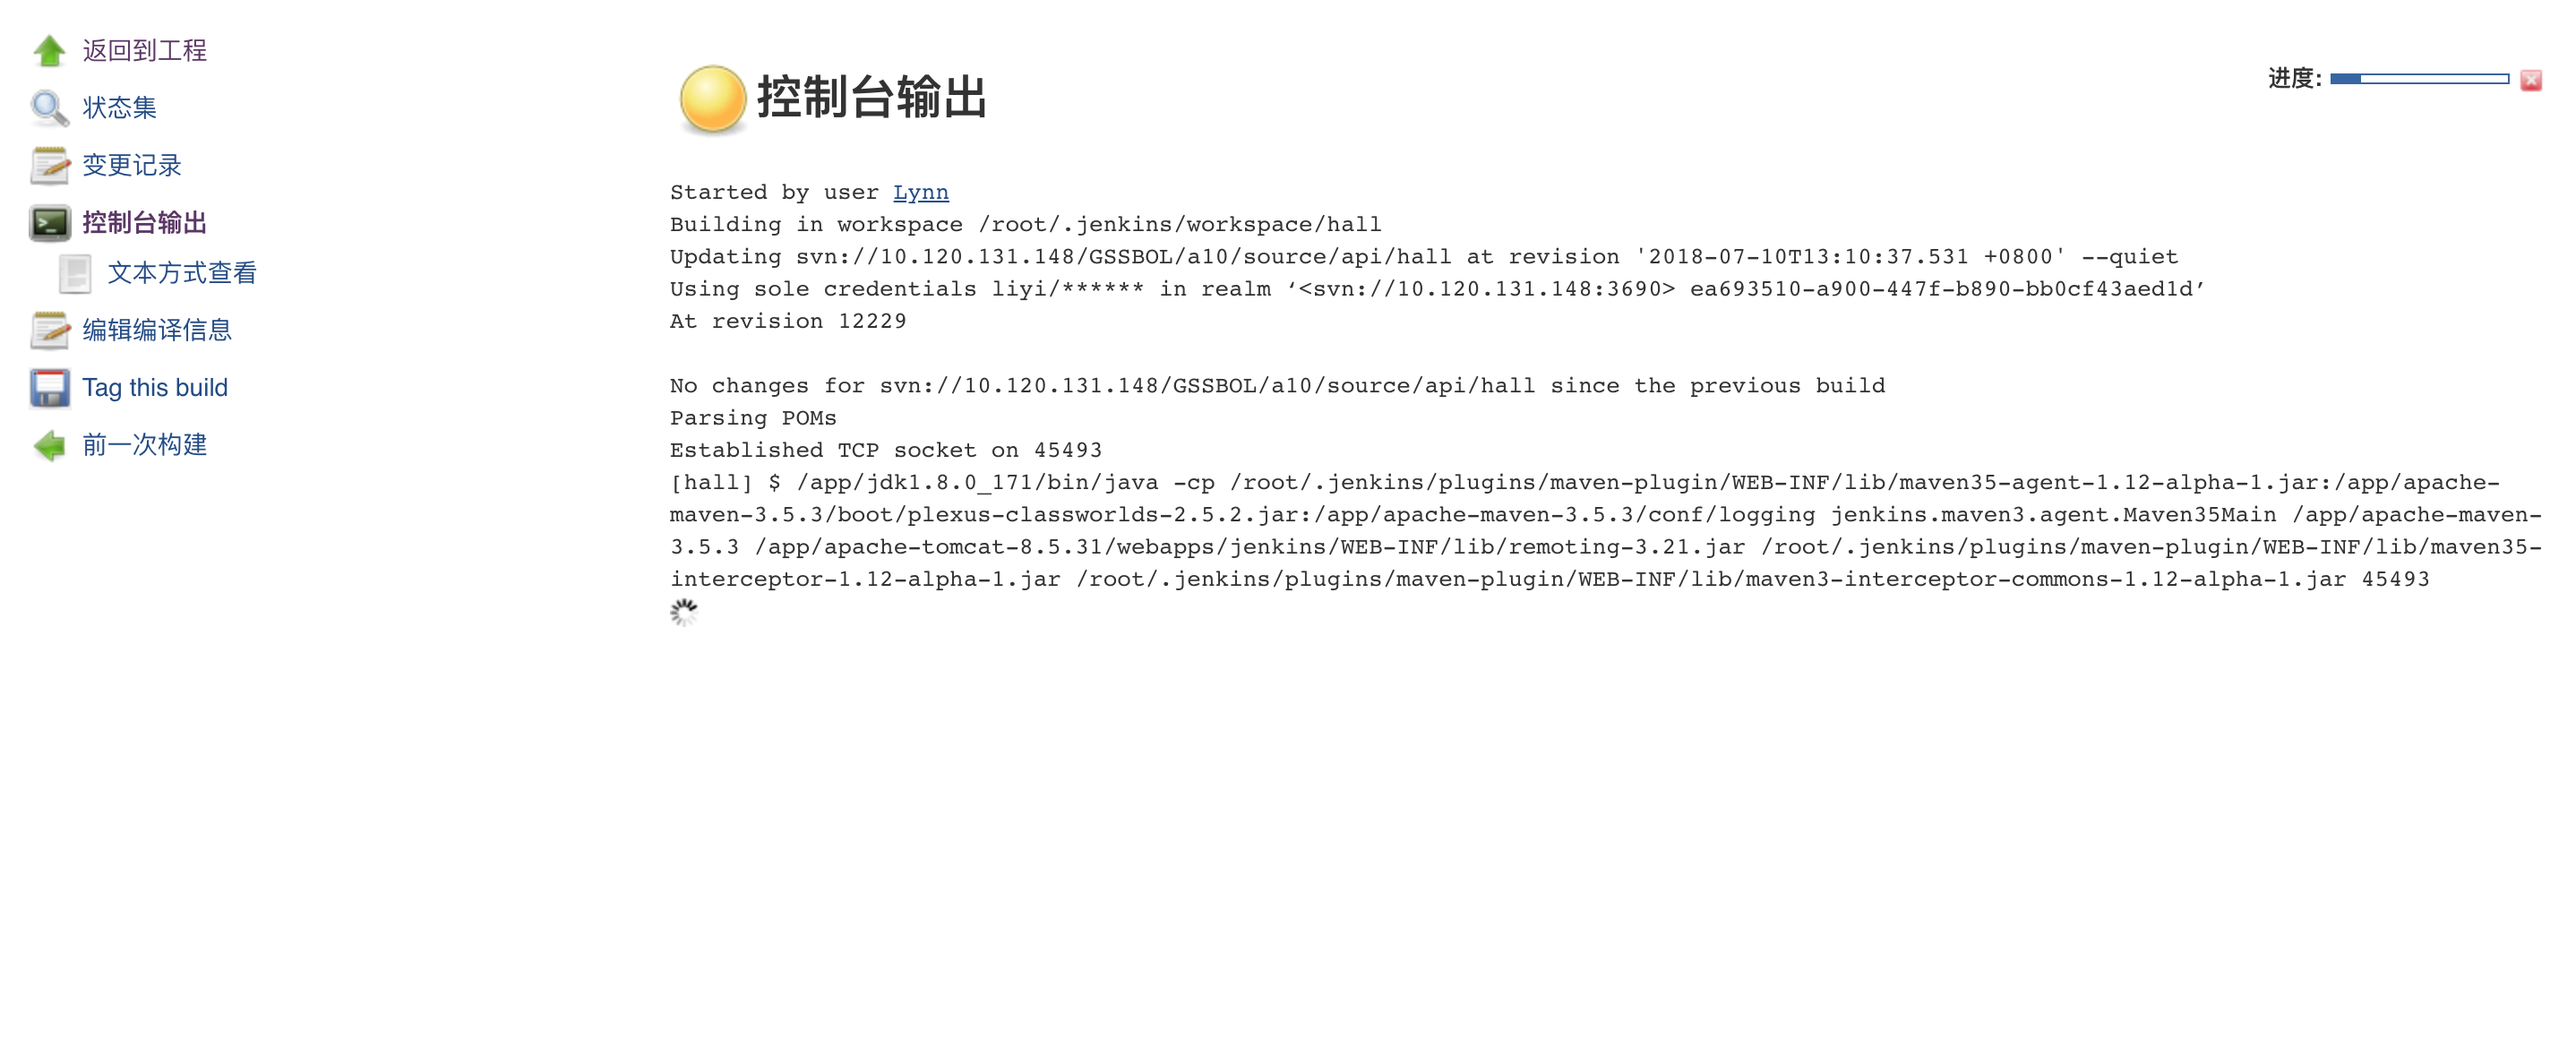
Auto build
It's troublesome for us to manually click "build now" every time. The highest level of program ape is to see who is lazier. I don't want to click that button. I just think I can build automatically after submitting the code. What can I do? Simply, enter the task configuration interface and find the build trigger option:
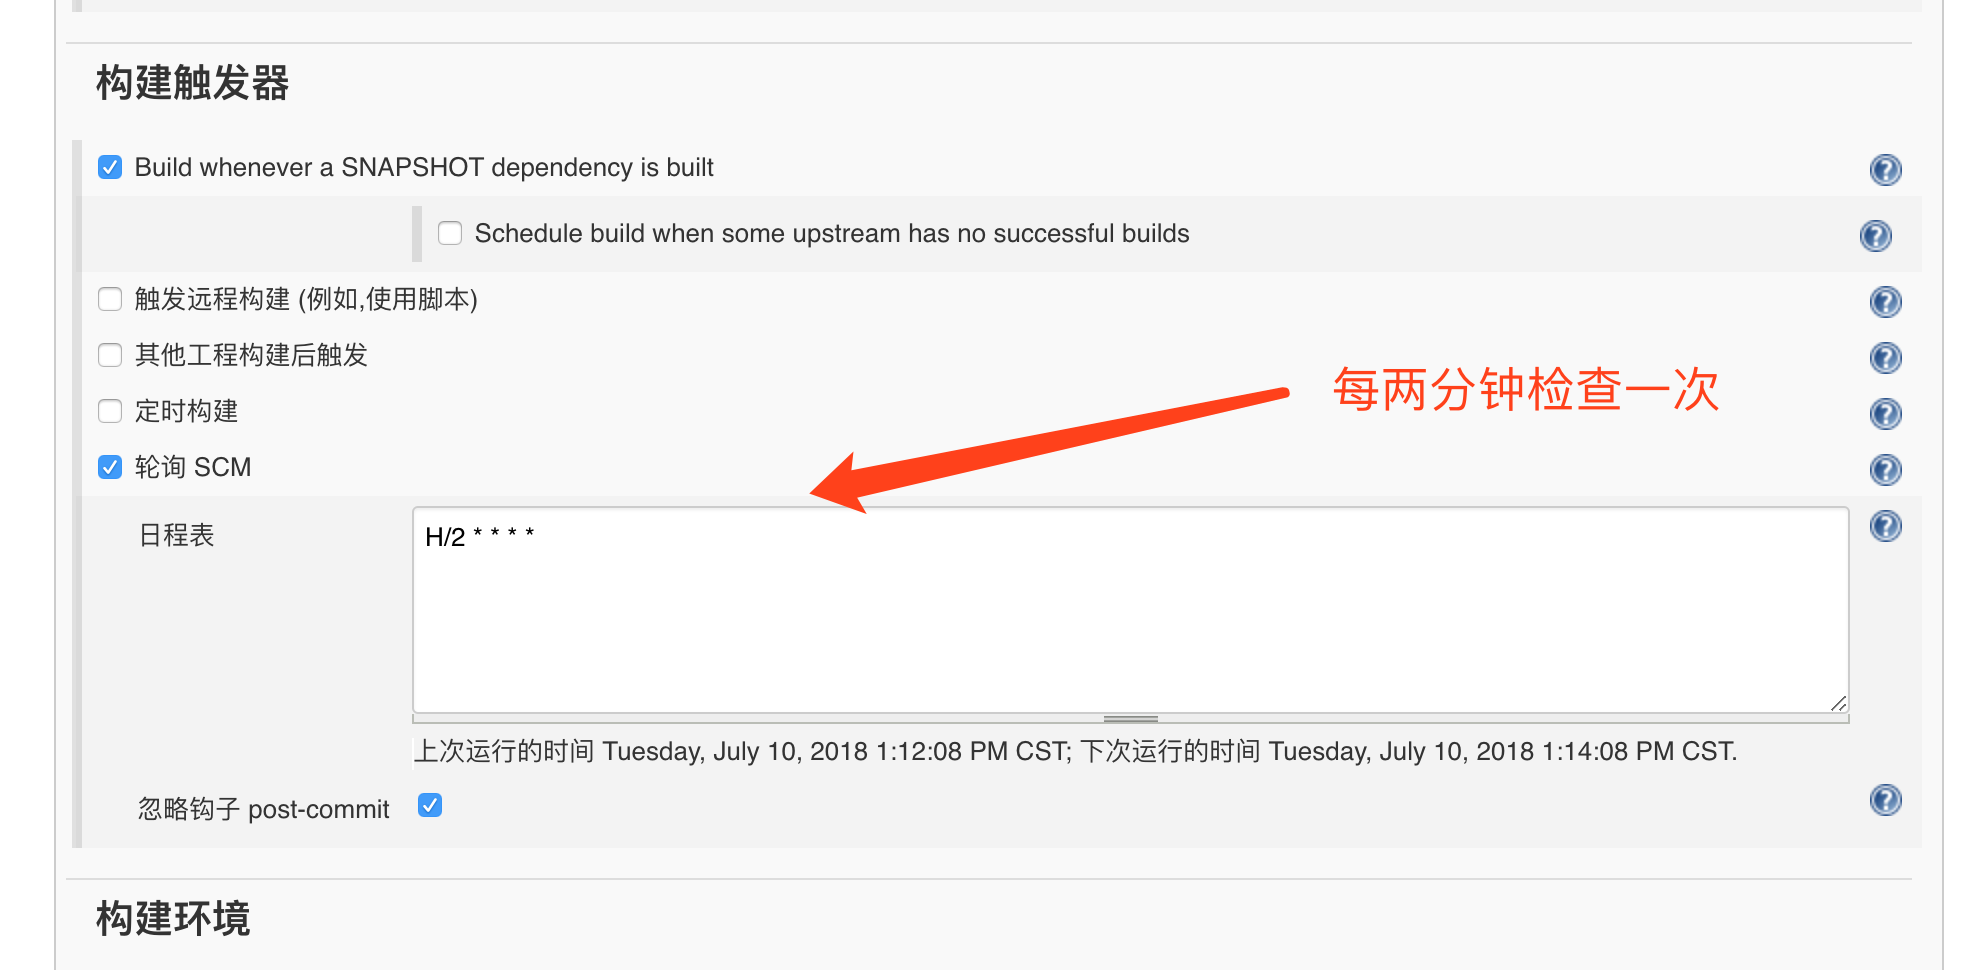
After saving, Jenkins will compare the SVN every two minutes. If there are changes, it will be built automatically.
summary
There are many ways to publish the system. We can choose the way suitable for ourselves according to our project characteristics. Of course, there are many ways, such as K8S and Docker. I won't repeat it here. I will explain the way of K8S+Docker in lesson 20.
Lesson 19: Spring Cloud source code analysis
Spring Cloud integrates many third-party frameworks, and it is not realistic to analyze all its source code. This paper leads readers to analyze a small part of the source code (other source code readers are interested and can continue to follow up), including the starter parts of Eureka server, Config and Zuul, and analyze its startup principle.
If we develop a framework to integrate with Spring Boot, we need to put it in its starter. Therefore, we can analyze the startup principle directly from the starter of each framework.
Eureka server source code analysis
We know that in order to realize registration and discovery, we need to add @ EnableEurekaServer @ annotation to the startup class. We enter its source code:
@EnableDiscoveryClient//Indicates that Eureka server is also a client service
@Target(ElementType.TYPE)
@Retention(RetentionPolicy.RUNTIME)
@Documented
@Import(EurekaServerMarkerConfiguration.class)
public @interface EnableEurekaServer {

}
Pay attention to the @ Import} annotation, which imports the EurekaServerMarkerConfiguration class. Continue to follow up this class:
/**
 * Responsible for adding in a marker bean to activate
 * {@link EurekaServerAutoConfiguration}
 *
 * @author Biju Kunjummen
 */
@Configuration
public class EurekaServerMarkerConfiguration {

    @Bean
    public Marker eurekaServerMarkerBean() {
        return new Marker();
    }

    class Marker {
    }
}
Through the above comments, we continue to view the source code of eurekaservenautoconfiguration class:
@Configuration
@Import(EurekaServerInitializerConfiguration.class)
@ConditionalOnBean(EurekaServerMarkerConfiguration.Marker.class)
@EnableConfigurationProperties({ EurekaDashboardProperties.class,
        InstanceRegistryProperties.class })
@PropertySource("classpath:/eureka/server.properties")
public class EurekaServerAutoConfiguration extends WebMvcConfigurerAdapter {
    /**
     * List of packages containing Jersey resources required by the Eureka server
     */
    private static String[] EUREKA_PACKAGES = new String[] { "com.netflix.discovery",
            "com.netflix.eureka" };

    @Autowired
    private ApplicationInfoManager applicationInfoManager;

    @Autowired
    private EurekaServerConfig eurekaServerConfig;

    @Autowired
    private EurekaClientConfig eurekaClientConfig;

    @Autowired
    private EurekaClient eurekaClient;

    @Autowired
    private InstanceRegistryProperties instanceRegistryProperties;

    public static final CloudJacksonJson JACKSON_JSON = new CloudJacksonJson();

    @Bean
    public HasFeatures eurekaServerFeature() {
        return HasFeatures.namedFeature("Eureka Server",
                EurekaServerAutoConfiguration.class);
    }

    //If Eureka client. Registerwitheureka = true, register yourself
    @Configuration
    protected static class EurekaServerConfigBeanConfiguration {
        @Bean
        @ConditionalOnMissingBean
        public EurekaServerConfig eurekaServerConfig(EurekaClientConfig clientConfig) {
            EurekaServerConfigBean server = new EurekaServerConfigBean();
            if (clientConfig.shouldRegisterWithEureka()) {
                // Set a sensible default if we are supposed to replicate
                server.setRegistrySyncRetries(5);
            }
            return server;
        }
    }

    //Interface for instantiating Eureka server
    @Bean
    @ConditionalOnProperty(prefix = "eureka.dashboard", name = "enabled", matchIfMissing = true)
    public EurekaController eurekaController() {
        return new EurekaController(this.applicationInfoManager);
    }

    static {
        CodecWrappers.registerWrapper(JACKSON_JSON);
        EurekaJacksonCodec.setInstance(JACKSON_JSON.getCodec());
    }

    @Bean
    public ServerCodecs serverCodecs() {
        return new CloudServerCodecs(this.eurekaServerConfig);
    }

    private static CodecWrapper getFullJson(EurekaServerConfig serverConfig) {
        CodecWrapper codec = CodecWrappers.getCodec(serverConfig.getJsonCodecName());
        return codec == null ? CodecWrappers.getCodec(JACKSON_JSON.codecName()) : codec;
    }

    private static CodecWrapper getFullXml(EurekaServerConfig serverConfig) {
        CodecWrapper codec = CodecWrappers.getCodec(serverConfig.getXmlCodecName());
        return codec == null ? CodecWrappers.getCodec(CodecWrappers.XStreamXml.class)
                : codec;
    }

    class CloudServerCodecs extends DefaultServerCodecs {

        public CloudServerCodecs(EurekaServerConfig serverConfig) {
            super(getFullJson(serverConfig),
                    CodecWrappers.getCodec(CodecWrappers.JacksonJsonMini.class),
                    getFullXml(serverConfig),
                    CodecWrappers.getCodec(CodecWrappers.JacksonXmlMini.class));
        }
    }

    @Bean
    public PeerAwareInstanceRegistry peerAwareInstanceRegistry(
            ServerCodecs serverCodecs) {
        this.eurekaClient.getApplications(); // force initialization
        return new InstanceRegistry(this.eurekaServerConfig, this.eurekaClientConfig,
                serverCodecs, this.eurekaClient,
                this.instanceRegistryProperties.getExpectedNumberOfRenewsPerMin(),
                this.instanceRegistryProperties.getDefaultOpenForTrafficCount());
    }

    @Bean
    @ConditionalOnMissingBean
    public PeerEurekaNodes peerEurekaNodes(PeerAwareInstanceRegistry registry,
            ServerCodecs serverCodecs) {
        return new PeerEurekaNodes(registry, this.eurekaServerConfig,
                this.eurekaClientConfig, serverCodecs, this.applicationInfoManager);
    }

    @Bean
    public EurekaServerContext eurekaServerContext(ServerCodecs serverCodecs,
            PeerAwareInstanceRegistry registry, PeerEurekaNodes peerEurekaNodes) {
        return new DefaultEurekaServerContext(this.eurekaServerConfig, serverCodecs,
                registry, peerEurekaNodes, this.applicationInfoManager);
    }

    @Bean
    public EurekaServerBootstrap eurekaServerBootstrap(PeerAwareInstanceRegistry registry,
            EurekaServerContext serverContext) {
        return new EurekaServerBootstrap(this.applicationInfoManager,
                this.eurekaClientConfig, this.eurekaServerConfig, registry,
                serverContext);
    }

    /**
     * Register the Jersey filter
     */
    @Bean
    public FilterRegistrationBean jerseyFilterRegistration(
            javax.ws.rs.core.Application eurekaJerseyApp) {
        FilterRegistrationBean bean = new FilterRegistrationBean();
        bean.setFilter(new ServletContainer(eurekaJerseyApp));
        bean.setOrder(Ordered.LOWEST_PRECEDENCE);
        bean.setUrlPatterns(
                Collections.singletonList(EurekaConstants.DEFAULT_PREFIX + "/*"));

        return bean;
    }

    /**
     * Construct a Jersey {@link javax.ws.rs.core.Application} with all the resources
     * required by the Eureka server.
     */
    @Bean
    public javax.ws.rs.core.Application jerseyApplication(Environment environment,
            ResourceLoader resourceLoader) {

        ClassPathScanningCandidateComponentProvider provider = new ClassPathScanningCandidateComponentProvider(
                false, environment);

        // Filter to include only classes that have a particular annotation.
        //
        provider.addIncludeFilter(new AnnotationTypeFilter(Path.class));
        provider.addIncludeFilter(new AnnotationTypeFilter(Provider.class));

        // Find classes in Eureka packages (or subpackages)
        //
        Set<Class<?>> classes = new HashSet<Class<?>>();
        for (String basePackage : EUREKA_PACKAGES) {
            Set<BeanDefinition> beans = provider.findCandidateComponents(basePackage);
            for (BeanDefinition bd : beans) {
                Class<?> cls = ClassUtils.resolveClassName(bd.getBeanClassName(),
                        resourceLoader.getClassLoader());
                classes.add(cls);
            }
        }

        // Construct the Jersey ResourceConfig
        //
        Map<String, Object> propsAndFeatures = new HashMap<String, Object>();
        propsAndFeatures.put(
                // Skip static content used by the webapp
                ServletContainer.PROPERTY_WEB_PAGE_CONTENT_REGEX,
                EurekaConstants.DEFAULT_PREFIX + "/(fonts|images|css|js)/.*");

        DefaultResourceConfig rc = new DefaultResourceConfig(classes);
        rc.setPropertiesAndFeatures(propsAndFeatures);

        return rc;
    }

    @Bean
    public FilterRegistrationBean traceFilterRegistration(
            @Qualifier("webRequestLoggingFilter") Filter filter) {
        FilterRegistrationBean bean = new FilterRegistrationBean();
        bean.setFilter(filter);
        bean.setOrder(Ordered.LOWEST_PRECEDENCE - 10);
        return bean;
    }
}
There is an annotation on this class: @ ConditionalOnBean(EurekaServerMarkerConfiguration.Marker.class). The class specified later is the class just now, and the function of @ ConditionalOnBean is to instantiate a Bean only when there is an object in the current context.
Therefore, the eurekaservenautoconfiguration class will be instantiated at startup.
@EnableConfigurationProperties({ EurekaDashboardProperties.class,
        InstanceRegistryProperties.class })
This annotation defines some Eureka configuration items.
Config source code analysis
Through the above method, we found the ConfigServerAutoConfiguration class:
@Configuration
@ConditionalOnBean(ConfigServerConfiguration.Marker.class)
@EnableConfigurationProperties(ConfigServerProperties.class)
@Import({ EnvironmentRepositoryConfiguration.class, CompositeConfiguration.class, ResourceRepositoryConfiguration.class,
        ConfigServerEncryptionConfiguration.class, ConfigServerMvcConfiguration.class, TransportConfiguration.class })
public class ConfigServerAutoConfiguration {

}
It can be found that this class is empty, with only a few more annotations, @ EnableConfigurationProperties(ConfigServerProperties.class) indicates that the Config configuration property is enabled.
The core annotation is @ Import, which imports some other configuration classes into this class. Among them, EnvironmentRepositoryConfiguration is an environment configuration class with the following built-in environment configurations.
1. Native
@Configuration
    @Profile("native")
    protected static class NativeRepositoryConfiguration {

        @Autowired
        private ConfigurableEnvironment environment;

        @Bean
        public NativeEnvironmentRepository nativeEnvironmentRepository() {
            return new NativeEnvironmentRepository(this.environment);
        }
    }
2. git
@Configuration
    @Profile("git")
    protected static class GitRepositoryConfiguration extends DefaultRepositoryConfiguration {}
3. subversion
@Configuration
    @Profile("subversion")
    protected static class SvnRepositoryConfiguration {
        @Autowired
        private ConfigurableEnvironment environment;

        @Autowired
        private ConfigServerProperties server;

        @Bean
        public SvnKitEnvironmentRepository svnKitEnvironmentRepository() {
            SvnKitEnvironmentRepository repository = new SvnKitEnvironmentRepository(this.environment);
            if (this.server.getDefaultLabel()!=null) {
                repository.setDefaultLabel(this.server.getDefaultLabel());
            }
            return repository;
        }
    }
4.vault
@Configuration
    @Profile("subversion")
    protected static class SvnRepositoryConfiguration {
        @Autowired
        private ConfigurableEnvironment environment;

        @Autowired
        private ConfigServerProperties server;

        @Bean
        public SvnKitEnvironmentRepository svnKitEnvironmentRepository() {
            SvnKitEnvironmentRepository repository = new SvnKitEnvironmentRepository(this.environment);
            if (this.server.getDefaultLabel()!=null) {
                repository.setDefaultLabel(this.server.getDefaultLabel());
            }
            return repository;
    }
    }
As you can see from the code, Git is the default environment of the configuration center.
@Bean
        public MultipleJGitEnvironmentRepository defaultEnvironmentRepository() {
            MultipleJGitEnvironmentRepository repository = new MultipleJGitEnvironmentRepository(this.environment);
            repository.setTransportConfigCallback(this.transportConfigCallback);
            if (this.server.getDefaultLabel()!=null) {
                repository.setDefaultLabel(this.server.getDefaultLabel());
            }
            return repository;
        }
We enter the MultipleJGitEnvironmentRepository class:
@ConfigurationProperties("spring.cloud.config.server.git")
public class MultipleJGitEnvironmentRepository extends JGitEnvironmentRepository {
}
This class indicates that multiple Git repositories can be configured. It inherits from the JGitEnvironmentRepository class:
public class JGitEnvironmentRepository extends AbstractScmEnvironmentRepository
        implements EnvironmentRepository, SearchPathLocator, InitializingBean {
/**
     * Get the working directory ready.
     */
    public String refresh(String label) {
        Git git = null;
        try {
            git = createGitClient();
            if (shouldPull(git)) {
                fetch(git, label);
                // checkout after fetch so we can get any new branches, tags,
                // ect.
                checkout(git, label);
                if (isBranch(git, label)) {
                    // merge results from fetch
                    merge(git, label);
                    if (!isClean(git)) {
                        logger.warn("The local repository is dirty. Resetting it to origin/" + label + ".");
                        resetHard(git, label, "refs/remotes/origin/" + label);
                    }
                }
            } else {
                // nothing to update so just checkout
                checkout(git, label);
            }
            // always return what is currently HEAD as the version
            return git.getRepository().getRef("HEAD").getObjectId().getName();
        } catch (RefNotFoundException e) {
            throw new NoSuchLabelException("No such label: " + label, e);
        } catch (NoRemoteRepositoryException e) {
            throw new NoSuchRepositoryException("No such repository: " + getUri(), e);
        } catch (GitAPIException e) {
            throw new NoSuchRepositoryException("Cannot clone or checkout repository: " + getUri(), e);
        } catch (Exception e) {
            throw new IllegalStateException("Cannot load environment", e);
        } finally {
            try {
                if (git != null) {
                    git.close();
                }
            } catch (Exception e) {
                this.logger.warn("Could not close git repository", e);
            }
        }
    }
}
The function of the refresh method is that ConfigServer will pull the configuration from the Git repository we configured.
Zuul source code analysis
Similarly, we find Zuul proxyautoconfiguration:
@Configuration
@Import({ RibbonCommandFactoryConfiguration.RestClientRibbonConfiguration.class,
        RibbonCommandFactoryConfiguration.OkHttpRibbonConfiguration.class,
        RibbonCommandFactoryConfiguration.HttpClientRibbonConfiguration.class })
@ConditionalOnBean(ZuulProxyMarkerConfiguration.Marker.class)
public class ZuulProxyAutoConfiguration extends ZuulServerAutoConfiguration {

    @SuppressWarnings("rawtypes")
    @Autowired(required = false)
    private List<RibbonRequestCustomizer> requestCustomizers = Collections.emptyList();

    @Autowired
    private DiscoveryClient discovery;

    @Autowired
    private ServiceRouteMapper serviceRouteMapper;

    @Override
    public HasFeatures zuulFeature() {
        return HasFeatures.namedFeature("Zuul (Discovery)", ZuulProxyAutoConfiguration.class);
    }

    @Bean
    @ConditionalOnMissingBean(DiscoveryClientRouteLocator.class)
    public DiscoveryClientRouteLocator discoveryRouteLocator() {
        return new DiscoveryClientRouteLocator(this.server.getServletPrefix(), this.discovery, this.zuulProperties,
                this.serviceRouteMapper);
    }
    //The following is the filter, the ZuulFilter interface implemented previously zuul mentioned
    // pre filters
    //Before routing
    @Bean
    public PreDecorationFilter preDecorationFilter(RouteLocator routeLocator, ProxyRequestHelper proxyRequestHelper) {
        return new PreDecorationFilter(routeLocator, this.server.getServletPrefix(), this.zuulProperties,
                proxyRequestHelper);
    }

    // route filters
    // When routing
    @Bean
    public RibbonRoutingFilter ribbonRoutingFilter(ProxyRequestHelper helper,
            RibbonCommandFactory<?> ribbonCommandFactory) {
        RibbonRoutingFilter filter = new RibbonRoutingFilter(helper, ribbonCommandFactory, this.requestCustomizers);
        return filter;
    }

    @Bean
    @ConditionalOnMissingBean(SimpleHostRoutingFilter.class)
    public SimpleHostRoutingFilter simpleHostRoutingFilter(ProxyRequestHelper helper, ZuulProperties zuulProperties) {
        return new SimpleHostRoutingFilter(helper, zuulProperties);
    }

    @Bean
    public ApplicationListener<ApplicationEvent> zuulDiscoveryRefreshRoutesListener() {
        return new ZuulDiscoveryRefreshListener();
    }

    @Bean
    @ConditionalOnMissingBean(ServiceRouteMapper.class)
    public ServiceRouteMapper serviceRouteMapper() {
        return new SimpleServiceRouteMapper();
    }

    @Configuration
    @ConditionalOnMissingClass("org.springframework.boot.actuate.endpoint.Endpoint")
    protected static class NoActuatorConfiguration {

        @Bean
        public ProxyRequestHelper proxyRequestHelper(ZuulProperties zuulProperties) {
            ProxyRequestHelper helper = new ProxyRequestHelper();
            helper.setIgnoredHeaders(zuulProperties.getIgnoredHeaders());
            helper.setTraceRequestBody(zuulProperties.isTraceRequestBody());
            return helper;
        }

    }

    @Configuration
    @ConditionalOnClass(Endpoint.class)
    protected static class RoutesEndpointConfiguration {

        @Autowired(required = false)
        private TraceRepository traces;

        @Bean
        public RoutesEndpoint zuulEndpoint(RouteLocator routeLocator) {
            return new RoutesEndpoint(routeLocator);
        }

        @Bean
        public RoutesMvcEndpoint zuulMvcEndpoint(RouteLocator routeLocator, RoutesEndpoint endpoint) {
            return new RoutesMvcEndpoint(endpoint, routeLocator);
        }

        @Bean
        public ProxyRequestHelper proxyRequestHelper(ZuulProperties zuulProperties) {
            TraceProxyRequestHelper helper = new TraceProxyRequestHelper();
            if (this.traces != null) {
                helper.setTraces(this.traces);
            }
            helper.setIgnoredHeaders(zuulProperties.getIgnoredHeaders());
            helper.setTraceRequestBody(zuulProperties.isTraceRequestBody());
            return helper;
        }
    }

    private static class ZuulDiscoveryRefreshListener implements ApplicationListener<ApplicationEvent> {

        private HeartbeatMonitor monitor = new HeartbeatMonitor();

        @Autowired
        private ZuulHandlerMapping zuulHandlerMapping;

        @Override
        public void onApplicationEvent(ApplicationEvent event) {
            if (event instanceof InstanceRegisteredEvent) {
                reset();
            }
            else if (event instanceof ParentHeartbeatEvent) {
                ParentHeartbeatEvent e = (ParentHeartbeatEvent) event;
                resetIfNeeded(e.getValue());
            }
            else if (event instanceof HeartbeatEvent) {
                HeartbeatEvent e = (HeartbeatEvent) event;
                resetIfNeeded(e.getValue());
            }

        }

        private void resetIfNeeded(Object value) {
            if (this.monitor.update(value)) {
                reset();
            }
        }

        private void reset() {
            this.zuulHandlerMapping.setDirty(true);
        }
    }
}
Several classes can be found through the @ Import} annotation:
- RibbonCommandFactoryConfiguration.RestClientRibbonConfiguration
- RibbonCommandFactoryConfiguration.OkHttpRibbonConfiguration
- RibbonCommandFactoryConfiguration.HttpClientRibbonConfiguration
We know that Zuul provides gateway capabilities. Through the above categories, we can analyze that it actually finds the interface address provided by each service through interface requests.
Enter the RibbonCommandFactoryConfiguration class:
public class RibbonCommandFactoryConfiguration {
    //Three different request modes are provided below
    @Configuration
    @ConditionalOnRibbonRestClient
    protected static class RestClientRibbonConfiguration {

        @Autowired(required = false)
        private Set<ZuulFallbackProvider> zuulFallbackProviders = Collections.emptySet();

        @Bean
        @ConditionalOnMissingBean
        public RibbonCommandFactory<?> ribbonCommandFactory(
                SpringClientFactory clientFactory, ZuulProperties zuulProperties) {
            return new RestClientRibbonCommandFactory(clientFactory, zuulProperties,
                    zuulFallbackProviders);
        }
    }

    @Configuration
    @ConditionalOnRibbonOkHttpClient
    @ConditionalOnClass(name = "okhttp3.OkHttpClient")
    protected static class OkHttpRibbonConfiguration {

        @Autowired(required = false)
        private Set<ZuulFallbackProvider> zuulFallbackProviders = Collections.emptySet();

        @Bean
        @ConditionalOnMissingBean
        public RibbonCommandFactory<?> ribbonCommandFactory(
                SpringClientFactory clientFactory, ZuulProperties zuulProperties) {
            return new OkHttpRibbonCommandFactory(clientFactory, zuulProperties,
                    zuulFallbackProviders);
        }
    }

    @Configuration
    @ConditionalOnRibbonHttpClient
    protected static class HttpClientRibbonConfiguration {

        @Autowired(required = false)
        private Set<ZuulFallbackProvider> zuulFallbackProviders = Collections.emptySet();

        @Bean
        @ConditionalOnMissingBean
        public RibbonCommandFactory<?> ribbonCommandFactory(
                SpringClientFactory clientFactory, ZuulProperties zuulProperties) {
            return new HttpClientRibbonCommandFactory(clientFactory, zuulProperties, zuulFallbackProviders);
        }
    }

    @Target({ ElementType.TYPE, ElementType.METHOD })
    @Retention(RetentionPolicy.RUNTIME)
    @Documented
    @Conditional(OnRibbonHttpClientCondition.class)
    @interface ConditionalOnRibbonHttpClient { }

    private static class OnRibbonHttpClientCondition extends AnyNestedCondition {
        public OnRibbonHttpClientCondition() {
            super(ConfigurationPhase.PARSE_CONFIGURATION);
        }

        @Deprecated //remove in Edgware"
        @ConditionalOnProperty(name = "zuul.ribbon.httpclient.enabled", matchIfMissing = true)
        static class ZuulProperty {}

        @ConditionalOnProperty(name = "ribbon.httpclient.enabled", matchIfMissing = true)
        static class RibbonProperty {}
    }

    @Target({ ElementType.TYPE, ElementType.METHOD })
    @Retention(RetentionPolicy.RUNTIME)
    @Documented
    @Conditional(OnRibbonOkHttpClientCondition.class)
    @interface ConditionalOnRibbonOkHttpClient { }

    private static class OnRibbonOkHttpClientCondition extends AnyNestedCondition {
        public OnRibbonOkHttpClientCondition() {
            super(ConfigurationPhase.PARSE_CONFIGURATION);
        }

        @Deprecated //remove in Edgware"
        @ConditionalOnProperty("zuul.ribbon.okhttp.enabled")
        static class ZuulProperty {}

        @ConditionalOnProperty("ribbon.okhttp.enabled")
        static class RibbonProperty {}
    }

    @Target({ ElementType.TYPE, ElementType.METHOD })
    @Retention(RetentionPolicy.RUNTIME)
    @Documented
    @Conditional(OnRibbonRestClientCondition.class)
    @interface ConditionalOnRibbonRestClient { }

    private static class OnRibbonRestClientCondition extends AnyNestedCondition {
        public OnRibbonRestClientCondition() {
            super(ConfigurationPhase.PARSE_CONFIGURATION);
        }

        @Deprecated //remove in Edgware"
        @ConditionalOnProperty("zuul.ribbon.restclient.enabled")
        static class ZuulProperty {}

        @ConditionalOnProperty("ribbon.restclient.enabled")
        static class RibbonProperty {}
    }
}
summary
I've led you to analyze a small section of source code. Spring Cloud is huge and can't be analyzed one by one. The main purpose of this paper is to teach you how to analyze the source code and where to start, so that you can continue to follow this idea.
Lesson 20: deploying Spring Cloud cluster with K8S+Docker
In an actual large-scale system, the micro service architecture may be composed of hundreds of services. If we publish a system simply by packaging, uploading and then publishing, the workload is undoubtedly huge and undesirable. As we know earlier, Jenkins can help us automate the publishing task.
However, we know that a Java application actually takes up more resources. Each service is published to the physical host, and the resource cost is also huge. Moreover, for each server expansion, the same software needs to be deployed repeatedly. This method is obviously undesirable.
The emergence of container technology has brought us new ideas. We package services into images, put them into containers, and run our services through containers. In this way, we can easily carry out distributed management, and the same services can also be easily expanded horizontally.
Docker is a leader in container technology. It is an open source container. Kubernetes (hereinafter referred to as K8S) is a platform for distributed clustering scheme. It is naturally paired with docker. Through the cooperation of K8S and docker, we can easily build a distributed clustering environment.
Next, let's take a look at the attractions of K8S and Docker.
Cluster environment construction
This paper uses a virtual machine to simulate the cluster environment.
Operating system: CentOS7 64 bit
Configuration: 2GB memory and 40GB hard disk.
Note: the construction scheme of real distributed environment is similar. Please refer to the blog: Kubernetes learning 2 - cluster deployment and construction.
Let's start to build a cluster environment.
1. Turn off the firewall:
systemctl disable firewalld
systemctl stop firewalld
iptables -P FORWARD ACCEPT
2. Install etcd:
yum install -y etcd
Start etcd after installation:
systemctl start etcd
systemctl enable etcd
After startup, we can check etcd health:
etcdctl -C http://localhost:2379 cluster-health
The following message appears to indicate that etcd is currently stable:
member 8e9e05c52164694d is healthy: got healthy result from http://localhost:2379
cluster is healthy
3. Install Docker:
yum install docker -y
Start Docker after completion:
chkconfig docker on
service docker start
4. Install Kubernetes:
yum install kubernetes -y
After installation, modify the configuration file / etc/kubernetes/apiserver:
vi /etc/kubernetes/apiserver
Kube_ ADMISSION_ Delete the ServiceAccount after control, such as:
KUBE_ADMISSION_CONTROL="--admission-control=NamespaceLifecycle,NamespaceExists,LimitRanger,SecurityContextDeny,ResourceQuota"
Then start kubernetes server successively:
systemctl enable kube-apiserver
systemctl start kube-apiserver
systemctl enable kube-controller-manager
systemctl start kube-controller-manager
systemctl enable kube-scheduler
systemctl start kube-scheduler
Then start kubernetes client successively:
systemctl enable kubelet
systemctl start kubelet
systemctl enable kube-proxy
systemctl start kube-proxy
Let's view the cluster status:
kubectl get no
You can see the following information:
NAME        STATUS    AGE
127.0.0.1   Ready     1h
So far, our K8S based cluster environment has been built, but we can't access it when we publish it to Docker. We also need to install Flannel to cover the network.
Execute the following command to install Flannel:
yum install flannel -y
After installation, modify the configuration file / etc/sysconfig/flanneld:
vim /etc/sysconfig/flanneld
The contents are as follows:
# Flanneld configuration options

# etcd url location.  Point this to the server where etcd runs
FLANNEL_ETCD_ENDPOINTS="http://127.0.0.1:2379"

# etcd config key.  This is the configuration key that flannel queries
# For address range assignment
FLANNEL_ETCD_PREFIX="/atomic.io/network"

# Any additional options that you want to pass
FLANNEL_OPTIONS="--logtostderr=false --log_dir=/var/log/k8s/flannel/ --etcd-prefix=/atomic.io/network  --etcd-endpoints=http://localhost:2379 --iface=enp0s3"
Where enp0s3 is the name of the network card, which can be viewed through ifconfig.
Then configure the key about Flannel in etcd:
etcdctl mk /atomic.io/network/config '{ "Network": "10.0.0.0/16" }'
Where / atomic IO / network should be consistent with the configuration in the configuration file.
Finally, start Flannel and restart Kubernetes:
systemctl enable flanneld
systemctl start flanneld
systemctl enable flanneld
service docker restart
systemctl restart kube-apiserver
systemctl restart kube-controller-manager
systemctl restart kube-scheduler
systemctl restart kubelet
systemctl restart kube-proxy
In this way, a complete cluster environment based on K8S+Docker has been built, and then we can deploy the distributed system on it.
This article is just a demonstration and will not really publish a set of systems. Therefore, we take the registry as an example to demonstrate how to publish a set of distributed systems.
Create Docker image
We first package the register locally as a Jar and upload it to the virtual machine, and then create an image of the register through Dockerfile. The Dockerfile content is as follows:
#Download the image of Java 8
FROM java:8
#Hang the local file to the / tmp directory
VOLUME /tmp
#Copy files to container
ADD register.jar /registar.jar
#Exposed 8888 port
EXPOSE 8888
#Configure the commands to execute after starting the container
ENTRYPOINT ["java","-jar","/register.jar"]
Build an image through docker build:
docker build -t register.jar:0.0.1 .
After executing this command, the following information is printed:
Sending build context to Docker daemon 48.72 MB
Step 1/6 : FROM java:8
Trying to pull repository docker.io/library/java ...
apiVersion: v1
8: Pulling from docker.io/library/java
5040bd298390: Pull complete
fce5728aad85: Pull complete
76610ec20bf5: Pull complete
60170fec2151: Pull complete
e98f73de8f0d: Pull complete
11f7af24ed9c: Pull complete
49e2d6393f32: Pull complete
bb9cdec9c7f3: Pull complete
Digest: sha256:c1ff613e8ba25833d2e1940da0940c3824f03f802c449f3d1815a66b7f8c0e9d
Status: Downloaded newer image for docker.io/java:8
 ---> d23bdf5b1b1b
Step 2/6 : VOLUME /tmp
 ---> Running in f6f284cf34f2
 ---> bf70efe7bea0
Removing intermediate container f6f284cf34f2
Step 3/6 : ADD register.jar registar.jar
 ---> 91d6f5aa9db3
Removing intermediate container e4dd67f5acc2
Step 4/6 : RUN bash -c 'touch /register.jar'
 ---> Running in 3b6d5f4ed216

 ---> 70381c5e0b5d
Removing intermediate container 3b6d5f4ed216
Step 5/6 : EXPOSE 8888
 ---> Running in b87b788ff362
 ---> 912e4f8e3004
Removing intermediate container b87b788ff362
Step 6/6 : ENTRYPOINT java -Djava.security.egd=file:/dev/./urandom jar /register.jar
 ---> Running in 1bc65e0bfbea
 ---> 1aec9d5e9c70
Removing intermediate container 1bc65e0bfbea
Successfully built 1aec9d5e9c70
At this time, you can see the image we just built through the docker images command:
[root@localhost ~]# docker images
REPOSITORY           TAG                 IMAGE ID            CREATED             SIZE
register.jar         0.0.1               1aec9d5e9c70        2 minutes ago       692 MB
docker.io/registry   2                   b2b03e9146e1        5 days ago          33.3 MB
docker.io/java       8                   d23bdf5b1b1b        18 months ago       643 MB
System release
With the image of our local virtual machine, we can publish it through K8S.
1. Create register RC yaml:
apiVersion: v1
kind: ReplicationController
metadata:
    name: register
spec:
    replicas: 1
    selector:
        app: register
    template:
        metadata:
            labels:
                app: register
        spec:
            containers:
            - name: register
              #Image name
              image: register
              #If there is a local image, it will not be pulled from the warehouse
              imagePullPolicy: IfNotPresent
              ports:
              - containerPort: 8888
Execute command:
[root@localhost ~]# kubectl create -f register-rc.yaml
replicationcontroller "register" created
After the prompt is created successfully, we can view the pod:
[root@localhost ~]# kubectl get po
NAME             READY     STATUS    RESTARTS   AGE
register-4l088   1/1       Running   0          10s
If the STATUS is Running, it indicates that the operation is successful. Otherwise, you can view the log through the following command:
kubectl describe po register-4l088
Then we use the docker ps command to view the currently running container:
[root@localhost ~]# docker ps
CONTAINER ID        IMAGE                                                        COMMAND                CREATED             STATUS              PORTS               NAMES
dd8c05ae4432        register                                                     "java -jar /app.jar"   8 minutes ago       Up 8 minutes                            k8s_register.892502b2_register-4l088_default_4580c447-8640-11e8-bba0-080027607861_5bf71ba9
3b5ae8575079        registry.access.redhat.com/rhel7/pod-infrastructure:latest   "/usr/bin/pod"         8 minutes ago       Up 8 minutes                            k8s_POD.43570bb9_register-4l088_default_4580c447-8640-11e8-bba0-080027607861_1f38e064
You can see that the container is already running, but the external is still inaccessible because K8S allocates virtual IP. To access through the host, you need to create a Service.
Write register SVC yaml:
apiVersion: v1
kind: Service
metadata:
  name: register
spec:
  type: NodePort
  ports:
  - port: 8888
    targetPort: 8888
    Nodes exposed to external ports (range must be 30000)-32767)
    nodePort: 30001
  selector:
    app: register
Then execute the command:
[root@localhost ~]# kubectl create -f register-svc.yaml
service "register" created
We can view the created Service:
[root@localhost ~]# kubectl get svc
NAME         CLUSTER-IP       EXTERNAL-IP   PORT(S)          AGE
kubernetes   10.254.0.1       <none>        443/TCP          20h
register     10.254.228.248   <nodes>       8888:30001/TCP   37s
At this time, you can access the register through IP:30001. If you can't access it, you need to run the command first:
iptables -P FORWARD ACCEPT
Visit http://172.20.10.13:30001 , as shown in the figure:
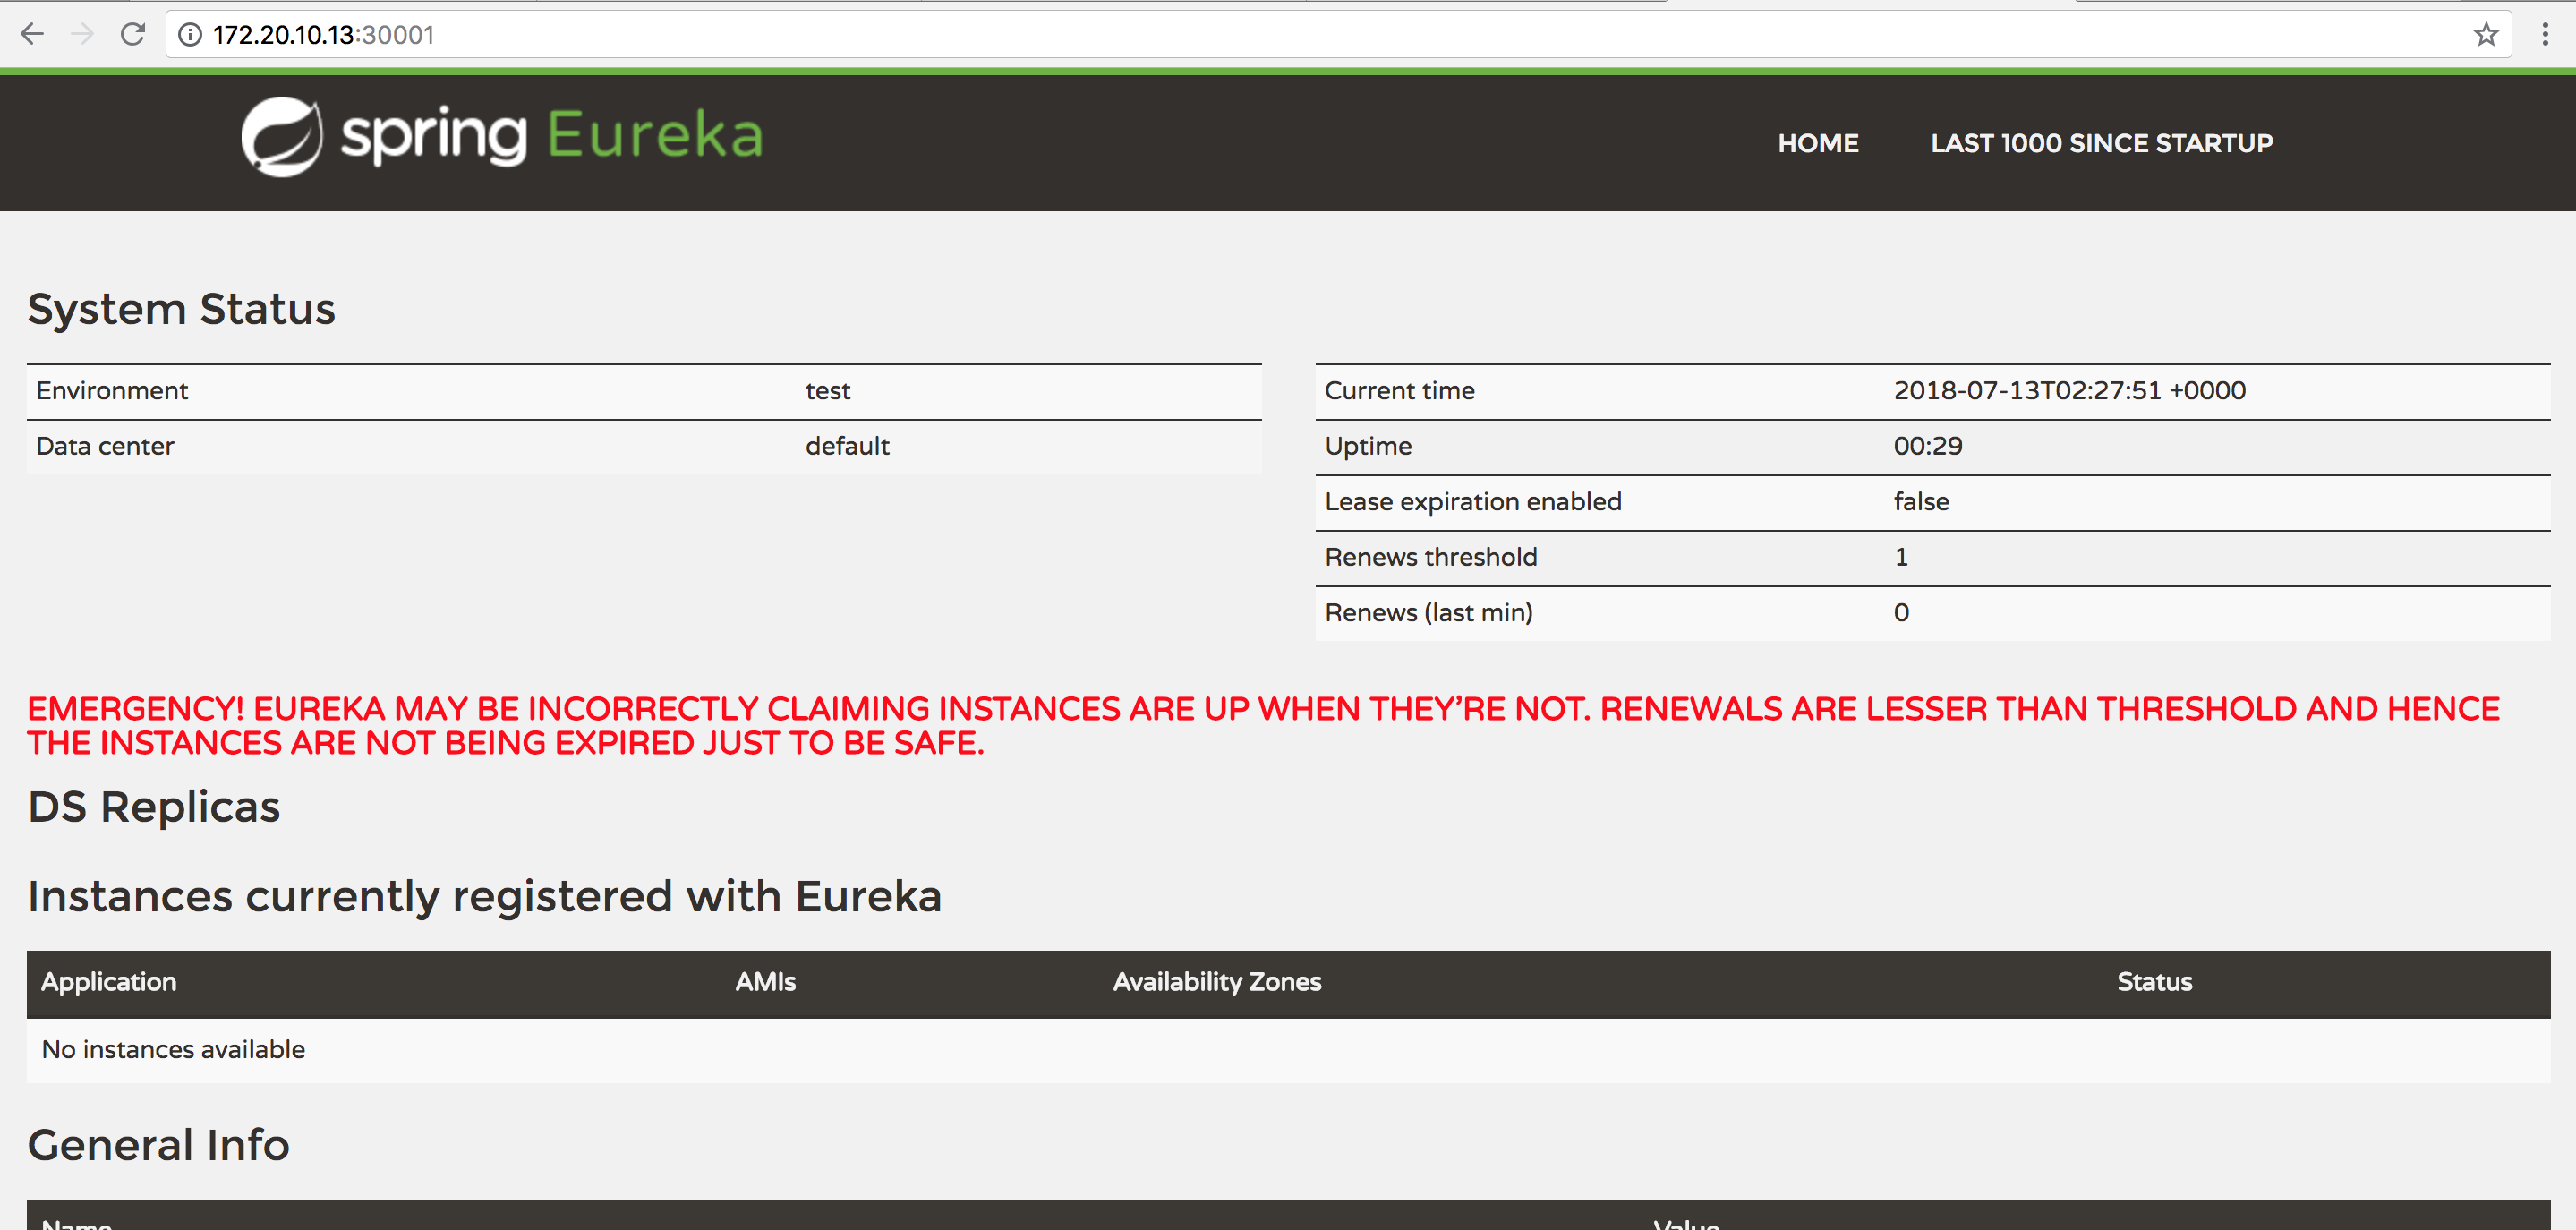
So far, our registry can be deployed through K8S. It seems troublesome now, but it's great in a large cluster environment. We can give Jenkins a series of manual operations just now in combination with Jenkins mentioned above.