v-model is a common instruction in Vue, which is often used for data binding in forms. The following basic usage must be familiar to everyone. The value of the checked attribute in data will change in real time with the status of multiple selection boxes.
<el-checkbox v-model="checked" />
But you may have heard that there is a "one-way data flow" between Vue components, that is, one-way transmission of data from parent components to child components through props. So, how to achieve the "two-way binding" effect of v-model?
Custom component implementation v-model
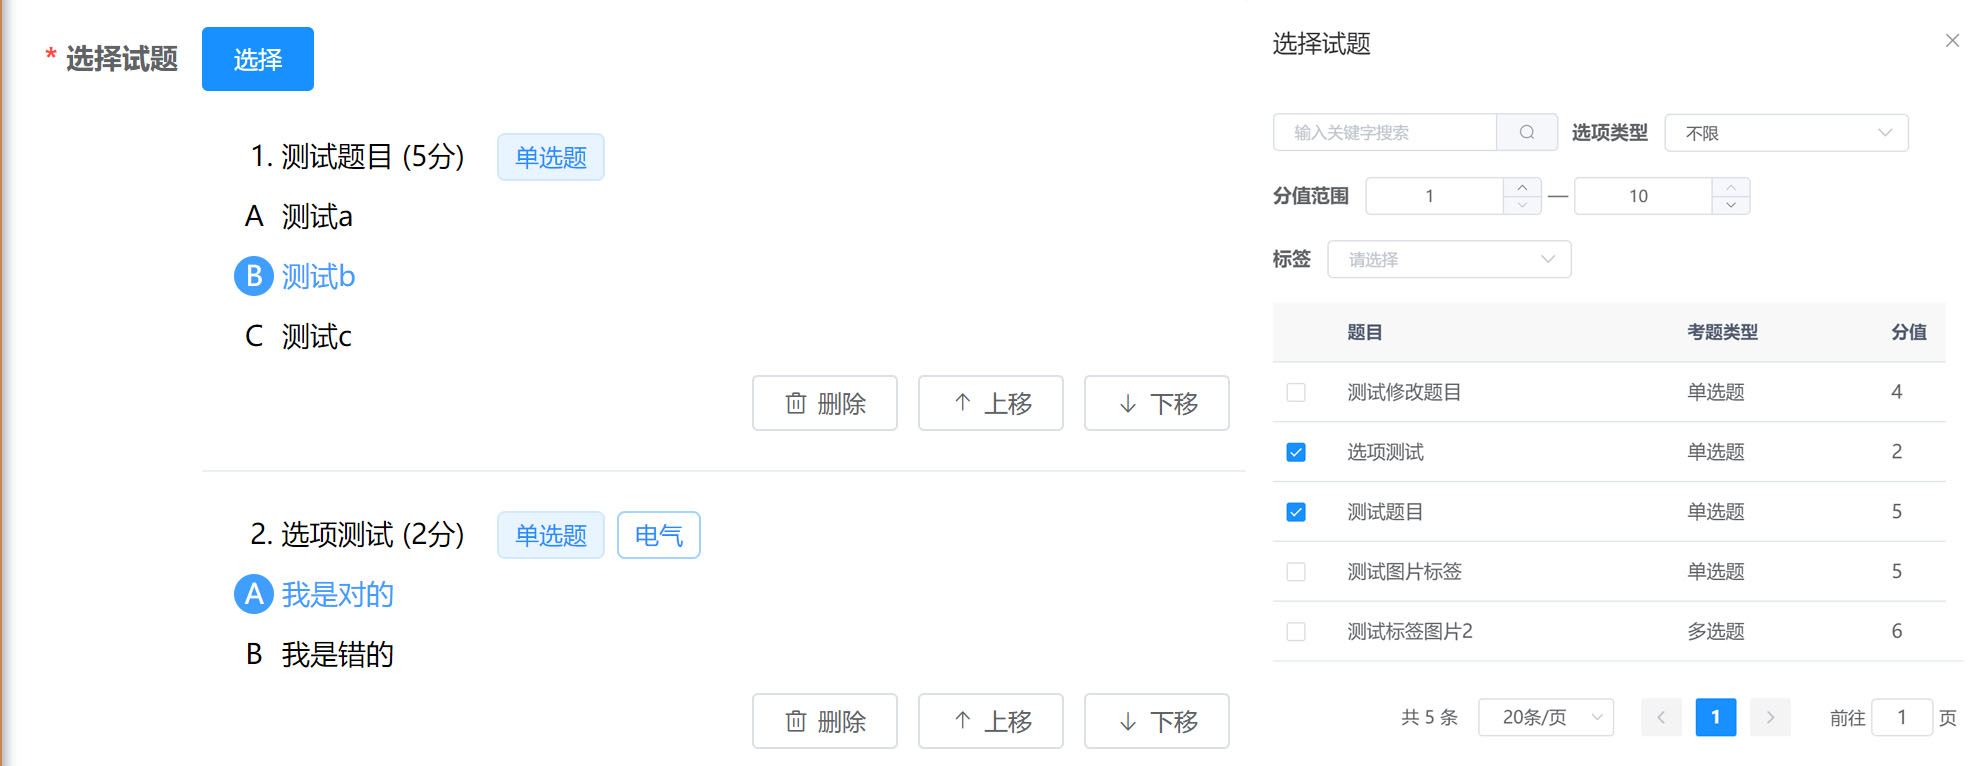
First, let's take a practical application example. The requirements are as follows: in the create test paper page paperCreate, query and select the question component questionSelect to form the test paper. The effect is shown in the figure below.
For ease of use, it is hoped that the v-model instruction can be used for two-way binding on the selected topic component:
<!-- Select topic component -->
<question-select v-model="formData.questions" />

<!-- Show selected topics -->
<div v-for="item in formData.questions" :key="item.id" >
    <question :question="item" />
</div>
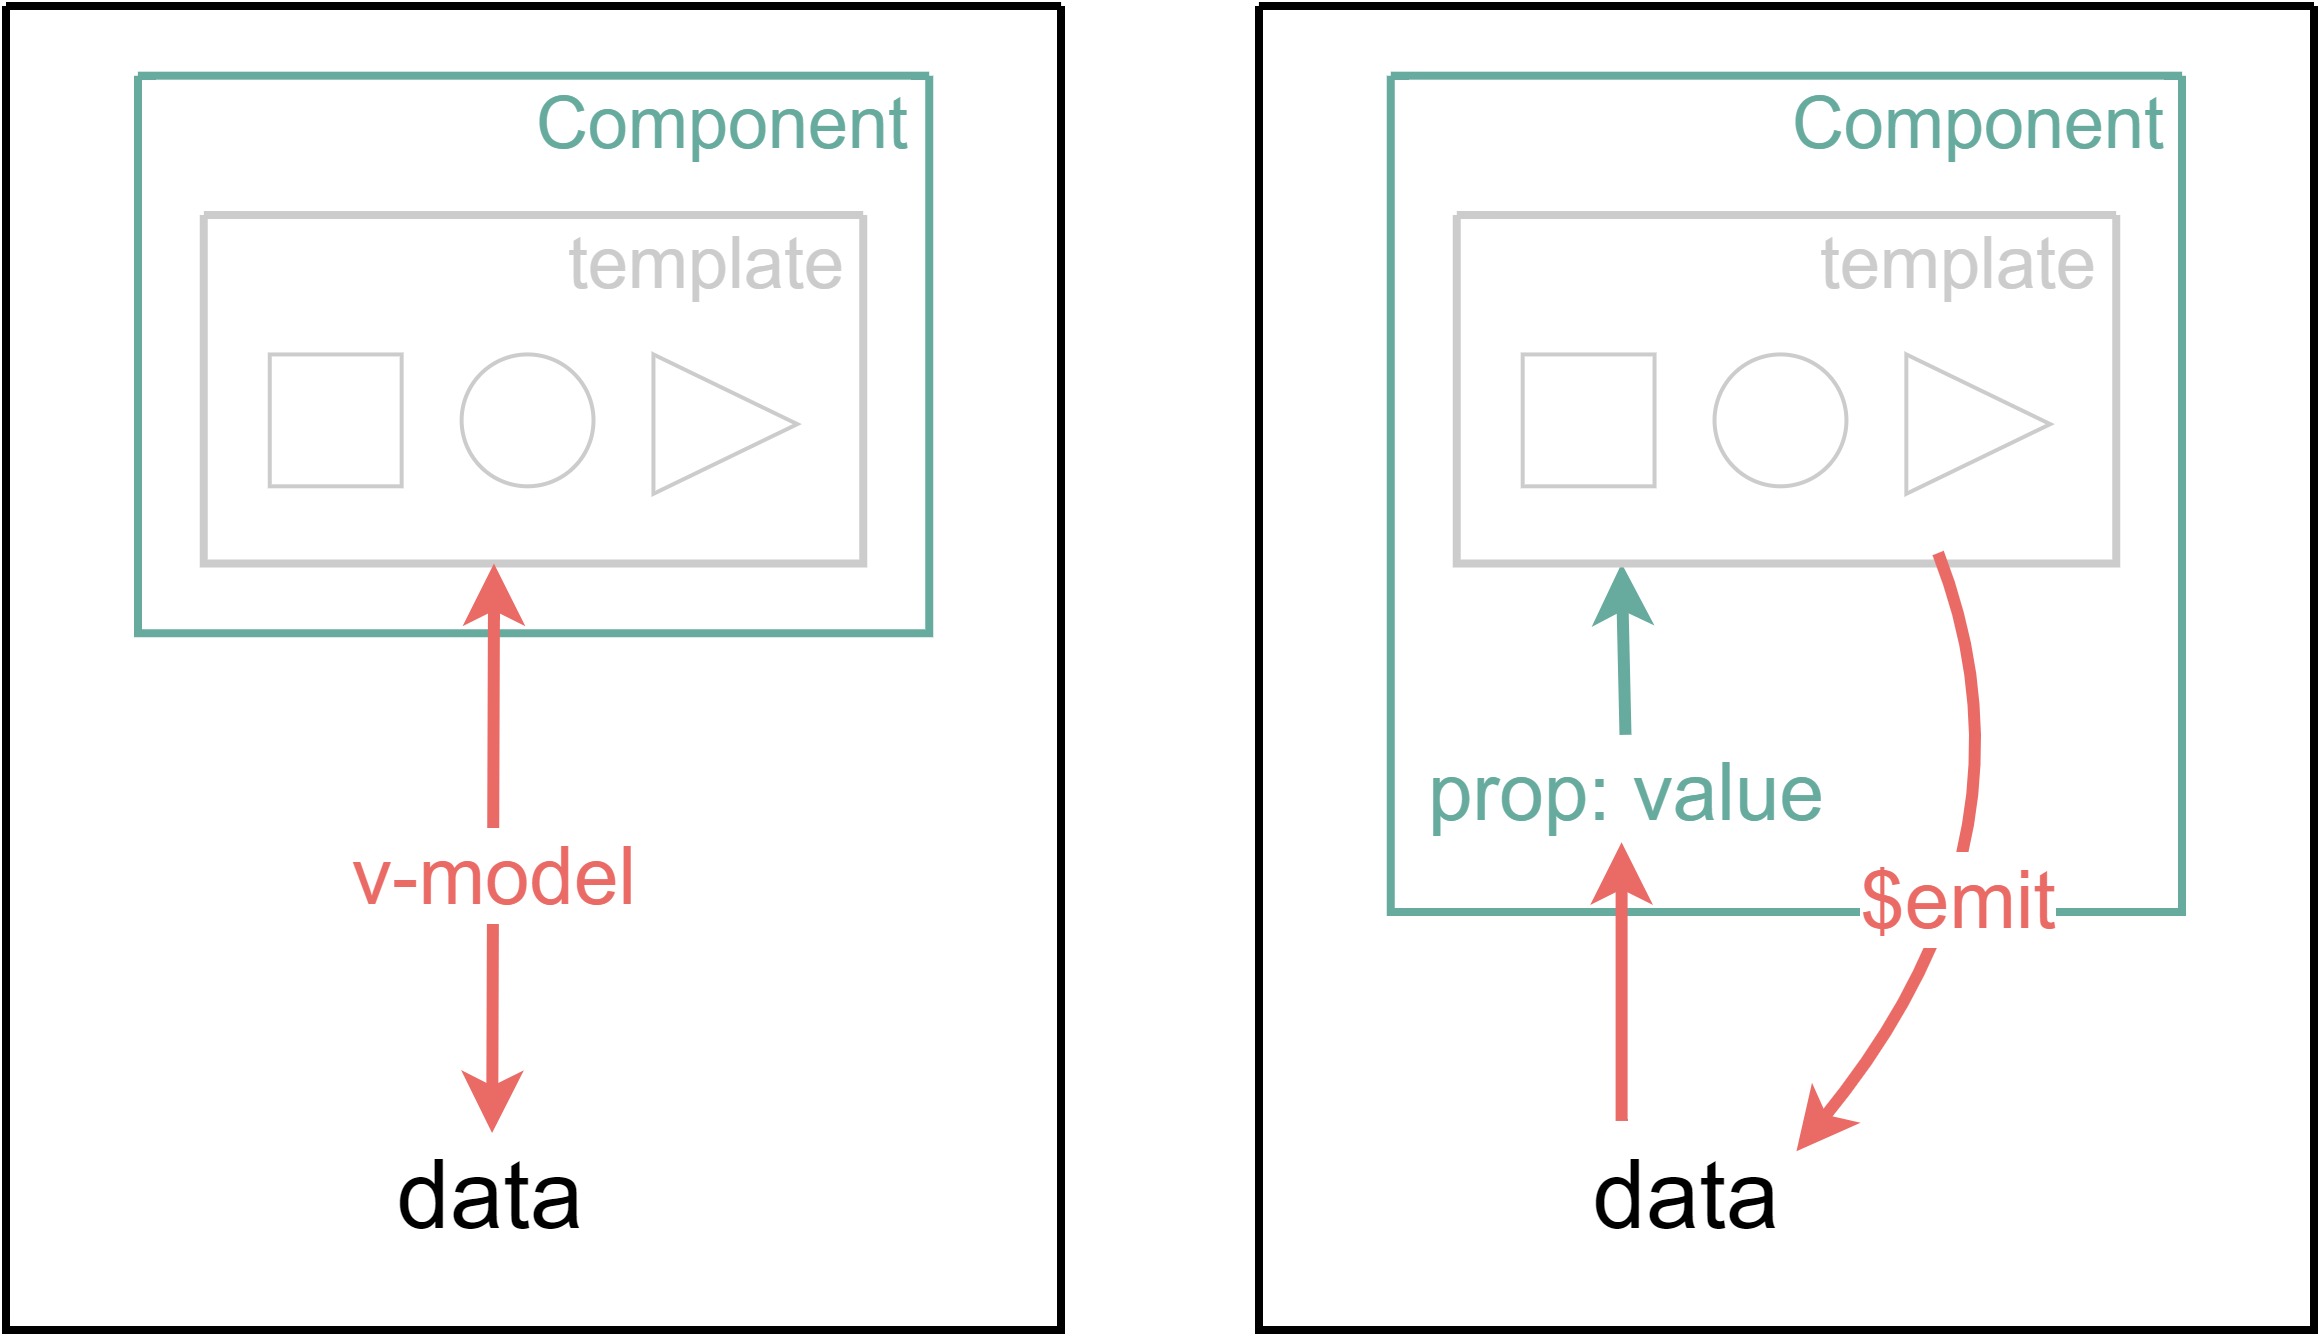
value attribute and input event
Custom components that support v-model only need to meet two conditions:
- value attribute as incoming data
- When the data changes, the new data is used as a payload and an input event is emit ted upward
It's that simple. The relevant code is:
export default {
  props: {
    value: Array,	// Type according to actual needs
  },
  methods: {
    handelChange() {
      this.$emit("input", newValue);
    },
  },
};
If you do not want to use the default value attribute and input event, you can also customize the corresponding attributes and events through the model object:
model: {
  prop: 'checked',
  event: 'change',
},
Unidirectional data flow
It should be noted that the value transfer of prop is one-way, that is, the data changes in the parent component will be reflected in the child component, but the value of prop cannot be actively changed within the child component. Specifically, operations like v-model="value" that attempt to change the value value cannot be used in subcomponents.
Therefore, the checkbox in the table only passes in value one way to control whether the selected status is selected, and then manually process the changed results when the selected status is changed.
- For a row (i.e. a topic) in the table, if the passed in value array (i.e. the selected topic list) contains its id, it will be displayed as selected
- You cannot directly change the original array value, but directly construct a new list:
- If an option is added, it is transferred to the original list + the selected object
- If an option is cancelled, it is transferred to the original list - selected object
(PS: the El checkbox provided in the component library is actually another user-defined component, which can be analyzed in the same way)
<el-table :data="questionList">
  <el-table-column>
    <template slot-scope="scope">
      <el-checkbox
        :value="selectedIds.includes(scope.row.id)"
        @change="(value) => handelChange(scope.row, value)"
      />
    </template>
  </el-table-column>
  <!-- Other properties -->
</el-table>
props: {
  value: Array,
},
computed: {
  selectedIds() {
    return this.value.map((item) => item.id);
  },
},
methods: {
  handelChange(item, checked) {
    if (checked) {
      this.$emit("input", [...this.value, item]);
    } else {
      this.$emit(
        "input",
        this.value.filter((element) => element.id != item.id)
      );
    }
  },
},
The specific writing method is related to the specific implementation of the component library. Briefly explain the element syntax here:
- scope.row is the object corresponding to the current row of El table
- The load of the change event of the El checkbox is the new value after the check box is clicked
Then it's over. When the parent component uses the selected topic component, it can use the v-model normally. In this example, the bound data is a complete list of topics, because the specific information of the selected topic needs to be displayed on the page; If you only need id data (such as components like select), you can only pass the id list during emit, and the writing method is completely the same.
Bidirectional binding
You must have seen from the above example that the "two-way binding" of the v-model instruction is actually a syntax sugar: it passes the data of the parent component into the child component through prop, and then listens to the input events of the child component to update the data in the parent component, so as to achieve the effect of two-way binding.
Conclusion & References
The above is my personal understanding and Reflection on the v-model instruction in Vue. I hope I can help you. If there are any questions or omissions, please discuss and correct them in the comments.
I will continue to update my study notes in my personal blog, focusing on front-end technology (Vue framework). If you are interested, please pay attention!
reference material: Vue official documents