Image Processing Basis
1. Software Installation
In the computer vision course, image processing is done in the python environment, so you need to select the software that can edit the python statement. The visual interface of PyCharm is selected here. In addition, there are editors such as VScode,Sublime, etc.
PyCharm needs to select python.exe in the Setting Projectinterpreter to compile.There is no built-in PyCharm, so Python is required before using PyCharm.
2. Environmental Configuration
Python environment configuration, you can choose to download the latest Python from the official website or use Anaconda, Anaconda can directly configure the Python environment, pip package management tools, commonly used libraries, configure the environment path and so on, which is more friendly for beginners.
1.Anaconda installation
Installation using Anaconda2-5.0.0 has been unsuccessful for some reason. Later, a mirror Anaconda2-5.3.1 installation failed, but it appeared in the cmd
UnicodeDecodeError: 'ascii' codec can't decode byte 0xcd in position 9: ordinal not in range(128)
python2 often encounters scrambling and scrambling whenever it encounters Chinese.Therefore, when installing, we should pay attention to avoid Chinese as much as possible, whether the path of interpreter interpreter or user project.
2.python 2.7 Installation
You can go to the official website to find the latest version, but there is a difference between python2 and python3. To avoid incompatibility, it is best to install it as needed.
Small code can be edited quickly and easily in IDLE, and you can verify that the installation was successful.
PCV installation, the sum of python installation, if you need to download PCV library file data
- In executing cmd, cd goes to the directory where the PCV is located
- Enter python setup.py install
- Enter import PCV in python's IDLE or python.exe, and if there are no errors, the installation is successful.
3. Validation experiments
This experiment is in PyCharm and the environment is anaconda2.
1. Read pictures in and display grayscale pictures
# -*- coding: utf-8 -*-
from PIL import Image
from pylab import *

# Add Chinese font support
from matplotlib.font_manager import FontProperties
font = FontProperties(fname=r"c:\windows\fonts\SimSun.ttc", size=14)
figure()

pil_im = Image.open(r'D:\test.jpg')
gray()
subplot(121)
title(u'Original Map',fontproperties=font)
axis('off')
imshow(pil_im)

pil_im = Image.open(r'D:\test.jpg').convert('L')
subplot(122)
title(u'Grayscale Grayscale',fontproperties=font)
axis('off')
imshow(pil_im)
show()
Experimental results: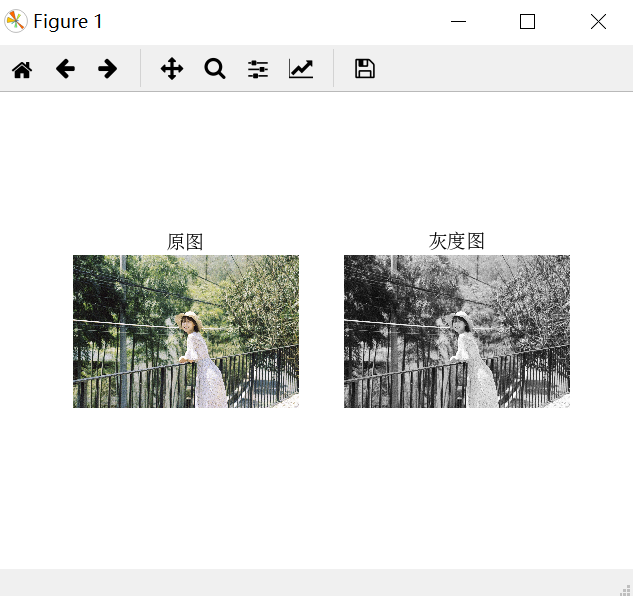
Problem:
IOError: [Errno 22] invalid mode ('rb') or filename
Solution:
You need to add an r before the quotation mark for the file name
2. Display picture histogram
# -*- coding: utf-8 -*-
from PIL import Image
from pylab import *
# Add Chinese font support
from matplotlib.font_manager import FontProperties
font = FontProperties(fname=r"c:\windows\fonts\SimSun.ttc", size=14)
im = array(Image.open(r'D:\test.jpg').convert('L'))  # Open the image and convert it to grayscale
figure()
subplot(121)
gray()
contour(im, origin='image')
axis('equal')
axis('off')
title(u'Image Contour', fontproperties=font)
subplot(122)
hist(im.flatten(), 128)
title(u'image histogram', fontproperties=font)
plt.xlim([0,260])
plt.ylim([0,11000])

show()
Experimental results: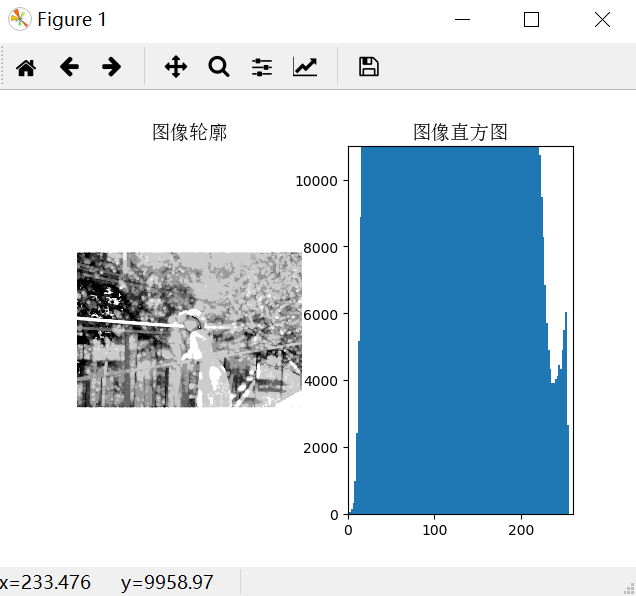
3. Histogram Equalization
# -*- coding: utf-8 -*-
from PIL import Image
from pylab import *
from PCV.tools import imtools
# Add Chinese font support
from matplotlib.font_manager import FontProperties
font = FontProperties(fname=r"c:\windows\fonts\SimSun.ttc", size=14)
im = array(Image.open('../data/empire.jpg').convert('L'))  # Open the image and convert it to grayscale
#im = array(Image.open('../data/AquaTermi_lowcontrast.JPG').convert('L'))
im2, cdf = imtools.histeq(im)
figure()
subplot(2, 2, 1)
axis('off')
gray()
title(u'original image', fontproperties=font)
imshow(im)
subplot(2, 2, 2)
axis('off')
title(u'Histogram equalized image', fontproperties=font)
imshow(im2)
subplot(2, 2, 3)
axis('off')
title(u'Original Histogram', fontproperties=font)
#hist(im.flatten(), 128, cumulative=True, normed=True)
hist(im.flatten(), 128, normed=True)
subplot(2, 2, 4)
axis('off')
title(u'Histogram after equalization', fontproperties=font)
#hist(im2.flatten(), 128, cumulative=True, normed=True)
hist(im2.flatten(), 128, normed=True)
show()
Experimental results: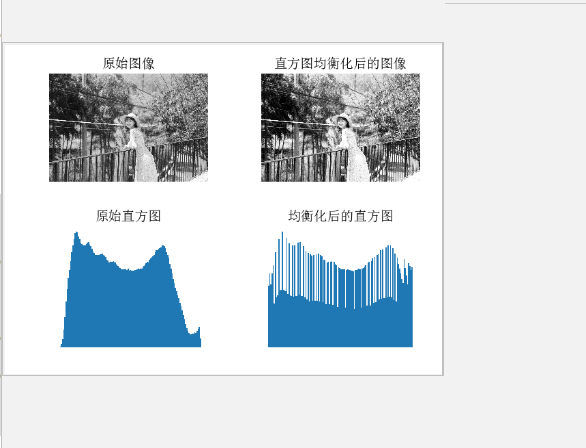
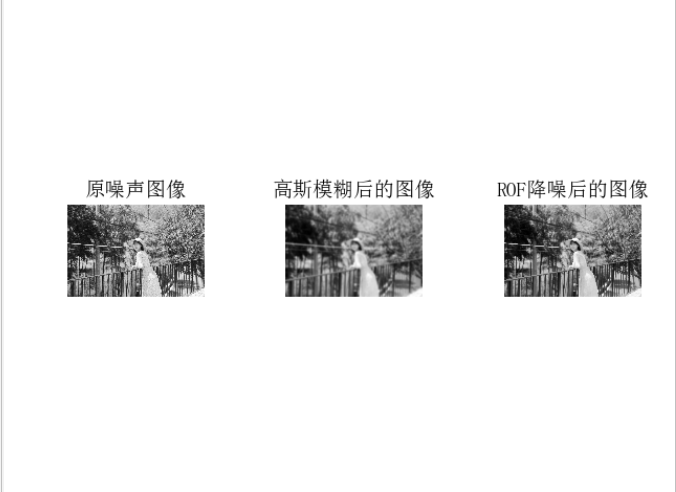
4. Gauss filter
# -*- coding: utf-8 -*-
from PIL import Image
from pylab import *
from numpy import *
from numpy import random
from scipy.ndimage import filters
from scipy.misc import imsave
from PCV.tools import rof
# Add Chinese font support
from matplotlib.font_manager import FontProperties
font = FontProperties(fname=r"c:\windows\fonts\SimSun.ttc", size=14)

im = array(Image.open('../data/empire.jpg').convert('L'))

U,T = rof.denoise(im,im)
G = filters.gaussian_filter(im,10)
# plot
figure()
gray()

subplot(1,3,1)
imshow(im)
#axis('equal')
axis('off')
title(u'Original noise image', fontproperties=font)

subplot(1,3,2)
imshow(G)
#axis('equal')
axis('off')
title(u'Gauss blurred image', fontproperties=font)

subplot(1,3,3)
imshow(U)
#axis('equal')
axis('off')
title(u'ROF Image after noise reduction', fontproperties=font)
show()
Experimental results: