Shooting
For the previous code, we will make a small reconstruction, that is, press and lift the key in the input function in different methods:
import sys
import pygame

#Monitor input
def check_keydown_events (event,ship ):
    if event.key == pygame.K_RIGHT:
        ship .moving_right= True
    if event.key == pygame.K_LEFT:
        ship .moving_left = True


def check_keyup_events(event,ship):
    if event.key == pygame.K_RIGHT:
        ship .moving_right= False
    if event.key == pygame.K_LEFT:
        ship .moving_left = False


def check_events(ship):
    for event in pygame.event.get():
        if event.type ==pygame.QUIT:
            sys.exit()
            #Get key press
        elif event.type ==pygame.KEYDOWN:
            check_keydown_events(event,ship)
            #Get key lift
        elif event.type ==pygame.KEYUP:
            check_keyup_events(event,ship)


#Update screen
def update_screen(ai_settings,screen,ship):
    screen.fill (ai_settings.bg_color)
    ship.biltme()
    pygame.display.flip()
This is done to facilitate the management of input methods Maybe you don't need it, but it's necessary when your game is complex enough. If your game function is simple, it's not necessary
Next, we will develop a bullet shooting function Of course, it must be a new script bullet Py, some bullet settings can be written directly in settings:
     #Bullet properties
        self .bullet_speed_factor =
        self .bullet_width =
        self .bullet_height=
        self .bullet_color = ,,
Then write the basic attribute code of the bullet in the bullet:
import pygame
from pygame.sprite import Sprite    #Import picture control

#Class that manages the bullets fired
class Bullet(Sprite):
    def __init__(self, ai_settings,screen,ship):
        super(Bullet,self ).__init__()
        self .screen = screen

        #Create a rectangle
        self .rect = pygame .Rect(,,ai_settings.bullet_width,ai_settings.bullet_height)
12        #Is the X-axis position of a picture sprite
13        self .rect.centerx = ship .rect.centerx
14        self .rect.top = ship .rect.top
15
16        self .y = float (self .rect .y)
17        self .color = ai_settings.bullet_color
18        self .speed_factor = ai_settings.bullet_speed_factor
19
20    #Update bullet location
21    def update (self):
22        self .y -= self .speed_factor
23        self .rect.y =self .y
24
25    #Draw bullets
26    def draw_bullet (self):
27        pygame.draw.rect (self .screen,self .color,self .rect)
First, we don't have the picture of bullet here. We directly call the sprite class in pygame to generate a rectangle
The usage of super is that it can use the methods in the parent class, that is, here, it can use the methods in the sprite class In other words, super is called to inherit sprite
The following update method can be used to update the location of sprite and draw bullets on the page
Of course, all bullets should be saved in a Group, which is not mentioned before. The use of this Group is a bit like the use of list. You can add and remove Of course, you can use arrays or dictionaries if you have to The following code is written in the main function:
import pygame
#Import settings class in settings script - 1
from settings import Settings
from ship import Ship       #Methods in import classes
import game_functions as gf#Import method
from pygame.sprite import Group


def run_game():
    #init game
    pygame.init()
    #Import settings class in settings script - 2
    ai_settings = Settings()

...

    #Create a group for storing bullets
    bullets = Group()

...

    while True:

        #Monitor input
        gf .check_events(ai_settings,screen,ship,bullets)
        ship.update()
        bullets .update()

        #Update screen
        gf.update_screen(ai_settings,screen,ship,bullets)


run_game()
Finally, press the space bar on the keyboard to generate a bullet at the position of the spacecraft and fly upward
import sys
import pygame
from bullet import Bullet
#Keyboard press event
def check_keydown_events (event,ai_settings,screen, ship,bullets ):
    if event.key == pygame.K_RIGHT:
        ship .moving_right= True
    if event.key == pygame.K_LEFT:
        ship .moving_left = True
    if event.key == pygame.K_SPACE:
        new_bullet = Bullet (ai_settings,screen,ship)
        bullets.add(new_bullet)

#Keyboard lift event
def check_keyup_events(event,ship):
    if event.key == pygame.K_RIGHT:
        ship .moving_right= False
    if event.key == pygame.K_LEFT:
        ship .moving_left = False


def check_events(ai_settings,screen, ship,bullets):
    for event in pygame.event.get():
        if event.type ==pygame.QUIT:
            sys.exit()
            #Get key press
        elif event.type ==pygame.KEYDOWN:
            check_keydown_events(event,ai_settings,screen,ship,bullets)

            #Get key lift
        elif event.type ==pygame.KEYUP:
            check_keyup_events(event,ship)


#Update screen
def update_screen(ai_settings,screen,ship,bullets):
    screen.fill (ai_settings.bg_color)

    for bullet in bullets.sprites():
        bullet.draw_bullet()
    ship.biltme()
    pygame.display.flip()
Here, when the player presses the spacebar, an instance of a bullet is created and then incorporated into a Group called bullets,
Then, there is the destruction of bullets flying out of the screen
 while True:

        #Monitor input
        gf .check_events(ai_settings,screen,ship,bullets)
        ship.update()
        bullets .update()
        for bullet in bullets.copy():
            if bullet .rect .bottom <=:
                bullets.remove(bullet)
        print (len(bullets))

        #Update screen
        gf.update_screen(ai_settings,screen,ship,bullets)


run_game()
Here you can see that the bullets disappear when they fly to the edge, or you can print out the number of bullets
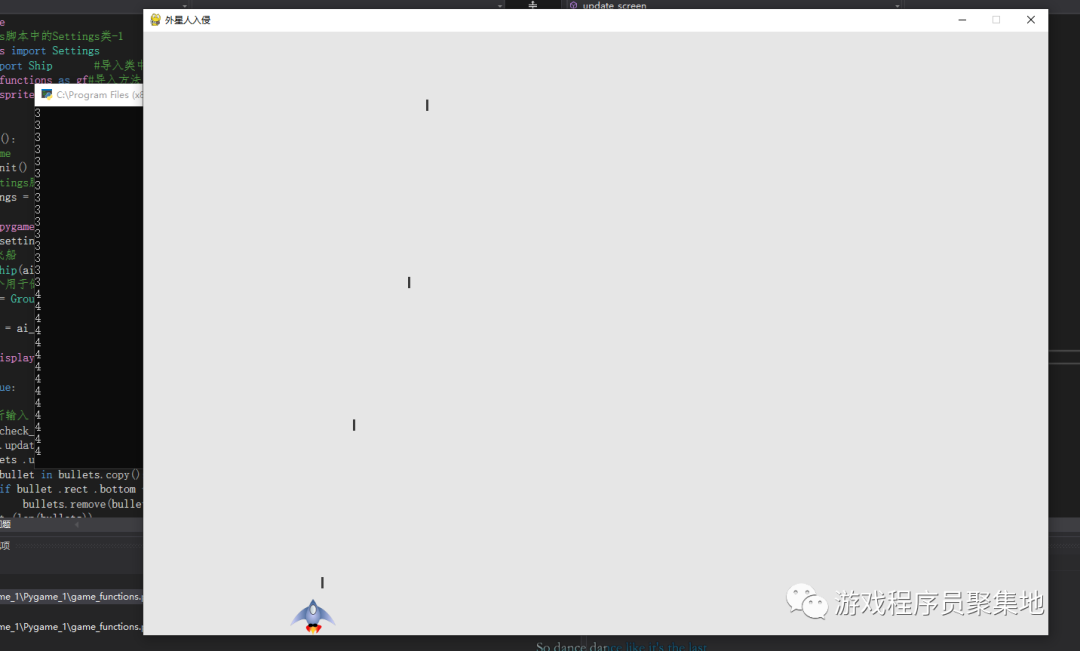
When you confirm that there is nothing wrong, you should delete the print code, because it also consumes resources
Next, we can also limit the number of bullets, that is, the number of bullets on the screen at the same time can not exceed 3. In fact, we have recorded the number of bullets in the group, but we don't need to judge in the main cycle. We judge after pressing the key, and write the firing method in a method
def fire_bullet (ai_settings,screen,ship ,bullets):
    if len(bullets) < ai_settings.bullet_allowed:
        new_bullet = Bullet (ai_settings,screen,ship)
        bullets.add(new_bullet)
Call this method when you press the spacebar:
#Keyboard press event
...
    if event.key == pygame.K_SPACE:
        fire_bullet(ai_settings,screen,ship,bullets)
This method is then invoked in the main loop.
gf .update_bullets(bullets)
The enemy is coming
Now the control of the spacecraft is basically completed. Now it's time to start writing the enemy's code! To be sure, the enemy also has a special control script We named it: alien Py, the first step is to render the enemy, which is very similar to the previous players. It also inherits the sprite class, and then reads the bmp image in the folder:
import pygame
from pygame.sprite import Sprite

class Alien(Sprite):
    def __init__(self, ai_settings,screen):
        super (Alien,self).__init__()
        self .screen= screen
        self.ai_settings = ai_settings

        #Load external picture
        self.image = pygame.image.load('images/ufo.bmp')
        self .rect = self.image.get_rect()
        #Set the location of Aliens
        self .rect.x = self .rect .width
        self .rect.y = self .rect.height
        #Store the exact location of aliens
        self .x = float (self .rect.x)

    #Render picture
    def blitme (self ):
        self .screen.blit(self .image,self .rect)
Refer to the previous player code to display the alien:
introduce
from alien import Alien
Next, create an alien:
alien = Alien(ai_settings.screen)
Next, let this update in the main loop
gf.update_screen(ai_screens.screen,ship,alien,bullets)
In fact, one thing is missing here, that is, update has not been modified_ The screen code renders the spacecraft on the screen, so we need to update it_ Screen writes here:
alien.blitme()
Then, you will see an alien rendering alone on the screen Since there is one, let's create a group of aliens
First of all, we need to know how many aliens can be accommodated in a row, so we need to know the width of the screen. We have a way to get the width of the screen Then remove the width on both sides, the width of several spaceships, and the gap between spaceships. Then we can specify the number and width. We will implement such an algorithm in the following specific code
 #Create a group for storing aliens
    aliens = Group()
#Create alien groups
 gf .creat_fleet(ai_settings,screen,ship,aliens)
gf.update_screen(ai_settings,screen,ship,aliens,bullets)
We also need to modify update_screen()
#Update screen
def update_screen(ai_settings,screen,ship,aliens,bullets):

    aliens.draw (screen)
Here, when draw ing is called, each element will be compiled automatically and displayed on the screen
Different from the previous code, it was a creation before, and now it is a group So it still needs to be modified
def creat_fleet (ai_settings,screen,ship,aliens):
    alien = Alien(ai_settings,screen)
    alien_width = alien .rect.width
    number_aliens_x = get_number_alien_x(ai_settings,alien.rect.width)
    number_rows = get_number_rows(ai_settings, ship.rect.height,alien.rect .height)
    #Create first row
    for row_number in range( number_rows):
        for alien_number in range (number_aliens_x):
        #Create first row
            creat_alien(ai_settings,screen,aliens,alien_number,row_number)
Then the code is planned in rows and columns, so the other affected codes need to be modified Refactoring create_ fleet()
#Enemy cluster
def get_number_alien_x (ai_settings,alien_width):
    #Calculate how many aliens a line of the screen can hold
    avaliable_space_x = ai_settings.screen_width-2*alien_width
    number_aliens_x = int (avaliable_space_x/(*alien_width))
    return number_aliens_x
def creat_alien(ai_settings,screen,aliens,alien_number,row_number):
    alien = Alien(ai_settings,screen)
    alien_width = alien.rect.width
    alien .x = alien_width+*alien_width*alien_number
    alien .rect .x = alien.x #Coordinates of x
    alien.rect.y =  alien.rect.height+*alien.rect .height*row_number
    aliens .add (alien)
def creat_fleet (ai_settings,screen,ship,aliens):
    alien = Alien(ai_settings,screen)
    alien_width = alien .rect.width
    number_aliens_x = get_number_alien_x(ai_settings,alien.rect.width)
    number_rows = get_number_rows(ai_settings, ship.rect.height,alien.rect .height)
    #Create first row
    for row_number in range( number_rows):
        for alien_number in range (number_aliens_x):
        #Create first row
            creat_alien(ai_settings,screen,aliens,alien_number,row_number)
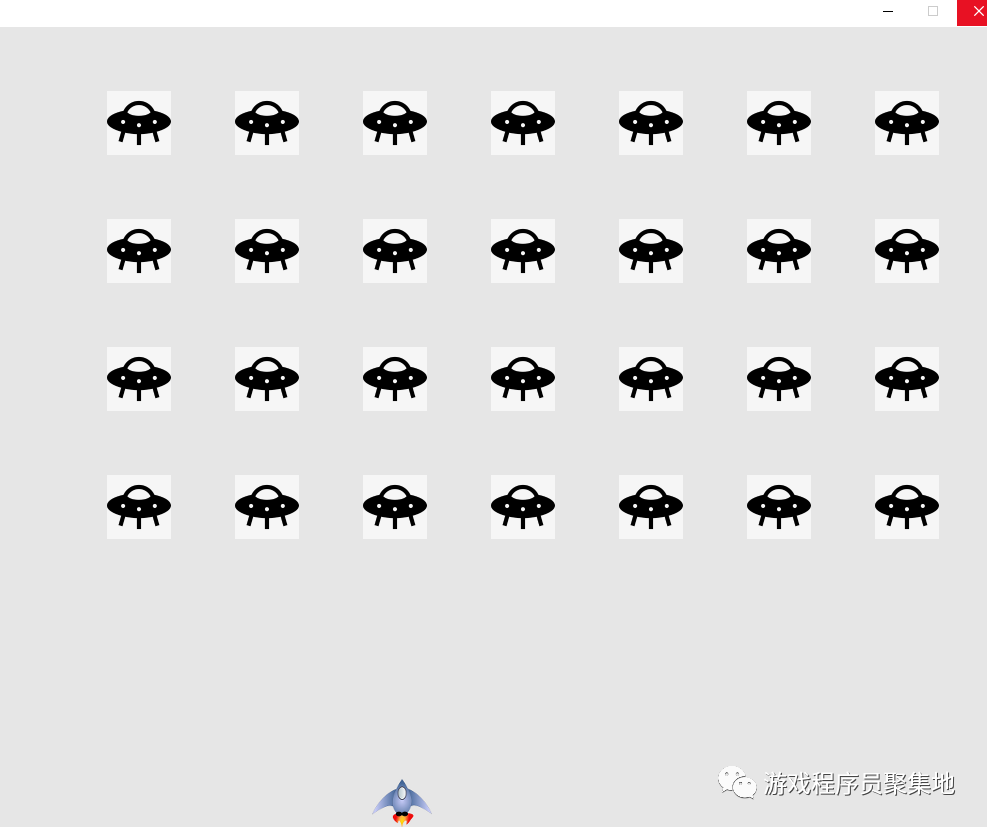
Then, the rows and columns are completely added Finally, call it in the main program.
gf .creat_fleet(ai_settings,screen,ship,aliens)
Then, you will see a group of aliens on the screen