Preface
A little bit of Android Reverse was done the year before, but it hasn't been done for a long time. Recently, a buddy asked me to help him do a subtitle about Android Reverse, so pick up the knowledge of Android Reverse and start over. This apk is a very simple, entry-level Android Reverse Analysis program, so this article is mainly aimed at readers who want to get involved in Android Reverse, so that readers can understand it.What's wrong with Android Reverse?I'm attaching the apk file here. It's best to download it if you're interested:
https://pan.baidu.com/s/17d7zKMjh8rKjj9mUl3J_0Q
Extraction Code: htrx
Introduction
Android programs are generally developed in the Java language. By generating an apk file and installing it on an Android phone, the apk is easy to get. We can learn the logic inside the apk file by using some disassembly tools, and even get his original Java source code (not exactly the same as the source code at the time of development, but roughly the same).Similar to smali code can also be obtained from the disassembly tool, which is an assembly language-like code suitable for machine execution but relatively obscure for programmers.
First, use the apktools and jad-gui tools or Androidkiller to get the disassembled smali and Java code, which can be easily searched on the web and used in a simple way, which will not be overlooked here.Now we begin the code analysis phase. The java code is easy to understand, so let's start with the Java code here:
Get flag from java
The java source code for MainActivity from these two tools is as follows:
package com.a.sample.androidtest;

import android.content.Context;
import android.os.Bundle;
import android.support.v7.app.AppCompatActivity;
import android.view.View;
import android.view.View.OnClickListener;
import android.widget.EditText;
import android.widget.Toast;

public class MainActivity extends AppCompatActivity {
    private EditText editText;
    private byte[] s = new byte[]{(byte) 113, (byte) 123, (byte) 118, (byte) 112, (byte) 108, (byte) 94, (byte) 99, (byte) 72, (byte) 38, (byte) 68, (byte) 72, (byte) 87, (byte) 89, (byte) 72, (byte) 36, (byte) 118, (byte) 100, (byte) 78, (byte) 72, (byte) 87, (byte) 121, (byte) 83, (byte) 101, (byte) 39, (byte) 62, (byte) 94, (byte) 62, (byte) 38, (byte) 107, (byte) 115, (byte) 106};

    public boolean check() {
        byte[] chars = this.editText.getText().toString().getBytes();
        if (chars.length != this.s.length) {
            return false;
        }
        int i = 0;
        while (i < this.s.length && i < chars.length) {
            if (this.s[i] != (chars[i] ^ 23)) {
                return false;
            }
            i++;
        }
        return true;
    }

    protected void onCreate(Bundle savedInstanceState) {
        super.onCreate(savedInstanceState);
        setContentView((int) R.layout.activity_main);
        final Context context = this;
        this.editText = (EditText) findViewById(R.id.edit_text);
        findViewById(R.id.button).setOnClickListener(new OnClickListener() {
            public void onClick(View v) {
                if (MainActivity.this.check()) {
                    Toast.makeText(context, "You got the flag!", 1).show();
                } else {
                    Toast.makeText(context, "Sorry your flag is wrong", 1).show();
                }
            }
        });
    }
}
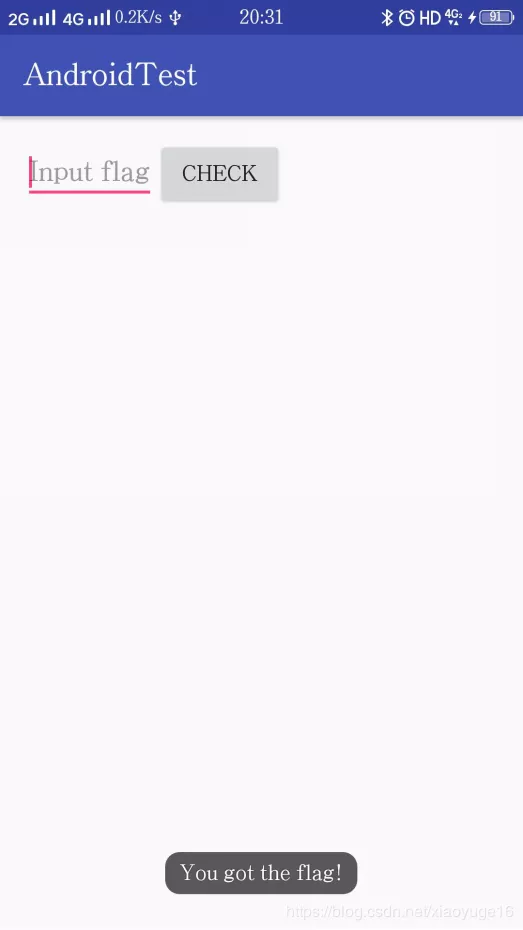
At first glance, this piece of code may be a little confused. I don't have the patience to see what this piece of code is doing. Here you can try running with Android emulator first, then observe the logic of the program, open it and find an input box, then a check button.As shown in the diagram: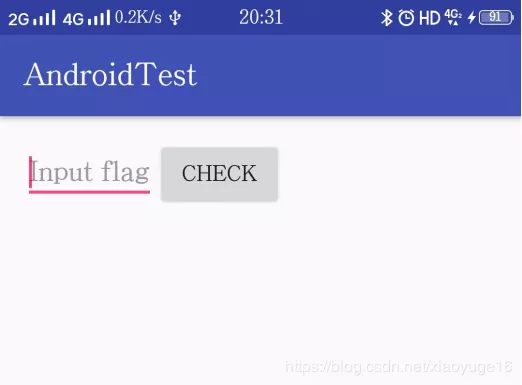
Combined with code analysis, when the check button is clicked, the onClick function is triggered, which is the following code snippet:
if (MainActivity.this.check()) {
                    Toast.makeText(context, "You got the flag!", 1).show();
                } else {
                    Toast.makeText(context, "Sorry your flag is wrong", 1).show();
So if the check function returns true, you are prompted to get the flag! Otherwise, you are prompted to Sorry your flag is wrong.The check function is analyzed below:
public boolean check() {
        byte[] chars = this.editText.getText().toString().getBytes();
        if (chars.length != this.s.length) {
            return false;
        }
        int i = 0;
        while (i < this.s.length && i < chars.length) {
            if (this.s[i] != (chars[i] ^ 23)) {
                return false;
            }
            i++;
        }
        return true;
    }
Where this.s is a byte array:
private byte[] s = new byte[]{(byte) 113, (byte) 123, (byte) 118, (byte) 112, (byte) 108, (byte) 94, (byte) 99, (byte) 72, (byte) 38, (byte) 68, (byte) 72, (byte) 87, (byte) 89, (byte) 72, (byte) 36, (byte) 118, (byte) 100, (byte) 78, (byte) 72, (byte) 87, (byte) 121, (byte) 83, (byte) 101, (byte) 39, (byte) 62, (byte) 94, (byte) 62, (byte) 38, (byte) 107, (byte) 115, (byte) 106};
First you see that the check function check s if the length of the flag and s arrays entered are equal, then a while loop is made, where the criteria in if are:
this.s[i] != (chars[i] ^ 23)
Here ^ refers to binary bitwise XOR.So the whole logic is clear, how do you get the right flag?
One practical technique to remember is that two bitwise exclusive OR operations result in the flag itself, so we can get the real flag by doing one more exclusive OR on the s array; the python script is as follows:
# -*- coding: utf-8 -*-
def ascii2str():
    asciis=[113,123,118,112,108,94,99,72,38,68,72,87,89,72,36,118,100,78,72,87,121,83,101,39,62,94,62,38,107,115,106]
    strs=[]
    for ascii in asciis:
        str=chr(ascii^23)
        strs.append(str)
    print(''.join(strs))

if __name__ == '__main__':
    print("begin!")
    ascii2str()
    print("finished!")
The output after running is: flag{It_1S@N_3asY@nDr0(I) 1|d},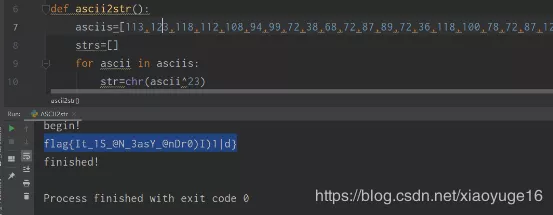
You get the flag! As shown in the figure: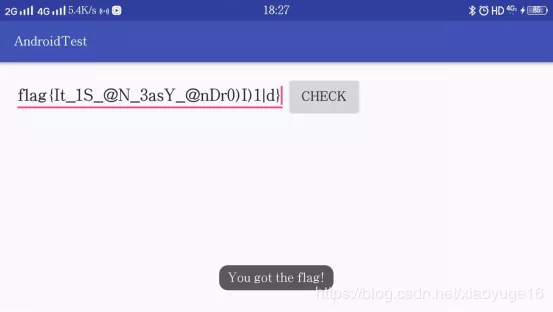
Crack by smali modify jump
As mentioned earlier, there is SmalI code in addition to Java source code. Now that the Java source code has been analyzed clearly, why should we still look at SmalI code?The advantage of SmalI is that it compiles back to crack, that is, it doesn't need to analyze its algorithm, and it doesn't need to know the real flag to show you get the flag!So let's do it with smali;
The smali source check function for MainActivity is as follows:
.method public check()Z
    .locals 5

    .prologue
    const/4 v2, 0x0

    .line 15
    iget-object v3, p0, Lcom/a/sample/androidtest/MainActivity;->editText:Landroid/widget/EditText;

    invoke-virtual {v3}, Landroid/widget/EditText;->getText()Landroid/text/Editable;

    move-result-object v3

    invoke-virtual {v3}, Ljava/lang/Object;->toString()Ljava/lang/String;

    move-result-object v3

    invoke-virtual {v3}, Ljava/lang/String;->getBytes()[B

    move-result-object v0

    .line 16
    .local v0, "chars":[B
    array-length v3, v0

    iget-object v4, p0, Lcom/a/sample/androidtest/MainActivity;->s:[B

    array-length v4, v4

    if-eq v3, v4, :cond_1

    .line 22
    :cond_0
    :goto_0
    return v2

    .line 18
    :cond_1
    const/4 v1, 0x0

    .local v1, "i":I
    :goto_1
    iget-object v3, p0, Lcom/a/sample/androidtest/MainActivity;->s:[B

    array-length v3, v3

    if-ge v1, v3, :cond_2

    array-length v3, v0

    if-ge v1, v3, :cond_2

    .line 19
    iget-object v3, p0, Lcom/a/sample/androidtest/MainActivity;->s:[B

    aget-byte v3, v3, v1

    aget-byte v4, v0, v1

    xor-int/lit8 v4, v4, 0x17

    if-ne v3, v4, :cond_0

    .line 18
    add-int/lit8 v1, v1, 0x1

    goto :goto_1

    .line 22
    :cond_2
    const/4 v2, 0x1

    goto :goto_0
.end method
It seems a lot harder to understand than Java source code. Actually, we only need to know the meaning of some key statements at present. Of course, if you want to learn more about Ken later, the more familiar the smali code is, the better. Here we will explain some of the smali here,.method public check()Z means this is a bool-type function;.Locals 5Indicates the minimum number of local registers to use in this function..line 15 indicates the number of lines of the code in the original Java file.I've forgotten a lot about the rest of the commands, so I'll probably explain the main points in order to avoid misleading children.
invoke-virtual {v3}, Landroid/widget/EditText;->getText()Landroid/text/Editable;
invoke-virtual is the calling function, followed by a pair of braces'{}', which is actually a list of instances + parameters that call the method.If you analyze v3, you will find that it is the flag we entered in the input box and v4 is the s in the above array; see here:
if-eq v3, v4, :cond_1
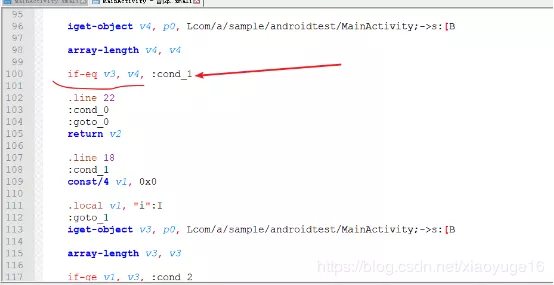
In fact, we have found a jump point, if-eq means jump somewhere when v3 v4 is equal, if we change it directly to jump when it is not equal, will you get the flag if you enter any value other than the real flag?Let's try changing if-eq directly to if-ne, then using the recompile feature in Androidkiller, sign him, reinstall the run, and find that you get the flag for any input!