In the first JavaFX Introduction (I): my first JavaFX program in my JavaFXML series blog, we wrote a very simple JavaFXML program in pure Java code. In this section, we used FXML to write the program interface, and then used Java to write the background logic to complete the program in the previous section to achieve the same functions.
Popular understanding of FXML: FXML is a file that represents JavaFX interface objects in XML format. Each element in the FXML file can be mapped to a class in JavaFX, and the attributes or child elements of each FXML element can be mapped to the attributes of the corresponding JavaFXML class.
We create a simple java project in Eclipse. The simplest work includes: a java file (HelloApplication.java, main program entry), an FMXL file (MainPanel.fxml, main interface layout) and a Controller file (MainPaneController.java, Controller file is a common Java class file used to control the processing of interface interaction events). The screenshot of the new project is as follows: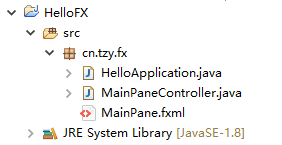
First, we use the FMXL file MainPanel.fxml to write the interface:
<?xml version="1.0" encoding="UTF-8"?>

<!--Import JavaFXML class-->
<?import javafx.scene.text.*?>
<?import javafx.scene.control.*?>
<?import java.lang.*?>
<?import javafx.scene.layout.*?>

<!--Layout control BorderPane,fx:controller Property is used to declare the of event handling Controller,Value is Controller The full name of the class-->
<!--xmlns Used to declare the default namespace. The declaration here follows your installation Java JDK The version number can be different, but it's better not to compare with the version you installed JDK High version-->
<BorderPane fx:controller="cn.tzy.fx.MainPaneController" xmlns="http://javafx.com/javafx/8.0.31" xmlns:fx="http://javafx.com/fxml/1">
   <center>
       <!--Declare a Button Elements, fx:id Used to give the Button A sign for and Controller Class Button Bind instance-->
       <!--onAction For binding Button Click events, handleButtonAction ahead#Used to bind with processing functions in Controller -- >
      <Button fx:id="btnHello" text="Hello World!" BorderPane.alignment="CENTER" onAction="#handleButtonAction">
          <!--I modified it here Button Default font and its size-->
         <font>
            <Font name="Arial" size="14.0" />
         </font>
      </Button>
   </center>
</BorderPane>
You can see the element BorderPane in the FXML file. The Button corresponds to the layout class or control class in JavaFX. Center is the attribute of BorderPane and Font is the attribute of Button. Therefore, generally, each element in the FXML file can be mapped to a class in JavaFX, and the attributes of each FXML element or its child elements can be mapped to the attributes of the corresponding JavaFXML class.
Then, we write the main class HelloApplication.java to load the interface elements:
package cn.tzy.fx;

import javafx.application.Application;
import javafx.fxml.FXMLLoader;
import javafx.scene.Scene;
import javafx.scene.layout.BorderPane;
import javafx.stage.Stage;

public class HelloApplication extends Application {

    @Override
    public void start(Stage primaryStage) throws Exception {
        try {
            // there root from FXML File for initialization, here FXMLLoader Class for loading FXML file
            BorderPane root = (BorderPane)FXMLLoader.load(getClass().getResource("MainPane.fxml"));
            Scene scene = new Scene(root, 500, 500);
            primaryStage.setScene(scene);
            primaryStage.setTitle("Hello World");
            primaryStage.show();
        } catch(Exception e) {
            e.printStackTrace();
        }

    }

    public static void main(String[] args) {
        launch(args);
    }
}
You can see that the general part of the program is similar to our previous section, except that the controls in Scene are declared in the FXML file, and then loaded using the FXMLLoader class. The advantage of this is the separation of foreground design and background logic.
Finally, we write the event handling code in the Controller file MainPaneController.java:
package cn.tzy.fx;

import javafx.event.ActionEvent;
import javafx.fxml.FXML;
import javafx.scene.control.Button;

public class MainPaneController {
    <!--there Button Object needs to be added@FXML Annotation, and then the name of the variable is what you just said FXML Declared in the document Button of id attribute-->
    @FXML
    private Button btnHello;

    <!--there handleButtonAction Method for us in FXML Declared in the document onAction Processing function for-->
    @FXML
    protected void handleButtonAction(ActionEvent event) {
        btnHello.setText("Hello World, I am JavaFX!");
    }

}
@The FXML annotation is used to indicate that the variable or method can be accessed in the FXML file. The official description of @ FXML is: Annotation that tags a class or member as accessible to markup. The handleButtonAction() method is described in the FXML file. It is the attribute value of the onAction of the Button. We use the handleButtonAction() method to process the logic of clicking the Button.
We run the program and click the button. The results are as follows: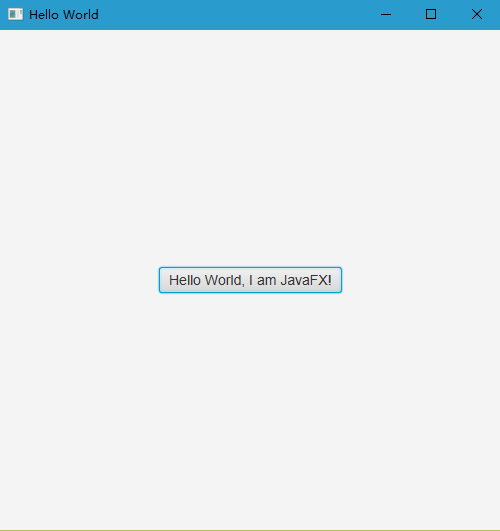
To sum up:
In JavaFX program, we can use FXML file to write foreground interface, and use FXMLLoader class to bind FXML file to main program.
Use a Controller class and @ FXML annotation to bind the logic of the operation to the interface elements in the FXML file.
In the FXML file, use the fx:id attribute to declare the id of the interface element, and define the element with the same name in the Controller class. The onAction property value gives the name of the event handling function starting with # sign, which is implemented in the Controller class.
In the next section, we will talk about how to use Eclipse Plug-in and scene builder to assist us in writing JavaFX programs: introduction to JavaFX (3): developing JavaFX programs using eclipse.