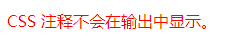
🌹 CSS comments 🌹
comments can be used to explain the code and will be helpful when writing source code in the future. The browser automatically ignores comments< Comments in style > begin with / * and end with * /.
you can add comments anywhere in the code to explain the code. Comments can span multiple lines.
example:
<!DOCTYPE html>
<html>
	<head>
		<style>
			/* This is a single line comment */
			/*This is multi line
			  notes*/
			p {
  				color: red;
			}
		</style>
	</head>
	<body>

		<p>CSS Comments are not displayed in the output.</p>

	</body>
</html>
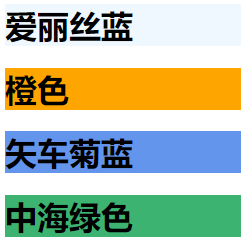
🔫 CSS color 🔫
color names or RGB, HEX, HSL, RGBA and HSLA values can be used to specify colors in CSS. 140 standard color names are supported in CSS/HTML.
example:
<!DOCTYPE html>
<html>
	<body>

		<h1 style="background-color:AliceBlue;">Alice blue</h1>
		<h1 style="background-color:Orange;">orange</h1>
		<h1 style="background-color:CornflowerBlue;">Cornflower blue</h1>
		<h1 style="background-color:MediumSeaGreen;">Zhonghai green</h1>

	</body>
</html>
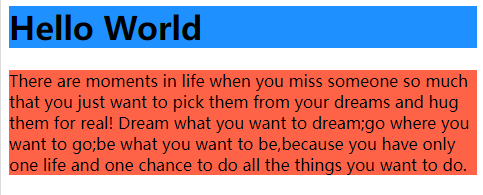
💦 CSS background color 💦
you can also set the background color for the elements in the HTML page.
example:
<!DOCTYPE html>
<html>
	<body>

		<h1 style="background-color:DodgerBlue;">Hello 	World</h1>

		<p style="background-color:Tomato;">
There are moments in life when you miss someone so much that you just want to pick them from your dreams and hug them for real! Dream what you want to dream;go where you want to go;be what you want to be,because you have only one life and one chance to do all the things you want to do.
		</p>

		</body>
</html>
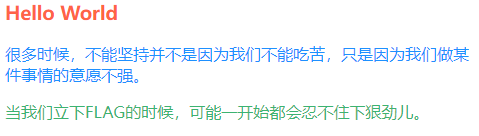
🌾 CSS text color 🌾
we can also set colors for text.
<!DOCTYPE html>
<html>
	<body>

		<h3 style="color:Tomato;">Hello World</h3>

		<p style="color:DodgerBlue;">Many times, we can't insist not because we can't bear hardships, but because we don't have a strong will to do something.</p>

		<p style="color:MediumSeaGreen;">When we stand FLAG At the beginning, I may be unable to help myself.</p>

	</body>
</html>
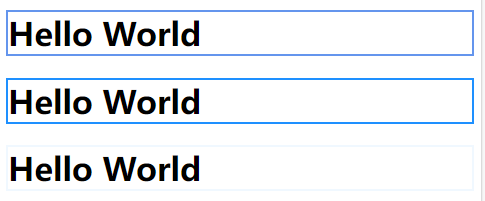
🌸 CSS border color 🌸
<!DOCTYPE html>
<html>
	<body>

		<h1 style="border: 2px solid CornflowerBlue;">Hello World</h1>

		<h1 style="border: 2px solid DodgerBlue;">Hello World</h1>

		<h1 style="border: 2px solid AliceBlue;">Hello World</h1>

	</body>
</html>
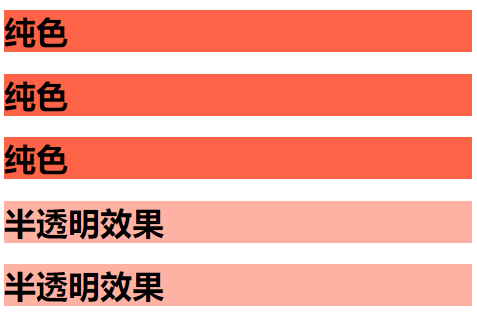
🍊 CSS color values 🍊
in CSS, you can not only use color names, but also use RGB values, HEX values, HSL values, RGBA values or HSLA values to specify colors, which has the same effect as color names such as "AliceBlue".
and RGBA and HSLA can specify color transparency.
<!DOCTYPE html>
<html>
	<body>

		<h1 style="background-color:rgb(255, 99, 71);">Solid color</h1>

<h1 style="background-color:#ff6347; "> solid</h1>

<h1 style="background-color:hsl(9, 100%, 64%);">Solid color</h1>


<h1 style="background-color:rgba(255, 99, 71, 0.5);">Translucent effect</h1>

<h1 style="background-color:hsla(9, 100%, 64%, 0.5);">Translucent effect</h1>

	</body>
</html>
🥬 CSS background 🥬
The background attribute in CSS is used to define the background effect of the element. In this section, we will learn the background properties of CSS.
- background-color
- background-image
- background-repeat
- background-position
- background-attachment
- background-position
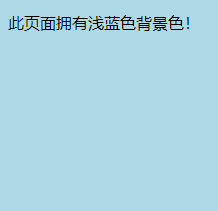
The background color attribute specifies the background color of the element. Through CSS, colors can usually be specified by valid color names, HEX, RGB values.
example:
<!DOCTYPE html>
<html>
	<head>
		<style>
			body {
  				background-color: lightblue;
			}
		</style>
	</head>
	<body>

		<p>This page has a light blue background color!</p>

	</body>
</html>
The background image attribute specifies the image of the element background. By default, the picture repeats to cover the entire element.
example:
<!DOCTYPE html>
<html>
	<head>
		<style>
			body {
  				background-image: url("./background.png");
			}
		</style>
	</head>
	<body>

		<p>The background of this page is a picture!</p>

	</body>
</html>

Note: when using background images, use images that do not interfere with the text.
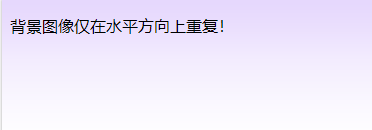
the background repeat attribute can set whether the image attribute repeats the image horizontally or vertically.
example:
<!DOCTYPE html>
<html>
	<head>
		<style>
			body {
  				background-image: url("./background.png");
  				background-repeat: repeat-x;
			}
		</style>
	</head>
	<body>

		<p>The background image repeats only horizontally!</p>

	</body>
</html>
<!DOCTYPE html>
<html>
<head>
<style>
body {
background-image: url("./background.png");
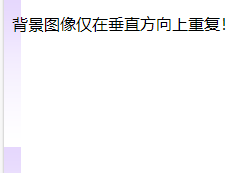
background-repeat: repeat-y;
}
</style>
</head>
<body>
<p>The background image repeats only horizontally!</p>
</body>
</html>
Tip: to set non repeating images, set background repeat: no repeat;
To set all direction repeats, set background repeat: repeat;
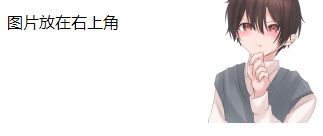
The background position property can be used to specify the position of the background image.
example:
<!DOCTYPE html>
<html>
	<head>
		<style>
			body {
  			background-image: url("./background.png");
  			background-repeat: no-repeat;
  			background-position: right top;
  			margin-right: 200px;
			}
		</style>
	</head>
	<body>

		<p>The picture is in the upper right corner</p>

	</body>
</html>
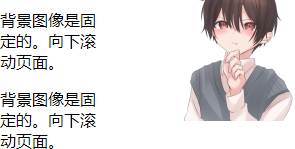
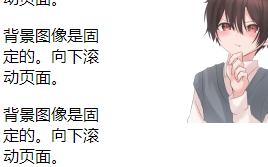
The background attachment property specifies whether the image is scrolled or fixed.
example:
<!DOCTYPE html>
<html>
	<head>
		<style>
			body {
  				background-image: url("./background.png");
  				background-repeat: no-repeat;
  				background-position: right top;
  				margin-right: 200px;
  				background-attachment: fixed;
			}
		</style>
	</head>
	<body>

		<p>The background image is fixed. Scroll down the page.</p>
		<p>The background image is fixed. Scroll down the page.</p>
		<p>The background image is fixed. Scroll down the page.</p>

</body>
</html>
Tip: to set the page to scroll along with the rest, please set: background attachment: scroll;
background attribute. All background attributes can be specified in one attribute. All of it is called abbreviated attribute.
example:
<!DOCTYPE html>
<html>
	<head>
		<style>
			body {
  				background: #ffffff url("./background.png") no-repeat right top;
  				margin-right: 200px;
			}
		</style>
	</head>
	<body>

		<p>The background image is not repeated and is located in the upper right corner.</p>

	</body>
</html>

🧅 CSS border 🧅
The border attribute allows us to specify the style, width and color of the element border.
🧄 CSS border style 🧄
The border style property specifies the type of border to display. It allows the following values.
- Dotted - defines the dotted line border
- Dashed - defines the dashed border
- Solid - defines a solid border
- Double - defines a double border
- Groove - defines the 3D groove border. The effect depends on the border color value
- Ridge - defines the 3D ridge border. The effect depends on the border color value
- Inset - defines the 3D inset border. The effect depends on the border color value
- Outlet - defines the 3D outlet border. The effect depends on the border color value
- none - defines no borders
- Hidden - defines the hidden border
The border style property can set one to four values (for top, right, bottom, and left borders).
example:
<!DOCTYPE html>
<html>
	<head>
		<style>
			p.dotted {border-style: dotted;}
			p.dashed {border-style: dashed;}
			p.solid {border-style: solid;}
			p.double {border-style: double;}
			p.groove {border-style: groove;}
			p.ridge {border-style: ridge;}
			p.inset {border-style: inset;}
			p.outset {border-style: outset;}
			p.none {border-style: none;}
			p.hidden {border-style: hidden;}
			p.mix {border-style: dotted dashed solid double;}
		</style>
	</head>
	<body>

		<p class="dotted">Dot border.</p>
		<p class="dashed">Dashed border.</p>
		<p class="solid">Solid border.</p>
		<p class="double">Double line border.</p>
		<p class="groove">Grooved border.</p>
		<p class="ridge">Ridge border.</p>
		<p class="inset">3D inset frame.</p>
		<p class="outset">3D outset frame.</p>
		<p class="none">No borders.</p>
		<p class="hidden">Hide borders.</p>
		<p class="mix">Blend borders.</p>

	</body>
</html>

Note: unless the border style property is set, other border properties will not work!
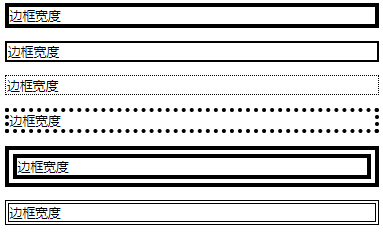
🍡 CSS border width 🍡
The border width property specifies the width of the four borders. You can set the width to a specific size (in px, pt, cm, em), and you can also use one of the following three predefined values: thin, medium, or thick
example:
<!DOCTYPE html>
<html>
	<head>
		<style>
			p.one {
			  border-style: solid;
			  border-width: 5px;
			}

			p.two {
			  border-style: solid;
			  border-width: medium;
			}

			p.three {
			  border-style: dotted;
			  border-width: 2px;
			}

			p.four {
			  border-style: dotted;
			  border-width: thick;
			}

			p.five {
			  border-style: double;
			  border-width: 15px;
			}

			p.six {
			  border-style: double;
			  border-width: thick;
			}
		</style>
	</head>
	<body>

		<p class="one">Border width</p>
		<p class="two">Border width</p>
		<p class="three">Border width</p>
		<p class="four">Border width</p>
		<p class="five">Border width</p>
		<p class="six">Border width</p>

	</body>
</html>
Note: the border color attribute does not work when used alone. First set the style using the border style property.
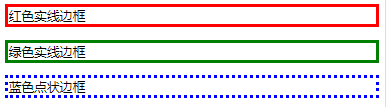
🧉 CSS border color 🧉
The border color property is used to set the color of the four borders. You can set the color in the following ways.
- Name - specifies the color name, such as "red"
- HEX - specifies a hexadecimal value, such as "#ff0000"
- RGB - specifies an RGB value, such as "rgb(255,0,0)"
- HSL - specify the HSL value, such as "hsl(0, 100%, 50%)"
- transparent
Note: if border color is not set, it inherits the color of the element.
example:
<!DOCTYPE html>
<html>
	<head>
		<style>
			p.one {
			  border-style: solid;
			  border-color: red;
			}

			p.two {
			  border-style: solid;
			  border-color: green;
			}

			p.three {
			  border-style: dotted;
			  border-color: blue;
			}
		</style>
	</head>
	<body>

		<p class="one">Red solid border</p>
		<p class="two">Green solid border</p>
		<p class="three">Blue dot border</p>

	</body>
</html>
🧃 CSS border edges 🧃
in CSS, there are some properties that can specify each border (top, right, bottom and left).
example:
<!DOCTYPE html>
<html>
	<head>
		<style>
			p {
				  border-top-style: dotted;
				  border-right-style: solid;
				  border-bottom-style: dotted;
				  border-left-style: solid;
			}
		</style>
	</head>
	<body>

		<p>There are two different border styles.</p>

	</body>
</html>

🍷 CSS shorthand border properties 🍷
Border to reduce the code, you can also specify all individual Border attributes in one attribute.
- border-width
- Border style (required)
- border-color
example:
<!DOCTYPE html>
<html>
	<head>
		<style>
			p {
			  	border: 5px solid red;
			}
		</style>
	</head>
	<body>

		<p>This property is a shorthand property.</p>

	</body>
</html>

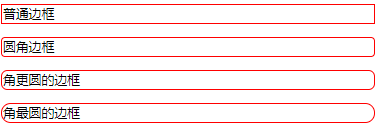
🍦 CSS rounded border 🍦
The border radius attribute is used to add a rounded border to the element
example:
<!DOCTYPE html>
<html>
	<head>
		<style>
			p.normal {
			  border: 2px solid red;
			}

			p.round1 {
			  border: 2px solid red;
			  border-radius: 5px;
			}

			p.round2 {
			  border: 2px solid red;
			  border-radius: 8px;
			}

			p.round3 {
			  border: 2px solid red;
			  border-radius: 12px;
			}
		</style>
	</head>
	<body>

		<p class="normal">Normal border</p>
		<p class="round1">Rounded border</p>
		<p class="round2">Rounded border</p>
		<p class="round3">Rounded border at corner</p>

	</body>
</html>