- Install git https://git-scm.com/downloads
- gitlab/github should have a project (or create a new one)
1. Download the project on gitlab server
-
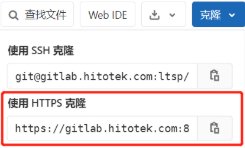
Find our project, click the clone icon in the upper right corner, select http, and then copy the address.

-
Just find a folder and create a new folder to store the project files that will be pulled down. This folder is used as the working directory of Git pull code

-
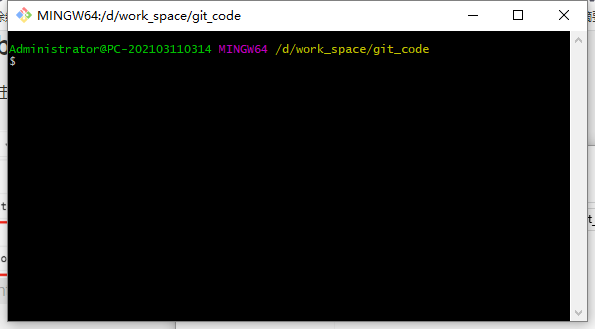
Enter the new price inquiry folder, right-click and select Git Bash Here

Open the following window, which is where we hit the command

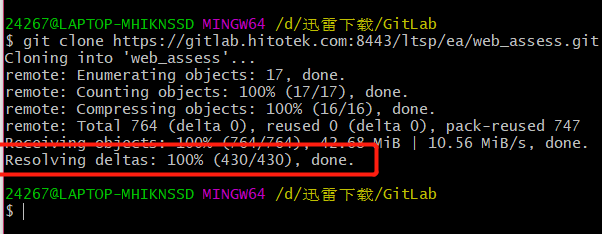
4. Then we can pull down the project on our server. Enter the following command in the black window:
git clone https://gitlab.hitotek.com:8443/ltsp/ea/web_assess.git
When 100% appears, the download is complete.

2. Submission code
When we first pull code from the server, there are two situations:
- 1 there is no code file on the server, just an empty folder, that is, when you are the first developer to submit code
- 2 continue to develop based on some code written by others
First, as the first developer to submit code, there must be no code on the server. At this time, we need to submit code for the first time.
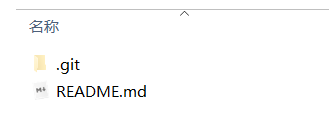
When we submit the code for the first time, we should first pay attention to whether there is any under the price folder we downloaded git folder. Only the price asking folder with this file will be managed by git.
Now we pull down an empty project, and we find that there are only And re git.adm MD file. Now we want to copy our local code into this folder.

Then drag and drop the code to this directory.
Then right-click Git bash here
git add .                         			// Leave the project to git management
git commit -m"Submit xxx code"       			// Submit the code to the local git warehouse, -m "remarks during submission"
git push origin dev(Branch name to commit)       	// Push code to remote warehouse
Finally, execute the commit instruction to complete the first commit of the code. Note that your account must have the permission to submit to this branch.
git push origin dev
be careful:
-
The local branch has nothing to do with the online branch. The local branch only maintains the local warehouse
-
The local branch can call any name. As long as you specify the branch name when submitting, it will submit to the specified branch. In other words, the local branch can not have the same name as the online branch. It is recommended to have the same name
2.1 single branch development
Based on the wgs branch, let's take a single branch as an example. First download the code on Gitlab to the local, then hand over the modified code to Git for management, and finally push.
- First, download the code from Gitlab to the local
git clone -b wgs URL
- Then set the user name and mailbox
# Set user name
git config --global user.name "XXX"
# Set mailbox
git config --global user.email "XXX"
- Leave the code to Git
dir

cd XXX

# All the files in ctr should be managed by git
git add .

# git commit -m "submitting new code is a comment describing what has been submitted"
git commit -m"ctr Add to local warehouse"
- push code
git push origin wgs
2.2 multi branch development
Idea:
- Download the code of the main branch (the main branch can only be downloaded and viewed, and cannot be modified or deleted), and then dir view the list (DIR is equivalent to ls of Linux).
- cd enters the main branch of the download
- It is recommended to create a sub branch with the same name as the sub branch of Gitlab
- Set user name and mailbox
- Give all the modified code to Git for management
- Then commit adds the comment information
- Switch to the main branch and pull to update the main branch code
- Then switch to your own sub branch and cover the branch with the code of the main branch
- Then push the sub branch
Continue to develop on the basis of existing code:
Or download the code first
# git clone https://gitlab.hitotek.com:8443/ltsp/ea/web_assess.git

git clone -b develop https://glab.tagtic.cn/ad/ctr.git
Then, after the download is completed, we create our own branch, which is based on the dev / Master branch automatically created by the system when we pull the project
# dir == linux ls
dir

# cd enters the main branch of the download
cd ctr

# Create a branch. If it is a single branch development, it is not necessary
# git checkout -b wgs develop
After the creation, we will automatically switch to the wgs branch
Give the above order a try in your own area, and we'll continue
When the implementation comes to this point, we have to follow three steps. (in its own branch)
The first step is to submit the local code to the local warehouse
# Set user name
git config --global user.name "XXX"
# Set mailbox
git config --global user.email "XXX"

# All the files in ctr should be managed by git
git add .

# git commit -m "submitting new code is a comment describing what has been submitted"
git commit -m"ctr Add to local warehouse"
The second step is to obtain the latest code of the server and merge the code
# First switch to the main branch dev/master
# git checkout dev
git checkout develop

# Update the code of the main branch * * never update your own branch, otherwise it will cause the online code to overwrite yours**
git pull

# Switch to your own branch
git checkout wgs

# Overwrite the latest code of the develop ment branch to the current branch (wgs). Note that if there is a code conflict here, it means that you are different from the one on the server and cannot be merged
git merge develop

# When submitting code to the server, we no longer submit it to dev, because in general, dev does not have permission to modify it, so we can only submit it to our own branch wgs
git push origin wgs
After submitting, open the gitlab project and switch to your own branch to check whether it has been submitted.