Environmental description and purpose
Preparation: I prepared three virtual machines myself Using Hyper-V to build virtual machine cluster environment on windows platform_ a18792721831 blog - CSDN blog
The environment is as follows
| host | nameNode | dataNode | resourceManager | nodeManager | Opening to the outside world |
|---|---|---|---|---|---|
| hadoop01 | start-up | Do not start | start-up | Do not start | to open up |
| hadoop02 | Do not start | start-up | Do not start | start-up | Not open |
| hadoop03 | Do not start | start-up | Do not start | start-up | Not open |
This is a typical master-slave cluster environment. The master node is Hadoop 01, and the slave nodes are Hadoop 02 and Hadoop 03.
The data of the slave node is not exposed to the public. All interface queries and job submissions must pass through the master node. Because MySQL and hive may also be started on the primary node, the primary node does not save data, does not participate in calculation, and only performs scheduling and management.
The configurations of the three nodes are the same, with 2 cores, a maximum of 2G memory and a maximum of 15G hard disk
objective
The purpose is very simple, that is to make hadoop cluster realize master-slave cluster. There is no high availability. When hadoop 01 hangs, the whole cluster will be finished. Therefore, this kind of cluster should be a pseudo distributed cluster.
Configuration description
The home directory of hadoop is / hadoop, and the directory of each node is the same.
prepare
Prepare Directory:
-
hdfs data directory
/Hadoop / DFs / Name: data saving directory of namenode
/Hadoop / DFs / data: data storage directory of datanode
-
yarn data directory
/Hadoop / yarn / data: the directory where nodemanager's intermediate data is saved
/Hadoop / yarn / logs: the log saving directory of nodemanager
-
hadoop log directory
/Hadoop / logs: the directory where Hadoop logs are saved
-
hadoop temporary directory
/Hadoop / tmp: temporary data directory of Hadoop
Basically, all directories are created on all nodes.
Ensure that the mapping relationship between domain name and ip is configured in / etc/hosts, and that the address and domain name are not duplicated.
hadoop-env.sh
# Configuring the java environment
export JAVA_HOME=/java
# Configure the configuration directory of hadoop
export HADOOP_CONF_DIR=${HADOOP_CONF_DIR:-"/etc/hadoop"}
# The parameters for configuring the jvm of hadoop are generally used for performance compensation of hadoop
export HADOOP_OPTS="$HADOOP_OPTS -Djava.net.preferIPv4Stack=true"
# Configure the parameters of the jvm of the nameNode of hdfs for tuning the nameNode of hdfs
export HADOOP_NAMENODE_OPTS="-Dhadoop.security.logger=${HADOOP_SECURITY_LOGGER:-INFO,RFAS} -Dhdfs.audit.logger=${HDFS_AUDIT_LOGGER:-INFO,NullAppender} $HADOOP_NAMENODE_OPTS"
# Configure the jvm parameters of the hdfs dataNode for tuning the hdfs dataNode
export HADOOP_DATANODE_OPTS="-Dhadoop.security.logger=ERROR,RFAS $HADOOP_DATANODE_OPTS"
# Configure the parameters of the jvm of the secondary nameNode of yarn
export HADOOP_SECONDARYNAMENODE_OPTS="-Dhadoop.security.logger=${HADOOP_SECURITY_LOGGER:-INFO,RFAS} -Dhdfs.audit.logger=${HDFS_AUDIT_LOGGER:-INFO,NullAppender} $HADOOP_SECON
# Configure the process id of hadoop
export HADOOP_PID_DIR=${HADOOP_PID_DIR}
In addition to the Java configuration, nothing else can be modified. In fact, if you configure Java in the environment variable_ Home, then this step can be omitted.
core-site.xml
<configuration>
  <!-- to configure hdfs Unified mailing address -->
  <property>
    <name>fs.defaultFS</name>
    <value>hdfs://hadoop01:8020</value>
  </property>
  <!-- to configure hadoop Temporary directory for -->
  <property>
    <name>hadoop.tmp.dir</name>
    <value>/hadoop/tmp</value>
  </property>
  <!-- Configure read / write cache size -->
  <property>
    <name>io.file.buffer.size</name>
    <value>131072</value>
  </property>
</configuration>
The address of hdfs is required, and others can use the default address. The default temporary directory is the system temporary directory / tmp
The default read / write cache size is 131072
hdfs://hadoop01:8020
The node representing Hadoop 01 is responsible for the metadata interaction of hdfs.
hdfs-site.xml
<configuration>
  <!-- Node name -->
  <property>
    <name>name</name>
    <value>hadoop01</value>
  </property>
  <!-- to configure hdfs of web Access port for -->
  <property>
    <name>dfs.namenode.http-address</name>
    <value>hadoop01:9870</value>
  </property>
  <!-- to configure hdfs of nameNode Data storage directory for -->
  <property>
    <name>dfs.namenode.name.dir</name>
    <value>file:/hadoop/dfs/name</value>
  </property>
  <!-- to configure hdfs of dataNode Data storage directory for -->
  <property>
    <name>dfs.datanode.data.dir</name>
    <value>file:/hadoop/dfs/data</value>
  </property>
  <!-- to configure hdfs Number of copies of data in -->
  <property>
    <name>dfs.replication</name>
    <value>1</value>
  </property>
  <!-- to configure hdfs Size of data block in -->
  <property>
    <name>dfs.blocksize</name>
    <value>2097152</value>
  </property>
  <!-- Configure which nodes are hdfs of dataNode -->
  <!-- Allow start dataNode Host -->
  <property>
    <name>dfs.hosts</name>
    <value>/hadoop/etc/hadoop/slaves</value>
  </property>
  <!-- Configure which nodes are not hdfs of dataNode -->
  <!-- Start not allowed dataNode -->
  <property>
    <name>dfs.hosts.exclude</name>
    <value>/hadoop/etc/hadoop/masters</value>
  </property>
</configuration>
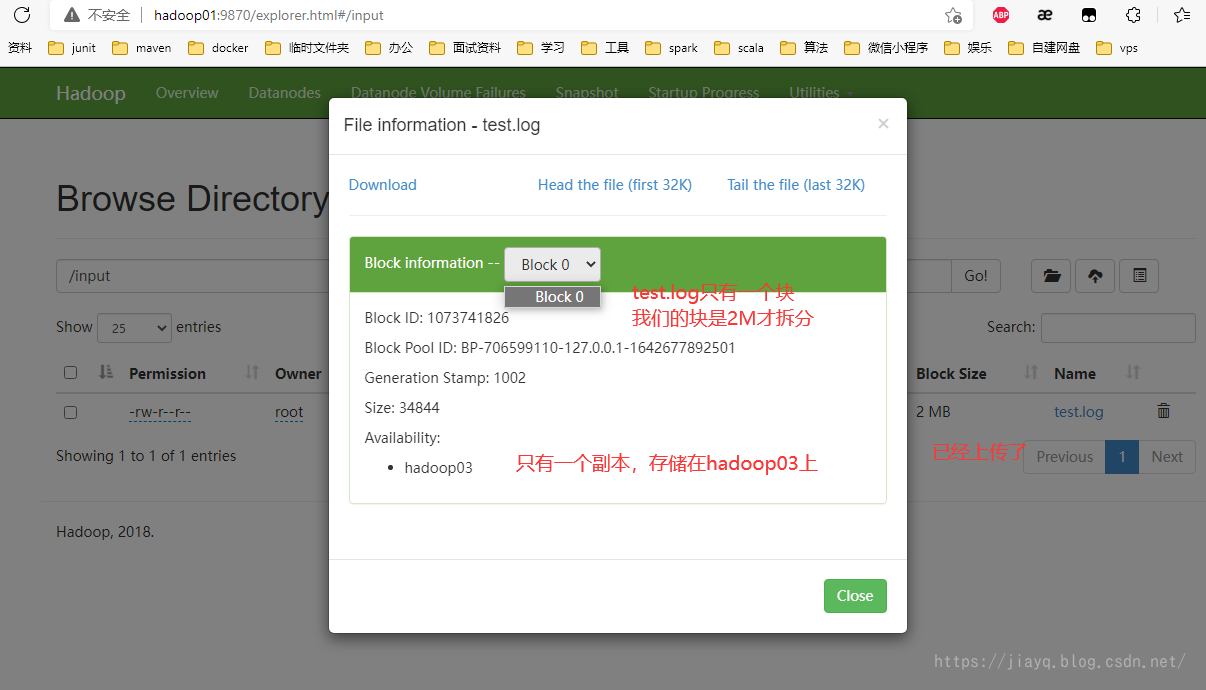
The default hdfs data block size is 256M, which I modify here to 2M, that is, when the file size exceeds 2M, it will be split.
yarn-site.xml
<configuration>

<!-- Site specific YARN configuration properties -->
  <!-- mapreduce of shuffle Services -->
  <property>
    <name>yarn.nodemanager.aux-services</name>
    <value>mapreduce_shuffle</value>
  </property>
  <!-- The address and port for the client to submit the job can be specified by itself, but all nodes need to be configured the same -->
  <property>
    <name>yarn.resourcemanager.address</name>
    <value>hadoop01:8032</value>
  </property>
  <!-- ApplicationMaster and scheduler The address for querying resource information. The port can be specified by itself. All nodes are configured the same -->
  <property>
    <name>yarn.resourcemanager.scheduler.address</name>
    <value>hadoop01:8030</value>
  </property>
  <!-- For resource reporting information, the port can be specified by itself, and the configuration of all nodes is the same -->
  <property>
    <name>yarn.resourcemanager.resource-tracker.address</name>
    <value>hadoop01:8031</value>
  </property>
  <!-- resource manager web ui Address of,The port can be customized, and the configuration of all nodes is the same -->
  <property>
    <name>yarn.resourcemanager.webapp.address</name>
    <value>hadoop01:8088</value>
  </property>
  <!-- Generally, only this configuration is required. The priority of this configuration is lower than that of the above configuration -->
  <property>
    <name>yarn.resourcemanager.hostname</name>
    <value>hadoop01</value>
  </property>
  <!-- Allow start resourcemanager The node of this node is configured to allow startup nodeManager and resourceManager -->
  <!-- These two configurations can be used to distinguish yarn and hdfs Nodes, such as which nodes are started yarn,Which nodes are started hdfs -->
  <!--
  <property>
    <name>yarn.resourcemanager.nodes.include-path</name>
    <value>/hadoop/etc/hadoop/masters</value>
  </property>
  -->
  <!-- Start not allowed resourcemanager To configure this node nodeManager It won't start -->
  <!--
  <property>
    <name>yarn.resourcemanager.nodes.exclude-path</name>
    <value>/hadoop/etc/hadoop/slaves</value>
  </property>
  -->
  <!-- nodemanager Total memory resources managed in -->
  <!-- We share two nodes to participate in the calculation, and the maximum memory of each node is 2 G,So the total is 4 G -->
  <property>
    <name>yarn.nodemanager.resource.memory-mb</name>
    <value>4096</value>
  </property>
  <!-- nodemanager Directory of intermediate data in -->
  <property>
    <name>yarn.nodemanager.local-dirs</name>
    <value>file:///hadoop/yarn/data</value>
  </property>
  <!-- nodemanager Directory of log data -->
  <property>
    <name>yarn.nodemanager.log-dirs</name>
    <value>file:///hadoop/yarn/logs</value>
  </property>
</configuration>
Here, we need to create a file, masters. There are slaves originally. The default is localhost.
masters is a list of hosts that can become primary nodes. If you configure one here, it is the primary node of the stand-alone version. If you configure multiple here, it is the primary node cluster.
In my opinion, the actual master-slave division standard in hadoop is whether management services are started on the node, such as hdfs namemanager and yarn resourceManager.
Therefore, if multiple nodes have started these management services, and you allow these nodes to query or distribute data in the configuration, it can be regarded as the primary node cluster.
Personal point of view..
Slave is the host list of slave nodes, which is mainly used for data storage and calculation.
In the Yard site above In XML, I bound yarn and hdfs together. Because at hdfs site The masters and slaves files used in XML are the same as the yarn site Masters. XML The slave file is the same file.
If more detailed and flexible division is required, it can be divided. hdfs uses one set of configuration and yarn uses one set of configuration.
In this way, you can flexibly specify what services are started on which node and what functions can be provided.
mapred-site.xml
<configuration>
  <!-- Implementation framework yarn -->
  <property>
    <name>mapreduce.framework.name</name>
    <value>yarn</value>
  </property>
  <!-- Historical task query address -->
  <property>
    <name>mapreduce.jobhistory.address</name>
    <value>hadoop01:9191</value>
  </property>
  <!-- Historical task web ui address -->
  <property>
    <name>mapreduce.jobhistory.webapp.address</name>
    <value>hadoop01:9192</value>
  </property>
</configuration>
Note that the historical task service needs to be started separately and will occupy a certain storage space of hdfs
It is stored in the / tmp directory, and the hdfs interface does not allow access
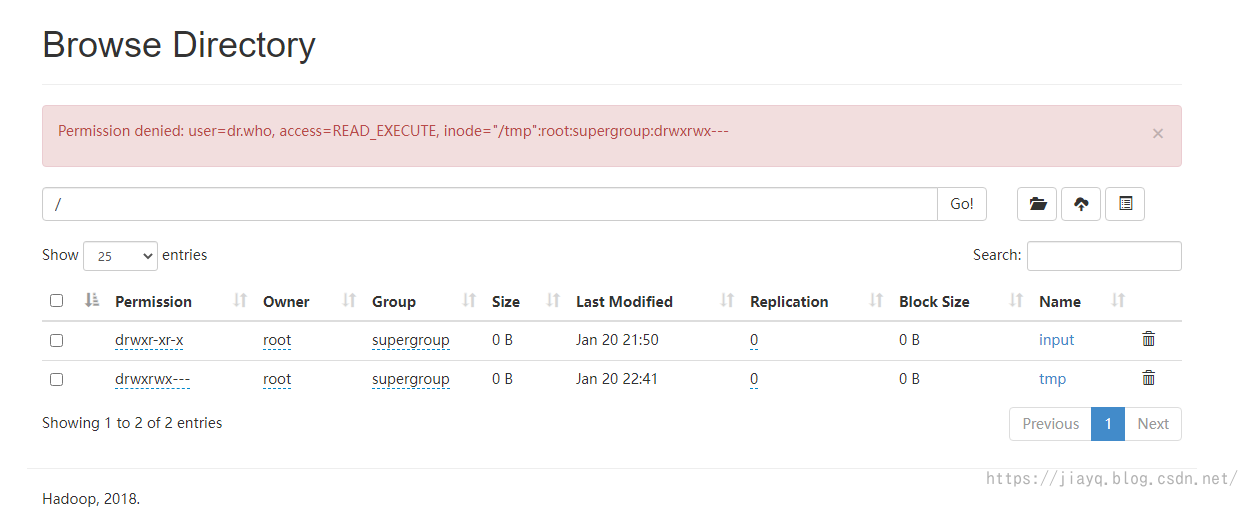
You can use the command line to view

log4j.properties
hadoop.root.logger=INFO,console
hadoop.log.dir=/hadoop/logs
hadoop.log.file=hadoop.log
It mainly specifies the hadoop log directory and log level
At this point, the configuration is basically completed
ssh secret free
In order to make the nodes communicate with each other for three days, it is best to set password free, which is very simple
First, execute ssh keygen - t RSA in each node, and then press enter all the way. This command will be displayed in ~ / Two file IDs are generated in ssh directory_ rsa,id_ rsa. Pub, which are the private key and public key respectively.
After all three nodes are executed, three public keys will be generated.
Write the three public keys to ~ / ssh/authorized_key file.
In this way, ssh encryption free is realized.
Note: after the configuration is completed, it is best to perform it manually, because the first link requires manual trust of the certificate.
When ssh Hadoop 01 is executed, you will be prompted whether to trust the certificate. Enter yes to log in to Hadoop 01, and then exit ssh with exists, followed by ssh Hadoop 02 and ssh Hadoop 03.
You need to do this once on each node.
start-up
First, start hadoop on hadoop 01 to see if our configuration is wrong and effective.
Before starting for the first time, you need to initialize with hadoop namenode -format hadoop. If you put the hadoop directory in Path, it can be executed anywhere. The second hadoop means that we set the name of our cluster to hadoop
If there is no exception during initialization, the initialization will succeed.

Pay attention to whether there is a successfully printed log in the log.
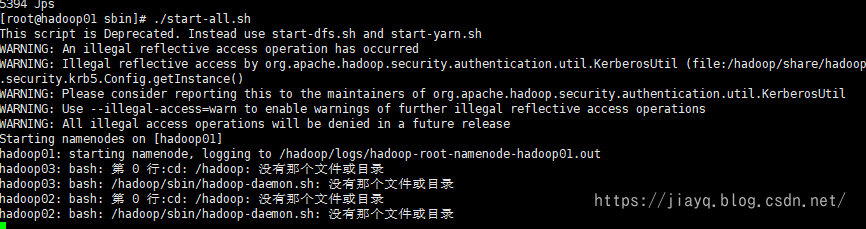
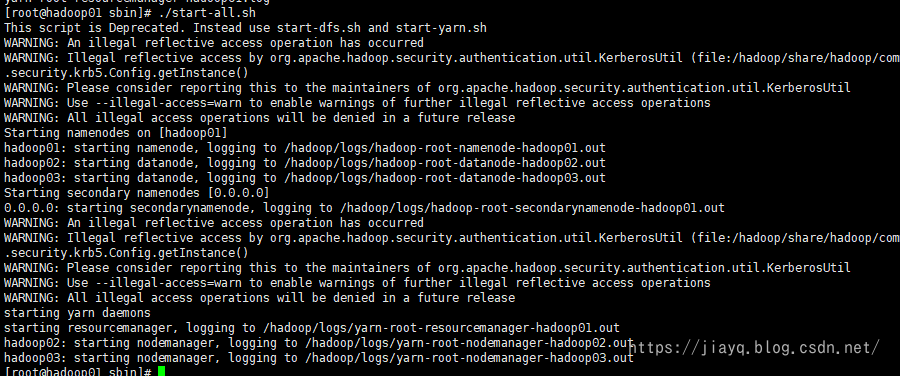
Then start hadoop, switch to the sbin directory of hadoop, and execute/ start-all.sh script.
During startup, the hadoop startup script will start the service on hadoop 02 and hadoop 03 in a secret free manner. However, because hadoop 02 and hadoop 03 have not been distributed and relevant files have not been created at this time, exceptions such as directory not found and script not found will be prompted during startup
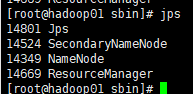
At this point, use jps to view the started service
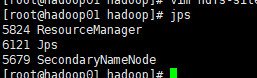
As expected, only ResourceManager was started
When this occurs, we can basically confirm that our master configuration is ok. Next, we need to distribute hadoop files to other nodes.
First, execute in / hadoop/sbin directory/ stop-all.sh stop hadoop service
Then use SCP - R / hadoop Hadoop 02: / hadoop to copy the hadoop directory on hadoop 01 to the hadoop directory of hadoop 02
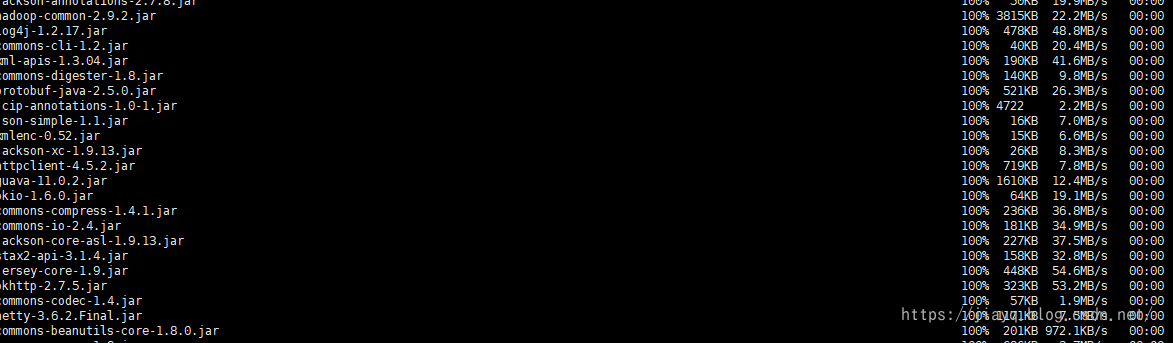
After the transfer is completed, you can view it on Hadoop 02

There are many extracted hadoop files, which need some time to transfer.
After the transfer is completed, you need to clear the directory Hadoop / tmp, / Hadoop / DFs / name, / Hadoop / DFs / data, / Hadoop / logs, / Hadoop / yarn / data, / Hadoop / yarn logs
The same operation is also performed on Hadoop 03
A very critical step is to give / hadoop directory permission and use Chmod - R 777 / hadoop to give permission. If you use hadoop user operation, this step is omitted. If you use root user to start directly, this step is necessary.
After copying the file, you need to reformat the namespace hadoop namenode -format hadoop on Hadoop 01
Then start in the hadoop/sbin directory of Hadoop 01/ start-all.sh
The view is consistent with the log output

Master node
Execution/ satrt-all. Some time after sh, the nameNode service terminates
The log is not initialized. Even if we have initialized it once before, it is the initialization of a single node, not the initialization of a cluster.
verification
Although the hadoop cluster has been started successfully, we do not know whether it is available. We need to verify it
Interface
hdfs
yarn
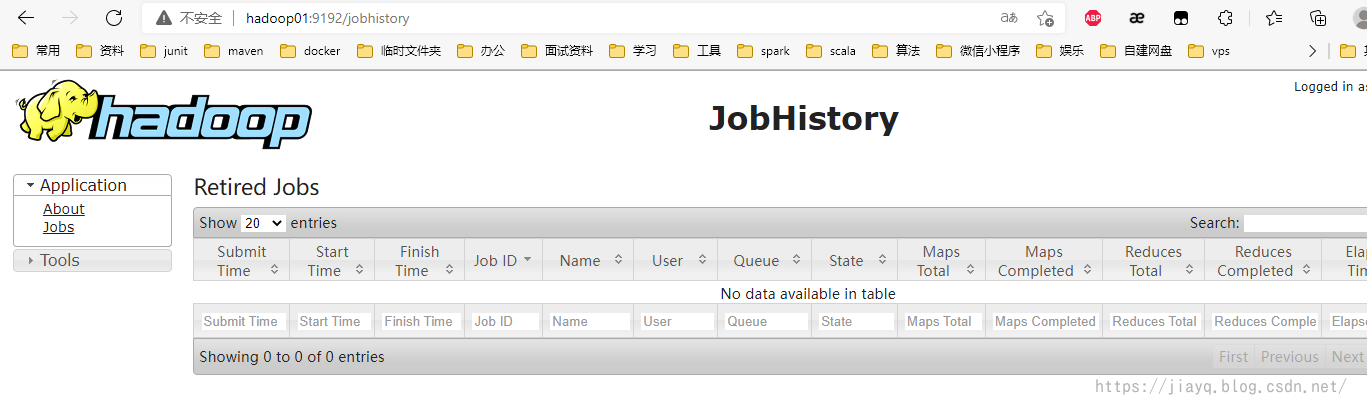
Task history
In the / hadoop/sbin directory, execute/ mr-jobhistory-daemon.sh start historyserver start task history

Then at mapred site The task execution history can be accessed from the address configured in XML
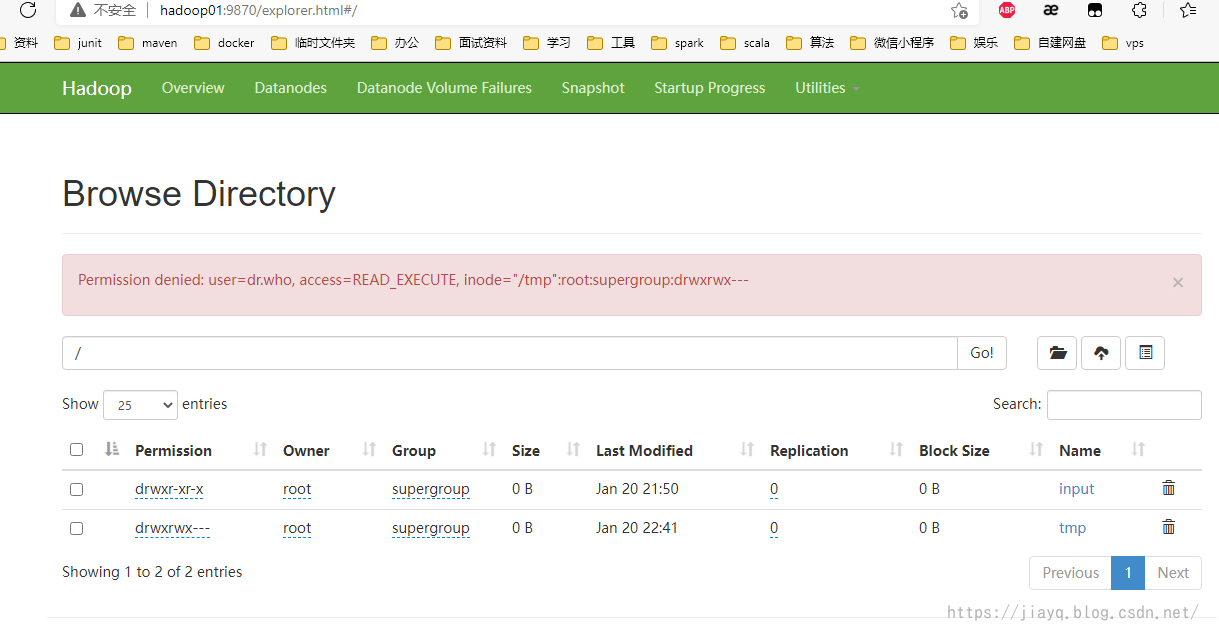
The hdfs:/tmp directory will also be generated
Task submission
We copy a startup log of nameNode to the / test directory of Hadoop 01 and rename it test log
Then use hadoop fs -mkdir /input to create the hdfs:/input directory
Then use Hadoop FS - put / test / test log /input/test.log will test Upload log to hdfs

see
Remember wordcount
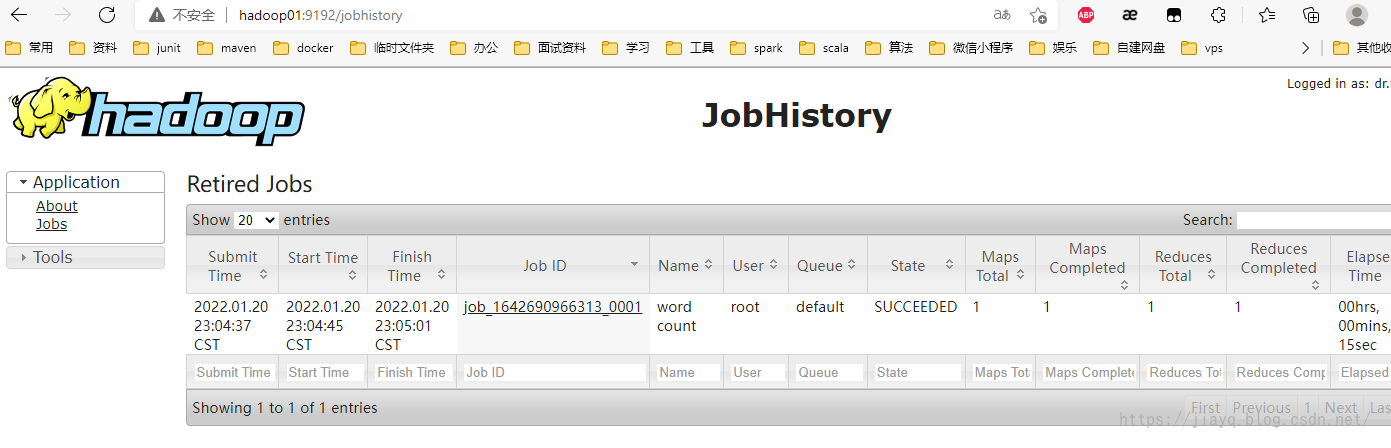
We use wordcount statistics
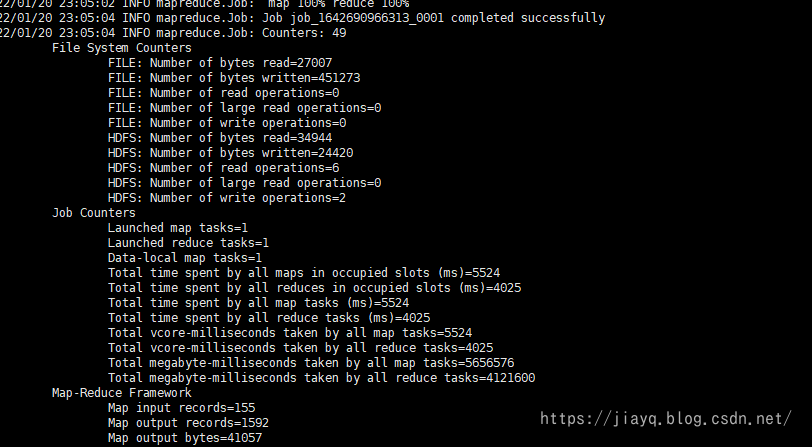
Execute Hadoop jar / Hadoop / share / Hadoop / MapReduce / hadoop-mapreduce-examples-2.9.2 jar wordcount /input/test. Log / output submit job

It can also be seen in the execution history
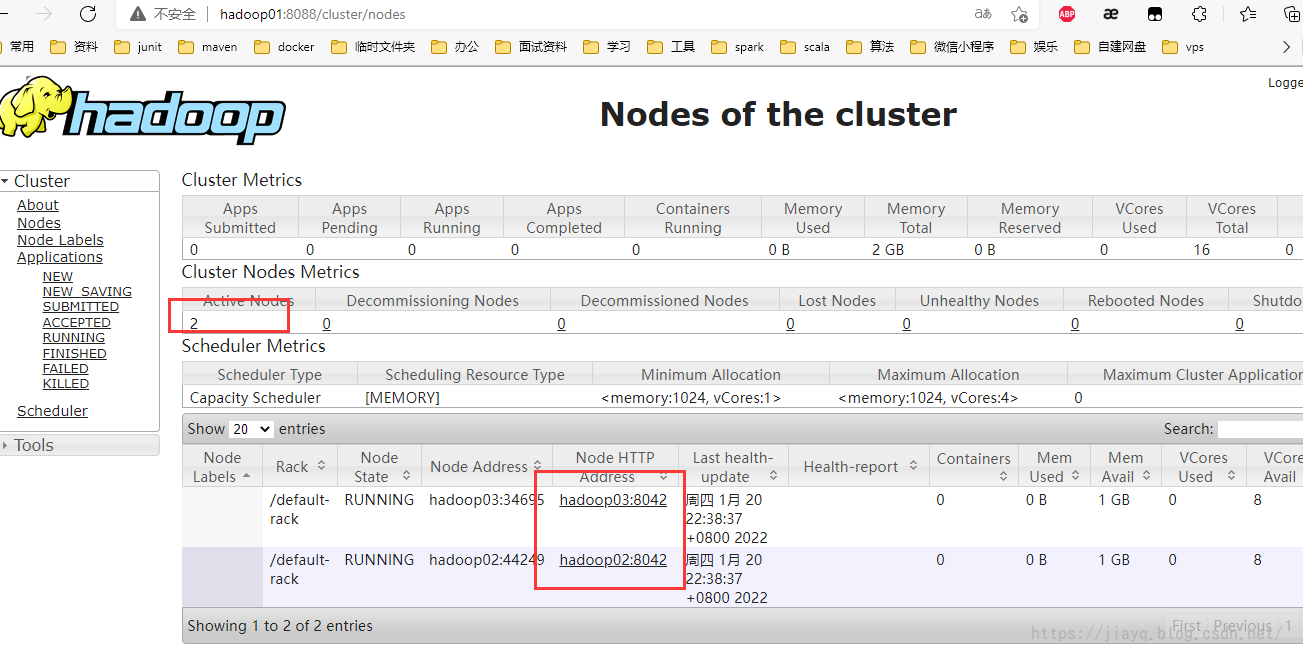
You can also see it in the resource information interface
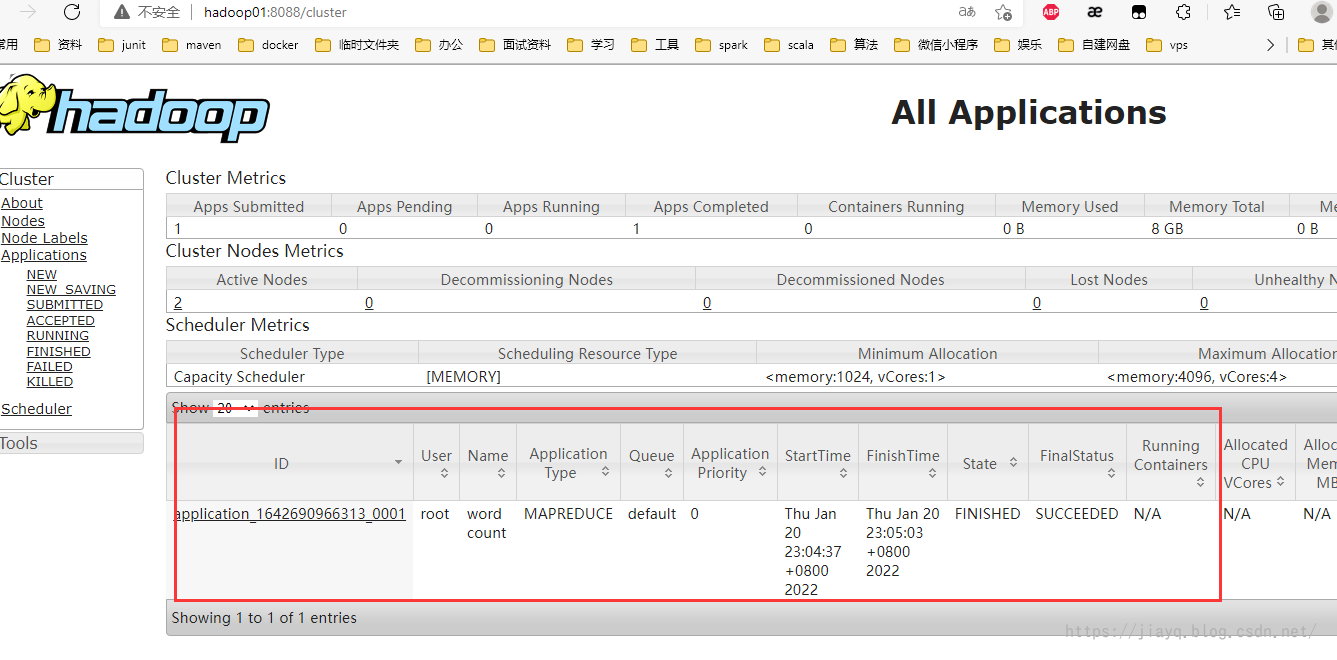
Our task has been completed
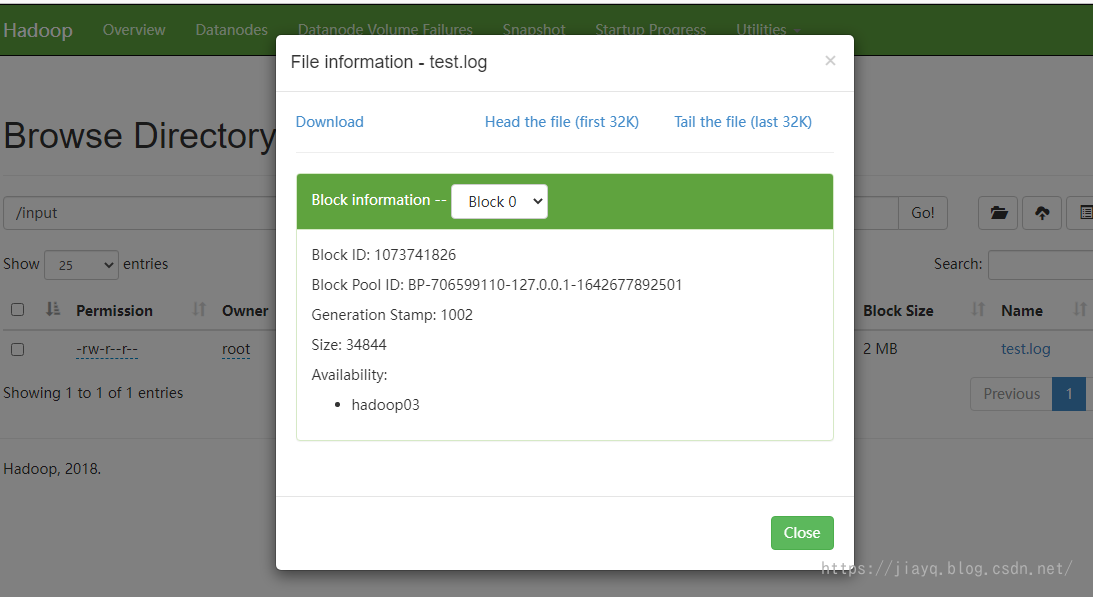
At the same time, you can also view the results on the hdfs interface

Remember, our test Log is on Hadoop 03 node
summary
Here, the hadoop cluster is built.
To be honest, the whole configuration process was not smooth and encountered many problems.
The first is that after configuration, the namenode or resouceManager is not started, which makes it impossible to view the interface on the web. First, access the web interface on the virtual machine and use crul to verify whether it can be accessed. Second, use the ping command on the accessed machine to test connectivity. The most important thing is to check the log first if there is a problem.
The second is that after configuration, the nameNode directly dies, resulting in no nameNode on Hadoop 01 or no resourceManager. This is related to the configuration. Check the log and find that Hadoop 01 is not allowed to start in the nameNode. This is found by checking the log.
The third is that after successful startup, the dataNode cannot register with the nameNode. This is related to the mapping between cluster nodes. One domain name and one address must be guaranteed, which cannot be repeated. Otherwise, it is sometimes good and sometimes bad. In addition, the address and port of the nameNode must be accurately specified in the configuration file.
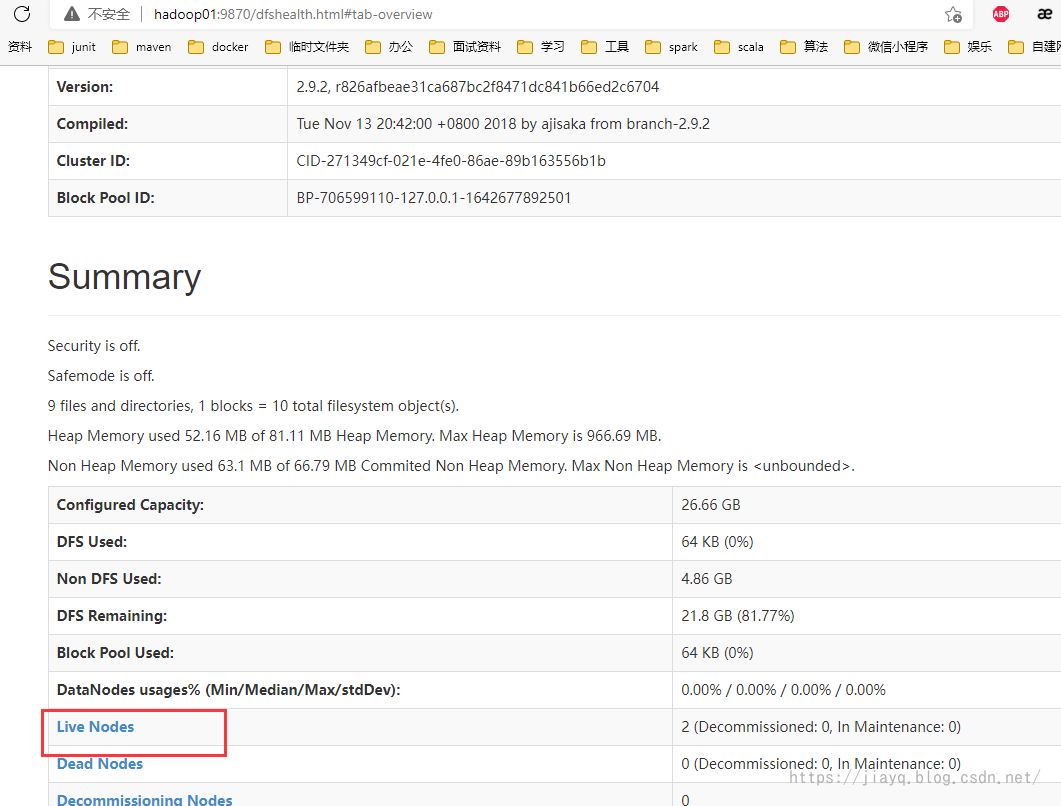
The fourth is to check the information on the interface after successful startup. It is found that there are always 0 or one live nodes in hdfs. At this time, it is necessary to check the log. After checking the log, it is found that nameNode startup takes a certain time. After nameNode is fully started, it will accept the registration request of dataNode. During this period, the dataNode will always retry the registration request, and the log will always brush the information that cannot be registered. It needs a little time to register successfully.
The fifth is to ensure that the configuration information of all nodes is consistent. If not, the nameNode or resourceManager configured by some nodes may not be available, resulting in the node being unable to join the cluster.
Although there are many problems, on the other hand, it has deepened my understanding of hdfs and yarn. Viewing the log can clearly see the startup process and the use of configuration.
Although there are many problems, as long as you don't give up, you will succeed.