I Cluster environment construction
Environmental preparation
(1) Server configuration
| IP | host name | Environment configuration | install |
| 10.100.100.42 | node01 | Close the firewall and selinux,host mapping, and clock synchronization | JDK,NameNode,ResourceManager,Zookeeper |
| 10.100.100.43 | node02 | Close the firewall and selinux,host mapping and clock synchronization | JDK,DataNode,NodeManager,Zookeeper |
| 10.100.100.44 | node03 | Close the firewall and selinux,host mapping and clock synchronization | JDK,DataNode,NodeManager,Zookeeper |
(2) Modify host name to host name mapping
- Edit the etc/hostname file
(3) Turn off firewall and SELinux
- Service iptables stop Chkconfig iptables off
- CentOS7
- systemctl stop firewalld.service # stop firewall
- systemctl disable firewalld.service # disable firewall startup
- Close Selinux
- View status command / usr/sbin/sestatus -v
- Modify the / etc/selinux/config file and change SELINUX=enforcing to SELINUX=disabled
- After setting, you need to restart to take effect
(4) SSH password free login
- The three machines in the cluster generate the public and private key pair SSH keygen - t RSA
- Copy the public keys of the three machines to the first ssh-copy-id node01
- Copy the public key of the first machine to the other two
- scp /root/.ssh/authorized_keys node02:/root/.ssh
- scp /root/.ssh/authorized_keys node03:/root/.ssh
- Perform ssh node02 on node01 for password free login verification
(5) Clock synchronization
- Install ntp using yum install -y ntp
- Turn on scheduled service
- crontab -e
- */1 * * * * /usr/sbin/ntpdate ntp4.aliyun.com;
(6) Cluster machine installation JDK(1.8)
- Check whether openJDK is installed. If the installation needs to uninstall rpm -qa | grep java
- Uninstall the jdk# rpm -e jar package -- nodeps
- Create a directory # mkdir -p /export/softPage # mkdir -p /export/soft
- Upload jdk and unzip it. Install upload tool yum -y install lrzsz
- Upload file command}rz -E
- Unzip the file command tar -xvf installation package (path) - C /export/soft
- Configure the environment variable vi /etc/profile
- export JAVA_HOME=/export/soft/jdk1.8.0_144
- export PATH=:$JAVA_HOME/bin:$PATH
- Make the configuration file effective source /etc/profile
- Verify that the jdk is successfully installed {java -version
- Remote copy folder} scp -r folder path node01:/export/soft
- Configure the environment variables of other machines. See the above for specific operations
- Cancel log reminder log
- vi /etc/profile add unset MAILCHECK , and then make the file effective , source /etc/profile
II Zookeeper cluster environment construction
(1) Cluster planning
| IP | host name | MyId |
| 10.100.100.42 | Node01 | 1 |
| 10.100.100.43 | Node02 | 2 |
| 10.100.100.44 | Node03 | 3 |
(2) Download Zookeeper (3.4.9) installation package
- Download address: Index of /dist/zookeeper
(3) Unzip file
- tar -xvf installation package - C /export/soft
(4) Modify profile
- cd /export/soft/zookeeper-3.4.9/conf/
- Copy template configuration file_ sample. cfg zoo. cfg
- Create zookeeper data directory MKDIR - P / export / soft / zookeeper-3.4.9/zkdata
- Configuration data directory

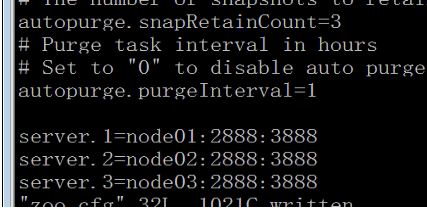
- Configure number of snapshots

- Configure log cleanup time

- Configure zookeeper cluster
- server.1=node01:2888:3888
- server.2=node02:2888:3888
- server.3=node03:2888:3888
(5) Create myid profile
- vi myid
- Echo 1 > /export/soft/zookeeper-3.4.9/zkdatas/myid
(6) The installation package is distributed to node02 node03
- scp -r folder path node02:/export/soft
- scp -r folder path node03:/export/soft
(7) Start the zookeeper service for each machine in the cluster
- Start service / export / soft / zookeeper-3.4.9/bin/zkserver.com sh start
- View service status / export / soft / zookeeper-3.4.9/bin/zkserver.com sh status
III Building Hadoop cluster environment
(1) Cluster planning
| Server IP | 10.100.100.42 | 10.100.100.43 | 10.100.100.44 |
| host name | Node01 | Node02 | Node03 |
| NameNode | yes | no | no |
| SecondaryNameNode | yes | no | no |
| dataNode | yes | yes | yes |
| ResourceManager | yes | no | no |
| NodeManager | yes | yes | yes |
(2) Installation package download (Hadoop 2.7.5)
(3) See similar operations above for details of file upload and decompression
(4) Modify profile
- Modify core site XML file path / export/soft/hadoop-2.7.5/etc/hadoop/core-site.xml xml
- Modification content
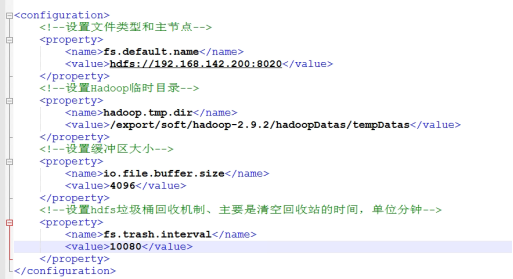
<configuration>

<!--Set file type and master node-->

<property>

<name>fs.default.name</name>

<value>hdfs://192.168.1.200:8020</value>

</property>

<!--set up Hadoop Temporary directory-->

<property>

<name>hadoop.tmp.dir</name>

<value>/export/soft/hadoop-2.7.5/hadoopDatas/tempDatas</value>

</property>

<!--Set buffer size-->

<property>

<name>io.file.buffer.size</name>

<value>4096</value>

</property>

<!--set up hdfs The garbage can recycling mechanism mainly refers to the time to empty the recycle bin, in minutes-->

<property>

<name>fs.trash.interval</name>

<value>10080</value>

</property>

</configuration>


modify hdfs-site.xml

File path

/export/soft/hadoop-2.7.5/etc/hadoop/hdfs-site.xml

Modification content

<configuration>

<!-- to configure secondaryNameNode Access address for -->

<property>

<name>dfs.namenode.secondary.http-address</name>

<value>node01:50090</value>

</property>

<!-- to configure nameNode Access address for -->

<property>

<name>dfs.namenode.http-address</name>

<value>node01:50070</value>

</property>

<!-- to configure nameNode Where metadata is stored -->

<property>

<name>dfs.namenode.name.dir</name>

<value>file:///export/soft/hadoop-2.7.5/hadoopDatas/namenodeDatas,file:///export/soft/hadoop-2.7.5/hadoopDatas/namenodeDatas2</value>

</property>

<!-- to configure dataNode Node location of the data store -->

<property>

<name>dfs.datanode.data.dir</name>

<value>file:///export/soft/hadoop-2.7.5/hadoopDatas/datanodeDatas,file:///export/soft/hadoop-2.7.5/hadoopDatas/datanodeDatas2</value>

</property>

<!-- to configure nameNode Log file storage location -->

<property>

<name>dfs.namenode.edits.dir</name>

<value>file:///export/soft/hadoop-2.7.5/hadoopDatas/nn/edits</value>

</property>

<!-- Configure checkpoint file storage location -->

<property>

<name>dfs.namenode.checkpoint.dir</name>

<value>file:///export/soft/hadoop-2.9.2/hadoopDatas/snn/name</value>

</property>

<!--   -->

<property>

<name>dfs.namenode.checkpoint.edits.dir</name>

<value>file:///export/soft/hadoop-2.9.2/hadoopDatas/dfs/snn/edits</value>

</property>

<!-- Number of copies stored in a single data slice file  -->

<property>

<name>dfs.replication</name>

<value>3</value>

</property>

<!-- Enable permissions -->

<property>

<name>dfs.permissions</name>

<value>false</value>

</property>

<!-- Single data slice size 128 M-->

<property>

<name>dfs.blocksize</name>

<value>134217728</value>

</property>

</configuration>

modify hadoop-env.sh   Mainly modify jdk Path of

/export/soft/jdk1.8.0_144

modify mapred-site.xml Modification content

<configuration>

<!-- open MapReduce Small task mode  -->

<property>

<name>mapreduce.job.ubertask.enable</name>

<value>true</value>

</property>


<!-- Set the host and port for historical tasks  -->

<property>

<name>mapreduce.jobhistory.address</name>

<value>node01:10020</value>

</property>


<!-- Set the host and port of the web page access history task  -->

<property>

<name>mapreduce.jobhistory.webapp.address</name>

<value>node01:19888</value>

</property>

</configuration>
Modify Yard site XML, modifying content
<!-- to configure yarn Location of master node -->

<property>

<name>yarn.resourcemananger.hostname</name>

<value>node01</value>

</property>


<!--  -->

<property>

<name>yarn.nodemanager.aux-services</name>

<value>mapreduce_shuffle</value>

</property>


<!-- Enable log aggregation -->

<property>

<name>yarn.log-aggregation-enable</name>

<value>true</value>

</property>


<!-- Set aggregation log file in hdfs Time saved on, in seconds -->

<property>

<name>yarn.log-aggregation.retain-seconds</name>

<value>604800</value>

</property>


<!-- set up yarn Memory allocation scheme of cluster -->

<property>

<name>yarn.nodemanager.resource.memory-mb</name>

<value>20480</value>

</property>

<property>

<name>yarn.scheduler.minimum-allocation-mb</name>

<value>2048</value>

</property>

<property>

<name>yarn.nodemanager.vmem-pmem-ratio</name>

<value>2.1</value>

</property>
- Modify mapred env Sh# mainly modifies the path of the jdk

export JAVA_HOME=/export/soft/jdk1.8.0_144
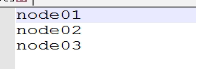
Modifying the slave file is mainly to configure the cluster level relationship. The modification contents are as follows: Node01 , Node02 , Node03
- Create directory
mkdir -p /export/soft/hadoop-2.9.2/hadoopDatas/tempDatas

mkdir -p /export/soft/hadoop-2.9.2/hadoopDatas/namenodeDatas

mkdir -p /export/soft/hadoop-2.9.2/hadoopDatas/namenodeDatas2

mkdir -p /export/soft/hadoop-2.9.2/hadoopDatas/datanodeDatas

mkdir -p /export/soft/hadoop-2.9.2/hadoopDatas/datanodeDatas2

mkdir -p /export/soft/hadoop-2.9.2/hadoopDatas/nn/edits

mkdir -p /export/soft/hadoop-2.9.2/hadoopDatas/snn/name

mkdir -p /export/soft/hadoop-2.9.2/hadoopDatas/dfs/snn/edits
- Installation package distribution
scp -r installation package path node02:$PWD
scp -r installation package path node03:$PWD
- Configuring hadoop environment variables
vi /etc/profile
export HADOOP_HOME=/ export/soft/hadoop-2.9.2
export PATH=:$HADOOP_HOME/bin:$HADOOP_HOME/sbin:$PATH
source /etc/profile
- Start the cluster on the primary node
cd /export/soft/hadoop-2.7.5/
Bin / HDFS / namenode - Format (executed after the first startup)
sbin/start-dfs.sh Sbin/start-yarn.sh
sbin/mr-jobhistory-daemon.sh start historyserver
Web view hdfs http://node01:50070/explorer.html#/
Web view yarn cluster http://node01:8088/cluster
Page view history completed tasks http://node01:19888/jobhistory
IV Hbase (hadoop database) installation
(1) Download and upload the installation package (hbase 2.1.0)
Download path http://archive.apache.org/dist/hb ase software version 2.1.0
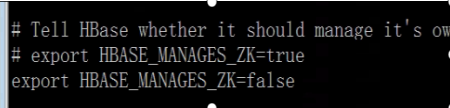
(2) Modify HBase env SH file
export JAVA_HOME=/export/soft/jdk1.8.0_144
export HBASE_MANAGES_ZK=false

(3) Modify HBase site XML file
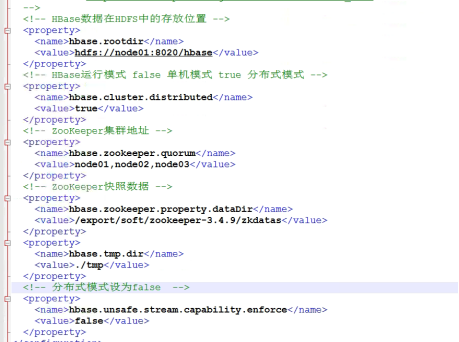
<!-- Hbase Data in HDFS Storage location in -->
  <property>
    <name>hbase.rootdir</name>
    <value>hdfs://node01:8020/hbase</value>
  </property>
  <!-- Hbase Operation mode false Click mode  true Distributed mode -->
  <property>
    <name>hbase.cluster.distributed</name>
    <value>true</value>
  </property>
  <!-- ZooKeeper Cluster address -->
  <property>
    <name>hbase.zookeeper.quorum</name>
    <value>node01,node02,node03</value>
  </property>
  <!-- ZooKeeper Snapshot data address -->
  <property>
    <name>hbase.zookeeper.property.dataDir</name>
    <value>/export/soft/zookeeper-3.4.9/zkdatas</value>
  </property>
  <property>
    <name>hbase.tmp.dir</name>
    <value>./tmp</value>
  </property>
  <!-- The distributed mode is set to false -->
  <property>
    <name>hbase.unsafe.stream.capability.enforce</name>
    <value>false</value>
  </property>
(4) Configure environment variable file
export HBASE_HOME=/export/soft/hbase-2.4.0
export PATH=:$HBASE_HOME/bin:$HBASE_HOME/sbin:$PATH
(5) Copy dependent Library
cp $HBASE_HOME/lib/client-facing-thirdparty/htrace-core4-4.2.0-incubating.jar $HBASE_HOME/lib
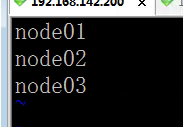
(6) Modify the regionservers file
(7) Installation package distribution

scp -r hbase-2.4.0/ node02:$PWD
scp -r hbase-2.4.0/ node03:$PWD
(8) Modify the environment variable of node02 and node03 and take effect
(9) Start Hbase
First, make sure that the zookeeper cluster and hadoop cluster are started. Then start Hbase on the primary node
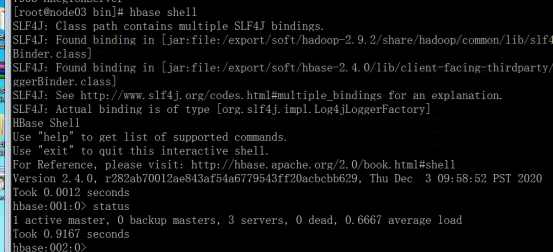
Enter the bin directory of Hbase and execute start Hbase sh
(10) Verify that Hbase started successfully
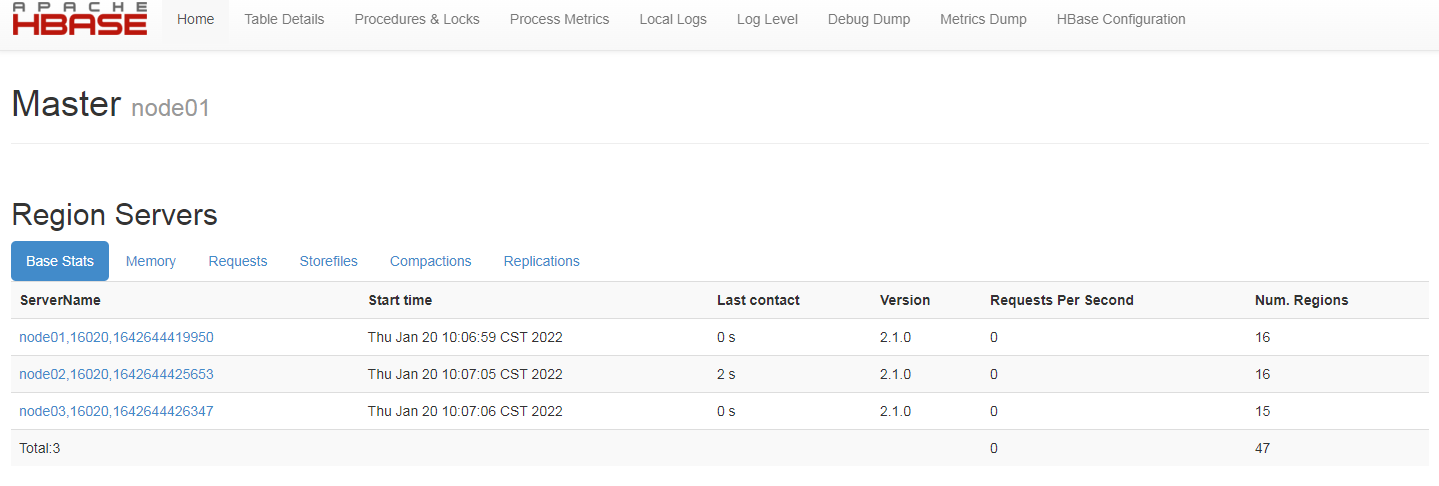
(11) Hbase web interface
Http://10.100.100.42:16010
V Phoenix(5.0.0) plug in installation
(1) File download
File download address Http://phoenix.apache.org/download.html
(2) Upload and unzip the file tar -xvf phoenix-hbase-2.4.0-5.1.2-bin tar. gz -C /export/soft
(3) Copy Jar package to Hbase directory
cp /export/soft/phoenix-hbase-2.4.0-5.1.2-bin/phoenix-*.jar /export/soft/hbase-2.4.0/lib/
(4) Distribute Jar package to other nodes of Hbase
scp phoenix-*.jar node02:$PWD
scp phoenix-*.jar node03:$PWD
(5) Modify profile
modify hbase Configuration file for

cd /export/soft/hbase-2.4.0/conf/

modify hbase-site.xml file

 <!-- support HBase Namespace mapping -->

  <property>

    <name>phoenix.schema.isNamespaceMappingEnabled</name>

    <value>true</value>

  </property>

  <!-- Support index log pre write encoding -->

  <property>

    <name>hbase.regionserver.wal.codec</name>

    <value>org.apache.hadoop.hbase.regionserver.wal.IndexedWALEditCodec</value>

  </property>
(6) Distribution profile
scp hbase-site.xml node02:$PWD
scp hbase-site.xml node03:$PWD
(7) Copy the configuration file to the phoenix directory
cp hbase-site.xml /export/soft/phoenix-hbase-2.4.0-5.1.2-bin/bin/
(8) Restart Hbase service
New cluster zookeeper 3 4.9 hadoop2. 7.5 hbase 2.1.0 phoenix (5.0.0-Hbase2.0)
Check Hadoop 2 7.5 support for local libraries
Bin/hadoop/ checknative spring boot integrates Hadoop
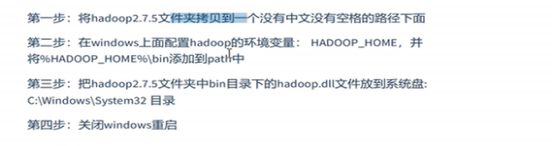
The client needs Hadoop in windows environment dll
These new clusters