1, Planning
1. Server
| OS | application | Hostname | remarks |
|---|---|---|---|
| CentOS 7.4(192.168.139.162) | HA + Keepalived | ha_1 | Cluster high availability (master) |
| CentOS 7.4(192.168.139.160) | HA + Keepalived | ha_2 | Cluster high availability (backup) |
| CentOS 7.4(192.168.139.158) | Erlang 23.2.5,RabbitMQ 3.9.7 | mq_1 | mq_1 disk node |
| CentOS 7.4(192.168.139.137) | Erlang 23.2.5,RabbitMQ 3.9.7 | mq_2 | mq_2 memory nodes (join mq#u 1 cluster) |
| CentOS 7.4(192.168.139.138) | Erlang 23.2.5,RabbitMQ 3.9.7 | mq_3 | mq_3 memory nodes (join mq#u 1 cluster) |
2. Resource download
- Erlang download 1: http://packages.erlang-solutions.com/erlang/rpm/centos/7/x86_64/
Erlang download 2 (GitHub): https://github.com/rabbitmq/erlang-rpm/releases/tag/v23.2.5 - RabbitMQ Download: https://github.com/rabbitmq/rabbitmq-server/releases/tag/v3.9.7
Note:
RabbitMQ must correspond to the specified Erlang version, otherwise an error may be reported during deployment.
Erlang version cross reference table specified by RabbitMQ: https://www.rabbitmq.com/which-erlang.html
3. Overall architecture
# topological structure
=================================================================================

						       [vip: 192.168.139.110]
                                          |
						   [LB1 ha_1]		   [LB2 ha_2]
					    192.168.139.162		192.168.139.160
                      |                   |                  |
	               [mq_1]	           [mq_2]  	          [mq_3]
               192.168.139.158     192.168.139.137    192.168.139.138

# Access mode
=================================================================================
HA The defined port number is 8888
http://192.168.139.110:8888/
2, Deploy
2.1 cluster deployment
2.1.1 install Erlang (all three operate)
1. Download Erlang RPM package
wget https://github.com/rabbitmq/erlang-rpm/releases/download/v23.2.5/erlang-23.2.5-1.el7.x86_64.rpm
2. Installation dependency
yum install -y *epel* gcc-c++ unixODBC unixODBC-devel openssl-devel ncurses-devel
3. Installing Erlang
yum install -y erlang-23.2.5-1.el7.x86_64.rpm
4. Check to see if it is installed
[root@mq_1 ~]# erl
Erlang/OTP 23 [erts-11.1.8] [source] [64-bit] [smp:1:1] [ds:1:1:10] [async-threads:1] [hipe]

Eshell V11.1.8  (abort with ^G)
1>

# This indicates that the Erlang environment has been installed
2.1.2 installing RabbitMQ
1. Download RabbitMQ RPM package (all three operate)
wget https://github.com/rabbitmq/rabbitmq-server/releases/download/v3.9.7/rabbitmq-server-3.9.7-1.el7.noarch.rpm
2. Install RabbitMQ (all three operate)
yum install -y rabbitmq-server-3.9.7-1.el7.noarch.rpm
3. Start RabbitMQ (all three operate)
systemctl start rabbitmq-server
systemctl enable rabbitmq-server
4. Start RabbitMQ built-in web plug-in (all three operate)
rabbitmq-plugins enable rabbitmq_management
5. Restart RabbitMQ (all three operate)
systemctl restart rabbitmq-server
6. Port description

2.1.3 start cluster deployment
1. Create a disk node (all three operate)
mkdir -p /data/rabbitmq/data       # Directory where data is stored
mkdir -p /data/rabbitmq/logs       # Directory where logs are stored
chown rabbitmq.rabbitmq -R /data/  # Permission to modify directory
2. Create profile (all three operate)
vim /etc/rabbitmq/rabbitmq-env.conf
RABBITMQ_MNESIA_BASE=/data/rabbitmq/data
RABBITMQ_LOG_BASE=/data/rabbitmq/logs
3. Restart RabbitMQ (all three operate)
systemctl restart rabbitmq-serve

# At this point, all three machines are disk nodes
4. Set MQ_ Copy the. erlang.cookie file of 1 to mq_2,mq_3 (mq#u 1 operation)
Rabbitmq's cluster is dependent on Erlang's cluster, so you must first build Erlang's cluster scene. Each node in Erlang's cluster is implemented through multiple cookies. The cookie is stored in / var/lib/rabbitmq/.erlang.cookie, and the file is 400 permissions. Therefore, the cookie of each node must be consistent, otherwise the nodes cannot communicate.
The official documents on clusters mentioned that. Erlang. Cookies generally have these two addresses: the first is home/.erlang.cookie; The second place is / var/lib/rabbitmq/.erlang.cookie. If we use the decompression method to install the deployed rabbitmq, the file will be in the {home} directory, that is, $home/.erlang.cookie. If we use installation packages such as rpm for installation, this file will be in the / var/lib/rabbitmq directory.
scp /var/lib/rabbitmq/.erlang.cookie root@mq_2:/var/lib/rabbitmq/
scp /var/lib/rabbitmq/.erlang.cookie root@mq_3:/var/lib/rabbitmq/
5. Set MQ_ 2,mq_ 3 add MQ as a memory node_ 1-node cluster (mq_2 and mq_3 operations)
-
Stop mq_2 nodes
# Note that the RabbitMQ service is not stopped
rabbitmqctl stop_app

#Set mq_2 add memory node to disk node MQ_ one
rabbitmqctl join_cluster --ram rabbit@mq_1

#Start node
rabbitmqctl start_app
-
Stop mq_3 nodes
# Note that the RabbitMQ service is not stopped
rabbitmqctl stop_app

#Set mq_3 add memory node to disk node MQ_ one
rabbitmqctl join_cluster --ram rabbit@mq_1

#Start node
rabbitmqctl start_app
By default, after RabbitMQ is started, all three are disk nodes, but in RabbitMQ cluster mode, mq_1 is the disk node, while mq_2 and mq_3 is the memory node. If you want to join the cluster as a disk node, remove the -- ram parameter.
# For example, add MQ as a disk node type_ 1 cluster
rabbitmqctl join_cluster --ram rabbit@mq_1
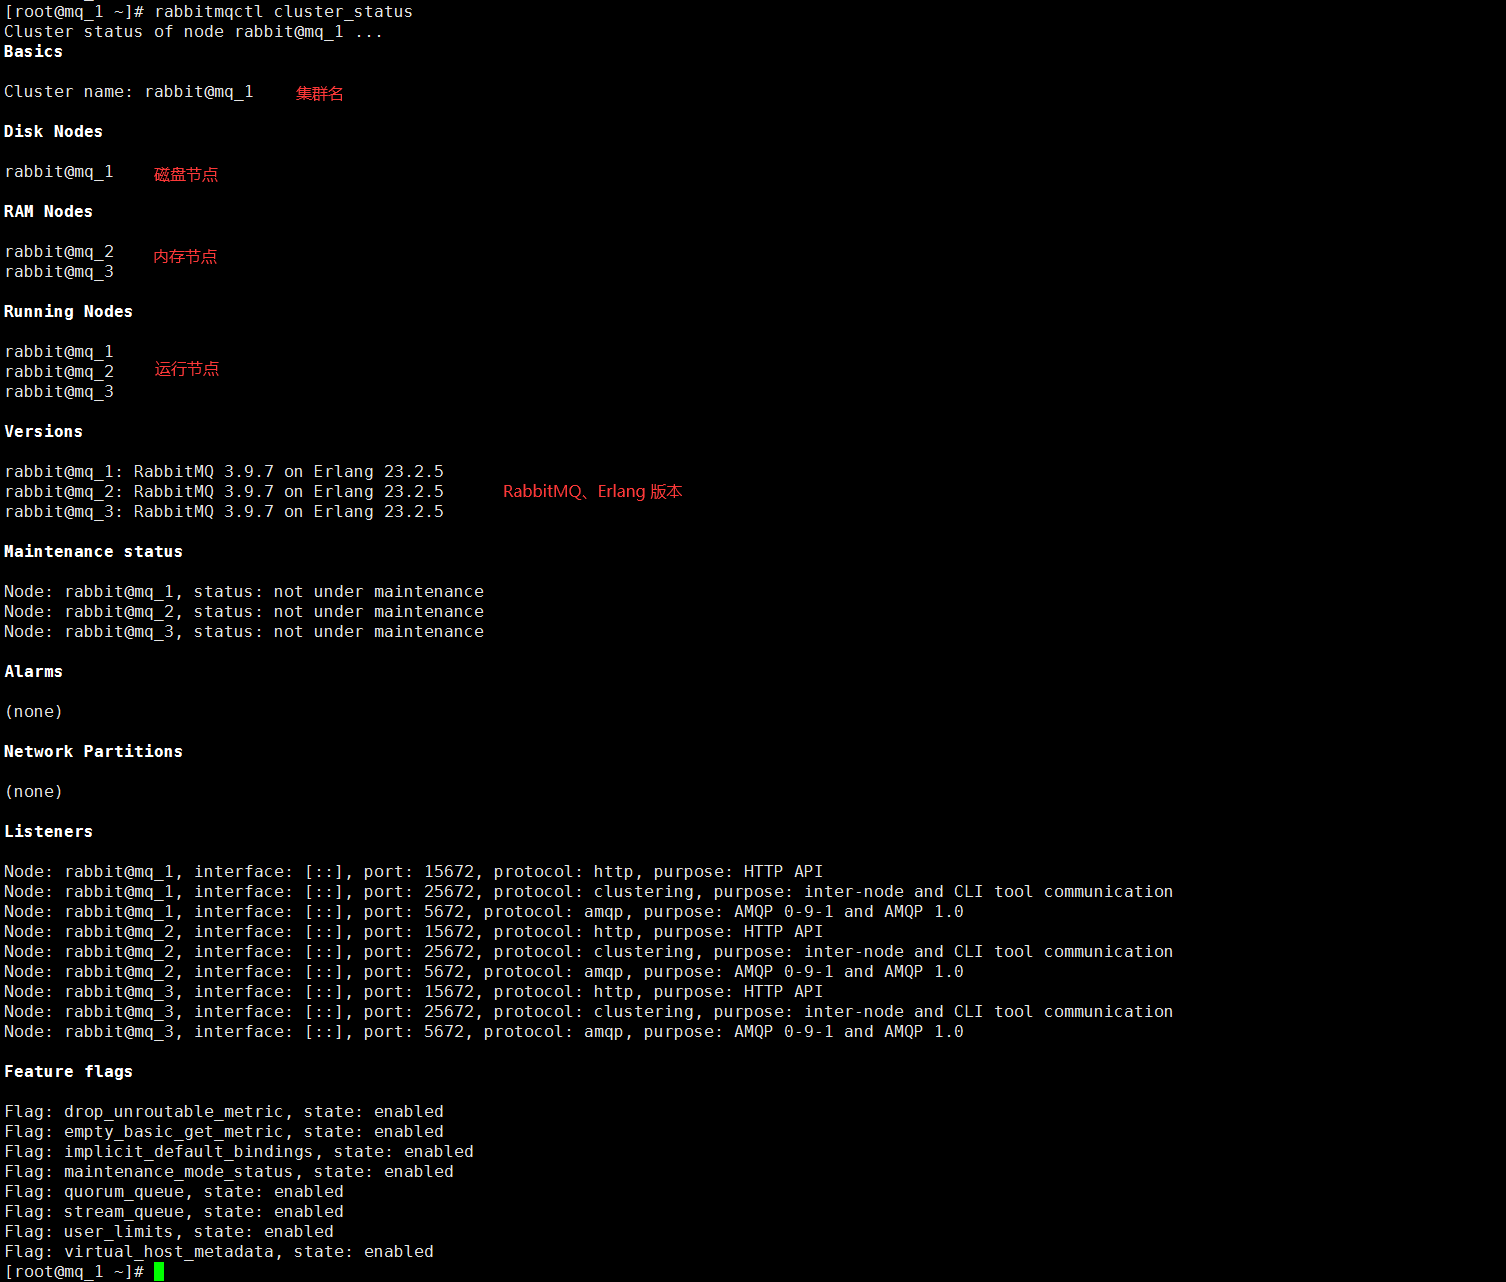
6. View cluster status (operate at mq#u 1)
[root@mq_1 ~]# rabbitmqctl cluster_status
7. Create user (mq#u 1 action only)
-
Add user and password
[root@mq_1 ~]# rabbitmqctl add_user zhurs 111111
Adding user "zhurs" ...
Done. Don't forget to grant the user permissions to some virtual hosts! See 'rabbitmqctl help set_permissions' to learn more.

# explain:
# User name / password: zhurs/111111
# Default administrator user / password: guest/guest
-
Set as Administrator
[root@mq_1 ~]# rabbitmqctl set_user_tags zhurs administrator
Setting tags for user "zhurs" to [administrator] ...
-
Add user permissions
[root@mq_1 ~]# rabbitmqctl set_permissions -p / zhurs ".*" ".*" ".*"
Setting permissions for user "zhurs" in vhost "/" ...

# When setting permissions here, note that there should be a space between '. *'. The three '. *' represent conf permission, read permission and write permission respectively
# For example, if you do not set these three permissions for soho, you do not have permission to query the queue, and you cannot see it in the ui interface
-
View user list
  [root@mq_1 ~]# rabbitmqctl list_users
  Listing users ...
  user	tags
  zhurs	[administrator]
  guest	[administrator]
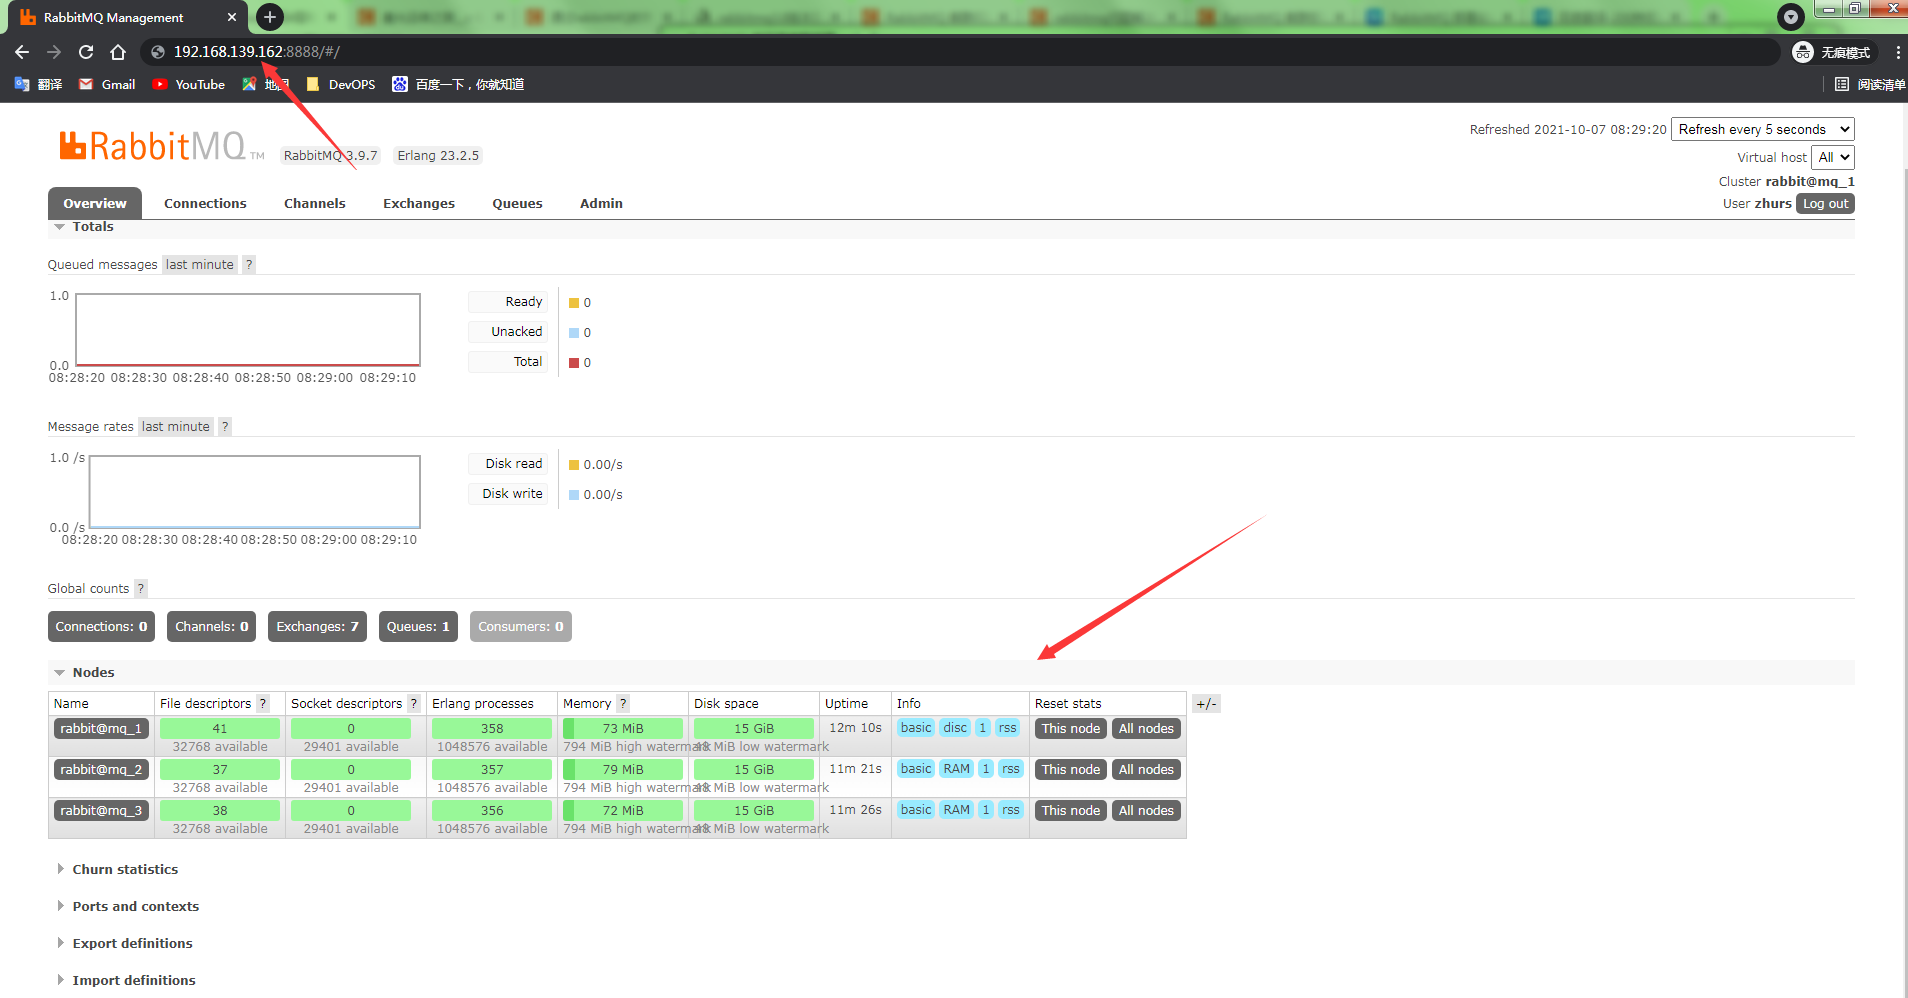
8. Log in to the RabbitMQ Web administration console
http://192.168.139.158:15672/
User name: zhurs
Password: 111111

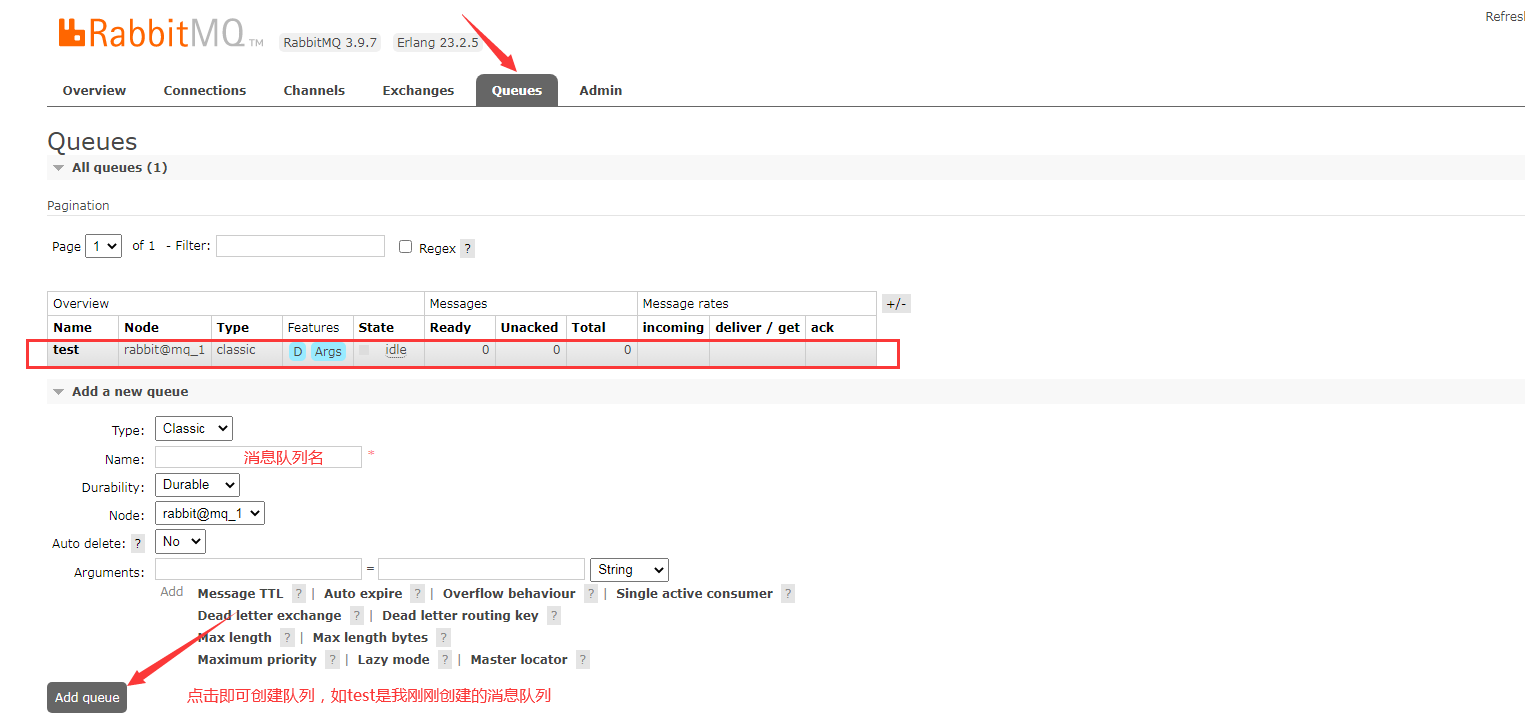
9. Create a message queue on the Web side
2.2 image deployment
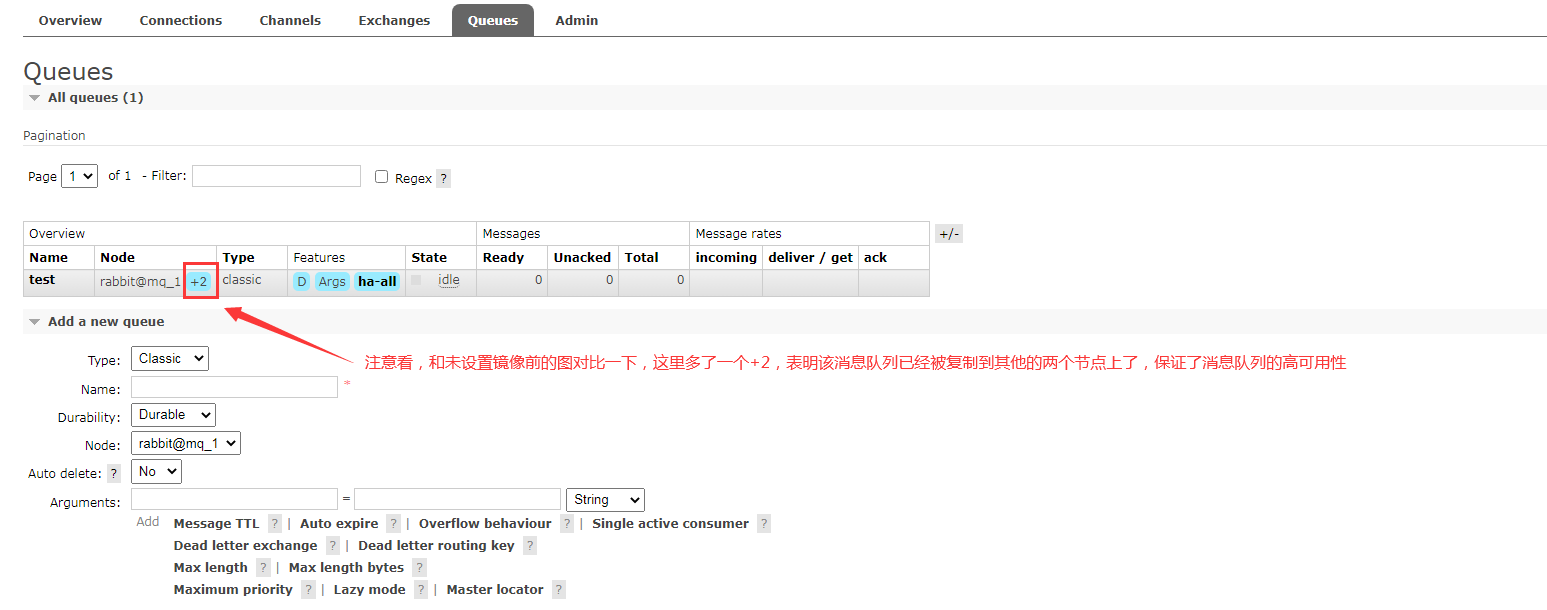
2.2.1 cluster image settings
[root@mq_1 ~]# rabbitmqctl set_policy  ha-all "^" '{"ha-mode":"all"}'
Setting policy "ha-all" for pattern "^" to "{"ha-mode":"all"}" with priority "0" for vhost "/" ...
Check it again on the RabbitMQ Web side
2.2.2 load balancing (HA) + kept
1. Install HAProxy (operate on ha_1 and ha_2)
yum -y install haproxy
2. Modify HAProxy configuration (operate on ha_1 and ha_2)
cp /etc/haproxy/haproxy.cfg /etc/haproxy/haproxy.cfg.bak
vim /etc/haproxy/haproxy.cfg
global   # overall situation
    log         127.0.0.1 local2 info    # Log (info level)
    pidfile     /var/run/haproxy.pid     # Process id
    maxconn     4000      # Maximum connections (low priority)
    user        haproxy   # user
    group       haproxy   # User group
    daemon                # Operation in background mode
    nbproc 1		      # The number of work processes is written in combination with the number of CPU s of the OS

defaults
    mode        http        # Working mode: default layer 7 load balancing (HTTP)
    log         global
    retries     3           # Health check: if the connection fails for 3 times, it is considered that the server is unavailable
    option      redispatch  # Redirect to another health server when the service is unavailable.
    maxconn     4000        # Maximum connections (in priority)
    contimeout	5000        # Timeout between ha server and backend server, unit: ms
    clitimeout	50000       # Timeout for client access to haproxy
    srvtimeout	50000       # Timeout of the backend service response result

listen rabbitmq
    bind *:8888  # Binding port (add this port when accessing HA - this port can be customized without conflict)
    mode tcp     # Working mode: layer 4 load balancing (TCP), which is not affected by the mode of the defaults module at this time
    balance roundrobin   # Load balancing 3 sets MQ
    server      rabbitmq_1 192.168.139.158:15672 check inter 2000s rise 2 fall 3
    server      rabbitmq_2 192.168.139.138:15672 check inter 2000s rise 2 fall 3
    server      rabbitmq_3 192.168.139.138:15672 check inter 2000s rise 2 fall 3
systemctl restart haproxy
3. Visit HA (ha_1 test)
http://192.168.139.162:8888/
As shown in the figure above, the HA configuration is normal. Next, configure the high availability of HA;
4. Install keepalived (operate on ha_1 and ha_2)
yum install -y keepalived
5. Modify the keepalived configuration file
-
ha_ Operation on 1
cp /etc/keepalived/keepalived.conf /etc/keepalived/keepalived.conf.bak
vim /etc/keepalived/keepalived.conf
! Configuration File for keepalived global_defs { router_id mq1 # Change back to directory2 (the name can be customized) } vrrp_instance VI_1 { state MASTER # Define active or standby interface ens33 # VIP binding interface virtual_router_id 80 # The scheduler of the whole cluster is consistent priority 100 # Change back to 50 advert_int 1 # Check interval: 1s by default authentication { auth_type PASS auth_pass 1111 } virtual_ipaddress { 192.168.139.110/24 } } -
ha_2 upper operation
cp /etc/keepalived/keepalived.conf /etc/keepalived/keepalived.conf.bak
vim /etc/keepalived/keepalived.conf
! Configuration File for keepalived

global_defs {
   router_id mq2
}

vrrp_instance VI_1 {
    state BACKUP          # Set to backup
    interface ens33
    virtual_router_id 80
    priority 50           # Change back to 50
    advert_int 1
    authentication {
        auth_type PASS
        auth_pass 1111
    }
    virtual_ipaddress {
        192.168.139.110/24
    }
}
6. Start KeepAlived (operate on ha_1 and ha_2)
systemctl start keepalived
systemctl enable keepalived
7. In ha_ Check whether VIP is generated on 1
[root@ha_1 ~]# ip a
1: lo: <LOOPBACK,UP,LOWER_UP> mtu 65536 qdisc noqueue state UNKNOWN qlen 1
    link/loopback 00:00:00:00:00:00 brd 00:00:00:00:00:00
    inet 127.0.0.1/8 scope host lo
       valid_lft forever preferred_lft forever
    inet6 ::1/128 scope host
       valid_lft forever preferred_lft forever
2: ens33: <BROADCAST,MULTICAST,UP,LOWER_UP> mtu 1500 qdisc pfifo_fast state UP qlen 1000
    link/ether 00:0c:29:f5:60:f3 brd ff:ff:ff:ff:ff:ff
    inet 192.168.139.162/24 brd 192.168.139.255 scope global dynamic ens33
       valid_lft 1525sec preferred_lft 1525sec
    inet 192.168.139.110/24 scope global secondary ens33
       valid_lft forever preferred_lft forever
    inet6 fe80::6c57:e3eb:af28:1c37/64 scope link
       valid_lft forever preferred_lft forever

# 192.168.139.110 generated
8. Access MQ via VIP
http://192.168.139.110:8888/
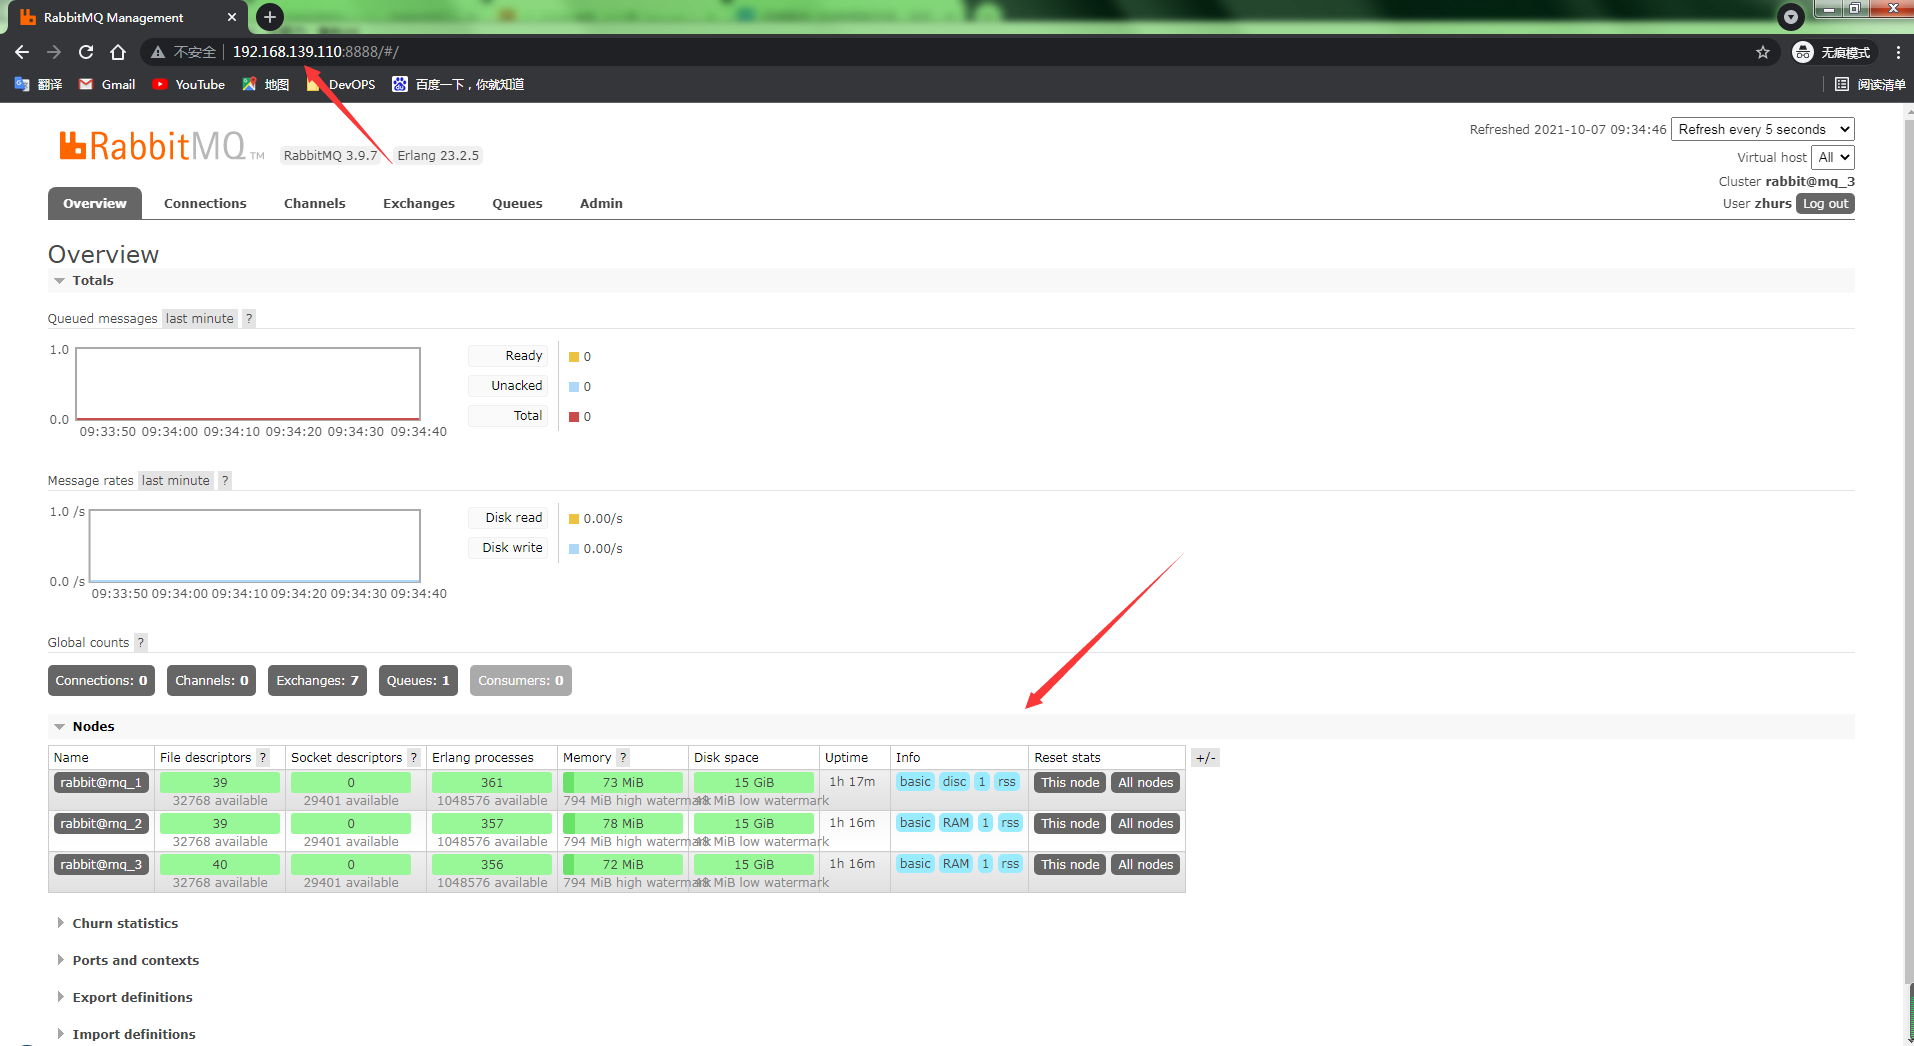
==So far, the high availability deployment of RabbitMQ cluster + HA + kept has been realized== The next step is the work of developers. We only need to provide services to developers
3, Summary
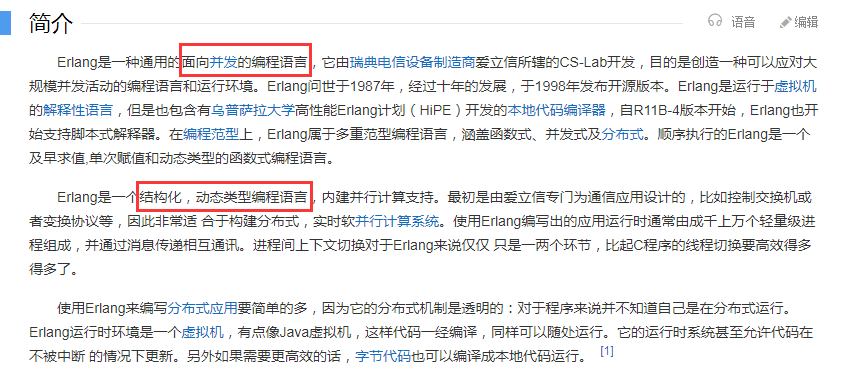
1,Erlang
2,RabbitMQ
RabbitMQ is an open source, reusable enterprise messaging system based on AMQP protocol. RabbitMQ is a kind of message queue middleware. Other MQS include Kafka, ActiveMQ, RocketMQ, etc. It mainly has the following functions:
-
Redundancy: it provides a mirror queue to prevent single node failure and ensure the effectiveness of information;
-
Horizontal expansion: multiple MQ S can smoothly join the cluster;
-
Decoupling: the coupling between processes is too high. If one process is changed, another process must be modified. Therefore, decoupling is realized through MQ;
-
Asynchronous communication: reduce interface response time and improve service performance;
The most common usage scenarios are ordering and inventory reduction:
- Synchronous communication mode, interface response time = order + inventory;
- Asynchronous communication mode, interface response time = single order, which basically doubles the performance.
-
Peak clipping: a common scenario in the message queue, which is generally widely used in second kill or grab enough activities.
Generally, because the traffic is too large, the application system configuration can not bear this instantaneous traffic, resulting in the system hanging up directly. To solve this problem, we will reject the huge traffic at the upper layer of the system, that is, transfer it to MQ instead of directly pouring into our interface.
Two modes of message oriented middleware:
-
P2P mode (message queuing system)
P2P mode includes three roles: * * message Queue, Sender and Receiver** Each message is sent to a specific Queue, and the Receiver gets the message from the Queue. The Queue holds messages until they are consumed or timed out.
-
Pub sub mode (publish subscribe message system)
The Pub/Sub mode contains three roles: * * Topic, Publisher and Subscriber** Multiple publishers send messages to Topic, and the system passes these messages to multiple subscribers.