Tools and Resource Center
Help developers work more efficiently and provide tools and resources around the whole life cycle of developers
https://developer.aliyun.com/tool?spm=a1z389.11499242.0.0.65452413o034Uw&utm_content=g_1000283979
The container storage function of Alibaba cloud container service ack is based on the Kubernetes storage system, deeply integrates Alibaba cloud storage services and is fully compatible with Kubernetes native storage services, such as EmptyDir, HostPath, Secret, ConfigMap and so on. Based on the community container storage interface (CSI), ACK implements Alibaba cloud storage service access capability by deploying CSI plug-ins. Container service ack supports Pod to automatically bind Alibaba cloud disk, NAS, OSS, CPFS, local volume and other storage services. See for the main characteristics and application scenarios of each storage volume Storage CSI overview.
prerequisite
- You need to create a registered cluster and connect the self built Kubernetes cluster to the registered cluster. For details, see Create an alicloud registered cluster and access the self built Kubernetes cluster.
- Your self built cluster has expanded Alibaba cloud ECS nodes. Please refer to how to expand Alibaba cloud ECS nodes for your self built Kubernetes cluster Create hybrid cluster , or your self built cluster is deployed on alicloud ECS.
matters needing attention
[note]
Alibaba cloud CSI storage components only support running on Alibaba cloud ECS nodes. Alibaba cloud ECS nodes in a self built Kubernetes cluster need to be labeled with the node label Alibaba cloud com/external=true.
- If your self built cluster is deployed on Alibaba cloud ECs, please refer to [self built Kubernetes cluster on Alibaba cloud ECS accesses ACK registered cluster] ()
- If you use the ACK registration cluster node pool function to expand the capacity of alicloud ECS nodes for the Kubernetes cluster built by the local data center, it is marked "alibabacloud. Com" by default com/external=true
Step 1: configure the RAM permissions of CSI components in the self built cluster
Before installing CSI components in the registered cluster, you need to set the permissions of AK to access cloud services in the access cluster. Before setting AK, you need to create RAM users and add permissions for them to access relevant cloud resources.
- Create RAM user. For specific steps on how to create a RAM user, see Create RAM user.
- Create a permission policy. For specific steps to create a permission policy, see Create custom policy . Please authorize RAM permissions as follows:
{
    "Version": "1",
    "Statement": [
        {
            "Action": [
                "ecs:AttachDisk",
                "ecs:DetachDisk",
                "ecs:DescribeDisks",
                "ecs:CreateDisk",
                "ecs:ResizeDisk",
                "ecs:CreateSnapshot",
                "ecs:DeleteSnapshot",
                "ecs:CreateAutoSnapshotPolicy",
                "ecs:ApplyAutoSnapshotPolicy",
                "ecs:CancelAutoSnapshotPolicy",
                "ecs:DeleteAutoSnapshotPolicy",
                "ecs:DescribeAutoSnapshotPolicyEX",
                "ecs:ModifyAutoSnapshotPolicyEx",
                "ecs:AddTags",
                "ecs:DescribeTags",
                "ecs:DescribeSnapshots",
                "ecs:ListTagResources",
                "ecs:TagResources",
                "ecs:UntagResources",
                "ecs:ModifyDiskSpec",
                "ecs:CreateSnapshot",
                "ecs:DeleteDisk",
                "ecs:DescribeInstanceAttribute",
                "ecs:DescribeInstances"
            ],
            "Resource": [
                "*"
            ],
            "Effect": "Allow"
        },
        {
            "Action": [
                "nas:DescribeFileSystems",
                "nas:DescribeMountTargets",
                "nas:AddTags",
                "nas:DescribeTags",
                "nas:RemoveTags",
                "nas:CreateFileSystem",
                "nas:DeleteFileSystem",
                "nas:ModifyFileSystem",
                "nas:CreateMountTarget",
                "nas:DeleteMountTarget",
                "nas:ModifyMountTarget",
                "nas:TagResources",
                "nas:SetDirQuota",
                "nas:EnableRecycleBin",
                "nas:GetRecycleBinAttribute"
            ],
            "Resource": [
                "*"
            ],
            "Effect": "Allow"
        },
        {
            "Action": [
                "oss:PutBucket",
                "oss:GetObjectTagging",
                "oss:ListBuckets",
                "oss:PutBucketTags",
                "oss:GetBucketTags",
                "oss:PutBucketEncryption",
                "oss:GetBucketInfo"
            ],
            "Resource": [
                "*"
            ],
            "Effect": "Allow"
        }
    ]
}- Add permissions for RAM users. For specific steps on how to authorize RAM users, see Authorize RAM users.
- Create AK for RAM users. For information on how to create AK for sub accounts, see Get AccessKey.
- Use AK to create a Secret resource named Alibaba addon Secret in the self built Kubernetes cluster. When installing the relevant components of the event center in step 2, this AK will be automatically referenced to access the corresponding cloud service resources.
kubectl -n kube-system create secret generic alibaba-addon-secret --from-literal='access-key-id=<your access key id>' --from-literal='access-key-secret=<your access key secret>'
You need to replace the above code with the AK information you obtained.
Step 2 component installation and upgrade
The installation steps of CSI components are as follows:
2) In the left navigation bar of the console, click cluster.
3) On the cluster list page, click Details on the right side of the target registration cluster page.
4) In the cluster details tab, click component management under O & M management.
5) Locate the CSI provider and CSI plugin and click Install.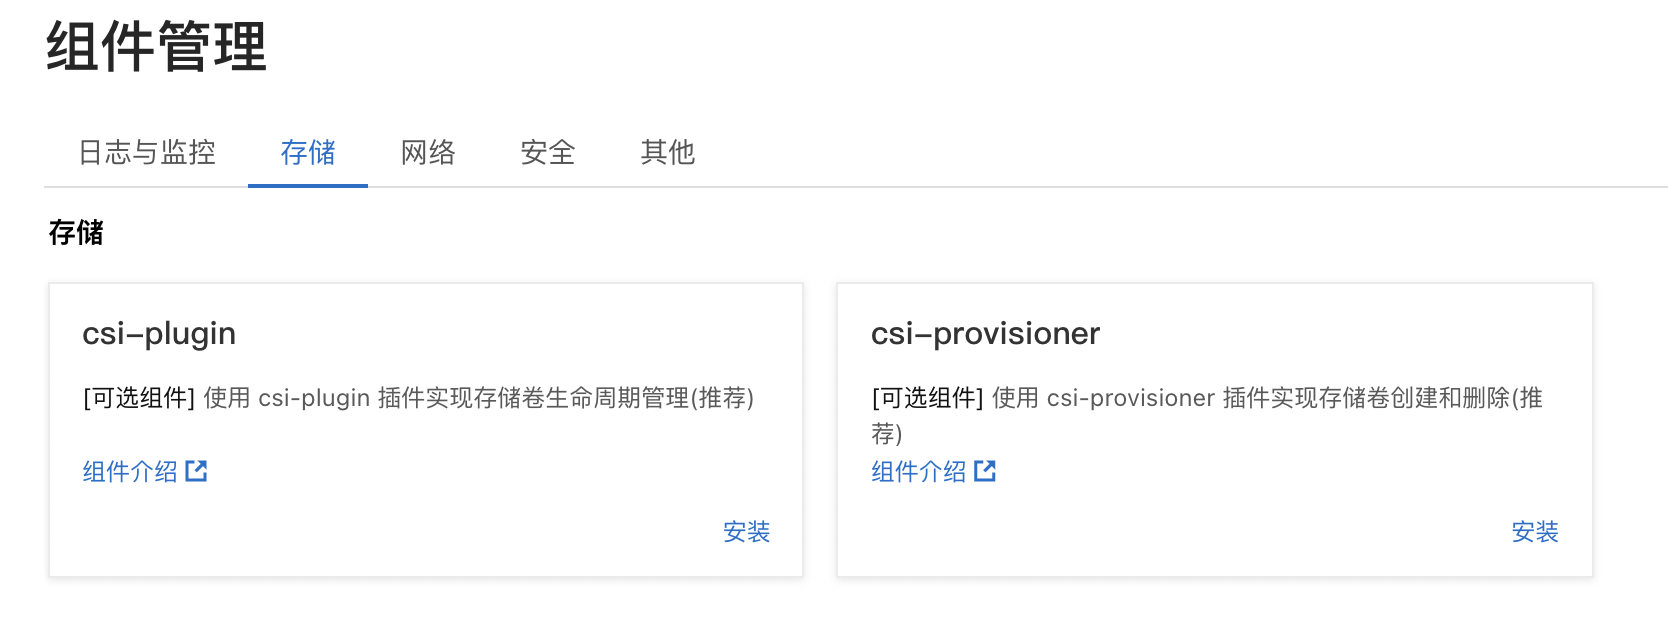
Step 3 use CSI storage plug-in
Please refer to how to use cloud disk to store volumes Cloud disk storage volume.
See how to use NAS storage volumes NAS storage volume.
See how to use OSS storage volumes OSS storage volume.