Installation premise
Confirm that the node and npm environment have been installed on the computer. If it is not installed, the following steps need to be performed: 1 Enter the official website: https://nodejs.org/zh-cn/ , download the long-term support version.
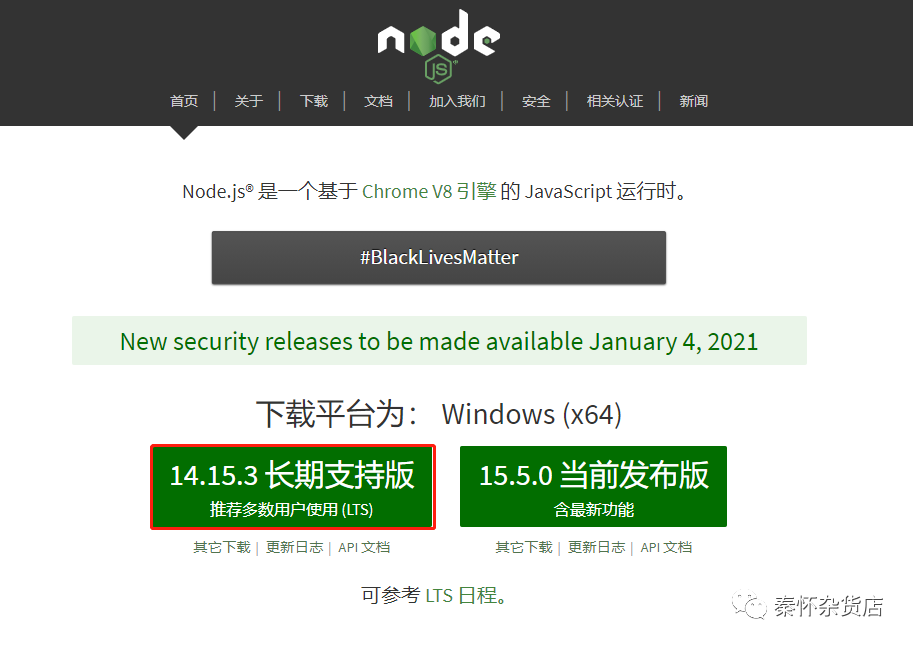
2. Just go to the next step after installation. The environment variables will be added by default.
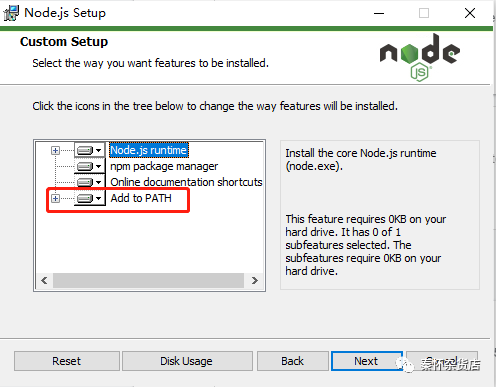
3. Until finish, open the cmd command line and check the environment variables and version. (at this time, you should only add the root directory of node.js to the environment variable path)

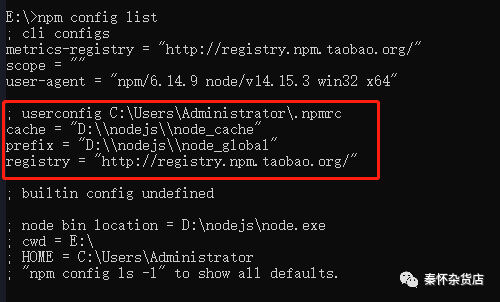
4. Run the command to modify the folder prefix and cache directory of npm and configure the mirror station.
npm config set prefix "D:\nodejs\node_global"
npm config set cache "D:\nodejs\node_cache"
npm config set registry=http://registry.npm.taobao.org
Then use npm config list to see your configuration:
More needs to be added
D:\nodejs\node_global\node_modules
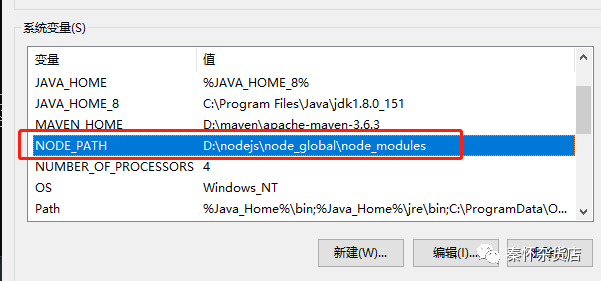
5. Then, if npm is used to install something, but the command cannot be found, we need to add the global folder of our node into the environment variable in Path.
D:\nodejs\node_global

So we can install things happily.
docsify walk up
Official website: https://docsify.js.org/#/
I won't talk more nonsense. Install docsify cli directly:
npm i docsify-cli -g
Then we create a test folder called note, and enter this folder from the command line:
cd note
docsify init ./docs
It's successful!!! When you see that it asks you to execute the command, start it locally:
docsify serve ./docs
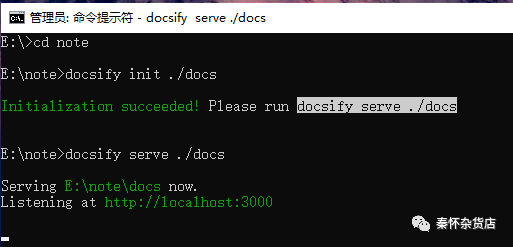
So you can do it locally http://localhost:3000 Once opened, you can save the modified content without restarting)
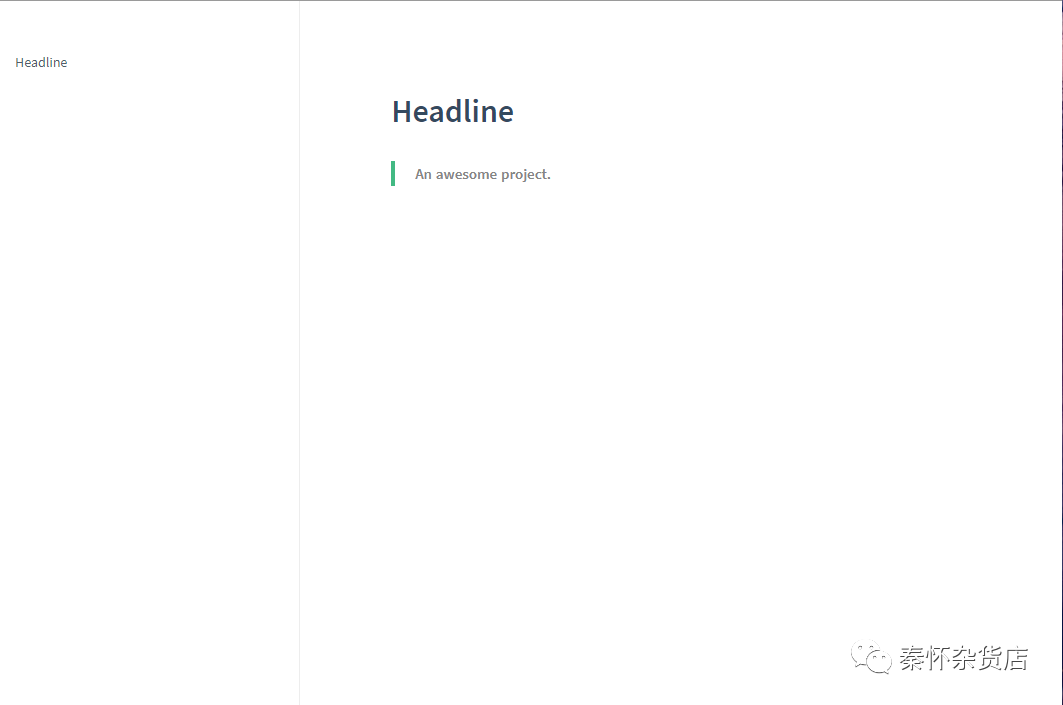
Beautify it
To be honest, it's ugly, so beautify it: first add a cover, which needs to be in 'index HTML, set the following properties to true
coverpage: true
Then create a new file_ coverpage.md:
# Mybatis groping the way


> This is my own note

[CSDN](https://blog.csdn.net/Aphysia)
[Scroll mouse](#introduction)
Then it became like this:
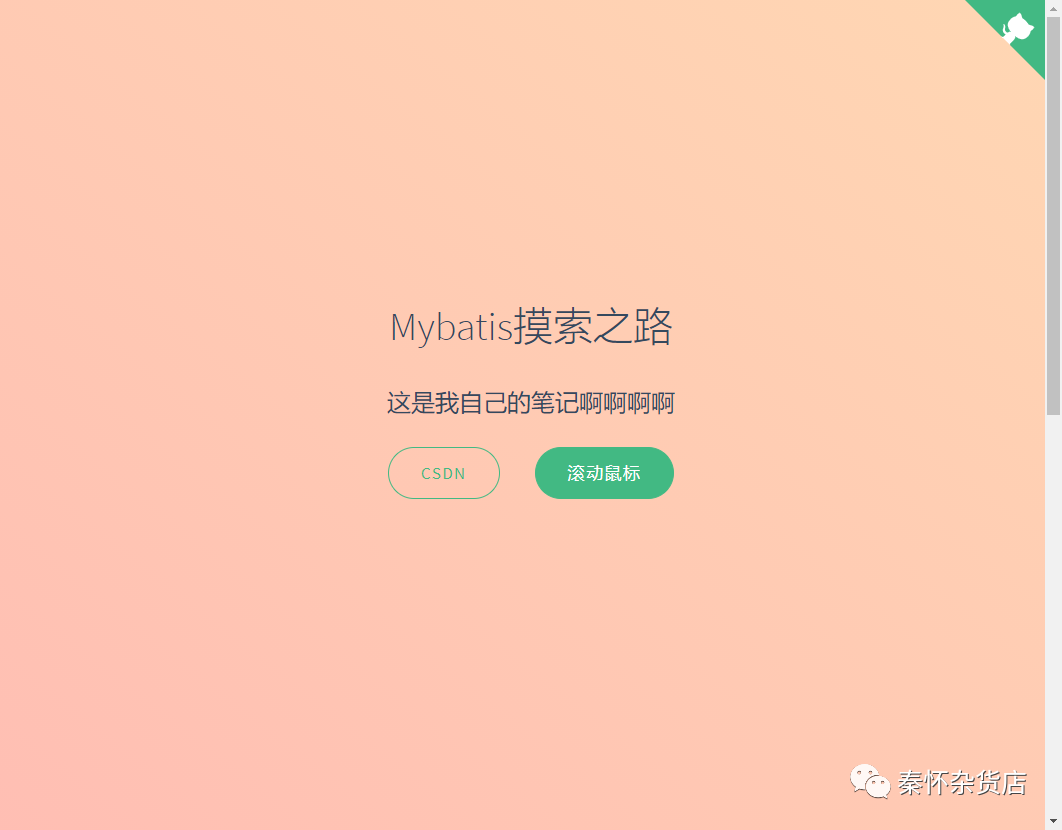
We also need a sidebar, and then open the sidebar properties:
loadSidebar: true
Then create a new sidebar file_ sidebar.md:
- Note

  - [Chapter I](Chapter I.md)
  - [Chapter II](Chapter II.md)
  - [Chapter III](Chapter III.md)
Then it became like this:
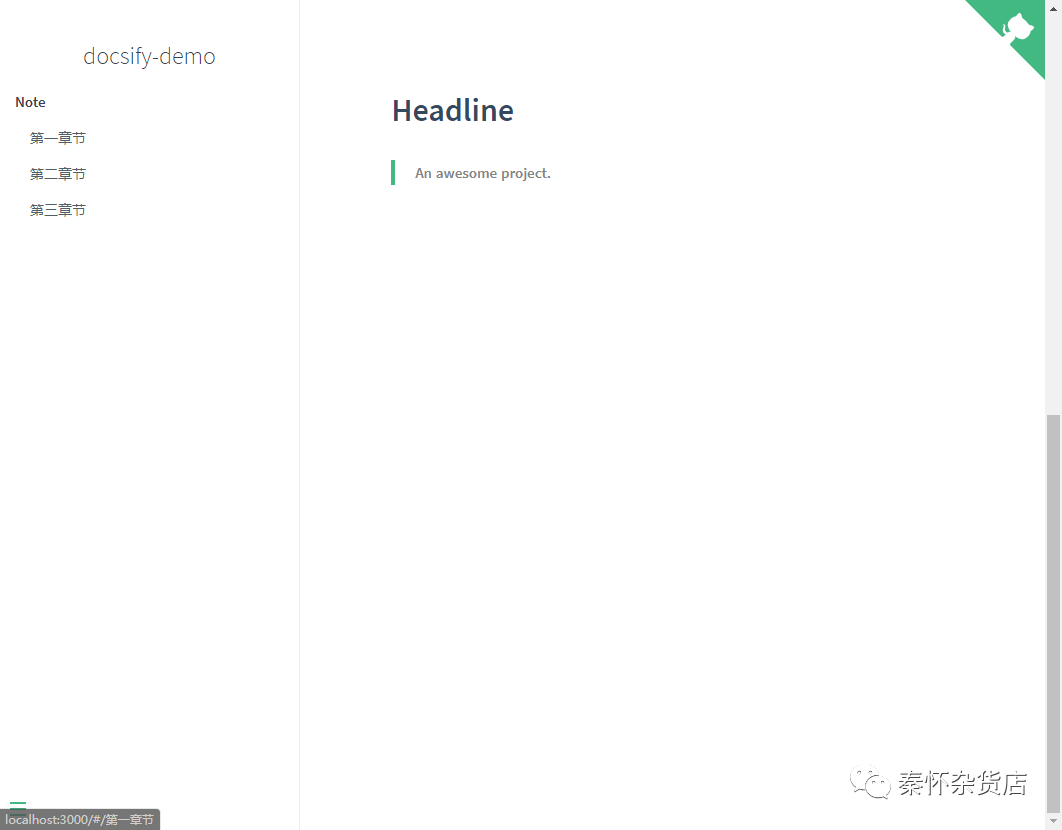
The middle part uses readme MD content, other index The content of HTML is as follows (you can set it according to your needs. If you have more advanced requirements, it is recommended to check the document on the official website!!!)
<!DOCTYPE html>
<html lang="en">

<head>
  <meta charset="UTF-8">
  <title>docsify-demo</title>
  <meta http-equiv="X-UA-Compatible" content="IE=edge,chrome=1" />
  <meta name="description" content="Description">
  <meta name="viewport"
    content="width=device-width, user-scalable=no, initial-scale=1.0, maximum-scale=1.0, minimum-scale=1.0">
  <link rel="stylesheet" href="//unpkg.com/docsify/lib/themes/vue.css">
</head>

<body>
  <div id="app"></div>
  <!-- docsify-edit-on-github -->
  <script src="//unpkg.com/docsify-edit-on-github/index.js"></script>
  <!--Java Code highlighting -->
  <script src="//unpkg.com/prismjs/components/prism-java.js"></script>
 <!--Full text search,Direct use of official information cannot take effect-->
 <script src="https://cdn.bootcss.com/docsify/4.5.9/plugins/search.min.js"></script>
 <!-- Copy code to clipboard -->
  <script src="//unpkg.com/docsify-copy-code"></script>
  <!-- Picture zoom -->
  <script src="//unpkg.com/docsify/lib/plugins/zoom-image.js"></script>
  <!-- word count  -->
  <script src="//unpkg.com/docsify-count/dist/countable.js"></script>
  <script>
    window.$docsify = {
      name: 'docsify-demo',
      repo: 'https://github.com/Damaer/Mybatis-Learning',
      maxLevel: 5,//Maximum supported Title level for rendering
      subMaxLevel: 3,
      homepage: 'README.md',
      coverpage: true,
      loadSidebar: true,
      auto2top: true,//Whether to automatically jump to the top of the page after switching pages
       //Full text search
       search: {
        maxAge: 86400000, // Expiration time, in milliseconds, defaults to one day
        paths: 'auto',
        placeholder: 'search',
        noData: 'No results found',
        // Maximum range level of search title, 1 - 6
        depth: 3,
      }
    }
  </script>
  <script src="//unpkg.com/docsify/lib/docsify.min.js"></script>
</body>

</html>
How to deploy to github
Let's talk about how to deploy. First, we need to have a remote warehouse. By default, you have it. Use the command to initialize the folder and associate the remote warehouse
git init
git remote add origin "The address corresponding to the warehouse you created on the third-party code hosting platform"
It's ok to push the code to the remote warehouse. git's operation is not explained carefully. Or you can clone the remote warehouse, create the document with docsify, and then submit it.
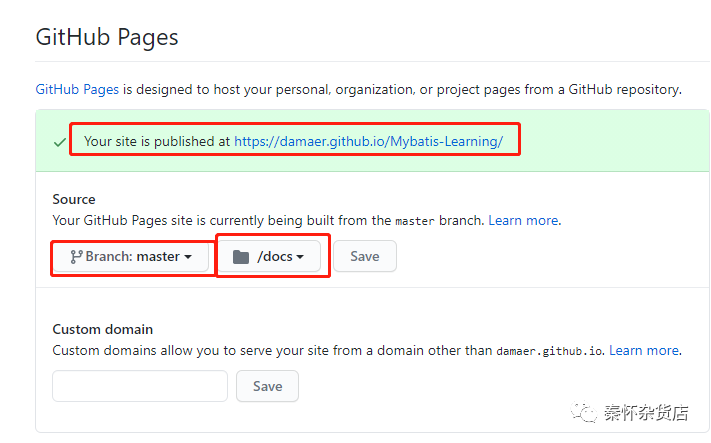
After submitting it, we need to do an operation. There is a GitHub Pages under settings. Select the build branch and file directory. I use master, the docs folder in the root directory. Then you can see that it has been published successfully. Just visit the website directly.
PS: the project is my other project address, but the process is the same.
Pit point
I can't open the website!!! It's because Telecom will block some websites, that is to say, it is understood by qiang. If you want to access, you can modify DNS,
This article only represents your own learning accumulation records or learning notes. If there is infringement, please contact the author to verify and delete. No one is perfect, so is the article. Your writing is immature. Don't spray if you don't have talent. If there are mistakes, please point them out. Thank you very much~