Scaffolding
The purpose of scaffolding is to quickly build the basic structure of the project and provide project specifications and conventions. At present, the scaffolds commonly used in daily work include Vue cli, create react app, angular CLI and so on. They all complete the rapid construction of content through simple initialization commands.
In fact, we can also use git clone url to create (copy) a new project. The low er way is to copy and paste the whole folder, which can also achieve the purpose of initialization.
The essence of scaffolding is to download a template remotely to carry out a new project, but scaffolding is an advanced version of cloning. It mainly provides interactive commands so that we can dynamically change the template, and then use one command to initialize other built-in dependencies, which facilitates multi person cooperation and does not need to pass files around.
Next, we will start to implement a simple version of scaffold heavy cli (which can be named by ourselves). The goal is to implement a command such as heavy init template name project name. Stop talking nonsense and get to the point!
Pre knowledge understanding
In fact, the amount of code of a simple version of heavy cli is not large, so let's first introduce the third-party library to be used
commander
This is used to write instructions and process command lines. The usage is as follows:
const program = require("commander");
// Definition instruction
program
  .version('0.0.1')
  .command('init', 'Generate a new project from a template')
  .action(() => {
    // Callback function
  })
// Parsing command line parameters
program.parse(process.argv);
Copy code
inquirer
This is a powerful interactive command line tool. Its usage is as follows:
const inquirer = require('inquirer');
inquirer
  .prompt([
    // Some interactive questions
  ])
  .then(answers => {
    // The callback function, answers, is the content entered by the user and is an object
  });
Copy code
chalk
This is used to modify the style of console output content and beautify the output content. The usage is as follows:
const chalk = require('chalk');
console.log(chalk.green('success'));
console.log(chalk.red('error'));
Copy code
ora
This is a good-looking loading interaction component, which is used for the loading effect in the downloading process. The usage is as follows:
const ora = require('ora')
let spinner = ora('downloading template ...')
spinner.start()
Copy code
download-git-repo
For downloading remote templates, GitHub, GitLab and Bitbucket are supported. The usage is as follows:
const download = require('download-git-repo')
download(repository, destination, options, callback)
Copy code
Where repository is the address of the remote warehouse; destination is the path where the downloaded file is stored. You can also write the file name directly. The default is the current directory; Options are options. For example, {clone: boolean} indicates whether to download in the form of http download or git clone.
initial directory
First, we create an empty folder named heaven cli;
directory structure
├── bin //Executable file
└── lib
    ├── init.js         //init command
    ├── template
        └── index.js        //All built-in templates
    └── utils
        └── utils.js        // Public method
├── package.json
├── README.md
 Copy code
Execute the npm init command in this directory to initialize.
Installation dependency
npm install  chalk commander inquirer ora download-git-repo
 Copy code
My package The dependency of JSON is like this
"dependencies": {
    "chalk": "^4.1.2",
    "commander": "^8.3.0",
    "download-git-repo": "^3.0.2",
    "inquirer": "^8.1.2",
    "ora": "^5.4.1"
}
Copy code
node.js has built-in support for command-line operation, package The bin field in JSON can define the command name and the associated execution file. In package Add bin field to JSON
"bin": {
    "heaven": "bin/heaven.js"
  },
Copy code
Create a new heaven. In the bin directory JS and add a line at the beginning of the line #/ usr/bin/env node specifies that the current script is controlled by node JS for parsing
#!/usr/bin/env node
const program = require('commander')

const init = require("../lib/init");

program
  .command('init <template> <app-name>')
  .description('generate a project from a remote template (legacy API, requires @heaven-cli)')
  .action((template, name) => {
    init(template, name)
  })

// Parsing command line parameters
program.parse(process.argv)
Copy code
The main function of this file is to define instructions. We use node/ Run bin / heavy and you can see the running results,
Of course, in the development process, in order to facilitate debugging, execute npm link in the current heavy cli directory and link the heavy command to the global environment,
In this way, we can run it directly every time we just enter heavy.
Then you can write / lib / init JS code
// interactive console
const inquirer = require('inquirer')
// Modify the style of the console string
const chalk = require('chalk')
// node built-in file module
const fs = require('fs')
// Read the built-in template under template
const tplObj = require("./template")

// download
const download = require("download-git-repo");

// Problems of customizing interactive command line and simple verification
let question = [
  {
    name: "name",
    type: 'input',
    message: "Project name (" + name + ')',
    validate (val) {
      if (val === '') {
        return 'Name is required!'
      } else {
        return true
      }
    }
  },
  {
      name: "description",
      type: 'input',
      message: "Project description"
  },
]

inquirer
  .prompt(question).then(answers => {
    // answers is the content entered by the user and is an object
    let {
        description
      } = answers;
      let projectName = answers.name
      // The load icon appears
      const spinner = ora("Downloading...");

      const url = tplObj.template[template]
      // Execute the download method and pass in parameters
      download(
        url,
        projectName,
        err => {
          if (err) {
            spinner.fail();
            console.log(chalk.red(`Generation failed. ${err}`))
            return
          }
          // Write the user input into package Within JSON
          const packageFile = path.join(process.cwd(), projectName + '/package.json');
          const package = require(packageFile);
          package.description = description;
          package.name = projectName;
          fs.writeFileSync(file, `module.exports = ${JSON.stringify(package, null, '\t')};`, 'utf8');
          // End loading Icon
          spinner.succeed();
          console.log(chalk.green('\n Generation completed!'))
          console.log('\n To get started')
          console.log(`\n    cd ${projectName} \n`)
        }
      )
  })
Copy code
So far, a small scaffold is finished.
Next, test whether the heavy init Vue my project command works

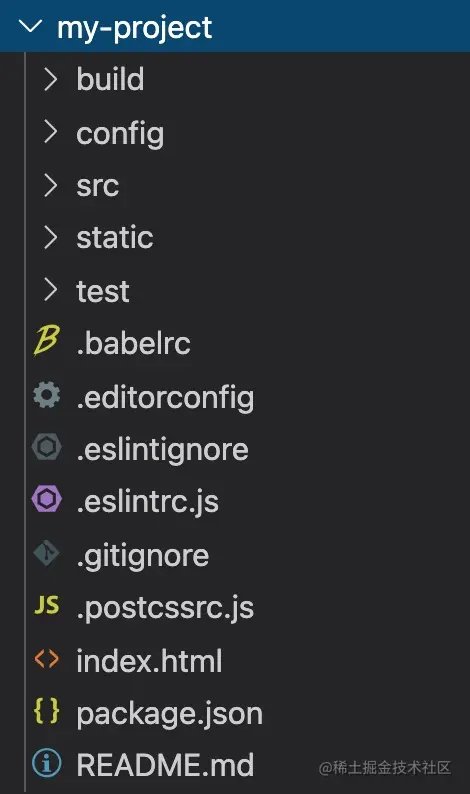
You will soon see that my project has been successfully initialized. At this time, you can take a look under the my project folder
Publish to npm
Now that you have successfully installed the above command to other users, you can execute the - install - he npm command. You can use the heaven command.
Source address: github.com/hujinbin/he...
You can use template to include the following
- vue
- vue-seo
- koa-react
- koa-vue
- microservice
vue
- vue-cli,webpack5. Version 28
Vue SEO (under development)
- Pseudo ssr scaffold based on Vue cli, webpack5 28 version, package and generate the corresponding static html, and jump to the real website for seo Search.
koa-react
- koa+react project skeleton, ssr mode, supporting mysql and mongodb database
koa-vue
- koa+vue project skeleton mvc structure, front-end vue single page application
microservice (under development)
- Building micro front-end scaffold based on vite
Original link: How to build your own scaffold - startle