In the development process, we may encounter such needs. We need to parse information from local Excel or CSV files. These information may be attendance clock in records, calendar information or recent bill flow. However, their common feature is that there are many and complicated data, the workload of manual input is huge, error prone, and it takes a lot of time. Is there any way to automatically parse files and obtain useful information?

When the amount of data in this file is not large, there are many front-end tools to choose from. For example, SheetJS provides many methods to parse information from Excel and CSV, which is very convenient.
When the amount of data is only a few thousand, there is a lot of choice, but once the amount of data increases, the processing becomes complex. If the XLSX/CSV data volume reaches 100w + pieces, it will take a long time for Office and WPS to open and have a look.
How to parse data from such a large volume of Excel/CSV/TXT?
background
Let's talk about the whole process of understanding through a hypothetical requirement. Suppose we need to parse the data from local Excel, CSV, TXT (or other format) files and store it in the local database file after cleaning. However, the volume of these files may be 5M, 50M, 500M or even larger. So how to upload in the browser environment? How to resolve in Node environment?
First of all, what we need to know is how to upload large volume files on the browser Web page?
How to upload large volume files on Web pages?
Web pages can generally upload large files, but they will face a problem. If the data to be uploaded is relatively large, the whole upload process will be relatively long. Coupled with the uncertain factors of the upload process, once it fails, the whole upload will start from scratch and take a long time.
Facing this problem, we can solve it by dividing large files into multiple small files and uploading only one at a time. In this way, even if a request fails, there is no need to start from scratch. Just upload the failed one again.
If we want to use this method, we need to meet the following requirements:
- Large volume files support slice upload
- Can continue transmission at breakpoints
- You can know the upload progress
First, let's take a look at how to cut large files. Web pages basically obtain local files through < input type ='File '/ >. And through the "event" of input target. Files , the file obtained is actually an instance of , file , class and a subclass of , Blob , class.
Blob} object represents an immutable class file object with original data. It can also be used to read binary data in readable stream format. A simple understanding of oneness takes blob as a binary container, which means that a large binary file is stored. Blob object has a very important method: slice(). It should be noted here that blob object is immutable. Slice method returns a new blob, indicating the binary file to be cut.
The slice() method accepts three parameters, the start offset, the end offset, and an optional mime type. If the mime type is not set, the mime type of the new Blob object is the same as the parent. The File interface is based on Blob, and the File object also contains the slice method. The result contains the data in the specified range of the active Blob object.
After reading the cutting method, we can split the binary file. Examples of splitting are as follows:
function sliceInPiece(file, piece = 1024 * 1024 * 5) {
  let totalSize = file.size; // Total file size
  let start = 0; // Start byte of each upload
  let end = start + piece; // End byte of each upload
  let chunks = []
  while (start < totalSize) {
    // Intercept the data to be uploaded each time according to the length
    // The File object inherits from the Blob object and therefore contains the slice method
    let blob = file.slice(start, end);
    chunks.push(blob)

    start = end;
    end = start + piece;
  }
  return chunks
}
After obtaining the array after file cutting, you can call the interface one by one and upload it to the server.
let file =  document.querySelector("[name=file]").files[0];

const LENGTH = 1024 * 1024 * 0.1;
let chunks = sliceInPiece(file, LENGTH); // Split the slice first

chunks.forEach(chunk=>{
  let fd = new FormData();
  fd.append("file", chunk);
  post('/upload', fd)
})
After the upload is completed, go to the server to splice the slice file into a complete file, and let the FileReader object read data from the Blob.
Of course, there will be two problems here. One is that in the face of a pile of sliced files uploaded, how should the server know their correct order? Second, if multiple large files are uploaded at the same time, how can the server determine which slice belongs to which file?
We can deal with the problem of sequence by adding parameters when constructing the sliced FormData. For example, the parameter "ChunkIndex" is used to indicate the order of the current slice.
For the second problem, you can mark the source of the original file by adding parameters such as "sourceFile" (the value can be the full path of the current large volume file or, more strictly, the hash value of the file). In this way, when the server obtains the data, it can know which slices come from which file and the sequence between slices.
If it is not convenient to construct by yourself for the time being, you can also consider using cloud services. For example, cloud storage supports large file upload and breakpoint continuation. For example:
Breakpoint continuation
When uploading large files or files on the mobile terminal, if the upload fails due to network quality, long transmission time and other reasons, you can use breakpoint for continuous transmission. In particular, the image uploaded by breakpoint continuation does not support preprocessing. In particular, the file uploaded by breakpoint continuous transmission cannot be overwritten by other upload methods. If it needs to be overwritten, the file must be deleted first.
\
Name concept
- File segmentation: directly cut binary files into small pieces. The block size is fixed at 1M. Except the last block.
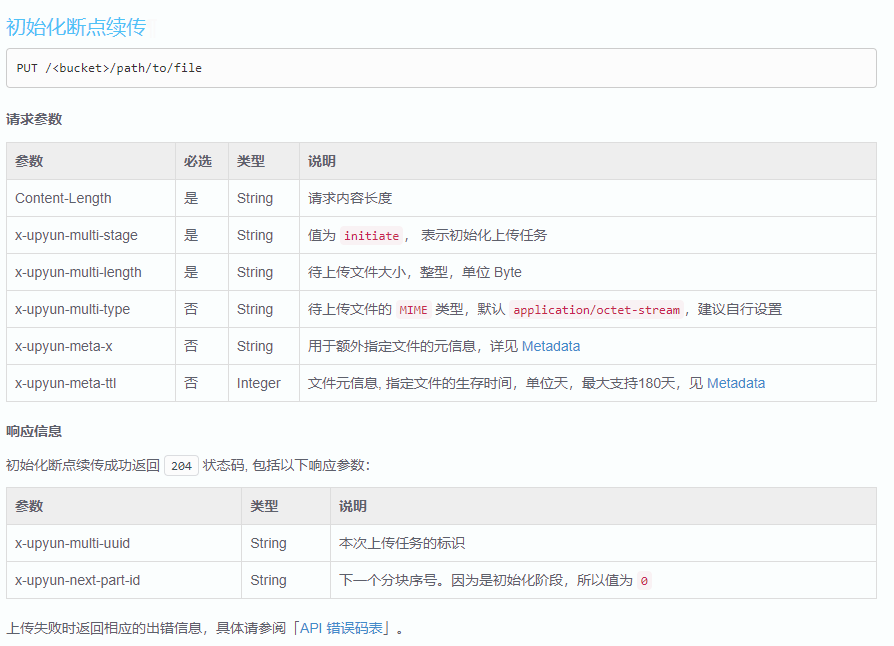
- Upload phase: use the x-upyun-multi-stage parameter to indicate the phase of breakpoint continuation. It is divided into the following three stages: initiate, upload and complete. Each stage is carried out in turn.
- Slice serial number: use the x-upyun-part-id parameter to indicate the current slice serial number, which is calculated from 0.
- Sequential upload: only sequential upload is supported for the same breakpoint continuation task.
- Upload identification: use the x-upyun-multi-uuid parameter to uniquely identify an upload task. The type is string and the length is 36 bits.
- Upload Cleanup: files that have not been completed will be saved for 24 hours. After that, the files will be deleted.
It can be seen that cloud storage solves the two problems mentioned above through fragment serial number # x-upyun-part-id # and upload ID # x-upyun-multi-uuid #. It should be noted here that these two data are not generated by the front end itself, but returned through the responseHeader after initial upload.
What I mentioned above is how to upload large files using Web pages. Next, let's take a look at how NodeJS parses and processes such large volume files?
NodeJS parsing large volume files
First of all, we need to clarify a concept. There is no File object in NodeJS, but there is fs (File system) module. The FS module supports standard POSIX function modeling to interact with the File system\
POSIX is the abbreviation of Portable Operating System Interface of UNIX. In short, POSIX is to provide a unified calling interface under the operating systems provided by different kernels, such as opening files under linux and widnows. Maybe the kernel provides different methods, but because fs supports POSIX standard, for program apes, no matter what the kernel provides, call fspromises directly in Node You can use the [, path, flags] method.
Here is a simple example of Vue. Vue runs in different environments, such as Web pages or Weex, and generates page elements in different ways. For example, the createElement under the Web is as follows:
export function createElement (tagName: string, vnode: VNode): Element {
  const elm = document.createElement(tagName)
  if (tagName !== 'select') {
    return elm
  }
  // false or null will remove the attribute but undefined will not
  if (vnode.data && vnode.data.attrs && vnode.data.attrs.multiple !== undefined) {
    elm.setAttribute('multiple', 'multiple')
  }
  return elm
}
In the case of Weex, it is as follows:
export function createElement (tagName: string): WeexElement {
  return document.createElement(tagName)
}
The # createElement in the above two cases is different. Similarly, there are many other ways to create modules or elements, but Vue provides the same patch method for different platforms to update or create components.
import * as nodeOps from 'web/runtime![]()de-ops'\
import { createPatchFunction } from 'core![]()dom/patch'\
import baseModules from 'core![]()dom/modules/index'\
import platformModules from 'web/runtime/modules/index'\
\
// the directive module should be applied last, after all\
// built-in modules have been applied.\
const modules = platformModules.concat(baseModules)\
\
//nodeops # encapsulates a series of DOM operation methods. Modules defines the implementation of hook functions of some modules\
export const patch: Function = createPatchFunction({ nodeOps, modules })
import * as nodeOps from 'weex/runtime![]()de-ops'\
import { createPatchFunction } from 'core![]()dom/patch'\
import baseModules from 'core![]()dom/modules/index'\
import platformModules from 'weex/runtime/modules/index'\
\
// the directive module should be applied last, after all\
// built-in modules have been applied.\
const modules = platformModules.concat(baseModules)\
\
export const patch: Function = createPatchFunction({\
  nodeOps,\
  modules,\
  LONG_LIST_THRESHOLD: 10\
})
In this way, no matter whether the internal implementation of the running environment is different or not, just call the same patch method. The concept of POSIX is the same as the case illustrated above.
After a brief understanding of POSIX, let's return to the fs module. The fs module provides many methods to read files, such as:
- fs.read(fd, buffer, offset, length, position, callback) reads the file data. To operate the file, you must first open the file. fd of this method is to call FS Open returns the file descriptor.
- fs.readFile(path[, options], callback) reads all the contents of the file asynchronously. It can be regarded as FS Further encapsulation of read.
The usage scenarios are as follows:
import { readFile } from 'fs';

readFile('/etc/passwd','utf-8', (err, data) => {
  if (err) throw err;
  console.log(data);
});
Because FS The readfile function will buffer the whole file. It's ok if the file to be read is small, but it will put pressure on the memory if the file is large. Is there a way to read files with less memory pressure?
Yes, our protagonist stream is on stage today.
stream
Stream stream is used in node Abstract interface for processing stream data in JS. The stream module provides an API for implementing the stream interface. A stream can be readable, writable, or both.
There is a fs in the fs module Createreadstream (path [, options]) method, which returns a readable stream. The default size is 64k, that is, 64k buffer. Once the internal read buffer reaches this threshold, the stream will temporarily stop reading data from the underlying resource until the current buffered data is consumed.
The method of consuming data can be the {pipe() method, or it can be consumed directly by events.
// pipe consumption
readable.pipe(writable)

// perhaps
// Event consumption
readable.on('data', (chunk) => {
  writable.write(chunk);
});
readable.on('end', () => {
  writable.end();
});
In addition to the readable stream, there are also writable streams Createwritestream (path [, options]) can write data to a file.
Well, the required pre knowledge is basically introduced. Let's get back to the subject. Suppose we have a folder containing dozens of XLSX/CSV files, each with a volume of more than 500M. How to read information from these files and write it into the database file?
Batch parsing CSV files
Assuming that the file paths we need to parse are known and the files can be obtained through the paths, store these paths in an array and name them "needParseArr". We need to parse the information of these "CSV" and "XLSX" files one by one in order, clean them, and then write them into the database.
First, read one by one logic.
async readOneByOne () {
   try {
    for (let i = 0; i < needParsePathArr.length; i++) {
      const filePath = needParsePathArr[i]
      console.log(`Resolve to page ${i}Files, file name: ${filePath}`)
      await streamInsertDB(filePath)
    }
  } catch (err) {

  }
}
streamInsertDB is our main logical entry.
async function streamInsertDB (filePath) {
  return new Promise((resolve, reject) => {
    const ext = path.extname(filePath)
    // Determined the file type
    if (ext === '.csv') {
      // Parsing csv
      parseAndInsertFromCSV(filePath, resolve, reject)
    } else if (ext === '.xlsx') {
      // Self executing function
      (async function getName () {
        try {
          // First convert to csv. You can also directly parse xlsx without conversion, which will be explained in detail later.
          const csvFileName = await convertXlsx2Csv(filePath)
          // Logic of reusing and parsing csv
          parseAndInsertFromCSV(csvFileName, resolve, reject)
        } catch (error) {
          reject(`error: ${error.message || error}`)
        }
      })()
    }
  })
}
parseAndInsertFromCSV is the main place to use the knowledge points we mentioned earlier. The following is a brief introduction to each function:
- chardet: this function is used to monitor the encoding format of CSV files. After all, not every CSV is UTF-8 encoding. The encoding type of CSV with Chinese may be GBK or GB18030, GB18031, etc. this format is read directly without processing, and the Chinese will be displayed as garbled code. Therefore, you need to perform the conversion function {iconv} conversion.
- Pipe: it can be used to establish a pipeline chain. It can be understood that the function of pipe is like a pipeline. It can read and write the target stream while decoding. Here, we re encode while decoding.
- insertInBlock: after obtaining a certain amount of data (in this case, when about 30000 pieces of data are parsed from CSV), this function pauses to perform some operations, such as writing to the database or filtering and processing the data in it, which is determined according to the actual needs.
- csv: this function is used to read out the specific data in the stream.
The specific logical explanation can be seen in the notes.
const chardet = require('chardet');
const csv = require('fast-csv'); // A tool that parses csv faster
const iconv = require('iconv-lite');

const arrayFromParseCSV = []  // Store the parsed rows of csv data
let count = 0 // count
// Resolve and reject are passed in from external functions to judge the execution state of the function, so as to correctly carry out subsequent logical processing
function parseAndInsertFromCSV (filePath, resolve, reject) {
  const rs = fs.createReadStream(filePath)  // Create a readable stream
  // Here's anti shake and Coriolis
  const delayInsert = debounce((isEnd, cb = () => {}) => insertInBlock(isEnd, cb, rs, resolve, reject), 300)
  ///sampleSize: 5120 indicates the value. You can judge the encoding type of the file by reading the first 5120 bytes of the file. You don't need to read all of them
  chardet.detectFile(filePath, { sampleSize: 5120 }).then(encoding => {
    // If it is not UTF-8 coding, it is converted to utf8 coding
    if (encoding !== 'UTF-8') {
      rs.pipe(iconv.decodeStream(encoding))
        .pipe(iconv.encodeStream('UTF-8'))
        .pipe(csv.parse({ header: false, ignoreEmpty: true, trim: true })) // Parsing csv
        .on('error', error => {
          reject(`analysis csv error: ${error}`)
        })
        .on('data', rows => {
          count++ // Count, because we have to read and operate in blocks
          arrayFromParseCSV.push(rows) // Push it to the array when you read it
          if (count > 30000) { // 30000 lines have been read. We need to dispose of these 3w lines first to avoid taking up too much memory.
            rs.pause() // Pause readable stream
            delayInsert(false) // false is not over yet. Note: even rs.pause, the reading of the stream is not suspended immediately, so anti shake is required.
          }
        }).on('end', rowCount => {
          console.log(`Finished parsing ${filePath}Total documents ${rowCount}that 's ok`)
          delayInsert(true, () => {
            rs.destroy() // Destroy stream
            resolve('ok') // A file has been read
          })
        })
    }
  })
}
The logic of cleaning data and subsequent operations is in insertInBlock.
function insertInBlock (isEnd, cb, filePath, resolve, reject) {
  const arr = doSomethingWithData() // There may be some operations to clean the data
  // If our subsequent demand is to write data into the database
  const batchInsert = () => {
    batchInsertDatabasePromise().then(() => {
      if (cb && typeof cb === 'function') cb()
      !isEnd && rs.resume() // After the data of this fragment is written, the stream can be resumed to continue reading
    })
  }

  const truely = schemaHasTable() // For example, if there is a table in the database, write it. No table is created before writing.
  if (truely) { //
     batchInsert()
   } else {
     // Create a table or other operations, and then write
     doSomething().then(() => batchInsert())
  }
}
In this way, the process of parsing and writing is completed. Although many business codes are simplified, the implementation is generally similar to this process.
Batch parsing of # XLSX # files
Convert to CSV?
In the previous code example, we used the writable stream FS Createwritestream converts the XLSX file into a CSV file, and then reuses and parses the CSV. It should be noted here that when writing data to CSV format files, the bom header \ UFF should be written at the beginning. In addition, you can also use the convert function of XLSX extract to convert XLSX files into TSV.
const { XLSX } = require('xlsx-extract')
new XLSX().convert('path/to/file.xlsx', 'path/to/destfile.tsv')
    .on('error', function (err) {
        console.error(err);
    })
    .on('end', function () {
        console.log('written');
    })
Some people may wonder, isn't it CSV? How can it be converted to TSV?
In fact, the difference between tsv and CSV is only the separator of field values. CSV uses comma separated values, while TSVA uses tab separated values. The fast CSV tool we used earlier to quickly parse CSV files supports the selection of tab \ t as the separator of values.
import { parse } from '@fast-csv/parse';
const stream = parse({ delimiter: '\t' })
    .on('error', error => console.error(error))
    .on('data', row => console.log(row))
    .on('end', (rowCount: number) => console.log(`Parsed ${rowCount} rows`));
Direct resolution?
Can I parse XLSX files directly without converting to CSV? In fact, it is also feasible.
const { xslx } = require('xlsx-extract') // Streaming parsing xlsx file tool
// parser: expat. Node expat needs to be installed additionally to improve the parsing speed.
new XLSX().extract(filePath, { sheet_nr: 1, parser: 'expat' })
    .on('row', function (row) {
        // Each row of data can be triggered when it is acquired
      }).on('error', function (err) {
        // error
     });
However, this method has a defect. Once the parsing starts, the data reading process cannot be suspended. Xlsx extract encapsulates sax and does not provide pause and resume methods.
What if we directly use the readable stream to read the XLSX file?
const readStream = fs.createReadableStream('path/to/xlsx.xlsx')
You can see that the data in the stream now exists in the form of buffer. However, because xlsx format is actually a compressed format of zip archive, it stores the text information of XML structure. Therefore, the readable stream cannot be used directly and needs to be decompressed first.
The npm package unzipper can be used for decompression.
const unzip = require('unzipper')
const zip = unzip.Parse();
rs.pipe(zip)
  .on('entry', function (entry) {
    console.log('entry ---', entry);
    const fileName = entry.path;
    const { type } = entry; // 'Directory' or 'File'
    const size = entry.vars.uncompressedSize; // There is also compressedSize;
    if (fileName === "this IS the file I'm looking for") {
      entry.pipe(fs.createWriteStream('output/path'));
    } else {
      entry.autodrain();
    }
  })
Now we have extracted the file.
As mentioned earlier, xlsx extract encapsulates sax, which is used to parse XML text. We can also use sax to process readable streams here.
The source code of sax parsing can be seen here. It roughly judges its content, line feed, start, end, etc. according to each character, and then triggers the corresponding event.
const saxStream = require('sax').createStream(false);
saxStream.on('error', function (e) {
  console.error('error!', e);
});
saxStream.on('opentag', function (node) {
  console.log('node ---', node);
});
saxStream.on('text', (text) => console.log('text ---', typeof text, text));
Finally, combine the two:
const unzip = require('unzipper');
const saxStream = require('sax').createStream(false);
const zip = unzip.Parse();

saxStream.on('error', function (e) {
  console.error('error!', e);
});
saxStream.on('opentag', function (node) {
  console.log('node ---', node);
});
saxStream.on('text', (text) => {
    console.log('text ---', typeof text, text)
});

rs.pipe(zip)
  .on('entry', function (entry) {
    console.log('entry ---', entry);
    entry.pipe(saxStream)
  })
After testing with the local XLSX file, the console prints the following information:

This information corresponds to this part of the information in the XLSX file. The ST SI printed in Node represents the xml tag.
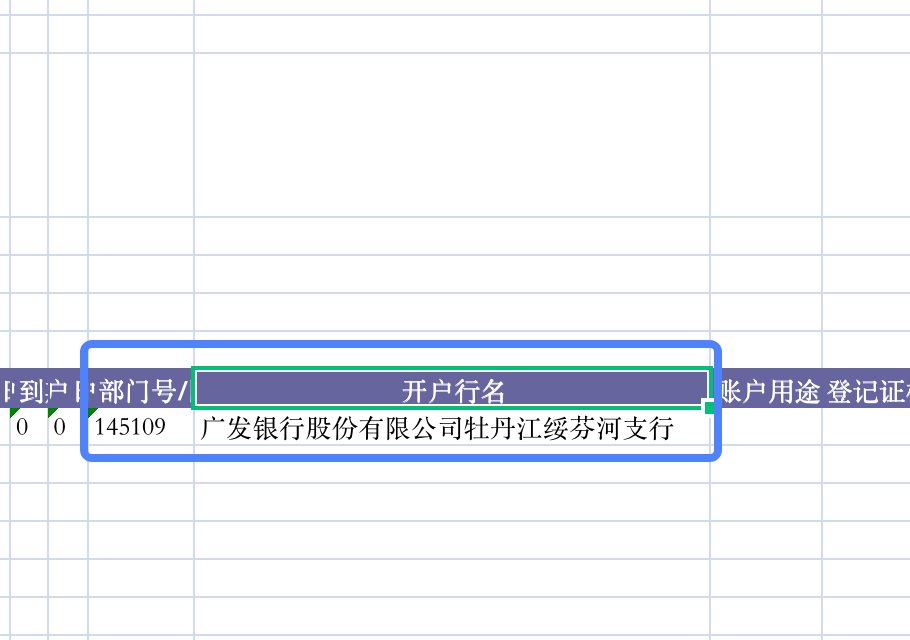
In this way, in fact, we also got the data in XLSX, but these data still need to be cleaned, summarized and matched one by one. At the same time, since we operate directly on the readable stream, we can also use pause and resume streams to realize the logic of block reading and other operations.
summary
For smaller XLSX and CSV files, the basic SheetJS can meet the parsing requirements of files in various formats. However, once the document volume is large, slicing and streaming reading and writing will become an essential way.
Through the previous examples and code decomposition, we can understand the solutions to such problems and expand different solutions to similar needs. Once we can have a certain concept and understanding of the block processing of large volume files, we will know where the implementation idea is when we encounter similar problems.