The installation method provided in this article is applicable to jdk1 Users of version 8 (with the method and configuration of installing jdk1.8)
First of all, I need to explain
Because jdk1 8 has javafx, so we don't need to download the plug-ins related to javafx, just install jdk1 8 is enough
1.jdk1.8 Download and configuration of
(1). Jdk1 is provided directly here 8's official download address: https://www.oracle.com/java/technologies/javase/javase-jdk8-downloads.html
 windows 32-bit download first (Windows x86)
windows 64 bit download second (Windows x64)
(2). After downloading, install normally and select the path you want to play
(it is recommended that jdk1.8.0_281 and jre1.8.0_281 be placed in the same directory for easy management and search in the future)
(3). Configure environment and system variables
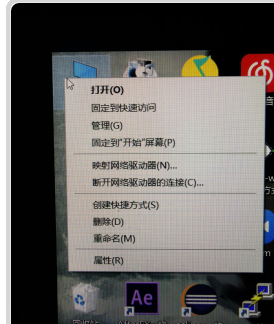
You can find this computer on your desktop and right-click it (or from control panel - > system and security - > System)
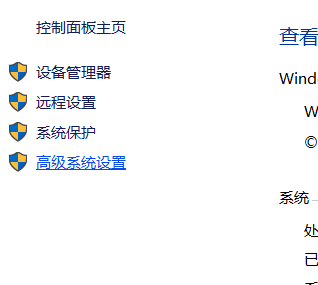
Then find the position of the interface in the system and click Advanced system settings
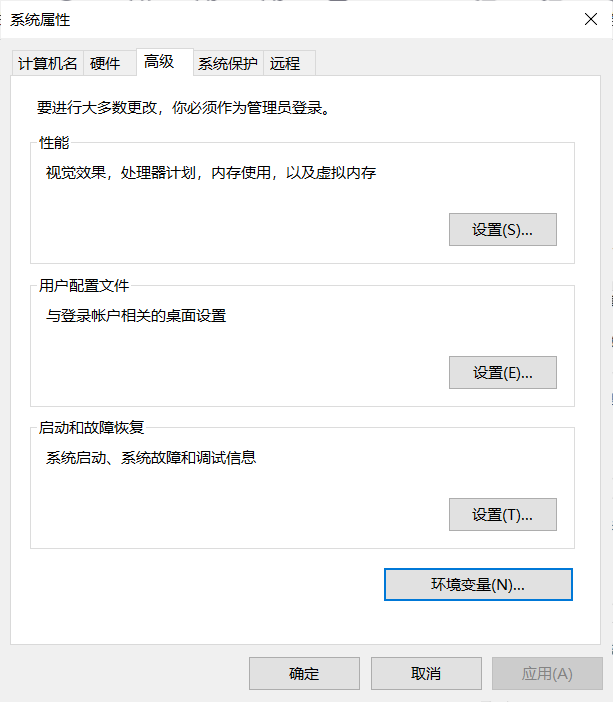
Then find the setting of the environment variable
Create a new variable named JAVA in the user variable, and fill in the variable value of jdk1.0 just installed 8.0_ 281 the path of the package, and then determine.
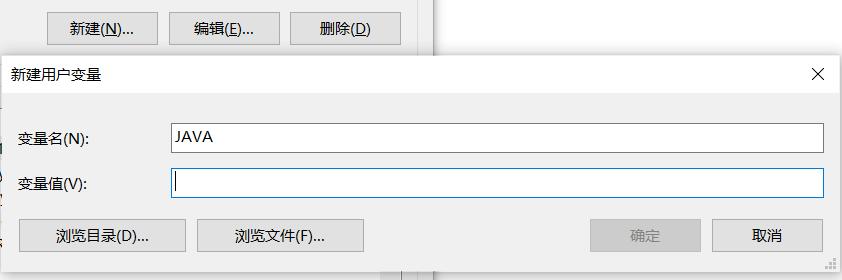
(the path replication method is also provided here
Find the jdk1.0 you installed 8.0_ 281 folder and open it, and then copy the path directly in this position of the picture below.)

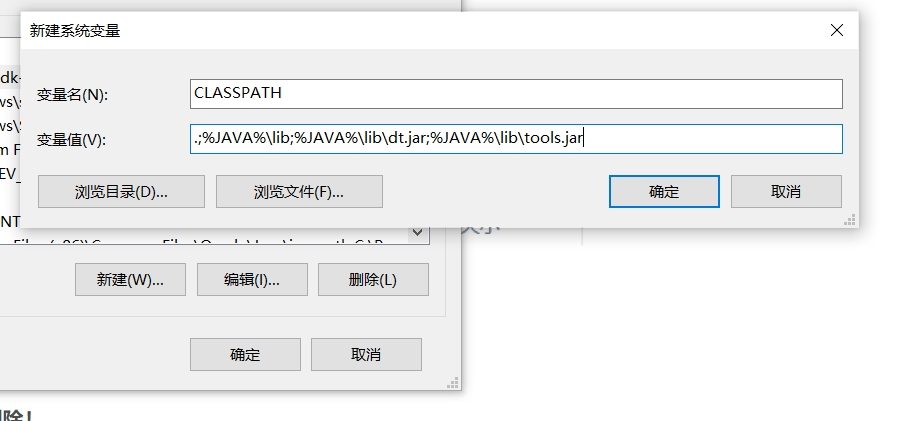
Next, we create a new variable named CLASSPATH in the system variable, and the variable value is [.;% JAVA%\lib;%JAVA%\lib\dt.jar;%JAVA%\lib\tools.jar]
Please note that!!! Every symbol in brackets cannot be missing!! If you copy it together with brackets, you must remember to delete it at the end!
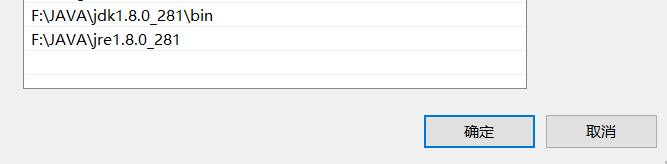
Finally, we need to find the system variable of Path in the system variable. After entering and editing the environment variable, we need to create a new one on the page twice (that is, the action of creating a new one is repeated twice)
Add jdk1 8.0_ bin directory of 281 and jre1 8.0_ 281. Copy the path of the directory and save it
So far jdk1 Installation of 8 is completed
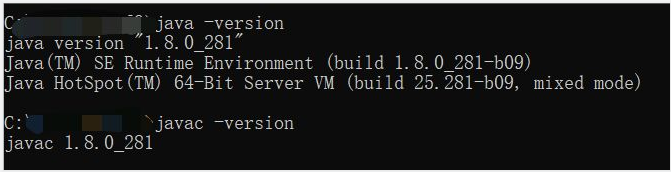
(check whether the installation is successful. You can enter java -version and javac -version respectively from the cmd command prompt)
2.jdk1.8 configuration in eclipse
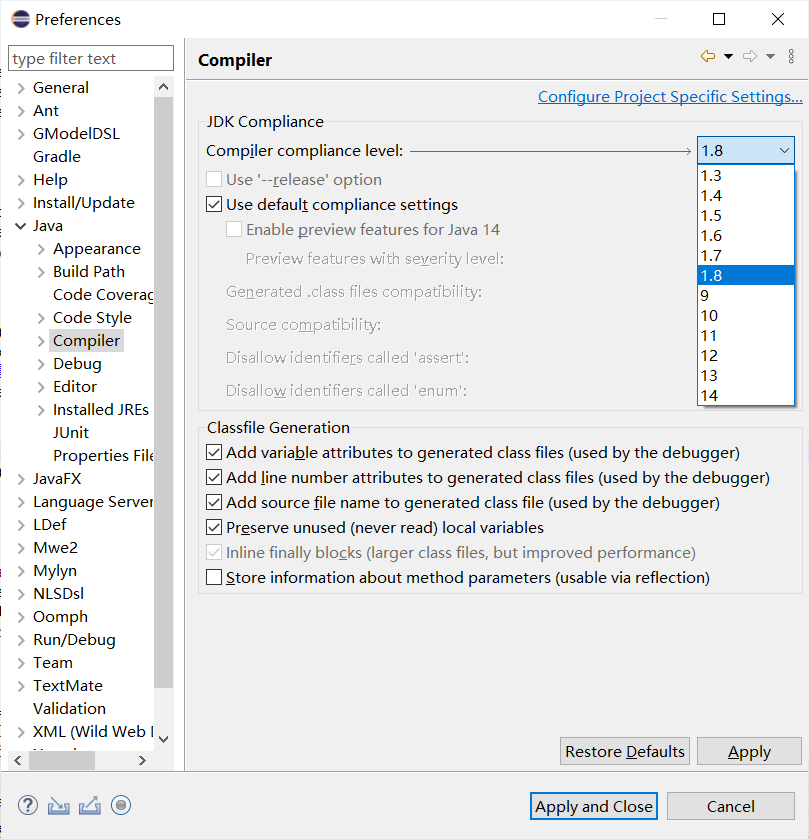
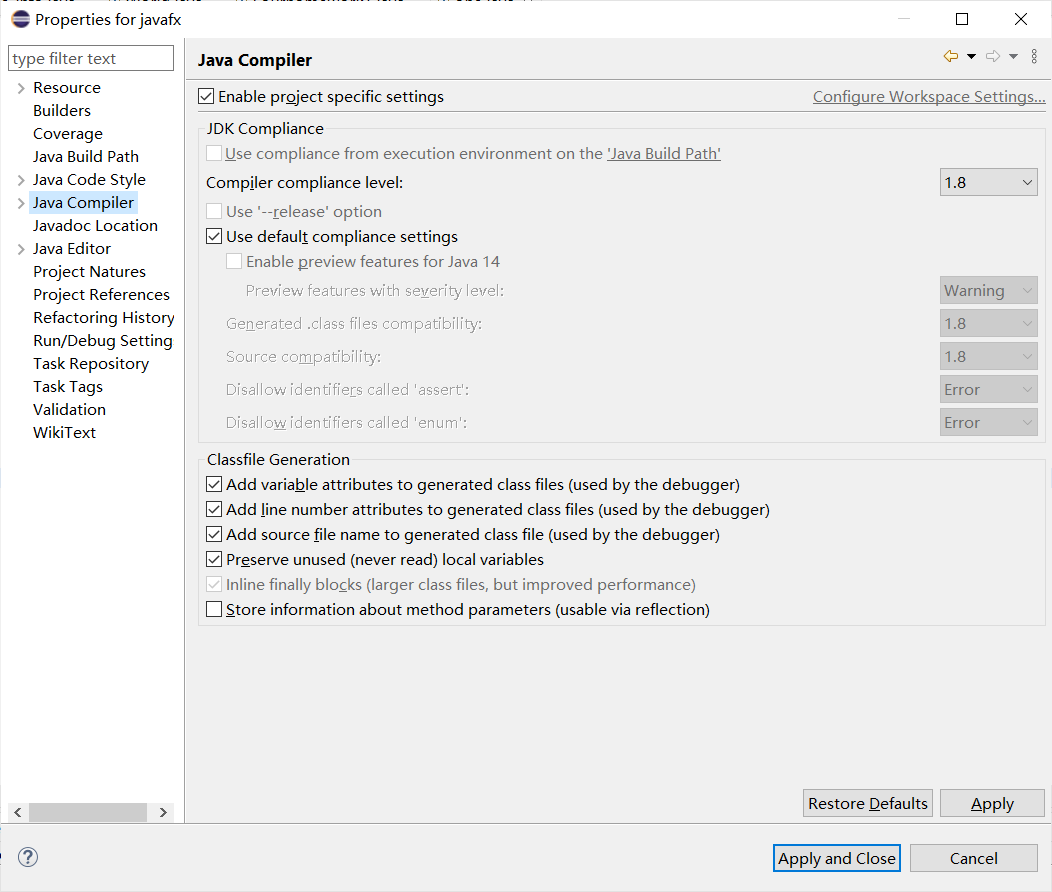
(1) After opening eclipse, find the Compiler under java in window - > preferences and set it to 1.8
At the same time, I found Installed JREs under java
The order of configuration is as follows:
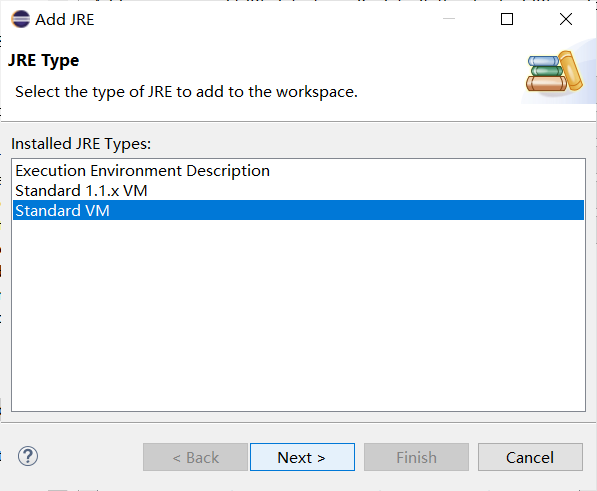
Click Add
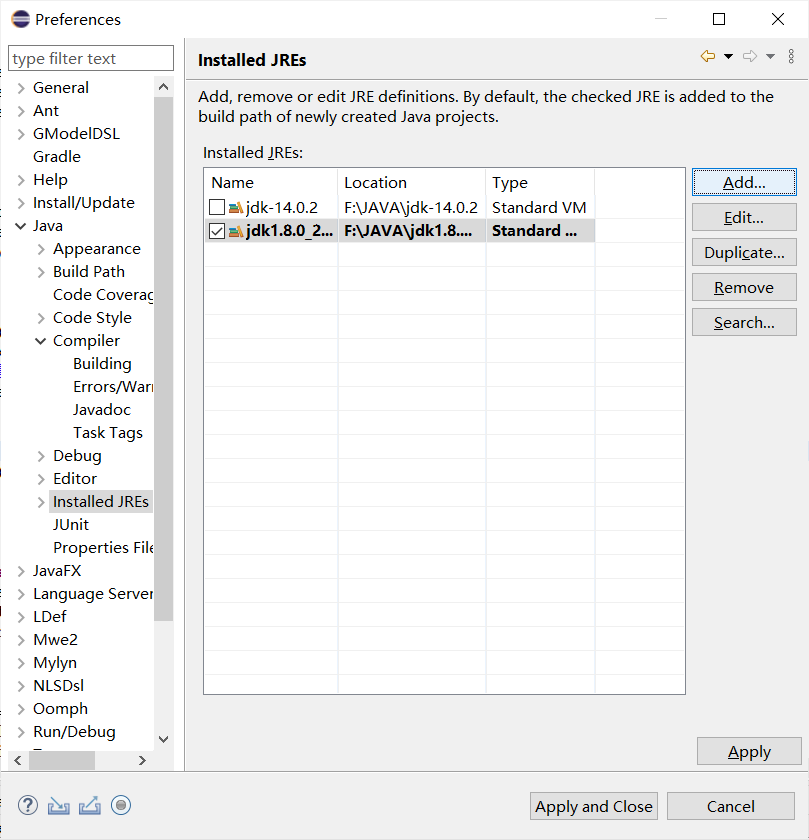
Select Standard VM
Select Directory to find your jdk1 8.0_ 281. Table of contents

Appears after selection
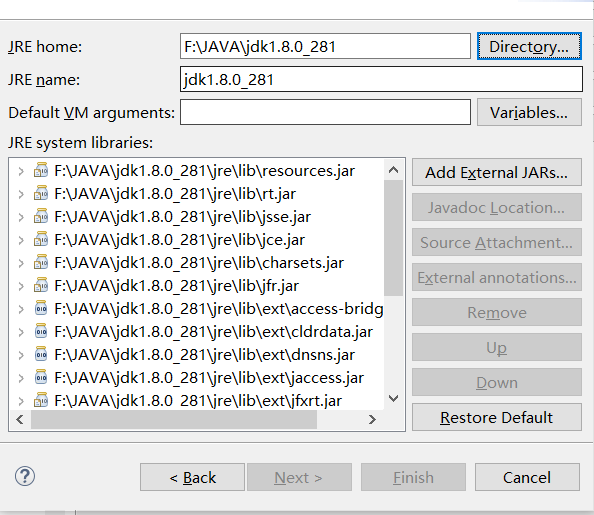
Then set it successfully
(2) Then at the project office

Right click to display the following (right click - > build path - > configure build path)
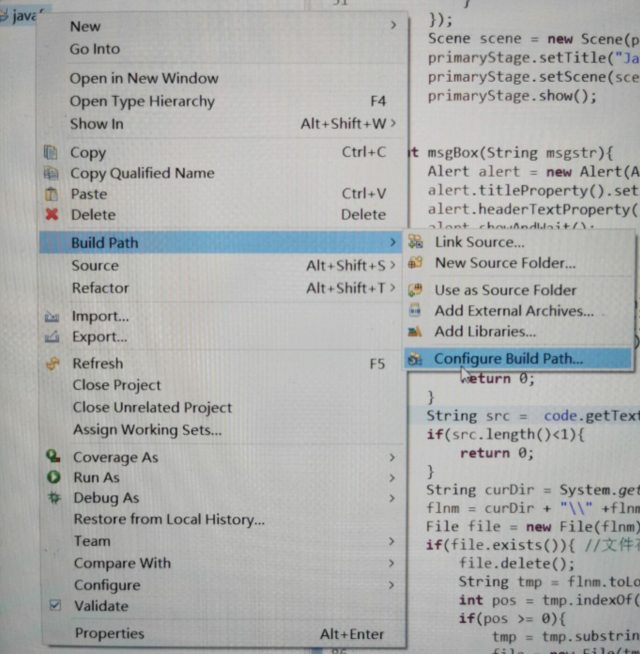
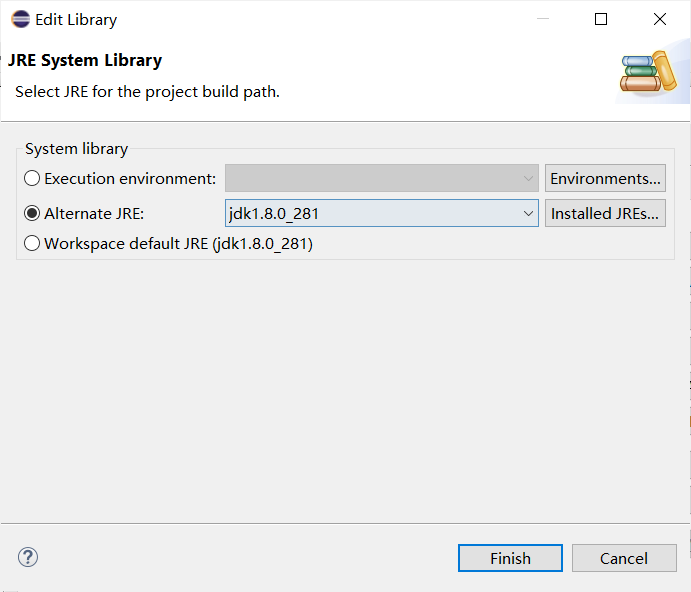
Find JRE System Library under Libraries and Edit it
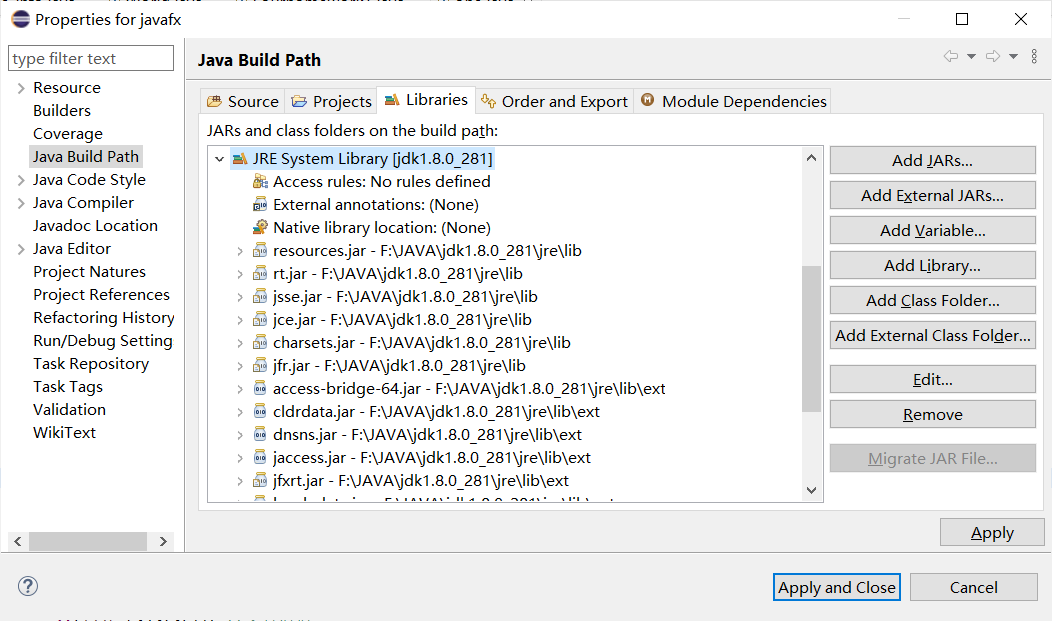
Then set it like this
In addition, it is also set to 1.8 in Java Compiler
Finally, we run the following code to check the results (remember to modify the class name and package name)
package Hello;

import javafx.application.Application;
import javafx.event.ActionEvent;
import javafx.event.EventHandler;
import javafx.geometry.Pos;
import javafx.scene.Scene;
import javafx.scene.control.Button;
import javafx.scene.control.Label;
import javafx.scene.layout.BorderPane;
import javafx.scene.layout.GridPane;
import javafx.scene.layout.StackPane;
import javafx.scene.paint.Color;
import javafx.scene.shape.Rectangle;
import javafx.scene.text.Font;
import javafx.stage.Stage;

public class World extends Application {

	private int counter = 0;

	public static void main(String[] args) {
		launch();
	}

	@SuppressWarnings("static-access")
	public void start(Stage stage) {
		stage.setTitle("Hello World!");

		GridPane grid = new GridPane();
		grid.setHgap(0);
		grid.setVgap(0);

		Rectangle r1 = new Rectangle();
		r1.setFill(Color.DARKKHAKI);
		r1.setHeight(125);
		r1.setWidth(125);

		Rectangle r2 = new Rectangle();
		r2.setFill(Color.rgb(189, 40, 40));
		r2.setHeight(125);
		r2.setWidth(125);

		Rectangle r3 = new Rectangle();
		r3.setFill(Color.hsb(235, 0.52, 0.36));
		r3.setHeight(125);
		r3.setWidth(125);

		Rectangle r4 = new Rectangle();
		r4.setFill(Color.web("b894cc"));
		r4.setHeight(125);
		r4.setWidth(125);

		grid.add(r1, 0, 0);
		grid.add(r2, 0, 1);
		grid.add(r3, 1, 0);
		grid.add(r4, 1, 1);

		Label l = new Label();
		l.setFont(new Font("Calibri", 15));
		l.setTextFill(Color.BLACK);

		Button button = new Button();
		button.setFont(new Font("Calibri", 15));
		button.setText("Say 'Hello World'");

		button.setOnAction(new EventHandler<ActionEvent>() {
			public void handle(ActionEvent event) {
				l.setText("You said Hello to the world: " + ++counter + ((counter == 1) ? " time" : " times"));
			}
		});

		BorderPane bp = new BorderPane();
		bp.setBottom(l);
		bp.setAlignment(l, Pos.CENTER);
		bp.setCenter(button);

		StackPane root = new StackPane();
		root.getChildren().add(grid);
		root.getChildren().add(bp);
		stage.setScene(new Scene(root, 250, 250));
		stage.show();

	}

}
give the result as follows
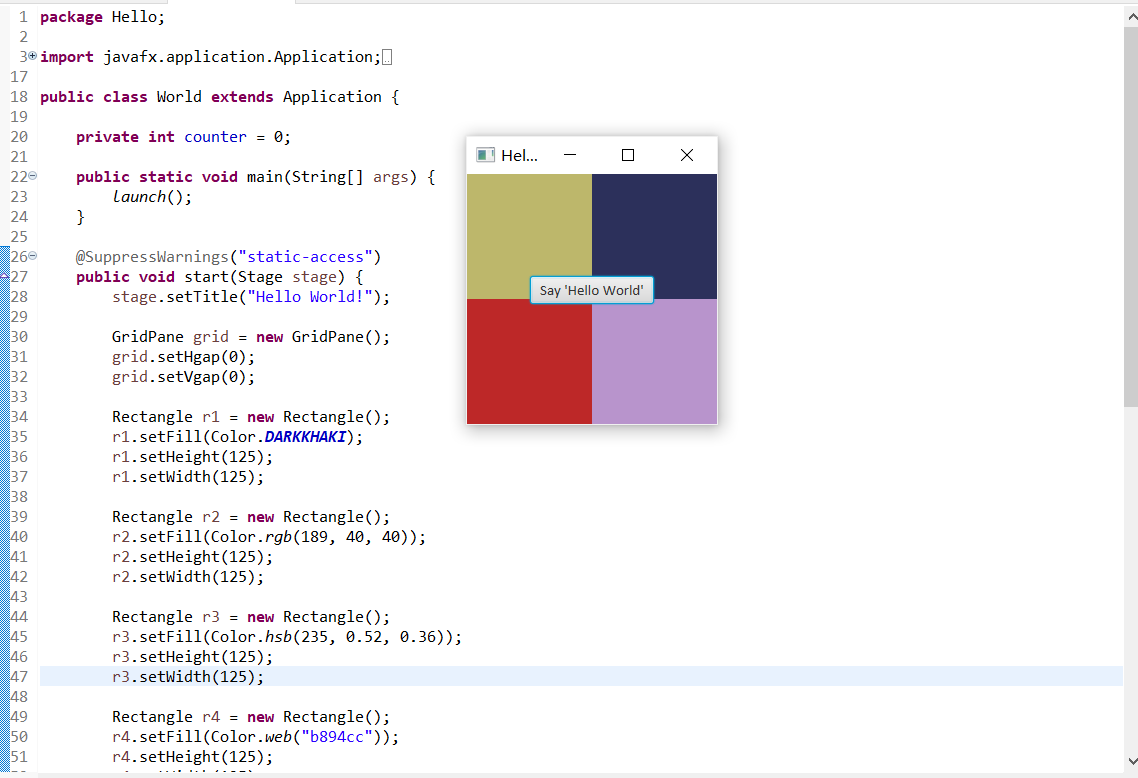
That's it!
If you like it, remember to collect and praise it~