A recent scenario in business is that if a user has not paid for 30 minutes after placing an order in a store, the order needs to be disposed of, either deleted or marked as invalid. Why?
- 1. Inventory, the user will lock an inventory after placing an order. If the user does not pay, it will occupy the inventory and affect other users'purchase.
- 2. With the development of business and the increase of users, our order data will become more and more, so we need to clean up invalid orders in time to improve the performance of the system;
Once pure and flawless
First of all, I had those flawless ideas. The first time I saw this demand, if I wanted to clean up an invalid order, I would write a timed task, run once in 5 or 10 minutes, delete an expired order, and increase inventory.
Timed tasks can really solve the above problems, but there is a real problem, that is, database pressure, even affect the performance of the entire system. If you have hundreds, thousands of orders, if hundreds of thousands, or even millions, this method will certainly not work.
Advanced Version
Now that I find that the above method is not working, I'll rethink it and know which orders are about to expire without querying the database. Then, thinking about it, I made a message queue with Redis. When I generated the order, I generated a 10-minute delay message, and when the 10-minute delay ended, I took the order from Redis's queue.Then I can delete the order and increase the inventory.
Problems with Redis Queuing Messages
Previously, using a new Redis as the message queue, the data stored is not much, and it feels good. When Redis stores more than 90% of the messages as business increases, a large number of messages are not consumed, that is, the message loss is serious.That is certainly not possible.
Deleting orders and increasing inventory can't be too erroneous, so Redis message queues can't meet my needs anymore, so we need a reliable message queue, RabitMQ, which we're going to cover this time.
RabbitMQ Installation and Panel Introduction
I won't tell you how to install RabbitMQ here. There are many such tutorials on the Internet, so you can search for them yourself.It's important to tell you that the RabbitMQ panel, our message queue, and messages are visible on the panel.The MQ version I'm using is 3.8, and the panels may be a little different between versions.
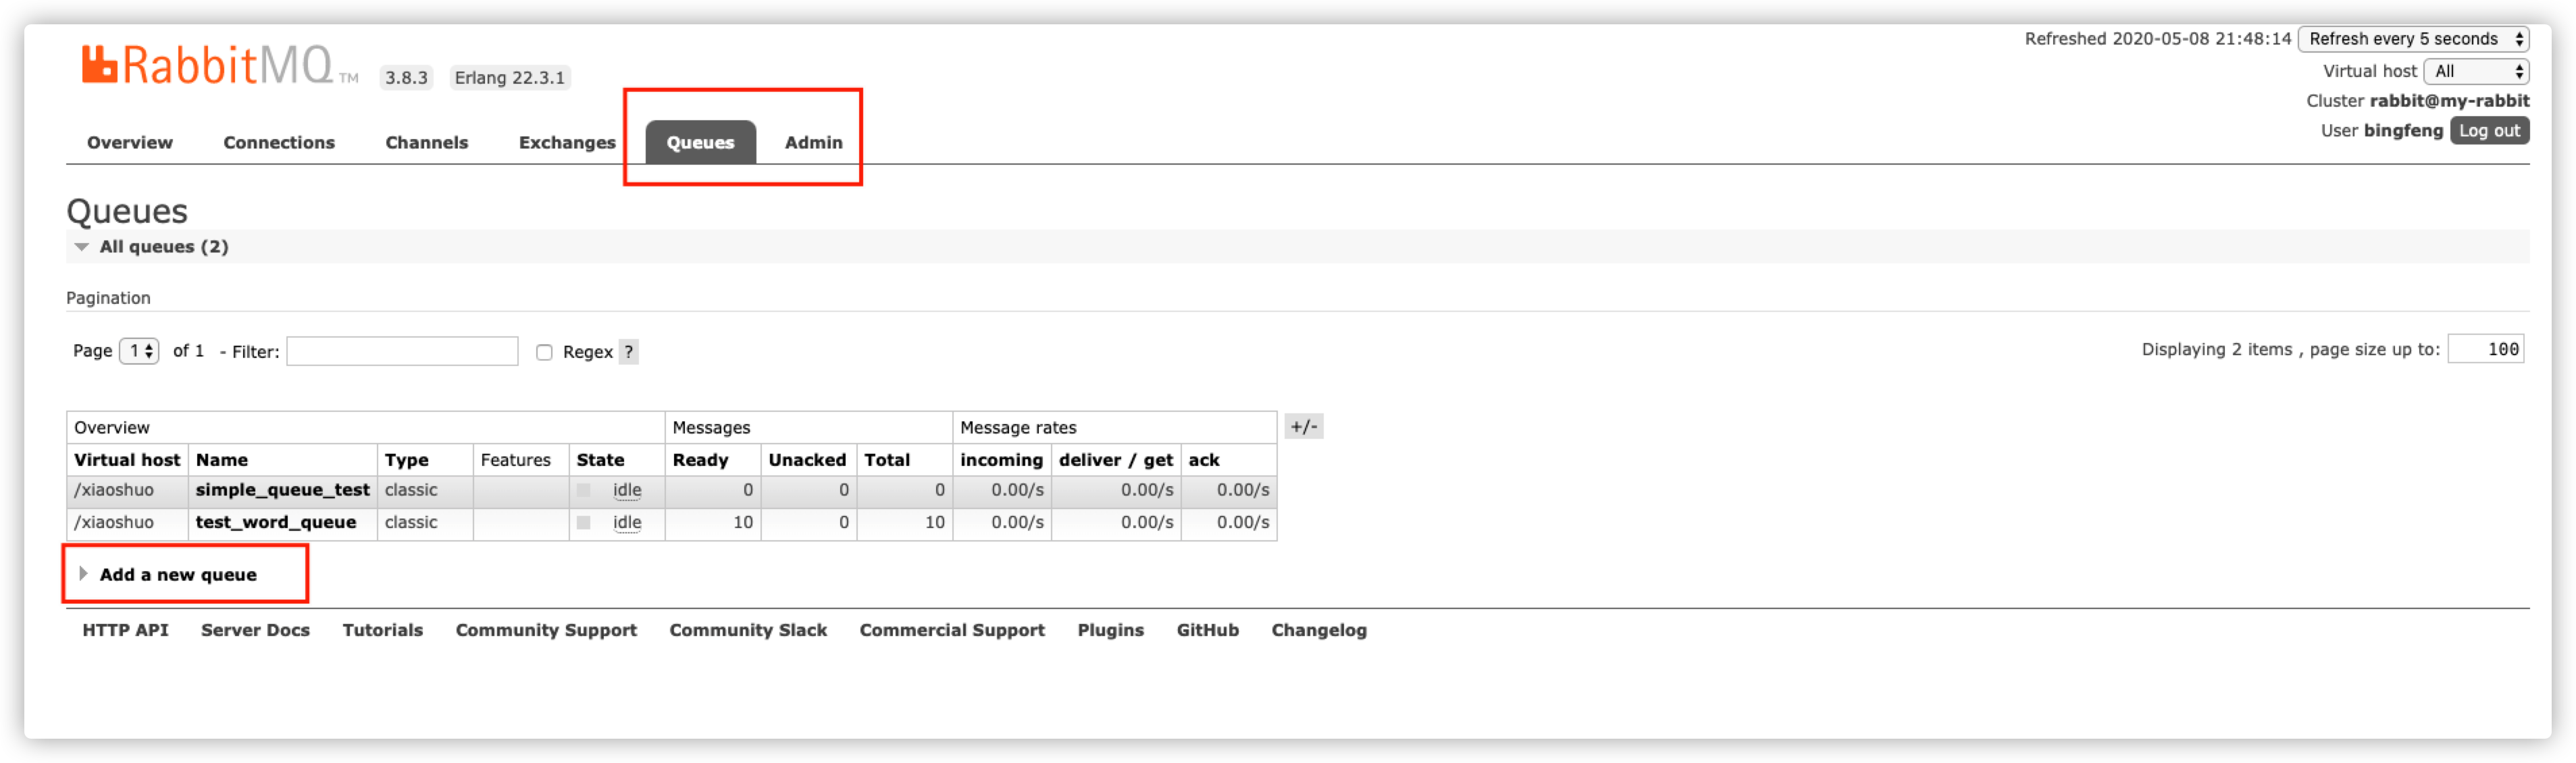
For the first time, we don't want to understand them all at once and know what they are for. I don't think it's necessary to get familiar with the basics first. I circled two local Queues, Admin and Add a new queue, which are the three most basic things we have to learn.
- Queue: This is the message queue we declared;
- Admin: User management, RabbitMQ has one user by default as guest, but the magic of RabbitMQ is that each library must create a user role;
- Add a new queue: This creates a new queue, but we usually create it in code instead of directly creating it.
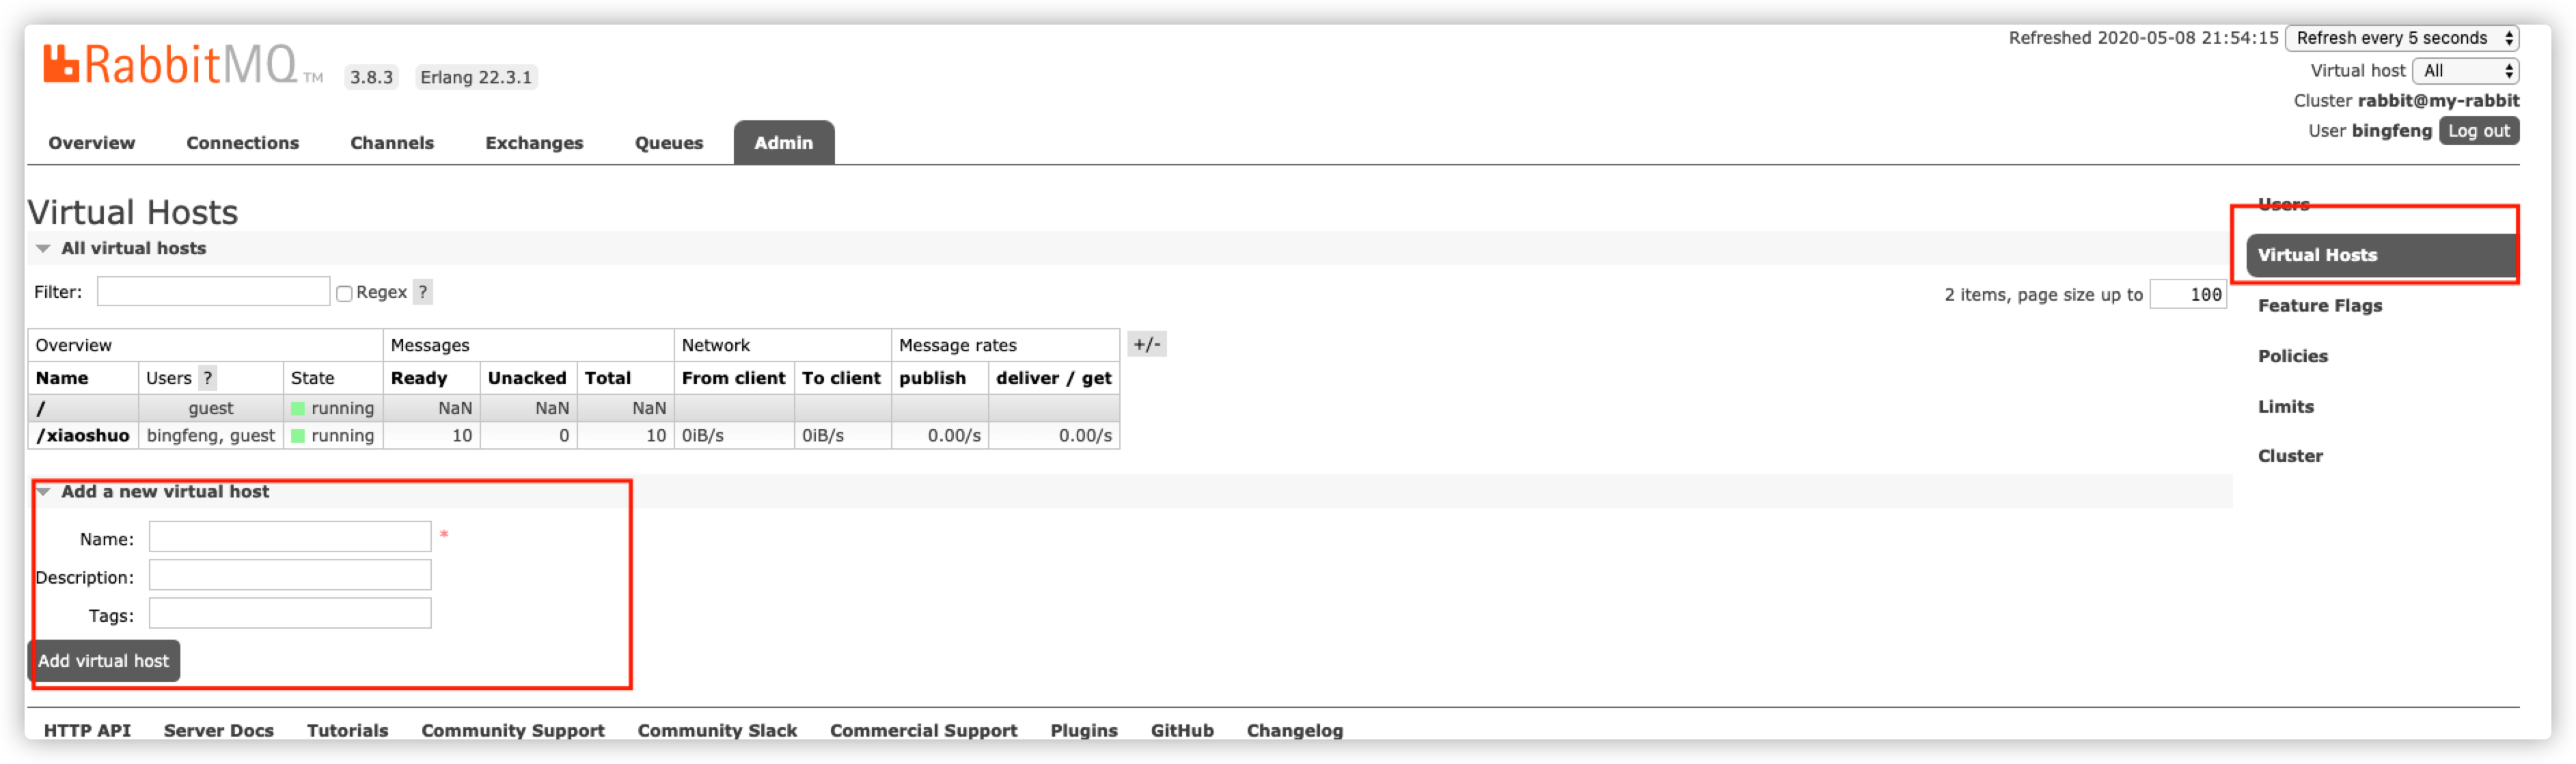
Let's add Admin. First of all, let's tell you the basic thing: if you want to declare a queue, then you must have a library (metaphor). Queues exist in the library. You can imagine whether mysql has to have a library before a table.MQ is the same.
Virtual Hosts on the right creates libraries, Name is the name of libraries, and must be preceded by /;
If a careful friend can see in the first image that two queues are preceded by the library name, the identity queue exists in the xiaoshuo library.
A simple message queue

When a producer produces a message, sends it to a queue, and consumers listen for messages in the queue to consume, we will first implement a simple message queue.
Code
We don't apply the SpringBoot framework, so we start with the basic writing, life's native API, so we can understand what's going on in the future.
1. Introduce the required pom file
<dependency>
    <groupId>com.rabbitmq</groupId>
    <artifactId>amqp-client</artifactId>
    <version>4.0.2</version>
</dependency>

<dependency>
    <groupId>org.slf4j</groupId>
    <artifactId>slf4j-api</artifactId>
    <version>1.7.10</version>
</dependency>

<dependency>
    <groupId>org.slf4j</groupId>
    <artifactId>slf4j-log4j12</artifactId>
    <version>1.7.5</version>
</dependency>

<dependency>
    <groupId>log4j</groupId>
    <artifactId>log4j</artifactId>
    <version>1.2.17</version>
</dependency>

<dependency>
    <groupId>junit</groupId>
    <artifactId>junit</artifactId>
    <version>4.11</version>
</dependency>
2. Connect RabbitMQ
/**
 * @description: TODO MQ Connect Factory
 * @author: bingfeng
 * @create: 2020-05-07 08:55
 */
public class MQConnectUtil {

    public static Connection getConnection() throws IOException, TimeoutException {

        // Define Connection Factory
        ConnectionFactory factory = new ConnectionFactory();

        // Set Connection Address
        factory.setHost("127.0.0.1");

        // Set Port
        factory.setPort(5672);

        // Select vhost
        factory.setVirtualHost("/xiaoshuo");

        // Username
        factory.setUsername("bingfeng");

        // Password
        factory.setPassword("123");

        return factory.newConnection();
    }
}
3. Send Messages
/**
 * @description: TODO Analog Send Message
 * @author: bingfeng
 * @create: 2020-05-07 09:01
 */
public class Producer {

    /**
     * Queue name
     */
    public static final String QUEUE_NAME = "simple_queue_test";

    public static void main(String[] args) throws IOException, TimeoutException {

        Connection connection = MQConnectUtil.getConnection();

        // Get a channel from the connection
        Channel channel = connection.createChannel();

        // Create queue declaration
        channel.queueDeclare(QUEUE_NAME, false, false, false, null);

        // Message Content
        String msg = "Hello, Ice Peak!";

        channel.basicPublish("", QUEUE_NAME, null, msg.getBytes());

        System.out.println("Send a message:" + msg);

        channel.close();
        connection.close();
    }
}
4. Consumer News
/**
 * @description: TODO Consumer MQ
 * @author: bingfeng
 * @create: 2020-05-07 09:11
 */
public class Consumer {

    public static final String QUEUE_NAME = "simple_queue_test";

    public static void main(String[] args) throws Exception {

        // Get Connections
        Connection connection = MQConnectUtil.getConnection();

        // Create Channel
        Channel channel = connection.createChannel();

        // Queue declaration
        channel.queueDeclare(QUEUE_NAME, false, false, false, null);

        // Define consumers
        DefaultConsumer consumer = new DefaultConsumer(channel) {
            @Override
            public void handleDelivery(String consumerTag, Envelope envelope, AMQP.BasicProperties properties, byte[] body) {
                String msg = new String(body, StandardCharsets.UTF_8);

                System.out.println("Consumer News:" + msg);
            }
        };

        // listen queue
        channel.basicConsume(QUEUE_NAME, true, consumer);
    }
}
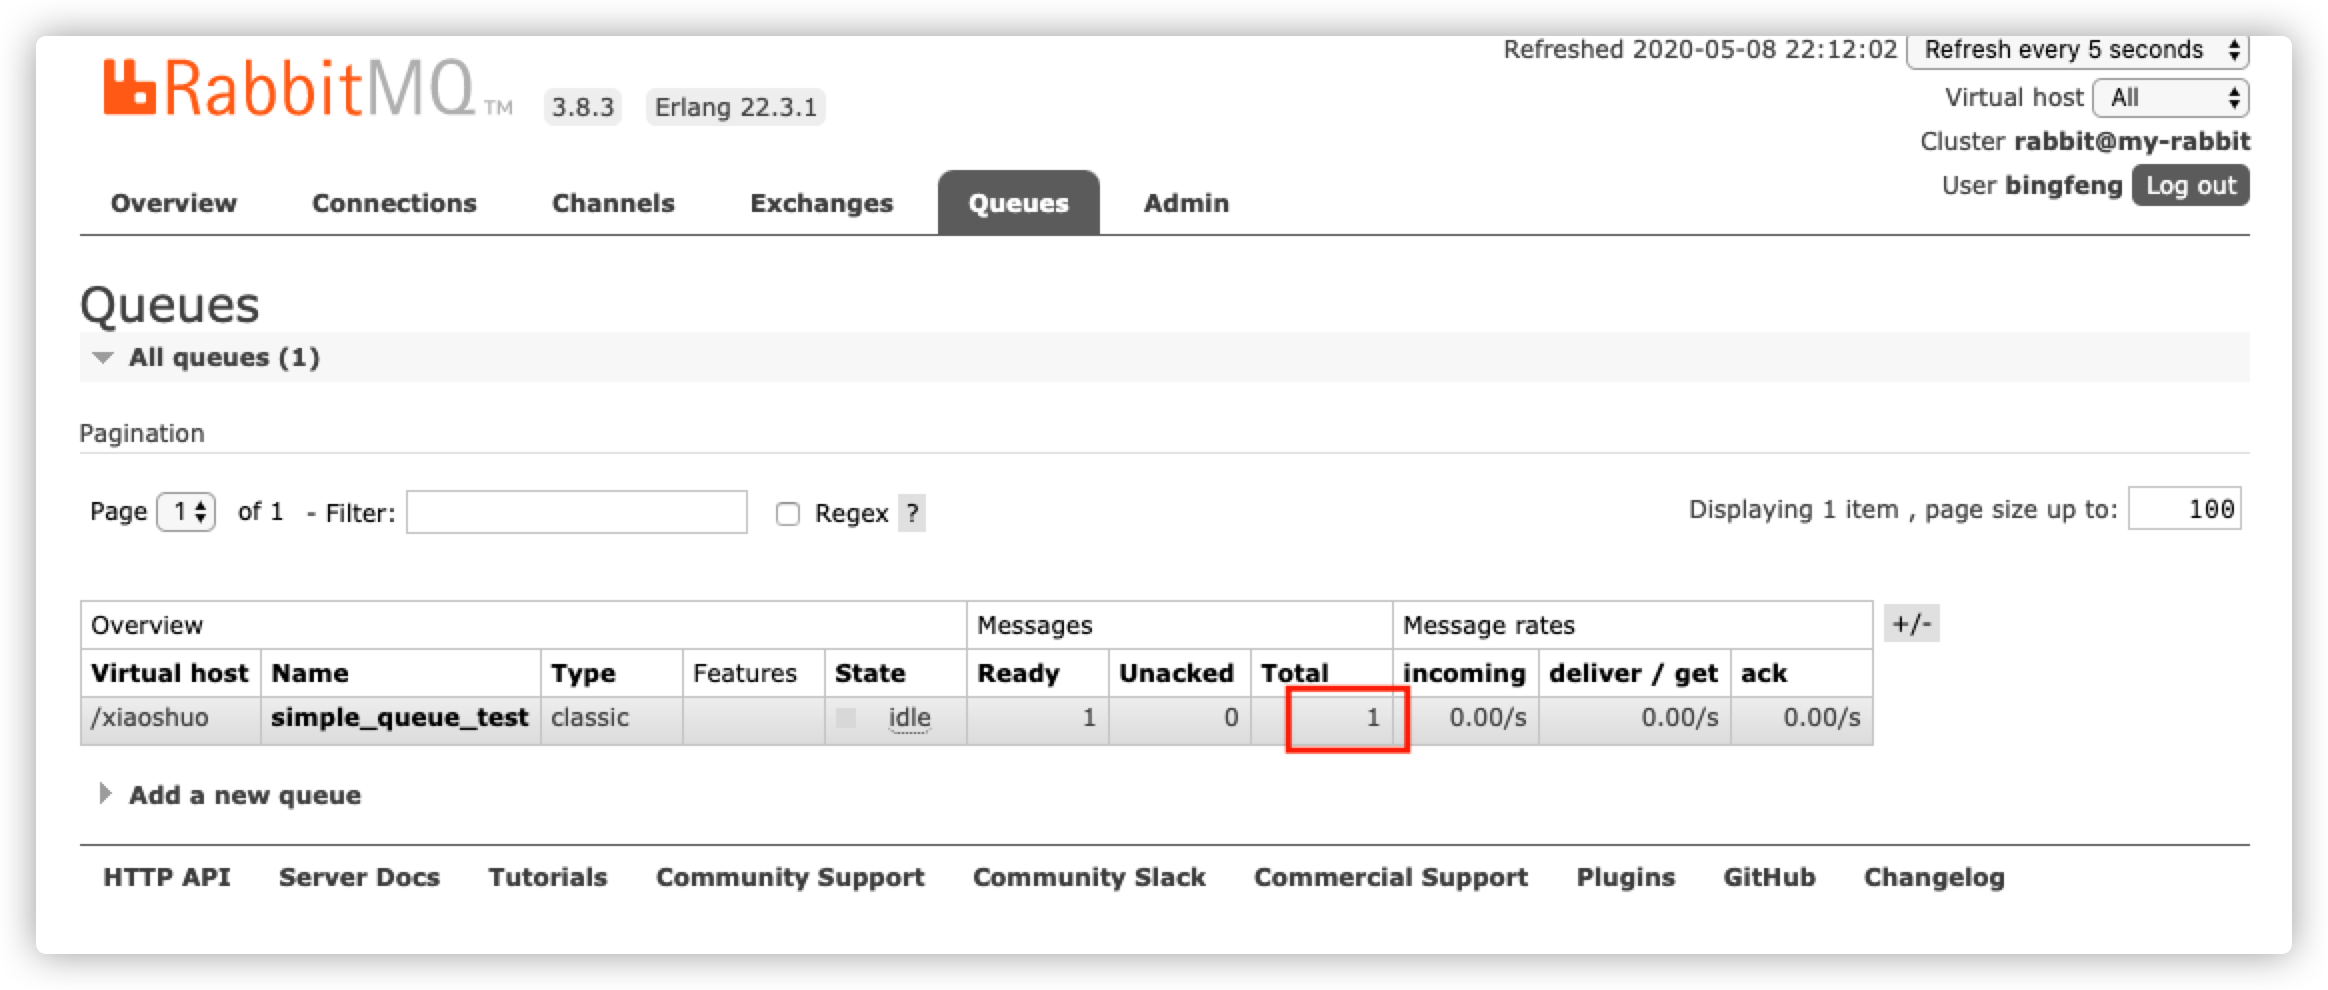
When we send a message, we can see the number of messages in the queue directly in the panel
When you click in and pull down below, Messages is the number of messages we want to see. Just fill in a few messages. When you've finished, click Get Messages below and our latest messages will appear below.
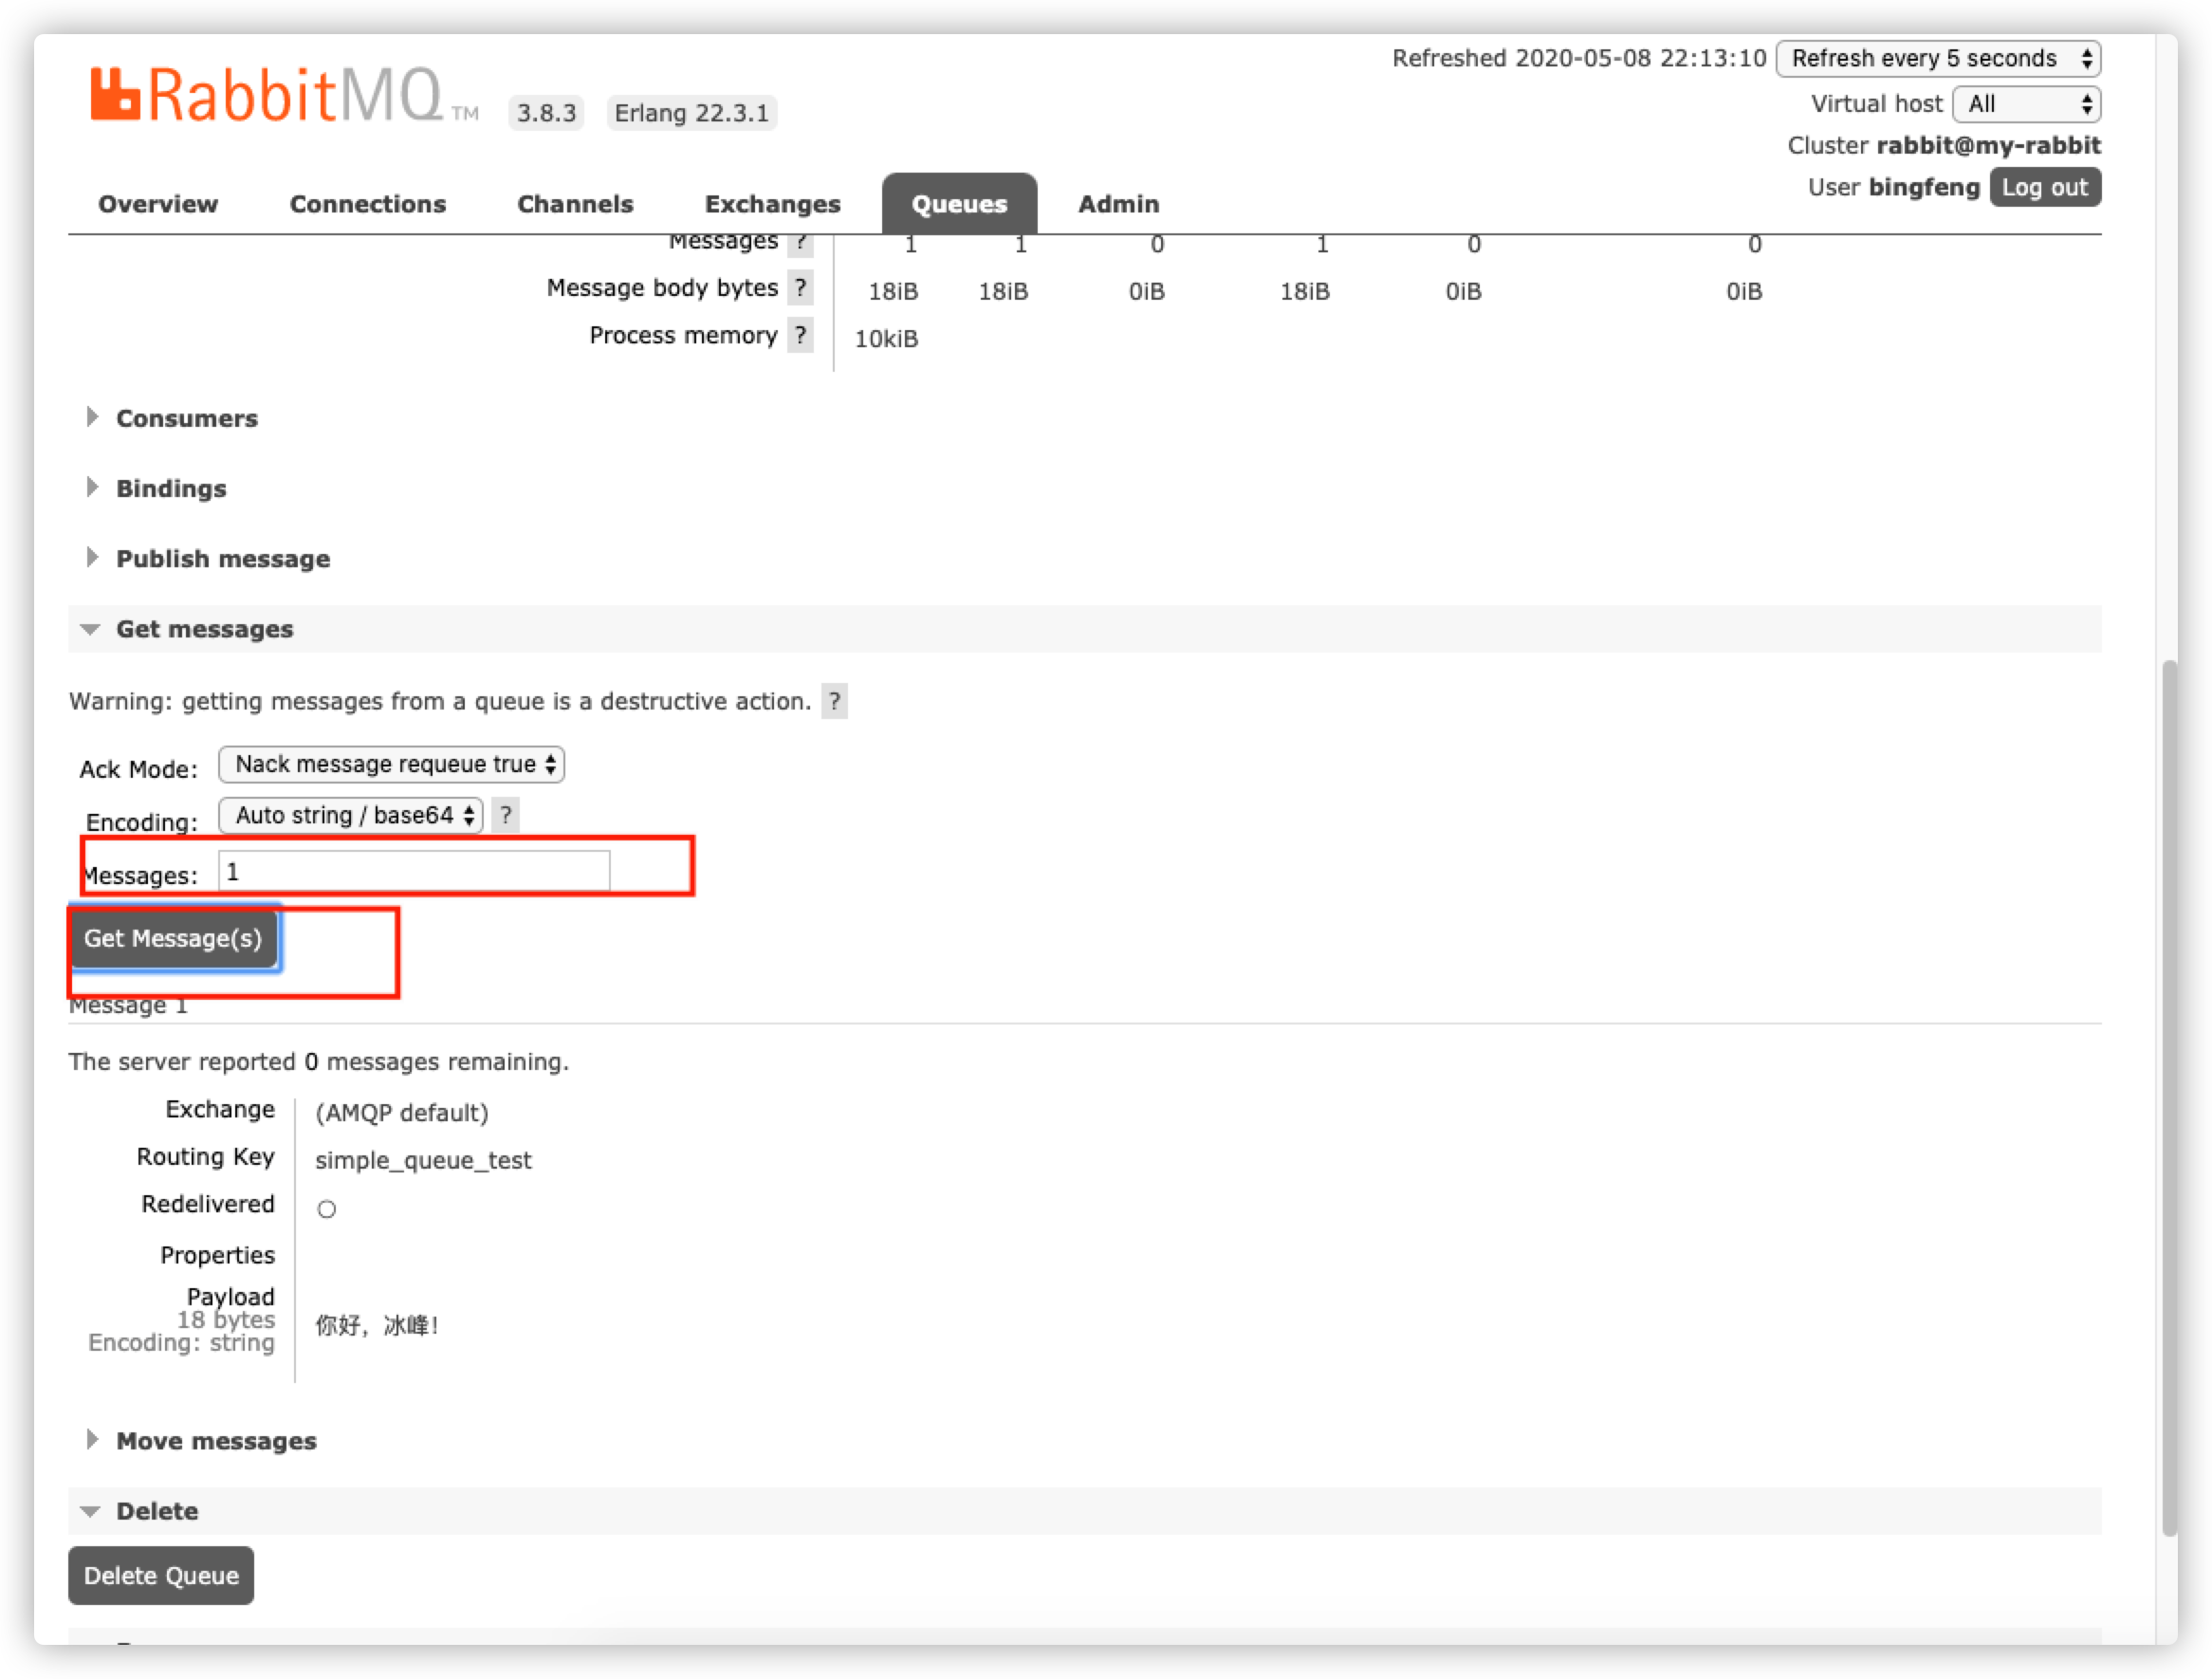
When we consumed the message, it disappeared from the queue.
Last words
As I write today, I intend to share RabbitMQ's practical usage from entry level to project level one with you, one is to prevent you from forgetting you can look back later, the other is to share it with friends who are interested in learning together, and later I will also write over what I said before, business scenarios where orders are expired and deleted.
Friends who are familiar with RabbitMQ may find it easy to solve things written, but after all, there are many people who have not used MQ in their actual work, and they may not know it themselves. For friends who have not, I think it is good to enter the door.
What's wrong? Welcome to solo below.
<p style="text-align:center; font-weight:bold; color:#0e88eb; font-size:16">More exciting content, please pay attention to WeChat Public Number: the growth of a programmer</p>