1 example of many to many relationship
1. Table names and fields
Student form: student (s_id, s_name, s_birth, s_gender) -- > student number, student name, date of birth, student gender
Curriculum: Course (c_id, c_name) -- > course number, course name
Teacher form: teacher (t_id, t_name) -- > teacher number, teacher name
Transcript: score (s_id, c_id, s_score) -- > student number, course number, score
Teacher curriculum: teacher (t_id, c_id)
2. Relationship between tables
There is a many to many (m:n) relationship between students and courses: a student has to study multiple courses, and more than one student studies a course.
There is a many to many (m:n) relationship between teachers and courses: one teacher can take multiple courses, and one course can be taken by multiple teachers
Note: for many to many relationships, the third table will be generated to convert many to many relationships into one to many relationships
2 create CDM
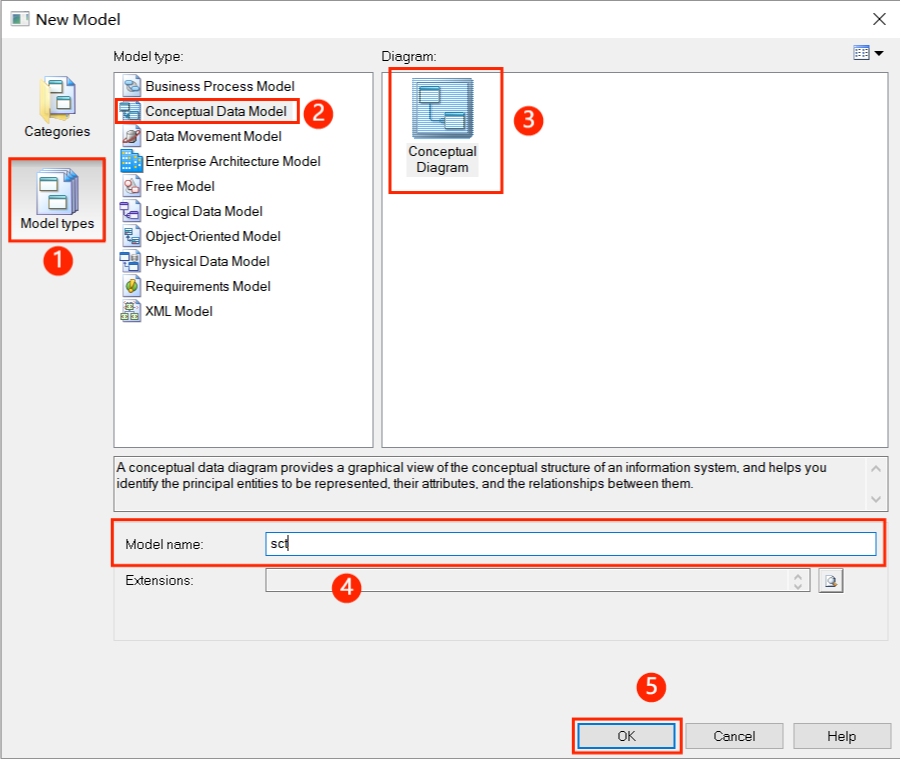
Click "File" in the menu bar and "New Model" to open the New Model dialog box. In this dialog box:
① Select the second, Model types;
② Select the second, Conceptual Data Model;
③ Conceptual Diagram is selected by default
④ Name the model at Model name, in this case: sct;
⑤ Click ok.
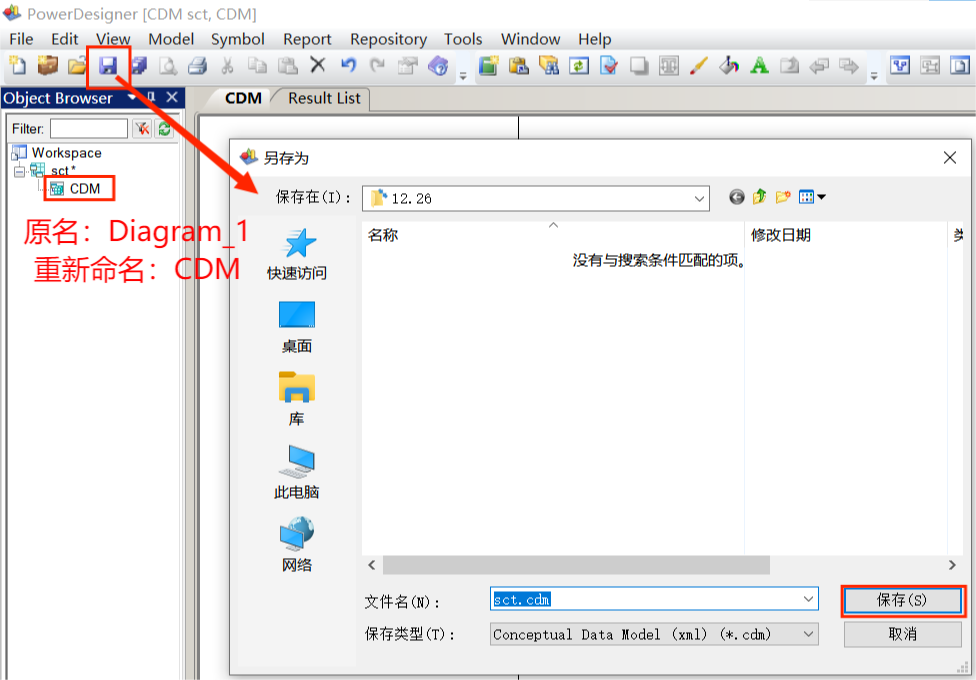
Add Diagram_1 change the name to CDM, then click the Save button and select the appropriate path to save the model.
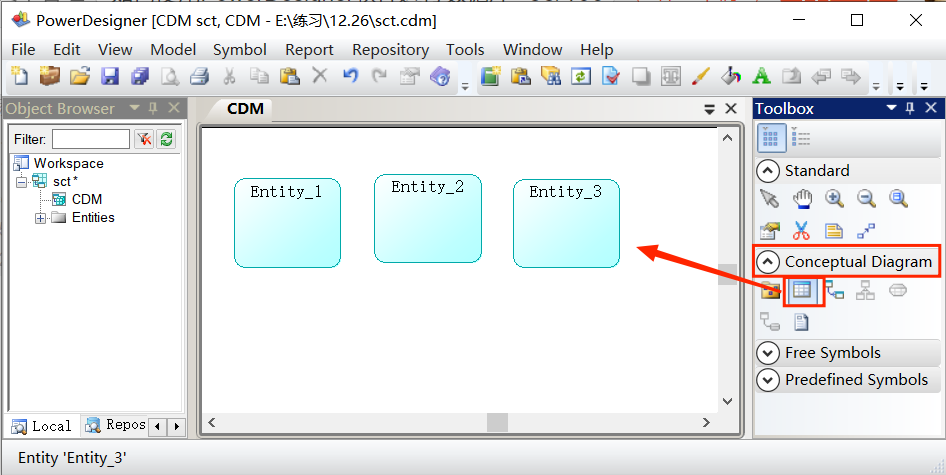
In the rightmost Toolbox, select Conceptual Diagram and the second icon. Draw in the middle drawing area. If there are several entities, click the mouse a few times (in this case, there are three entities, so draw three), and then restore the mouse to the arrow state.
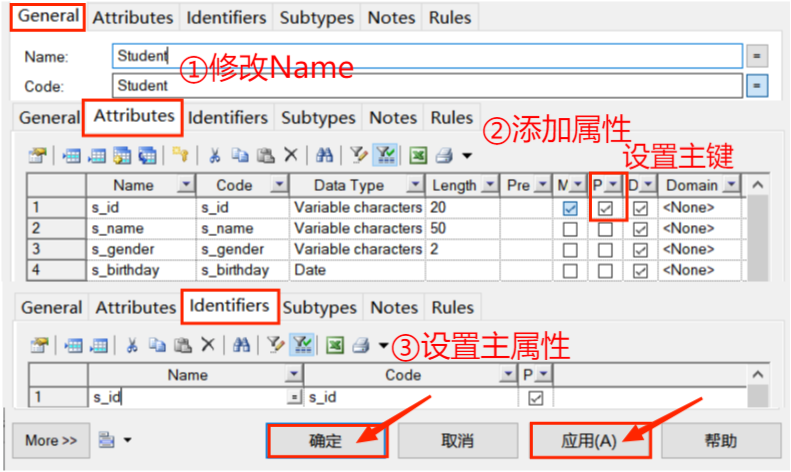
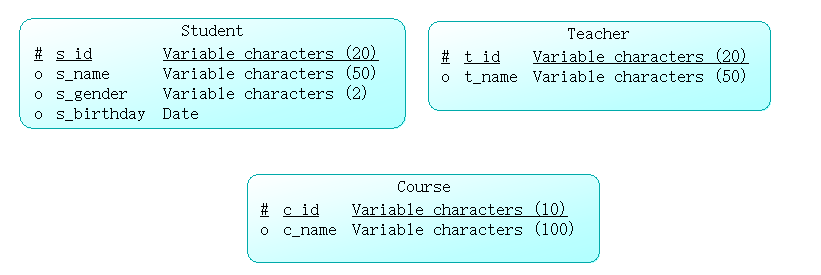
① Double click the first entity icon (the blue image just created) and draw according to the Student table (s_id, s_name,s_gender,s_birthday);
② Enter the General interface and change the Name. In this example, it is changed to: Student;
③ Click Attributes, add Attributes, fill in the field Name in the Name field, and select the data type in the Data Types field (both icons are options to modify the data type). If the field is a primary key, check the middle column (Primary Identifier);
④ Click Identifiers, add the main attribute at Name, click "apply" below, and then click OK.
The other two entity icons are also set according to the above method, and the setting results are as follows:
In order to make the entity diagram look more beautiful, set fonts for the entity diagram. Right click the Student entity diagram, select Format, and then click the Font tab, where you can modify the font. Finally, click "apply", and then click "OK". The same is true for Teacher and Course entity diagrams.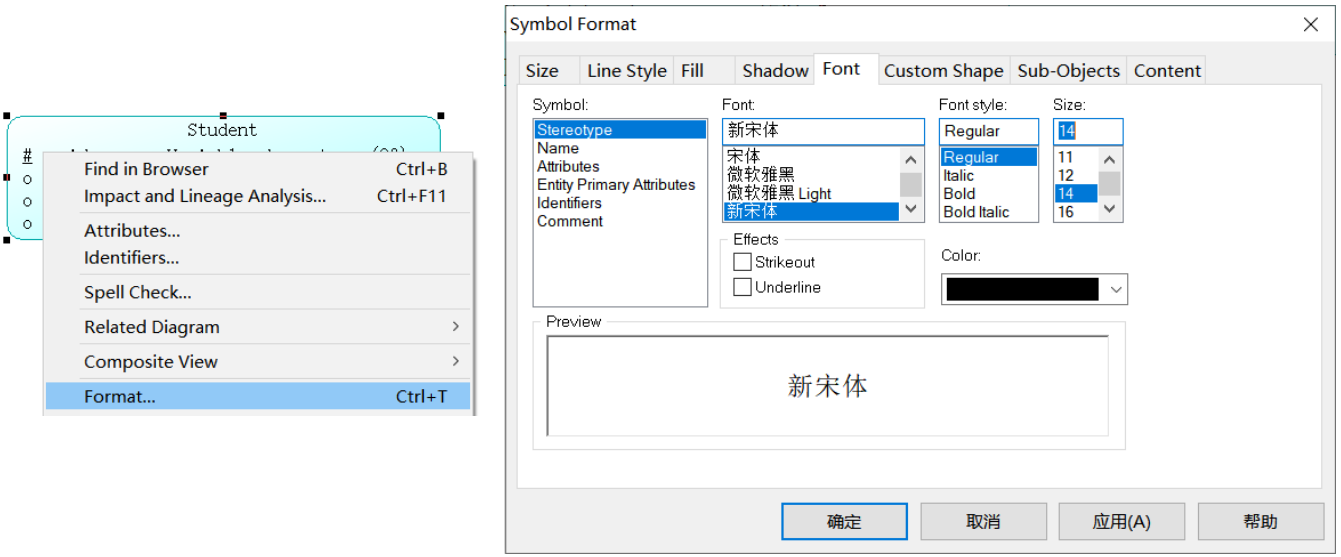
3 establish links between entities
① Click the third small icon (Relationship) under Conceptual Diagram under Toolbox;
② Hold down the mouse and pull it from the Student box to the Course box, release the mouse, and then switch the mouse back to the arrow. Teacher and Course are the same.

Double click relationship_ In part 1, the relationship window will pop up. Change the Name in the General tab. The relationship between students and courses is grades, so change the Name to Course. Then click the Cardinalities tab, select 1: n in the Student to Course section, select 1: n in the Course to Student section, click the application at the bottom, and then click OK.
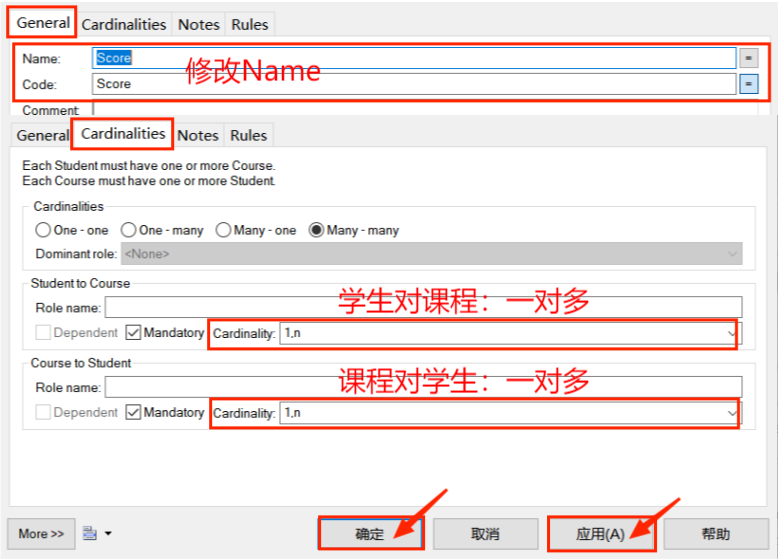
Double click Relationship_2. Change the Name in the General tab. The relationship between the teacher and the course is class, so change the Name to Teach. Then click the Cardinalities tab, select 1: n in the Teacher to Course section, select 1: n in the Course to Teacher section, click the application at the bottom, and then click OK. The following results are obtained:
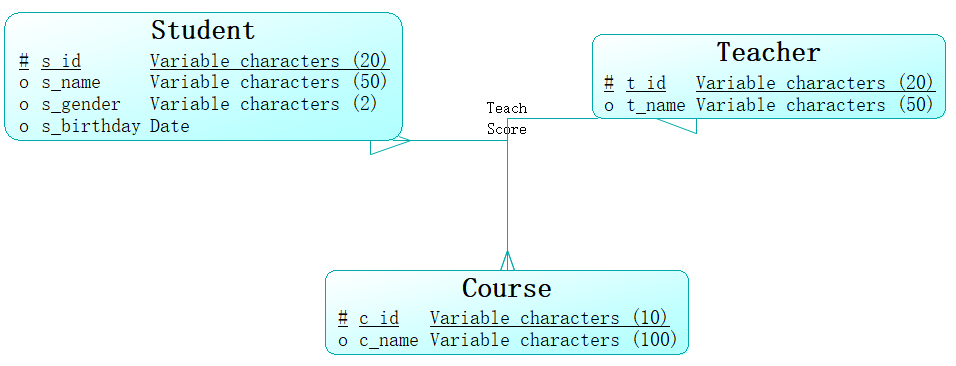
4 check CDM
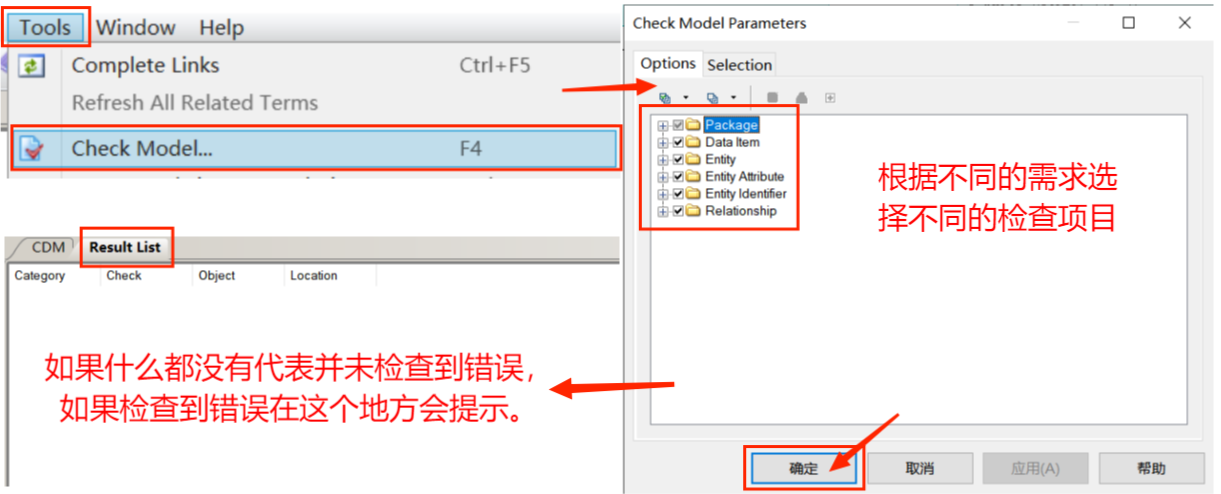
Click the Tools option in the top menu bar and select Check Model to open the Check Model interface. Select the items to check according to your own needs. In this case, select all checks. After clicking OK, the Result List window will open. If nothing is displayed under this window, it means that the model has not checked for errors. If information is displayed, Indicates that an error has been detected.
5 convert CDM into PDM
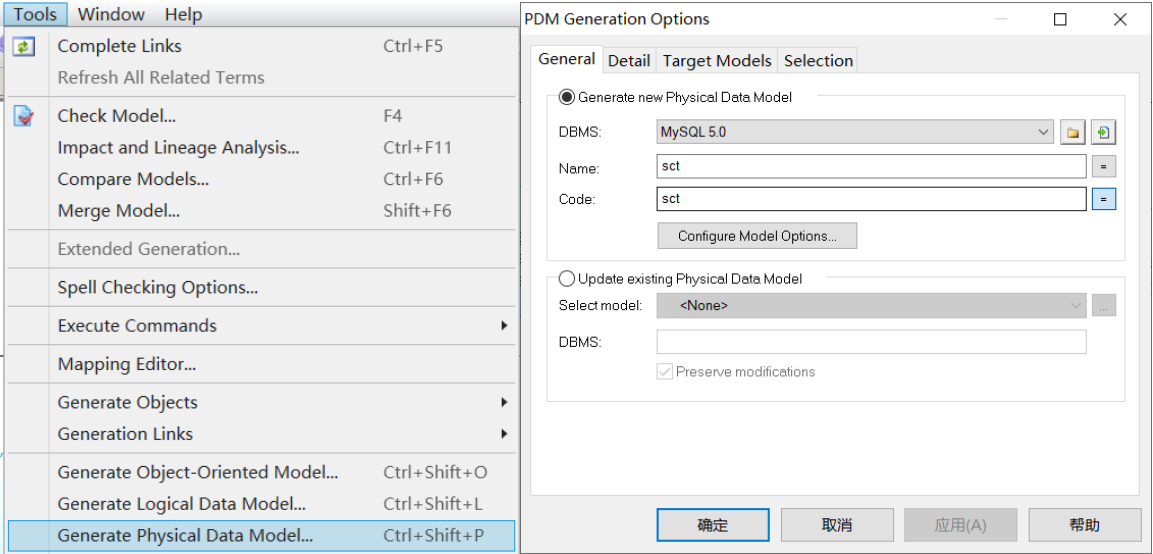
Click the Tools option in the top menu bar and select Generate Physical Data Model. The following window will pop up. Select your own database in the DBMS column. In this case, the database used is mysql. Therefore, select MySQL 5.0, which can be compatible with MySQL 8.0 database. Then click apply and click OK.
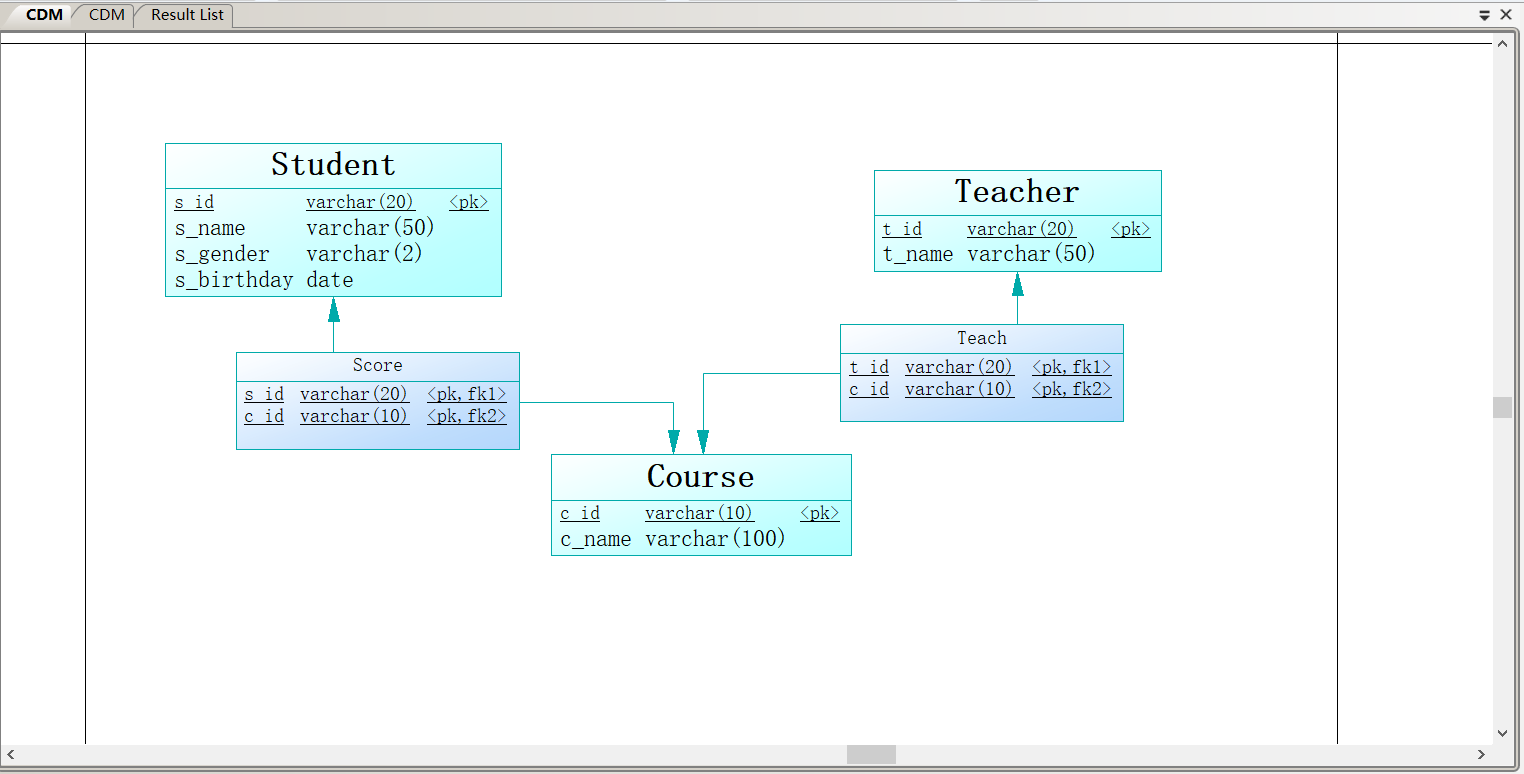
At this time, the following page will be opened. In this page, < PK > represents the primary key and < FK > represents the foreign key.
At this time, two CDMS will be displayed on the interface, which will cause conflict, so the CDM on this page needs to be renamed PDM.
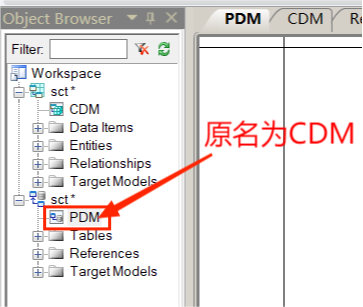
At this time, you need to save the PDM again. Click the Save button and select the appropriate folder to save.
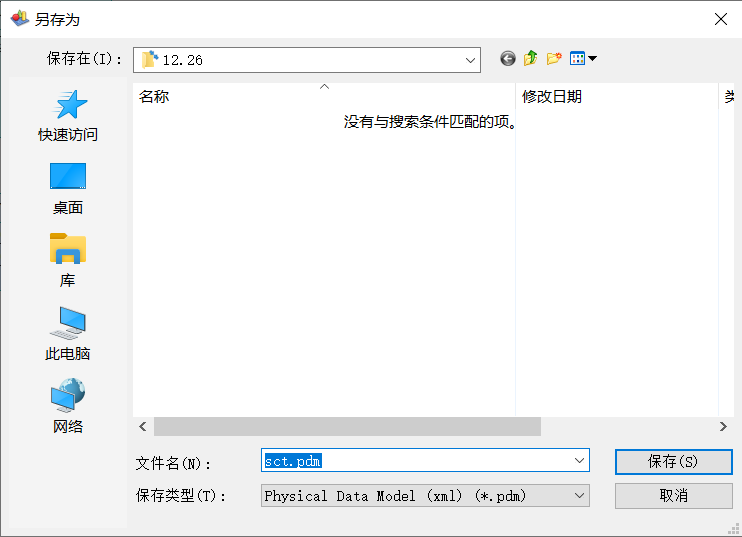
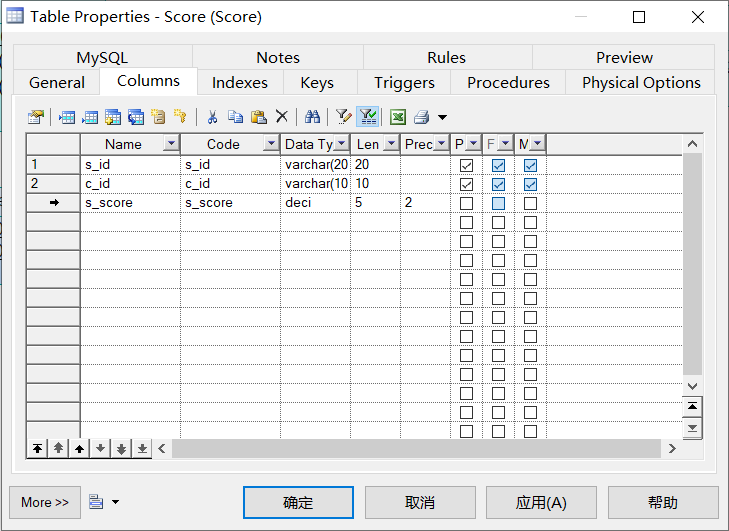
After saving, you need to edit the Score table. Double click the Score table to open the dialog box of table properties, and add a column of scores in the Columns tab_ Score. Click apply and click OK.
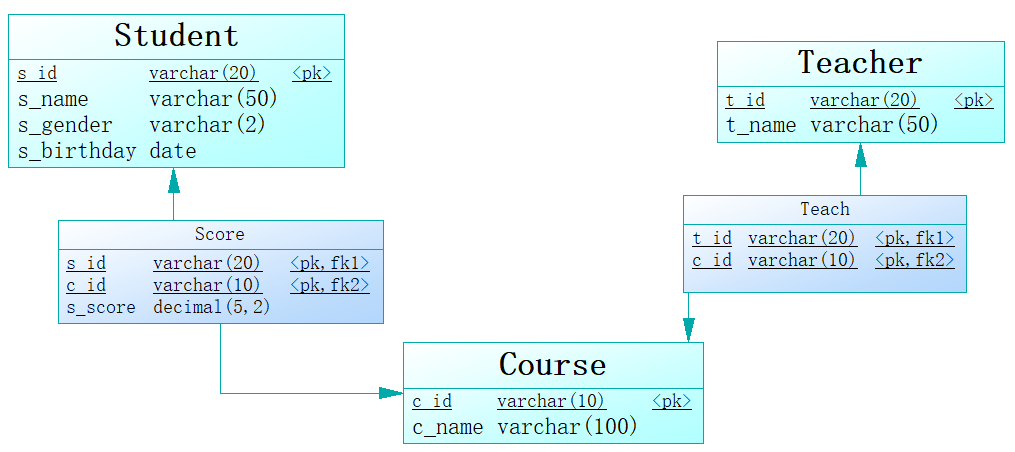
After modification, the display effect on the page is as follows:
6. Generate sql file by PDM
Switch to the PDM page, select Database in the menu bar (Note: there is no Database option on the CDM page), and click Generate Database.
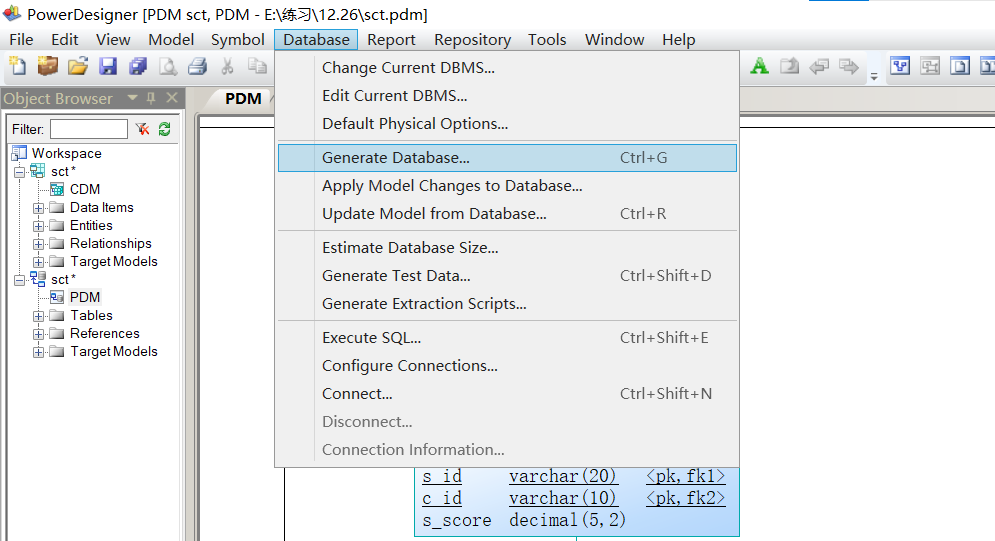
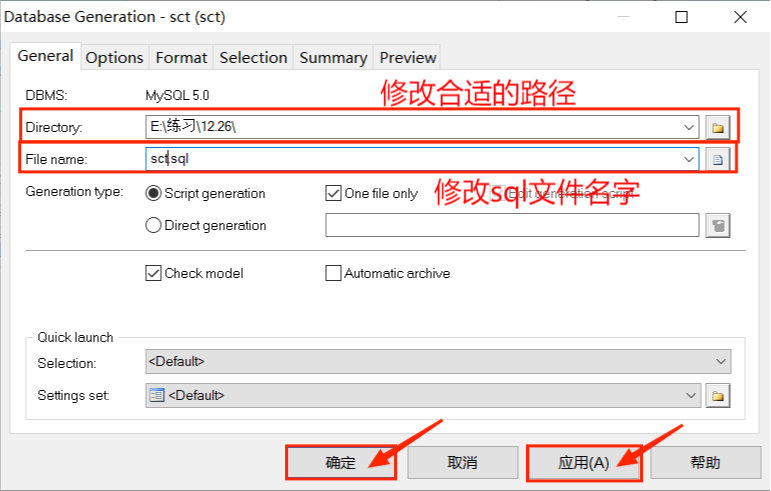
In the pop-up dialog box, first modify the path where the sql file is stored, then modify the name of the sql file, click apply, and then click OK.
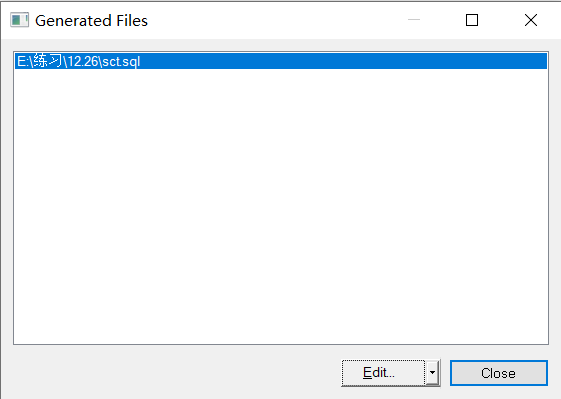
Next, the following window will pop up. Click Edit to view the generated sql file. After generating the sql file, you can import the sql file from the database.
The generated sql files are as follows:
/*==============================================================*/
/* DBMS name:      MySQL 5.0                                    */
/* Created on:     2022/1/26 18:15:25                           */
/*==============================================================*/


drop table if exists Course;

drop table if exists Score;

drop table if exists Student;

drop table if exists Teach;

drop table if exists Teacher;

/*==============================================================*/
/* Table: Course                                                */
/*==============================================================*/
create table Course
(
   c_id                 varchar(10) not null,
   c_name               varchar(100),
   primary key (c_id)
);

/*==============================================================*/
/* Table: Score                                                 */
/*==============================================================*/
create table Score
(
   s_id                 varchar(20) not null,
   c_id                 varchar(10) not null,
   s_score              decimal(5,2),
   primary key (s_id, c_id)
);

/*==============================================================*/
/* Table: Student                                               */
/*==============================================================*/
create table Student
(
   s_id                 varchar(20) not null,
   s_name               varchar(50),
   s_gender             varchar(2),
   s_birthday           date,
   primary key (s_id)
);

/*==============================================================*/
/* Table: Teach                                                 */
/*==============================================================*/
create table Teach
(
   t_id                 varchar(20) not null,
   c_id                 varchar(10) not null,
   primary key (t_id, c_id)
);

/*==============================================================*/
/* Table: Teacher                                               */
/*==============================================================*/
create table Teacher
(
   t_id                 varchar(20) not null,
   t_name               varchar(50),
   primary key (t_id)
);

alter table Score add constraint FK_Score foreign key (s_id)
      references Student (s_id) on delete restrict on update restrict;

alter table Score add constraint FK_Score2 foreign key (c_id)
      references Course (c_id) on delete restrict on update restrict;

alter table Teach add constraint FK_Teach foreign key (t_id)
      references Teacher (t_id) on delete restrict on update restrict;

alter table Teach add constraint FK_Teach2 foreign key (c_id)
      references Course (c_id) on delete restrict on update restrict;