 https://dev.to/therealdanvega/html-template-tag-in-vanilla-javascript-and-vue-5eoo
Over the past few months, I've been writing a lot of documents, tutorials, and exercises around VueJS and Vanilla JavaScript. In some cases, I am Tech Elevator This is a coding training camp, which can teach students how to code in 14 weeks. With this in mind, all content is for beginners, but suitable for everyone.
I've been doing some tutorials and exercises on Fetch API recently. I want to organize a good example to illustrate how to read some JSON data from local files and add it to the page. In a simple example, I'll just use createElement and createTextNode And attach the item to the DOM.
In a more complex example involving more tags, creating elements, nodes, and handling attributes and classes can become cumbersome. In this case, a good solution is Content element template . I also realized that many developers (beginners and veterans) may not know what this is or why we use it.
In this article, I'll look at tags in < template > HTML and Vanilla JavaScript. When you know why this tag exists, it may make more sense to use it in Vue single file components.
Content element template
You can < template > < / template > treat tags in HTML like any other template. A template is a mold or pattern that gives you a starting point for creating something else. The MDN document defines the HTML content template as:
The HTML content template (< template >) element is a mechanism for saving client-side content that will not be rendered when the page is loaded, but may then be instantiated at run time using JavaScript.
Think of a template as a piece of content stored for later use in a document. Although the parser < template > does handle the contents of elements when loading the page, it only does so to ensure that these contents are valid; However, the content of the element is not rendered.
It sounds simple, but if it doesn't make sense, don't worry. We will look at a practical example and hope it can clarify everything for us.
HTML content template presentation
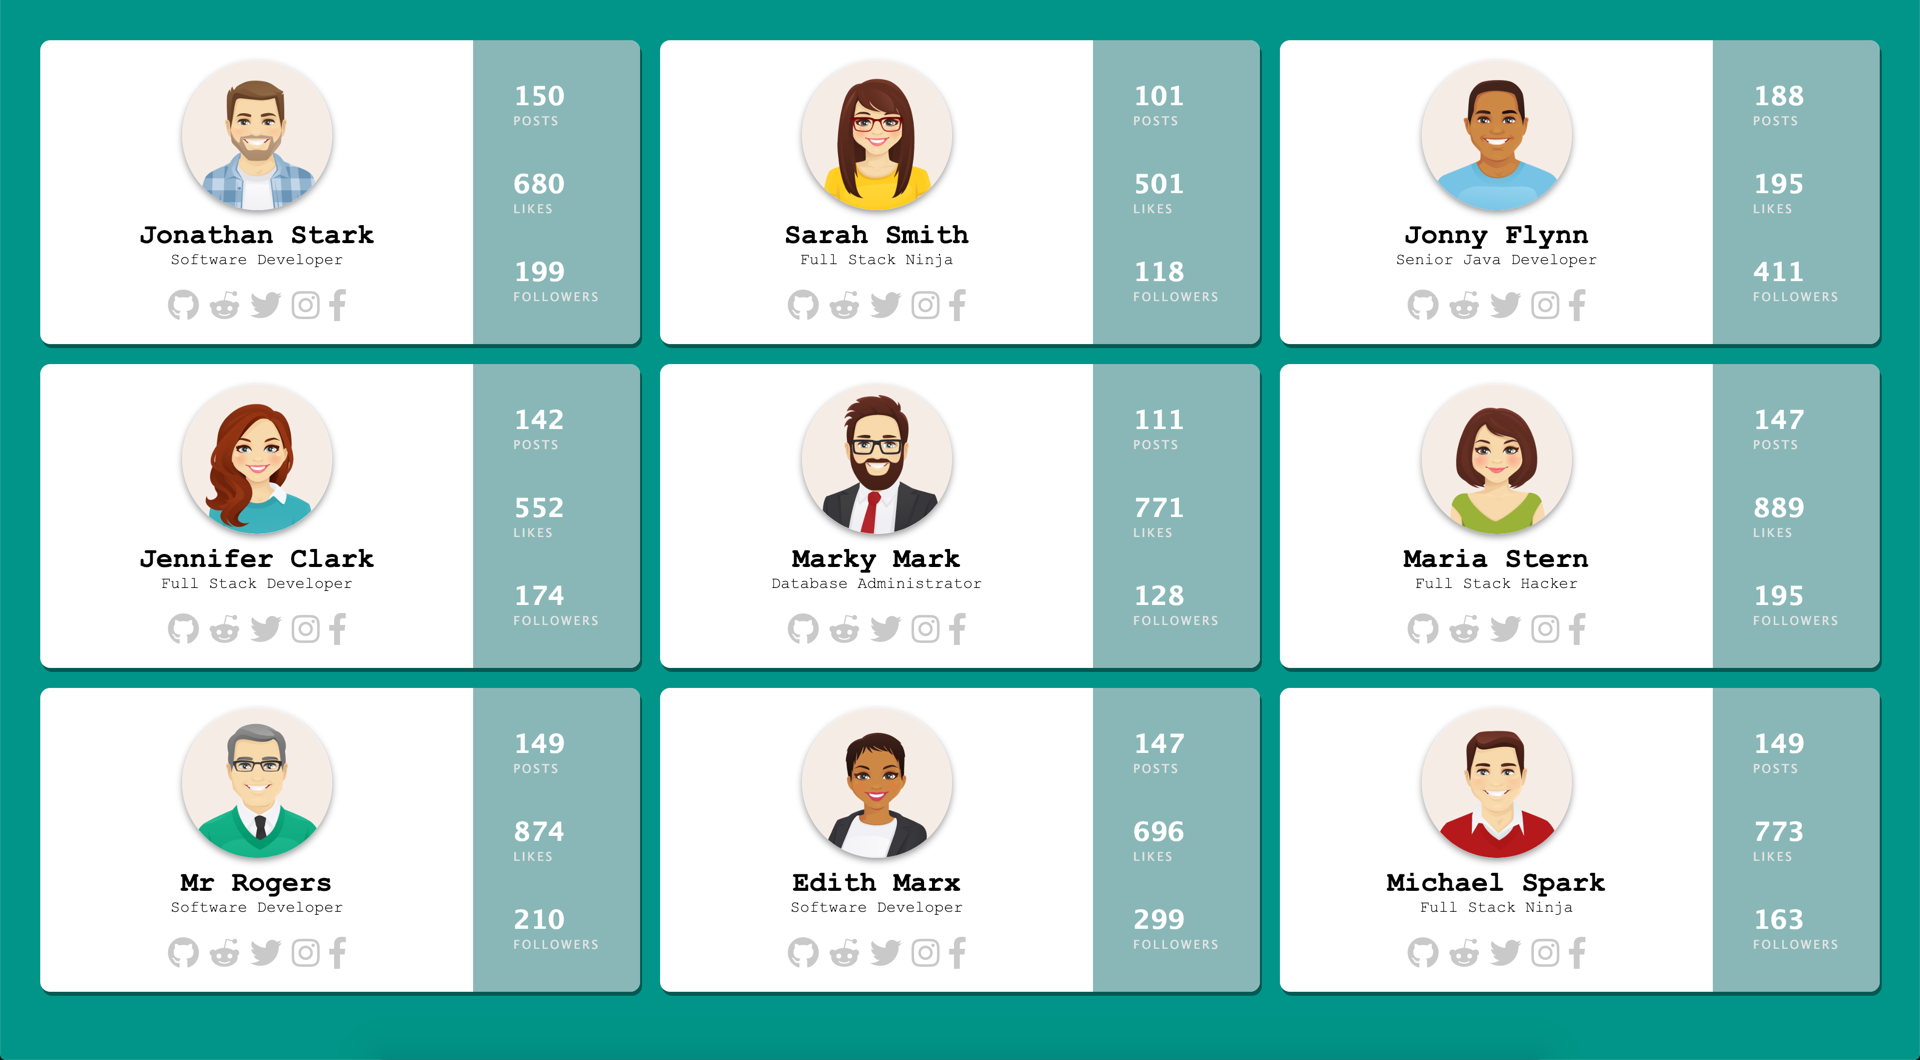
I'll show you how to < template > < / template > put the contents of tags together in Vanilla JavaScript. If you want to view the source code of this demonstration, you can Github Find it on the. We will build a page that loads the user card list based on some JSON data, and it will eventually look like this.
Mark
As I said before, the goal of this project is to read some user data from JSON files and then write user information to the page. This can become cumbersome when you have to create elements one by one and add them to the page.
A better way to solve this problem is to build the look and feel of tags and CSS, and then wrap tags in template tags. The following HTML is what I finally got. When I'm done, I just need to add a tag around the < template > < / template > tag and give it an id.
<template id="user-card-template">
<div class="user">
    <div class="profile">
        <img src="" class="avatar"/>
        <h2></h2>
        <span class="title"></span>
        <div class="social">
            <a href="https://www.github.com" target="_blank"><i class="fab fa-github fa-2x" target="_blank"></i></a>
            <a href="https://www.reddit.com" target="_blank"><i class="fab fa-reddit-alien fa-2x"></i></a>
            <a href="https://www.twitter.com" target="_blank"><i class="fab fa-twitter fa-2x"></i></a>
            <a href="https://www.instagram.com" target="_blank"><i class="fab fa-instagram fa-2x"></i></a>
            <a href="http://www.facebook.com" target="_blank"><i class="fab fa-facebook-f fa-2x"></i></a>
        </div>
    </div>
    <div class="stats">
        <div class="posts">
            <h3></h3>
            <span>Posts</span>
        </div>
        <div class="likes">
            <h3></h3>
            <span>Likes</span>
        </div>
        <div class="followers">
            <h3></h3>
            <span>Followers</span>
        </div>
    </div>
</div>
</template>
JavaScript
Now that I have my tag, it's time to look at JavaScript. I have a JSON file named users JSON, which has an array of nine users, looks like this.
{
    "id": 1,
    "fullname": "Jonathan Stark",
    "title": "Software Developer",
    "avatar": "img/user_1.png",
    "social": {
        "github": "github_username",
        "reddit": "reddit_username",
        "twitter": "twitter_username",
        "instagram": "instagram_username",
        "facebook": "facebook_username"
    },
    "stats": {
        "posts": "150",
        "likes": "680",
        "followers": "199"
    }
}
The first step is to read JSON, for which we will use the Fetch API. If you have used fetch before, this is nothing new.
fetch('users.json')
.then((response) => {
  return response.json();
})
.then((users) => {
  // we have an array of users
})
.catch((err) => console.error(err));
Now that we have a group of users, we can start using our template. First, we need to check whether the user's browser supports HTML Content Template tags. As long as you use a modern browser , it should support it, But it's best to do this.
if('content' in document.createElement('template')) {

});
} else {
    console.error('Your browser does not support templates');
}
Now that we know that the browser supports this function, we need to get a reference to the parent container, and we will attach each user card to it. In this case, it is an element with user ID. Then we will traverse each element in the array.
if('content' in document.createElement('template')) {
    const container = document.getElementById('users');
    users.forEach((user) => {

    });
} else {
    console.error('Your browser does not support templates');
}
In each iteration of the user array, we will create a copy (clone) of the template. The way we do this is to get the reference to the element, get the content (the content in the template label), and then clone it. We pass true to the cloneNode method so that we can use deep cloning and use it to grab all the child nodes.
const tmpl = document.getElementById('user-card-template').content.cloneNode(true);
From there, we can simply query the template of a specific element and set its content to the value we read from the user array. In most cases, I just set the internal text of the element. Finally, we use references to container elements and attach everything in the template tag to our page.
fetch('users.json')
.then((response) => {
  return response.json();
})
.then((users) => {
  if('content' in document.createElement('template')) {
    const container = document.getElementById('users');
    users.forEach((user) => {
      const tmpl = document.getElementById('user-card-template').content.cloneNode(true);
      tmpl.querySelector('h2').innerText = user.fullname;
      tmpl.querySelector('.title').innerText = user.title;
      tmpl.querySelector('img').setAttribute("src",user.avatar);
      tmpl.querySelector('.posts h3').innerText = user.stats.posts;
      tmpl.querySelector('.likes h3').innerText = user.stats.likes;
      tmpl.querySelector('.followers h3').innerText = user.stats.followers;
      container.appendChild(tmpl);
    });
  } else {
    console.error('Your browser does not support templates');
  }
})
.catch((err) => console.error(err));
Conditional sentence
After writing this article, my friend Todd asked me a very good question.

What we do here is to clone the tag in the template tag. Because this is a normal marker, we can use it to do anything we want to do. Therefore, suppose that some users have an account on all social networks, while others do not.
"social": {
  "github": "github_username",
  "reddit": "reddit_username",
  "twitter": "twitter_username",
  "instagram": "instagram_username",
  "facebook": "facebook_username"
}
"social": {
"github": "github_username",
"reddit": "reddit_username",
"twitter": "twitter_username"
}Traversing all the social networks we know we can do here If the social object does not have the key, we will delete the element from the DOM. We use normal elements here again, so we can do some things, such as setting the visibility to hide or delete them completely. In this case, we want to delete it, because if we just hide it, we will have this blank space in some cases, which doesn't look good.
// this is a list of social networks we display under a users profile
const socialLinks = ['github','reddit','twitter','instagram','facebook']
// iterate over that list and check to see if they have an account on that network
socialLinks.forEach((social) => {
  // if they don't have a link in the JSON data hide that link & icon
  if(!user.social.hasOwnProperty(social)) {
    tmpl.querySelector(`.${social}`).remove();
  }
});
HTML templates in vanilla JavaScript wrap
That's all you need to create a template in a tag, clone it, and add data to it. I'll mention this because it's important to know, but if you take this approach and look at the source code, you'll only see the template code. This means that if you have data to write to a search engine friendly page, this may not be a good solution.
Template labels in Vue
Now that we know what the < template > < / template > tag is, it should better understand the purpose of Vue using it. If you create a new single file component in Vue, you will have some code as shown below.
<template>
    <div id="users">
        <!-- markup here -->
    </div>
</template>

<script>
    // js here
</script>

<style>
    /* css here */
</style>
It should now be clear why we need to add a top-level element to the template tag. Vue compiles everything in the template tag into the virtual DOM. The Vue document describes the template syntax as:
Vue.js uses an HTML based template syntax that allows you to declaratively bind the rendered DOM to the data of the underlying Vue instance. All Vue JS templates are valid HTML and can be parsed by standard browsers and HTML parsers.
At the bottom, Vue compiles the template into a virtual DOM rendering function. Combined with the responsive system, Vue can intelligently calculate the minimum number of components to re render, and apply the minimum DOM operations when the application state changes.
If you are familiar with the concept of virtual DOM and prefer the original functions of JavaScript, you can also write rendering functions directly instead of templates, and provide optional JSX support.
conclusion
If you've never used the < template > < / template > tag before, I hope you've learned something new today. Feel free to ask any questions about this article or the demo I built.