
This article was first published on my personal blog
Click on the link to enter the original text
Preface
Dagger2 is now a very popular dependency injection framework, currently maintained by Google, and has 12K star on Github. The entry threshold of Dagger 2 is relatively high. It is known that many Android engineers do not know Dagger 2 well, do not use Dagger 2 or have problems with its usage. The main purpose of this article is to let Android engineers quickly master Dagger 2 and use Dagger 2 elegantly and concisely. Here's a best practices tutorial for Dagger2 on Android.
Note: The Dagger2 framework is more difficult to get started than the general framework, so we should try to minimize interference factors and introduce as few other complex third-party libraries as possible. The best way is to rely only on the Android base library and the libraries Dagger2 For Android needs.
Recommendation of other technical articles
Give you a fully automatic screen adaptation scheme (based on SW scheme)! —— Free your hands and UI
Gradle Automatic Implementation of Android Component Module Construction
Technical Tutorial Demo Address (Demo in this article is also included)(
Dependency injection
What is dependency injection?
Wikipedia's introduction is that in software engineering, dependency injection is an implementation of control inversion to solve dependency design patterns. A dependency refers to an object (i.e. the service provider) that can be exploited. Dependency injection is the transfer of dependencies to dependent objects (that is, clients) that will be used. The service is part of the state that will become the client. The basic requirement of this design pattern is to deliver services to clients rather than allow them to establish or find services.
Simply put, dependency injection is to pass instance objects into another object.
Implementation of Dependency Injection
Wikipedia's statement is very abstract, in fact, in ordinary coding, we have been injecting since use. Dependency injection can be implemented in the following ways.
- Constructor Inject
public class Chef{
    Menu menu;
    public Man(Menu menu){
        this.menu = menu;
    }
}
- setter method injection
public class Chef{
    Menu menu;
    public setMenu(Menu menu){
        this.menu = menu;
    }
}
- Interface injection
public interface MenuInject{
    void injectMenu(Menu menu);
}

public class Chef implements MenuInject{
    Menu menu;

    @Override
    public injectMenu(Menu menu){
        this.menu = menu;
    }
}
- Dependency Injection Framework
public @Inject class Menu{
    ...
}

public class Chef{
    @Inject
    Menu menu;
}
As can be seen from the examples above, dependency injection is actually something we use every day.
Dagger2 Implementing Dependency Injection
Why use Dagger 2?
From the simple example above, it seems unnecessary to introduce a third-party framework in order to achieve dependency injection. It's really unnecessary to introduce Dagger 2 when there's only one person developing and the business is as simple as above. But what if multiple people develop at the same time and the business is very complex? For example, we need to initialize Menu here, and the menu also depends on specific dishes? If it's only used in one place, it's acceptable. What if there are many places in the project that can be used at the same time? What if the menu needs to be changed? Experienced developers may think of using the singleton model. But if there are many types of structures in a project, then we need to manage a lot of singletons, and singletons may also need to rely on other objects. In this case, if there is a change requirement or a change of maintenance personnel, simple changes will become very cumbersome, and easy to lead to a variety of strange BUG. So here we need to introduce a third-party dependency injection tool to help us achieve dependency injection.
Dagger2 is the third-party dependency injection tool we need. Dagger2 has an advantage over other dependency injection tools, that is, it compiles code by static compilation and generates auxiliary code at compile time without affecting runtime performance, which is very suitable for mobile applications.
How to use Dagger 2
Dagger identifies requirements and dependent objects through Component, which can be said to be the link between them. If you've used Dagger2 or learned about Dagger2's tutorials, you must know that Dagger2's usage is very cumbersome. Every place where you need to use dependency injection, you need to write template code for DaggerxxxComponent to achieve dependency injection. To write a lot of template code, greatly increase the complexity of the system. When I used Dagger 2.17, I found that Google had optimized Dagger 2. Now there is very little code to write to implement dependency injection using Dagger, and the complexity has been greatly reduced. Here, the author will not introduce the old way of use, the students who have used Dagger 2 can compare the differences between the two ways, and the students who have not used it can directly learn the new way of use.
The simplest way to use Dagger2 is as follows:
public class A{
    @Inject
    public A(){

    }
}

public class B{
    @Inject A a;
    ...
}
This method is the simplest, no difficulty. But in actual projects, we will encounter a variety of complex situations, for example, A also needs to rely on other classes, and this class is provided in third-party class libraries. Or A implements the C interface, and we need to use the dependency-induced principle to enhance the maintainability of our code when coding. At this point, these requirements cannot be met with the above method, and the main difficulty in using Dagger 2 is due to the above reasons.
Or use the example above to explain, suppose you need to make a catering system, you need to order the menu to the chef, let the chef responsible for cooking. Now let's try to use Dagger2 to achieve this requirement.
First, we need to introduce some column dependency libraries for Dagger For Android:
 implementation 'com.google.dagger:dagger-android:2.17'
    implementation 'com.google.dagger:dagger-android-support:2.17' // if you use the support libraries
    implementation 'com.google.dagger:dagger:2.17'
    annotationProcessor 'com.google.dagger:dagger-compiler:2.17'
    annotationProcessor 'com.google.dagger:dagger-android-processor:2.17'
Then we implement the Chef and Menu classes
Cooking interface
public interface Cooking{
    String cook();
}
Chef
public class Chef implements Cooking{

    Menu menu;

    @Inject
    public Chef(Menu menu){
        this.menu = menu;
    }

    @Override
    public String cook(){
        //key dish name, whether value is cooking
        Map<String,Boolean> menuList = menu.getMenus();
        StringBuilder sb = new StringBuilder();
        for (Map.Entry<String,Boolean> entry : menuList.entrySet()){
            if (entry.getValue()){
                sb.append(entry.getKey()).append(",");
            }
        }

        return sb.toString();
    }
}
Menu
public class Menu {

    public Map<String,Boolean> menus;

    @Inject
    public Menu( Map<String,Boolean> menus){
         this.menus = menus;
    }

    Map<String,Boolean> getMenus(){
        return menus;
    }

}
Now let's write an Activity to implement cooking using Chef objects in the onCreate method. Let's first look at the difference between code that doesn't use Dagger2 and code that uses Dagger2.
MainActivity
public class MainActivity extends Activity {

    @Override
    protected void onCreate(Bundle savedInstanceState) {
        setContentView(R.layout.activity_main);
        Map<String, Boolean> menus = new LinkedHashMap<>();
        menus.put("Boiled Fish with Pickled Cabbage and Chili", true);
        menus.put("Potato silk", true);
        menus.put("Beef Steak Served on a Sizzling Iron Plate", true);
        Menu menu = new Menu(menus);
        Chef chef = new Chef(menu);
        System.out.println(chef.cook());
    }
}
DaggerMainActivity
public class DaggerMainActivity extends DaggerActivity {
    @Inject
    Chef chef;

    @Override
    protected void onCreate(Bundle savedInstanceState) {
        super.onCreate(savedInstanceState);
        setContentView(R.layout.activity_main);
        Log.d(TAG,chef.cook());
    }
}
As you can see, the user's code becomes very concise when using Dagger2. However, Dagger 2 also needs some columns of auxiliary code to implement dependency injection. If you've used Dagger2, you know you need to write a lot of template code to implement dependency injection. So can we use Dagger2 in a simpler way? Today I'm going to introduce a more concise way to use Dagger2 on Android.
Let's first look at what code is needed to implement dependency injection on DaggerMainActivity.
CookModules
@Module
public class CookModules {

    @Singleton
    @Provides
    public Map<String, Boolean> providerMenus(){
        Map<String, Boolean> menus = new LinkedHashMap<>();
        menus.put("Boiled Fish with Pickled Cabbage and Chili", true);
        menus.put("Potato silk", true);
        menus.put("Beef Steak Served on a Sizzling Iron Plate", true);
        return menus;
    }
}
ActivityModules
@Module
abstract class ActivityModules {

    @ContributesAndroidInjector
    abstract MainActivity contributeMainActivity();
}
CookAppComponent
@Singleton
@Component(modules = {
        AndroidSupportInjectionModule.class,
        ActivityModules.class,
        CookModules.class})
public interface CookAppComponent extends AndroidInjector<MyApplication> {

    @Component.Builder
    abstract class Builder extends AndroidInjector.Builder<MyApplication>{}

}
MyApplication
public class MyApplication extends DaggerApplication{

    @Override
    public void onCreate() {
        super.onCreate();
    }

    @Override
    protected AndroidInjector<? extends DaggerApplication> applicationInjector() {
        return DaggerCookAppComponent.builder().create(this);
    }
}
Analysis of Dagger2 For Android Use Points
-
CookModules
CookModule is simple, and its purpose is to provide the data needed by Menu objects through the @Providers annotation. Because Menu relies on a Map object, we construct a Map object for it through CookModules and inject it into the Menu instance automatically. -
ActivityModules
The main function of Activity Modules is to mark which class needs dependency injection through @Contributes Android Injector, where ManActivity is marked, so MainActivity can inject Chef objects through the @Inject annotation. -
CookAppComponent
CookAppComponent is equivalent to a syringe. Modules we defined earlier are injected classes. The place where @Inject is used to inject objects is the recipient class. -
MyApplication
MyApplication is characterized by inheriting the DaggerApplication class and constructing a DaggerCookAppComponent syringe in the application Injector method.
This is how Dagger 2 is used in Android, where we can see that receiving code in MainActivity is very simple, and implementing dependency injection only uses:
@Inject
Chef chef;
There is no redundant code in the receiving class at all. If we want to expand the Second Activity, we need to use the Menu class in the Second Activity.
Then we just need to add in Activity Modules:
@ContributesAndroidInjector
abstract SecondsActivity contributeSecondsActivity();
Then Menu is injected into SecondsActivity:
@Inject
Menu menu;
As you can see, for the whole project, the template code to be written to implement dependency injection using Dagger2 For Android is very little and very simple. It only needs to be configured once, and there is no need to write a lot of template code frequently. Overall, Dagger2 has solved the problem of adding template code.
Advantages of Dagger 2
Here we summarize the advantages of using Dagger 2.
- Reduce the amount of code and improve work efficiency
For example, in the example above, if we build a Chef object, without Dagger2, we need to initialize a bunch of pre-objects (Menu, Map) before initializing the Chef object, and need to manually inject them into the corresponding instance. Imagine that if we add a Restaurant object and need to inject Chef into Restaurant, the pre-steps needed to initialize the Restaurant object are more cumbersome.
Maybe someone will think that's okay. I don't mind manual initialization. But what if there are N places in your system where Restaurant objects need to be initialized? With Dagger2, you just need to inject annotations. - Automatically handle dependencies
When using Dagger2, we don't need to specify object dependencies. Dagger2 automatically handles dependencies (for example, Chef needs to rely on Menu, Menu needs to rely on Map, Dagger automatically handles this dependency). - Static compilation does not affect operational efficiency
Because Dagger2 handles dependency injection at compile time, it will not affect the efficiency of the system, but also improve the efficiency of the system to a certain extent (for example, using Dagger2 to implement singletons without locking is more efficient). - Improving the efficiency of multiplayer programming
When many people collaborate, after one person has written the code in Dagger2, all other team members can inject common objects directly through the @Inject annotation. Speed up programming efficiency, and can greatly increase the reusability of code.
Above we've covered the basic usage of Dagger2 For Android. Perhaps some readers still have a lot of ideas and think this example is too simple. So let's try to build a more sophisticated system and experience the advantages of Dagger2 For Android in depth. Now let's expand on the above example and try to develop a simple order Demo to experience it in depth.
Dagger 2 Application Practice
Now let's see how to use Dagger2 to develop a simple Demo, where the author developed Demo is a simple order Demo. The Demo function is very simple, providing menu display, menu add/edit/delete and order function. The order function simply displays the name of the dish on the screen with Snackbar.
Demo Exhibition
Operation display

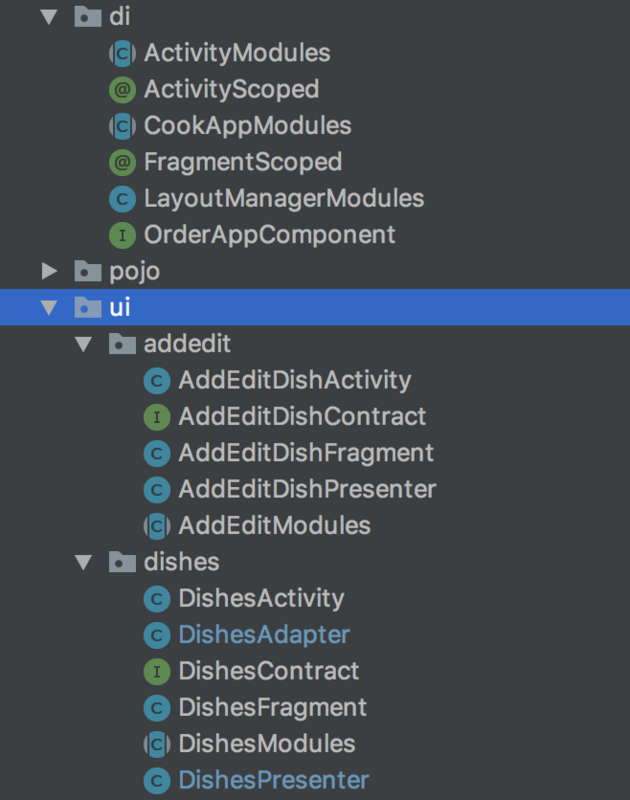
Code directory
This Demo uses the classical MVP architecture. Let's first briefly analyze the details of Demo implementation.
- Use Shared Preferences to provide simple caching (storage menu).
- Use Gson to serialize the list into Json format data, and then store it in Shared Preferences in String form.
- Use Dagger2 to implement dependency injection.
This basically implements a simple order Demo.
Application Explanation of Dagger in Demo
When we use Shared Preferences and Gson to implement caching, we will find that this Shared Preferences and Gson object are needed in many parts of the project. So we can draw two conclusions:
- Common instances are used for multiple modules in the project.
- These public instances should be singleton objects.
Let's look at how to implement dependency injection for this type of object by using Dagger2 to provide global Modules.
CookAppModules
@Module
public abstract class CookAppModules {

    public static final String KEY_MENU = "menu";
    private static final String SP_COOK = "cook";

    @Singleton
    @Provides
    public static Set<Dish> providerMenus(SharedPreferences sp, Gson gson){
        Set<Dish> menus;
        String menuJson = sp.getString(KEY_MENU, null);
        if (menuJson == null){
            return new LinkedHashSet<>();
        }
        menus = gson.fromJson(menuJson, new TypeToken<Set<Dish>>(){}.getType());
        return menus;
    }

    @Singleton
    @Provides
    public static SharedPreferences providerSharedPreferences(Context context){
        return context.getSharedPreferences(SP_COOK, Context.MODE_PRIVATE);
    }

    @Singleton
    @Provides
    public static Gson providerGson(){
        return new Gson();
    }

    @Singleton
    @Binds
    public abstract Context context(OrderApp application);

}
Take dishes module as an example. DishesPresenter is responsible for data processing in dishes, so we will inject these instances into DishesPresenter.
DishesPresenter
public class DishesPresenter implements DishesContract.Presenter{

   private DishesContract.View mView;

   @Inject
   Set<Dish> dishes;

   @Inject
   Gson gson;

   @Inject
   SharedPreferences sp;

   @Inject
   public DishesPresenter(){

   }

   @Override
   public void loadDishes() {
       mView.showDishes(new ArrayList<>(dishes));
   }

   @Override
   public String order(Map<Dish, Boolean> selectMap) {
       if (selectMap == null || selectMap.size() == 0) return "";
       StringBuilder sb = new StringBuilder();

       for (Dish dish : dishes){
           if (selectMap.get(dish)){
               sb.append(dish.getName()).append(",");
           }
       }
       if (TextUtils.isEmpty(sb.toString())) return "";

       return "cooking: " + sb.toString();
   }

   @Override
   public boolean deleteDish(String id) {
       for (Dish dish : dishes){
           if (dish.getId().equals(id)){
               dishes.remove(dish);
               sp.edit().putString(CookAppModules.KEY_MENU, gson.toJson(dishes)).apply();
               return true;
           }
       }
       return false;
   }


   @Override
   public void takeView(DishesContract.View view) {
       mView = view;
       loadDishes();
   }

   @Override
   public void dropView() {
       mView = null;
   }
}
The above code is a good way to experience the benefits of Dagger2, and if we have more complex objects in our project that will be used in many places, we can simplify our code in this way.
The UI of the Dishes module is implemented by Activity plus Fragment, which implements the main functions, while Activity is simply the outer layer of Fragment. They are: Dishes Activity and Dishes Fragment
DishesActivity relies on DishesFragment objects, while DishesFragment relies on DishesAdapter, RecyclerView.LayoutManager, DishesContract.Presenter objects.
Let's first look at the key code for DishesActivity and DishesFragment, respectively.
DishesActivity
public class DishesActivity extends DaggerAppCompatActivity {

    @Inject
    DishesFragment mDishesFragment;

    ...
}
DishesFragment
public class DishesFragment extends DaggerFragment implements DishesContract.View{

    RecyclerView rvDishes;

    @Inject
    DishesAdapter dishesAdapter;

    @Inject
    RecyclerView.LayoutManager layoutManager;

    @Inject
    DishesContract.Presenter mPresenter;

    @Inject
    public DishesFragment(){

    }

 }
DishesFragment injects DishesAdapter, RecyclerView.LayoutManager, DishesContract.Presenter through Dagger2, and these instances are provided by DishesModules.
DishesModules
@Module
public abstract class DishesModules {

    @ContributesAndroidInjector
    abstract public DishesFragment dishesFragment();

    @Provides
    static DishesAdapter providerDishesAdapter(){
        return new DishesAdapter();
    }

    @Binds
    abstract DishesContract.View dishesView(DishesFragment dishesFragment);

    @Binds
    abstract RecyclerView.LayoutManager layoutManager(LinearLayoutManager linearLayoutManager);


}
Here we will first explain the role of these annotations.
-
@ContributesAndroidInjector
You can think of it as whether Dagger2 will automatically inject the required Modules into Dishes Fragment. This annotation is the key to simplifying the code for Dagger2 For Android, as illustrated in a specific example in the following sections. -
@Module
The classes marked by this annotation can be regarded as providers of dependent objects, and the association of dependencies can be achieved by combining the marked classes with other annotations. -
@Provides
The main purpose is to provide objects for third-party class libraries or to provide a role for building very complex objects similar to factory classes in Dagger 2. -
@Binds
The main function is to determine the interface and specific implementation classes, which is more abstract. Let's take a look at some examples.
In Dishes Fragment, there's a code like this:@Inject DishesContract.Presenter mPresenter;We know that DishesContract.Presenter is an interface that may have many different implementation classes, and @Binds is used to determine the specific implementation class. Take a look at the code for PresenterModules:
@Module public abstract class PresenterModules { @Binds abstract DishesContract.Presenter dishesPresenter(DishesPresenter presenter); ... }As you can see from this code, the specific implementation class of the DishesContract.Presenter object injected with @Inject is DishesPresenter.
How does Dagger2 For Android inject dependencies?
When we use Dagger2, we use some template code to implement dependency injection (DaggerXXXComponent. builder (). inject (xxxx) template code), but we don't see any similar code in DishesFragment in Demo. So when did these objects inject into DishesFragment weight?
The answer is the @Contributes Android Injector annotation
Let's first look at how Dagger2 can automatically inject dependencies into DishesActivity.
ActivityModules
@Module public abstract class ActivityModules { @ContributesAndroidInjector(modules = DishesModules.class) abstract public DishesActivity contributesDishActivity(); @ContributesAndroidInjector(modules = AddEditModules.class) abstract public AddEditDishActivity contributesAddEditDishActivity(); }
Yes, that's the @Contributes Android Injector annotation. Modules represent which Modules the DishesActivity needs to rely on. In this tutorial, we don't explain how it works. You just need to know the role of @Contributes Android Injector.
When we used to use Dagger2, we needed a lot of Components to help us implement dependency injection, but now we only need to write a Component in the whole App. @ Contributes Android Injector annotations help us generate other required Components, automatically handle the relationships between Components, and automatically inject dependencies using generated Components.
Let's first look at how Component, the only component in our entire module, works.
OrderAppComponent
@Singleton @Component(modules = { AndroidSupportInjectionModule.class, LayoutManagerModules.class, CookAppModules.class, PresenterModules.class, ActivityModules.class}) public interface OrderAppComponent extends AndroidInjector<OrderApp>{ @Component.Builder abstract class Builder extends AndroidInjector.Builder<OrderApp>{ } }
OrderApp
public class OrderApp extends DaggerApplication { @Override protected AndroidInjector<? extends DaggerApplication> applicationInjector() { return DaggerOrderAppComponent.builder().create(this); } }
To deepen your understanding of the @Contributes Android Injecto annotation r, let's modify the Dishes Modules slightly.
@Module public abstract class DishesModules { //@ContributesAndroidInjector //abstract public DishesFragment dishesFragment(); @Provides static DishesAdapter providerDishesAdapter(){ return new DishesAdapter(); } @Binds abstract DishesContract.View dishesView(DishesFragment dishesFragment); @Binds abstract RecyclerView.LayoutManager layoutManager(LinearLayoutManager linearLayoutManager); }
DishesActivity
public class DishesActivity extends DaggerAppCompatActivity { //@Inject DishesFragment mDishesFragment; Toolbar toolbar; @Override protected void onCreate(@Nullable Bundle savedInstanceState) { super.onCreate(savedInstanceState); setContentView(R.layout.activity_dishes); DishesFragment dishesFragment = (DishesFragment) getSupportFragmentManager().findFragmentById(R.id.content_fragment); if (dishesFragment == null){ mDishesFragment = new DishesFragment();//New code dishesFragment = mDishesFragment; ActivityUtils.addFragmentToActivity(getSupportFragmentManager(), dishesFragment, R.id.content_fragment); } initView(); } ... }
//Change Dagger Fragment to Fragment public class DishesFragment extends Fragment implements DishesContract.View{ }
At this point, when we run, we will find that the dependency injection in DishesFragment fails, and the runtime will throw a null pointer exception without injecting the required data. This is because we use new to create DishesFragment instances here. Why didn't Dagger2 inject instances for us when we used new?
When we use @Inject to inject DishesFragments, Dagger2 will automatically help us determine the objects on which DishesFragments depend (@Inject annotation tag). If the objects can be injected directly, they will be injected directly into Fragments. Otherwise, we will find out if there is a need for objects from DishesModules or, in some cases, into DishesFragments. When we used new to create Dishes Fragments, Dagger2 could not find objects through Dishes Modules because we did not declare the connection between Dishes Fragments and Dishes Modules, and Dishes Fragments did not automatically inject annotations (HasSupportFragment Injector was not implemented). So Dagger2 can't judge their dependencies or automatically inject dependencies into DishesFragment.
If we insist on using new to rely on Dishes Fragments, we can achieve their association through the @Contributes Android Injecto annotation. The concrete realization way is as follows:
DishesModules
@Module(includes = PresenterModules.class) public abstract class DishesModules { @ContributesAndroidInjector abstract public DishesFragment dishesFragment(); //Add this abstract method @Provides static DishesAdapter providerDishesAdapter(){ return new DishesAdapter(); } @Binds abstract DishesContract.View dishesView(DishesFragment dishesFragment); @Binds abstract RecyclerView.LayoutManager layoutManager(LinearLayoutManager linearLayoutManager); }
Dishes Fragment inherits from Dagger Fragment
public class DishesFragment extends DaggerFragment implements DishesContract.View{ ... }
Instead, when we create DishesFragment s through new methods, we can also implement dependency injection through annotations. Why? Because @Contributes Android Injector generates the required Subcomponent when it works, and then Dagger Fragment implements dependency injection through the Dispatching Android Injector <Fragment> object (the underlying principle is similar to that of using Dagger XXX Component to manually implement dependency injection). Let's look at the code generated by the method annotated by @Contributes Android Injector in Dishes Modules.
@Module(subcomponents = DishesModules_DishesFragment.DishesFragmentSubcomponent.class) public abstract class DishesModules_DishesFragment { private DishesModules_DishesFragment() {} @Binds @IntoMap @FragmentKey(DishesFragment.class) abstract AndroidInjector.Factory<? extends Fragment> bindAndroidInjectorFactory( DishesFragmentSubcomponent.Builder builder); @Subcomponent public interface DishesFragmentSubcomponent extends AndroidInjector<DishesFragment> { @Subcomponent.Builder abstract class Builder extends AndroidInjector.Builder<DishesFragment> {} } }
As you can see, the generated code conforms to our conclusions above.
Dagger2 For Android Use Points
Now let's summarize some of the necessary conditions for a simplified version of Degger to implement dependency injection:
- Third-party libraries provide dependencies through Modules @provides annotations
- Provides a globally unique Component, and requires the Skyline AndroidSupportInjectionModule class in Modules, which acts as a correlation between requirements and dependencies
- Application needs to inherit the DaggerApplication class and build and return the unique Component instance for the whole play in the application Injector
- Other builds that need to use dependency injection need to inherit the Dagger component name class, and need to inject dependency builds through the @Contributes Android Injector annotation tag in the corresponding Modules.
The four steps above are the main points of using Dagger2 to implement dependency injection. Overall, the complexity is much simpler than the previous method, and the template code to be written is also much less.
Generally speaking, the above knowledge points are enough for us to use Dagger2 normally in the project, but there are still some other problems in use, Dagger2 also provides solutions. If you want to know more, you can continue to read the following.
Dagger 2 Expansion
@Scope
Scope literally means scope. When we use Dagger2, we often use the @Singleton annotation, which means to provide singleton objects. And when we use the @Singleton annotation, we use @Provides and @Component at the same time. Why do we do this? Because the scope of @Scope is actually the scope of the singleton, which is mainly determined by Component.
So @Scope's role is to specify the scope of the Component as a boundary to provide local singleton objects. We can validate this argument with the above examples.
We add a code to DishesActivity to inject the DishesPresneter object when it works.
@Inject
DishesContract.Presenter mPresenter;
From the above code, we know that DishesPresneter objects have been injected in the same way in DishesFragment, so what's the difference between them? Let's look at the debugging function.


As you can see, DishesPresenter in DishesActivity and DishesFragment is not the same instance, and their memory addresses are different. If we add @Singleton to the dishesPresenter method of PresenterModules
@Singleton
@Binds
abstract DishesContract.Presenter dishesPresenter(DishesPresenter presenter);
It is predictable that DishesPresenter in DishesActivity and DishesFragment will become the same instance, in which @Singleton serves to provide a global singleton (because the global and unique Component of OrderAppComponent is also marked @Singleton). This usage is relatively simple, and it is no longer in-depth here. The more difficult thing to understand is to customize Scope. Let's take an example to deepen our understanding of the custom Scope.
@DishesScoped
@Documented
@Scope
@Retention(RetentionPolicy.RUNTIME)
public @interface DishesScoped {
}
To make the test more effective, let's modify the Demo Order slightly.
DishesModules
@Module
public abstract class DishesModules {
   ...
    @DishesScoped  // adding annotations
    @Binds
    abstract DishesContract.Presenter dishesPresenter(DishesPresenter presenter);
   ...

}
ActivityModules
@Module
public abstract class ActivityModules {

    @DishesScoped  // adding annotations
    @ContributesAndroidInjector(modules = DishesModules.class)
    abstract public DishesActivity contributesDishActivity();
}
Now let's run Demo and look at the objects of DishesContract.Presenter in DishesActivity and DishesFragment:


It can be seen that they are the same object, which confirms our conclusion above. Another minor problem here is that we said before that @Scope determines the boundaries of action through Component, but in the example above, there is no @Dishes annotation for any Component class? So how do we confirm the boundary here?
Let's look at the class ActivityModules_ContributesDishActivity generated by Dagger, which is based on the contributesDishActivity method in ActivityModules.
@Module(subcomponents = ActivityModules_ContributesDishActivity.DishesActivitySubcomponent.class)
public abstract class ActivityModules_ContributesDishActivity {
  private ActivityModules_ContributesDishActivity() {}

  @Binds
  @IntoMap
  @ActivityKey(DishesActivity.class)
  abstract AndroidInjector.Factory<? extends Activity> bindAndroidInjectorFactory(
      DishesActivitySubcomponent.Builder builder);

  @Subcomponent(modules = DishesModules.class)
  @DishesScoped   //Look here
  public interface DishesActivitySubcomponent extends AndroidInjector<DishesActivity> {
    @Subcomponent.Builder
    abstract class Builder extends AndroidInjector.Builder<DishesActivity> {}
  }
}
When we add the @DishesScoped annotation to contributesDishActivity, the automatically generated DishesActivitySubcomponent class is annotated by @DishesScoped. So @DishesScoped confirms the scope of action through DishesActivitySubcomponent, which is consistent with the above conclusion.
@ The Realization Principle of Scope
@ The principle of Scope's implementation of singletons is very simple. We can see that Dagger's injection assistant code generated for us after adding @DishesScoped. Here we only look at the key methods:
private void initialize(final DishesActivitySubcomponentBuilder builder) {
      this.dishesFragmentSubcomponentBuilderProvider =
          new Provider<DishesModules_DishesFragment.DishesFragmentSubcomponent.Builder>() {
            @Override
            public DishesModules_DishesFragment.DishesFragmentSubcomponent.Builder get() {
              return new DishesFragmentSubcomponentBuilder();
            }
          };
      this.dishesPresenterProvider =
          DishesPresenter_Factory.create(
              DaggerOrderAppComponent.this.providerMenusProvider,
              DaggerOrderAppComponent.this.providerGsonProvider,
              DaggerOrderAppComponent.this.providerSharedPreferencesProvider);
      this.dishesPresenterProvider2 = DoubleCheck.provider((Provider) dishesPresenterProvider);   //This code is the key to implementing singletons.
    }
As you can see, our dishesPresenterProvider2 object is initialized by double-lock checking, so this object is a single object. Other classes that do not use the @Spoce annotation do not use double-lock checking to initialize. The principle of Dagger implementing singletons through @Scope is very simple. That's all for the @Spoce introduction. If you need to go deeper, you can take a closer look at the auxiliary code generated by Dagger2.
@ Qualifier and @Named annotations
In addition to the scope problem, we often encounter a problem. As we all know, Dagger2 automatically judges dependencies. What if we need to use the same class in our code to generate two or more different objects? For example, our Linear Manager, we now want to provide a horizontal Manager with Dagger, which would be wrong if written directly in the project, because Dagger can't determine which object to inject / depend on. The following code:
LayoutManagerModules
@Module
public class LayoutManagerModules {

    @Provides
    public LinearLayoutManager providesLinearLayoutManager(Context context){
        return new LinearLayoutManager(context);
    }

    @Provides
    public LinearLayoutManager providesHorizonalLinearLayoutManager(Context context){
        return new LinearLayoutManager(context, LinearLayoutManager.HORIZONTAL, false);
    }

}
This code is bound to report errors. If we want to implement this function, we need to use @Qualifier or @Named annotations at this time.
Let's first implement the above requirement with @Named.
LayoutManagerModules
@Module
public class LayoutManagerModules {

    @Named("vertical")
    @Provides
    public LinearLayoutManager providesLinearLayoutManager(Context context){
        return new LinearLayoutManager(context);
    }

    @Named("horizontal")
    @Provides
    public LinearLayoutManager providesHorizonalLinearLayoutManager(Context context){
        return new LinearLayoutManager(context, LinearLayoutManager.HORIZONTAL, false);
    }


}
DishesModules
public class DishesFragment extends DaggerFragment implements DishesContract.View{

    RecyclerView rvDishes;

    @Inject
    DishesAdapter dishesAdapter;

    @Named("horizontal")
    @Inject
    LinearLayoutManager layoutManager;
}
At injection time, we can control which LayoutManager is actually injected by @Named("horizontal"). The @Name annotation should be used with @Providers when defining dependencies and @Inject when using dependencies.
@Qualifier
@ The role of Qualifier is the same as @Named, and @Name is annotated with @Qualifier. When using @Named, we need to add our defined key, so it's a bit cumbersome. We can solve this problem by customizing the @Qualifier annotation. The way to customize the @Qualifier annotation is the same as the way to customize @Spoce. It's very simple. I won't go into it here.
Dagger2 also provides functions such as lazy loading, which are relatively simple to use, and will not be further introduced here due to space limitations. Interested readers can read the source code or read official documents to experience.
Summary
Dagger2 For Android is a dependency injection framework that is very suitable for mobile applications. It provides a way of static compilation to implement dependency injection, with excellent performance. And the latest version of Degger 2.17 provides very friendly support for Android. Now when we use Dagger 2, we don't need to inject code by hand, all of which Dagger 2 automatically implements for us. Generally speaking, Dagger2 is very suitable for our project. And the way Dagger2 implements dependency injection is very interesting. If we can master this technology, it will greatly improve our performance. I hope you can experience it after reading this article.
If this article is helpful to you, you can pay attention to other articles of the author. Welcome to star t on my github.
Give you a fully automatic screen adaptation scheme (based on SW scheme)! —— Free your hands and UI
Gradle Automatic Implementation of Android Component Module Construction
Technical Tutorial Demo Address (Demo in this article is also included)(
Wechat Public Number:
If you want to receive updates of my technical articles at the first time, you can scan the following two-dimensional code to pay attention to my personal public number: programmers outside the code
Or collect my personal blog: TANG BLOG
